Proctoring overview
Proctored exams help ensure candidates complete exams in a secure and controlled environment. YouTestMe supports two proctoring options:
- Record & review – AI monitors the exam and flags incidents for later review by a proctor.
- Live proctoring – a proctor monitors candidates in real time.
This guide explains how to monitor candidates using both live proctoring and record & review.
Live monitoring
Live monitoring lets you supervise one or more candidates in real time. Access steps vary by platform. Select your integration method below.
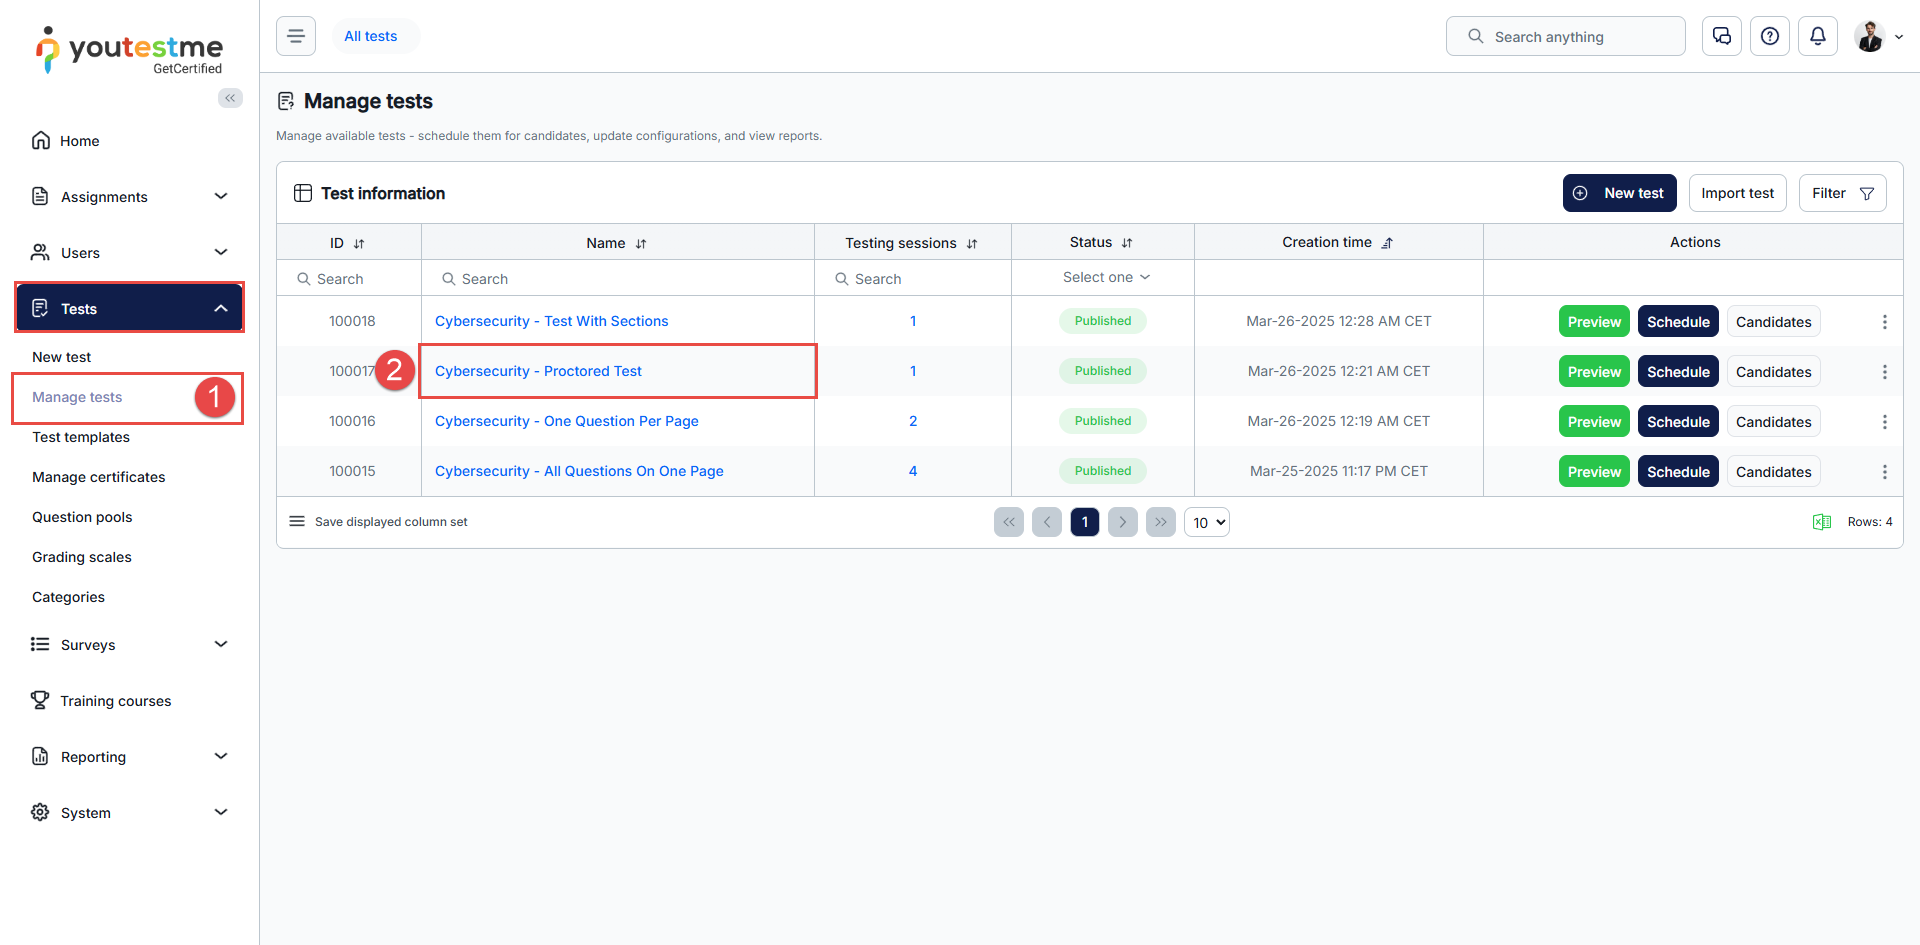
To access Live monitoring:
- Go to Tests → Manage tests.
- Open the test you want to monitor.
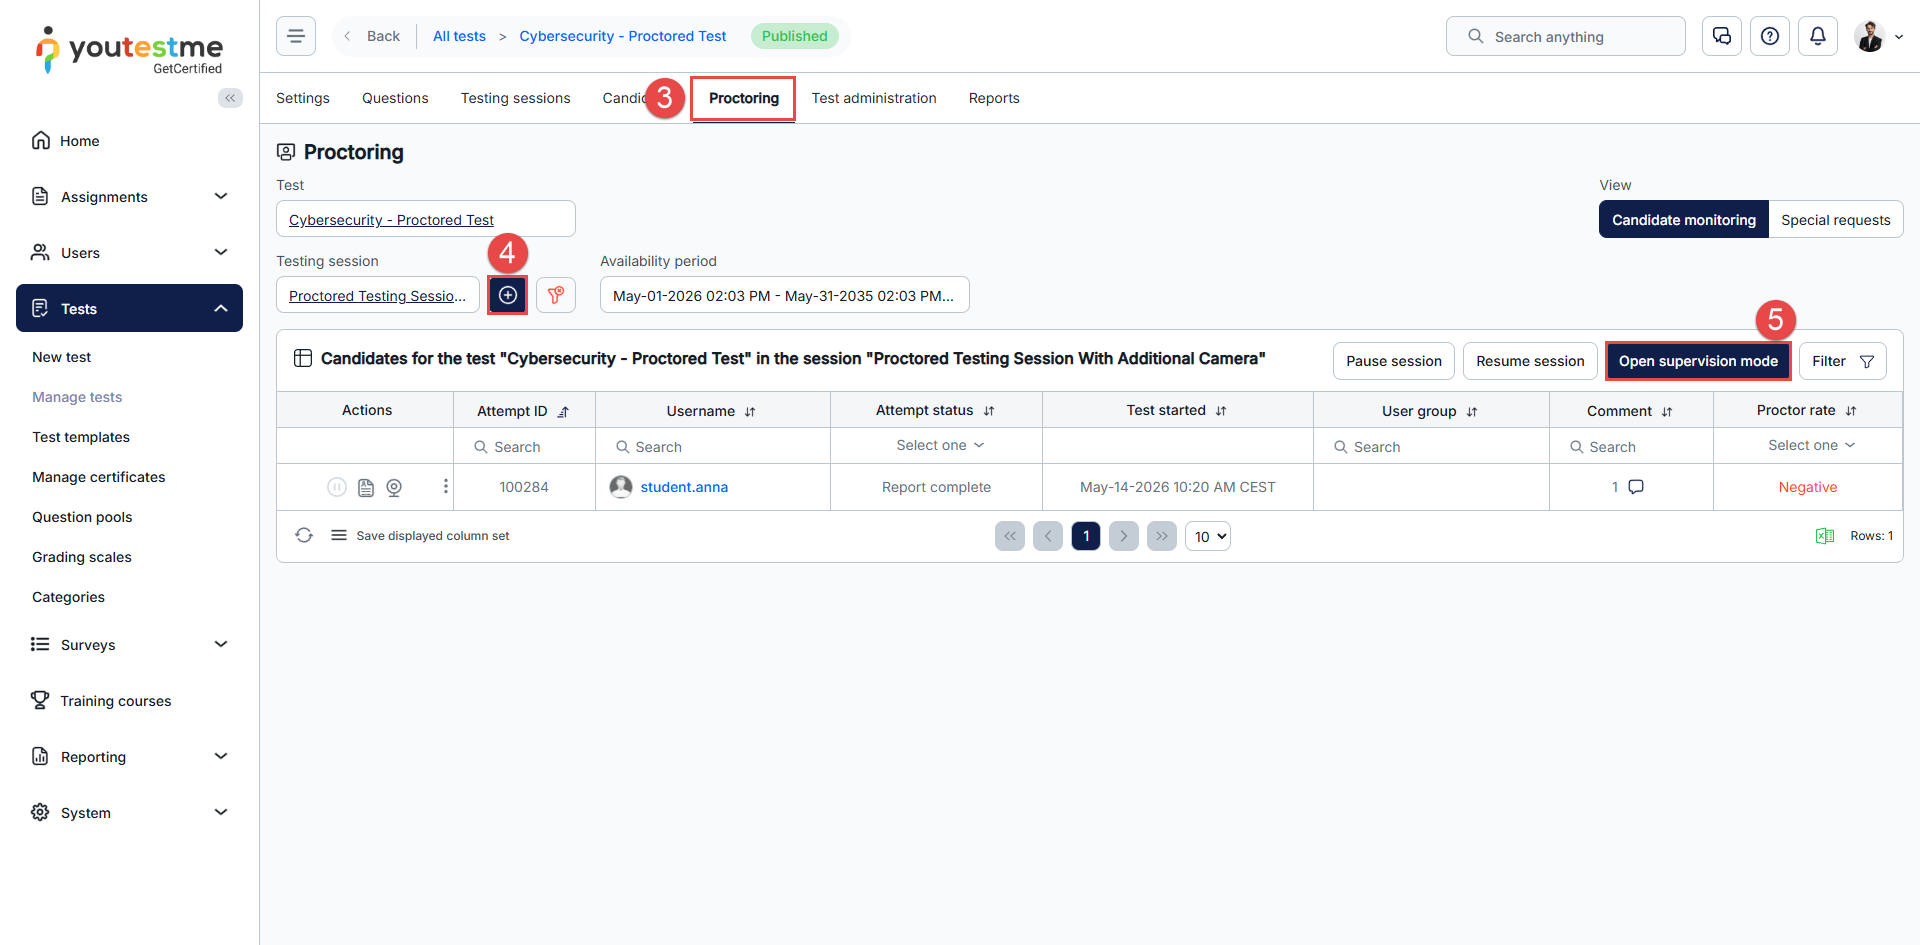
- Open the Proctoring tab.
- Select the testing session to monitor.
- Click Open supervision mode.
To access Live monitoring:
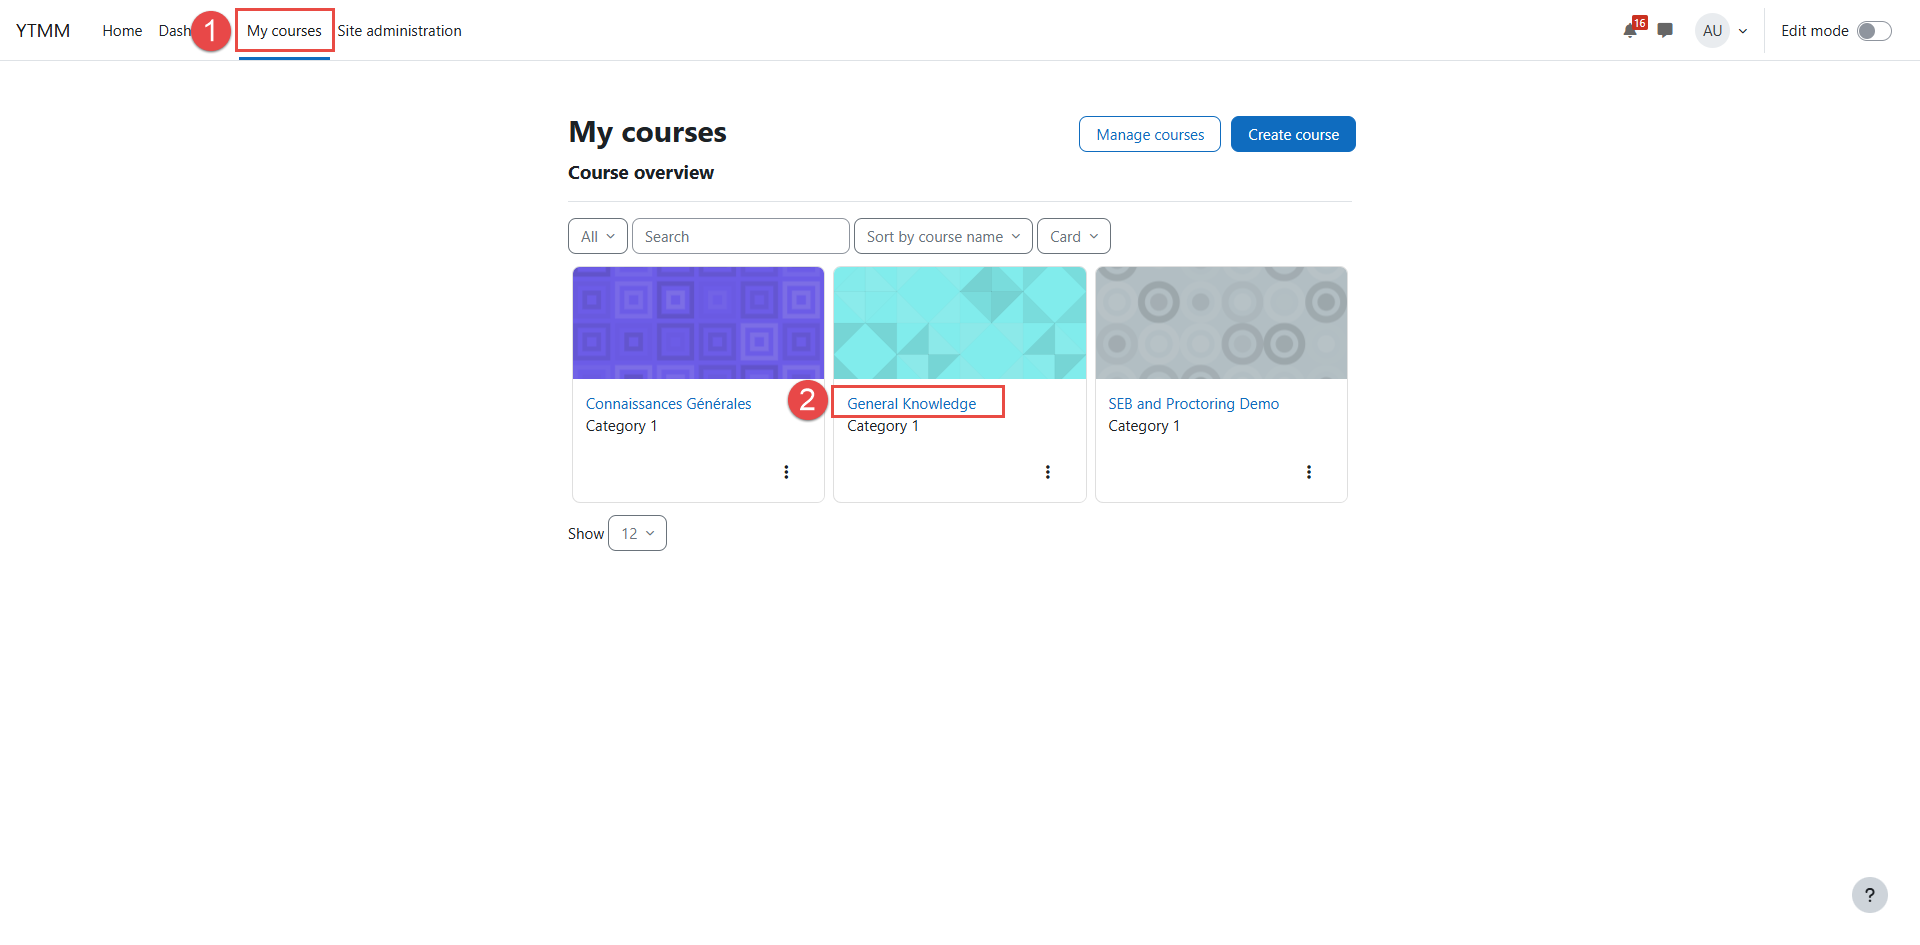
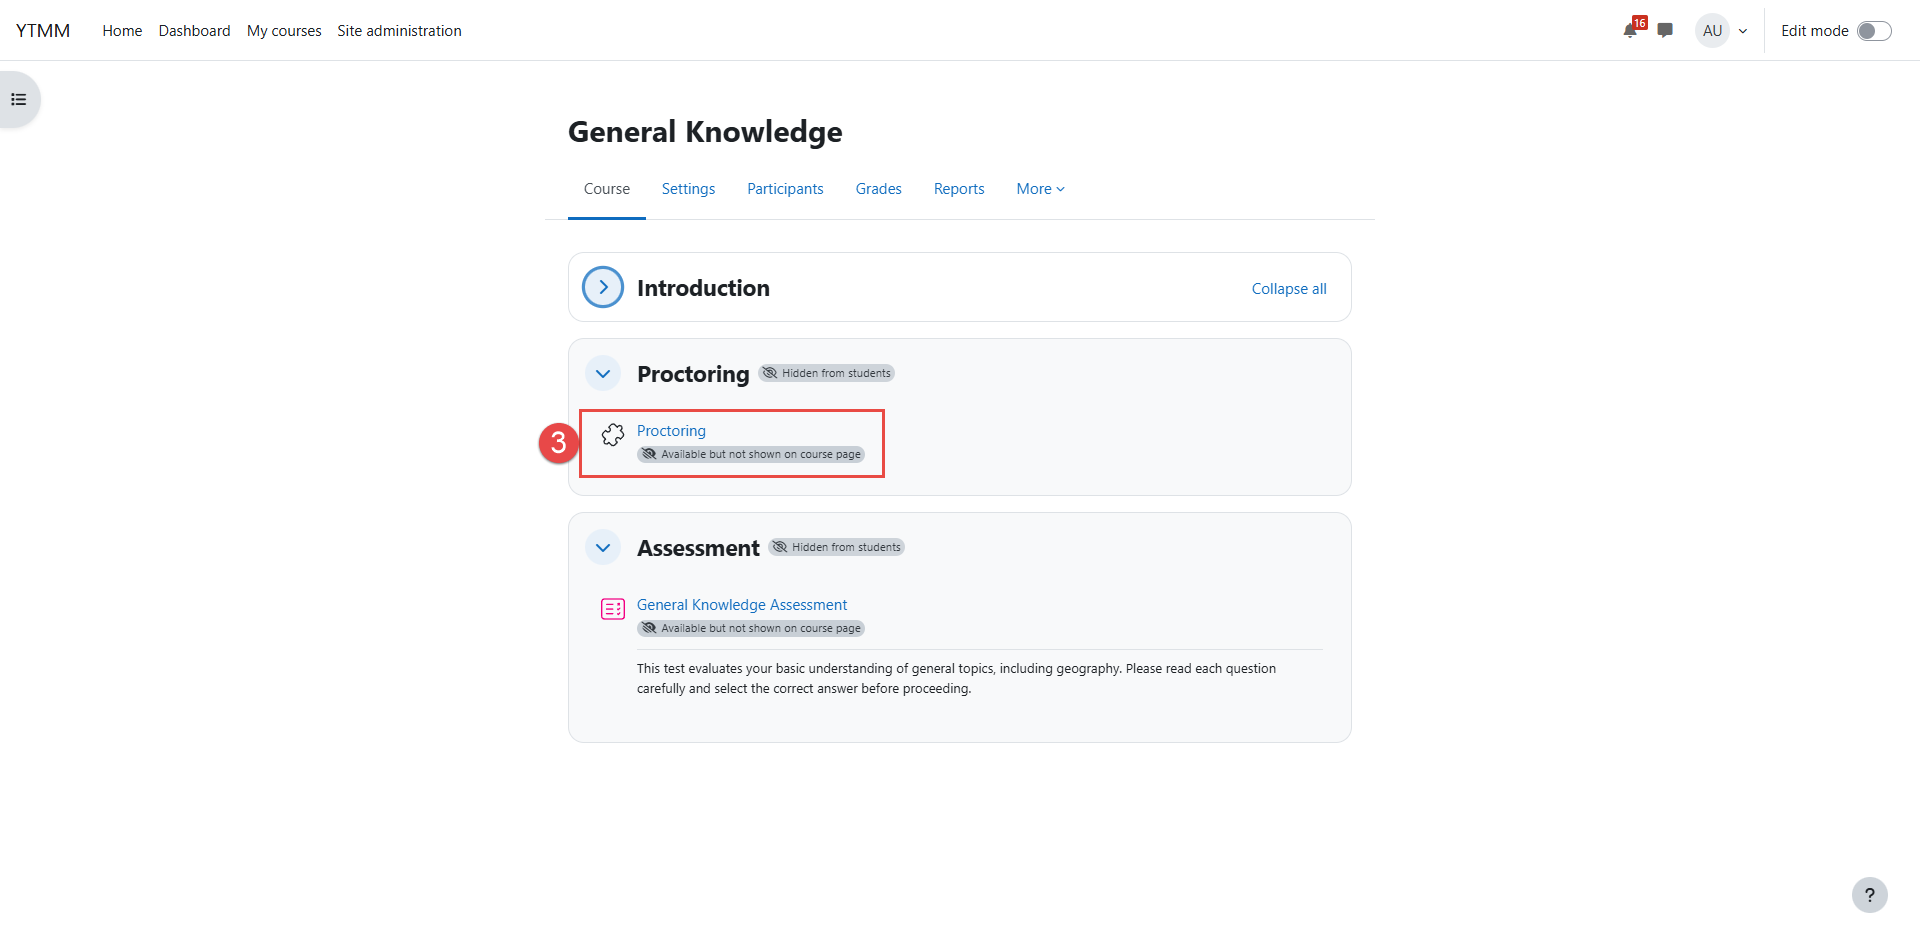
- Go to My Courses.
- Open the course you want to monitor.
- Open the External tool - Proctoring activity.
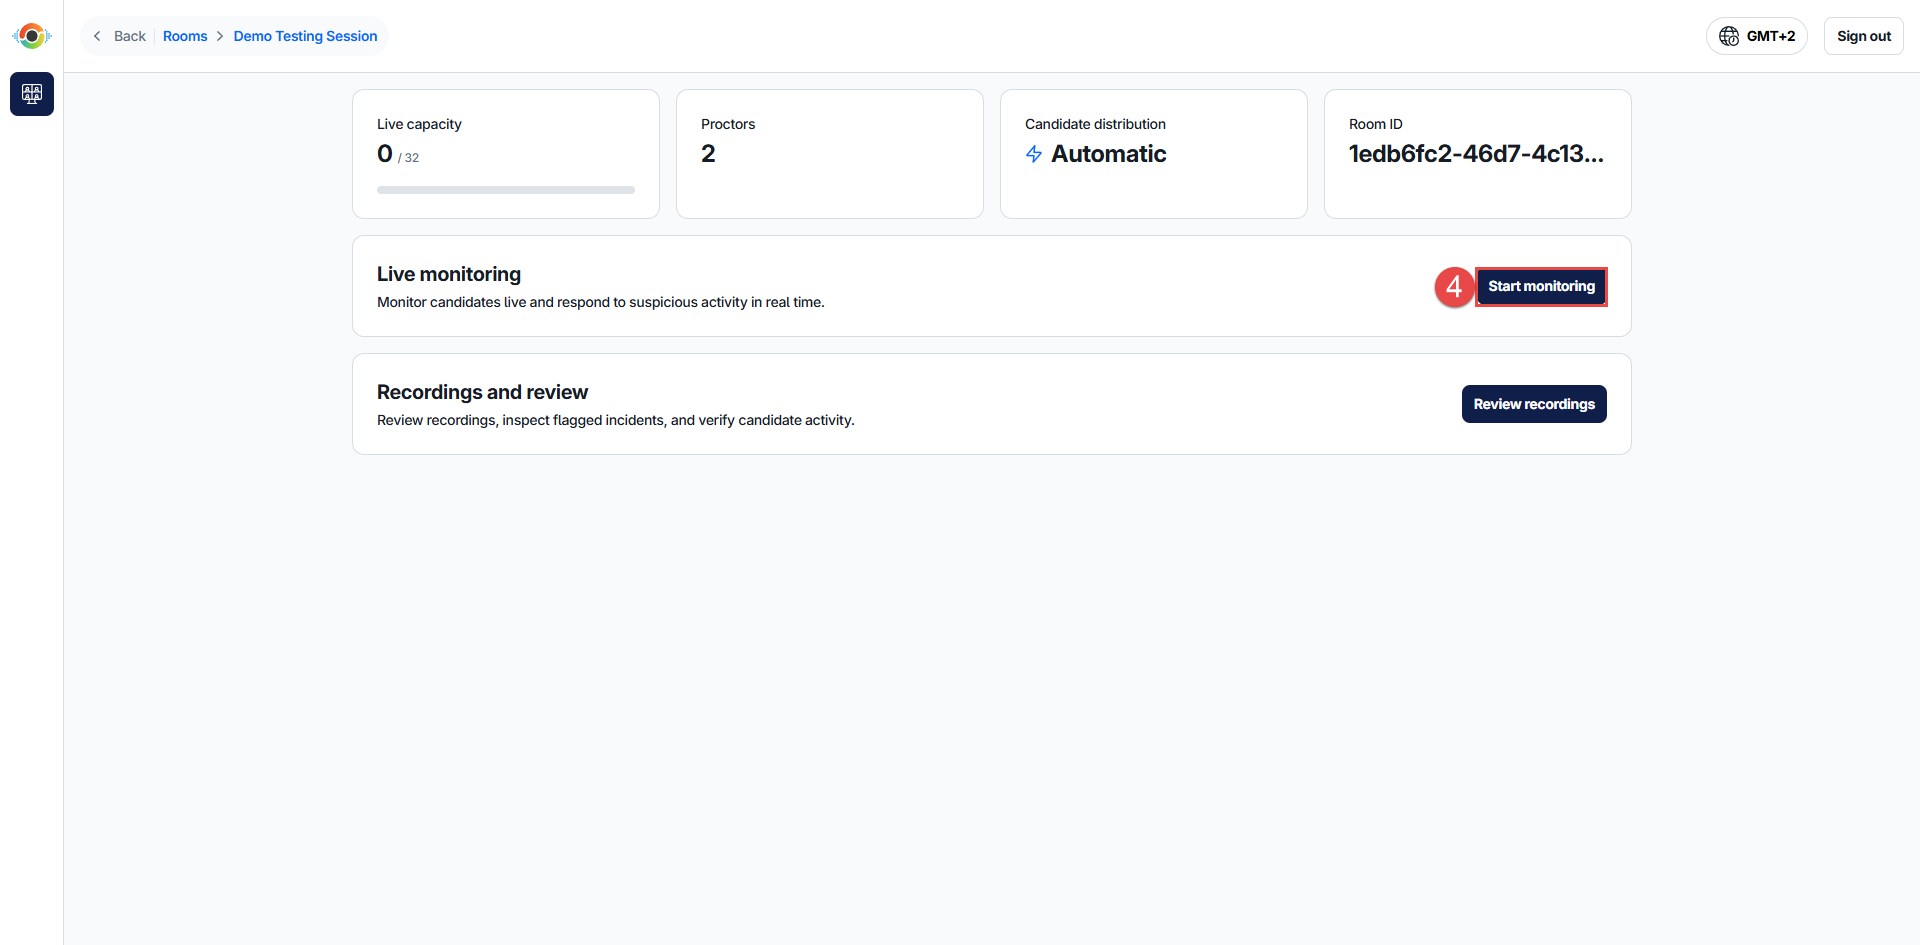
- Click Start monitoring button to begin live monitoring.
To access Live monitoring:
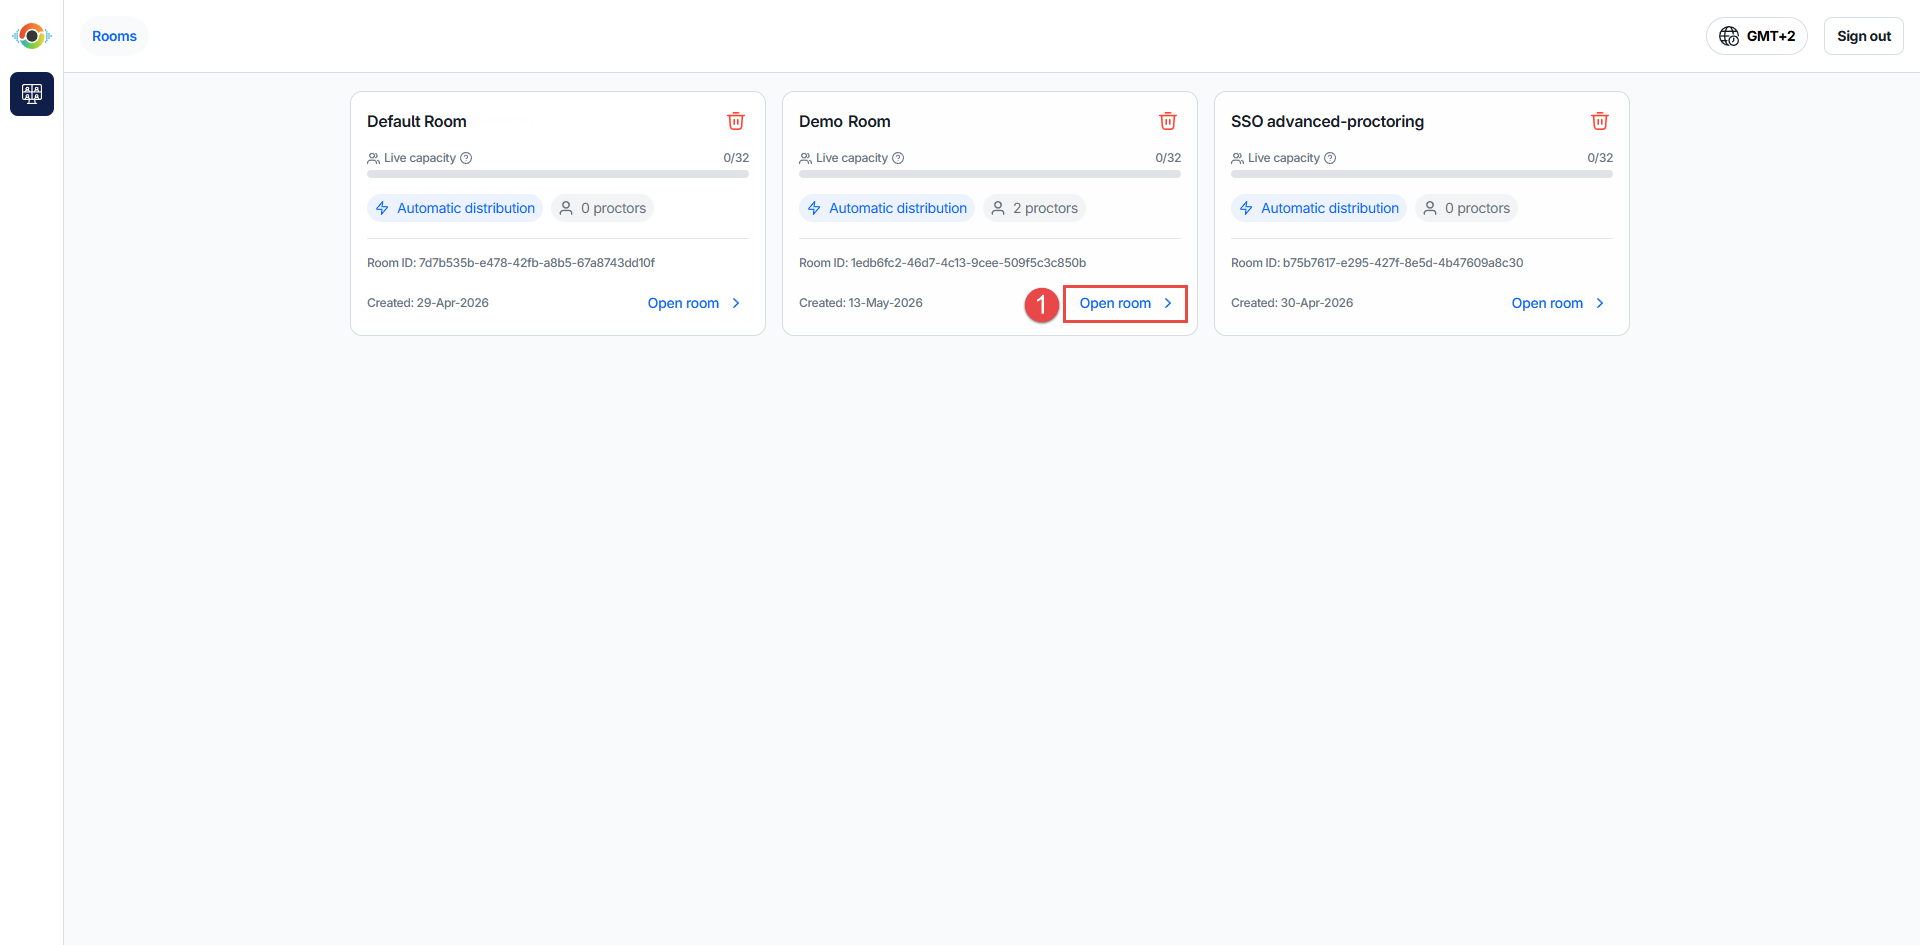
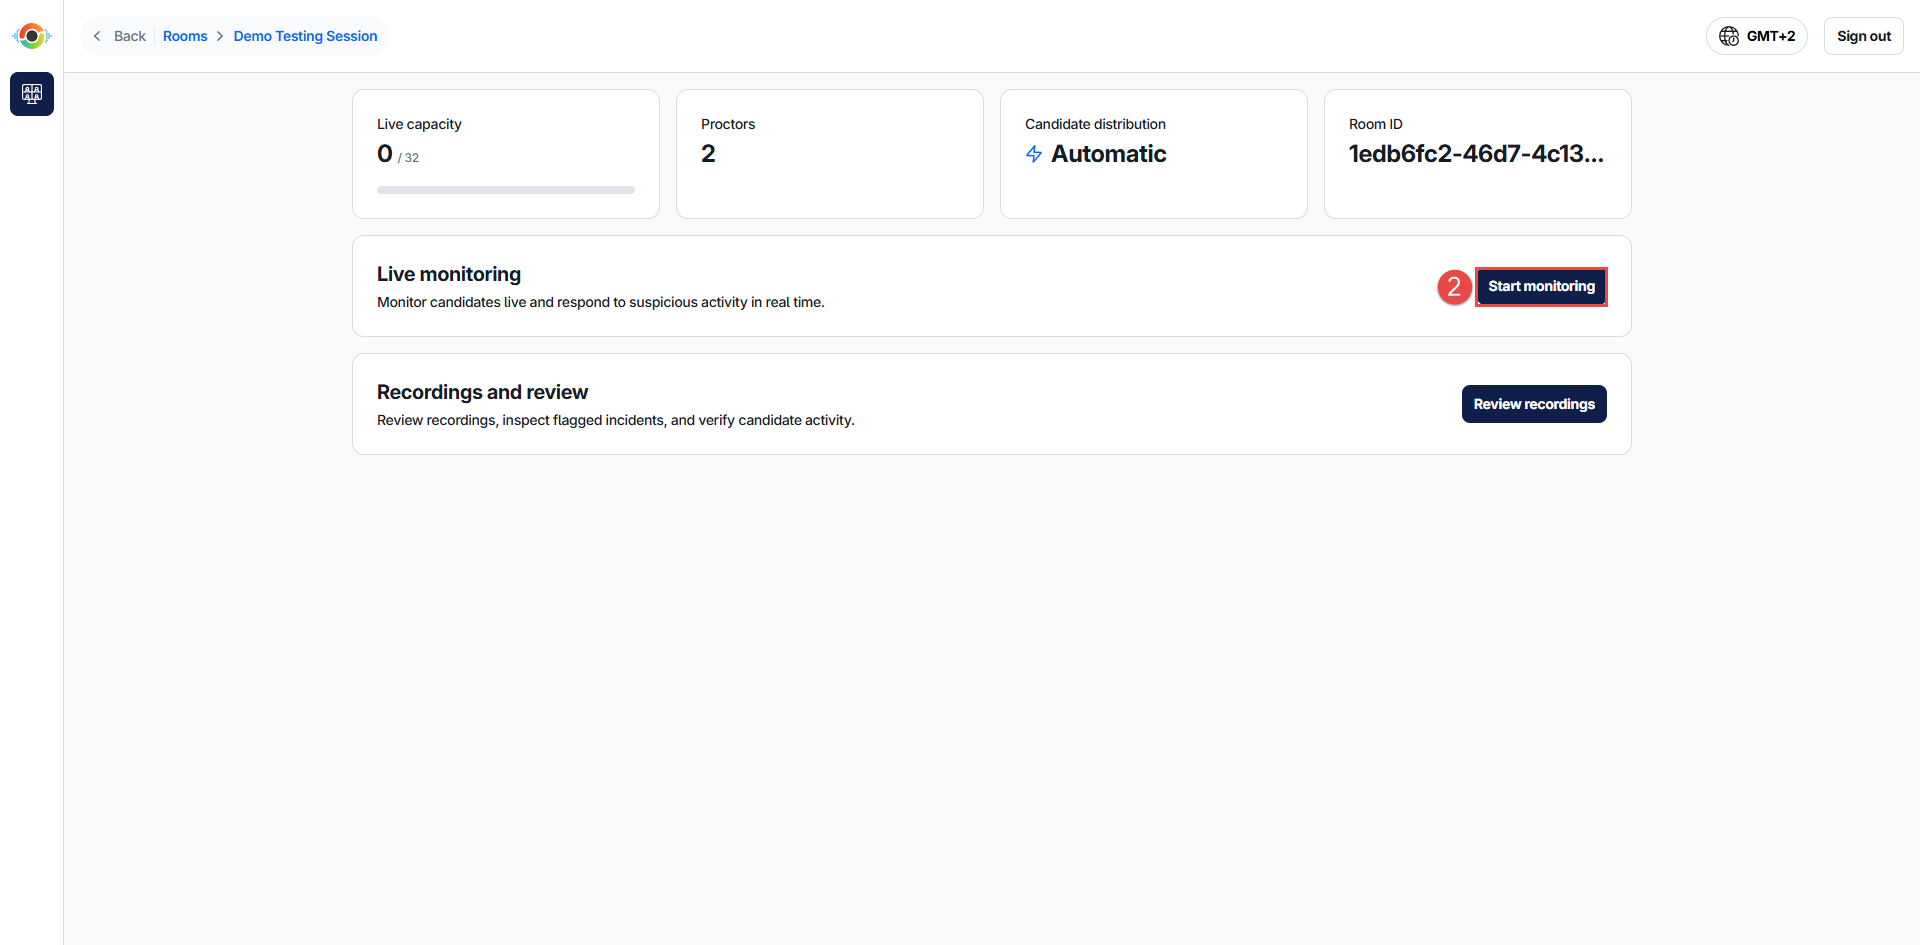
- Open the room you want to monitor.
- Click Start monitoring.
Live monitoring is typically accessed through your examination platform. Refer to your platform's documentation for platform-specific instructions.
Review recordings
After an exam is completed, recordings can be reviewed at any time. Access steps vary by platform. Select your integration method below.
To review a recording:
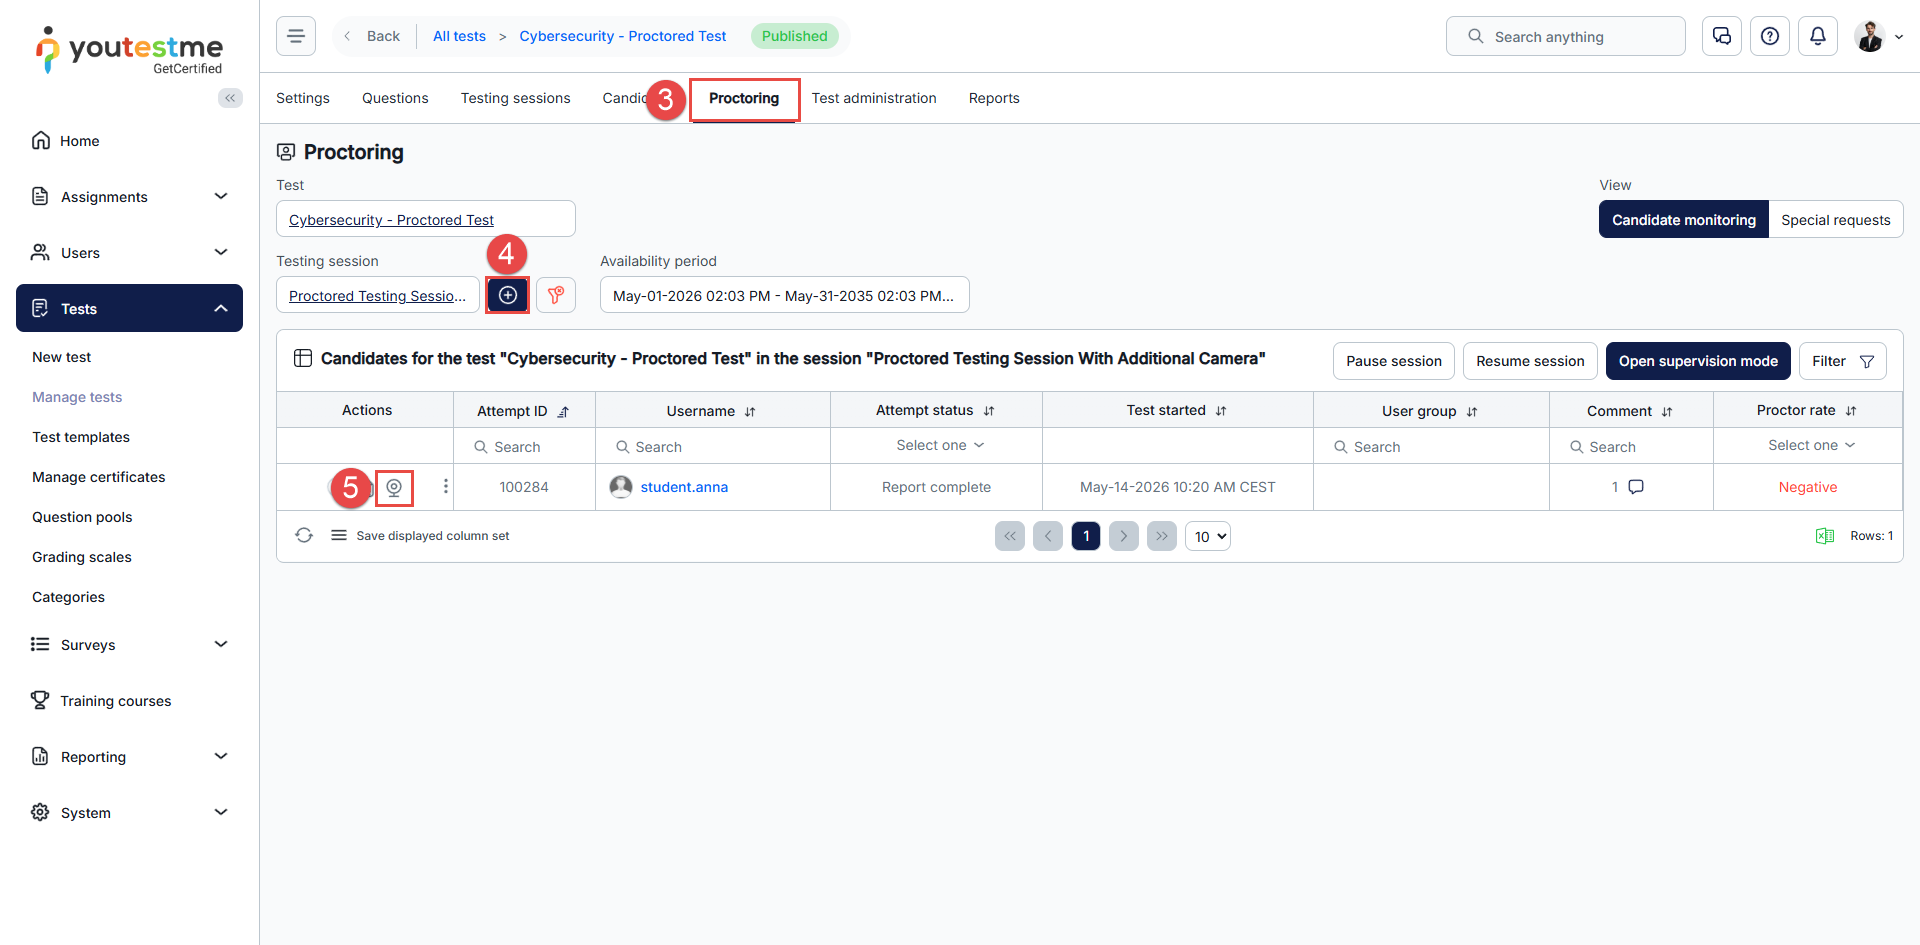
- Go to Tests → Manage tests.
- Open the test you want to review.
- Open the Proctoring tab.
- Select the testing session you want to review.
- Click the Camera icon.
To review a recording:
- Go to My Courses.
- Open the course you want to review.
- Open the External tool - Proctoring activity.
- Click Review recordings button to begin reviewing the recordings.
To review a recording:
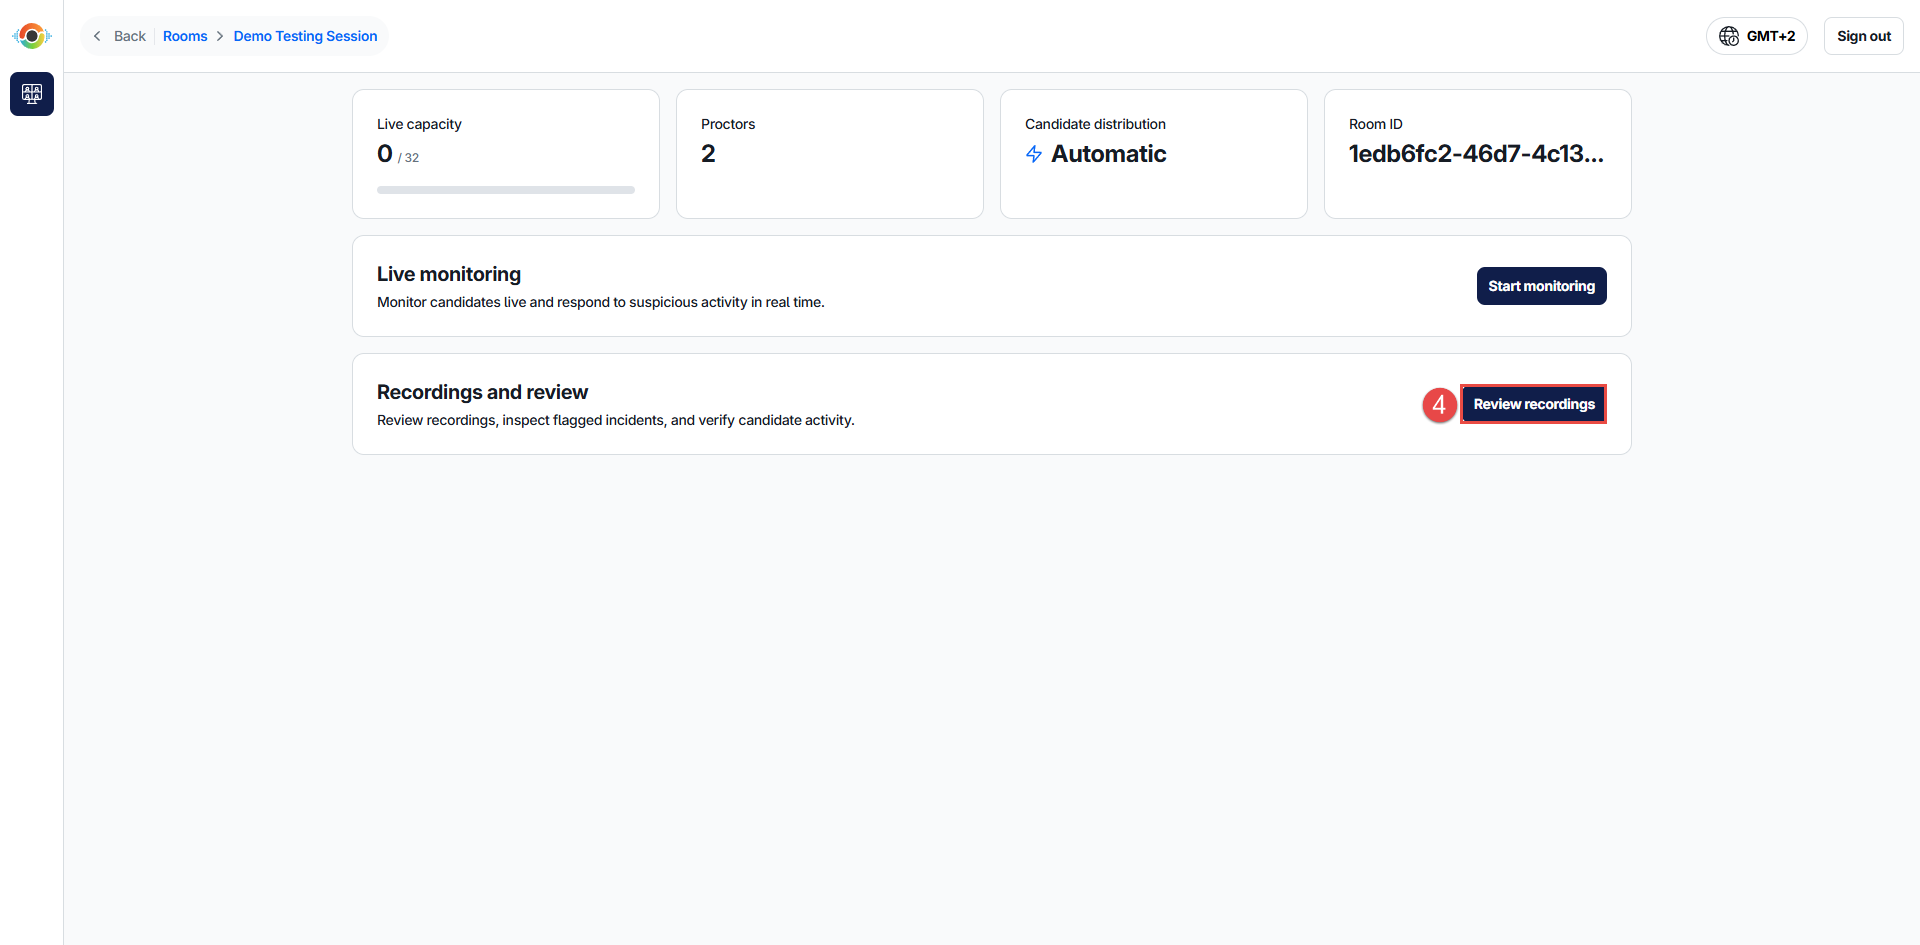
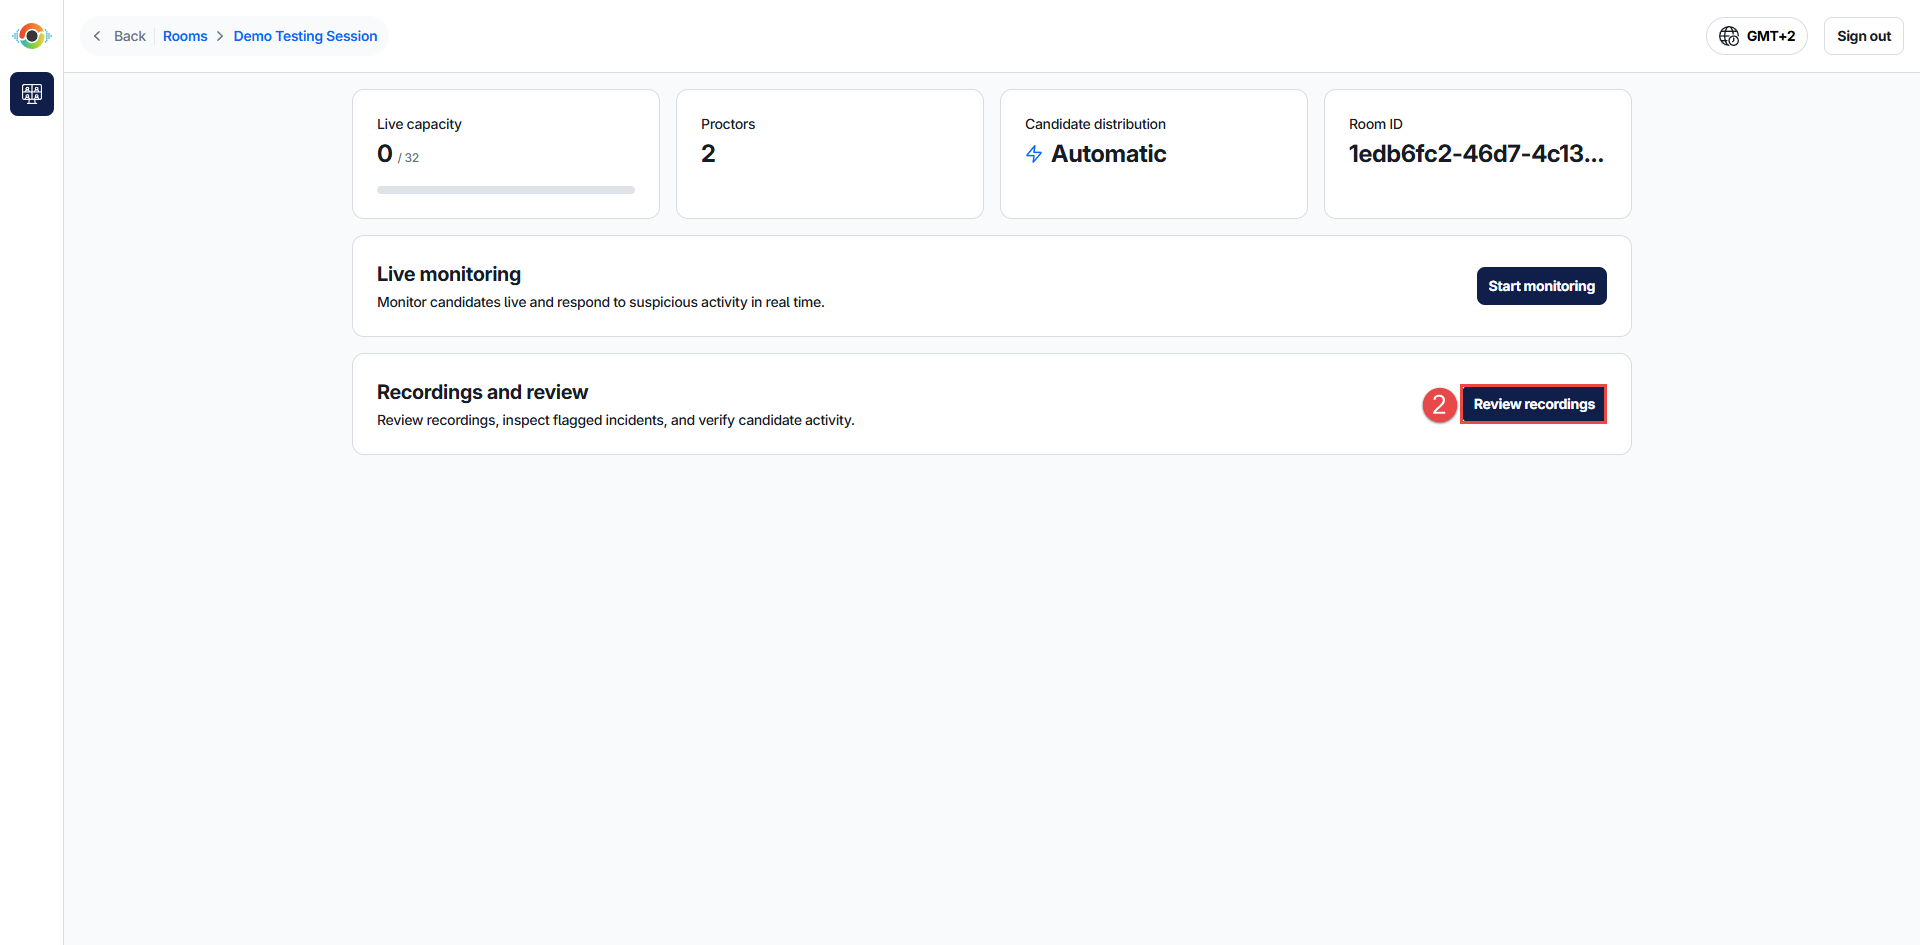
- Find the room you want to review and click Open room.
- Click Review recordings to begin reviewing the recordings.
Recordings are typically accessed through your examination platform. Refer to your platform's documentation for platform-specific instructions.