YTM logo
YTM Proctoring Help center
Role: Admin Proctor Candidate

Before you begin

Make sure you have the following before starting your exam:

Laptop or desktop computer
Latest version of Chrome, Firefox, or Edge
Camera and microphone
Stable internet connection
Valid government-issued photo ID (if required)
Quiet, well-lit room and a clear desk
Smartphone for QR scan (if required)

Exam process

1
Access the exam
Access your exam through your platform. The exact steps depend on your platform and are described below.
2
Complete the system check
Allow access to your camera, microphone, and screen. Complete ID verification and a room scan if required.
3
Wait for proctor approval (if required)
Some exams require a proctor to verify your ID and testing environment before you can begin. Keep your camera and microphone enabled while you wait.
4
Complete the exam
Your camera and screen activity may be monitored and recorded. You may receive warnings if potential incidents are detected during the exam.

Accessing an exam

The steps to access an exam depend on the platform used for exam delivery. Select your platform below.

Log in to your account, then:

  1. Go to Assignments → My tests.
  2. Find the exam and click Start.
  3. Review and acknowledge the instructions, if required.

After you click Start, the proctoring system launches automatically and guides you through the system check.
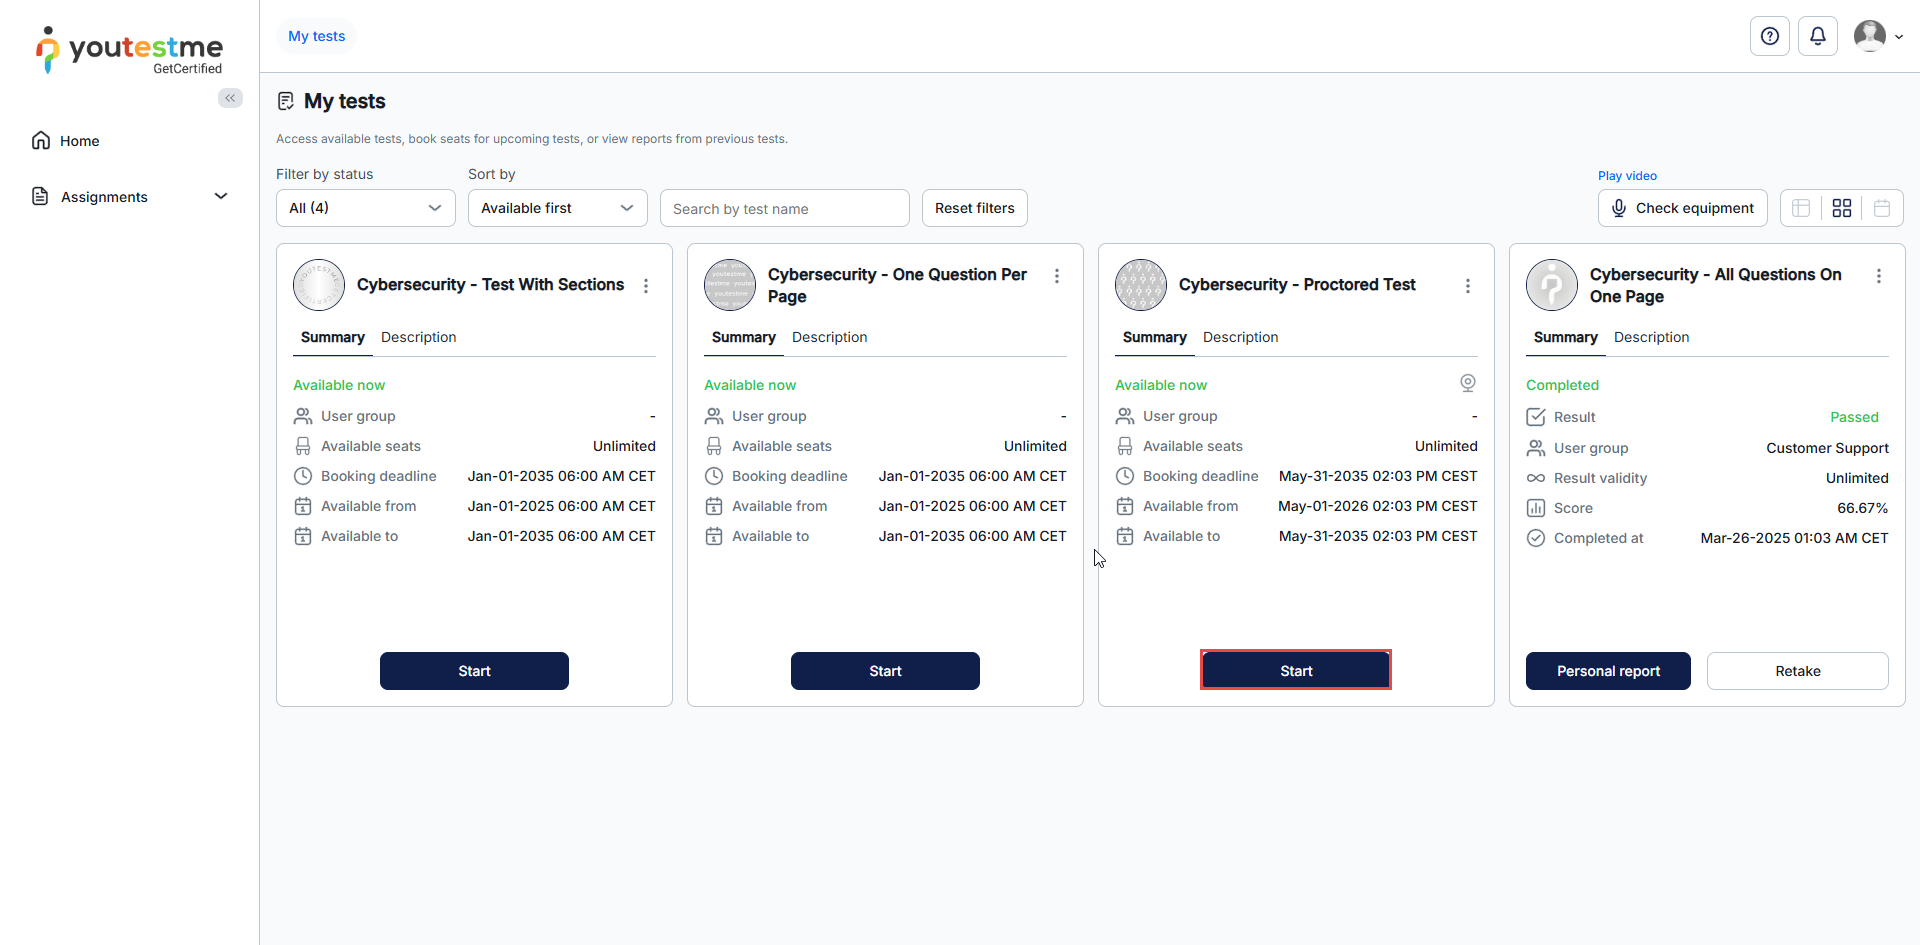
Starting a test in GetCertified
Assignments → My Tests → Start the exam

Log in to your account, then:

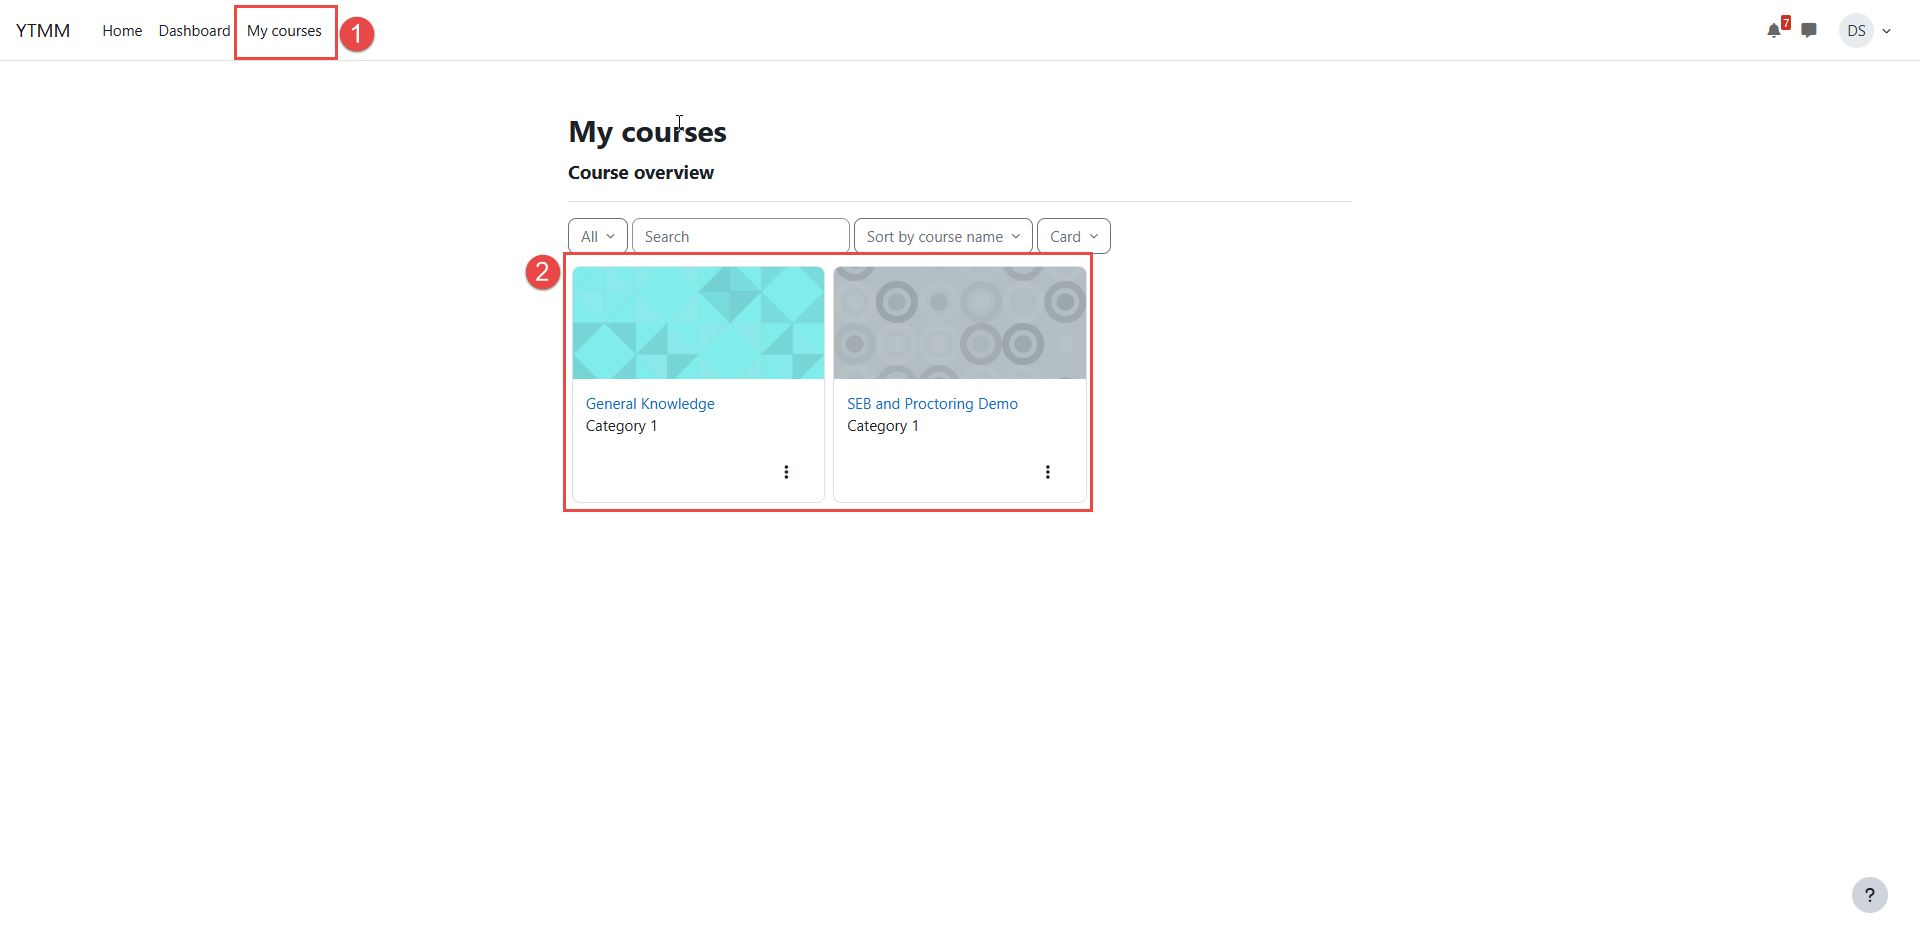
  1. Go to My Courses.
  2. Open the course.
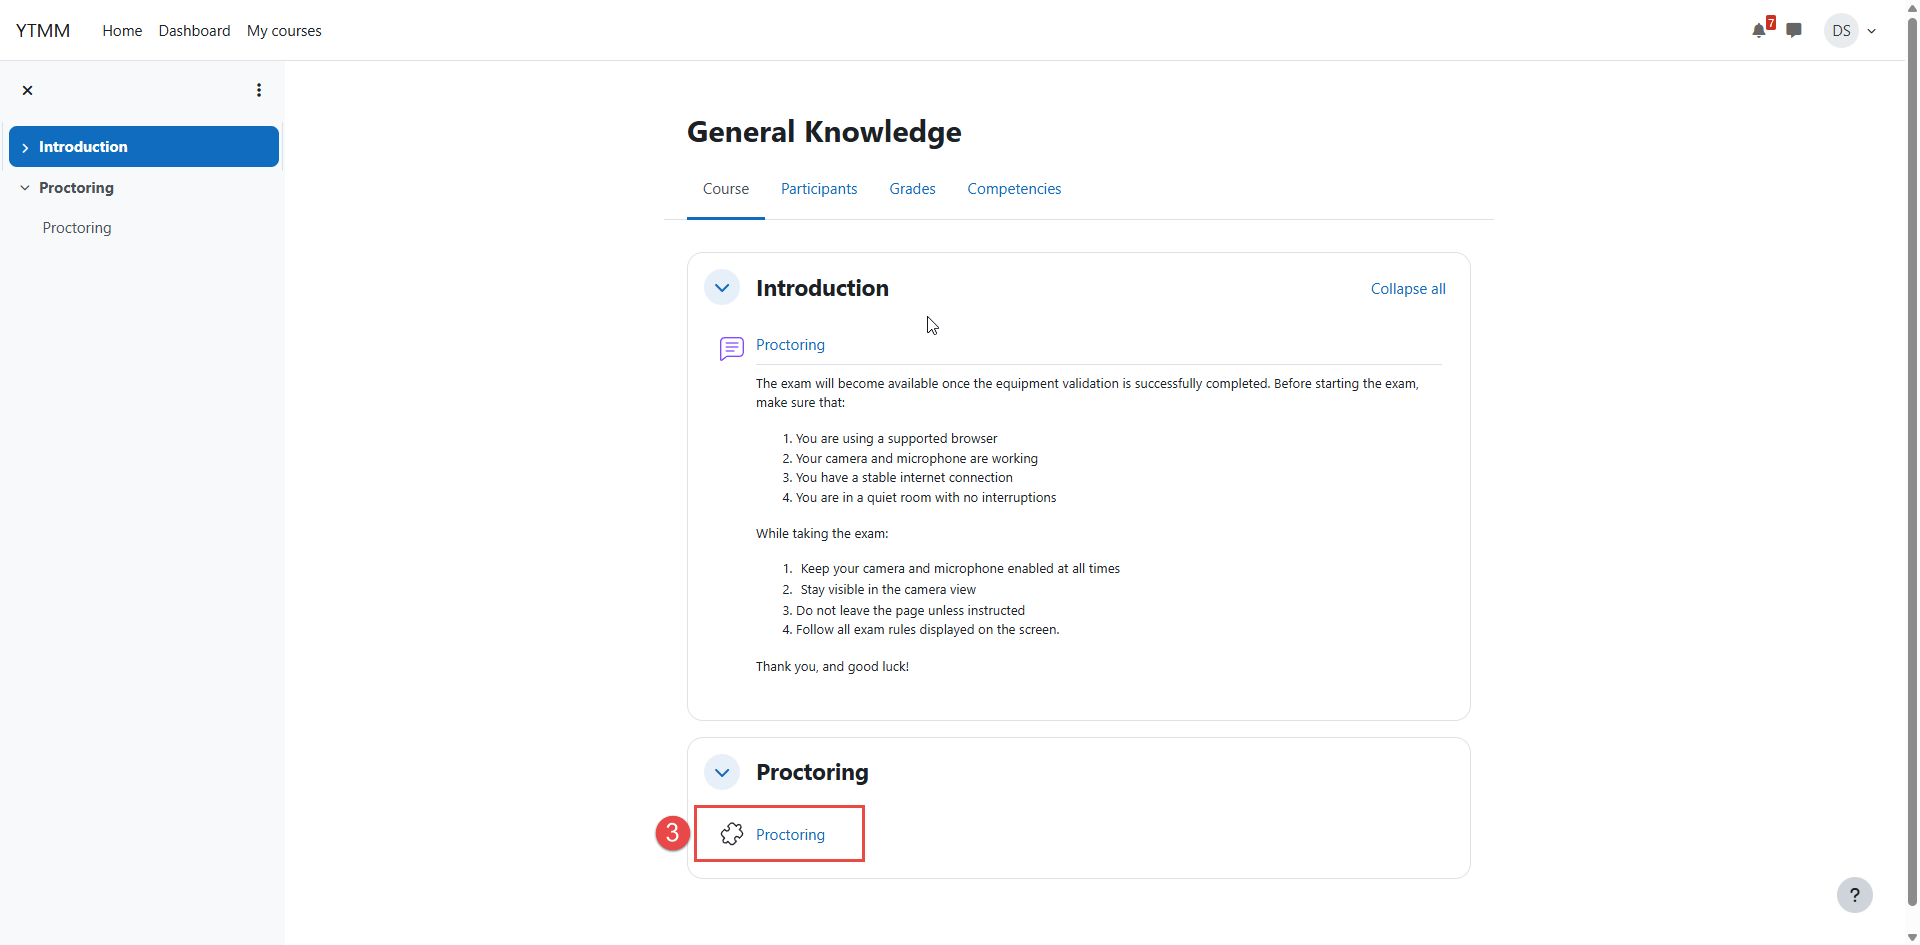
  3. Opening the course in Moodle
    My Courses → Open the course
  4. Click the proctoring activity.
  5. Equipment Verification activity in Moodle
    Click the Proctoring activity

After the system check is complete and monitoring has started, you can begin the quiz.

If your organization does not use an integrated examination platform, you will receive a direct link to the proctoring system from your administrator.

  1. Open the link provided by your administrator.
  2. The proctoring system launches automatically and guides you through the system check.

If your organization uses an examination platform that is not listed above, follow the instructions provided by your administrator or platform provider. Once you start the exam, the proctoring system launches automatically.

System check

Before the exam starts, the system check verifies that your device and environment meet the requirements for the exam. Follow the on-screen instructions to complete any required steps, such as:

  • Allow access to your camera.
  • Allow access to your microphone.
  • System check: camera and microphone
    System check: allow access to camera and microphone for monitoring and recording
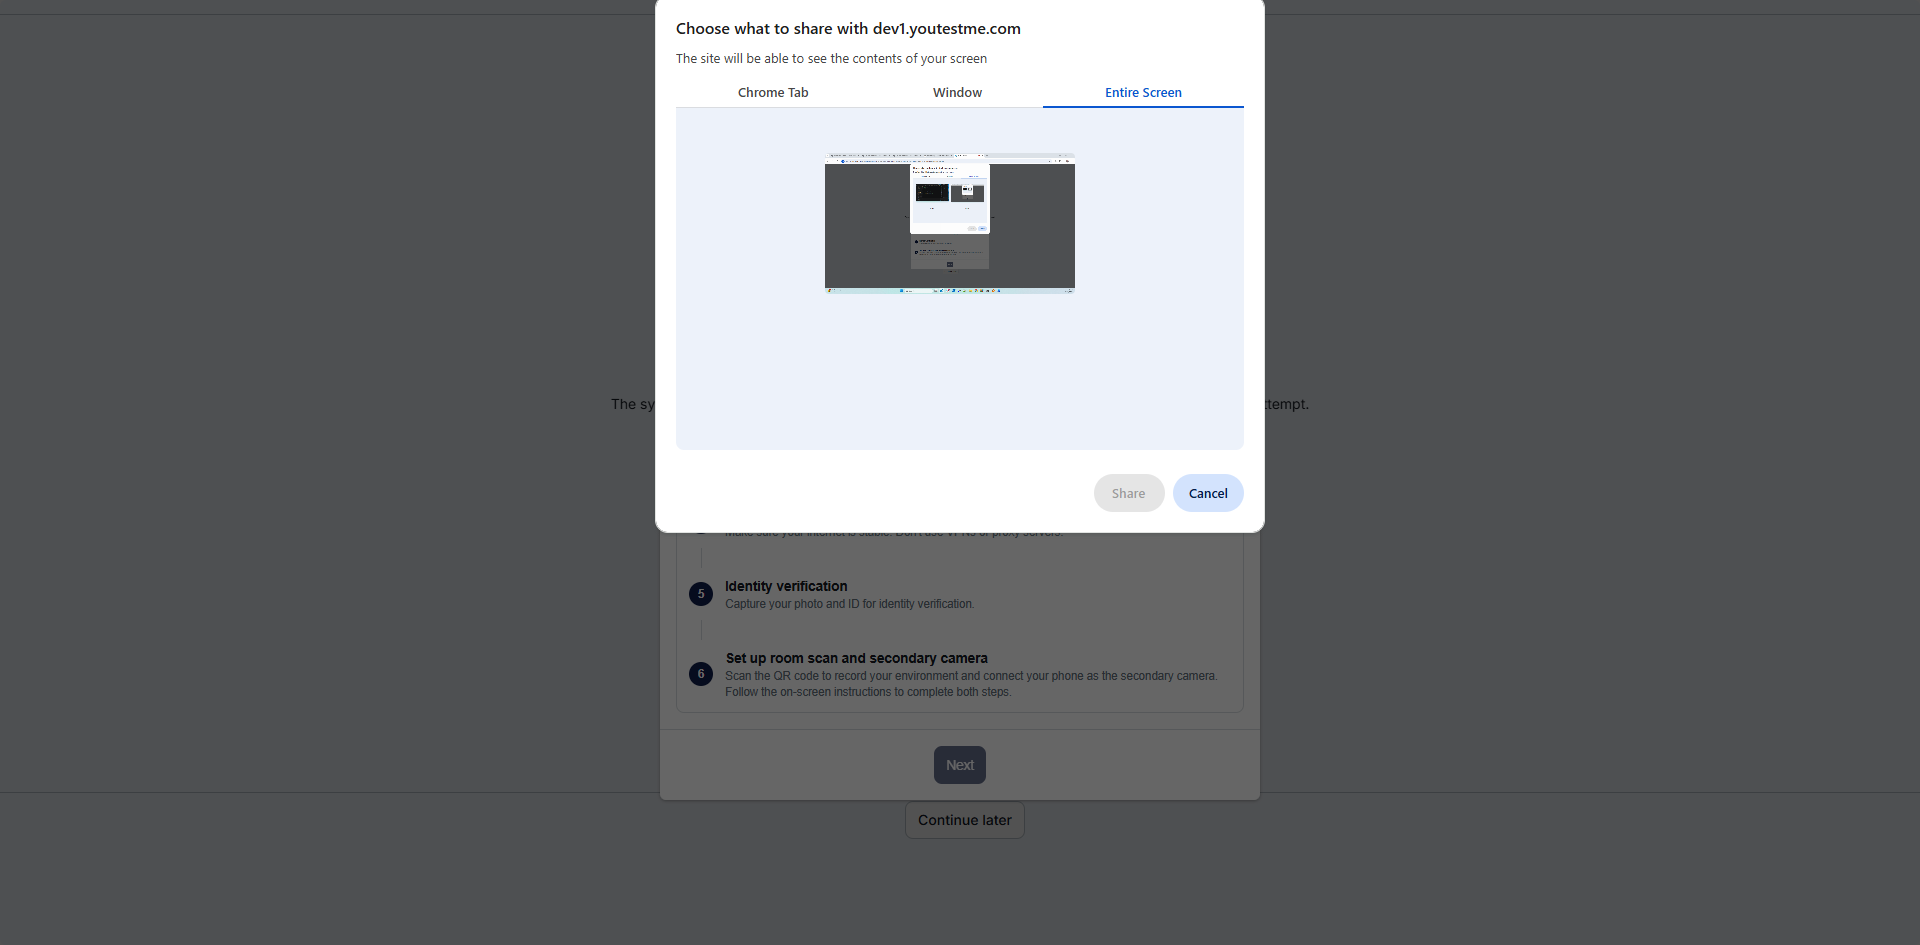
  • Allow access to your screen. You must share your entire screen to continue.
  • System check: screen sharing
    System check: share your entire screen
  • The system checks your network connection.
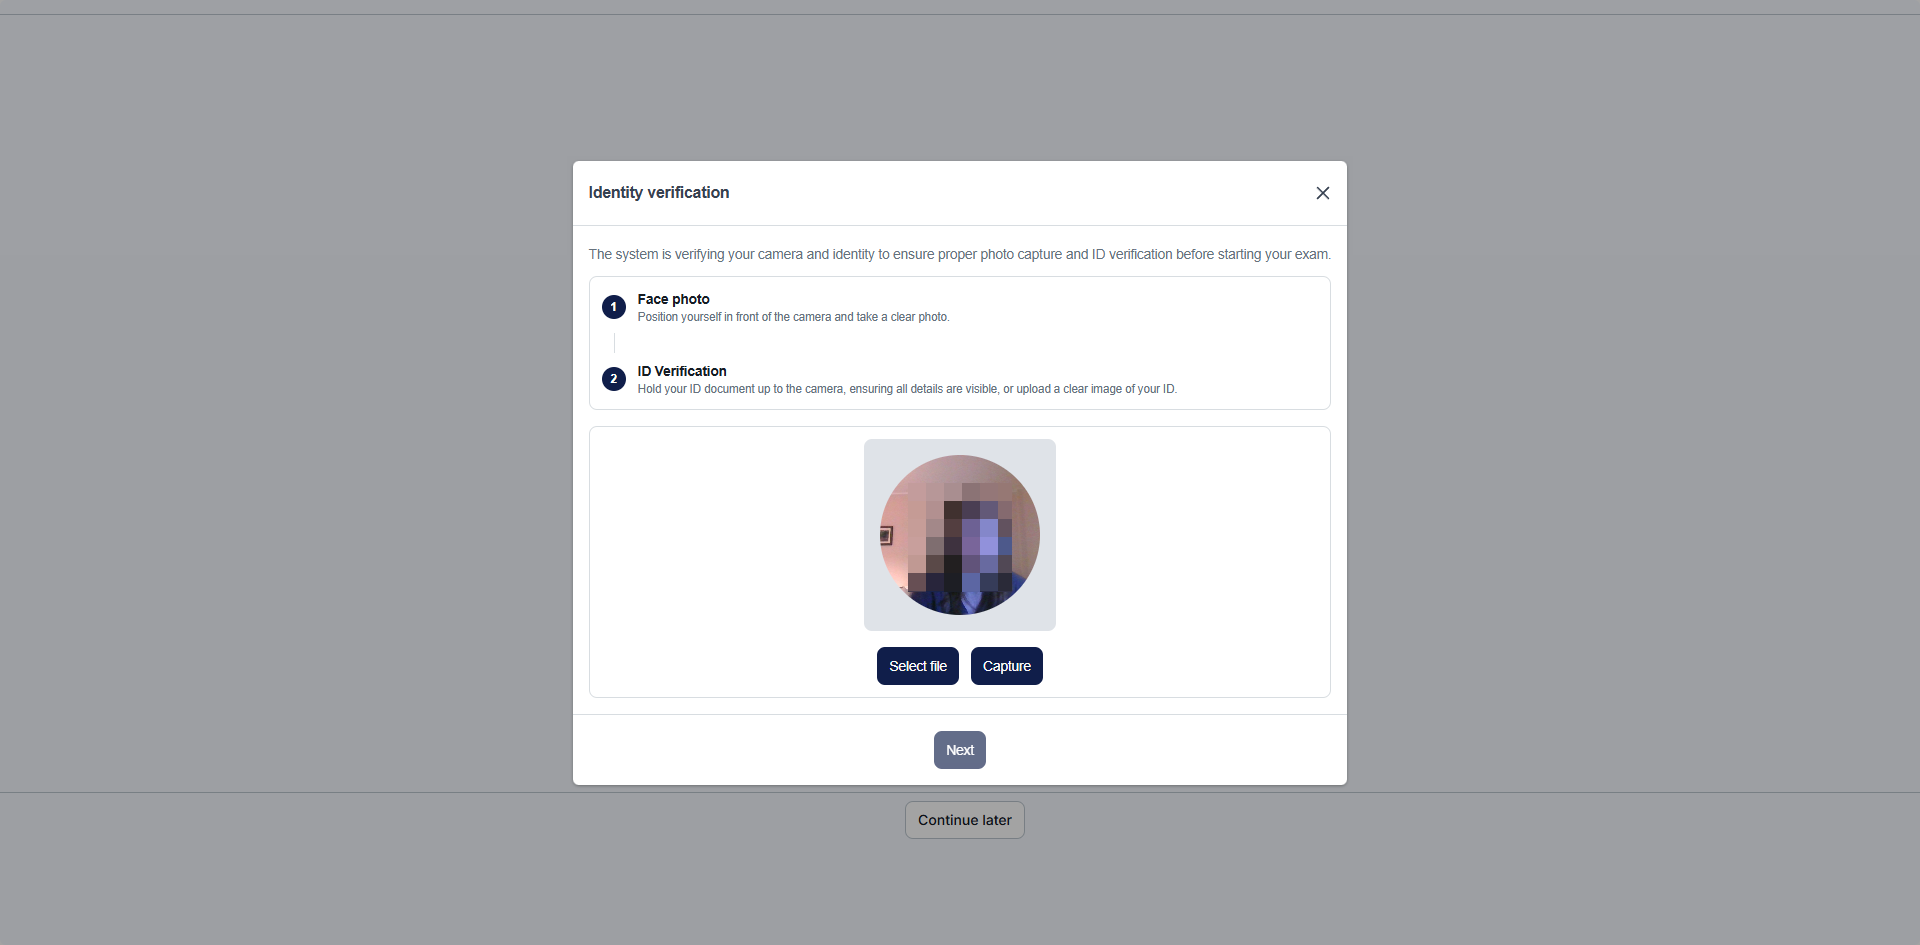
  • Take a photo of your face for identity verification.
  • System check: face photo
    System check: take a photo of your face for identity verification
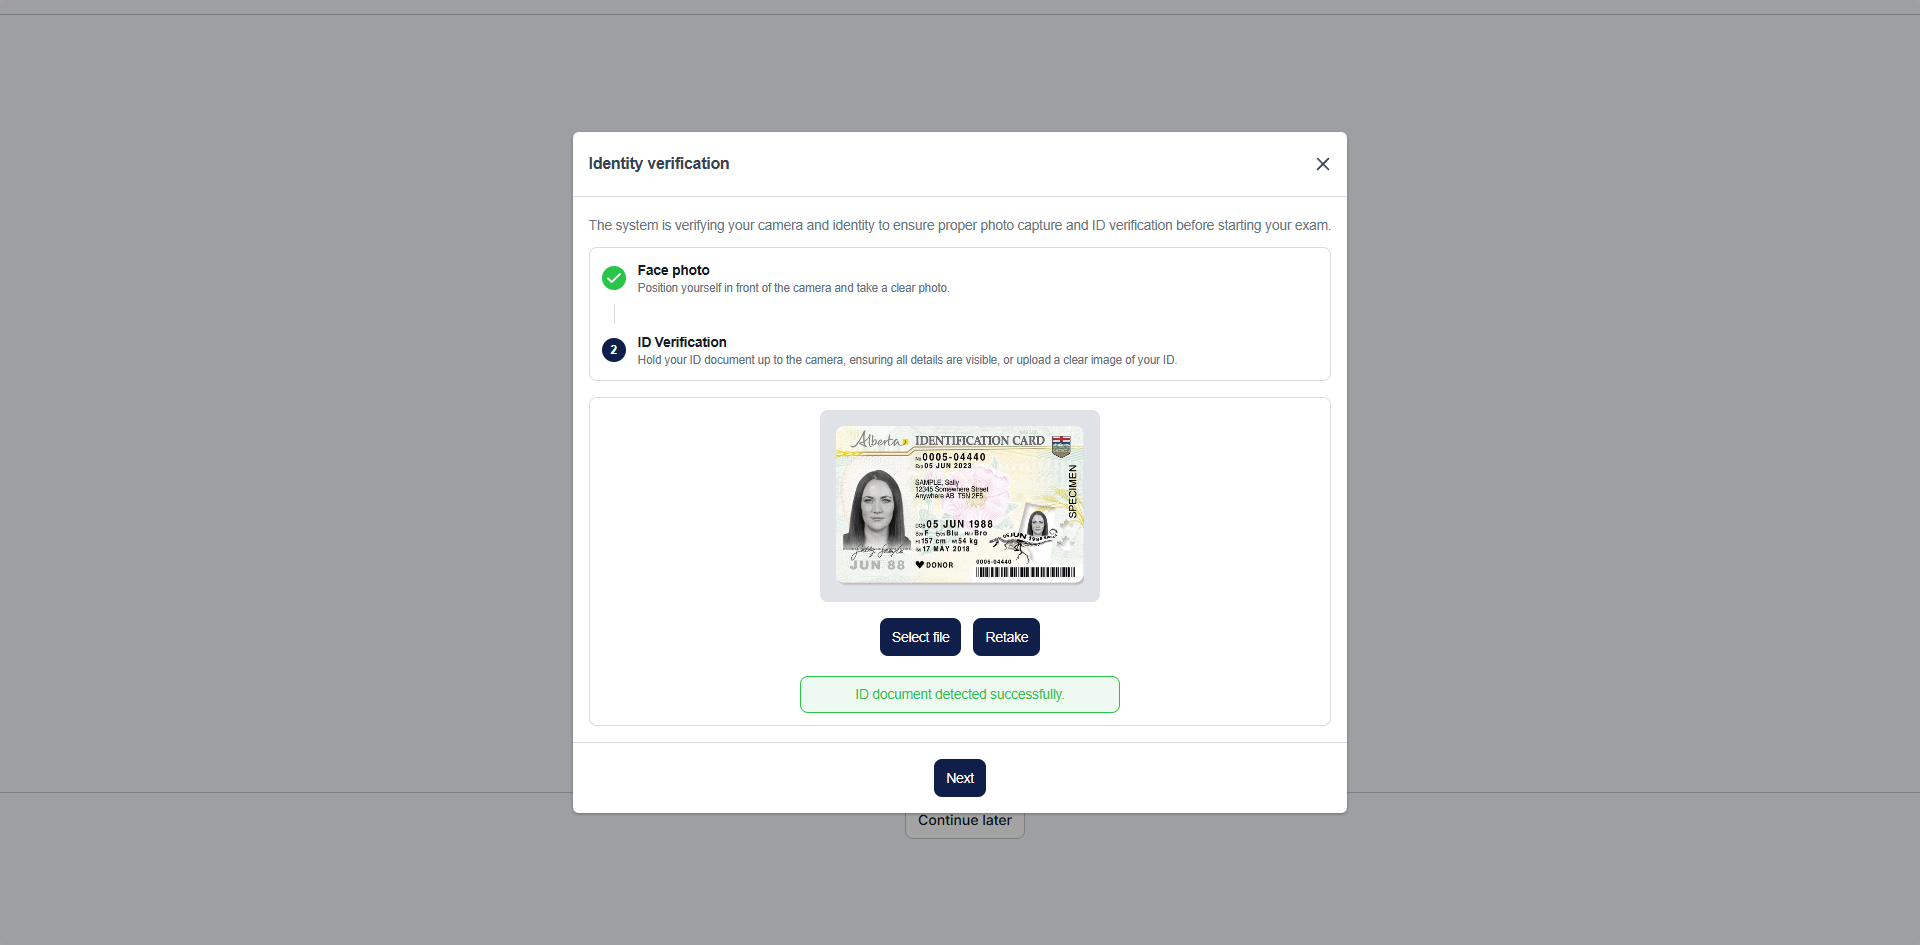
  • Take a photo of your government-issued photo ID.
  • System check: ID verification
    System check: photograph your ID document
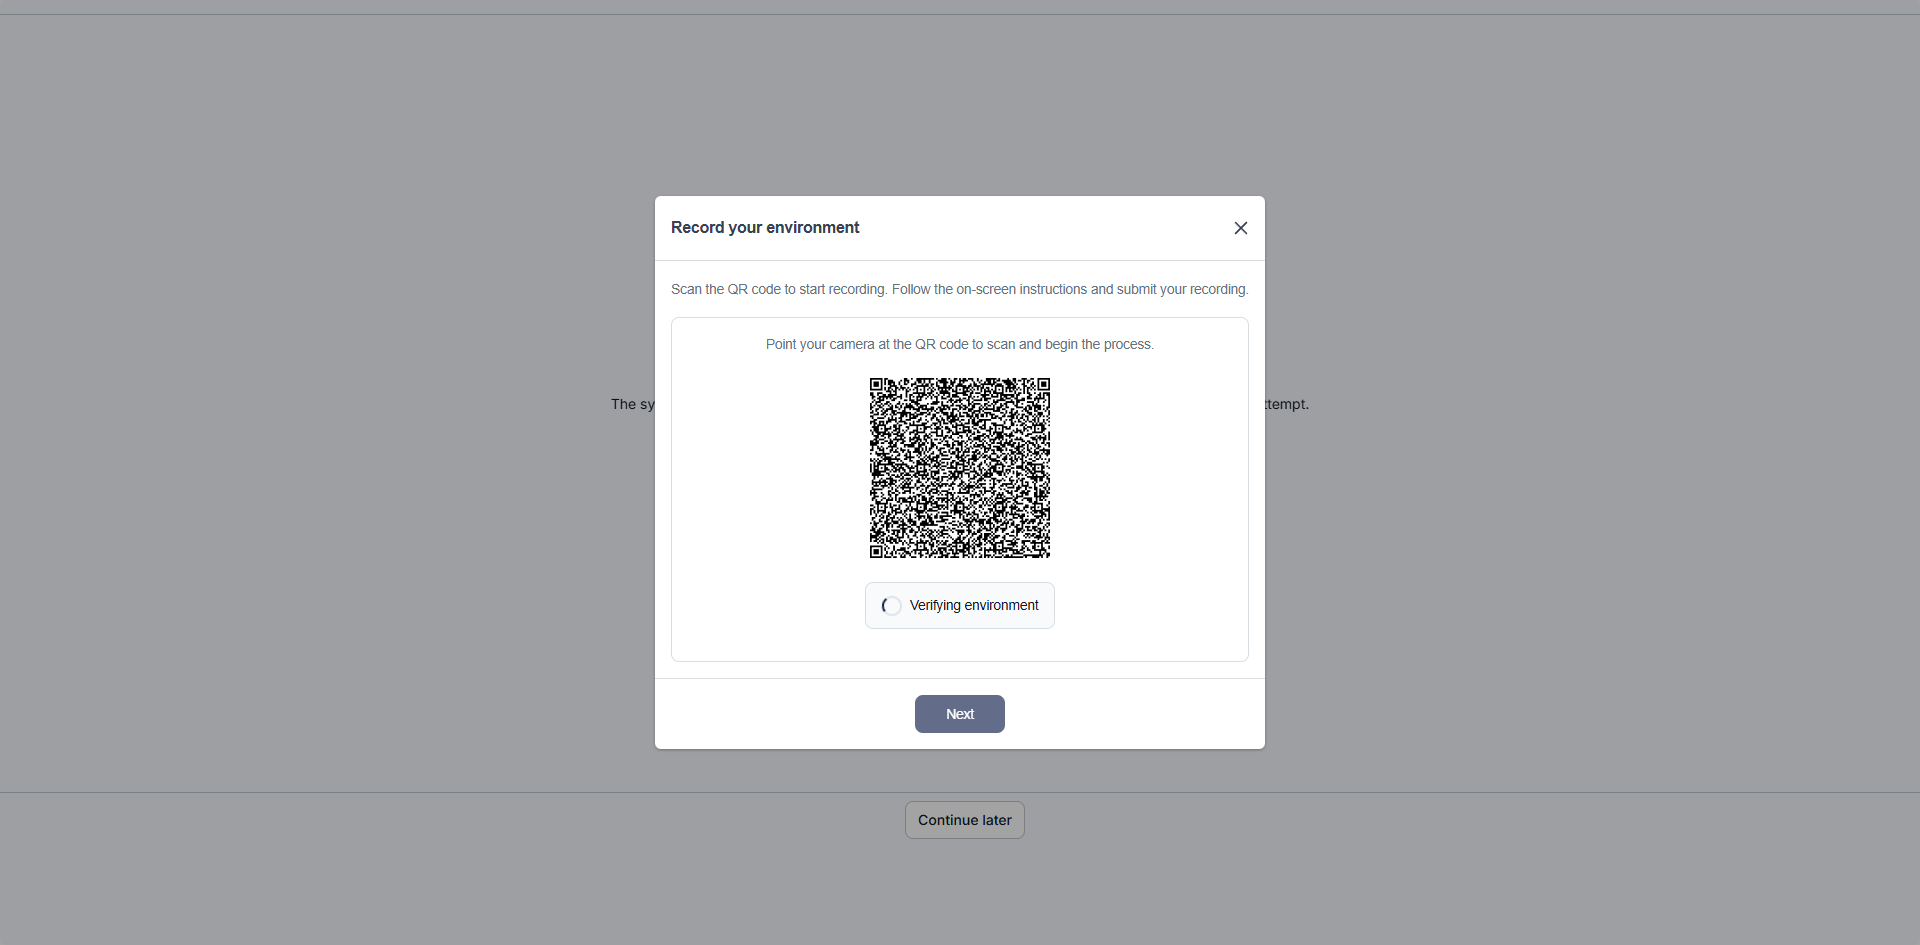
  • Scan the QR code displayed on screen and use your phone to record a short room scan video, slowly moving around the room to show your workspace and surrounding area.
  • System check: room scan
    System check: scan the QR code with your phone
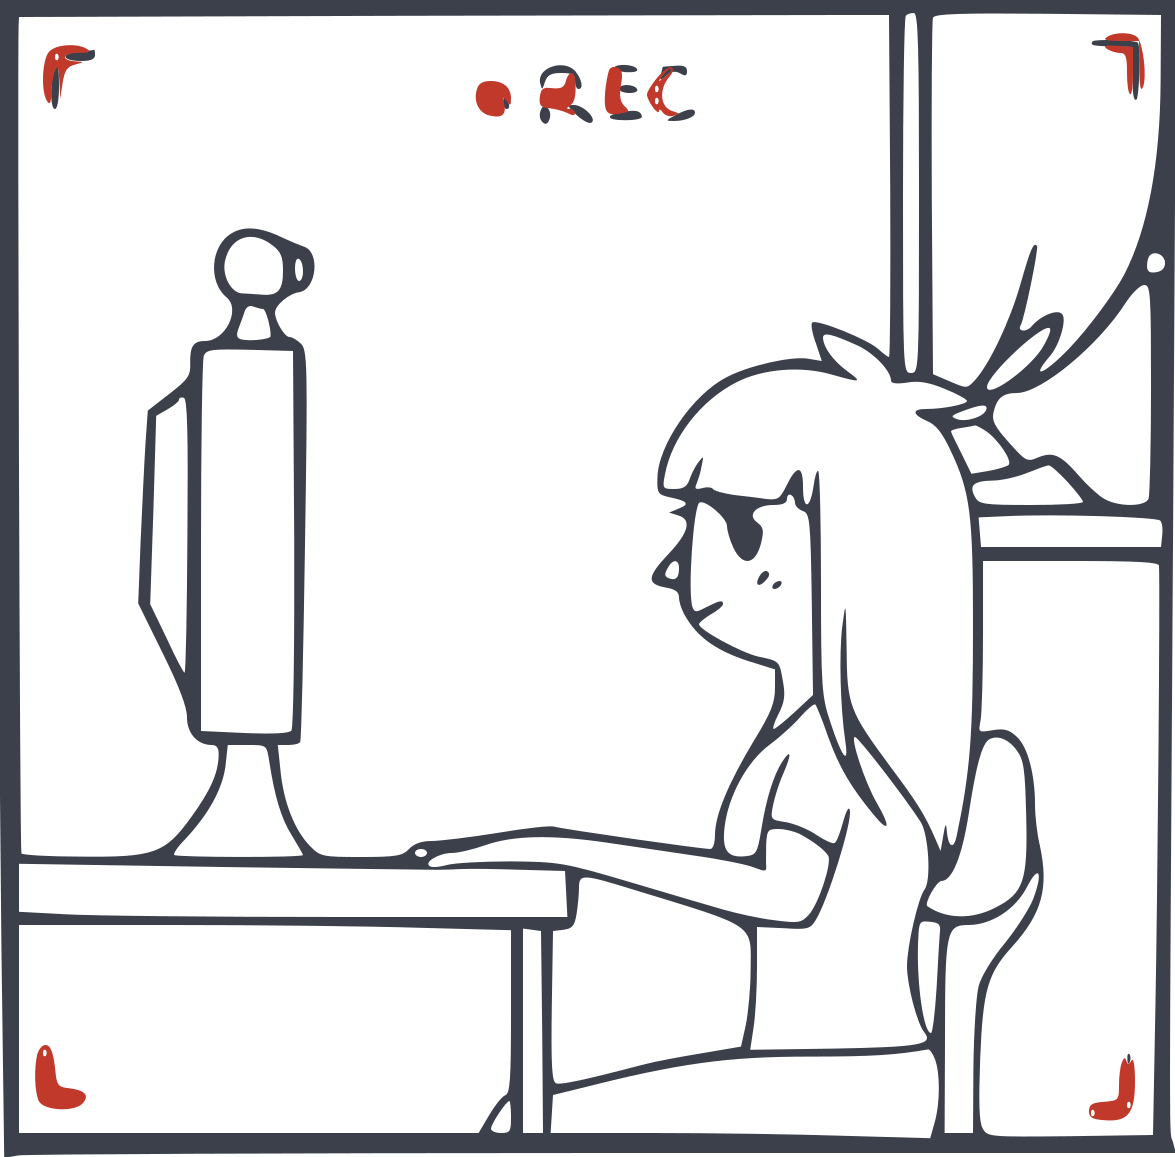
  • Connect your mobile phone as a secondary camera and position it to show your workspace and surrounding area.
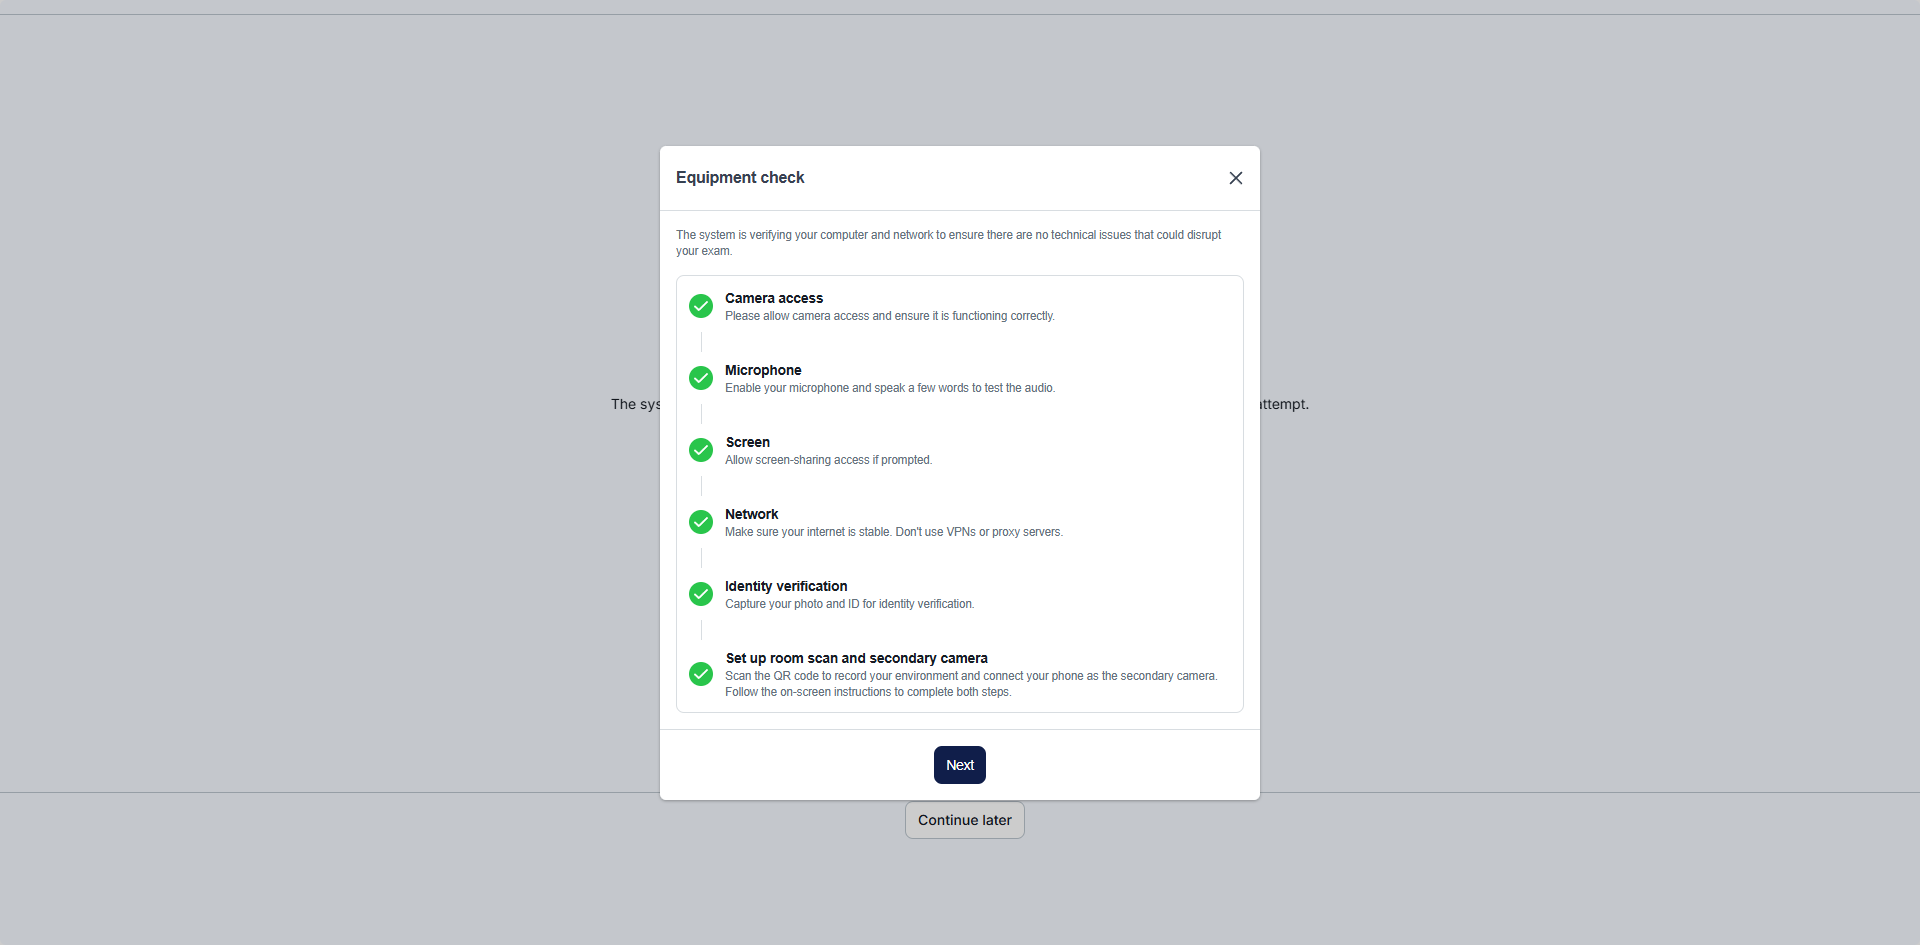
  • System check: secondary mobile camera
    System check: position your phone to show your workspace and surroundings

During the exam

During the exam, depending on your organization's configuration, your screen, webcam, microphone, and mobile camera (if enabled) may be monitored and recorded.

You may see:

  1. A thumbnail displaying your webcam feed.
  2. A chat panel for communication with the proctor, if enabled.
  3. Warning messages when incidents are detected.
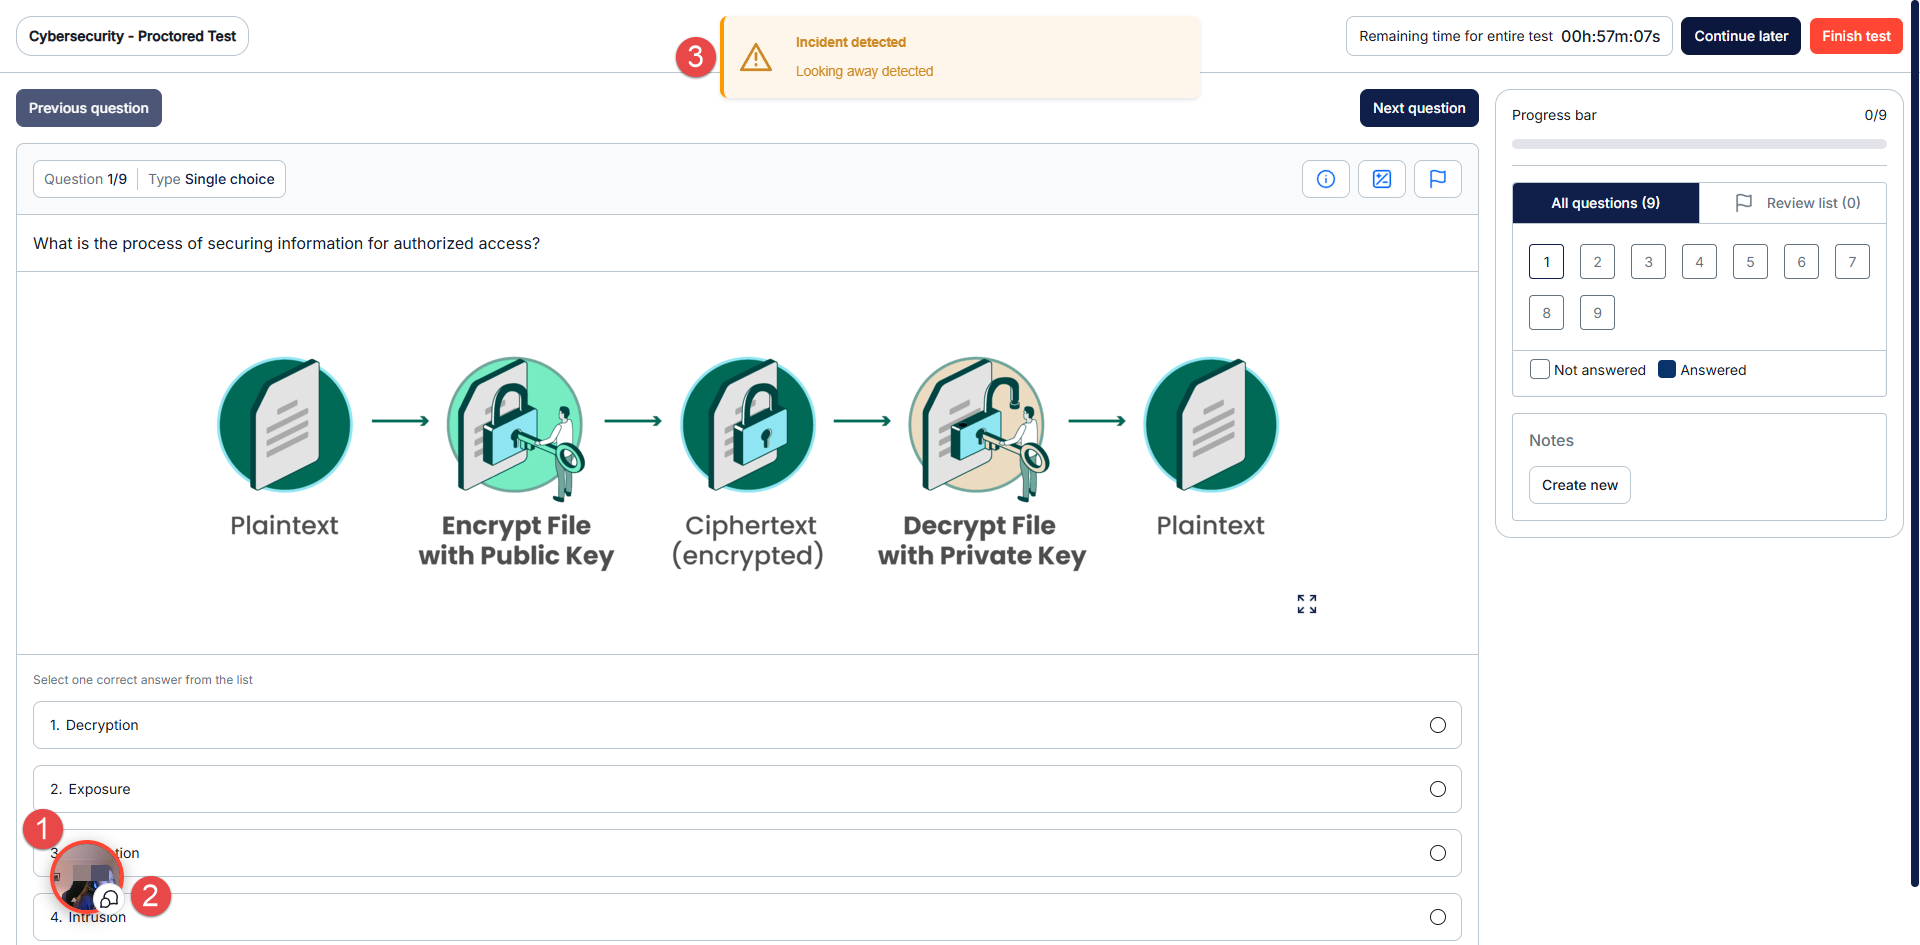
  4. ⚠️ When an incident is detected, a warning message will appear on the screen. Follow the instruction shown in the warning and correct the detected behaviour immediately.
Exam in progress with incident warnings
Exam view: webcam thumbnail (bottom left) and incident warnings (right panel)
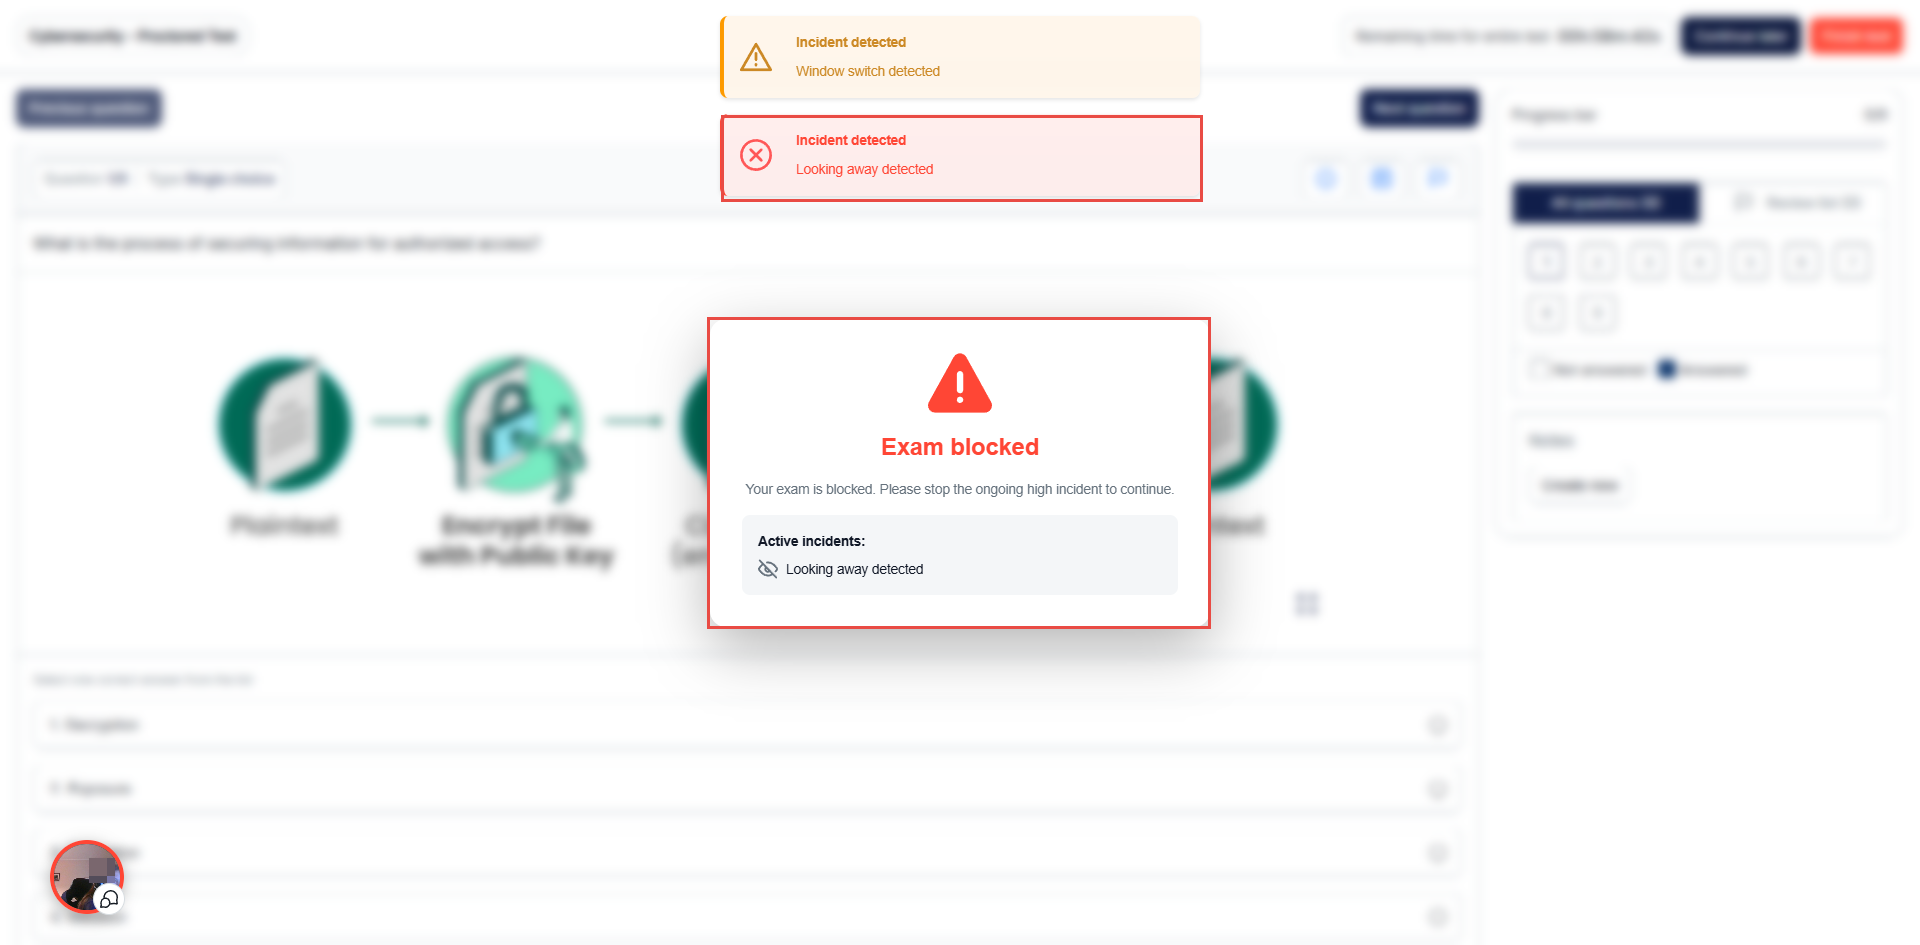
⚠️ If incidents continue to occur, the system may temporarily block access to the exam until the issue is resolved. Depending on your organization's configuration, this may also serve as a final warning before the exam is automatically disqualified.
High incident warning
⚠️ The system uses AI to detect potential rule violations. Some warnings may be triggered by environmental factors such as loud keyboard noise, pets, poor lighting, or reflections from glasses. The full recording is available for review, so candidates who follow the exam rules should not be concerned if an occasional warning appears.

Waiting for proctor approval

Some exams require approval from a proctor before you can begin. If proctor approval is required:

  • You will see a message informing you that you are waiting for approval.
  • A proctor will review your identification and room environment.
ℹ️ Stay on the page with your camera and microphone enabled. The exam starts automatically once approved. If the exam is time-limited, the timer does not start until the proctor approves you.

After the exam

  • Your recording may be reviewed as part of the exam integrity process.
  • Your result will be provided according to your organization's process and timeline.
Having trouble?