
Article verified for Release 15.2 on December 15, 2025.
Proctored exams provide a way for institutions to ensure students take exams under controlled and secure conditions. The YouTestMe platform offers two types of proctoring services:
- Record & Review – monitored automatically using AI, reviewed later by a proctor.
- Live proctoring – monitored in real time by a human proctor.
In both cases, candidates must follow a series of steps to successfully take the exam. This article outlines the requirements and preparation steps for proctored tests and explains the test-taking process.
Test requirements
To ensure a smooth and secure proctored test experience, candidates must meet the following requirements:
- Primary exam device:
- Laptop or desktop computer when screen recording/sharing is required.
- Smartphone or tablet when the exam is configured to be taken directly on a mobile device.
- Laptop or desktop computer requirements when used as the primary exam device:
- Webcam
- Microphone
- Screen-sharing capability
- Supported systems:
- All recent versions of Windows, macOS, and Linux
- All recent versions of major browsers (Chrome, Firefox, Edge, Safari)
- Stable internet connection capable of supporting video, audio, and screen recording when applicable.
- Permissions required:
- Camera access
- Microphone access
- Screen recording/sharing when a laptop or desktop computer is used as the primary exam device
- Identification:
- Valid government-issued photo ID
- Ability to capture or upload a clear photo
Note: If your ID contains two photos (a main photo and a smaller secondary image), the smaller image must be covered (for example, with your fingers). IDs showing both images will not be accepted by the verification system.
- Secondary camera (if required):
- Smartphone or tablet capable of scanning a QR code
- Used as a secondary camera for environmental monitoring.
- Environment:
- Quiet, well-lit room
- No other people present
- Clean desk; ability to record a 360° room scan (if required)
Proctoring Via Mobile Device
A proctored test can be taken directly on a smartphone or tablet. In this setup, the mobile device is the primary exam device and its camera can be used for proctoring.
Important: When the exam is taken directly on a smartphone or tablet, the mobile browser cannot record or share the candidate’s screen because mobile browsers do not support screen recording. Therefore, the candidate’s camera/proctoring footage may be available, but the candidate’s exam screen cannot be recorded.
This is different from the secondary-camera setup, where the candidate takes the exam on a laptop or desktop computer and uses a smartphone or tablet as an additional camera. In that setup, the laptop or desktop computer provides the screen recording, while the mobile device records the candidate’s surroundings.
How to Perform an Equipment Check
Taking a proctored test begins with a simple check-in process composed of steps defined by the test administration. This Equipment Check verifies everything needed for a secure and successful test. The system automatically assesses browser compatibility, internet stability, webcam and microphone functionality, screen-sharing capabilities, and the candidate’s identity. Depending on the test settings, candidates may also be asked to record their environment or connect a secondary camera.
To ensure a smooth experience, candidates can run an equipment check before the actual test. This simulation follows the same check-in steps configured for the test, allowing candidates to confirm their setup and troubleshoot any issues in advance.
To perform an equipment check:
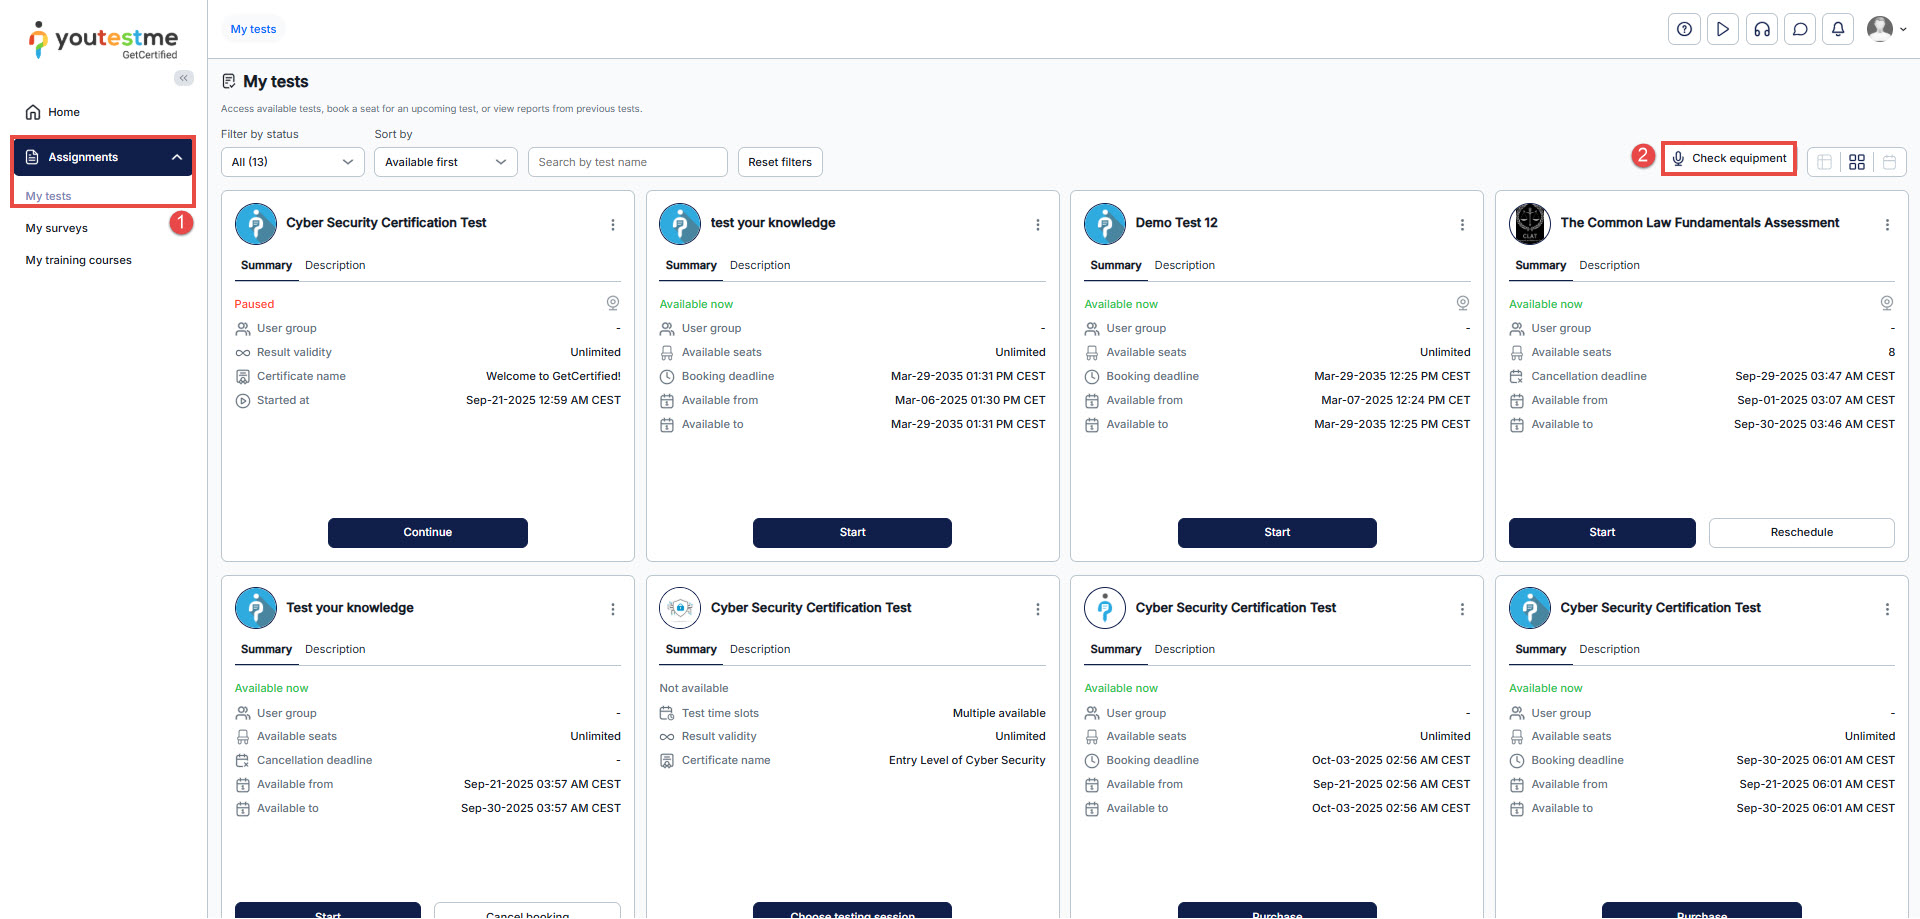
- Log in to your account and go to Assignments > My Tests.
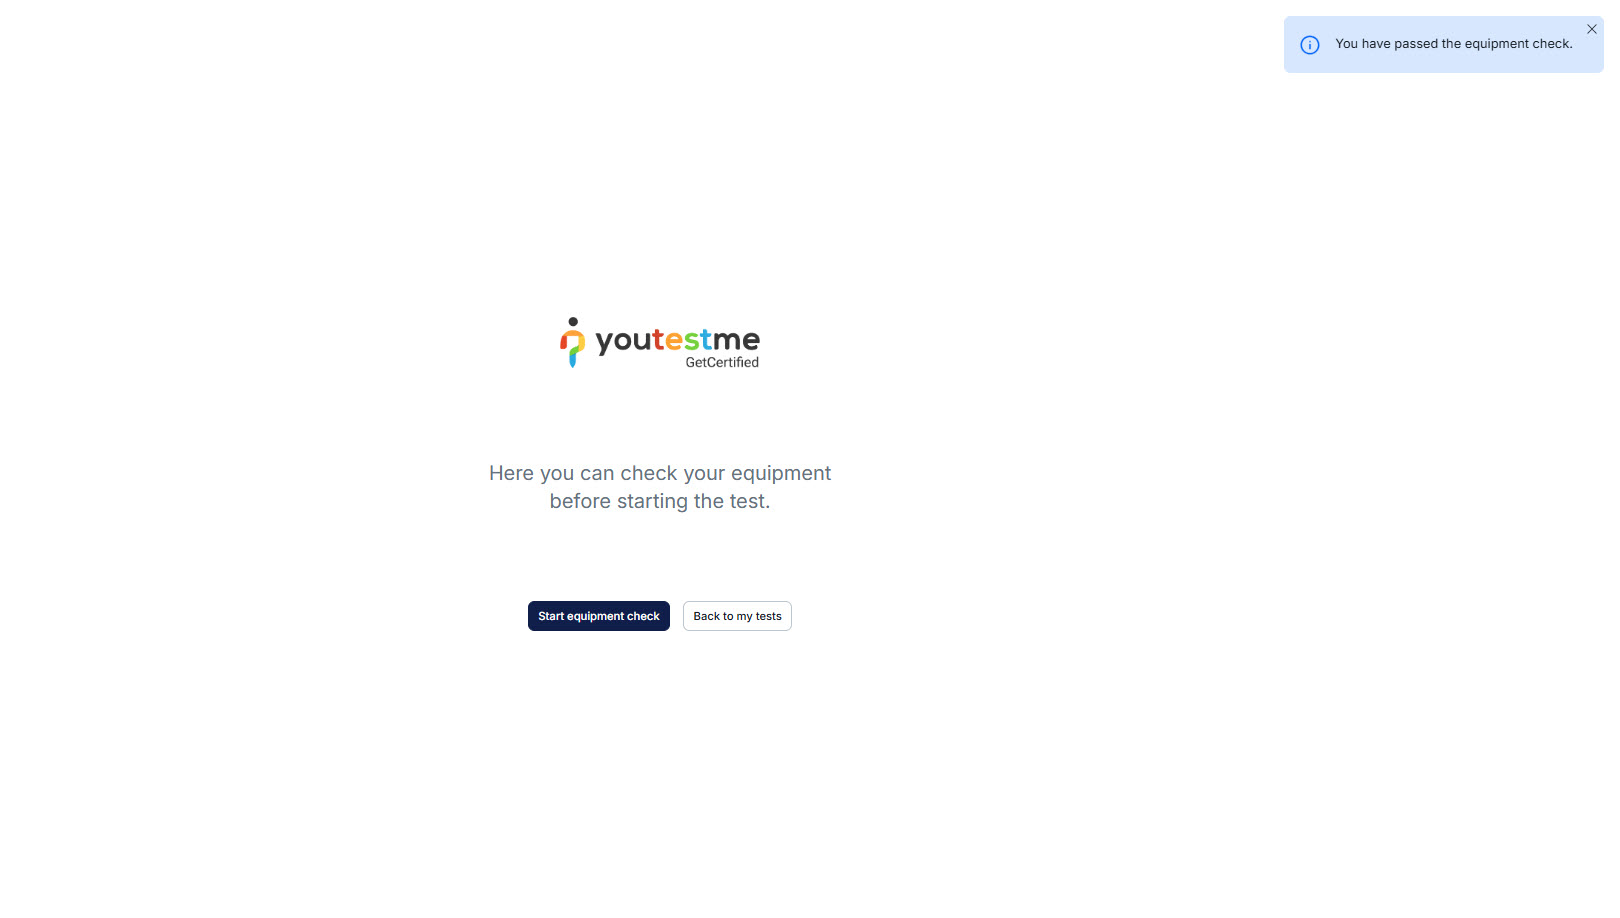
- Click the Check Equipment button to start the test.
This will verify that your setup meets all technical requirements for a smooth test experience.
Equipment Check Overview
The Equipment Check consists of several steps, each designed to verify that your setup meets the requirements for your proctored test.
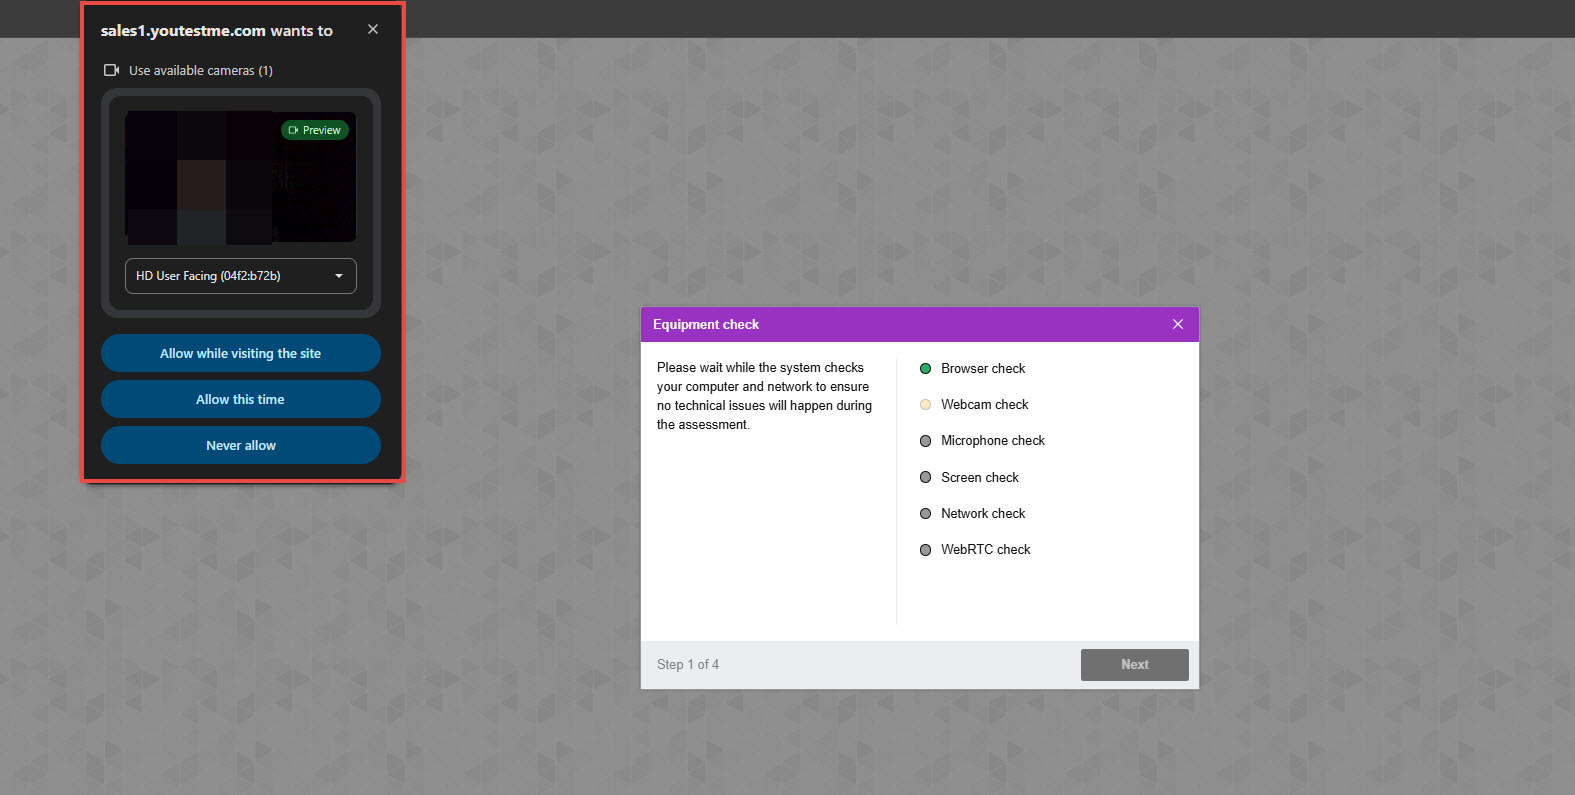
Step 1: Equipment Check
At the beginning of each session, a computer and internet connection check is performed automatically to identify any technical issues. User interaction is only required if problems are detected.
- During this step, your browser will request permission to access your camera and microphone and, when screen sharing is required, your exam screen. Please allow the required permissions and, when prompted, share your entire screen.
- Once the system completes the check, the Next button will turn green, allowing you to proceed to the next step.
- For troubleshooting assistance, please refer to the following articles: Camera, Microphone, Screen, and WebRTC.
Step 2: Taking a Face Photo
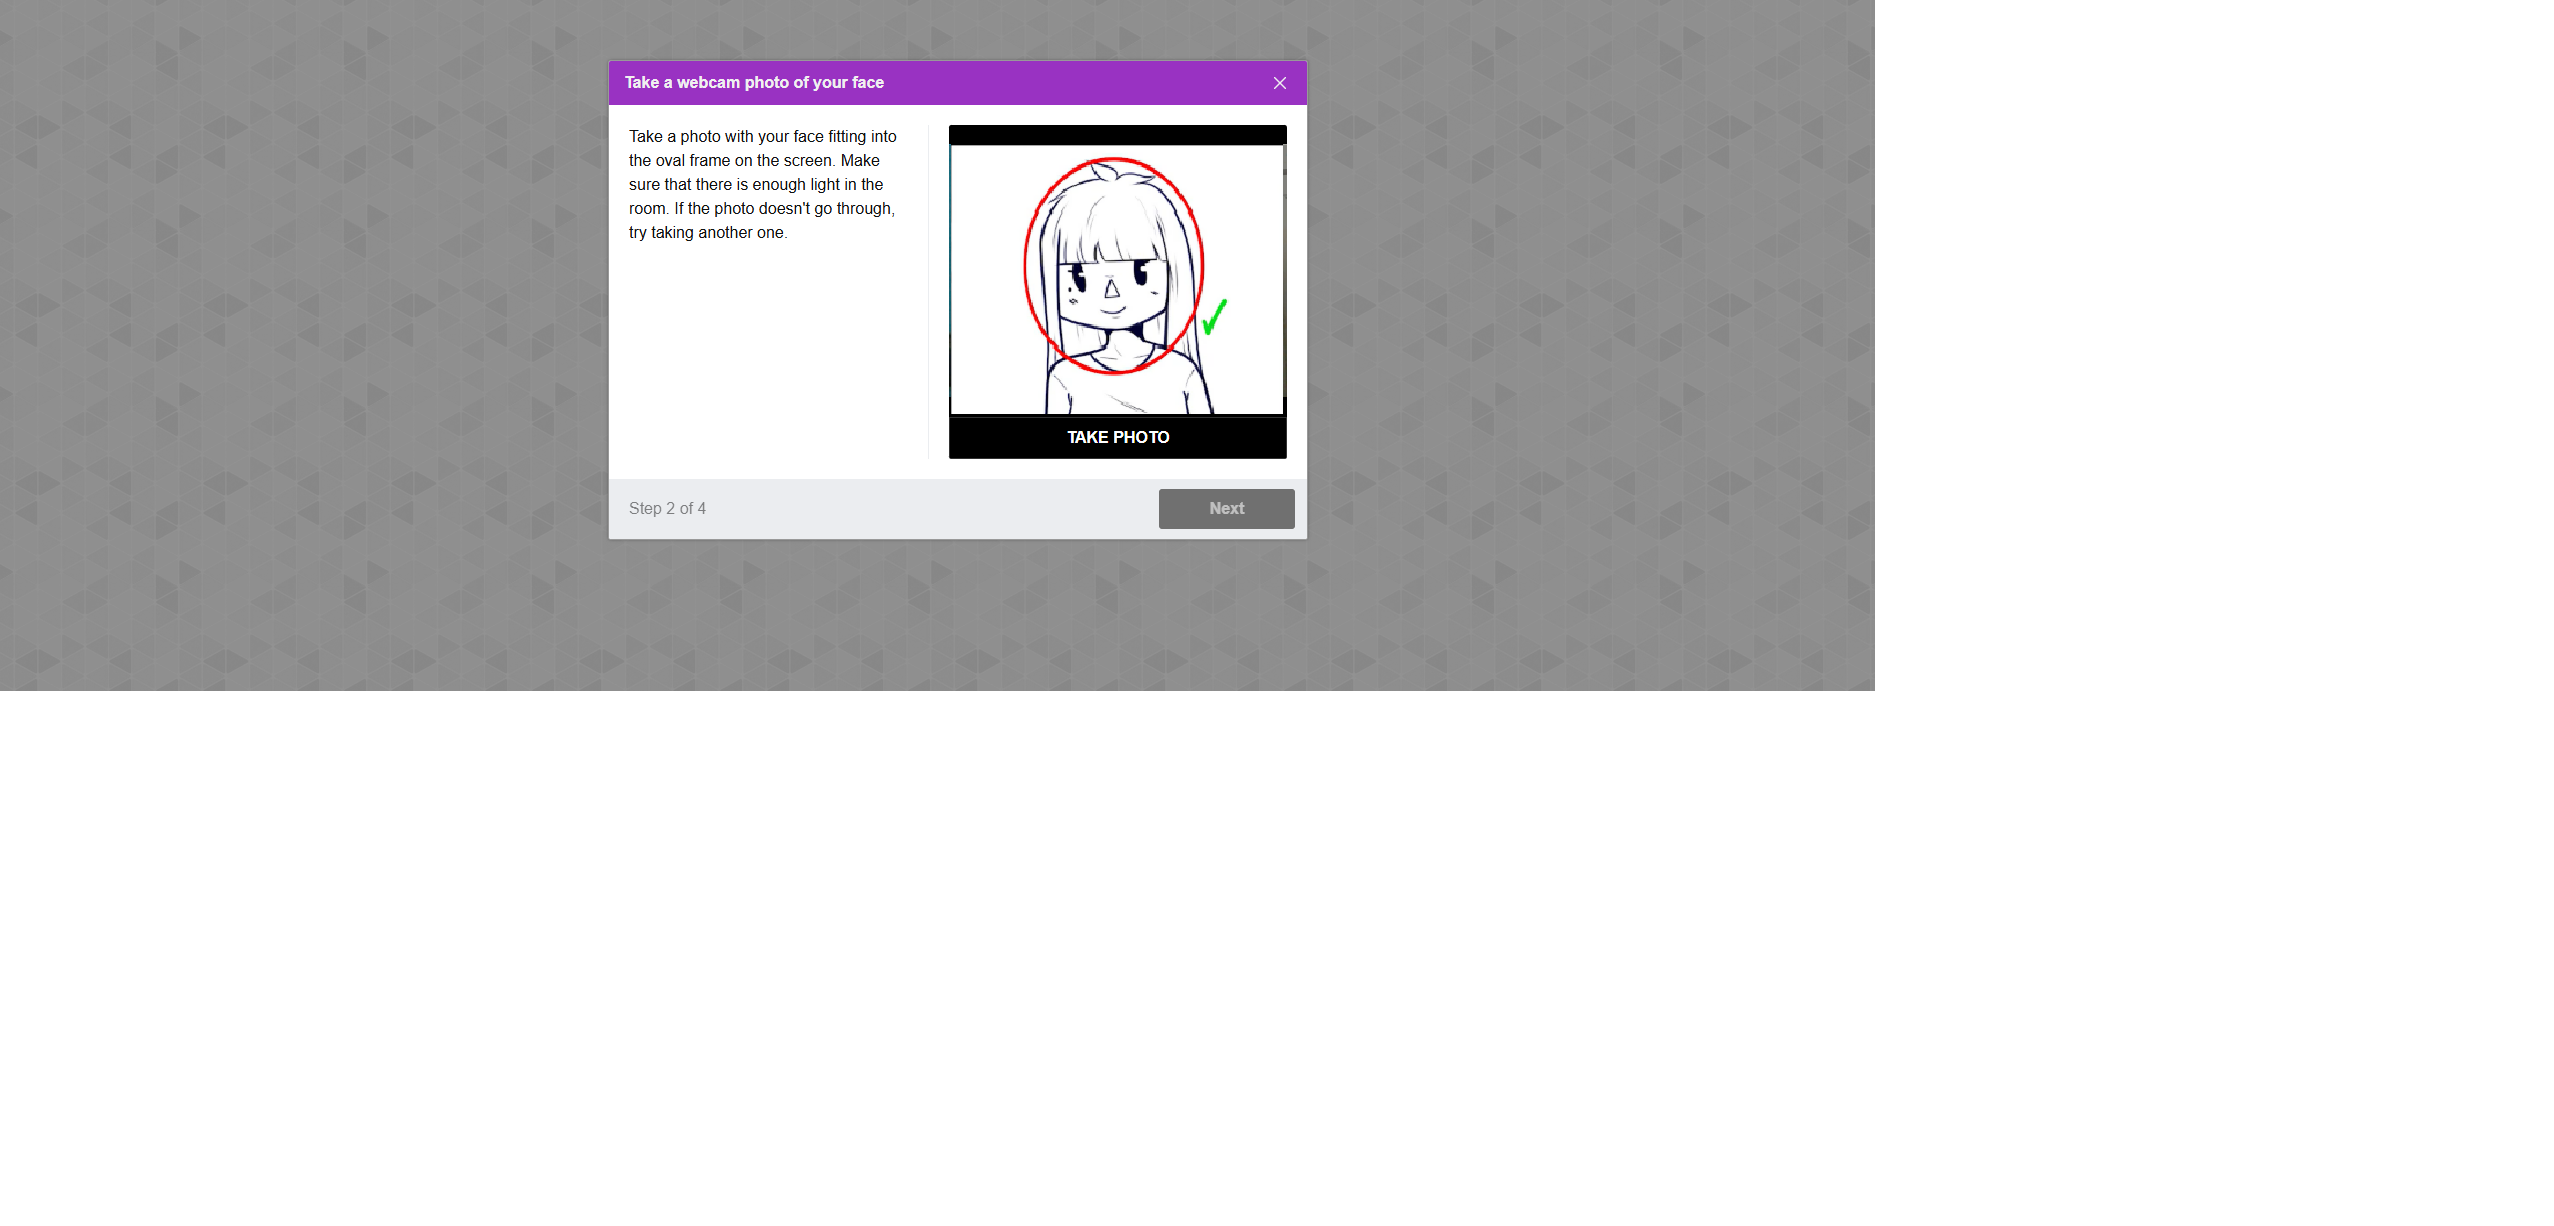
- Your webcam will activate, allowing you to take a photo of your face.
- After taking the photo, the system will verify and approve it.
- Once approved, the Next button will turn green, enabling you to proceed.
- For troubleshooting assistance, please refer to the following article.
Step 3: Taking or Uploading an ID Photo
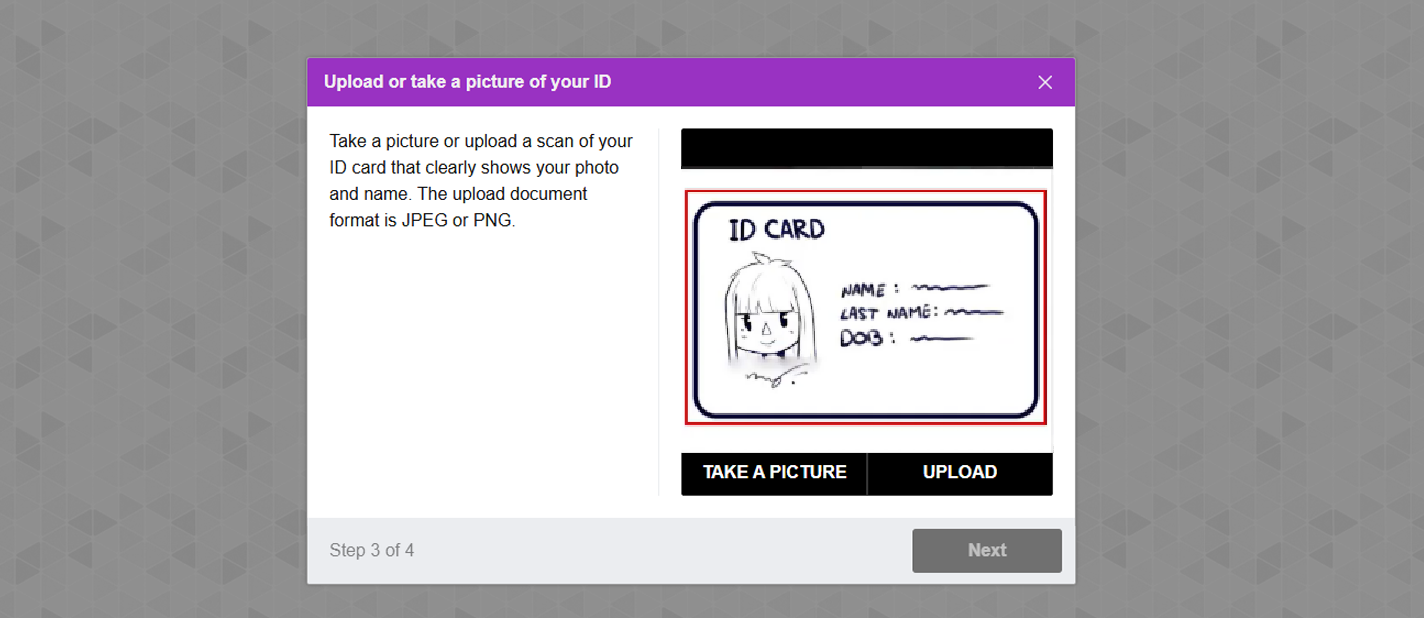
- The system will activate your webcam so you can take a picture of your ID.
- Alternatively, you can use the Upload button to upload an ID image from your device.
- After the ID is verified and approved, the Next button will turn green, allowing you to continue.
- For troubleshooting assistance, please refer to the following article.
Step 4: Secondary Camera Setup
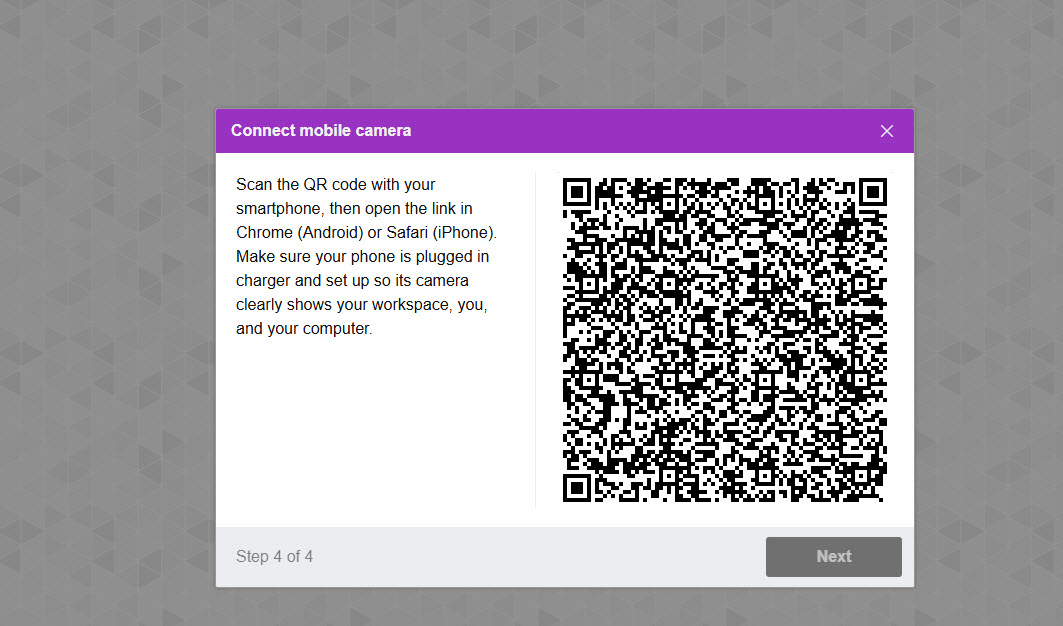
- A QR code will be displayed; scan it with your smartphone.
- Scanning the QR code connects your mobile camera as a secondary camera during the test.
- The mobile device is used to record the candidate’s surroundings and does not capture or share the candidate’s exam screen. The exam screen is shared from the laptop or desktop computer.
- Once the mobile camera is connected, the Next button will turn green, signaling the completion of the Equipment Test.
- For troubleshooting assistance, please refer to the following article.
Once the equipment check is complete, you can return to the My Tests tab.
Note: The steps outlined above may vary depending on the test settings predefined by the test administrator. However, this guide covers all possible steps typically followed in proctored tests.
Test-Taking Process
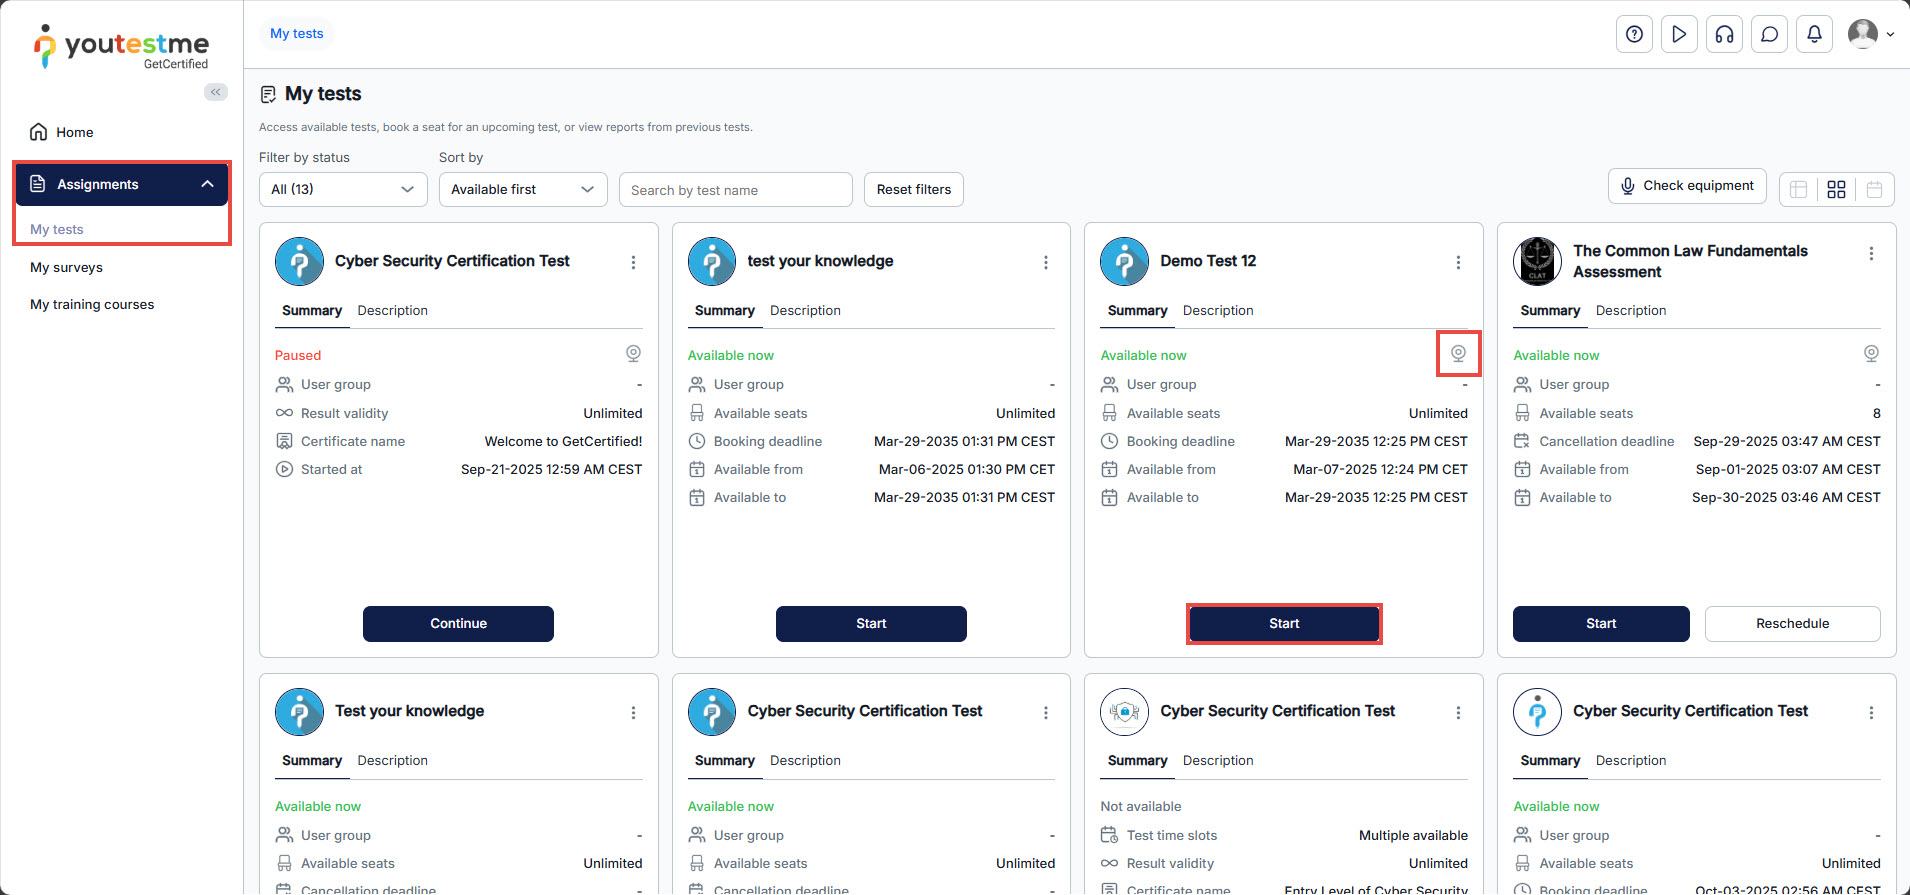
Starting the Test: Log in to your account and navigate to Assignments > My Tests. Proctored tests are marked with a camera icon next to the test title. Click the Start button to begin the test and review the instructions, which you may need to acknowledge before proceeding.
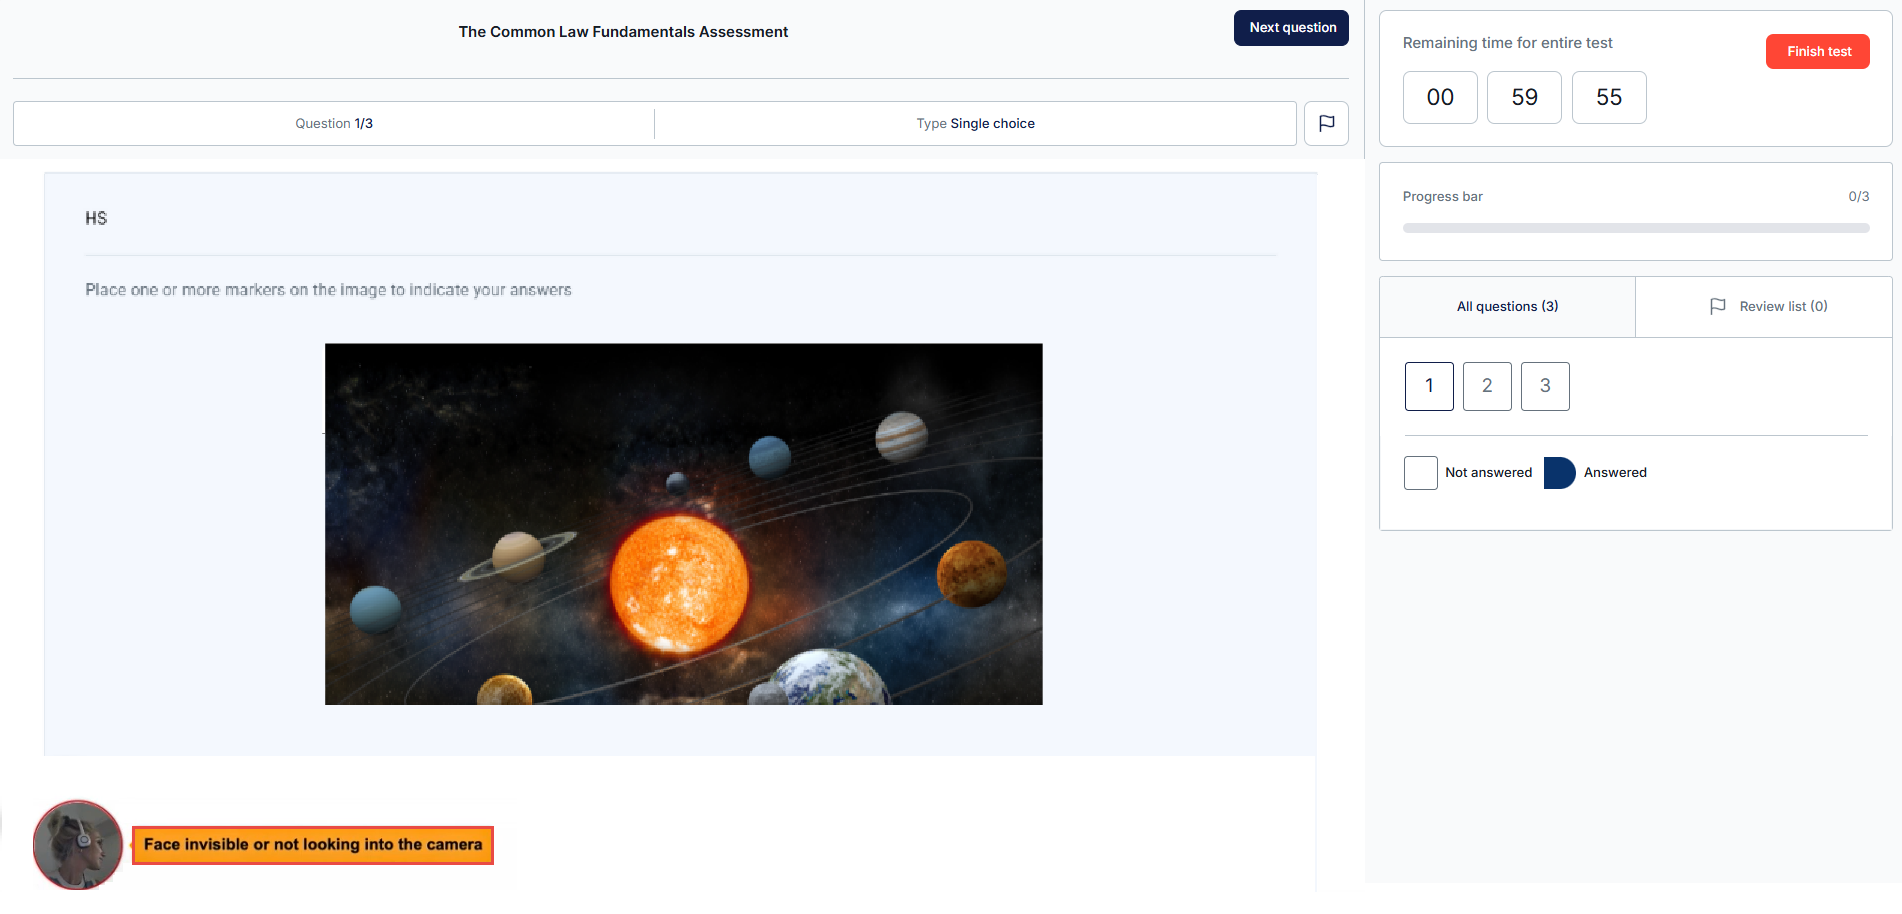
During the test, the primary webcam video is recorded continuously. When the exam is taken on a laptop or desktop computer with screen sharing enabled, the computer’s screen is also recorded. If a secondary camera is configured, the connected smartphone or tablet records the candidate’s surroundings for additional monitoring. A video thumbnail will appear in the bottom-left corner of the screen to display your video feed. The system uses artificial intelligence to monitor the test process and will issue warnings if test rules are not followed. Please watch this walkthrough video to familiarize yourself with the process of taking a proctored test.
Note: The system may generate false warnings under certain conditions (e.g., loud keyboard noise, a pet present, poor lighting). These warnings will not affect your test as long as you adhere to the rules. The test manager can disable this option.
Live Proctored Exam: Test-Taking Process
A live proctored exam is an assessment monitored in real time by a human proctor. During the exam, candidates may have additional features and must follow specific rules to ensure test security and integrity.
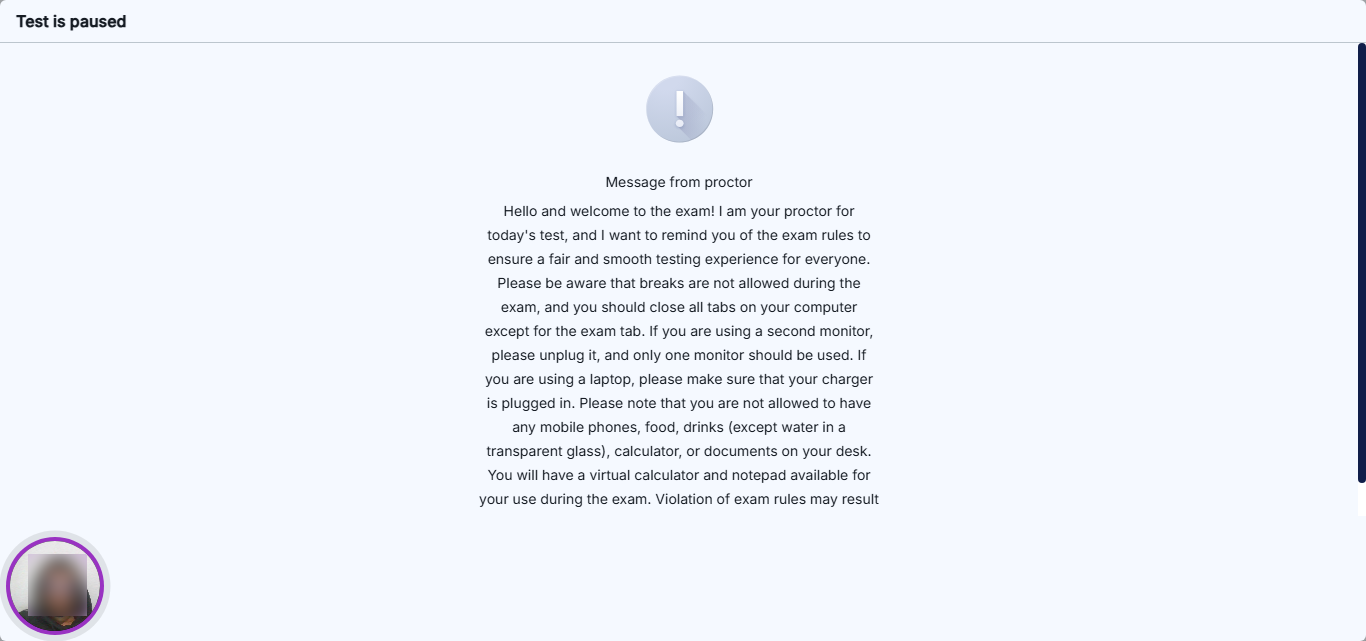
Once the candidate finishes the equipment check, they may be placed in a queue depending on the exam rules. A pause screen with a welcoming message and a reminder of the exam rules will be displayed, asking candidates to wait while the proctor verifies their ID and environment. The proctor can unpause the test for one student as soon as their check is complete or for all students at once. Only then does the test timer start.
For further information, please visit this article.
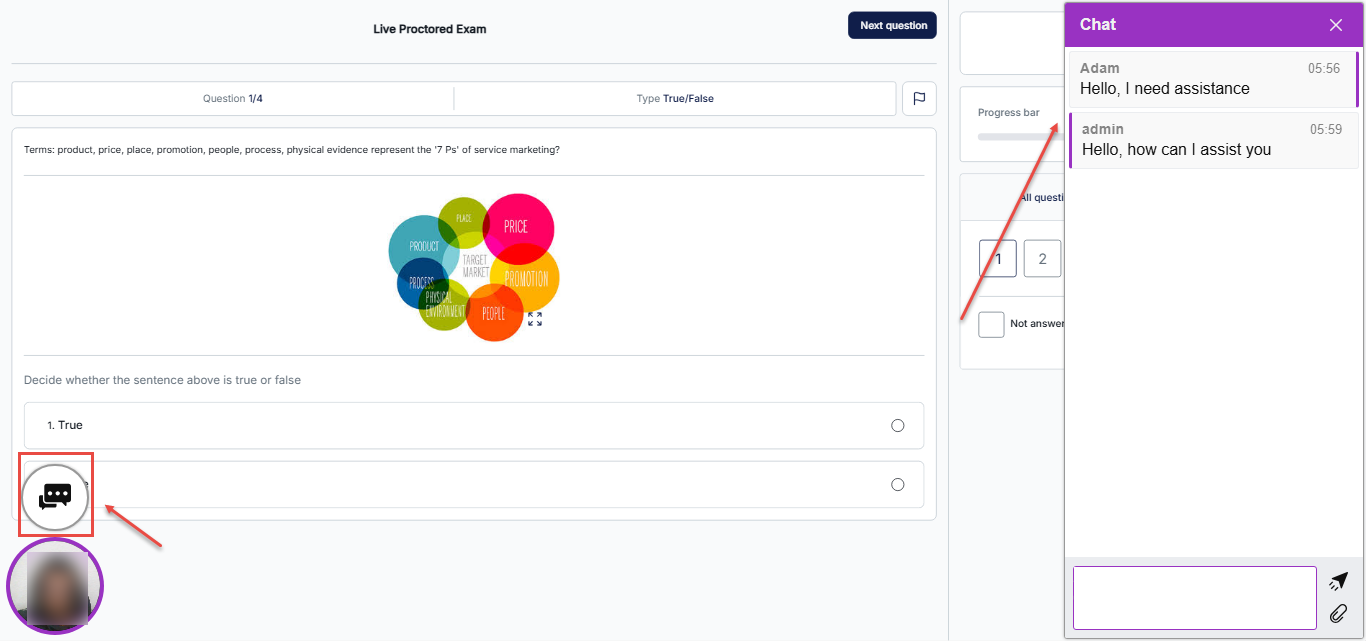
At any time, the student can contact the proctor via chat or voice. The proctor can respond through chat or a live connection using the microphone and camera.
- To use the chat, click on the circle and then the chat icon.
- Type your message and send it.
What Happens in the Case of Disconnection
- If you are disconnected during the test, you may be able to continue depending on the test configuration and system settings. Continuation can be automatic if the option is enabled, or it may require approval from the test manager if certain limits are exceeded.
- Upon re-entering, the system will initiate an equipment check. This does not reset the test; your progress is saved in real time.
- The equipment check is mandatory after disconnection, as you may need to use a different device or internet connection.