
This article explains how to set up and use webhooks in YouTestMe GetCertified so your external system automatically receives real-time updates about specific events happening in the application. It walks you through accessing the integration page, configuring a webhook, and confirming that it is working correctly.
Webhooks are a vital part of modern software applications, making it easy for different services and systems to communicate seamlessly. In simple terms, webhooks allow one application to quickly inform another about specific events or updates.
Setup
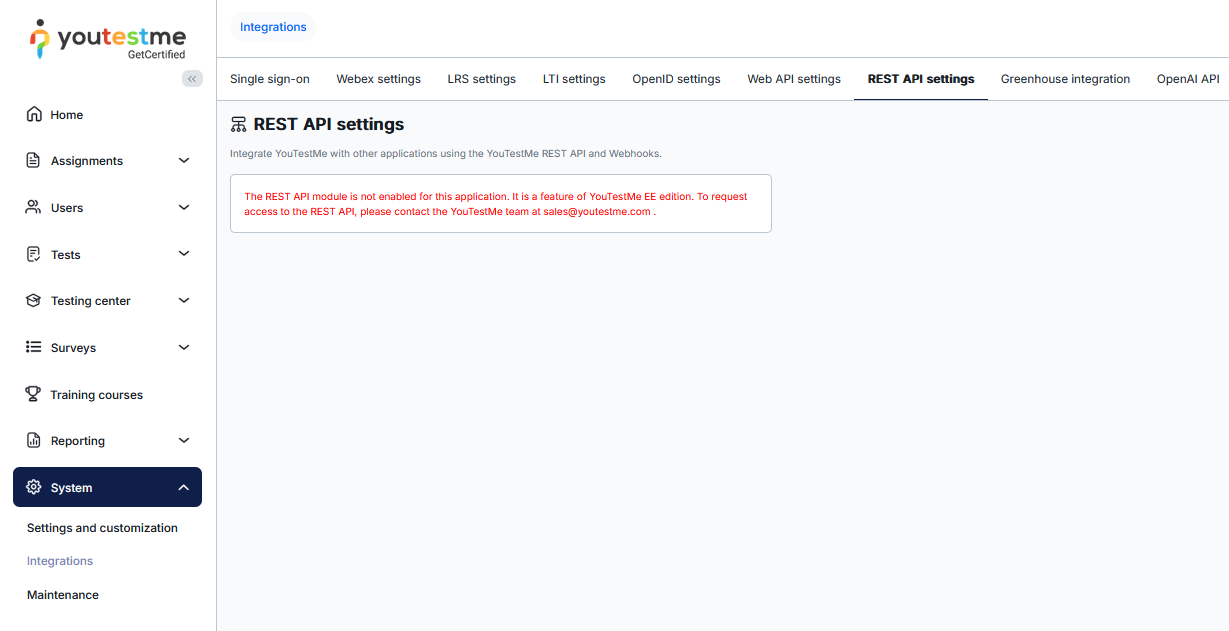
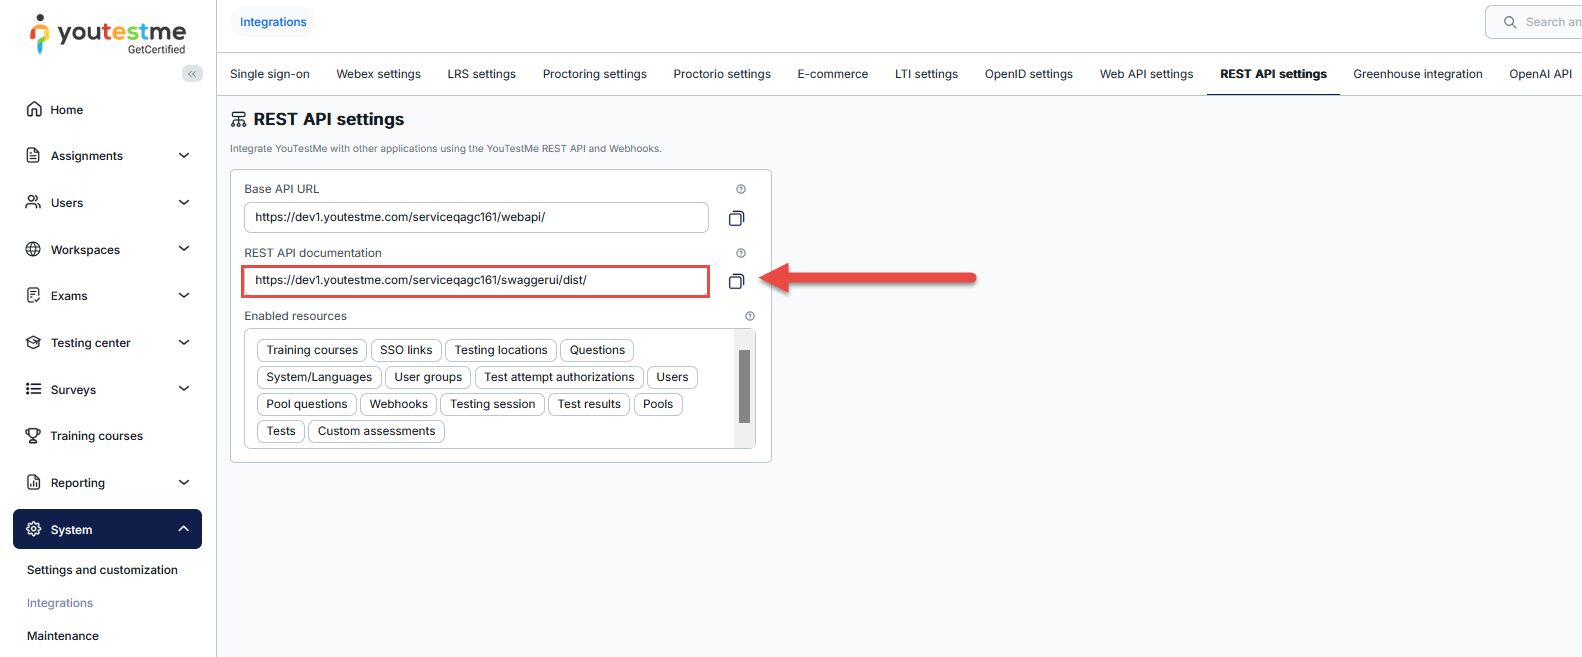
Log in to your YouTestMe GetCertified instance as an Administrator and navigate to System page → Integrations → REST API Settings tab.
- If the REST API module is not enabled for your application, please note that this functionality is available only in the YouTestMe Enterprise Edition. To request access to the REST API, please contact the YouTestMe team at sales@youtestme.com or reach out to your dedicated account manager.

- If the REST API module is enabled, webhooks are configured. Copy the link to the REST API documentation and open it in the browser.

Authentication and Authorization
Click the Authorize button 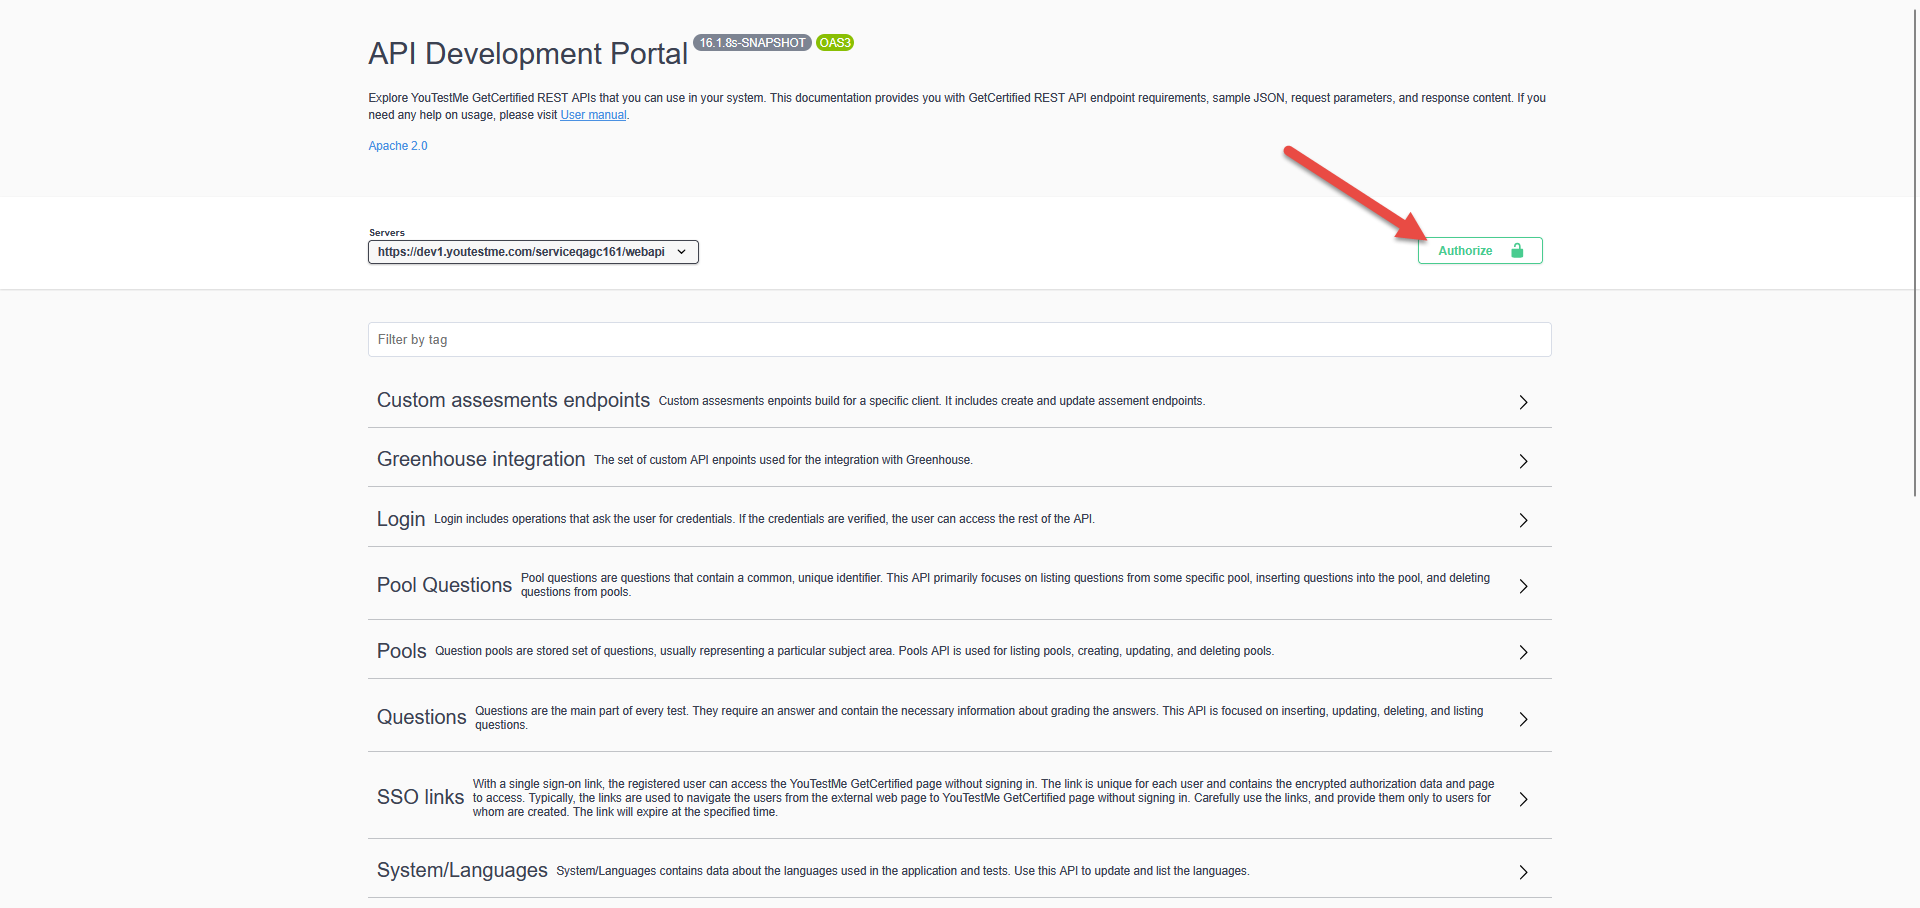
and:
- Enter your credentials under Basic Auth.
- Click on the Authorize button.

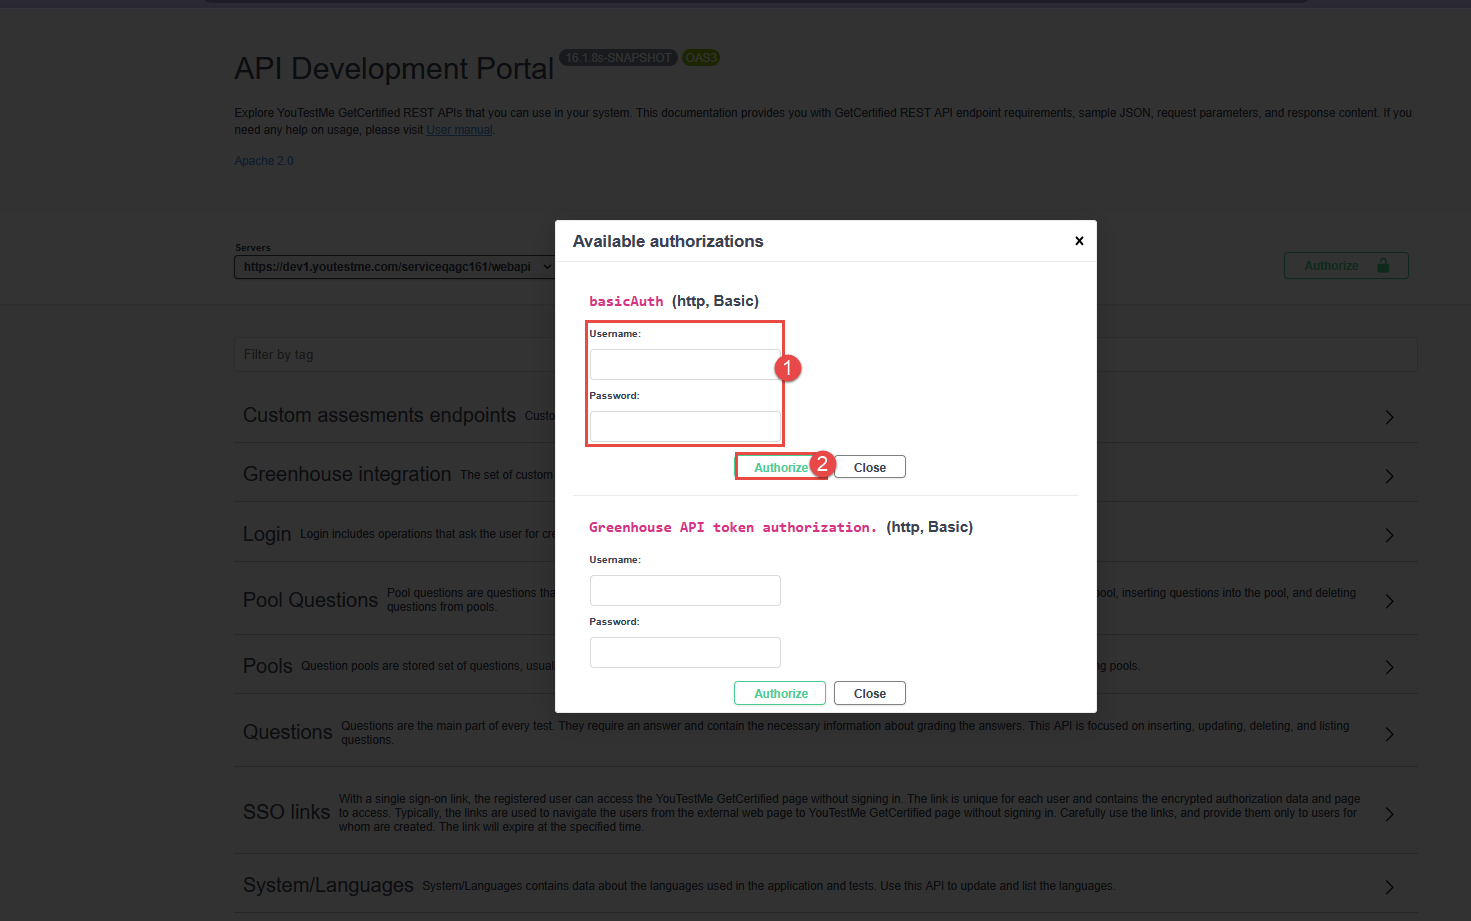
Once you have successfully authenticated, click the X icon to close the authorization window. You can now test the available API endpoints to verify that the authentication was completed successfully.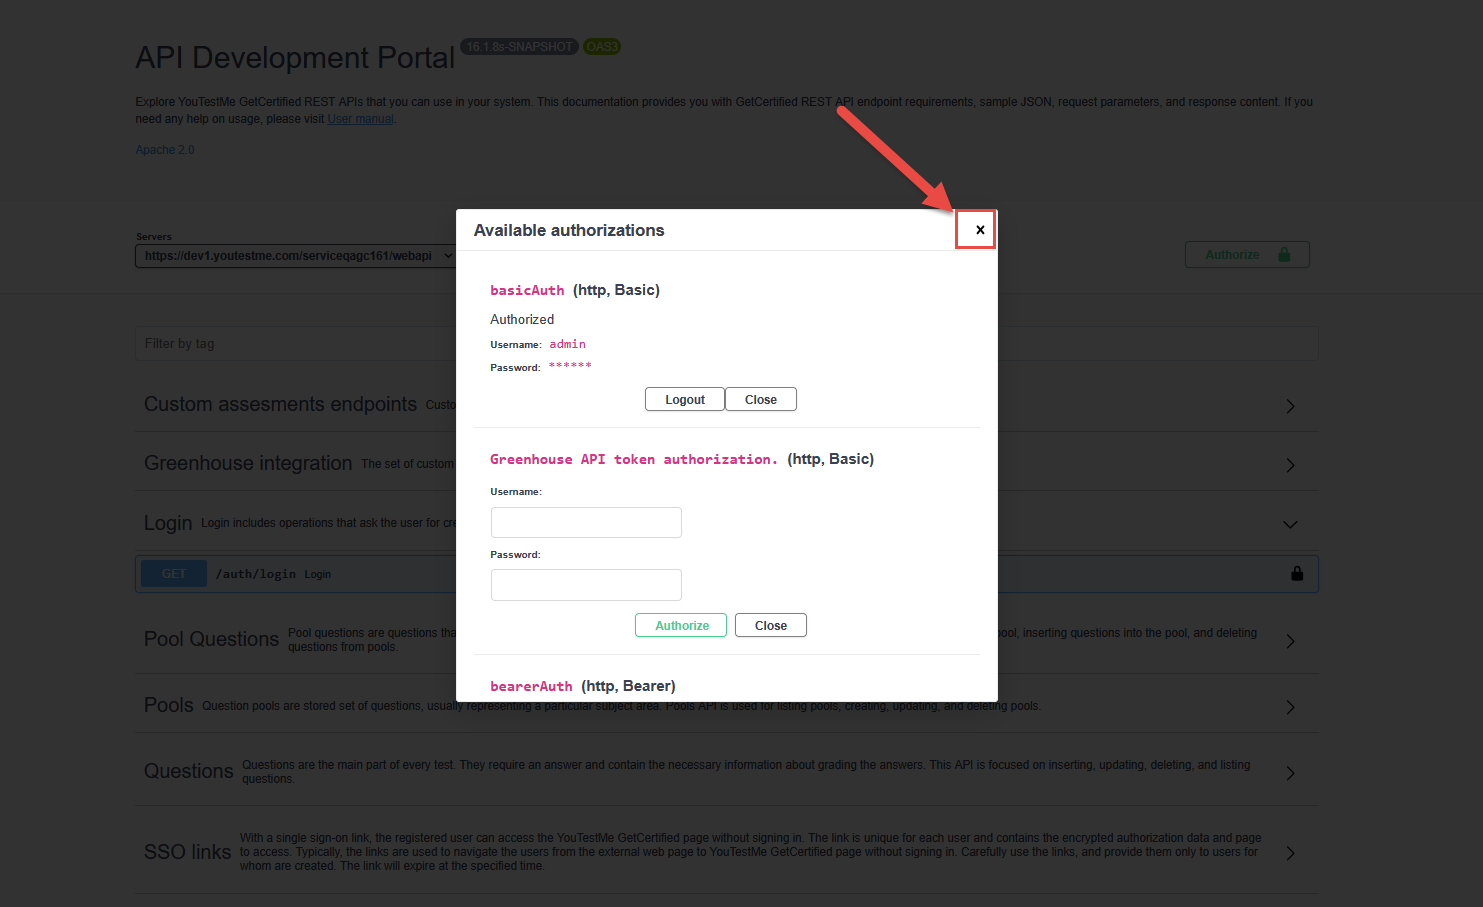
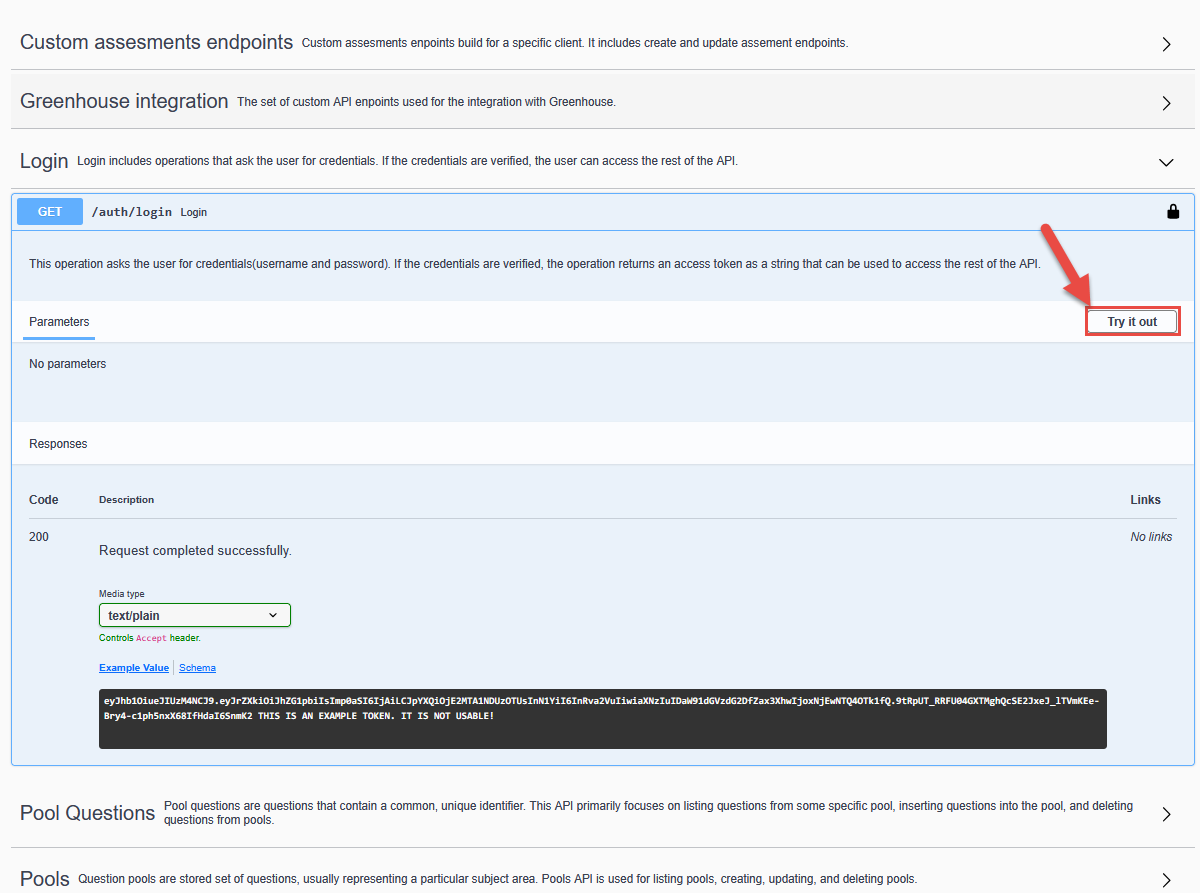
Then go to the Login endpoint for example and click Try it out to get your token.
Click on the Execute button: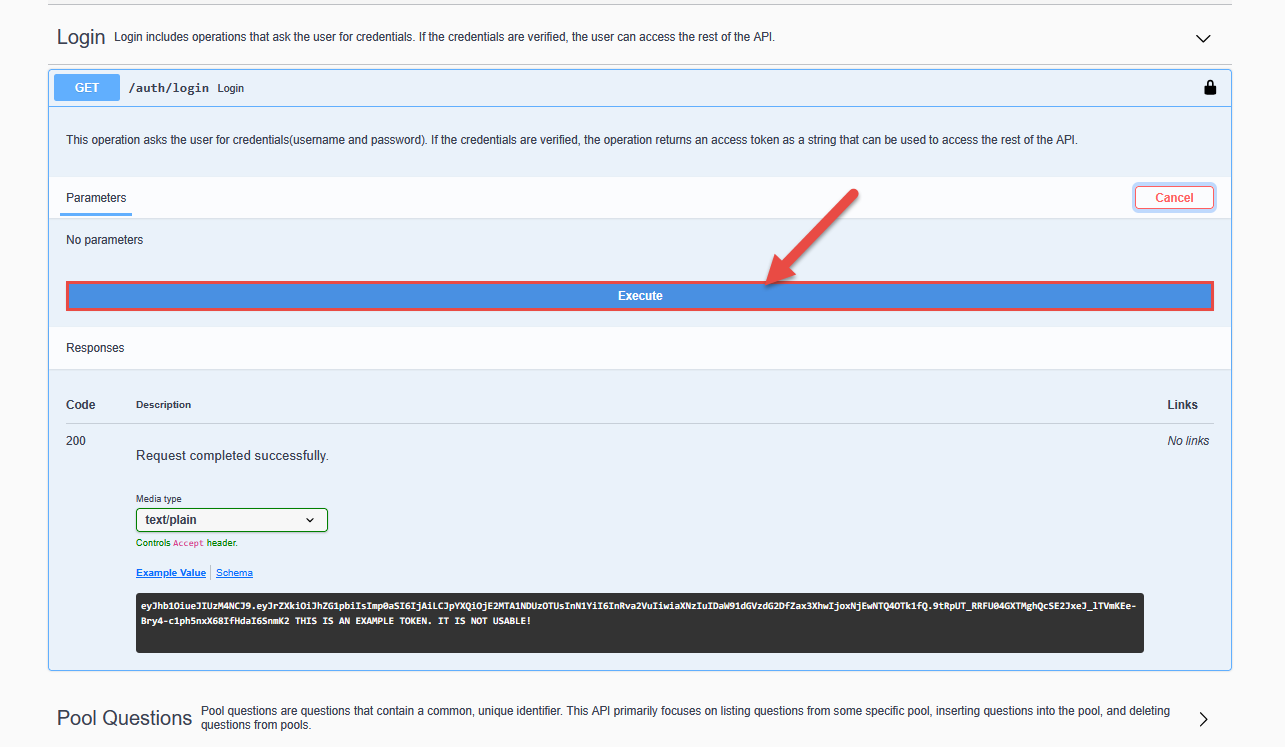
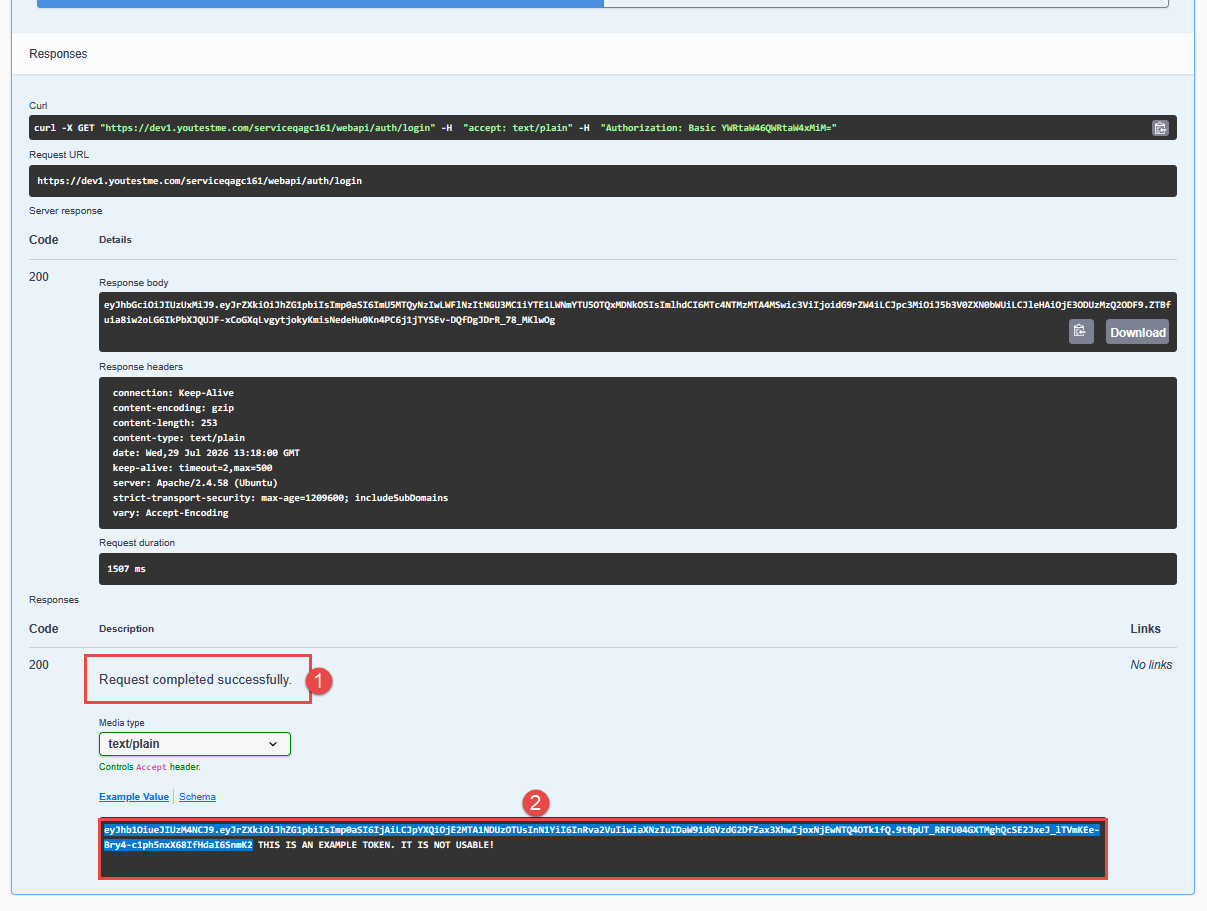
1. Confirm that the request was completed successfully by checking the response.
2. Copy the generated token, which will be displayed in the response, for use in the Bearer Auth authorization step.
Go back to Authorize and
- Enter the token under bearerAuth value.
- Click on the Authorize button.
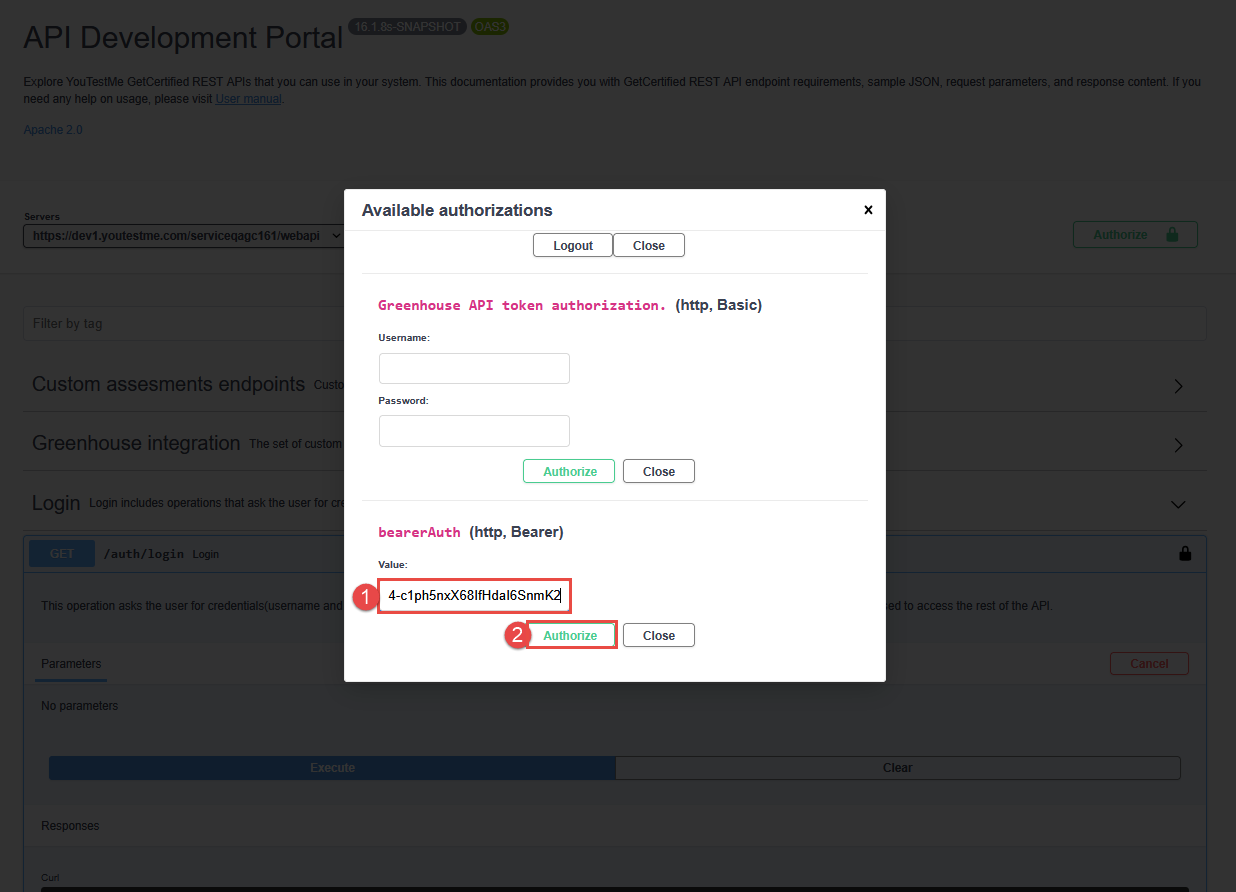
You are now authenticated and can use the available webhooks. 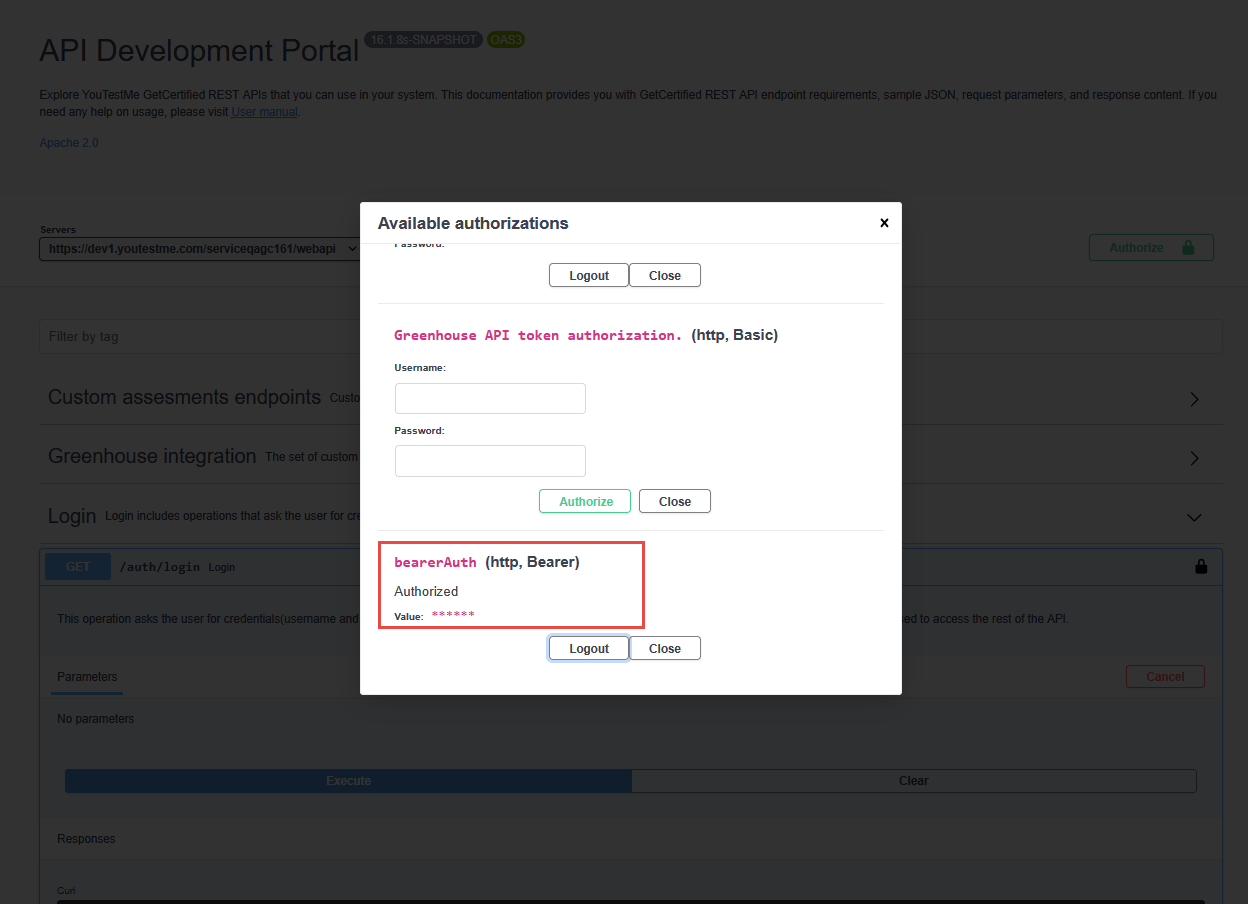
Use the Webhooks
Scroll down to the Webhooks section in the REST API documentation. This section lets you list available webhook events, create and manage webhook subscriptions, and retrieve the latest payload data for a given event. Whenever an event you subscribe to occurs, the application automatically sends a POST callback request with a JSON payload to the URL you specify.
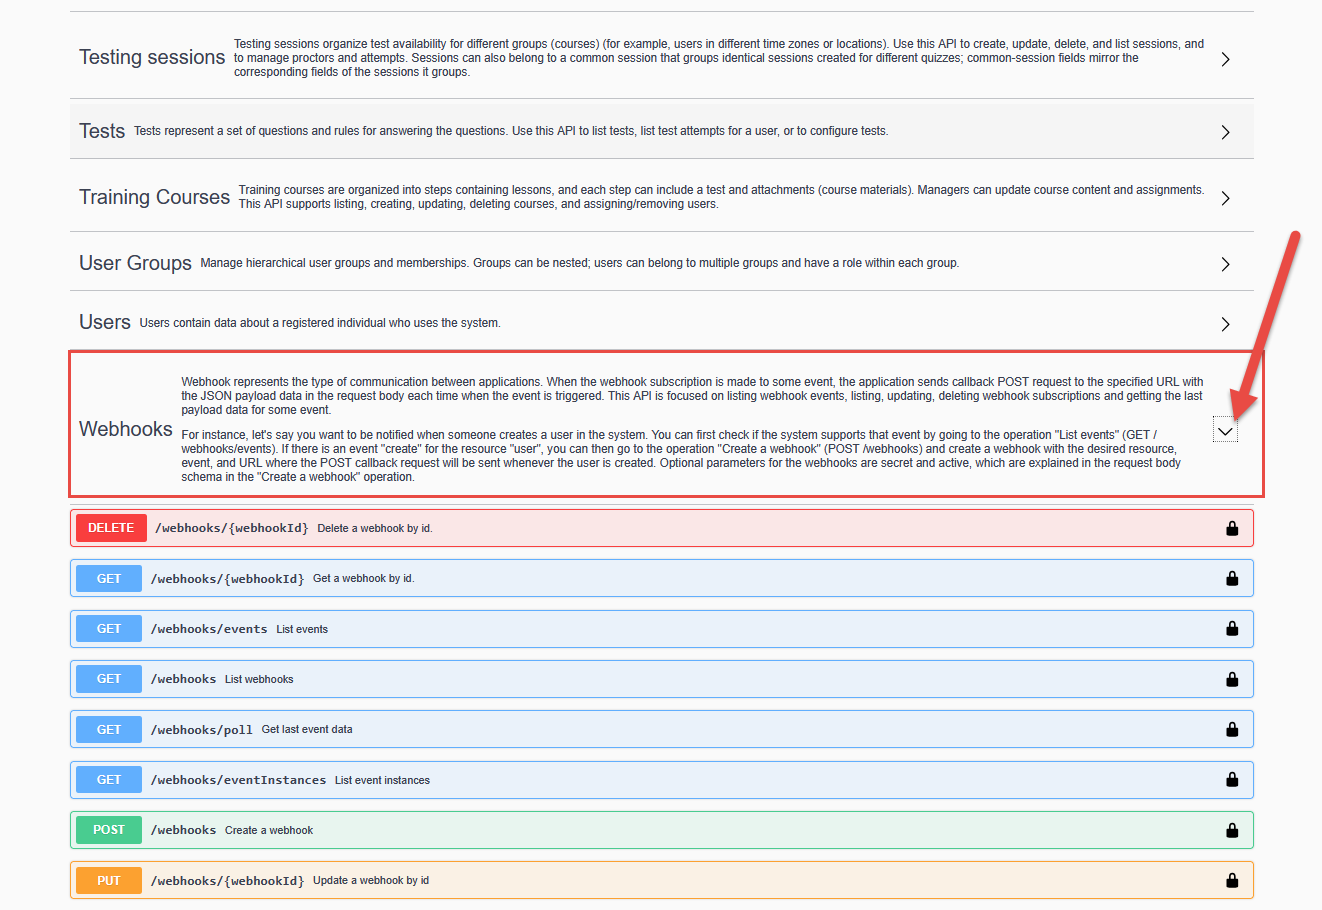
The following operations are available:
- GET /webhooks/events – List events – shows all the events the system supports (e.g., user created, test finished), so you can check whether the event you need is available before creating a webhook.
- GET /webhooks – List webhooks – returns all webhooks currently configured.
- GET /webhooks/{webhookId} – Get a webhook by id – returns the details of a specific webhook.
- GET /webhooks/poll – Get last event data – retrieves the most recent payload sent for a given event, useful for checking what data was delivered.
- GET /webhooks/eventInstances – List event instances – returns a history of triggered event instances.
- POST /webhooks – Create a webhook – registers a new webhook by specifying the resource, event, and callback URL that should receive the POST request whenever the event occurs. Optional parameters secret and active are also available here.
- PUT /webhooks/{webhookId} – Update a webhook by id – edits an existing webhook’s configuration.
- DELETE /webhooks/{webhookId} – Delete a webhook by id – removes a webhook subscription.
For every operation, the workflow is the same: click “Try it out” to make the fields editable, enter or adjust the required parameters (for example, the resource, event type, and callback URL when using POST), then click “Execute” to send the request. Always review the response returned below to confirm the operation worked as expected.
How to Test/check
To confirm that the operation was successful, check the response returned by the webhook operation. A status of 200 means everything worked correctly. 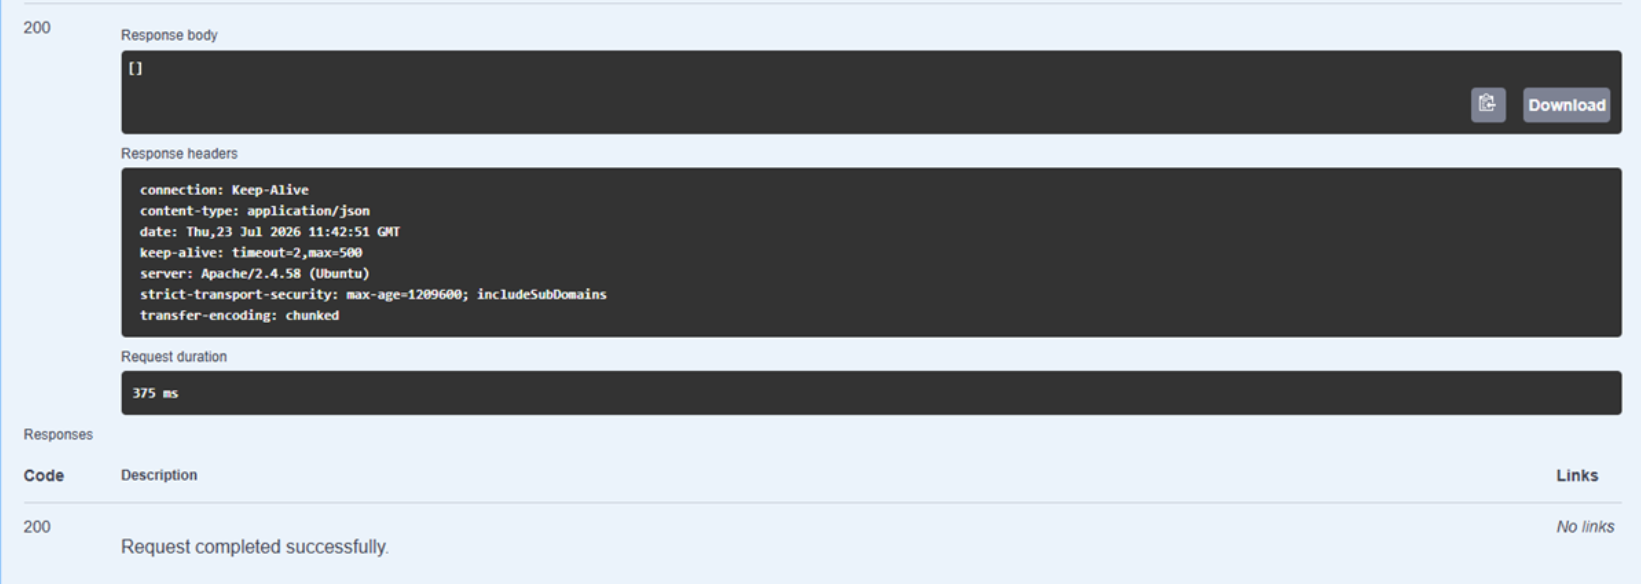
If the status is not 200, there is an issue — this could be due to invalid credentials or an expired token — so you’ll need to verify and correct that.
Conclusion
Setting up and using YouTestMe webhooks is a simple process once you understand the authentication flow: access the Integrations page, retrieve your token through the Login endpoint, and authorize your session using bearerAuth. From there, you can use the GET, POST, and DELETE operations to manage your webhooks directly through the REST API documentation. Always confirm success by checking the response status — a 200 code means the operation went through, while any other status signals a problem, most often related to credentials or an expired token.
To make it easier for you to grasp the importance and how webhooks work in the YouTestMe application, we’ve put together an informative video guide.