
Article verified for Release 15.0 on September 9, 2025
This article provides guidance on booking exam sessions, covering processes like purchasing, canceling, retaking, or rescheduling a testing session.
Book a Test
To book a test:
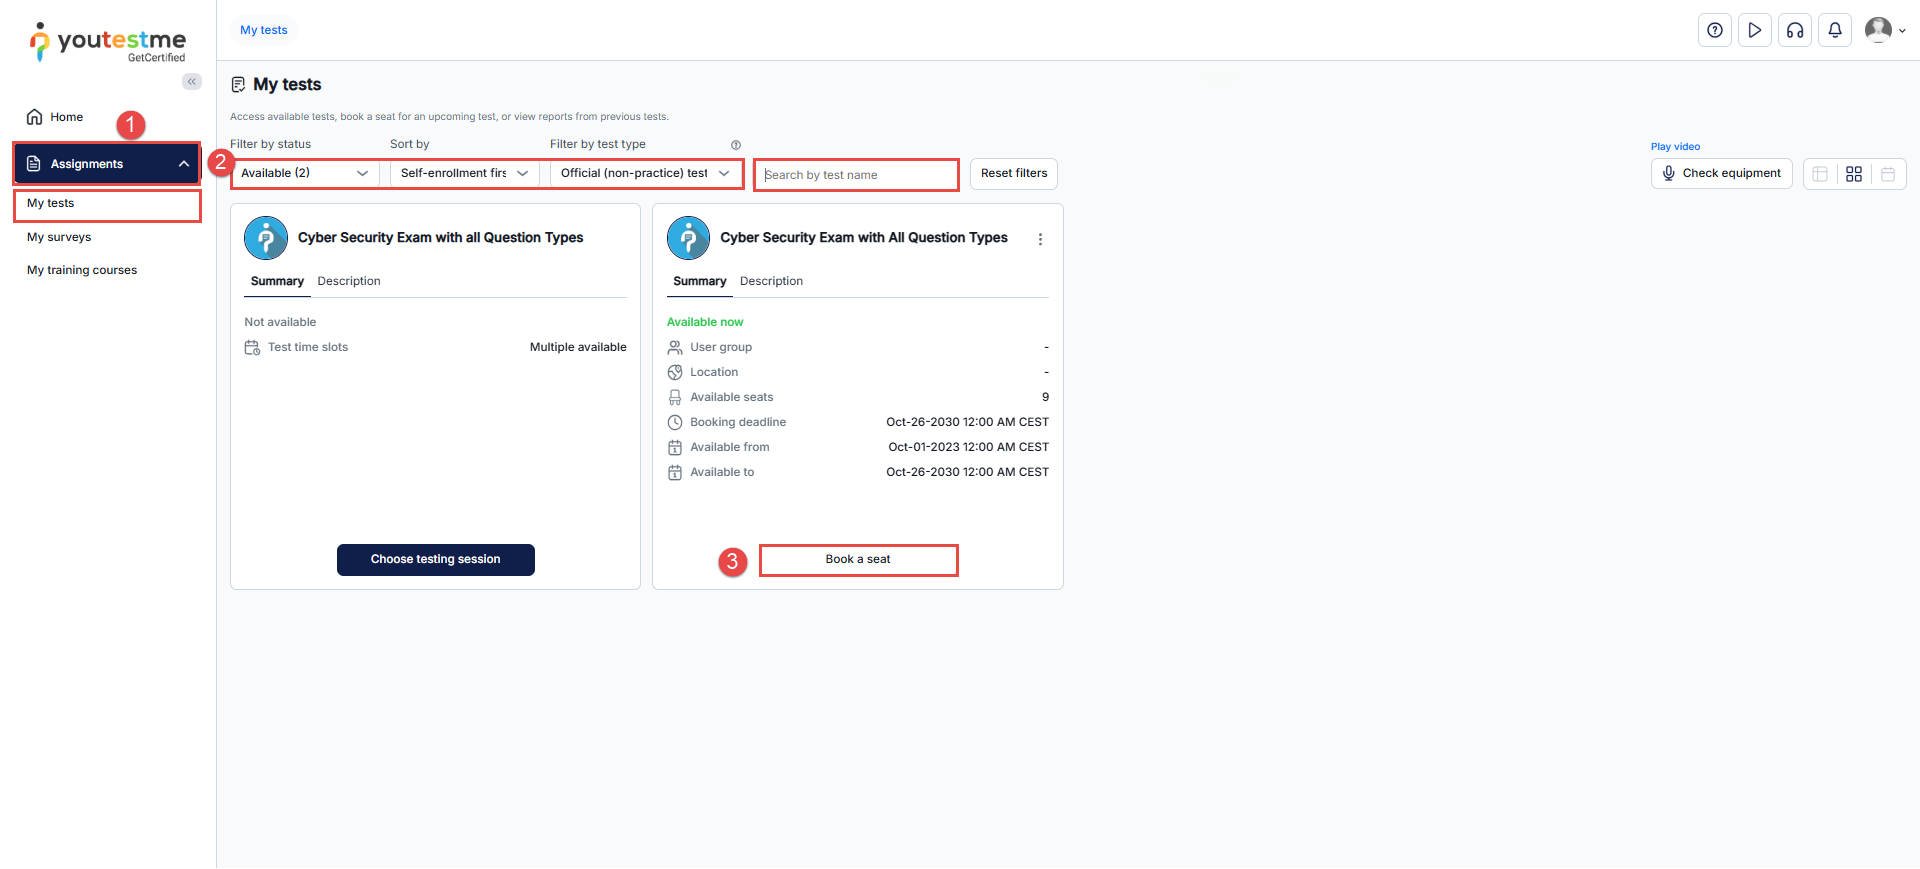
- Navigate to Assignments in the main menu and select the My tests module.
- Use the filters or the search bar to locate the desired test.
- Click the Book a seat button.
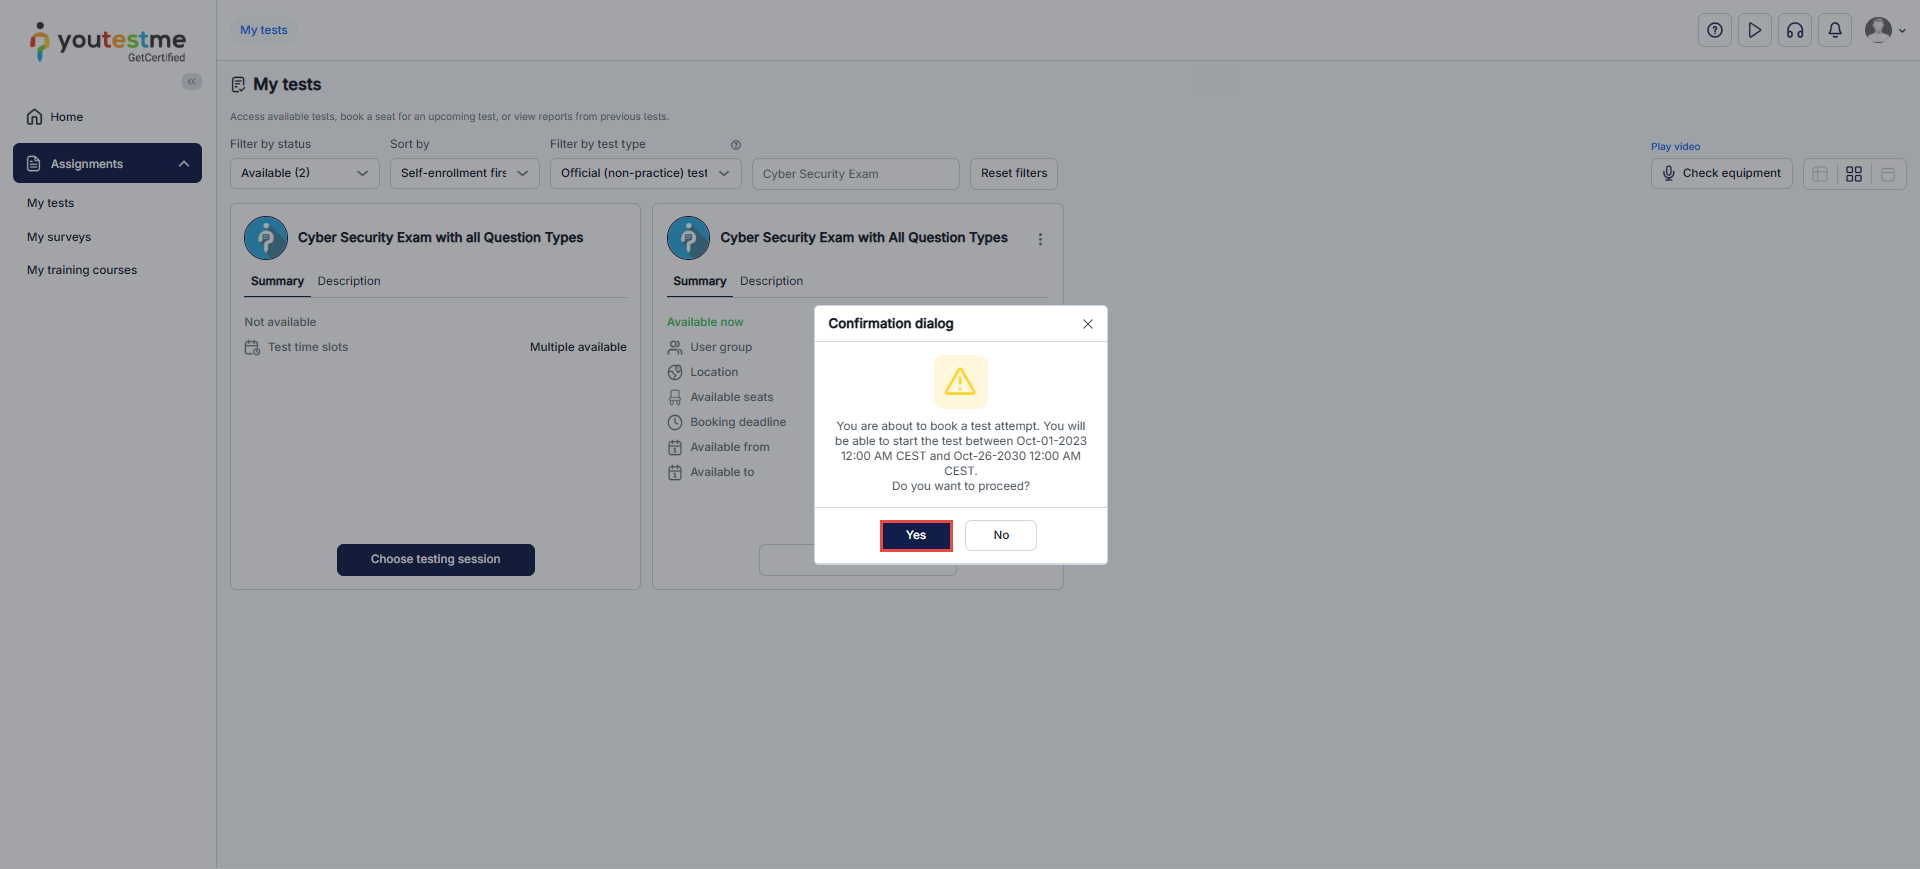
A confirmation dialog will appear, showing the test’s availability. Click Yes to confirm your booking.
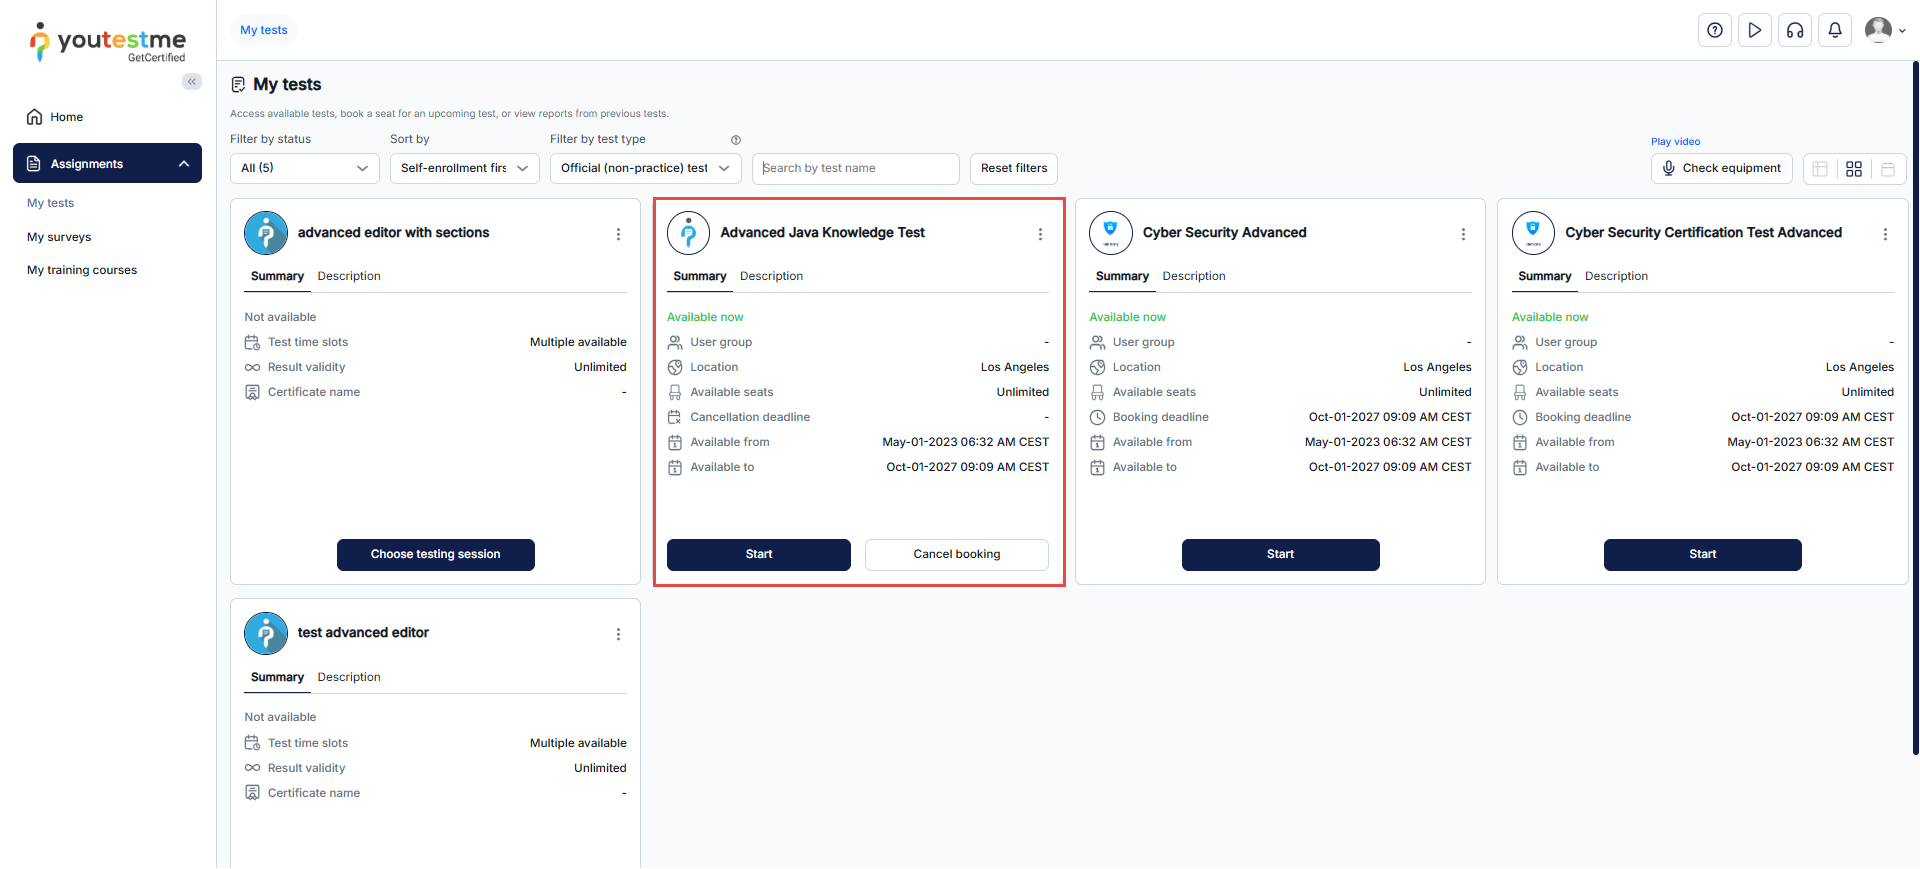
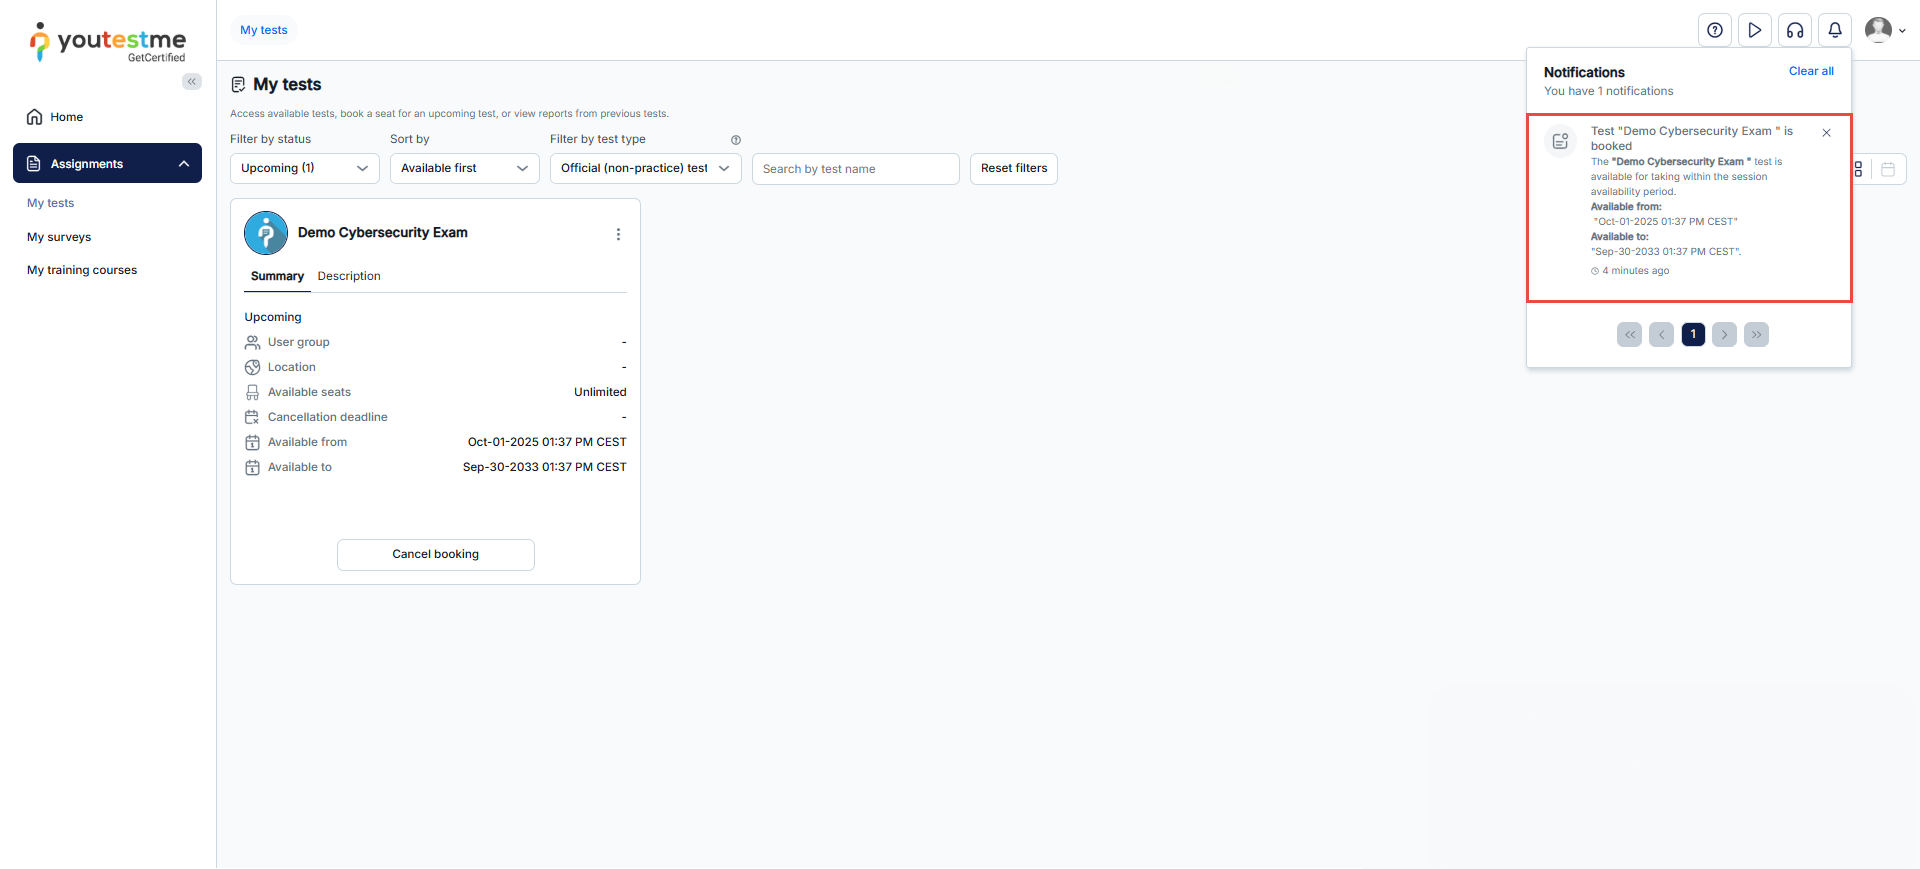
Once booked, the Start button will appear, allowing you to begin the session. You can also cancel your booking at any time by using the “Cancel booking” button.
Note: If the Start button is not visible, it means the session is not currently available.
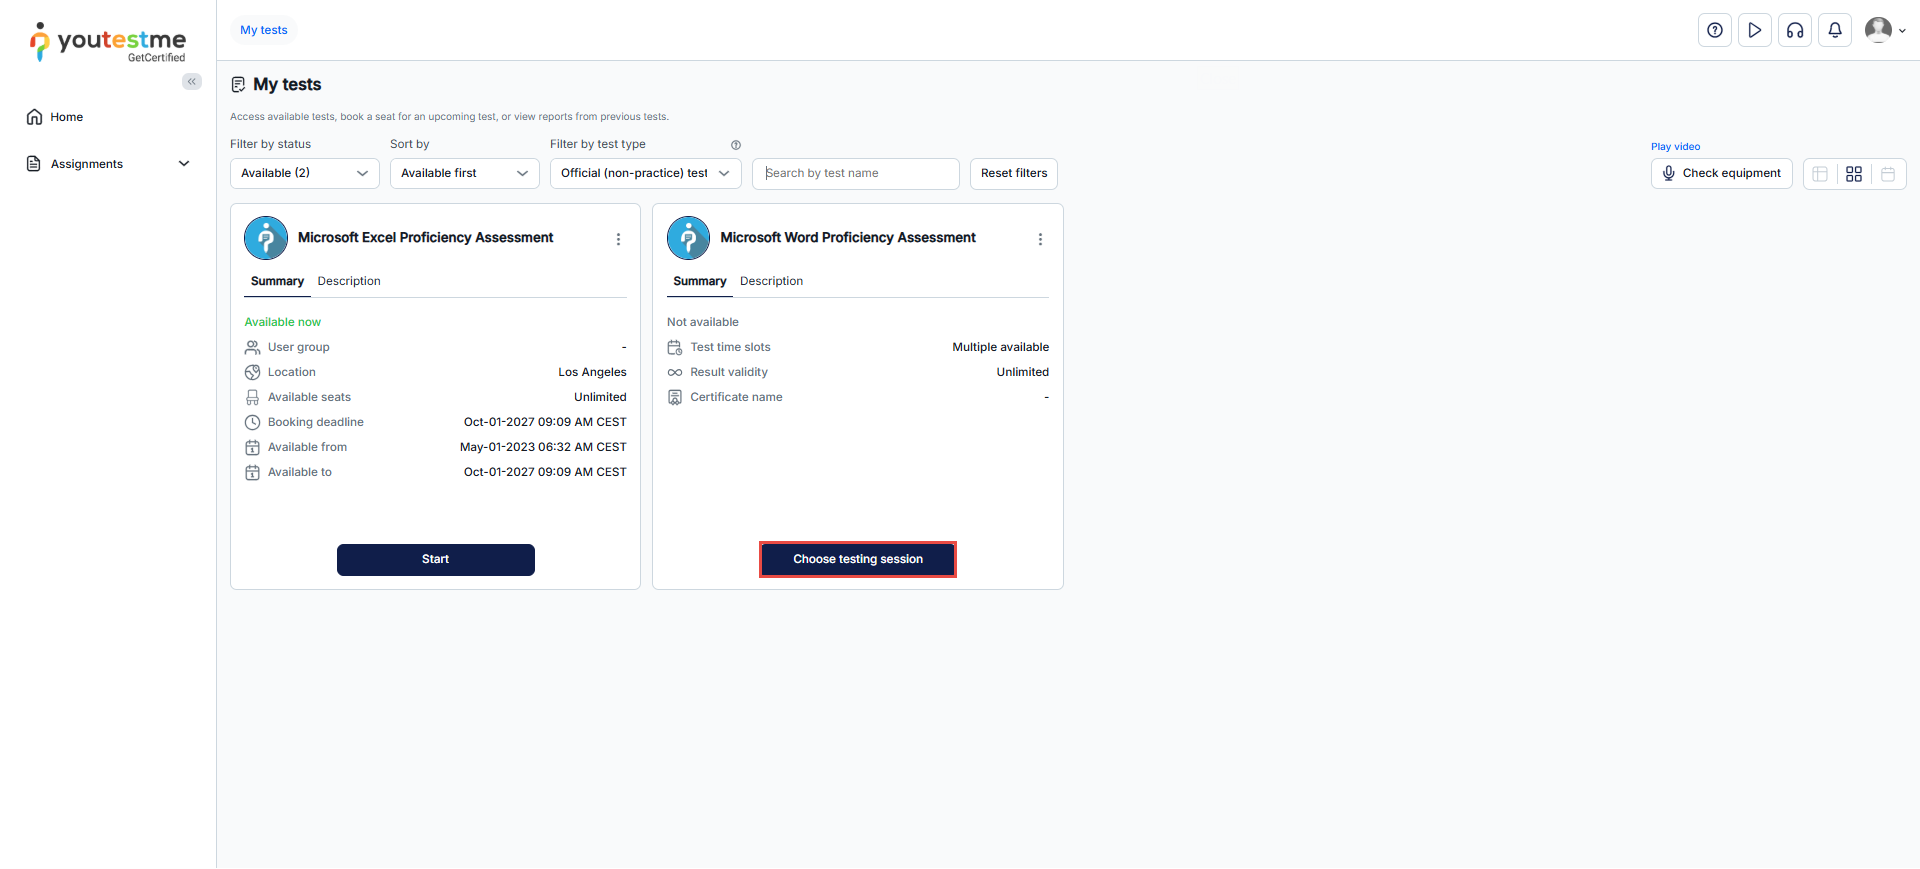
Book a Test with Multiple Sessions
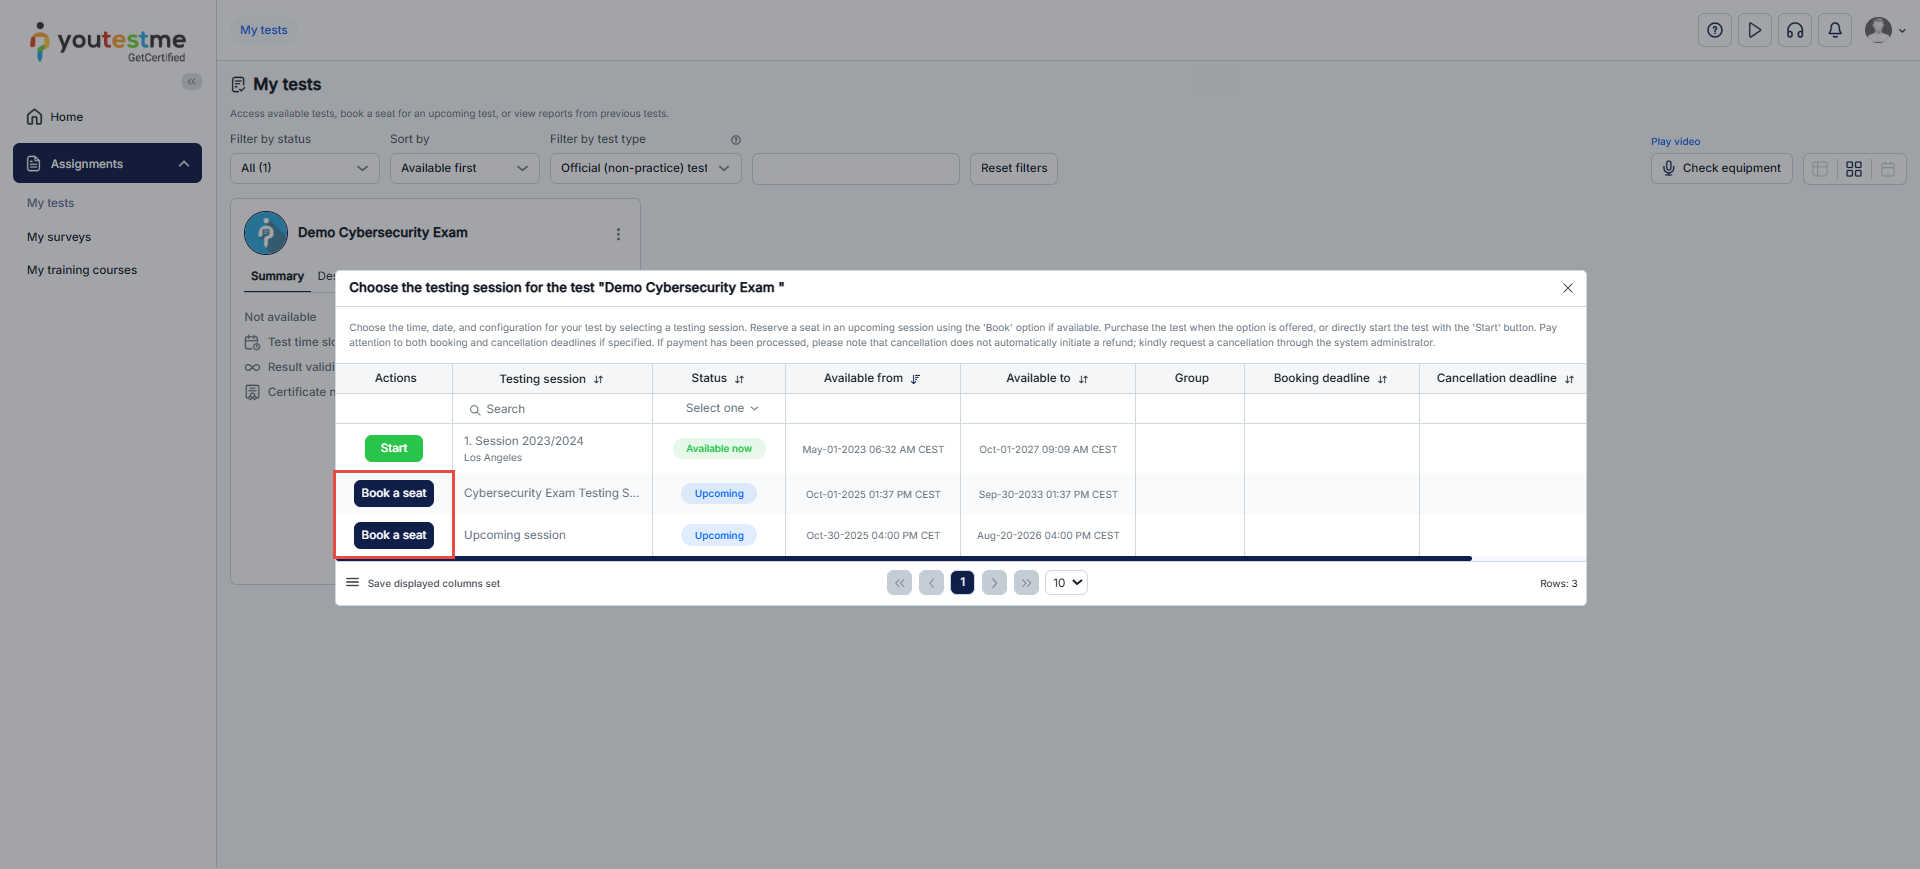
If a test has multiple sessions, use the Choose the sessions button.
In the list of available sessions, click Book a seat to reserve the session that best fits your schedule.
Cancel the Booked Test
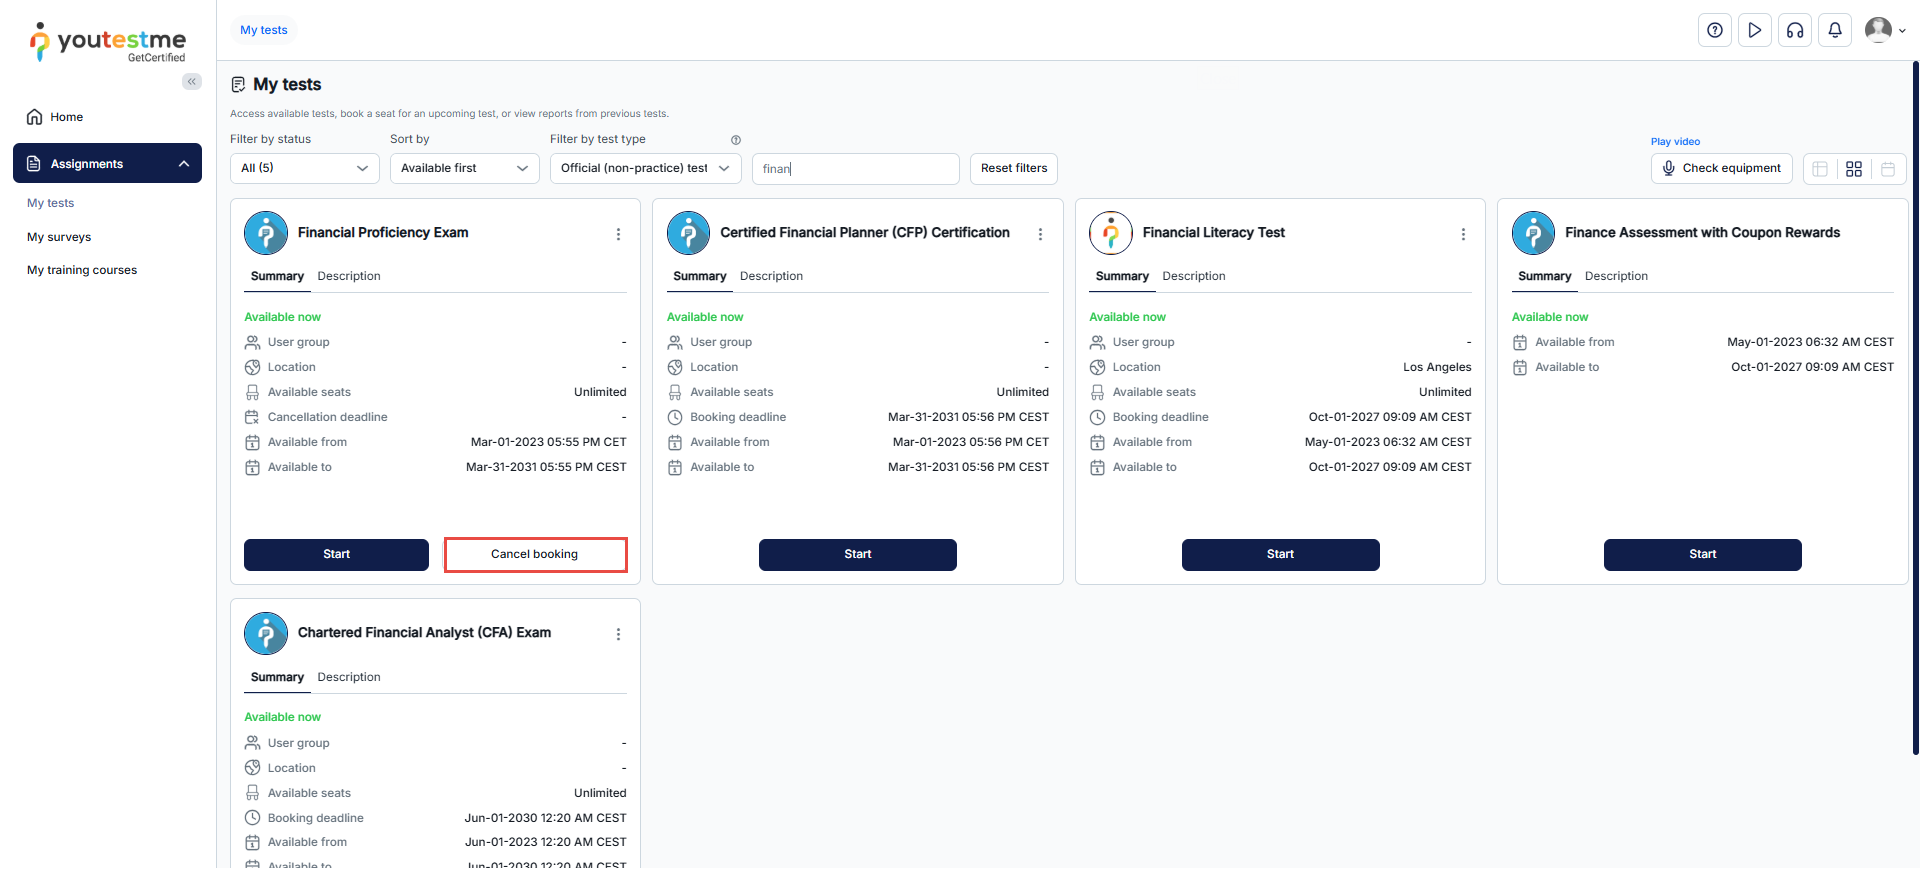
Select the test you wish to cancel and click the Cancel booking button.
Note: If the cancellation deadline has passed, the “Cancel booking” button will no longer be visible.
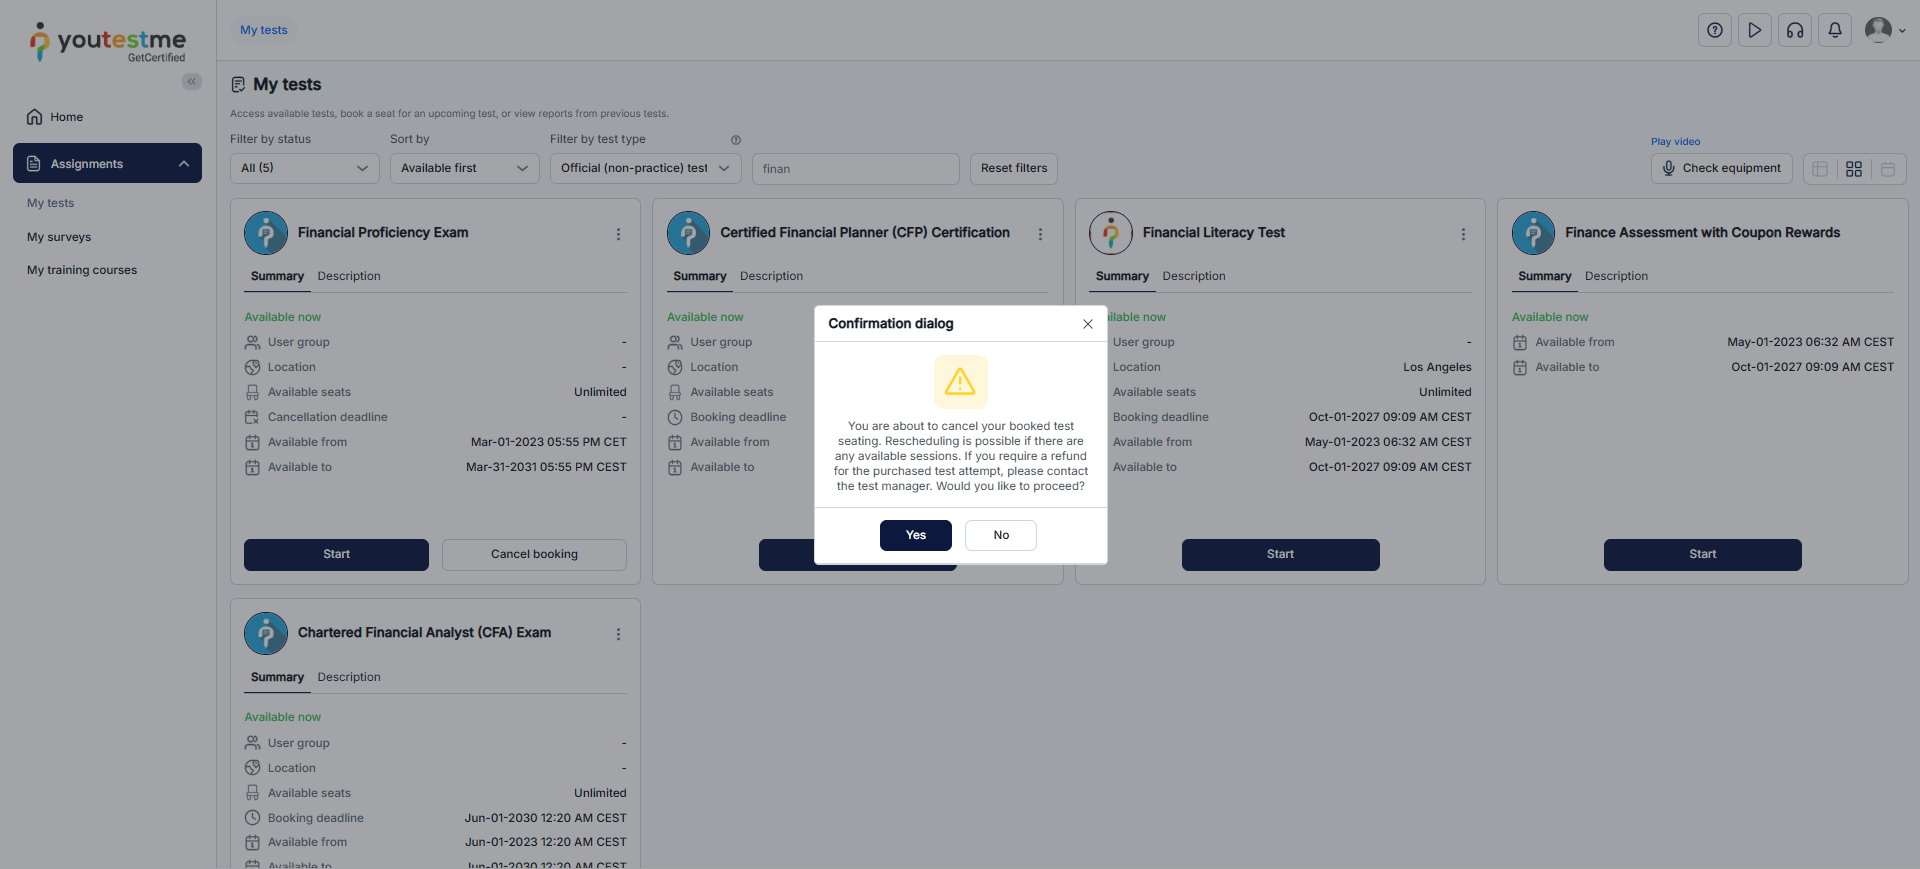
Click Yes to confirm the cancellation in the confirmation dialog.
Purchase a Test
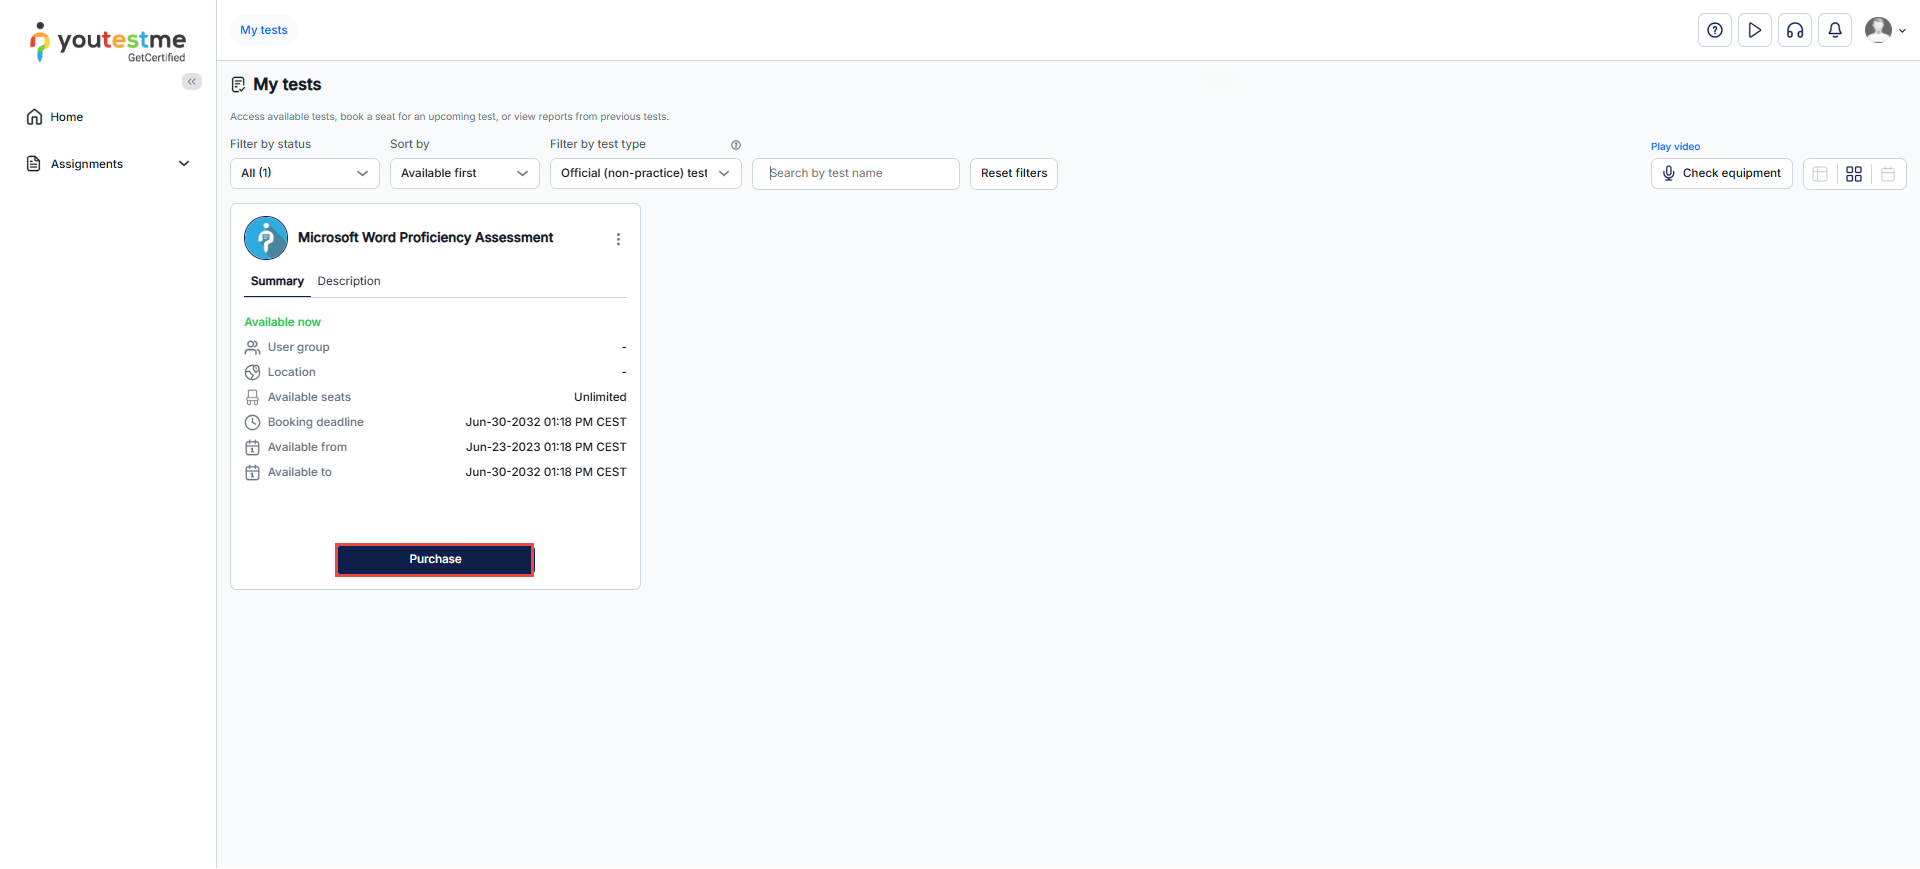
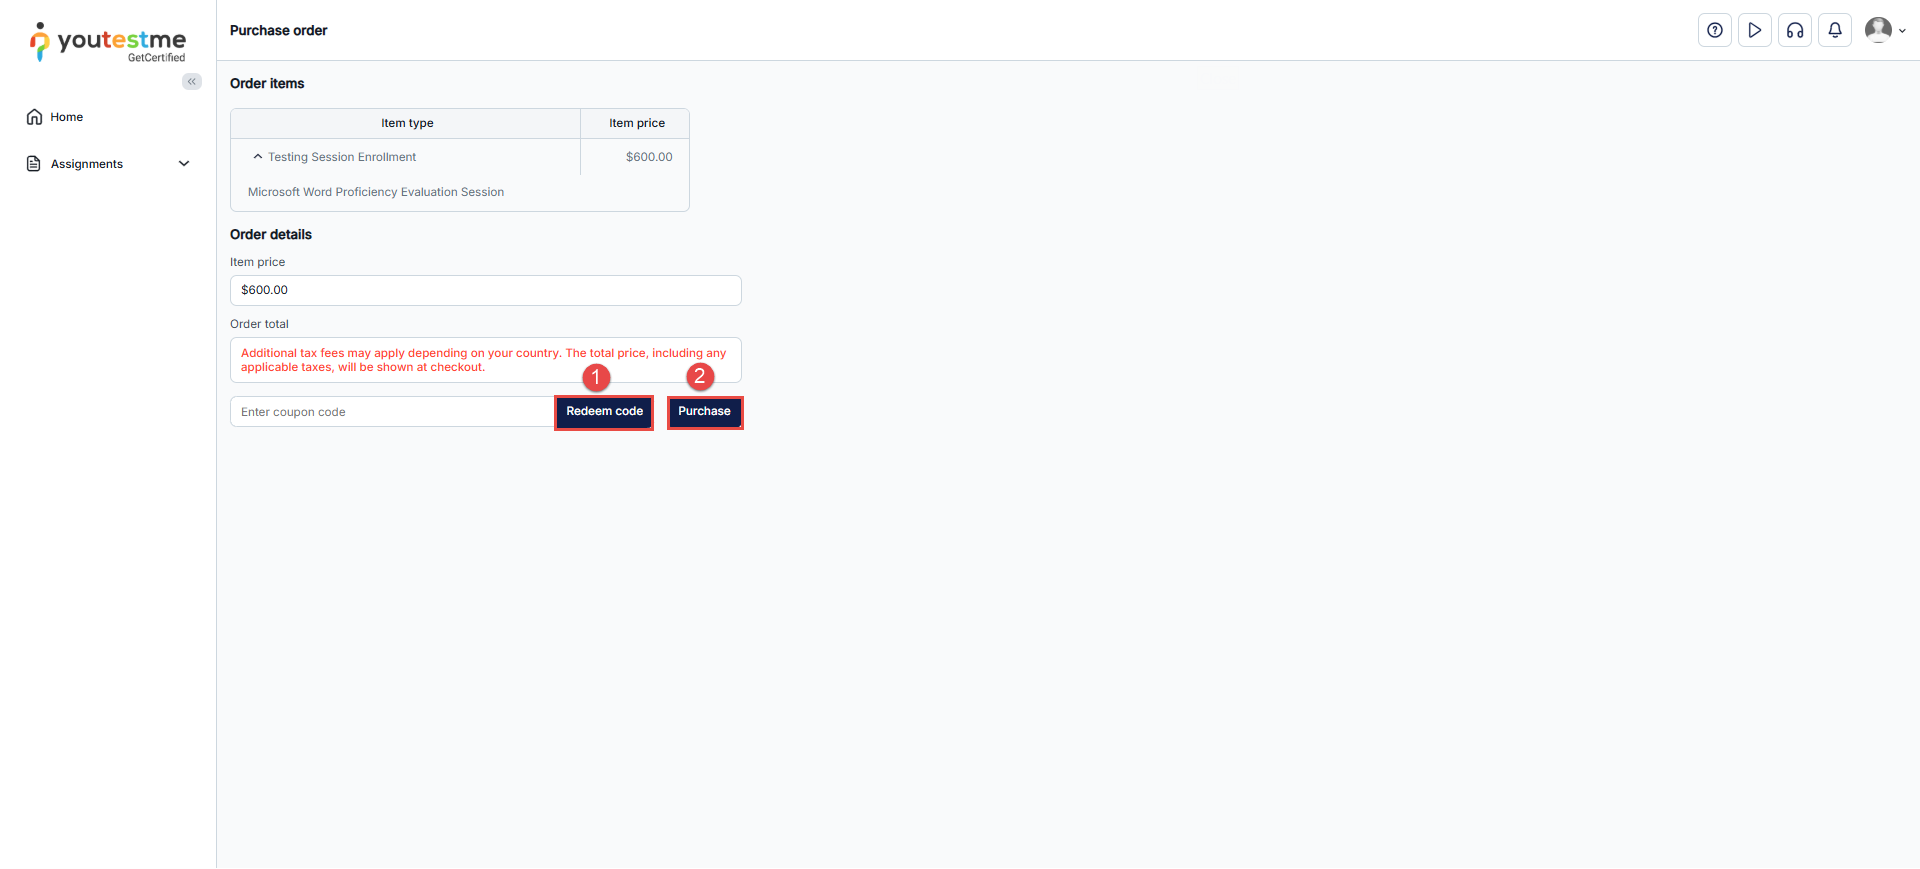
If a session requires payment, click the Purchase button, choose your preferred payment method, optionally enter a coupon code, and then click Pay to complete the purchase.
On the Purchase Order page, you can:
-
Enter a coupon code – Apply a free coupon (if provided) to take the test without paying any fees. For more information on using test coupons, see this article.
-
Proceed with payment by clicking the Purchase button.
Note: The purchase view may vary depending on whether taxes are calculated statically or dynamically. For more information, refer to the following article.
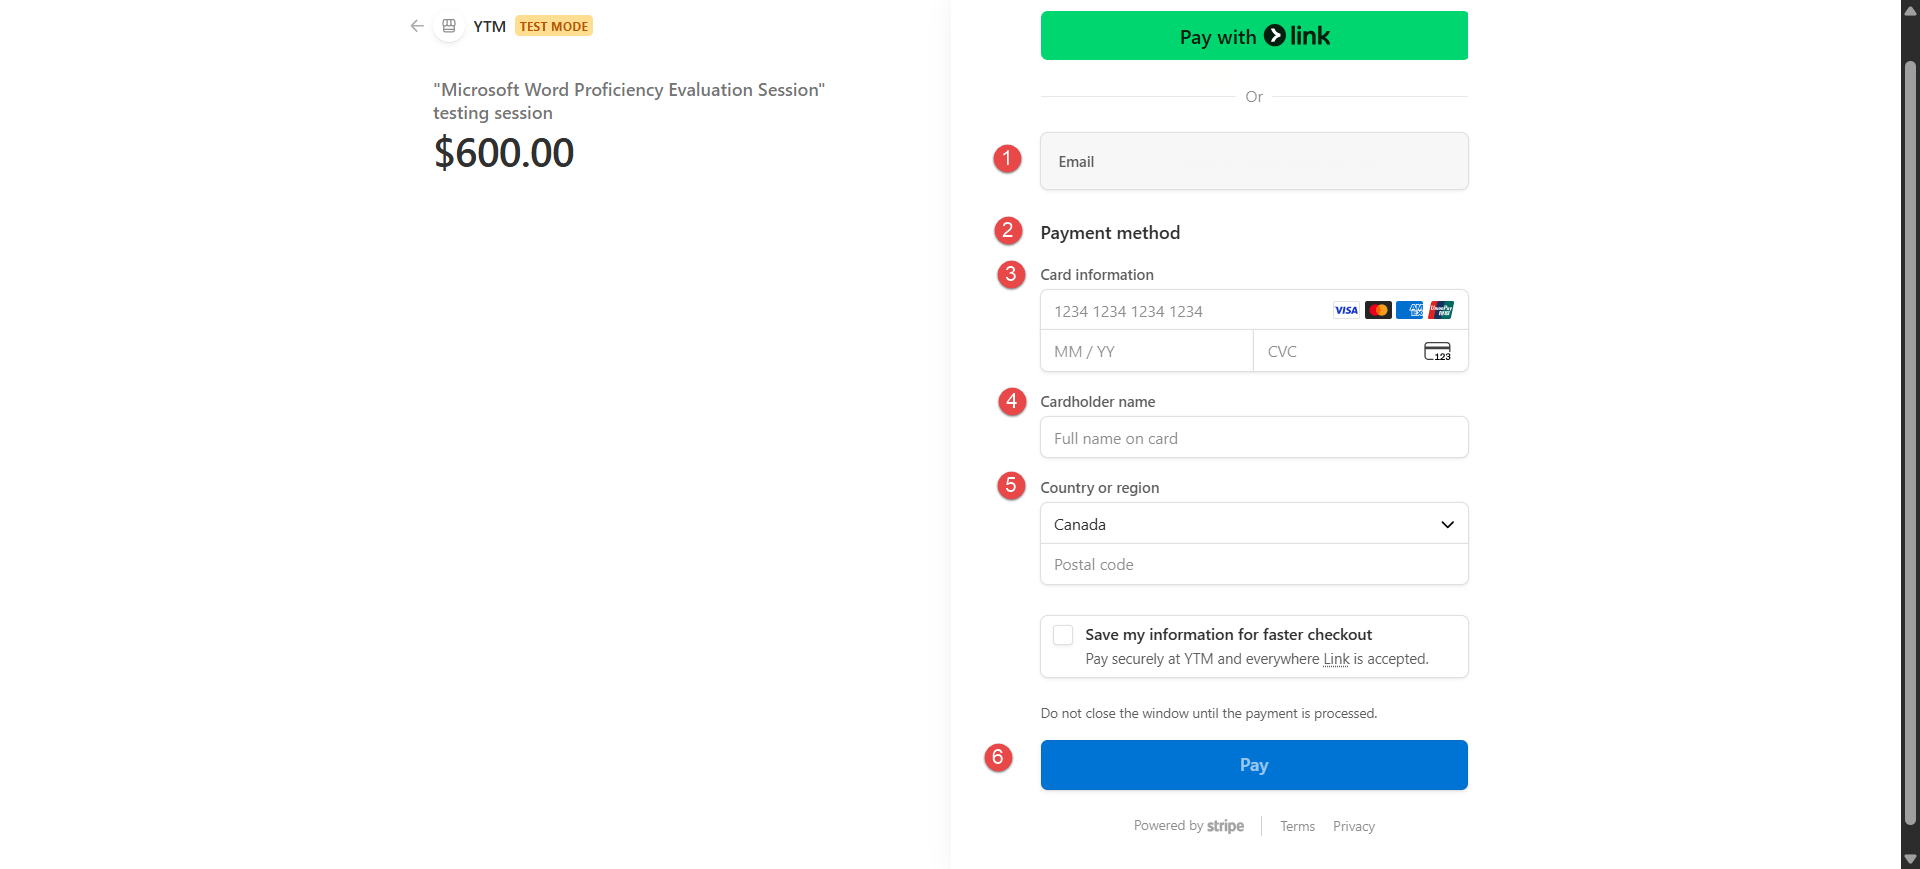
Checkout Process
- Your account’s registered email address will be displayed.
- Select one of the available payment methods.
- Enter your card information: card number, expiration date, and CVC code.
- Enter the cardholder’s name.
- Select your country or region.
- Click Pay to complete the transaction.
Note: During payment, some users may see a partially hidden phone number that does not belong to them and may be prompted to check out as a guest. This usually occurs due to previously saved test data, and no additional verification is required.
For demonstration purposes, enter the following dummy data:
- Card information: 4242 4242 4242 4242
- Date: Any future date
- CVC: Any three digits
- Cardholder name: Enter your name
- Click the Pay button
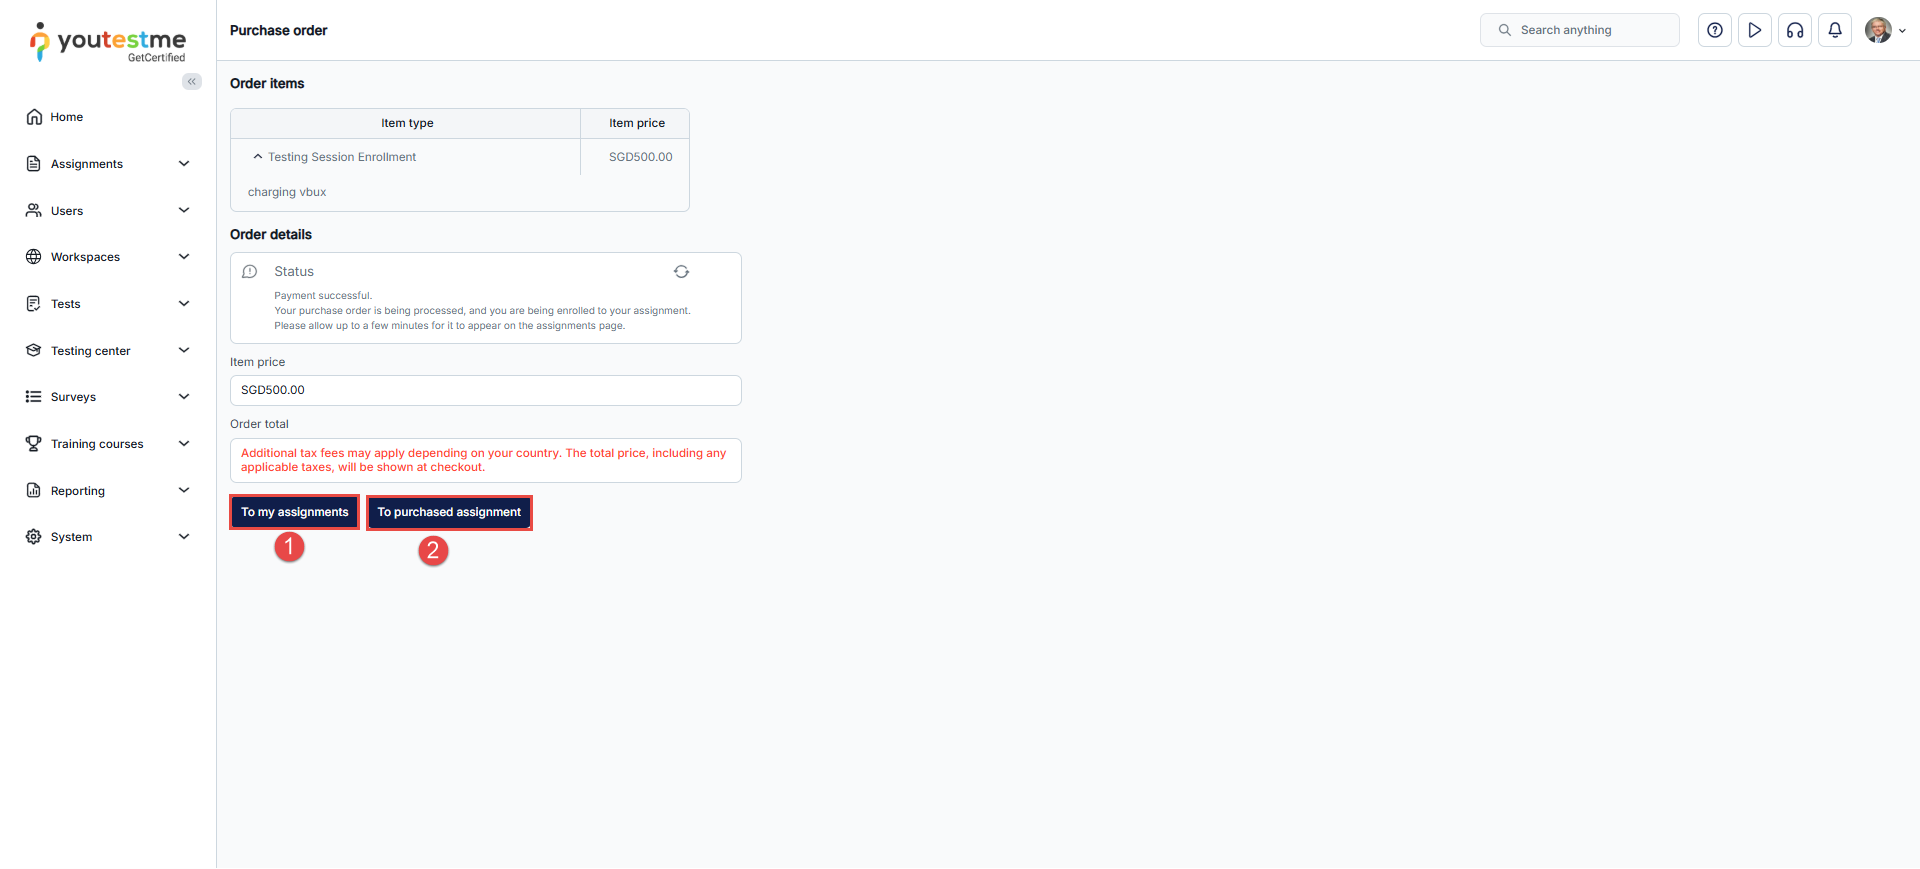
Once the purchase is completed:
- You will be redirected to the Purchase Order page, where you can view the order details and see the status updated to Completed.
- From here, you can:
- Return to the My Assignments page to view all available tests, including the purchased one.
- Return to the purchased assignment page, where only the purchased test will be visible and ready to take.
Retake Test
Depending on how the test is configured, you may be able to take it more than once. The number of retakes can be unlimited or limited, and retakes may be available only if you did not pass the previous attempt.
When the Retake option becomes available
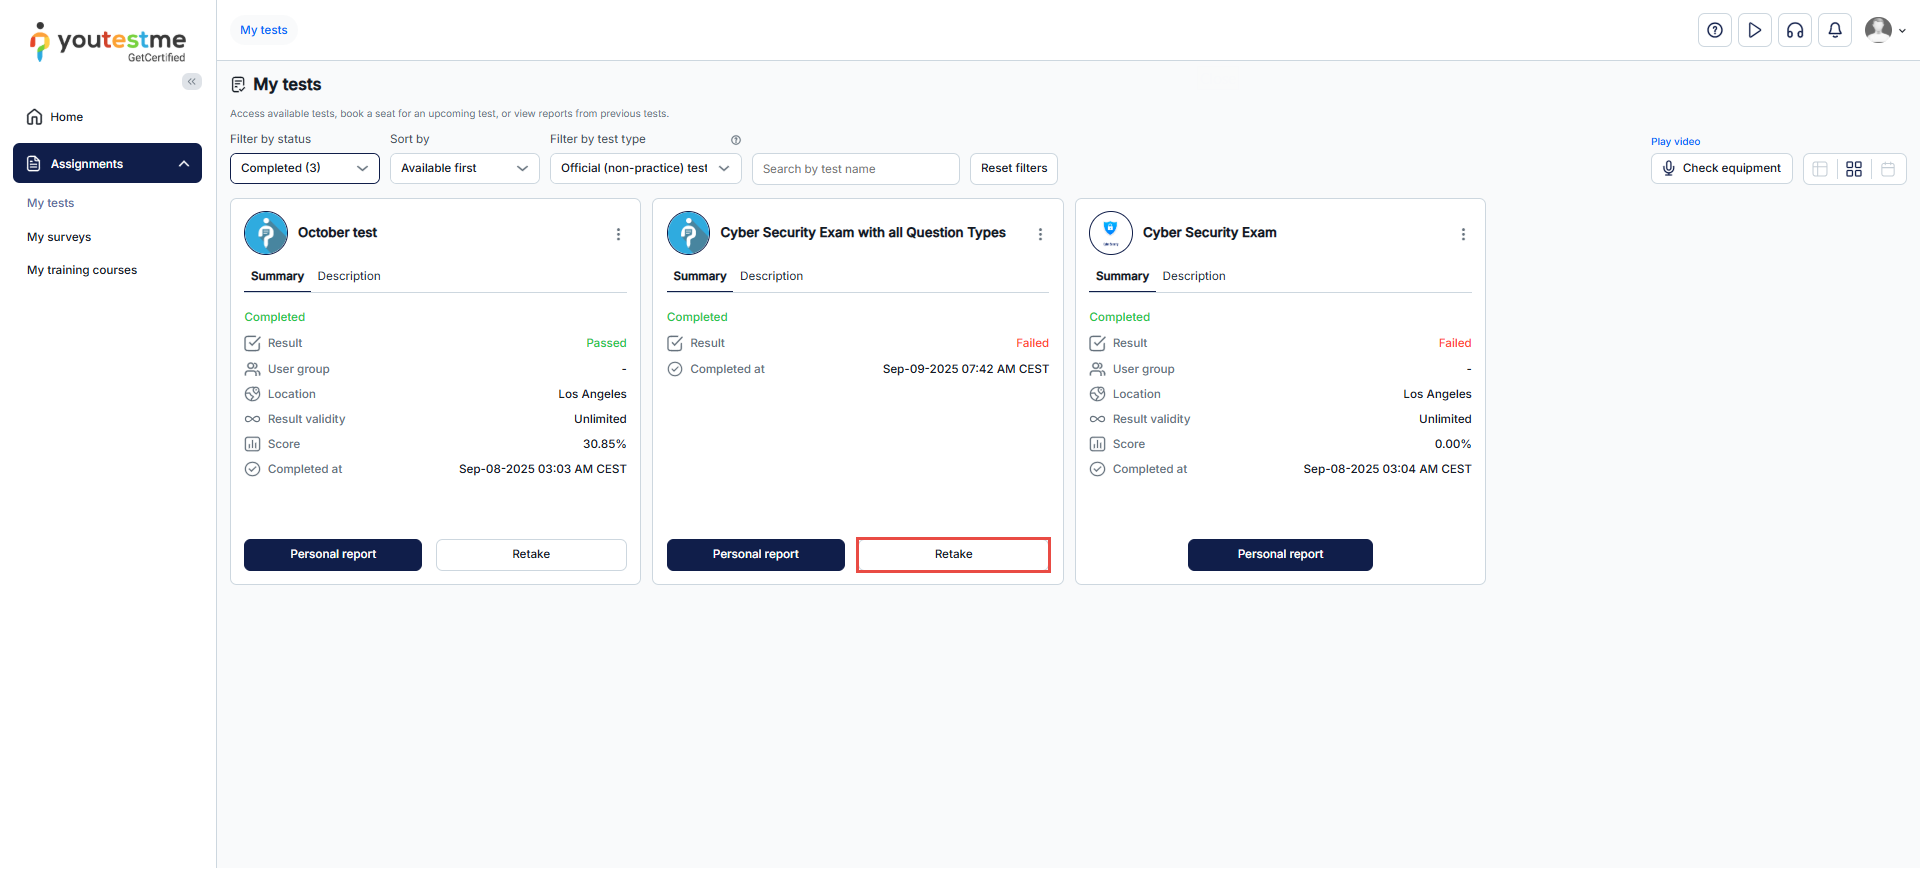
The Retake button appears on the test card only when all of the following are true:
- Your previous attempt has the Report complete status, meaning grading is finalized.
- You have not used all the allowed retakes.
- Retakes are allowed for your result. Some tests allow retakes only after a failed attempt.
- The required waiting time since your previous attempt has passed, if one is set.
- You are still within the retake period, if one is set. This period starts from your initial attempt, not your most recent one. For example, if the retake period is 2 days, all retakes must be taken within 2 days of your first attempt.
- The testing session is still within its availability period.
How to retake a test
- Go to My tests and find the test.
- Click Retake.
- If more than one testing session is available, select the session that fits your schedule.
- If a retake price is set, complete the payment. You can apply a coupon code if you have one.
- Start the test. If the test is configured to show it, the instructions dialog displays how many retakes you have left.
Note: If a retake price is set for the session, each retake is a separate paid attempt, including retakes in the same session you already took.
Note: If you don’t see the Retake button, check whether the waiting period has passed and whether you have retakes left. If you believe you should be able to retake the test, contact your test administrator. Administrators can reset an attempt or allow you to take the test again.
Reschedule a Test
For more information on rescheduling a testing session, please refer to the following article.
Note: If payment is made, rescheduling does not automatically result in a refund. A refund must be requested from the system administrator.
Notifications About Purchased Sessions
When you purchase a session, you will receive:
- An in-app notification confirming your session purchase.
- An email notification with the details of your purchased session, including a link to view the payment receipt.
For more related instructional materials, please visit: