Article verified for Release 15.1 on November 11, 2025.
This article explains how to create grading scales and define passing marks in YouTestMe GetCertified.
Grading scales provide standardized labels for evaluating test results, ensuring consistency and clarity in performance reporting.
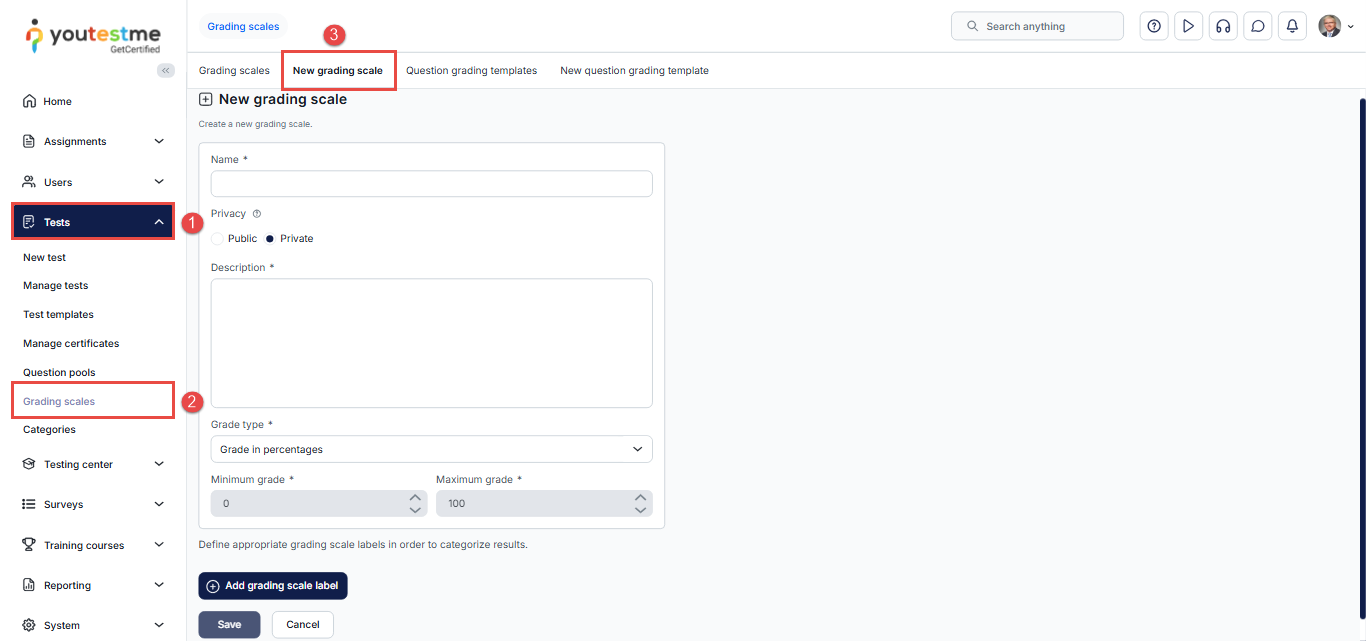
Accessing the Grading Scale Creation Page
To create a new grading scale:
- From the main menu, select Tests.
- Click the Grading Scales tab.
- Open the New Grading Scale tab to start creating your scale.
Creating a grading scale
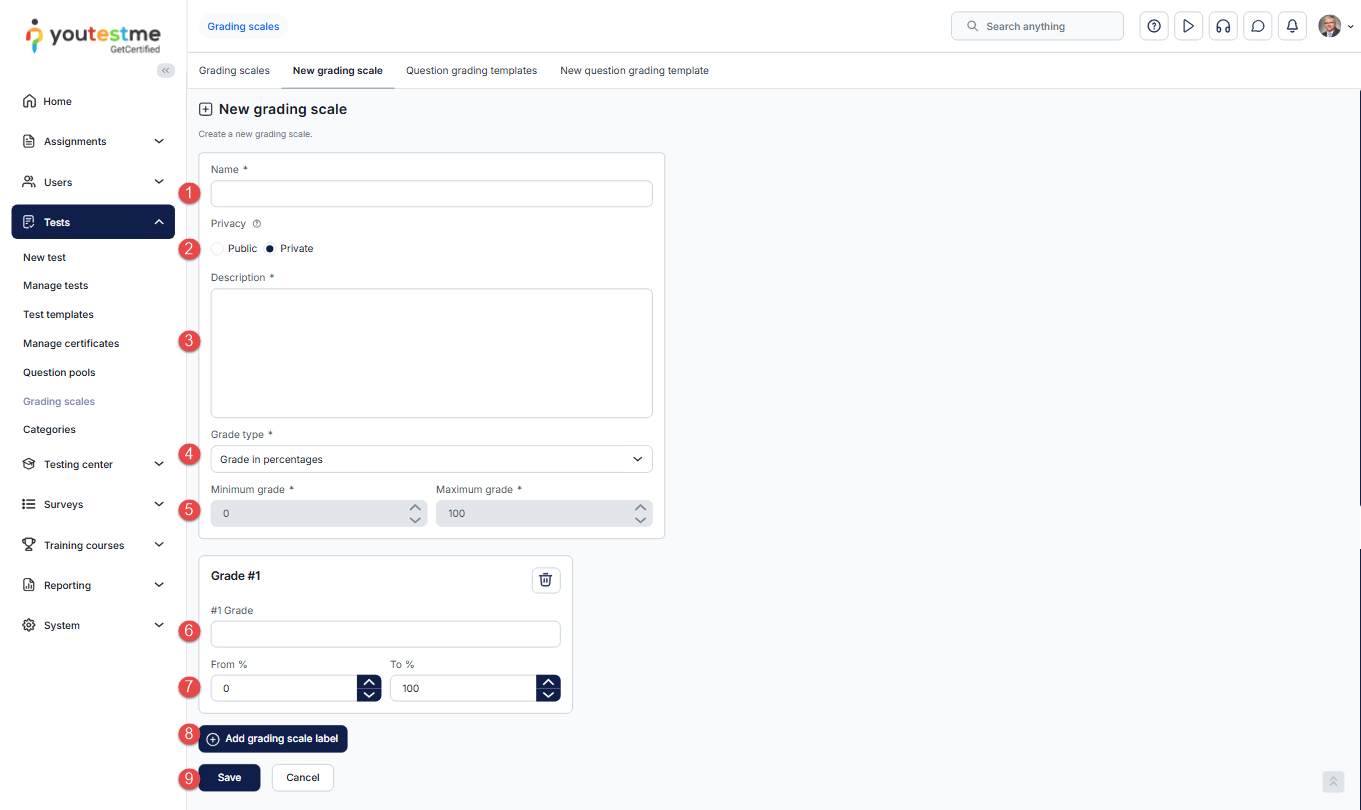
In the New Grading Scale tab, follow these steps:
- Enter the name of the grading scale.
- Set the privacy to either Public or Private, depending on who should have access to use or edit the scale.
-
Private scales are visible only to their creator.
-
- Enter a description of the grading scale.
- Select the grading type, either Percentage-based or Point-based grading.
- Set the minimum and maximum grade values:
-
- For Percentage-based scales, the default range is 0 to 100.
- For Point-based scales, define the range according to the total achievable score.
- Enter the name of the first grade.
- Define the range of points or percentages associated with this grade.
-
The From value is inclusive, meaning that if grade A encompasses points up to 30 and grade B begins from 30, the candidate will receive a grade of B.
-
- Add more grade labels if needed.
- Click Save to complete the process.
Once you have created a grading scale, the next step is to apply it to a test.
This can be done in the Grading configuration step of the test creation wizard.
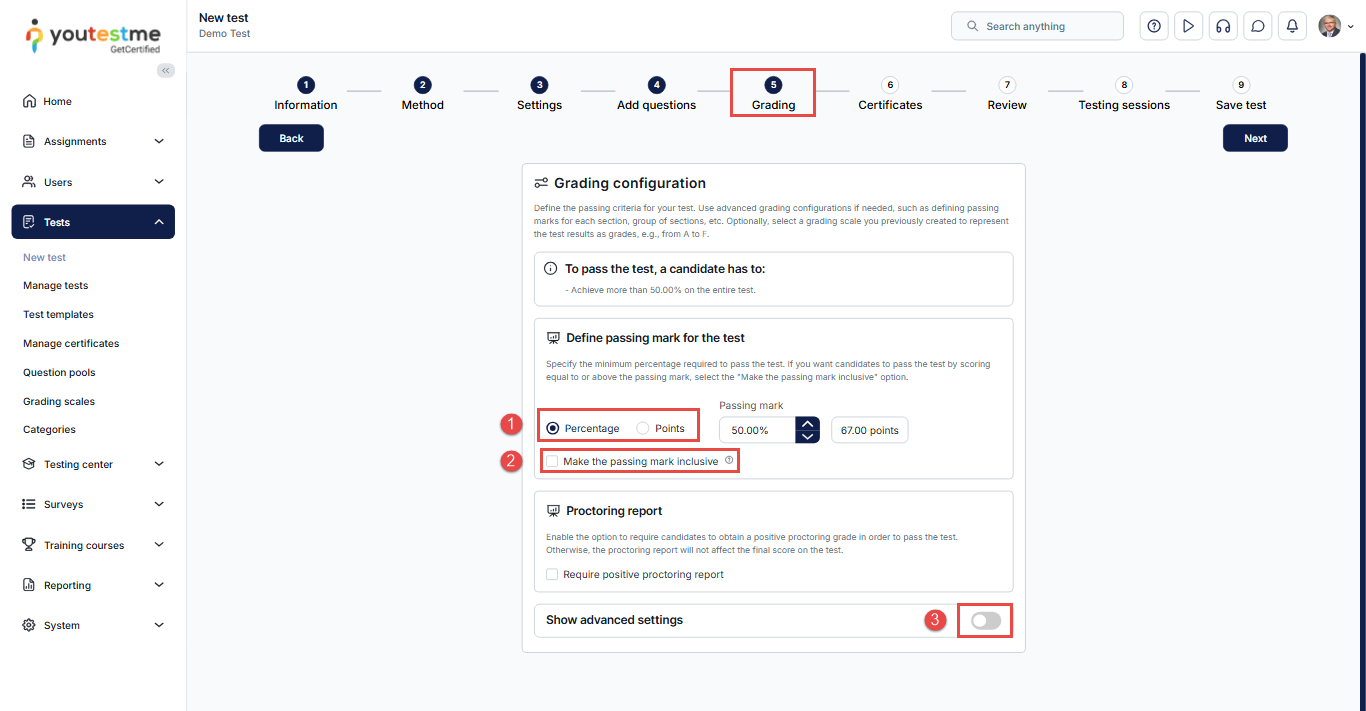
Grading configuration – Test without sections
The Grading configuration step of the test creation wizard allows you to set the grading options for the test.
To use the created grading scale for a test without sections, follow these steps:
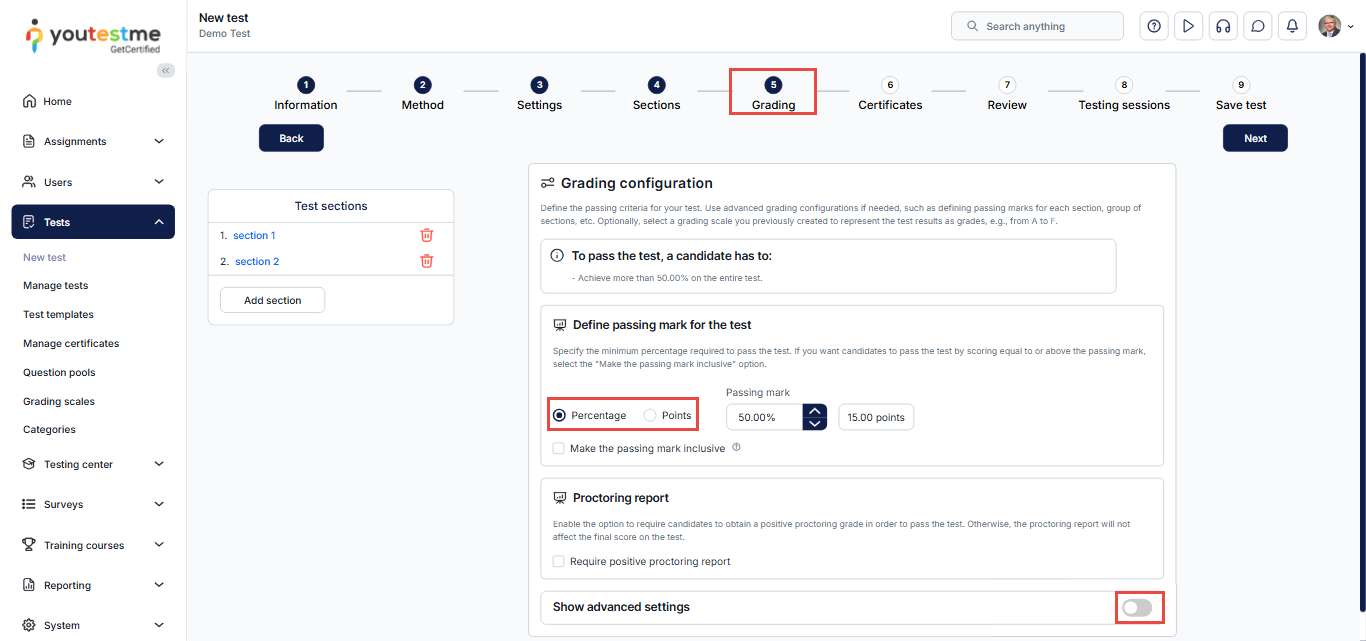
- In Step 5 of the test creation wizard, define the passing mark in percentage or points.
- Enable Make the passing mark inclusive if you wish. This ensures candidates pass only if they achieve a score equal to or higher than the passing mark.
- Click Show Advanced Settings to access the advanced grading options.
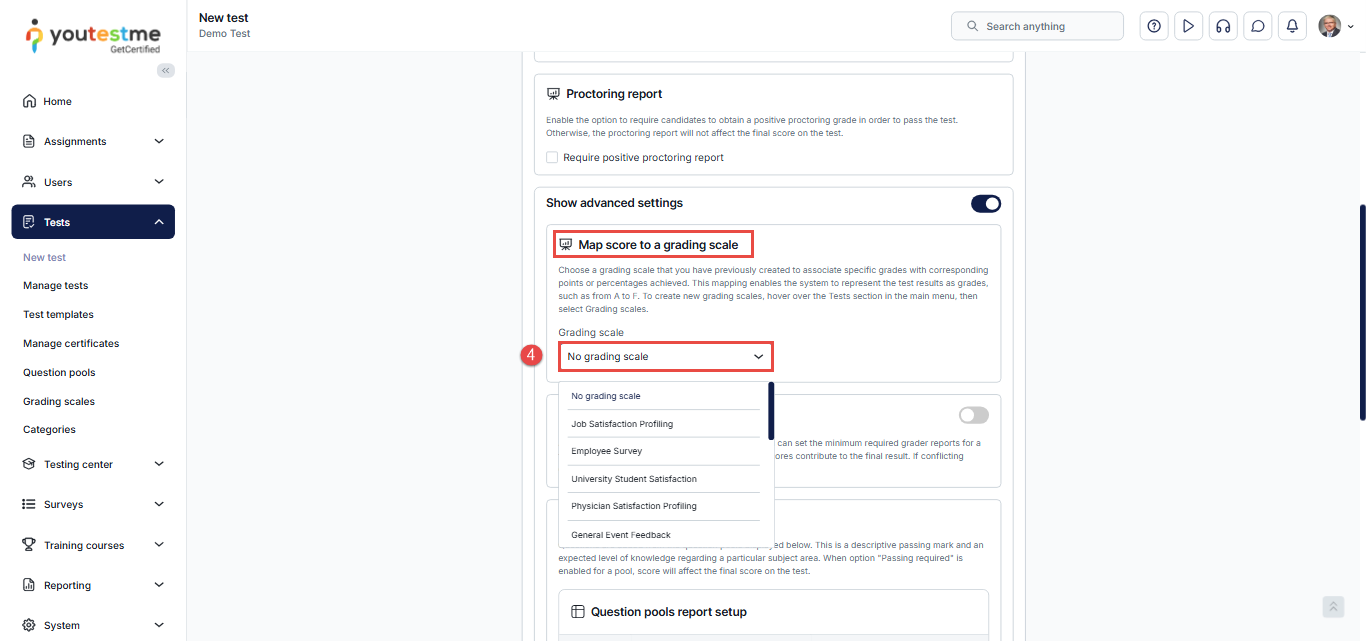
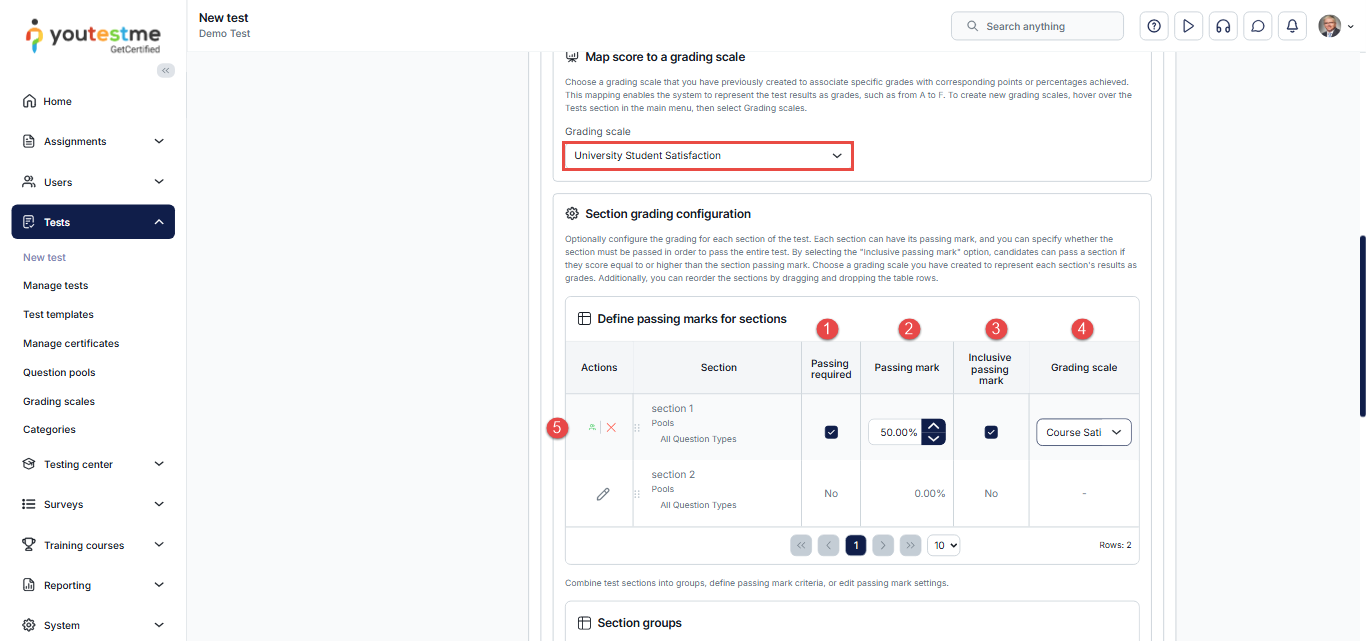
- Navigate to the Map score to a grading scale section and select the grading scale you previously created from the drop-down menu. This associates specific grades with the corresponding points or percentages that have been achieved.
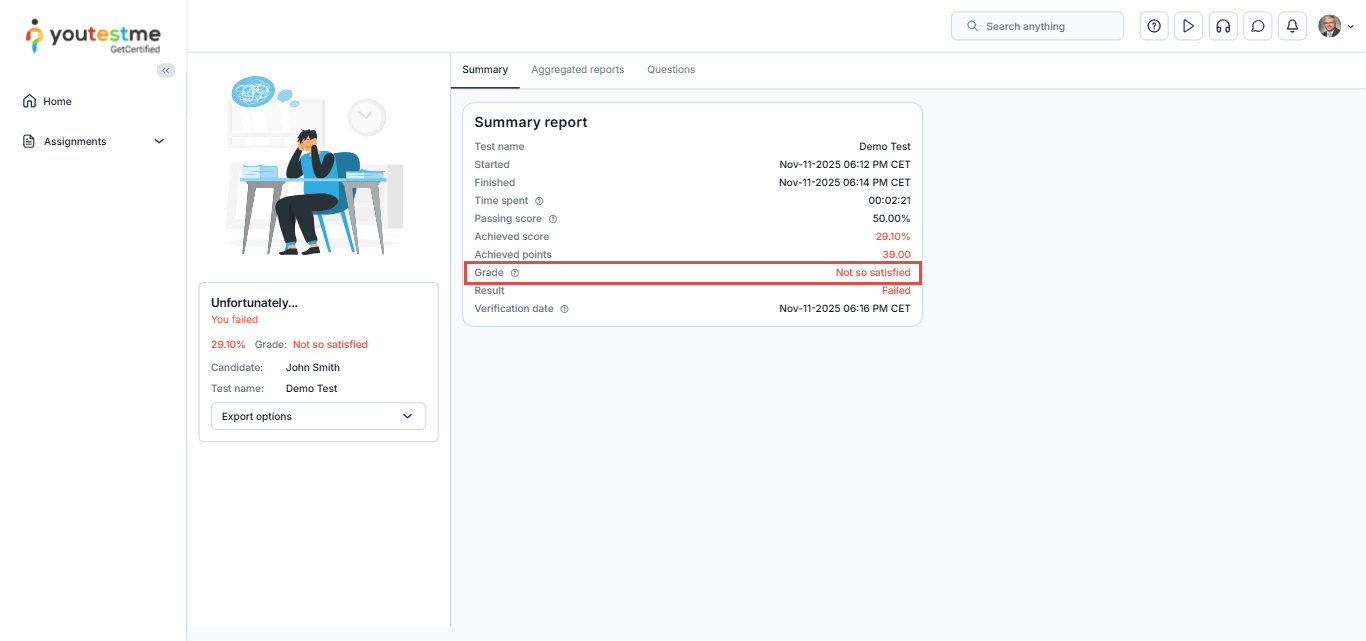
Candidate perspective
After completing the test and once a test manager has approved the report, the candidate will be able to see the assigned grade and their score details in the personal report.
Grading configuration – Test with sections
The procedure for adding a grading scale to a test with sections is slightly different. To configure grading for such tests, follow these steps:
After creating your sections:
- In Step 5 of the test creation wizard, choose the passing mark (in percentage or points).
- (Optional) Enable Make the passing mark inclusive – this ensures candidates pass only if they achieve a score equal to or higher than the passing mark.
- Click the Show Advanced Settings button to access the advanced grading settings.
Select the previously created grading scale for the test you are creating.
Click the Edit icon next to the desired section. From there, you can:
- Define a passing mark for the specific section.
- Choose a grading scale for that section.
- Enable the “Passing Required” option — if enabled, the candidate must pass this section to pass the entire exam.
- Enable “Inclusive Passing Mark” for the section if needed.
- Click the checkmark to save the changes.
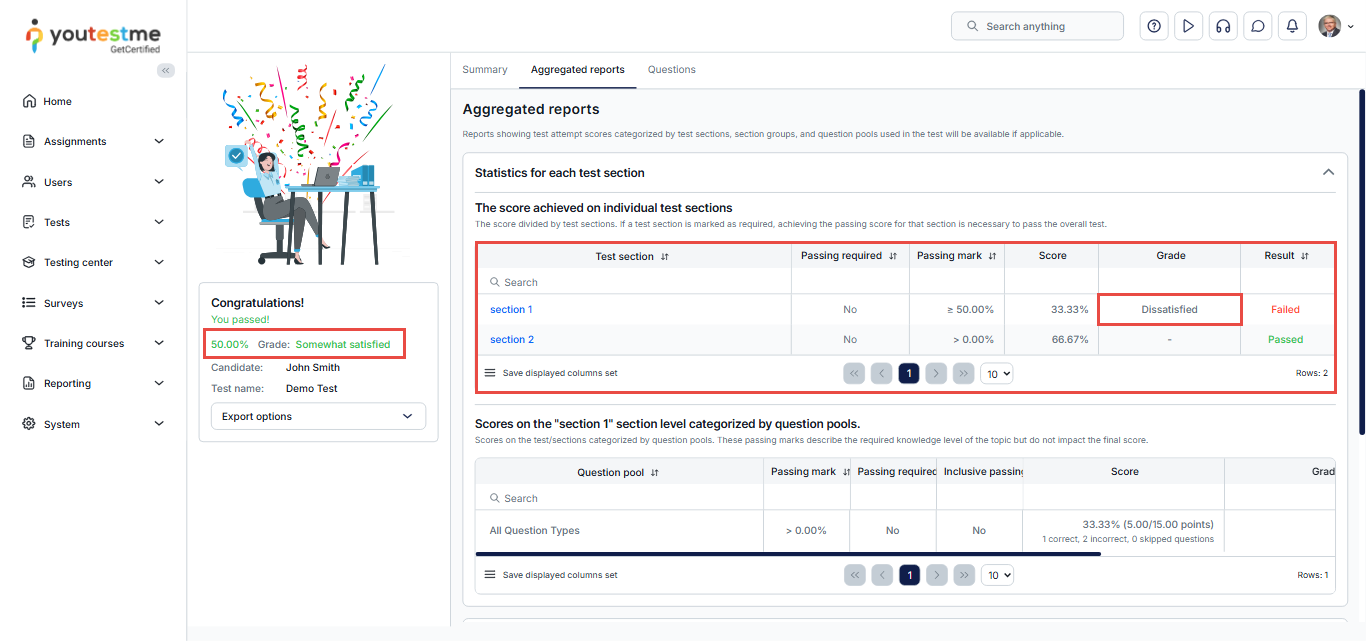
Candidate perspective
Once the candidate completes the test and the report is approved by a test manager, they will be able to view their overall score and detailed grade information for the exam, as well as for each section if a grading scale was set.
For more related instructional material, please see these links:


