Article verified for Release 14.1 on January 27, 2025.
This article serves as a fundamental guide to navigating the process of scanning paper-based tests utilizing Remark Office OMR. Whether you’re an educator or administrator, this comprehensive guide will take you step-by-step through the procedures for preparing and scanning your paper tests with Remark Office OMR.
Export the Test as a PDF
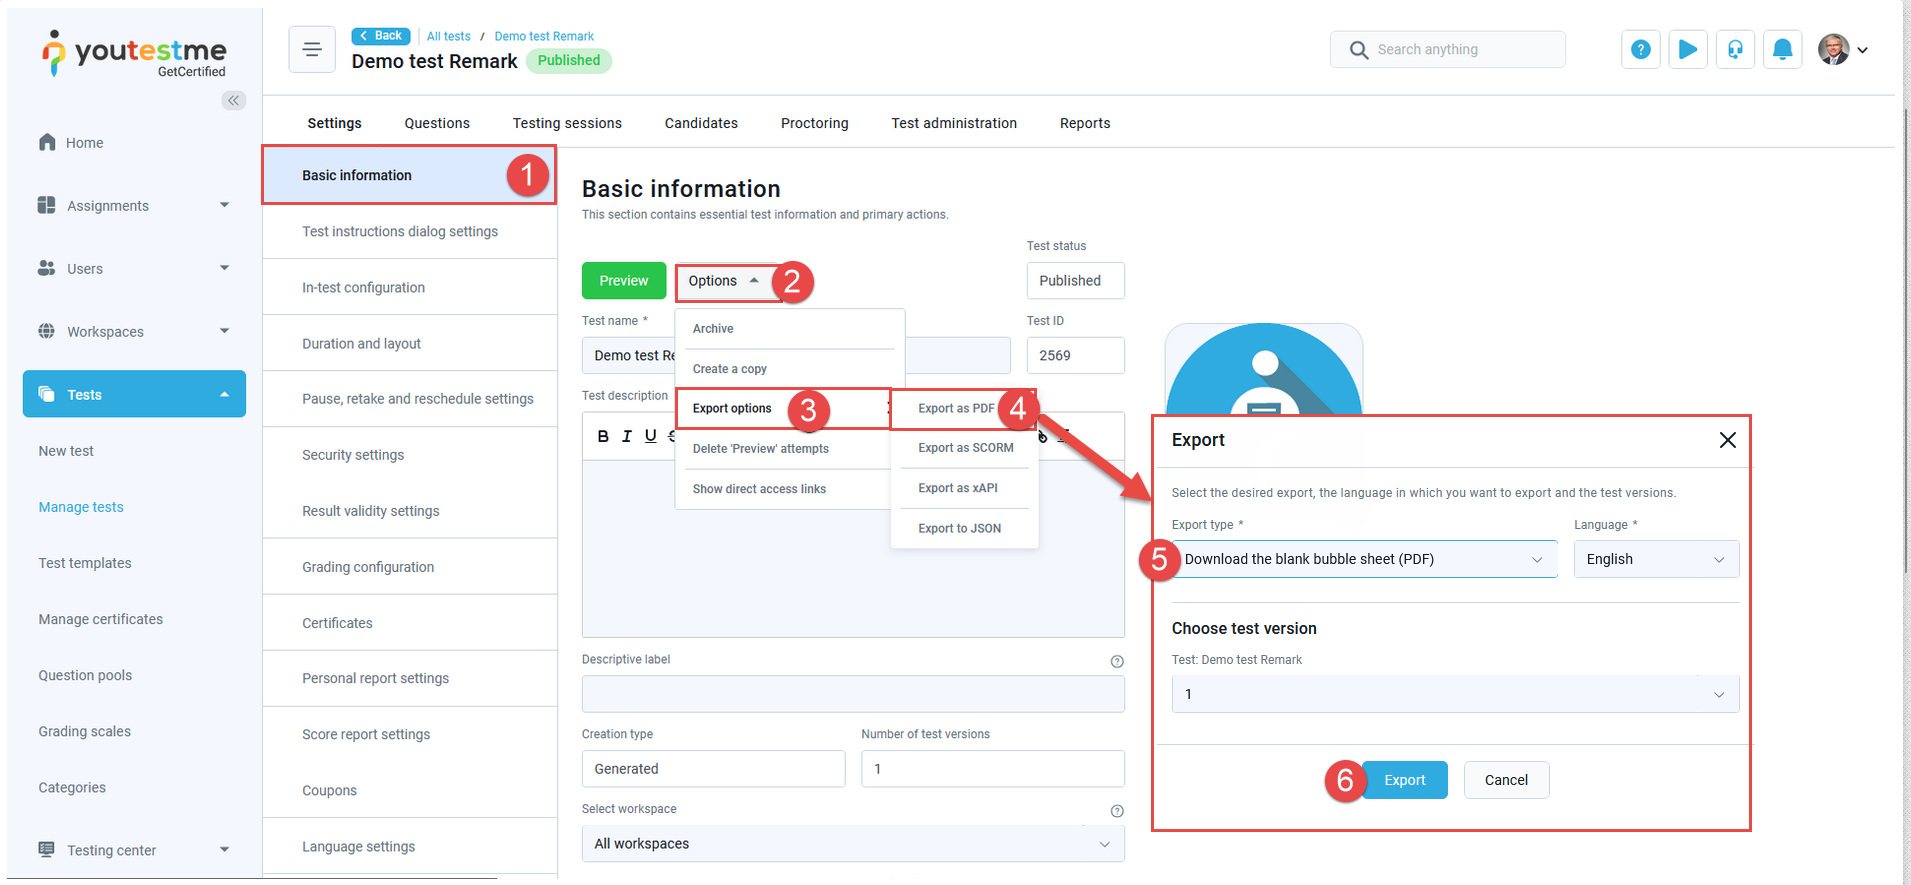
If you need participants to manually mark their responses on paper, you can export the test in PDF format using a predefined template. Within the application, select the test you want to export.
- Navigate to the Basic information tab.
- Click on the Options.
- Choose Export options.
- Select Export as PDF.
- When the pop-up window appear, choose the export type – Download the blank bubble sheet.
- Use the Export button to finish the action.
Use Remark Office OMR
Remark Office Demo is software used for recognizing and analyzing paper forms and surveys. It allows you to scan and digitize paper forms, automatically recognize data, create databases, and analyze collected data for optimizing business processes.
Creating a Template Using Exported PDF Test Data
You can use previously exported test data in PDF format to create a template, which you’ll later use for scanning and inputting the results of a vote. To get started, open Remark Office OMR:
- Click on the File.
- Select New Form Template to initiate the template creation process.

- When the pop-up window appears, add description for your template.
- Click on the Capture image button.

- Choose the Read Images option.
- Click on the Browse button.
- Choose the exported test and click on the Open button.

- Check the preview.
- Click on the OK button.


Interpreting Printed Content
While OCR excels at converting text from printed documents into machine-readable text, OMR is designed for recognizing specific marks and patterns on paper forms, making each technology valuable for streamlining diverse data processing tasks.
- OCR transforms printed words on paper into digital text. This means you can edit, search, and analyze the content.
- OMR focuses on spotting and capturing marks or patterns, like checkboxes and bubbles, on paper form tests and surveys.

Marking Additional Textual Information (Question)
- Navigate to the main menu and select the OCR option.
- Select the area where the text will be visible.
- Provide a name, for example, Region.
- Specify the data type.
- Indicate if it will contain more than one word.
- Click the Analysis button.
- Finally, save all the settings by clicking the OK button.

Marking and Recognizing Results/Checkboxes
- Navigate to the main menu and select the OMR option.
- Select the area where answers/votes will be visible.
- Provide a name, for example, Answers.
- Specify the data type.
- Specify the Region Layout – Indicate whether it’s organized in columns or rows, and specify the number of columns and rows if applicable.
- Choose possible label scales in the drop-down menu.
- Finally, save all the settings by clicking the OK button.

After setting up all the data, save the template:
- Select the Save option from the File menu.
- Enter name for the template.
- Click on the Save button.

Scanning Results
Enter previously created template:
- Select the Open Form Template option from the File menu.
- Find the template.
- Click on the Open button.


When you open the template, you gain access to a structured digital document that serves as a blueprint for collecting and processing data. The template contains predefined areas where data, such as marked check-boxes, can be recognized and interpreted. The next step is to import data to begin the reading process.
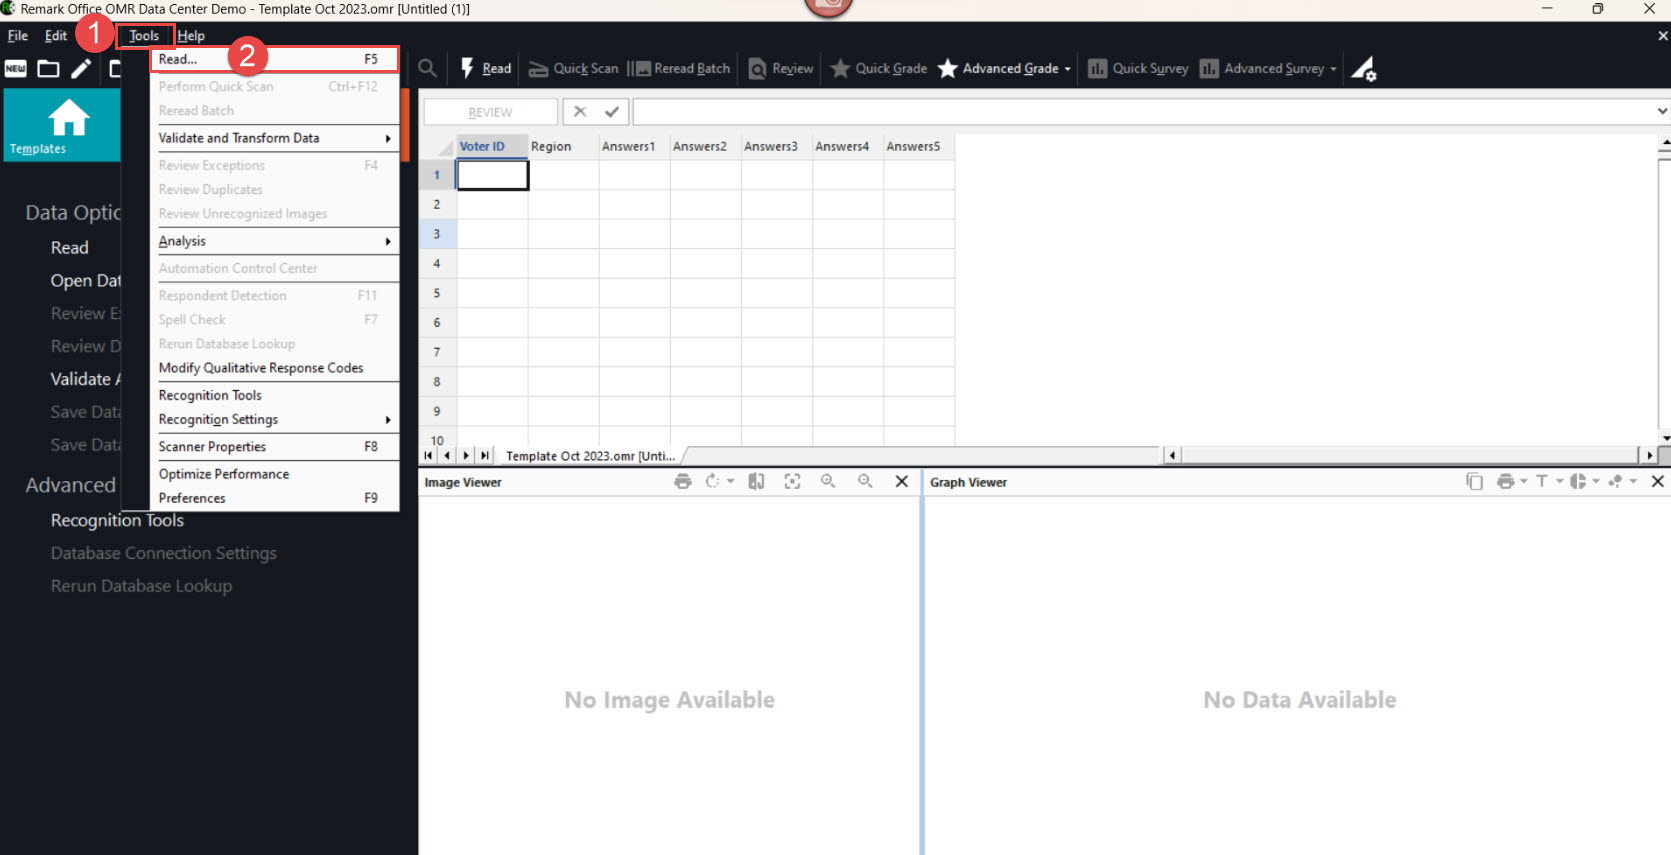
- Click on the Tools option from the main menu.
- Select the Read option.

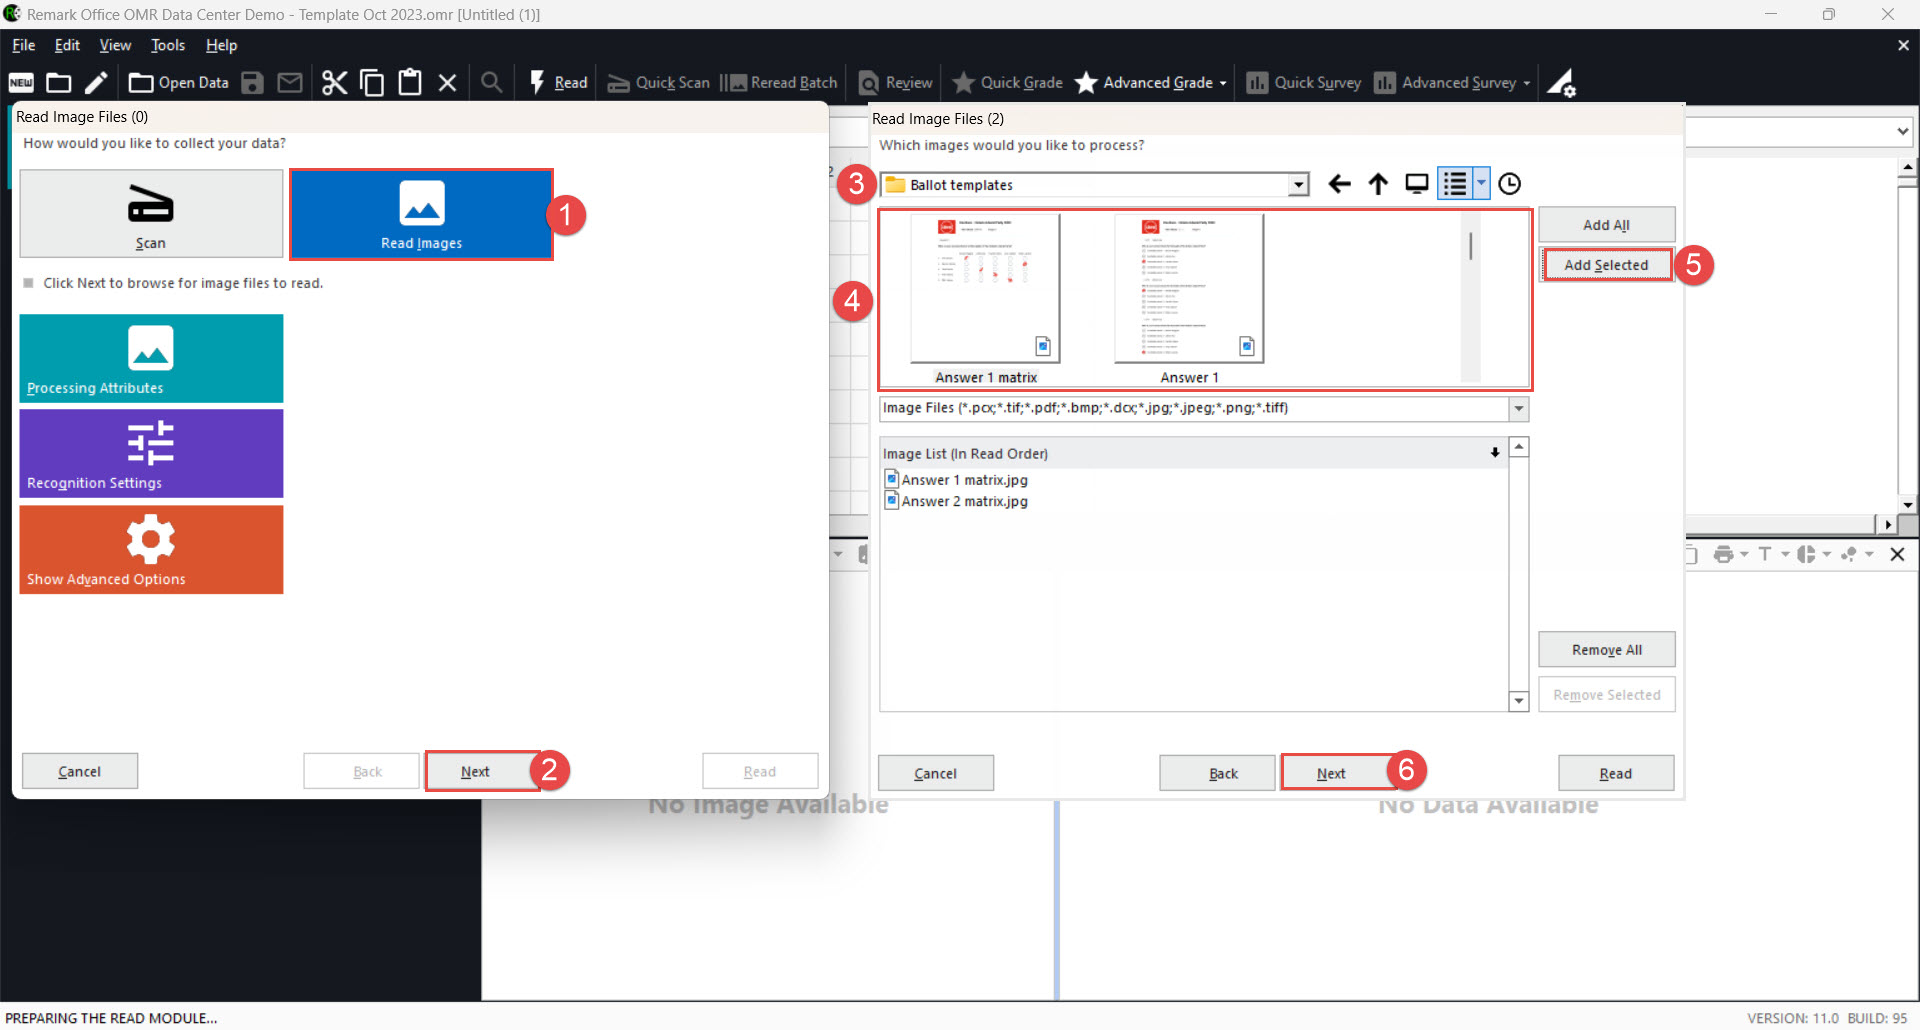
When the pop-up window appears:
- Click on the Read Images option.
- Click the Next button.
- Choose the folder where you have saved questions.
- Select the specific questions you want to scan.
- Click Add Selected.
- Click the Next button.
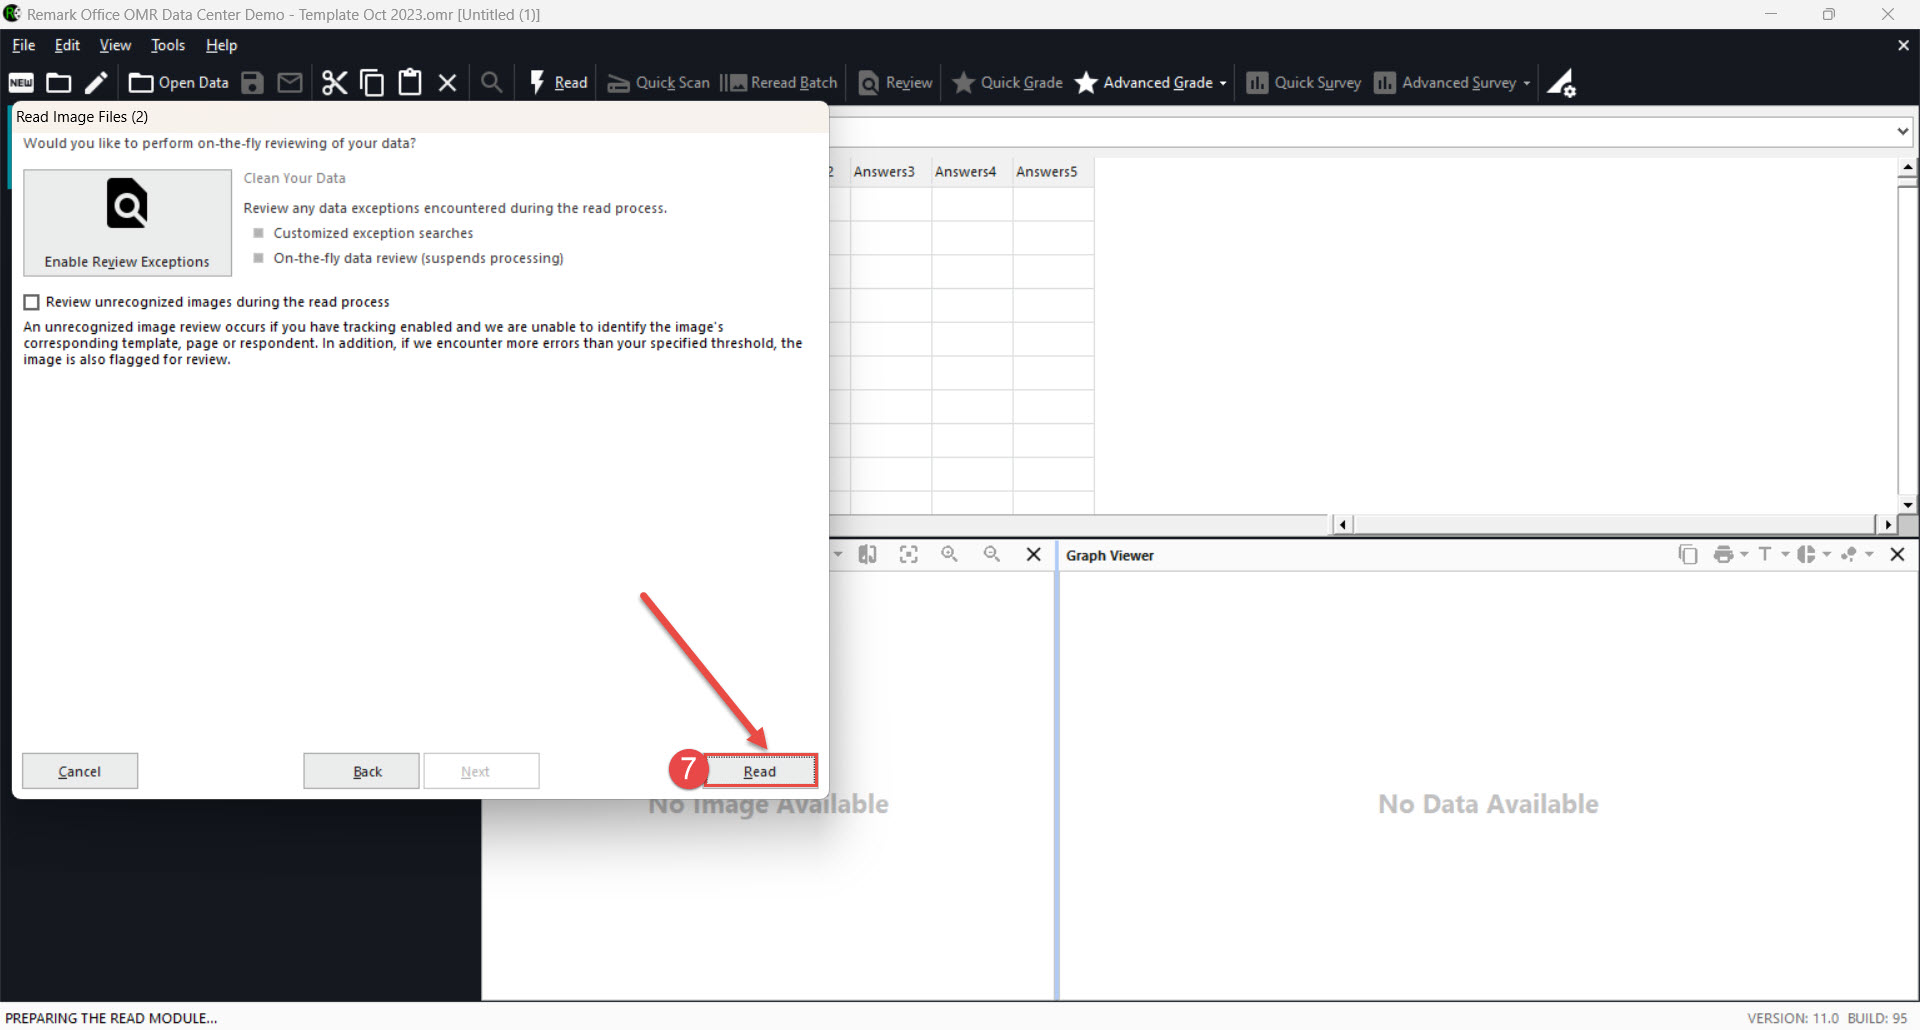
- Finally, click the Read button.
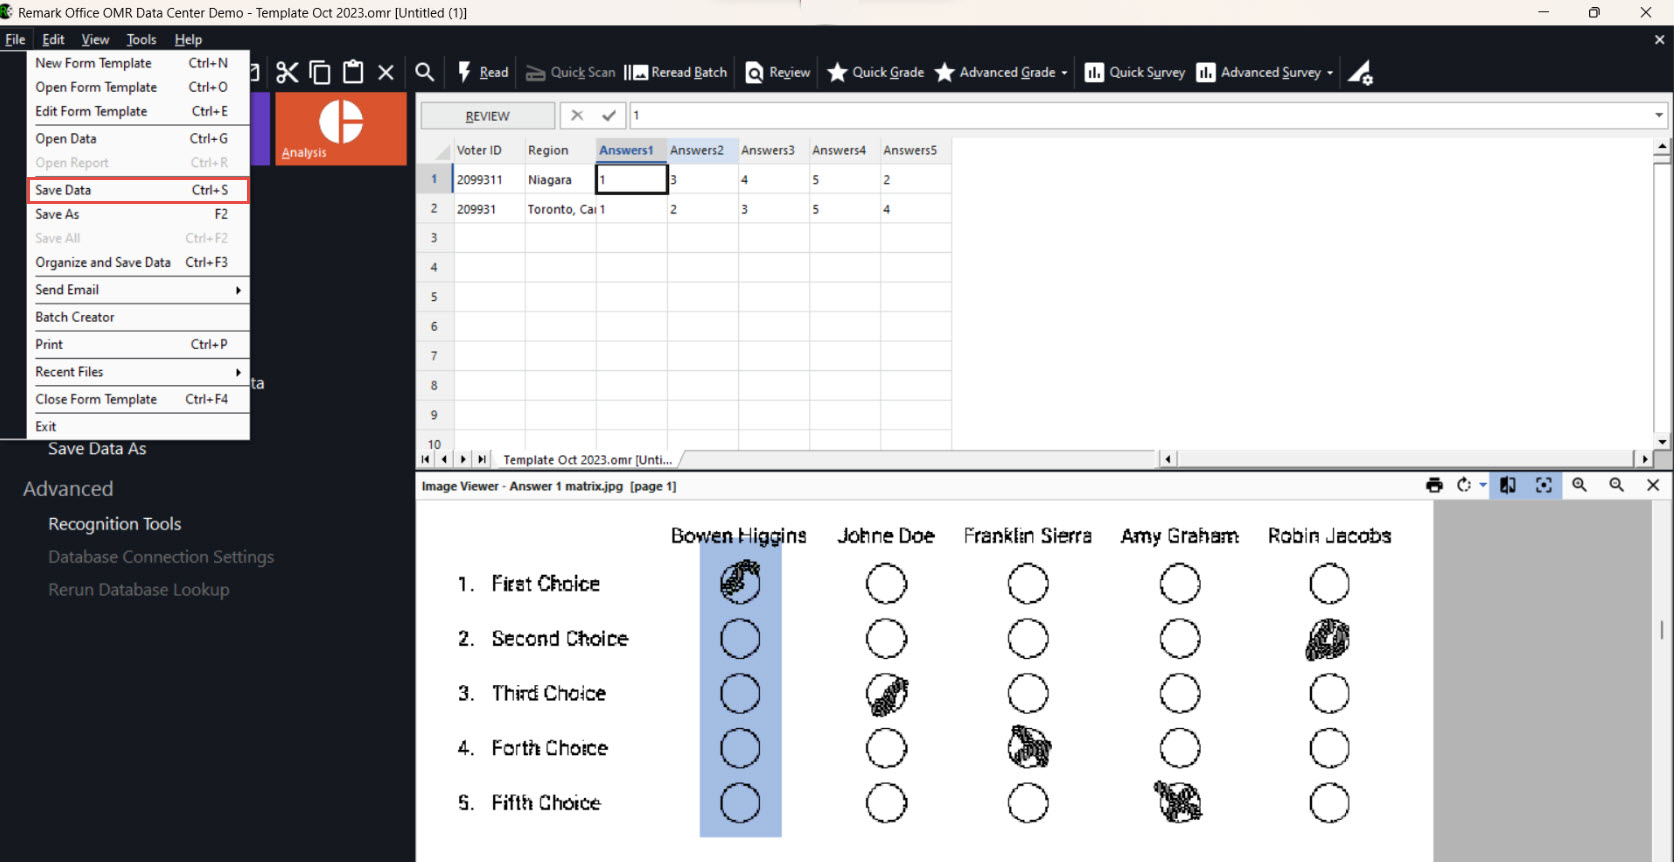
When all selected answers have been read and processed through the template, you will be able to see two parts:
- The first part displays all responses and data. You can click on any field to view it in more detail.
- In the preview of the selected field, you can see exactly what the scanned results.After reviewing all the scanned data, you can save it by selecting the Save Data option from the File in the main menu.


In summary, the combination of Remark Office OMR and YouTestMe GetCertified make a strong team in the world of data. Remark Office OMR excels in efficiently scanning and recognizing data from paper forms, while YouTestMe GetCertified enhances educational processes. This collaboration offers a highly effective solution for various applications, ensuring efficient and accurate data analysis and interpretation.


