This article outlines the steps for setting up OpenID integration, enabling users to log in to the YouTestMe GetCertified application using their Microsoft Azure AD credentials, rather than the application’s standard credentials.
Before creating this configuration, please:
- Ensure you have an active account created on Microsoft Azure AD and can log in at https://login.microsoftonline.com/
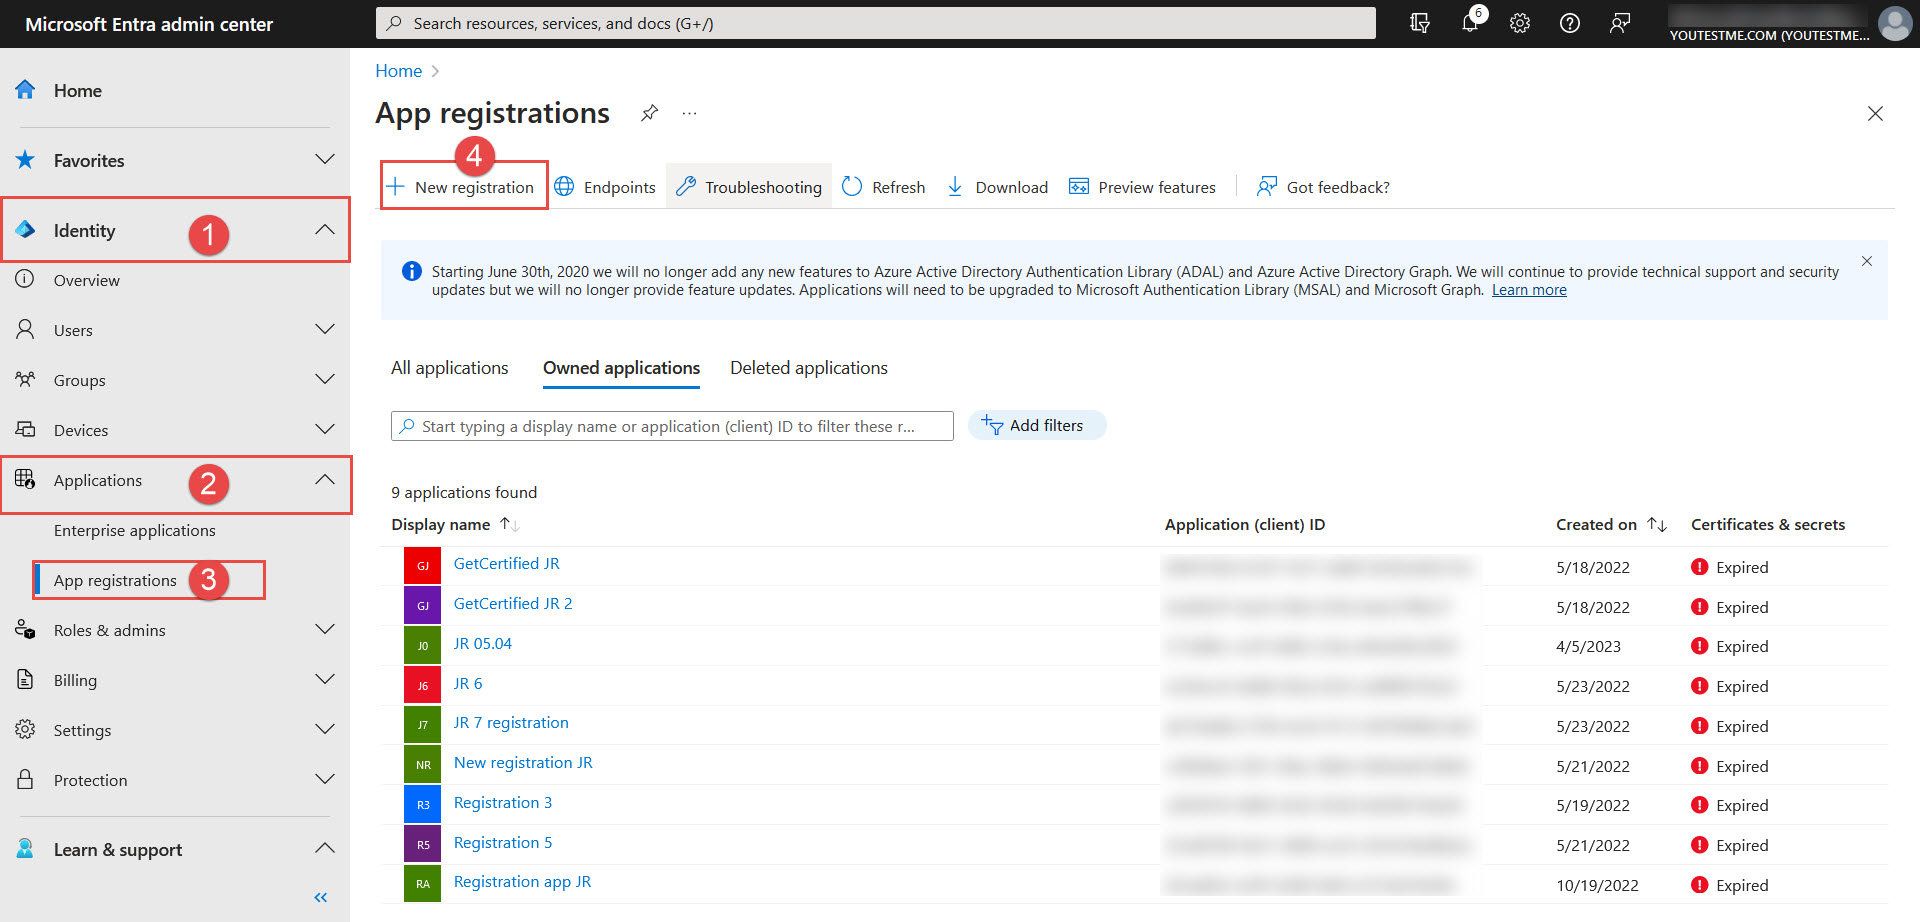
- Go to the https://aad.portal.azure.com/
Create the new OpenID configuration
When you log in to the YTM application, navigate to the following:
- Click on the System page.
- the Integrations option.
- When the page opens, go to the OpenID settings tab.
- Click the Create new button to create a new configuration.

The pop-up window will appear.
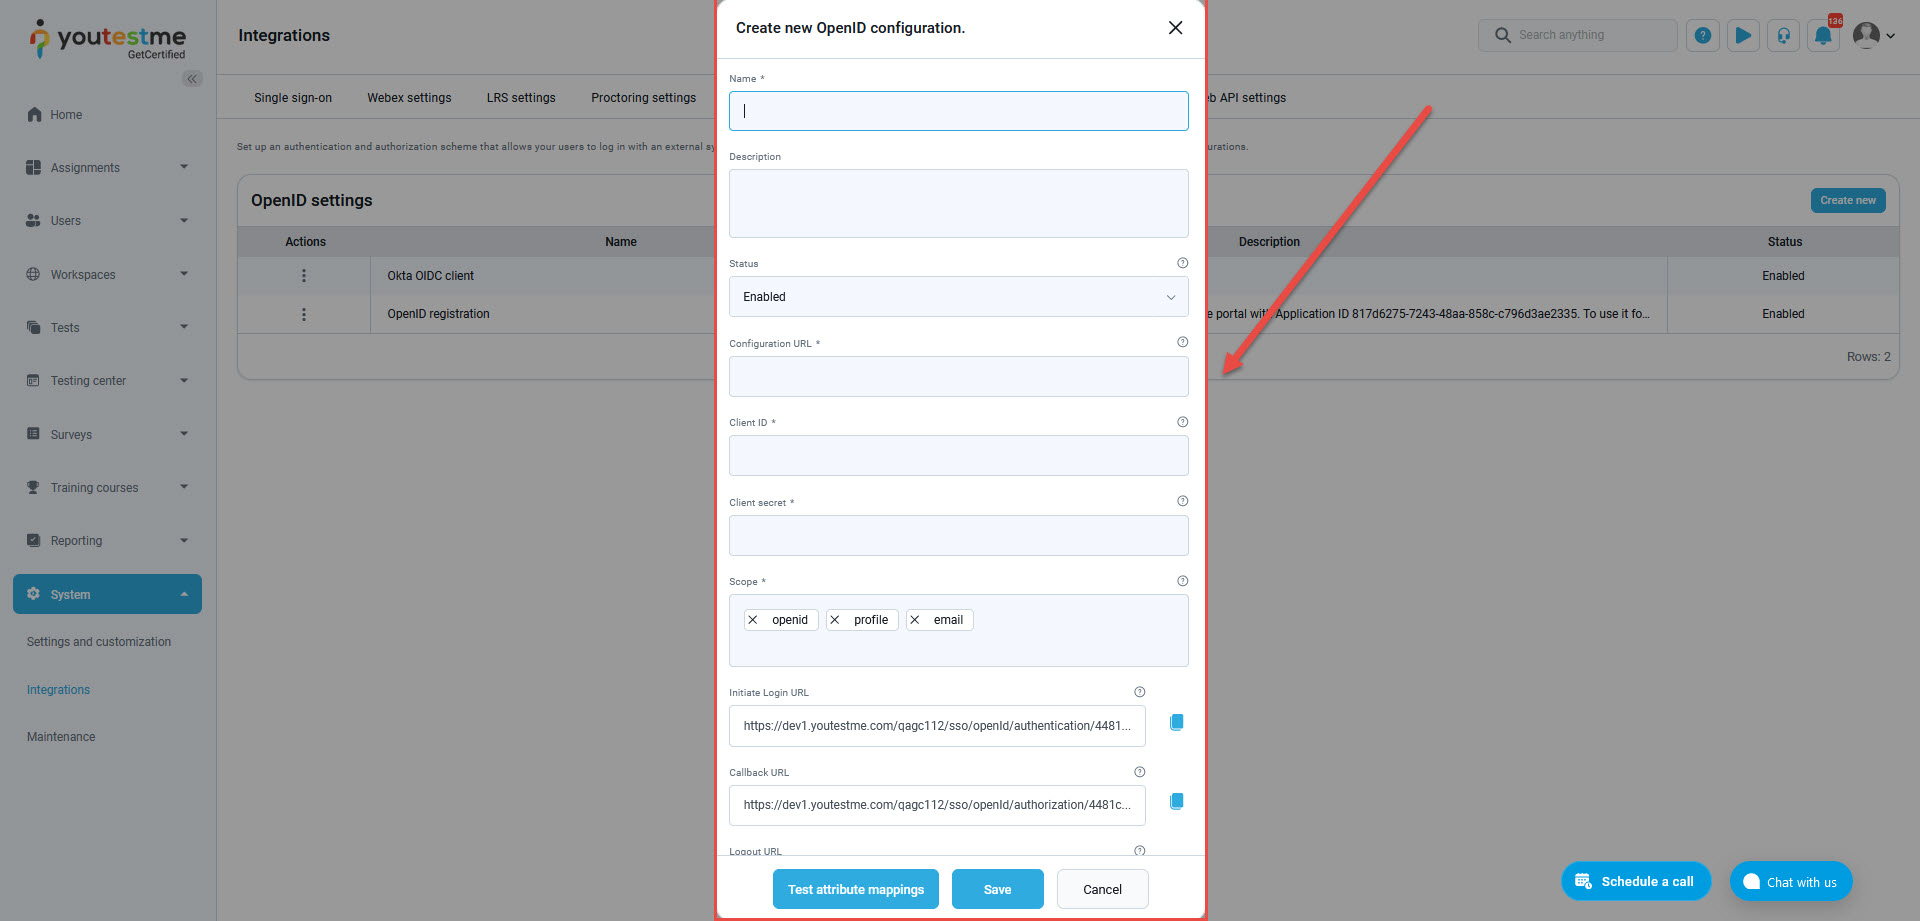
How to fill in the mandatory fields
-
- Name – Enter the name you choose for the configuration.
- Configuration URL – Go to the https://aad.portal.azure.com/ and create the new registration following the steps from the picture below:

- Give the Name to the new registration and confirm it with the Register button below (as in the picture below):
 Now, when the registration is created, navigate to the Endpoints to copy the OpenID Connect metadata document (as in the picture below):
  Paste the URL into the Configuration URL field in the YTM application.
 - Client ID – Copy the data from the Application (client) ID field (as in the picture below):
 And paste it to the Client ID field in the YTM application.
 - Client secret – To create it, follow the steps from these pictures below:
 Once the Client secret is created, copy the Value: And paste it to the Client secret field in the YTM application.
 - Scope – We already have predefined scope values in the YTM application:
 Which we need to confirm in Microsoft Azure (as in the picture below):
 After you add permissions, it should be displayed as below:
 - Now, you need to set Token configuration in Microsoft Azure and choose the Optional claims:
- And Groups claim by following the steps from the image below: Once you have set all claims, you can continue filling in the mandatory fields in the YTM application.
- Username attribute – We already have predefined values in the YTM application.
- Email attribute – We already have predefined values in the YTM application.
- First name attribute – We already have predefined values in the YTM application.
- Last name attribute – We already have predefined values in the YTM application.
- Role code attribute: There is a predefined code – ‘ATT’ which shouldn’t be changed. With that setting, all users that sign in using Open ID will get a Student role.
If you wish to modify the role mapping yourself, you can utilize the role code from the relevant role in the Roles and permissions tab to create a new OpenID configuration or update the existing one. Alternatively, if you require a different role mapping, please provide us with additional information regarding the desired mapping and the properties on which it should be based. We will then offer guidance on how to set it up. - Callback URL – The data that we integrate into Microsoft Azure by following these steps:

- And paste the Callback URL from the YTM application: into the Microsoft Azure application:


 Which we need to confirm in Microsoft Azure (as in the picture below):


After adding all the mandatory fields, click the Save button to save the configuration. 
Student’s perspective
Students can choose to sign in with the newly created OpenID: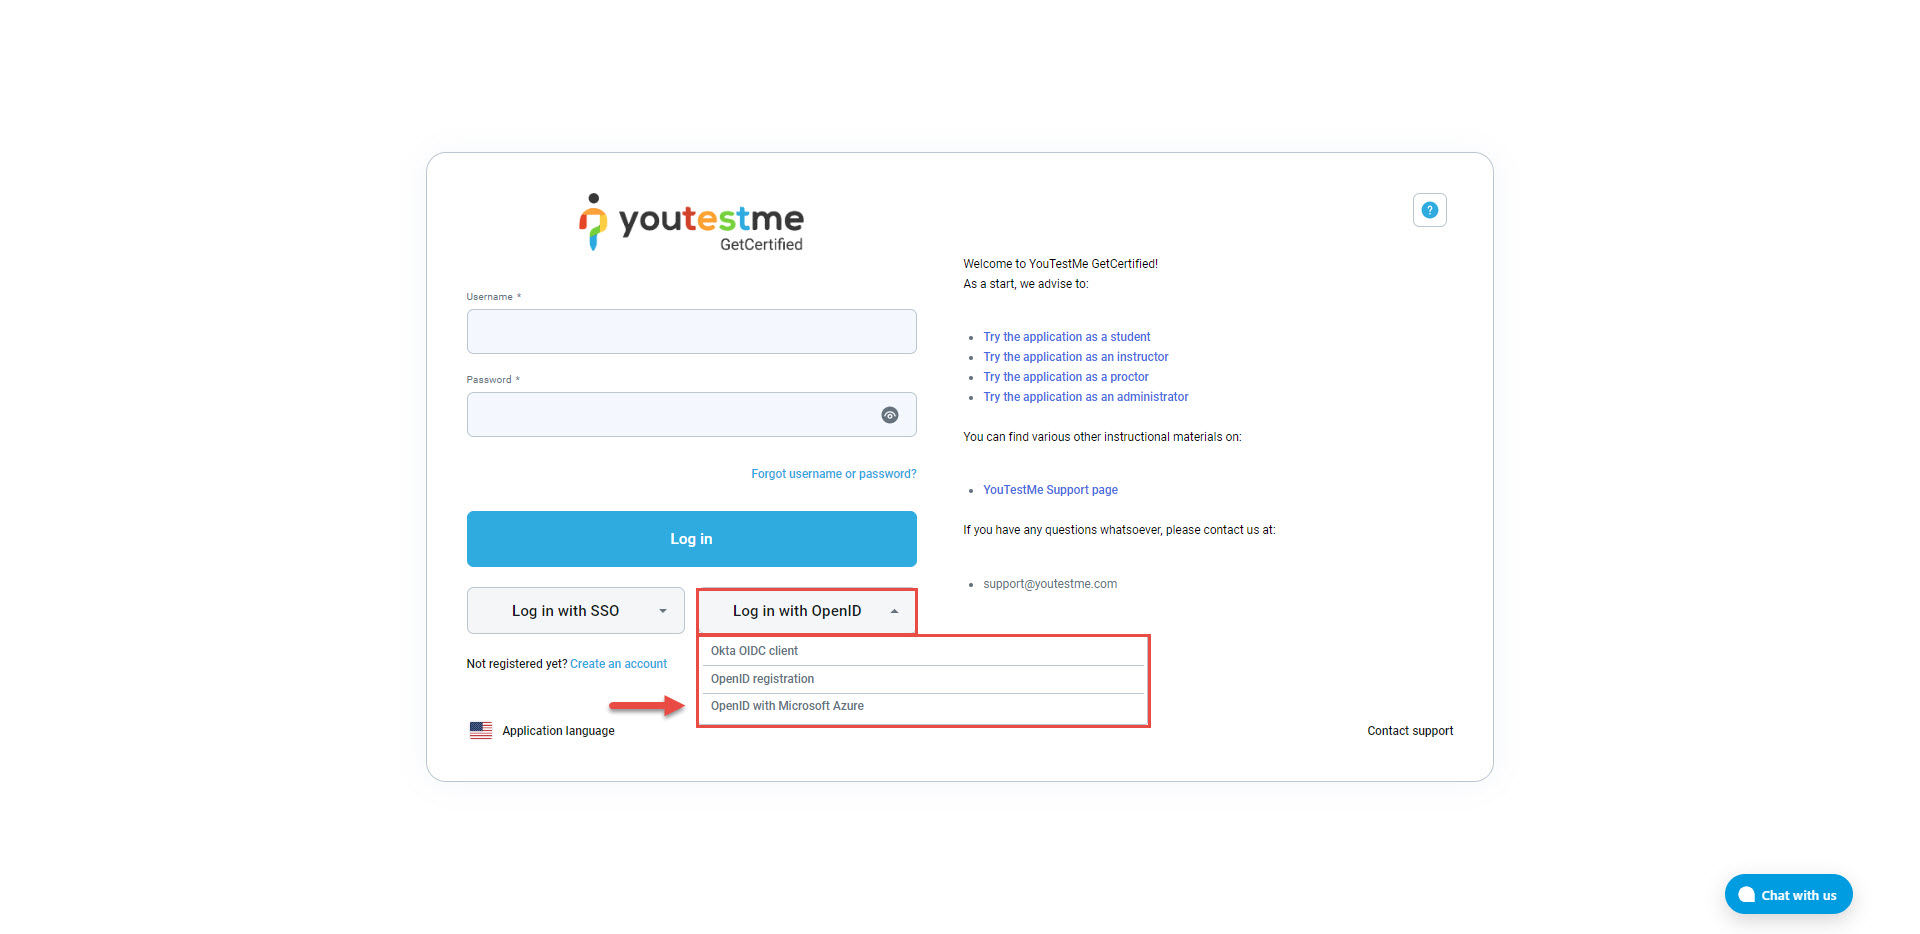
These are the first-time login steps:  Use the Authenticator application to confirm the process:
After successfully completing the validation steps, you will be directed to the YTM application.
NOTE: Please contact our support team at support@youtestme.com if you have trouble configuring your OpenID configuration.
For more related instructional materials, please visit:


