
Article verified for Release 15.2 on April 14, 2025.
YouTestMe GetCertified integrates seamlessly with conferencing tools such as Webex, Skype, Google Meet, Zoom, and others. This integration offers a cost-effective alternative to professional proctoring, enabling real-time, remote examination monitoring.
This article presents a comprehensive guide on setting up a test proctored using different meeting tools.
Organizing a Testing Session Proctored with Webex
- From the main menu, select Tests and navigate to Manage Tests.
- Select the desired test by clicking on its name, or create a new test by clicking the New Test button. For detailed instructions on creating a test, please refer to this article.
- Navigate to the Testing Sessions tab, click the New Testing Session button, and follow this article the instructions
- In the Proctoring Settings section, choose “Proctoring using conferencing tools” from the dropdown. Then select Webex Meeting as your method of monitoring.
Note: When using Webex as the meeting type, the following time constraints apply to the session configuration:
- The session end time cannot be set before the current date and time.
- The session end time cannot be set before the session start time.
- The duration between the start and end times must be at least 10 minutes.
- The duration between the start and end times cannot exceed 24 hours.
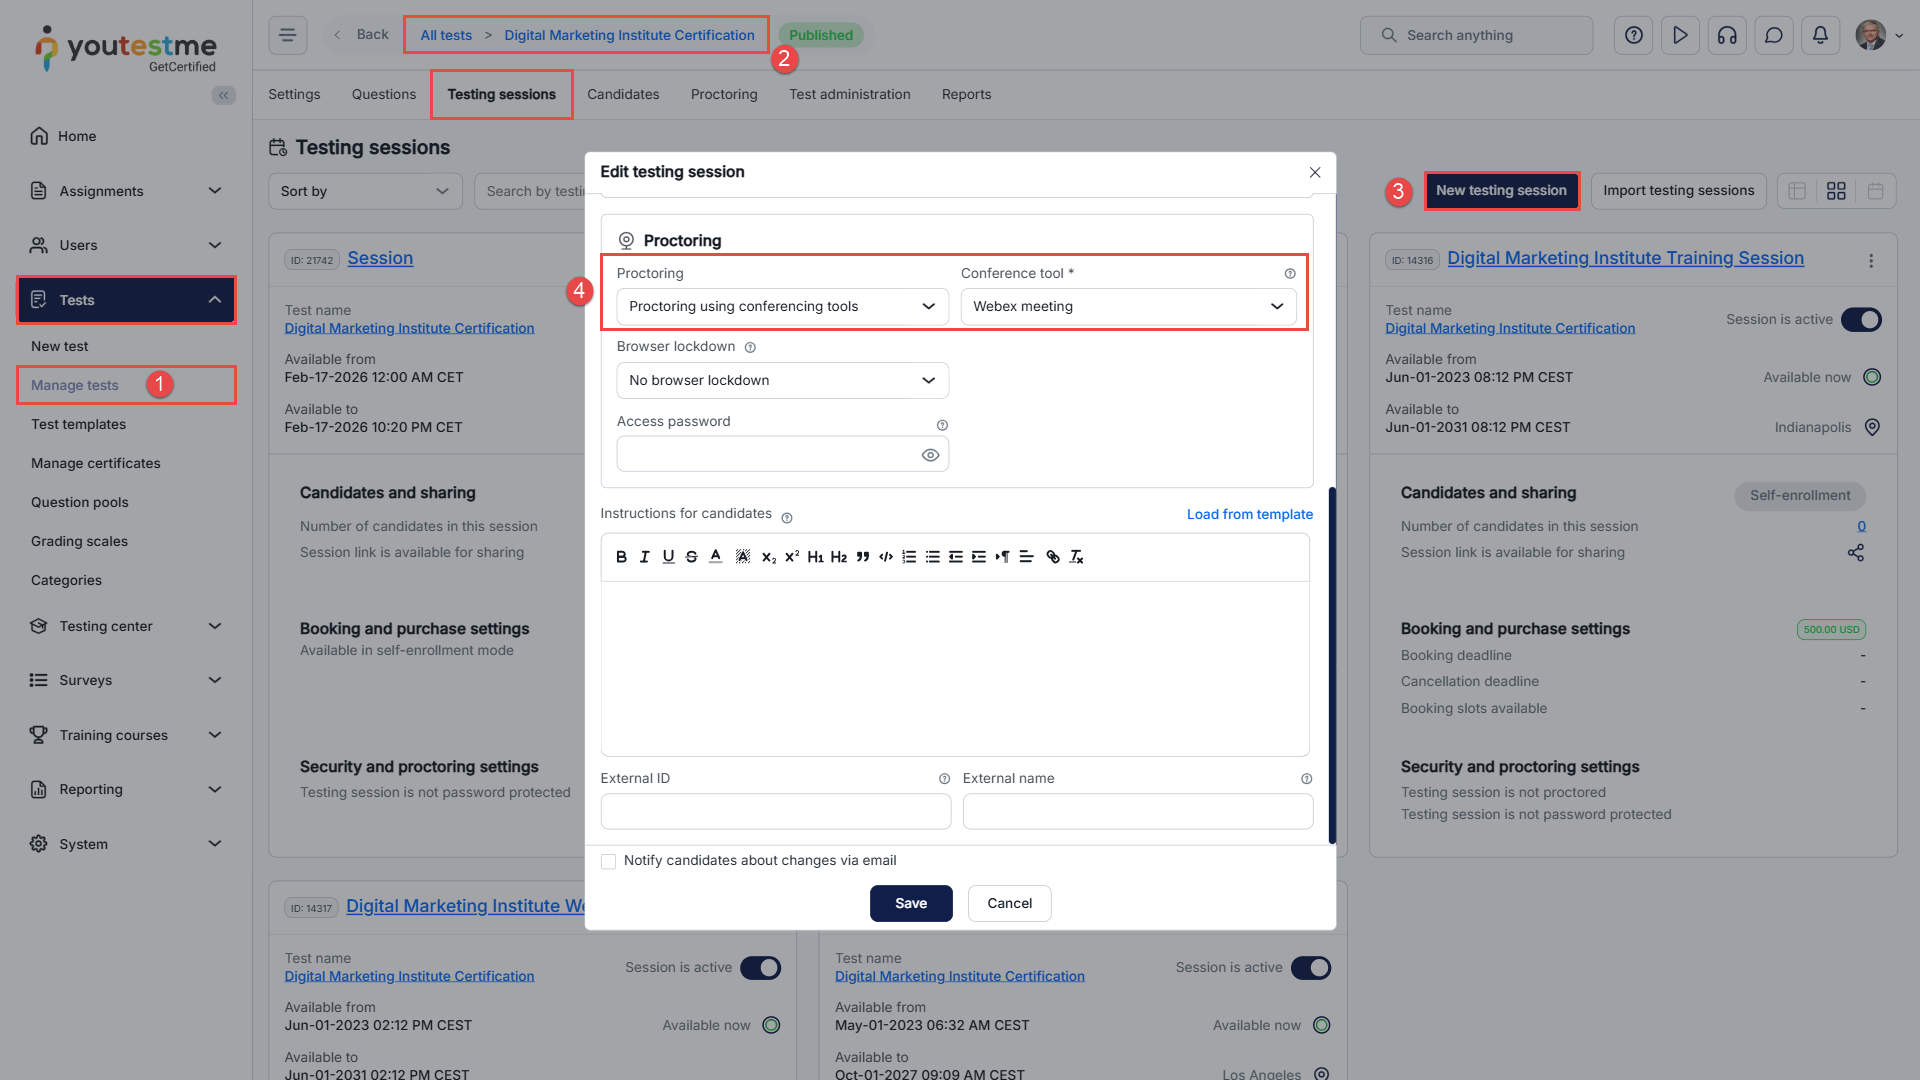
Once the session has been created, you’ll need to assign proctors who will be responsible for monitoring candidates during the exam through Webex Meeting. Please refer to this article on how to assign proctors.
Proctor’s perspective
Accessing the meeting link
When the session becomes available, the assigned proctor should access the Webex meeting by navigating to Testing Sessions under the Testing Center and following the steps below:
- Click the Kebab menu.
- Select Settings.
- Click View Testing Session.
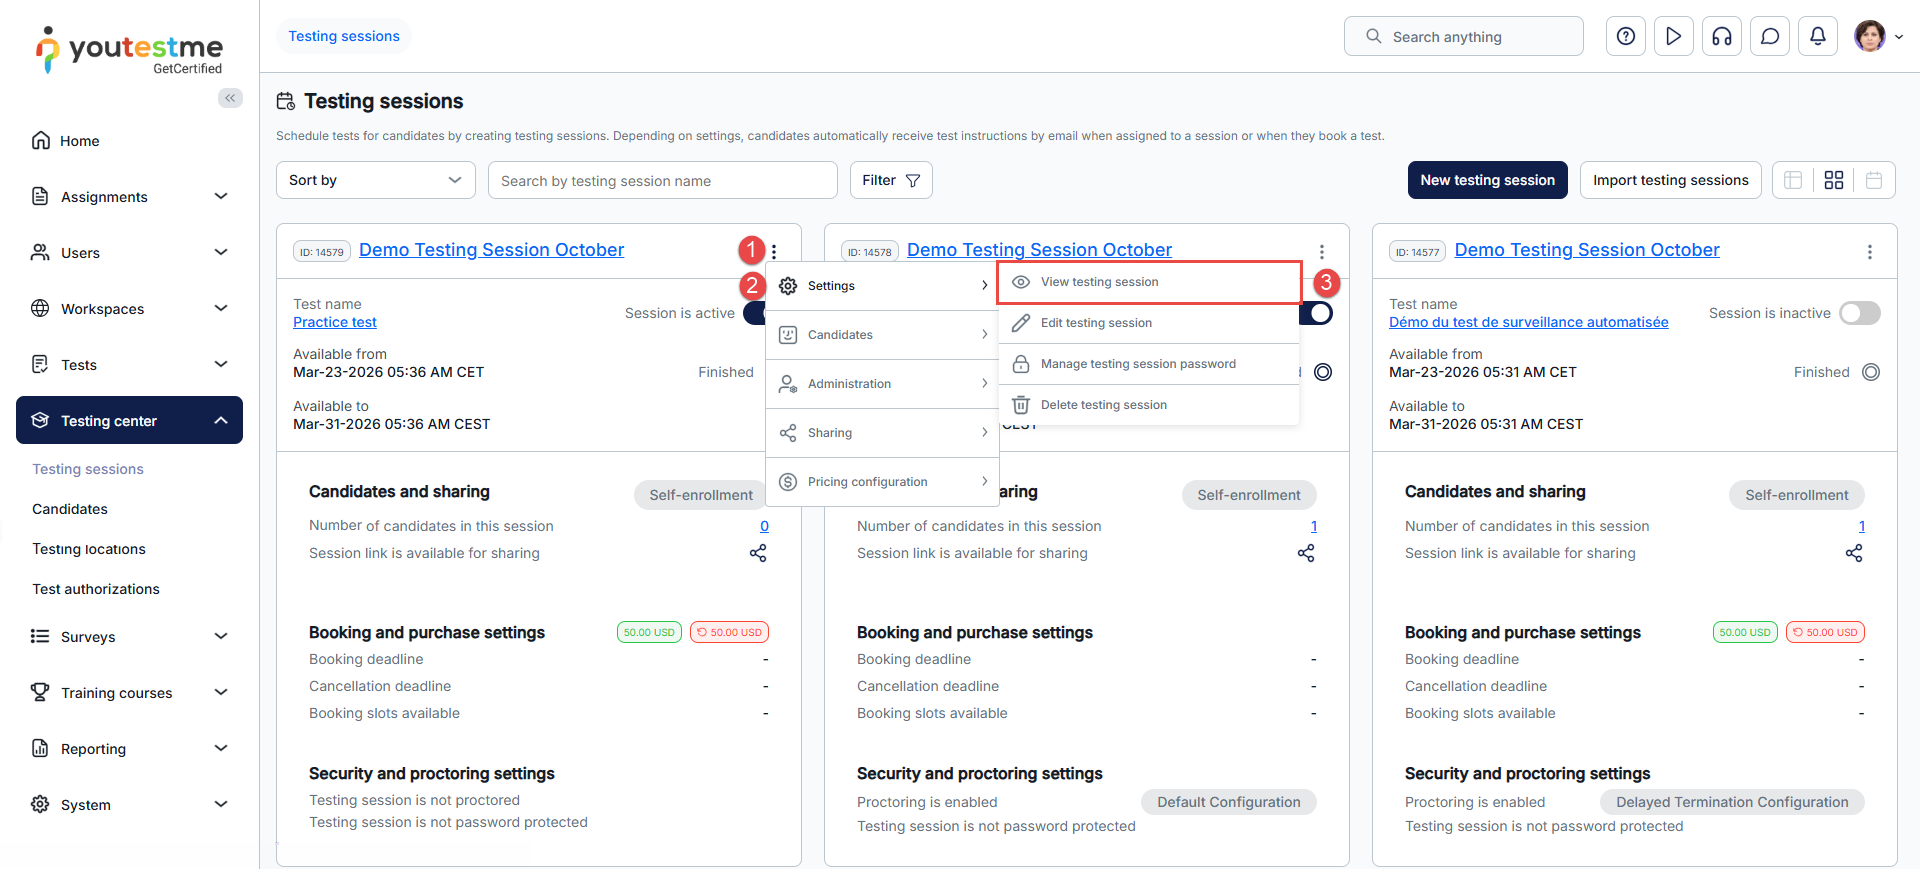
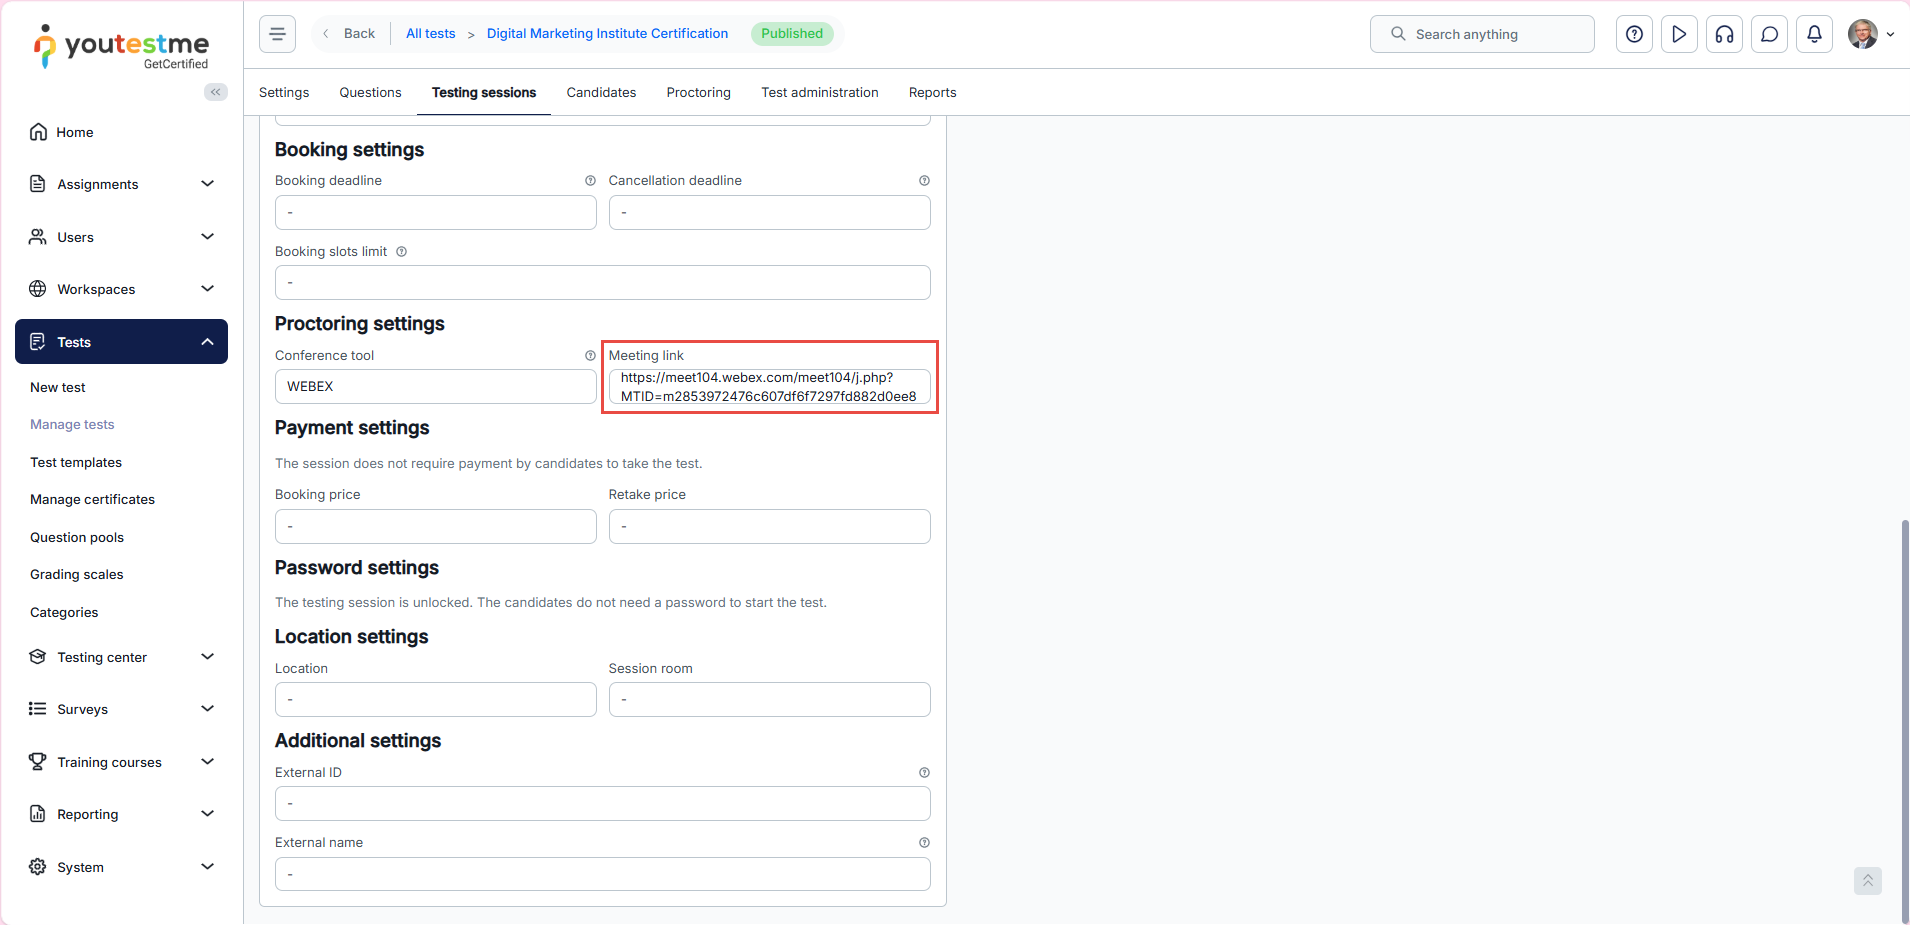
In the session details, scroll down to the Proctoring Settings section and use the automatically generated Webex meeting link to join the session.
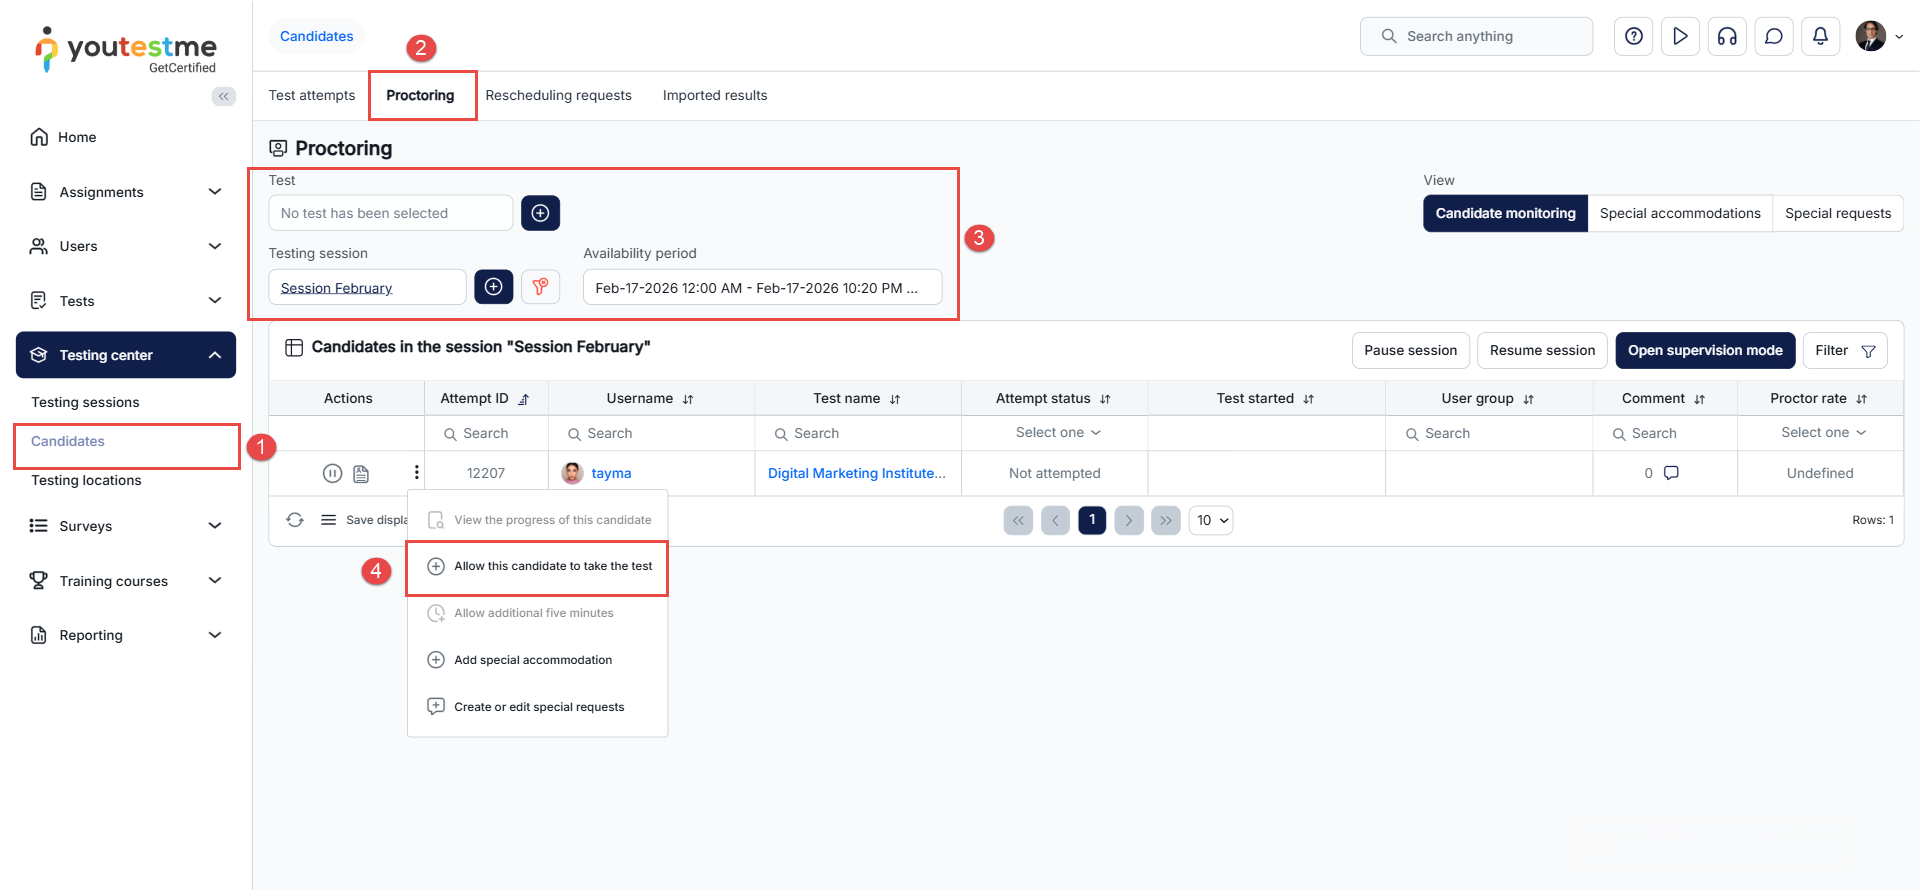
Allowing Candidates to start the test
By default, test-takers will be able to join the Webex meeting, but they will not be able to start the test until the proctor manually allows them to proceed. This ensures that each candidate has joined the meeting and is ready before beginning the exam.
To allow a test-taker to start the test:
- From the main menu, go to Testing Center and navigate to the Candidates module.
- Select the Proctoring tab.
- Use the filters to narrow the candidate list by selecting the test name and testing session.
- In the Actions column, click the three dots (⋮) next to the candidate’s name and select “Allow this candidate to take the test.”
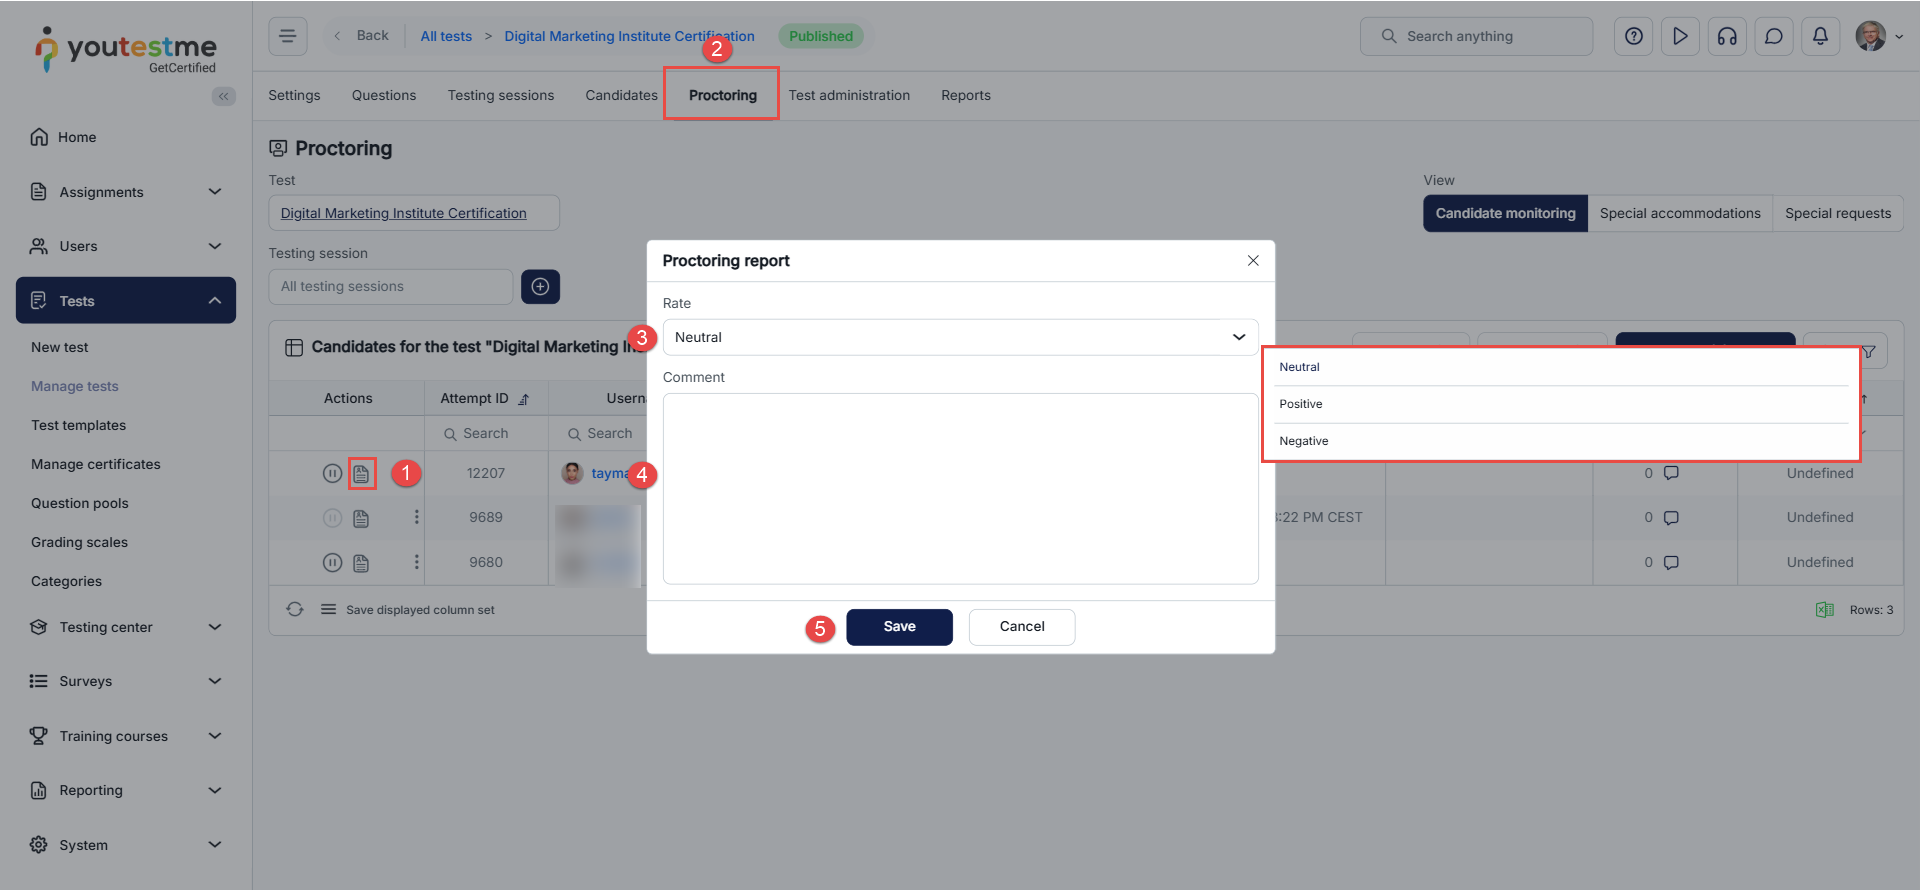
Writing the Proctoring Report
Once the candidate finishes the test, the proctor can provide a rating and write a summary report describing the candidate’s behavior during the exam.
To write the report:
- Navigate to the Proctoring tab.
- In the Actions column, click the Report button next to the candidate’s name.
- Select a rating:
- Positive – No violations were observed.
- Neutral – The attempt requires review or discussion.
- Negative – The candidate did not comply with exam rules.
- Enter a summary describing the candidate’s conduct during the session.
- Click Save to submit the report.
Candidate’s Perspective
When the session becomes available, test-takers will see a “Join Meeting” button that allows them to join the Webex meeting.
Once the proctor grants permission, a “Start” button will appear, enabling the candidate to begin the exam.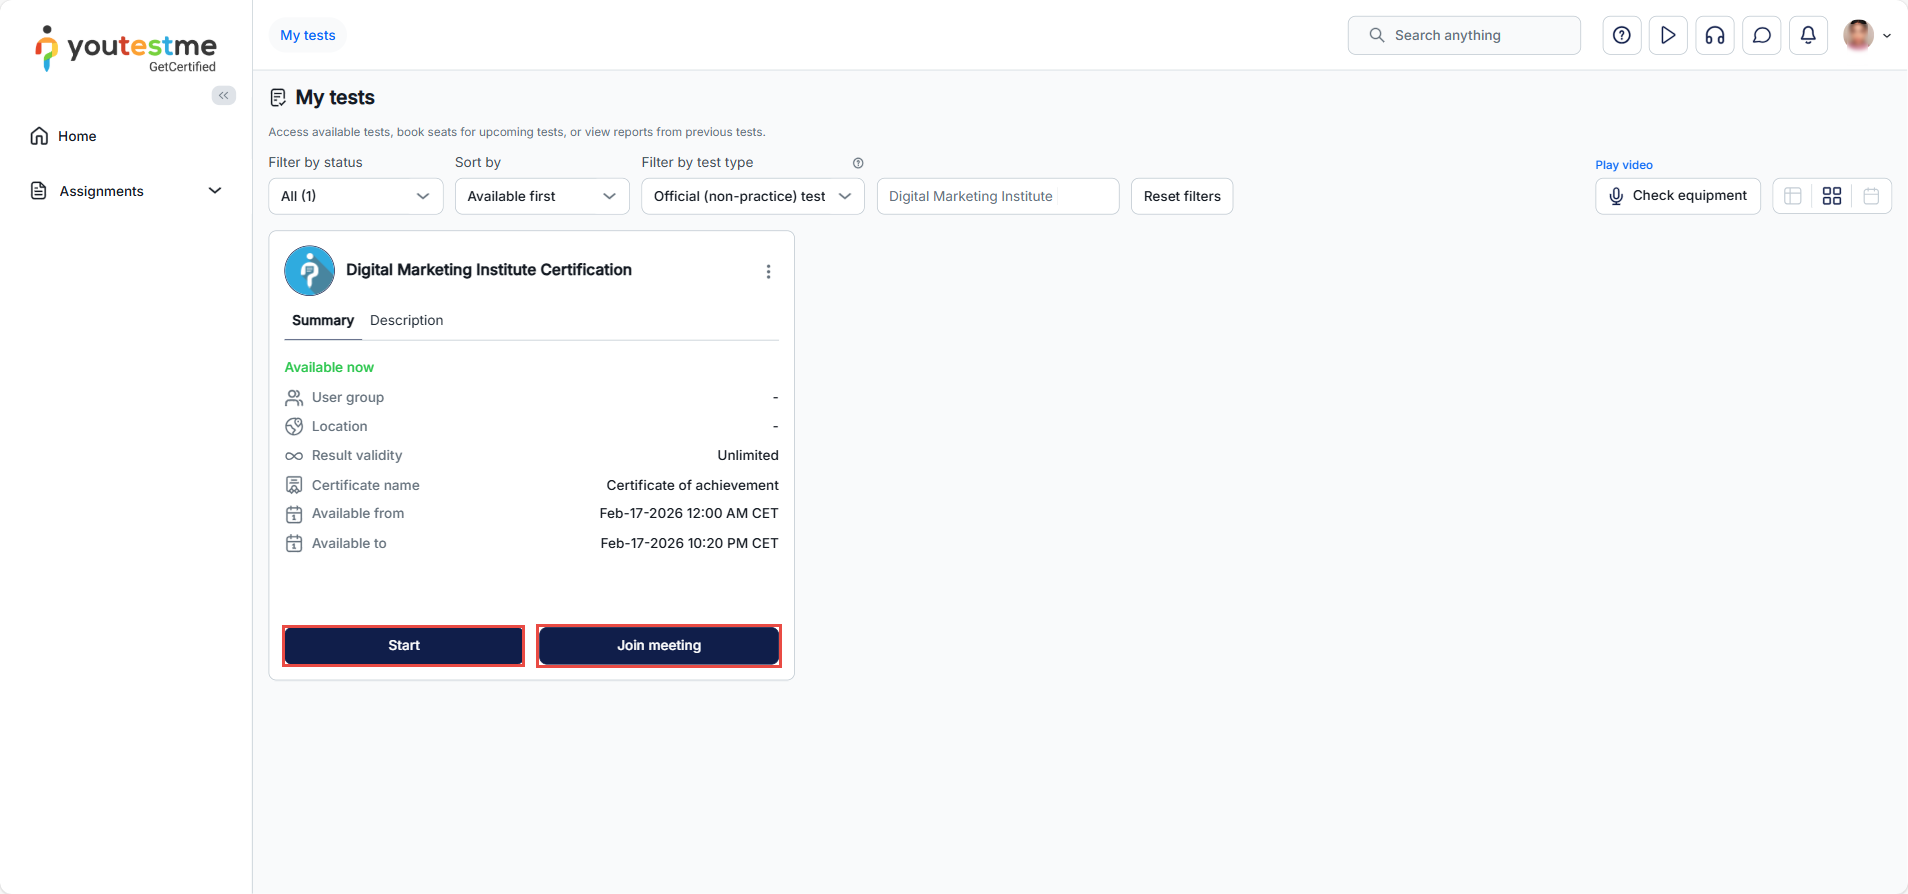
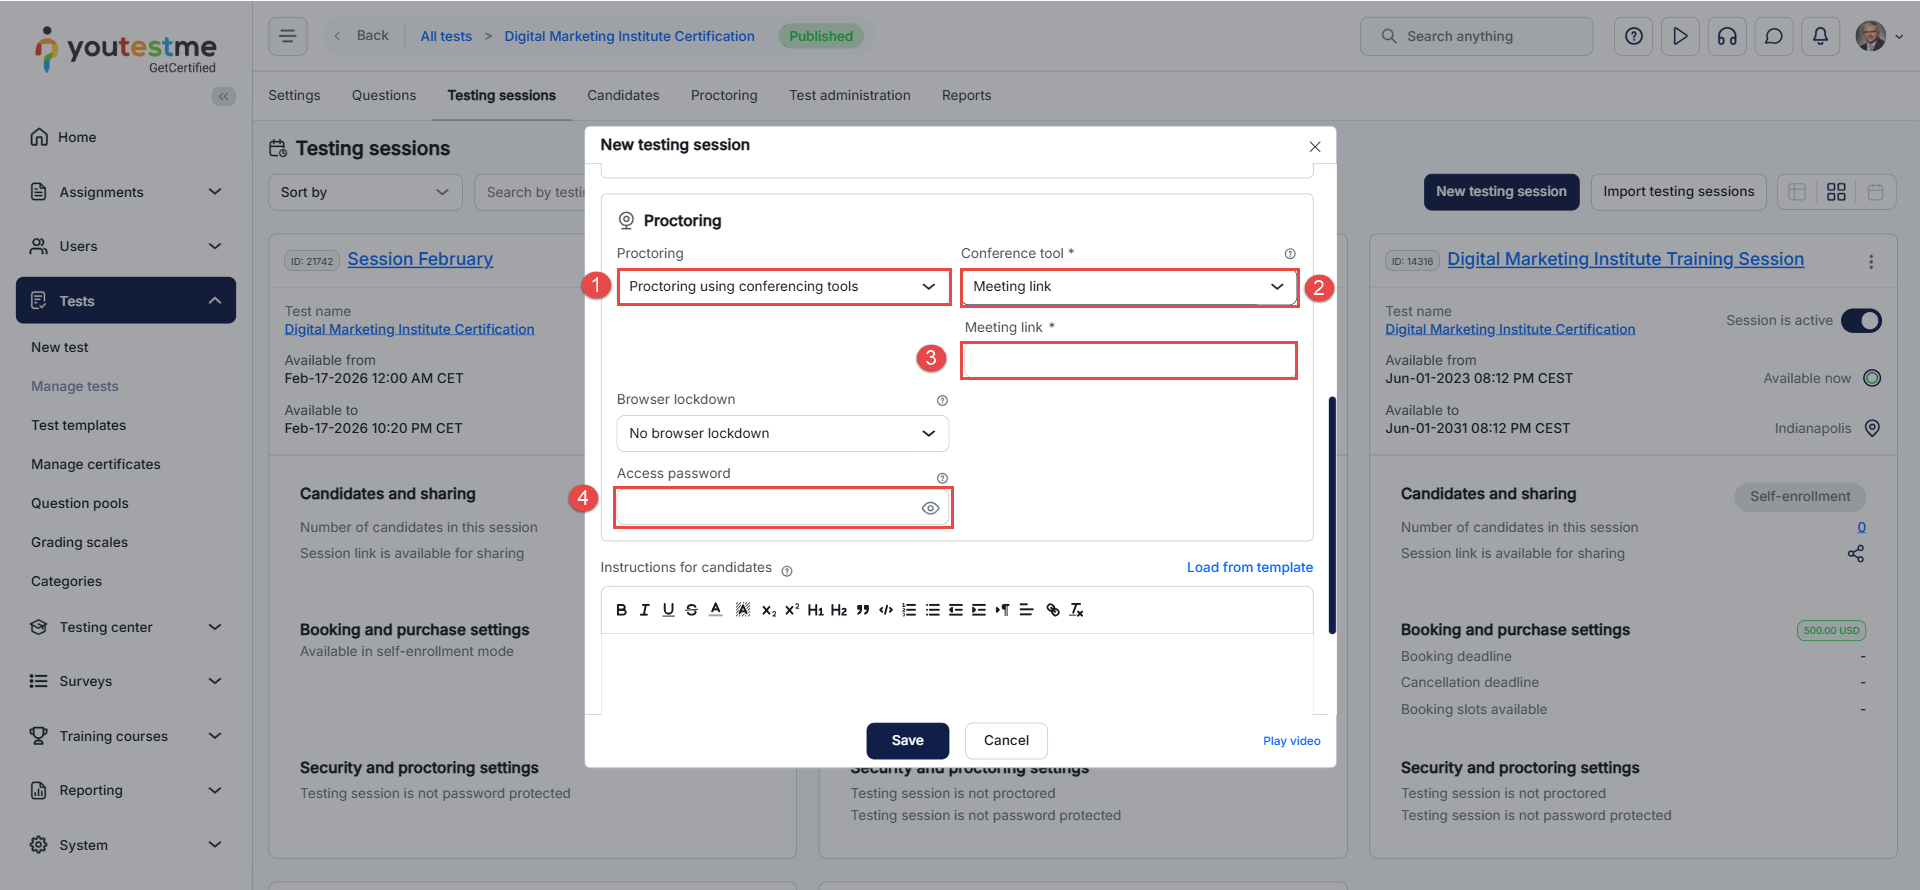
Organizing a Proctored Testing Session Using other Meeting tools
In the New Session dialog box, define the session name, availability, and access method. Then, in the Proctoring Settings section:
- From the dropdown menu, select “Proctoring using conferencing tools.”
- Choose “Meeting Link” as the monitoring method.
- Paste the meeting link into the designated field.
- To restrict access, enter a password to lock the session. This password should be communicated to test-takers in advance.
For more information about proctoring using meeting tools, please see:
