
Article verified for Release 15.1 on December 11, 2025.
This article explains all available methods for sharing access to a testing session via email, including Guest Links, Direct Links, Candidates’ Direct Links, and configuring email templates with the direct link variable.
1. Sharing a Test Using the Guest Link
A Guest Link allows candidates to access the test without creating or using an existing user profile.
The system automatically creates a guest user profile for every attempt.
How to Copy the Guest Link
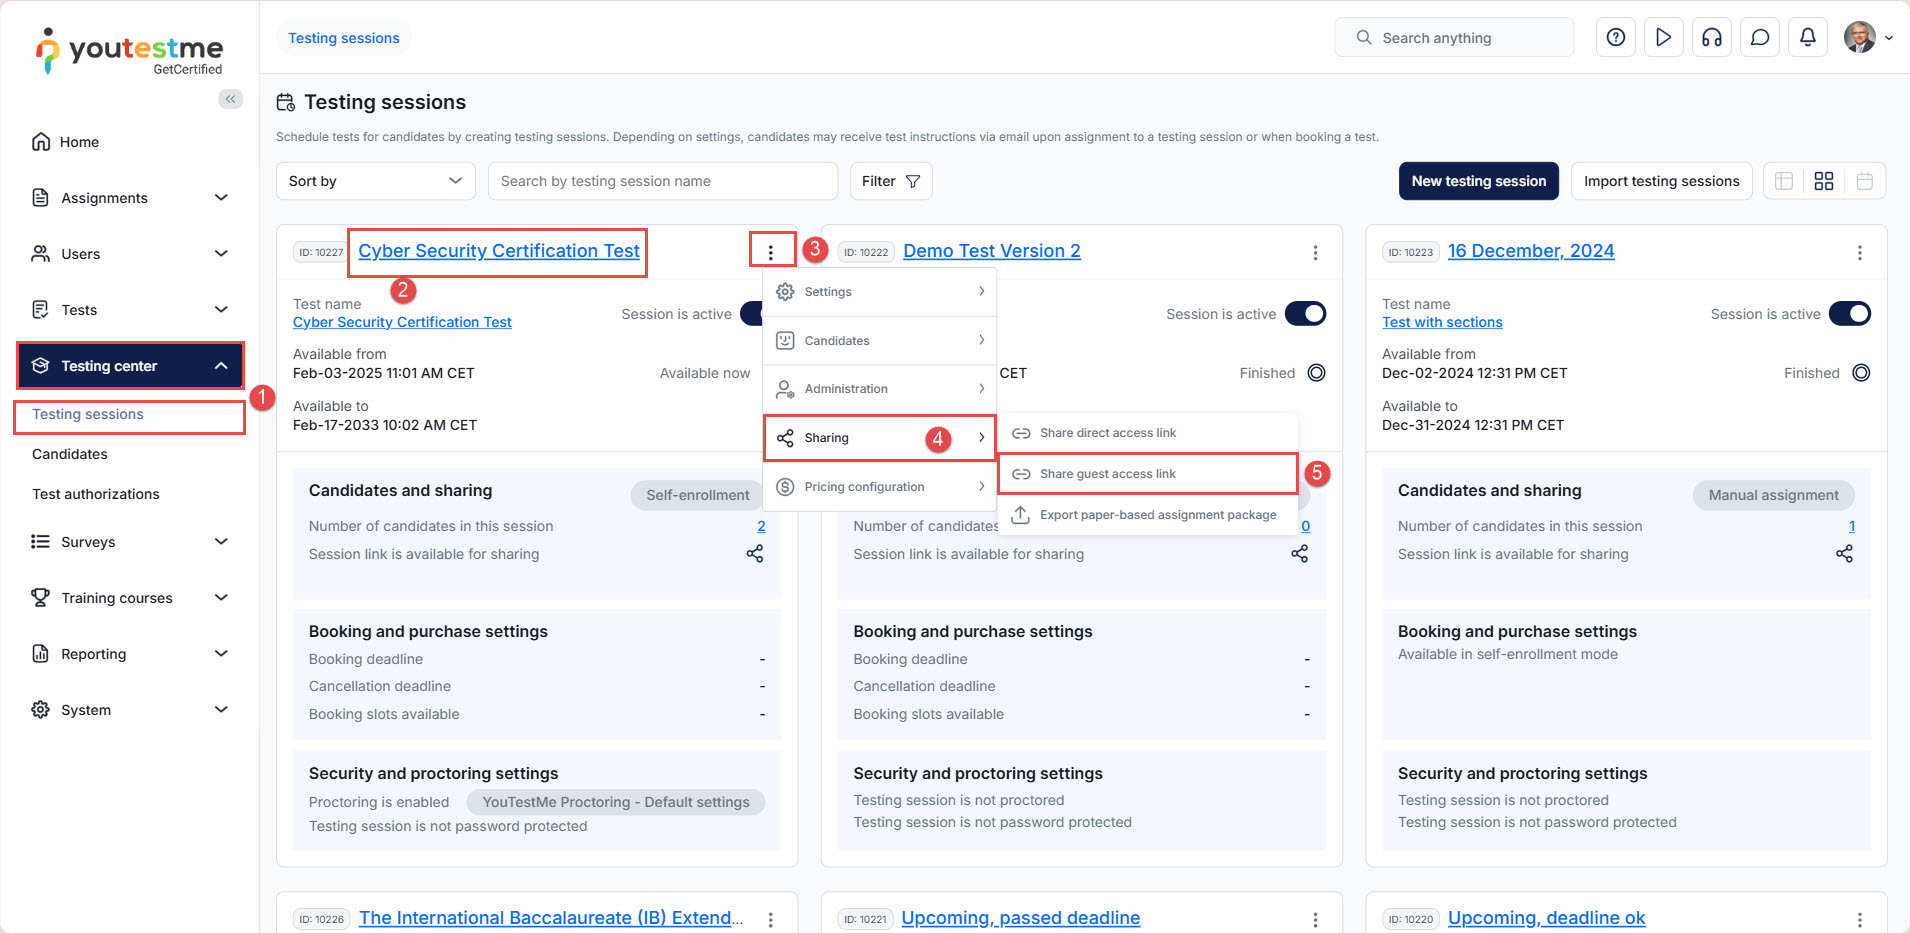
- Navigate to Testing center, then Testing sessions.
- Open the desired testing session.
- Click on the three vertical dots (⋮).
- Select Sharing options.
- Click the Share guest access link.

-
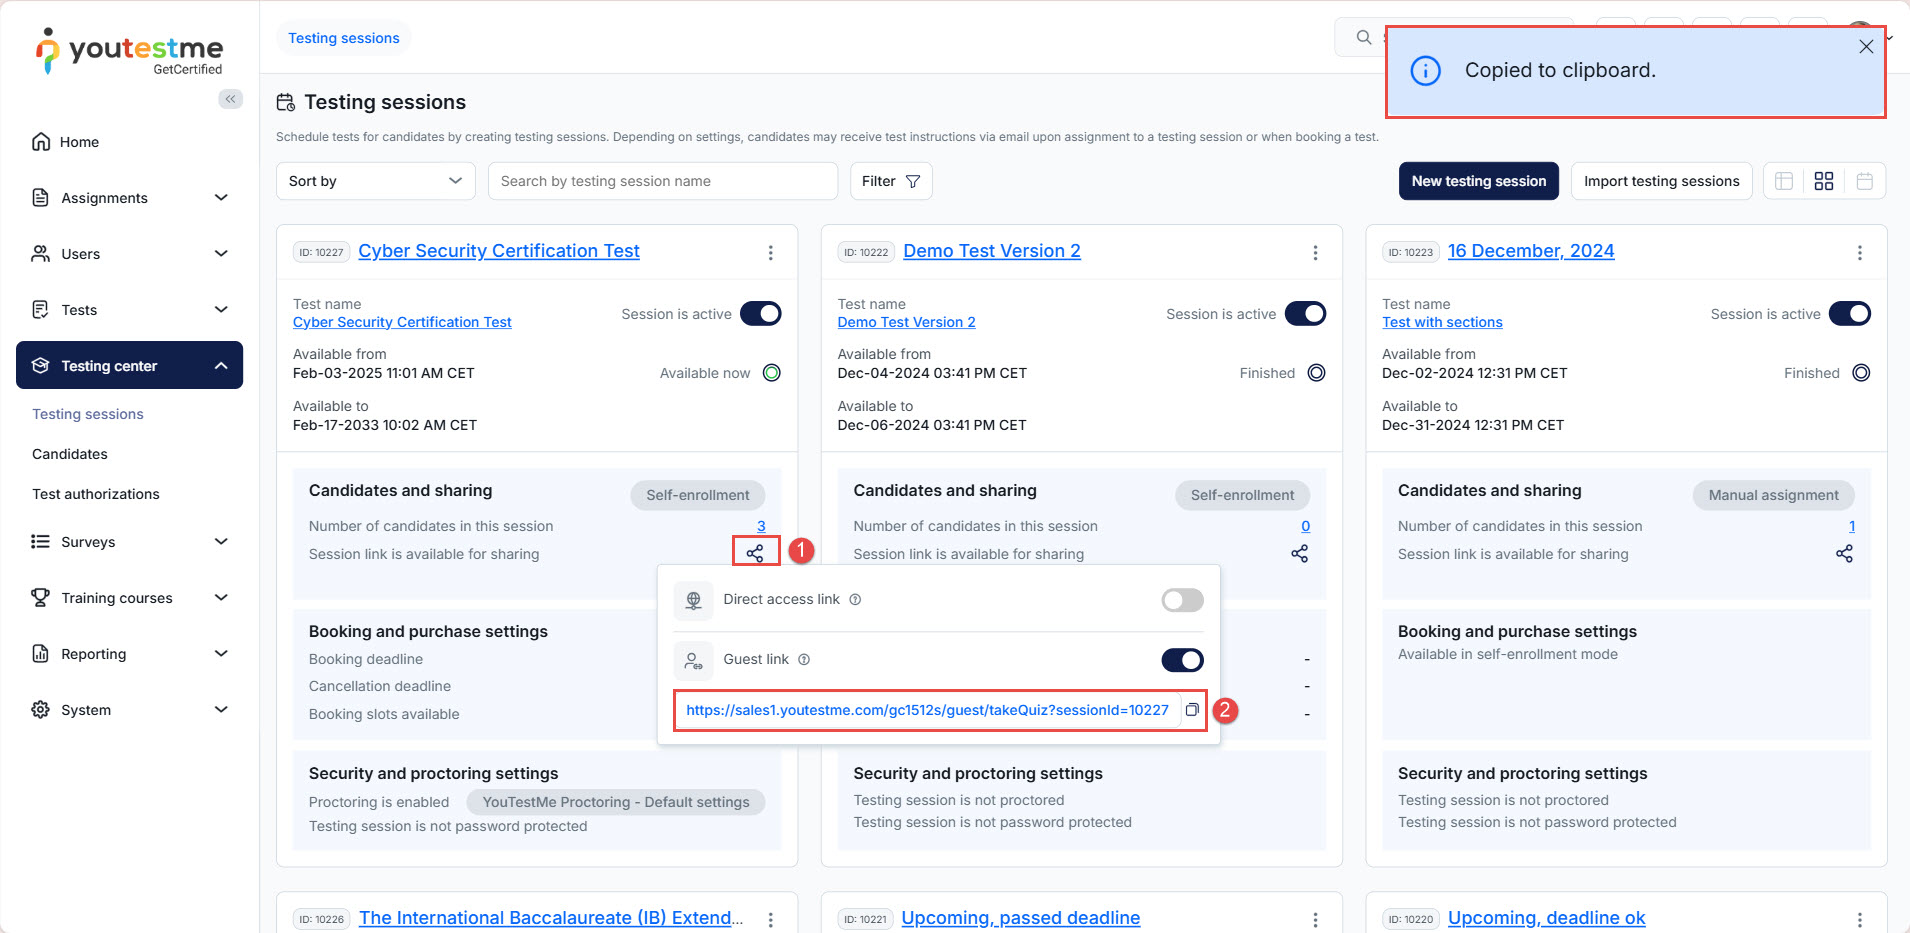
Click the Copy guest access link to clipboard to share it via email or any messaging platform.

Alternative method:
-
From the testing session page, click Share.
-
Copy the Guest link from the panel that appears.
Notes about Guest Users
-
In System preferences, administrators can choose whether guest users are deleted immediately after logging out or remain in the application. For more information, refer to the following article.
-
Guest links are ideal for:
-
Quick assessments.
-
Anonymous surveys.
-
Large-scale open-access sessions.
-
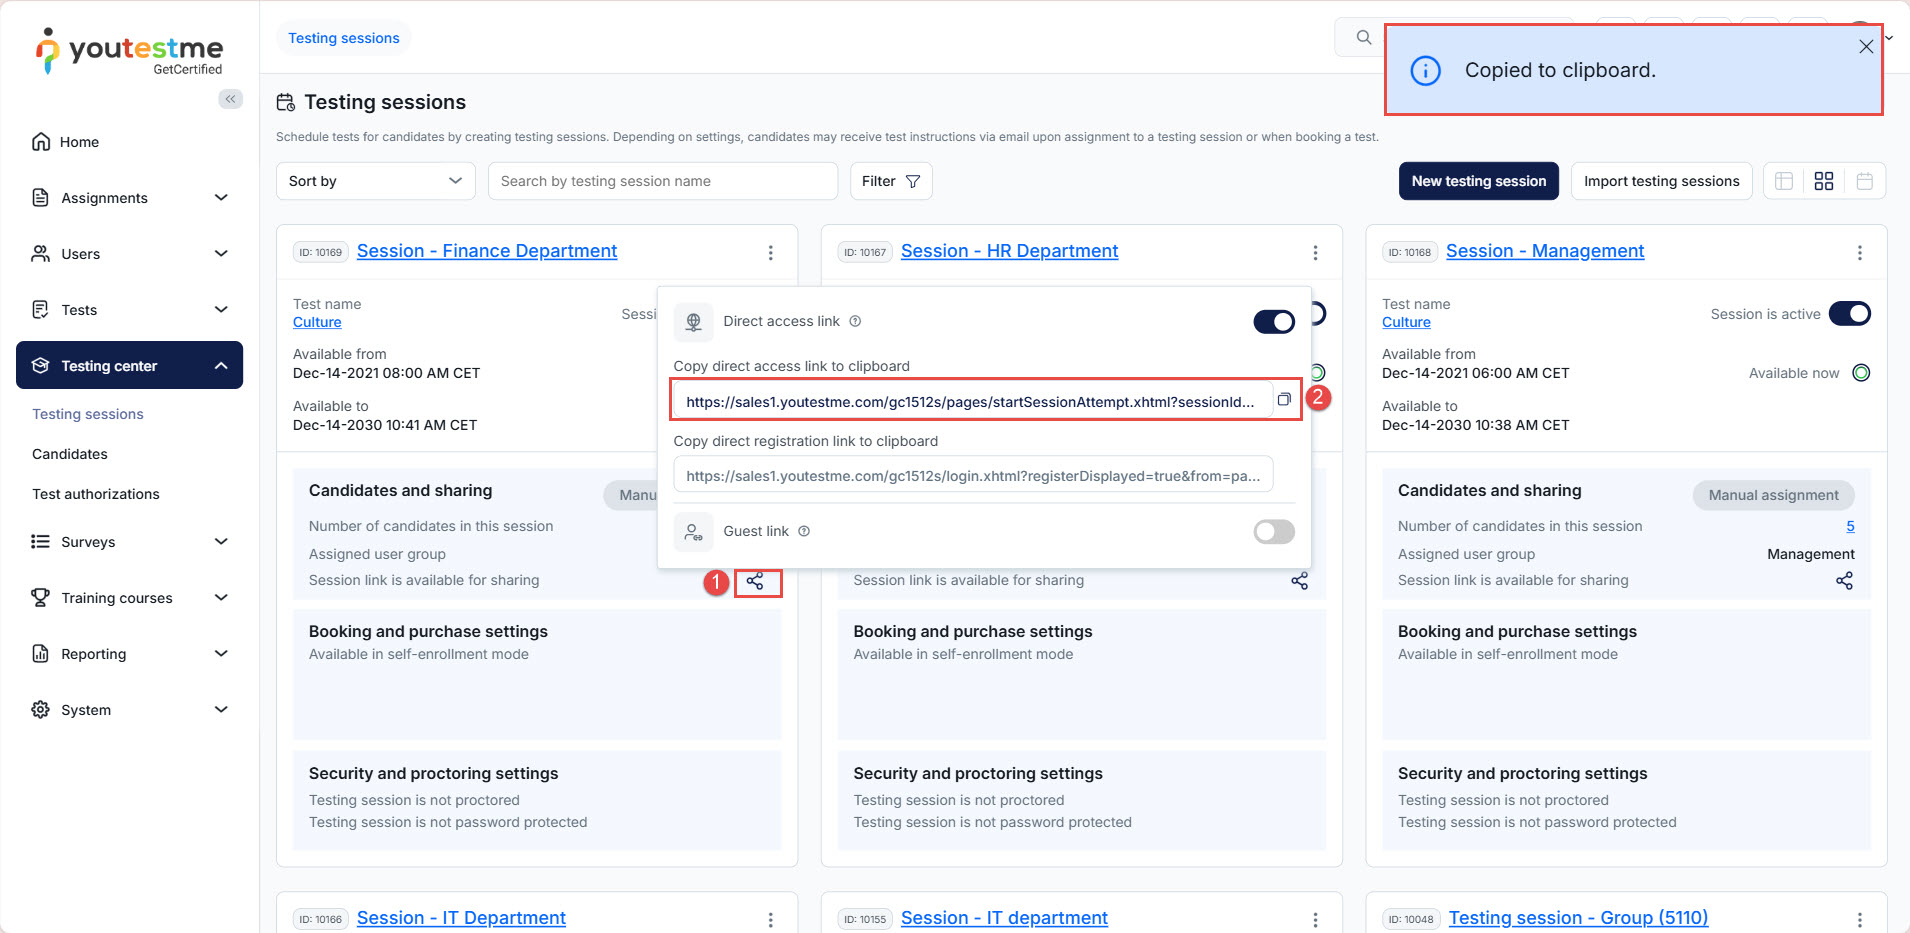
2. Sharing a Test Using the Direct Link
A Direct Link provides access to a specific testing session after the candidate logs in.
This method ensures secure access for registered users.
How to copy the Direct Link
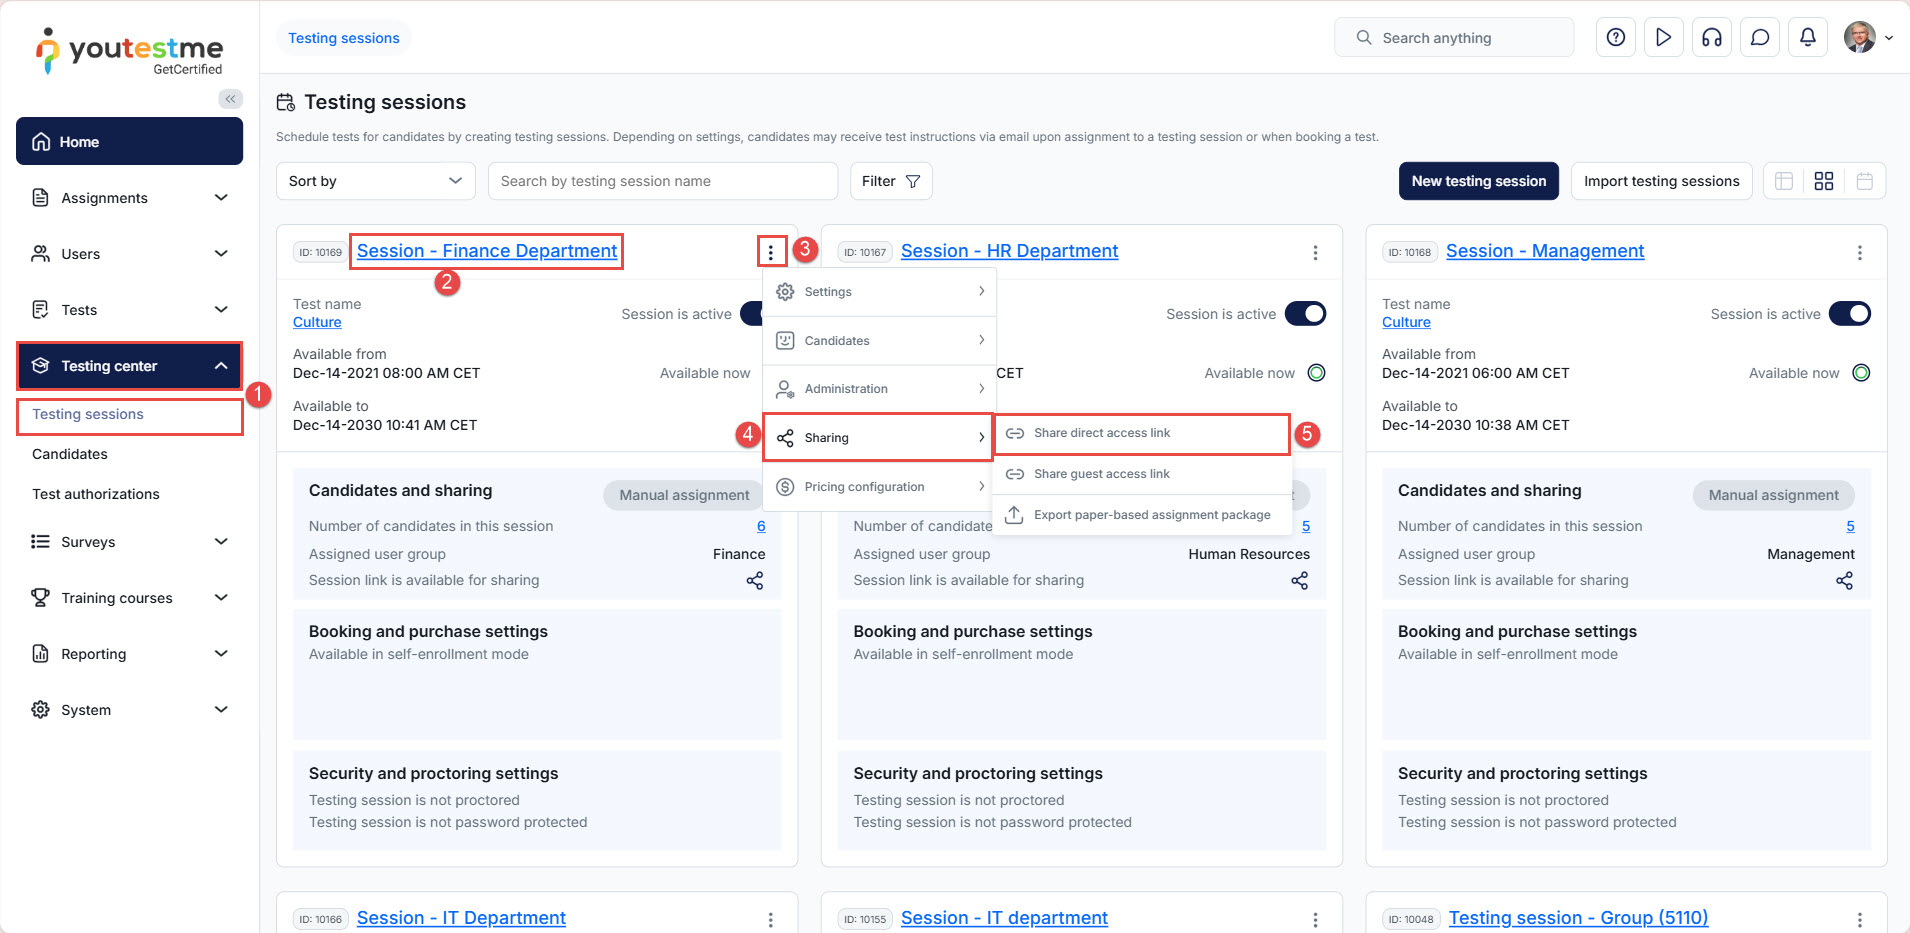
- Navigate to Testing center, then Testing sessions.
- Open the desired session.
- Click on the three vertical dots (⋮).
- Click on the Sharing options.
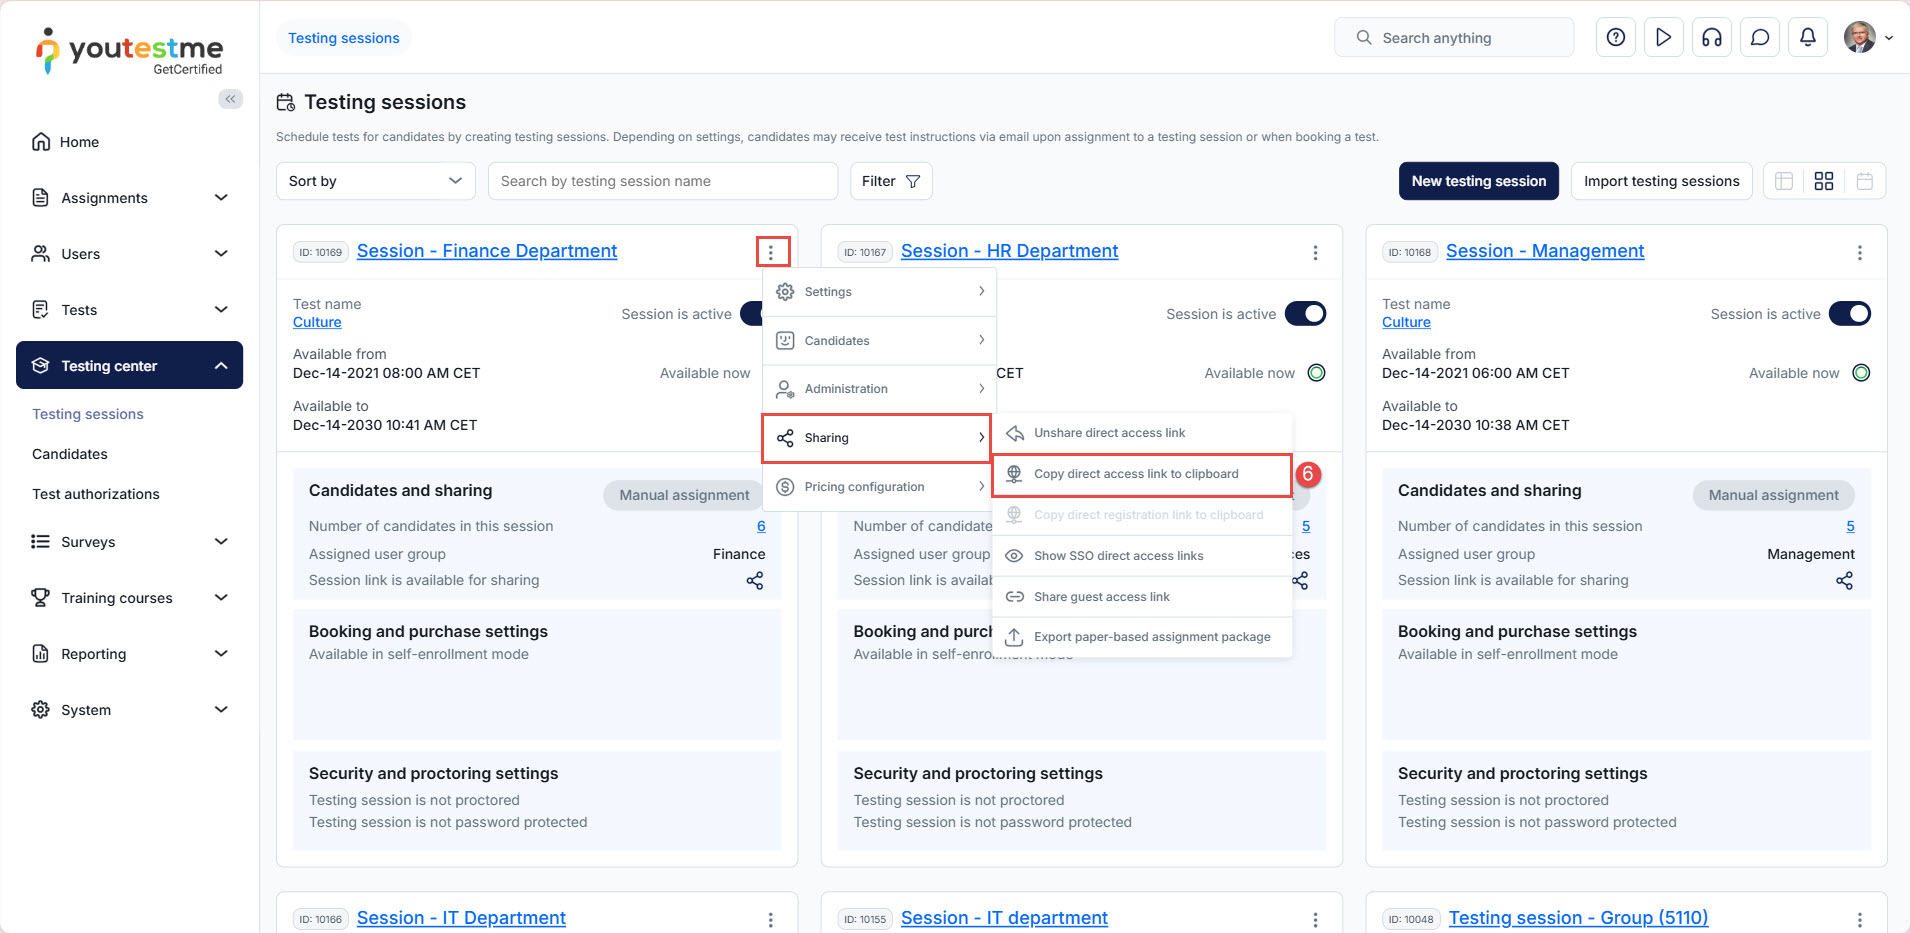
- Click to Share the direct access link.
- Click Copy guest access link to clipboard.
Alternative method
-
Click Share from the session page.
-
Copy the Direct link from the displayed panel.
Use cases
-
Internal tests for registered employees/candidates.
-
Secure access requiring authentication.
-
Controlled testing environments.
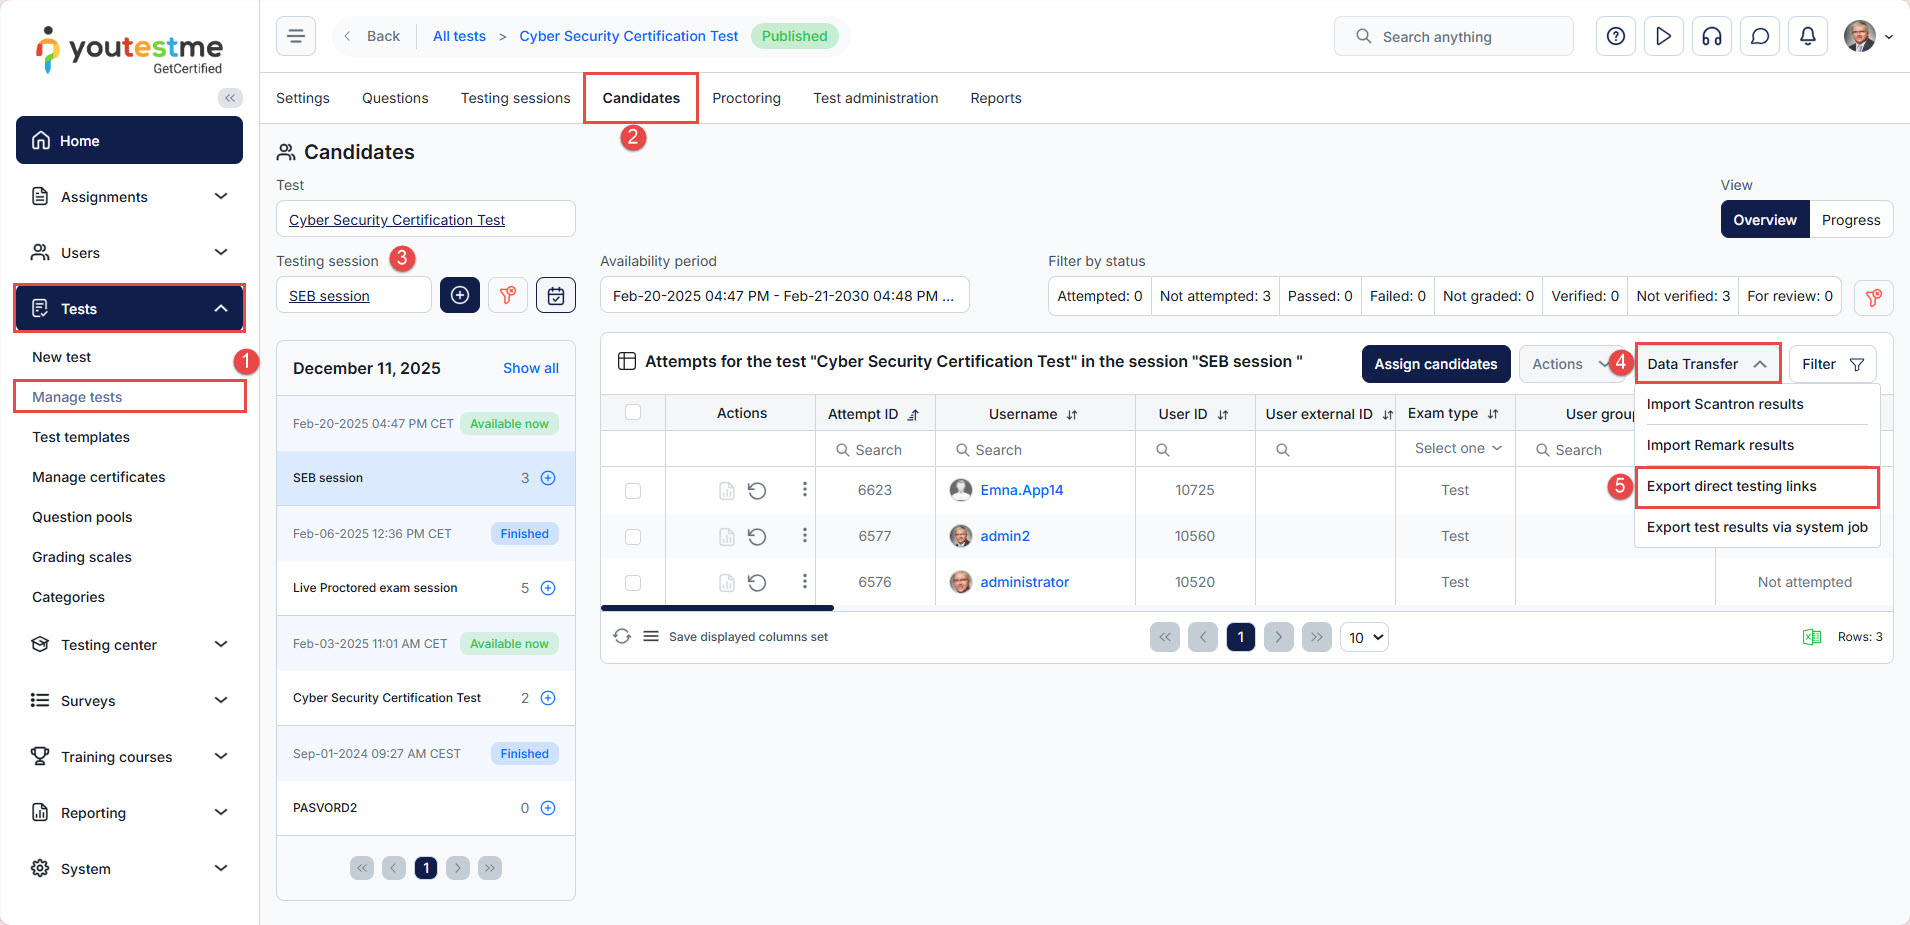
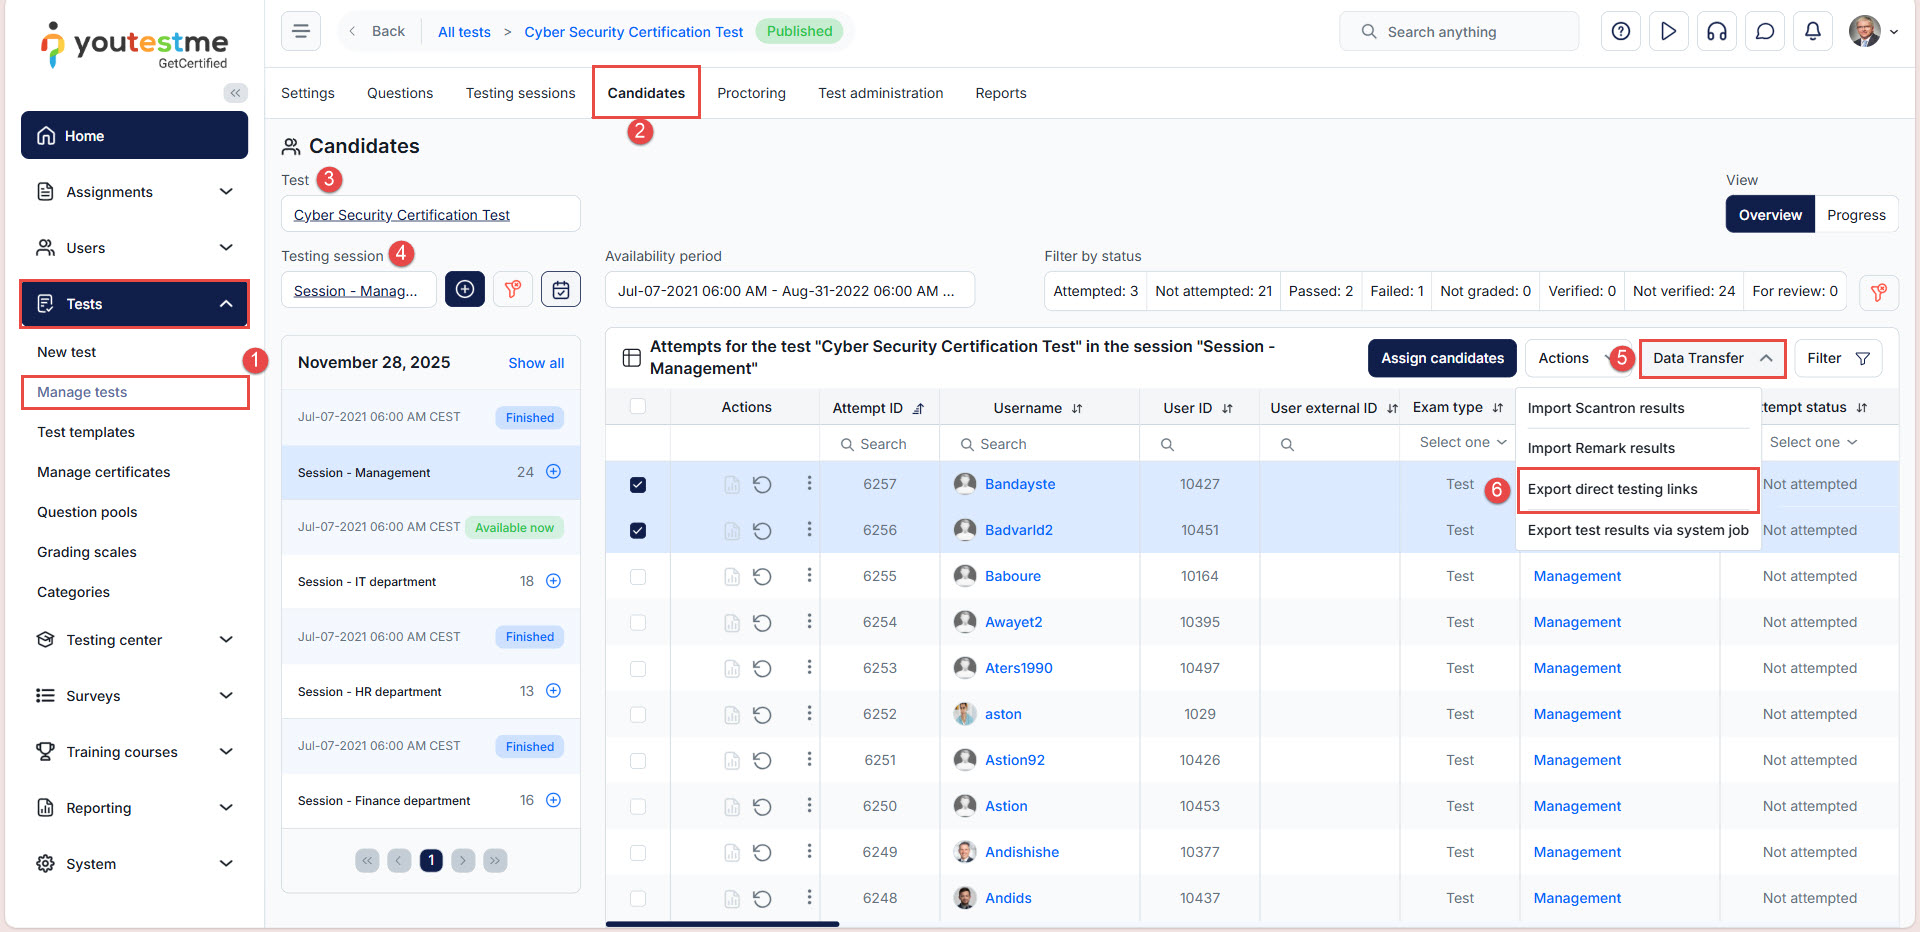
3. Downloading Candidates’ Direct Links
Each registered candidate assigned to a test has a personal direct link that allows them to start the test without logging in. The system automatically generates these links.
This is extremely useful for:
-
Mass test distribution.
-
Online certification tests.
-
Sending personalized invitations.
How to download all candidates’ direct links
-
Go to Tests, then Manage tests
-
Open the desired test and click the Candidates tab.
- Select the desired Testing session.
-
Click the Data Transfer button.
-
Select Export direct testing links. The Excel file will download automatically.
-
External User ID
-
YTM Username
-
Email
-
Personal Direct Test Link
You can use the file to send personalized emails manually or via external systems.
-

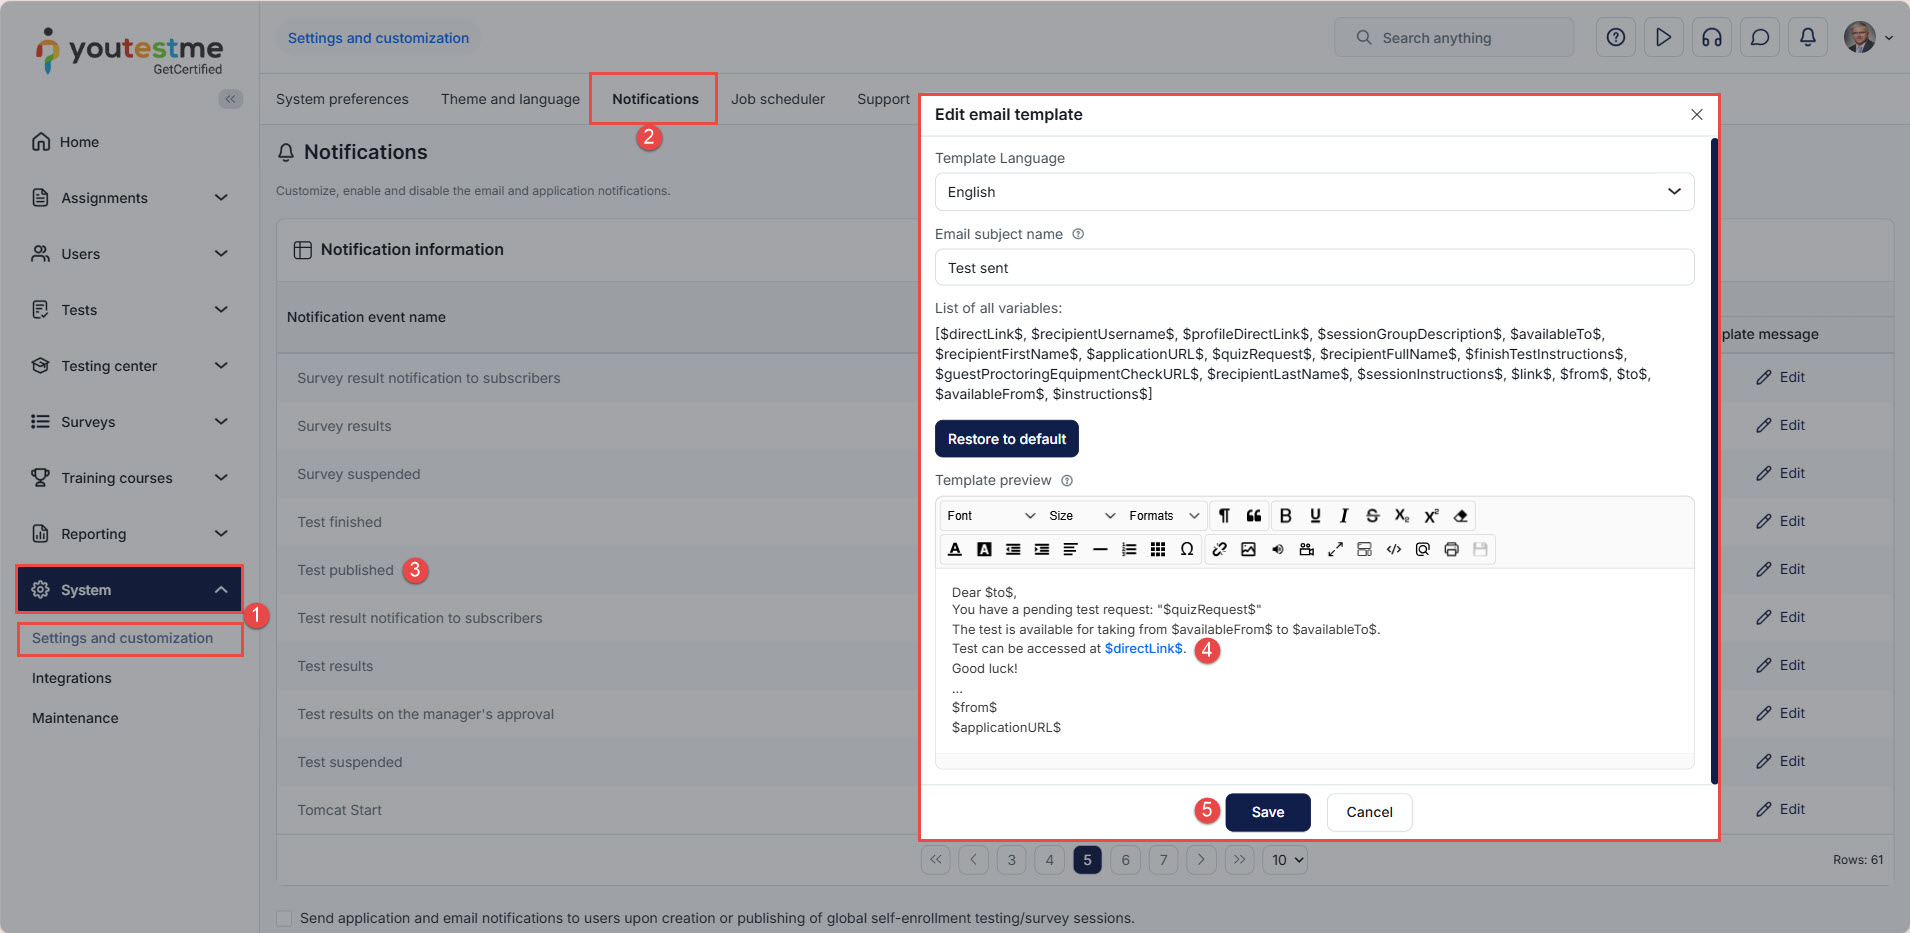
4. Sharing the Test via Email Templates
The system allows you to send automatic email notifications that include test links.
Using the $directLink$ variable
In email templates, you can insert:
$directLink$ — This automatically adds the candidate’s personal test link.
How to configure email notifications
-
Go to System, then Settings and customization.
-
Open the Notifications tab.
-
Locate the template you want to edit (e.g., Test published).
-
Insert $directLink$ where you want the clickable link to appear.
-
Save your changes.
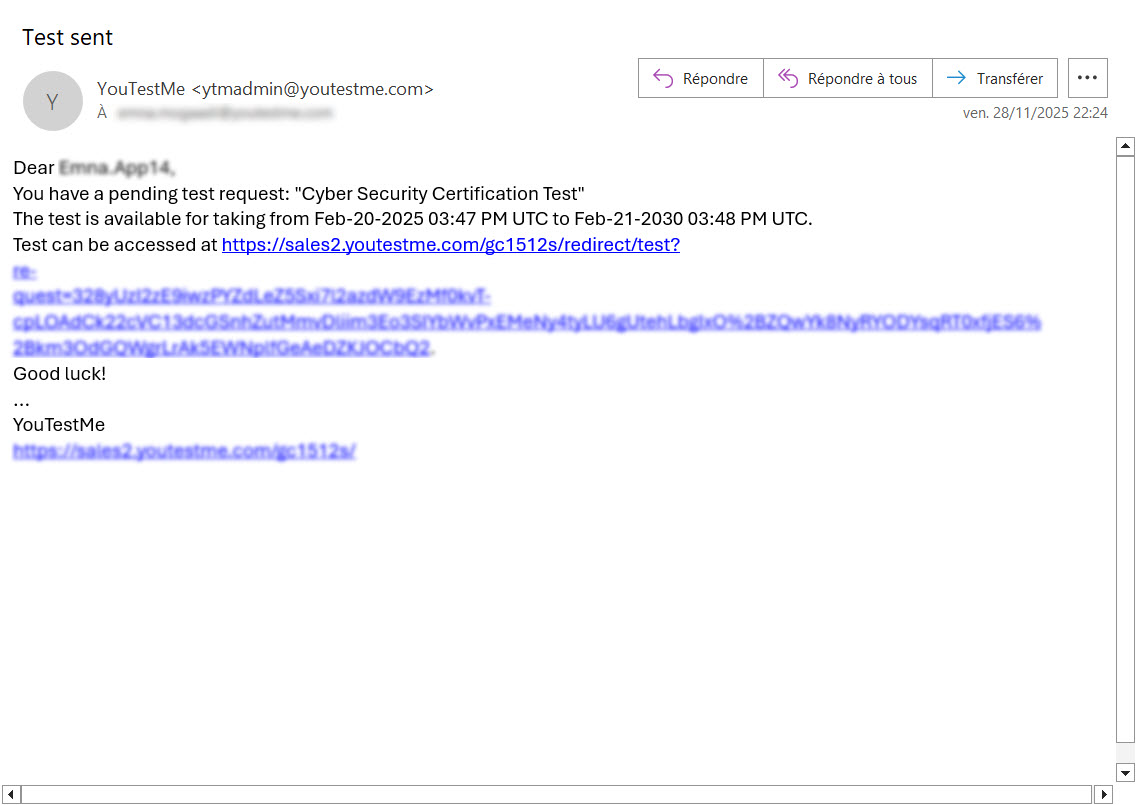
When the notification is sent, each candidate receives an email containing their unique access link, without needing to log in.
For more information on related topics, you may also find these articles helpful:
