YouTestMe GetCertified integrates seamlessly with various conference tools like Webex, Skype, Google Meet, Zoom, and others. This integration offers a cost-effective alternative for professional proctoring, enabling remote real-time examination monitoring.
This article presents a comprehensive guide on setting up a test proctored using different meeting tools.
Organizing a Testing Session Proctored with Webex #
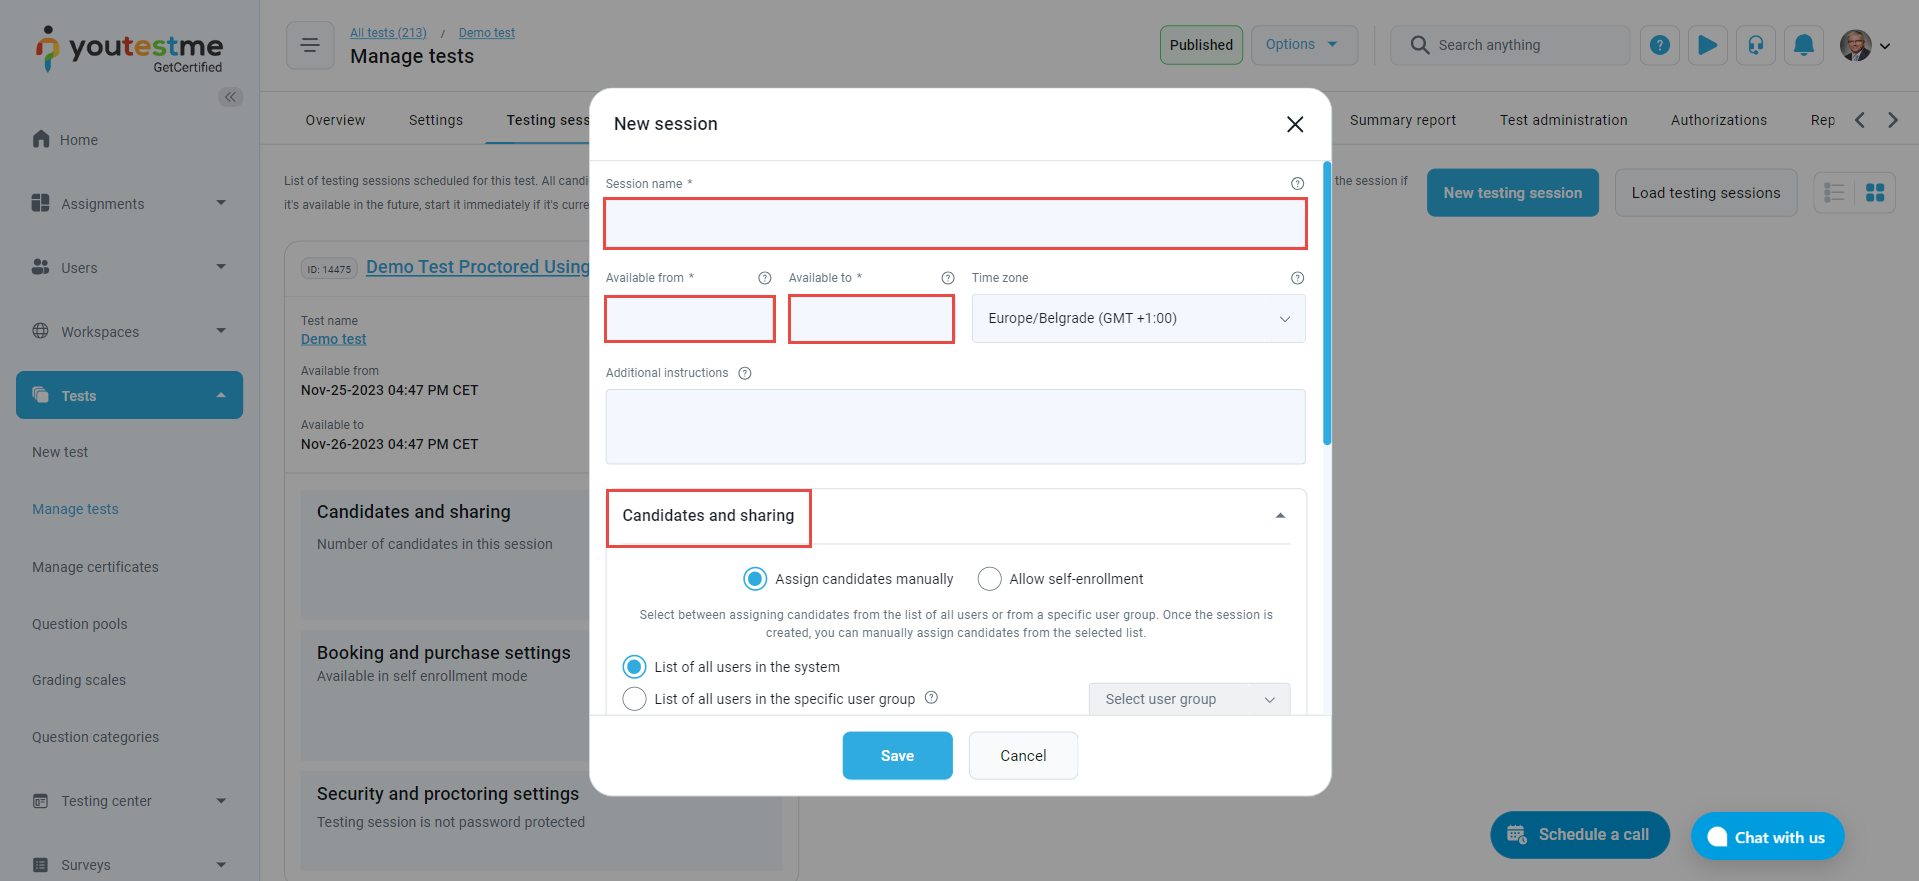
To set up a testing session monitored via Webex and select the Testing center/Testing sessions tab and choose the test you want to monitor using Webex. Click on the New testing session button.
In the New testing session dialog:
- Enter the session name, set its availability, and determine the session access (Manually assign candidates or enable the self-enrollment option for them to access the test independently).
- Select the test for the session.
- In the Proctoring and Password Protection settings, enable the Proctoring using conferencing tools.
- Select the Webex meeting from the Conferencing Tools drop-down menu.
- Webex-proctored sessions can be secured with a Lock feature. Create a password to be shared with candidates to access the exam.
- Once you finish the rest of the settings, click the Save button.
Once you finish creating the session, you can designate proctors to monitor it. Please refer to this article for instructions on assigning proctors to monitor a session.
Joining a Meeting #
Before the testing session, the proctor starts the Webex meeting directly from the testing session page and awaits the candidates to join the meeting.
Starting a Test #
When all candidates join the meeting, the proctor unlocks the testing session, and candidates can start the test.
Testing Session Monitoring #
Proctor monitors the testing session through the detailed event log in the monitoring dashboard, audio, and video recordings from the Webex meeting.
If the proctor notices the suspicious behavior, he can pause multiple candidates’ test attempts to warn them.
Reviewing the Ended Testing Session #
Webex dashboard offers a meeting overview and easy navigation to the suspicious moments.
Registering suspicious behavior #
Proctor marks suspicious activities during or after the testing session in the predefined Excel form, which can be uploaded to YouTestMe and incorporated into reports.
Grading Candidate Behavior #
Organizing a Testing Session Proctored Using Meeting Link #
In the New Session dialogue box, specify the session’s name and availability, and choose the access method in the Candidates and Sharing section (either Self-enrollment or manually assigning candidates).
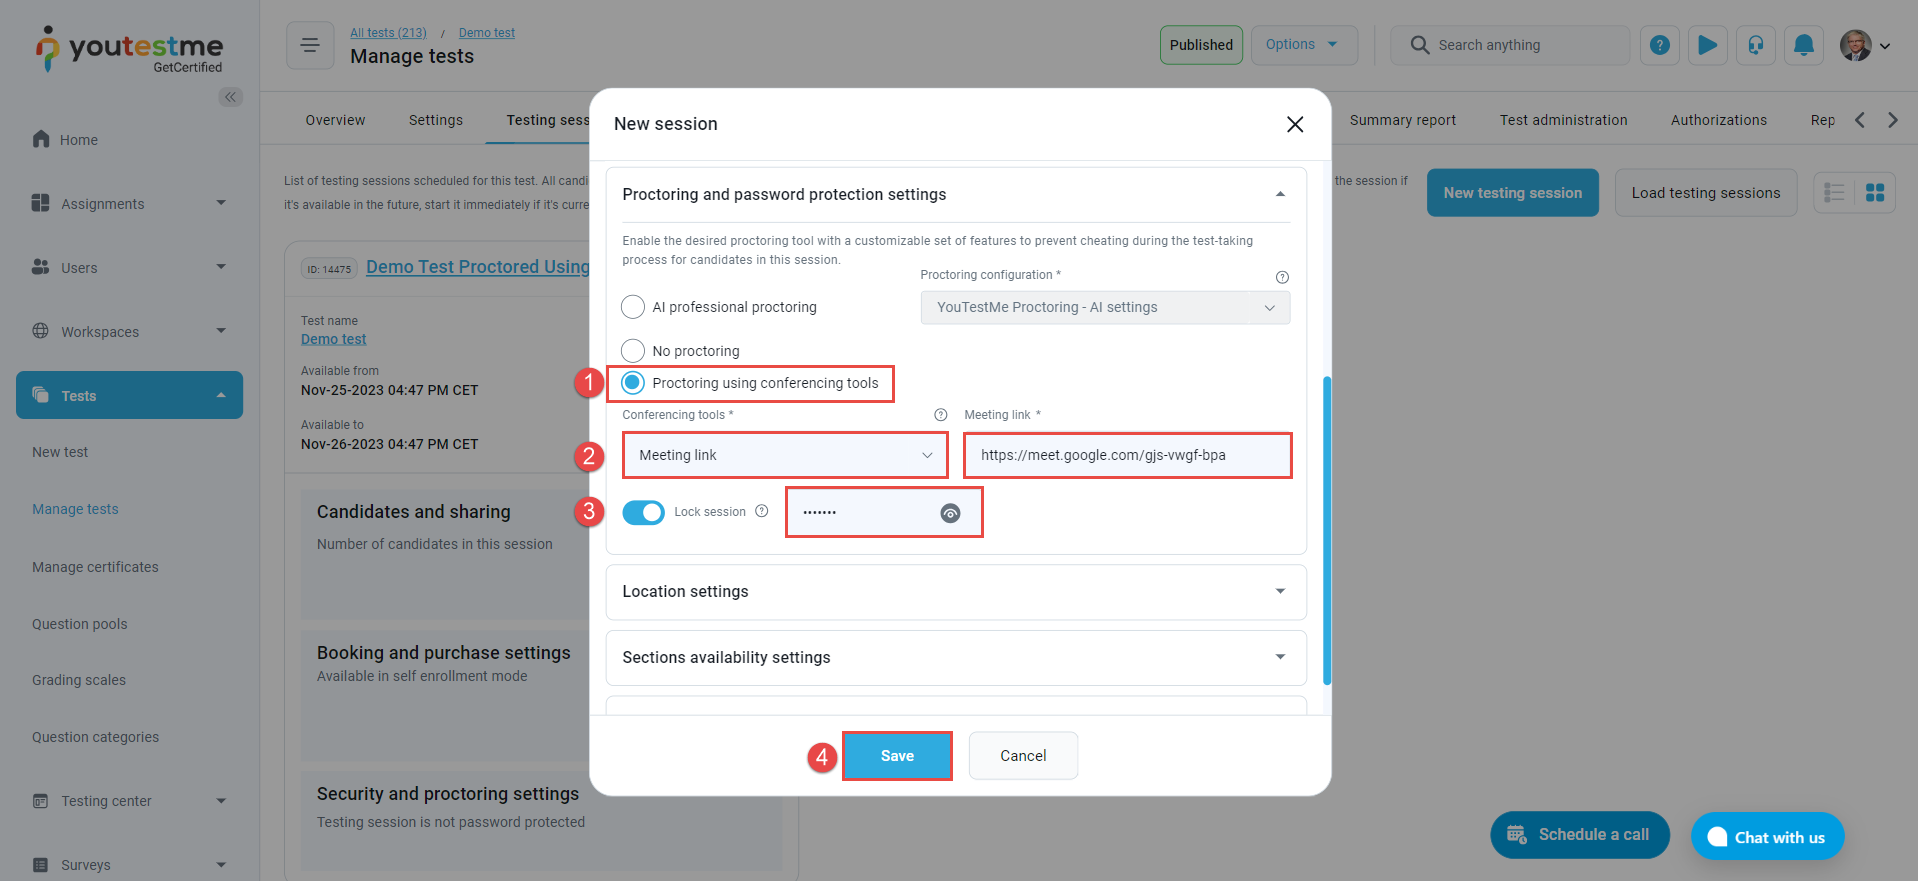
- Opt for Proctoring using conferencing tools within the Proctoring and Password Protection Settings.
- Select the Meeting Link option from the Conferencing Tools drop-down menu and input the designated meeting link.
- You may secure the session by locking it and generating a password to share with candidates as an optional step.
- After configuring the remaining settings, proceed to click the Save button.
Once the session is created, you can assign the proctor and candidates (If you have chosen the manual assignment).
Monitoring The Session #
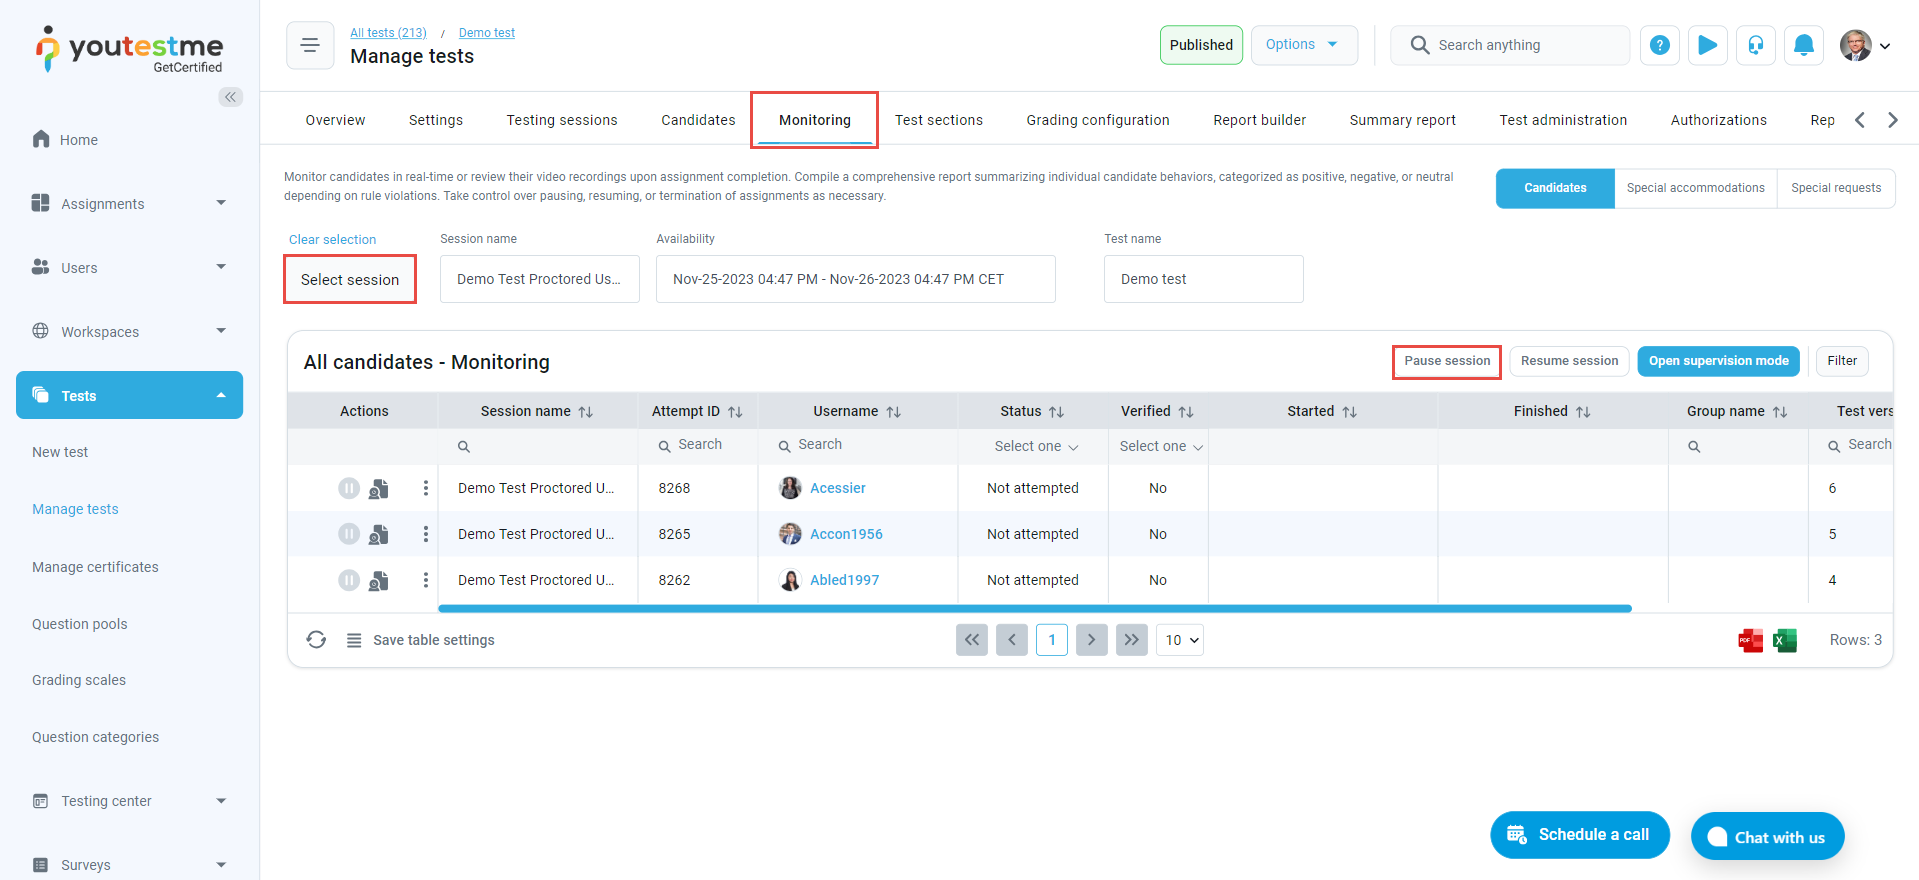
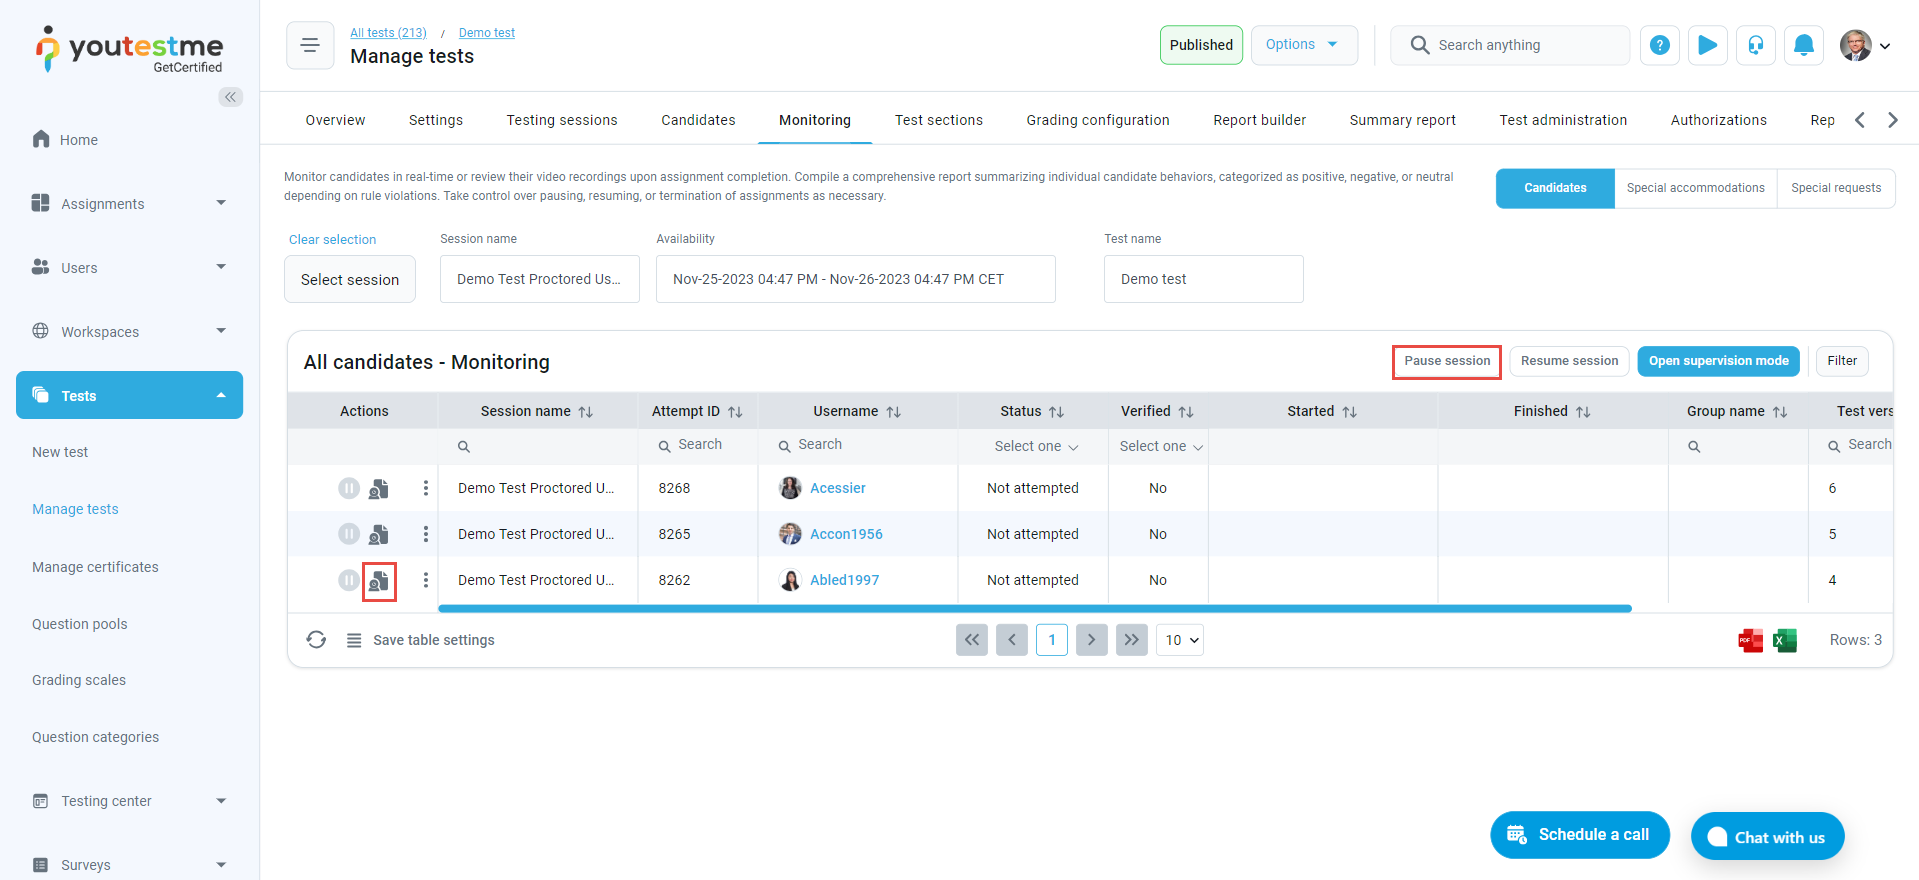
Before its commencement, the proctor must use the Pause Session button to temporarily pause the session for all candidates. This action prevents candidates from initiating the exam until the proctor authorizes it.
To execute this, the proctor should access the Monitoring tab, choose the specific session, and click the Pause Session button.
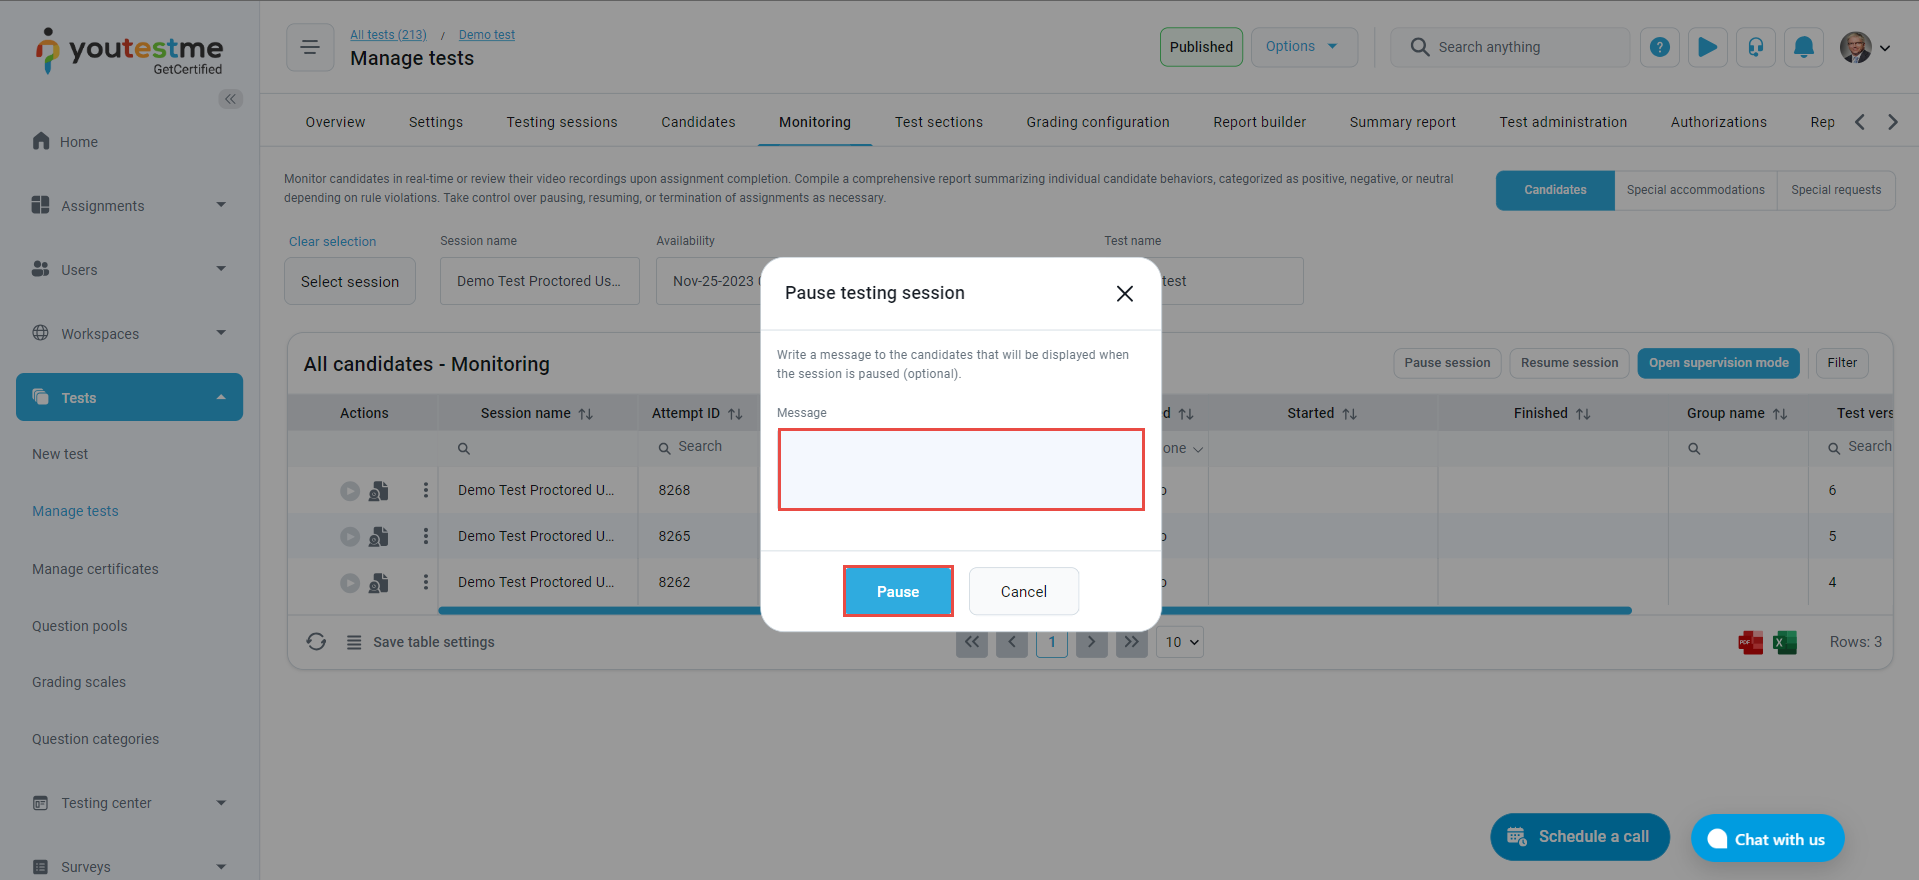
Within the pause session dialogue box, the proctor is prompted to input the message displayed to candidates upon entering the exam while the session is paused.
Once candidates access the exam, the proctor can permit them to commence it after ensuring they meet all the necessary exam conditions.
- To resume the exam for all candidates simultaneously, the proctor should utilize the Resume Session button.
- To resume the session specifically for an individual candidate, the proctor must click the resume button beside the candidate’s username in the action column. If the proctor observes a violation during the exam and needs to communicate with a candidate, this same button can be used.
After the candidate completes the exam, the proctor can generate a proctoring report from the Monitoring tab.
To access the area designated for the proctoring report, the proctor should utilize the Proctoring Report button, where they can document any observed violations or relevant information.
Candidate perspective #
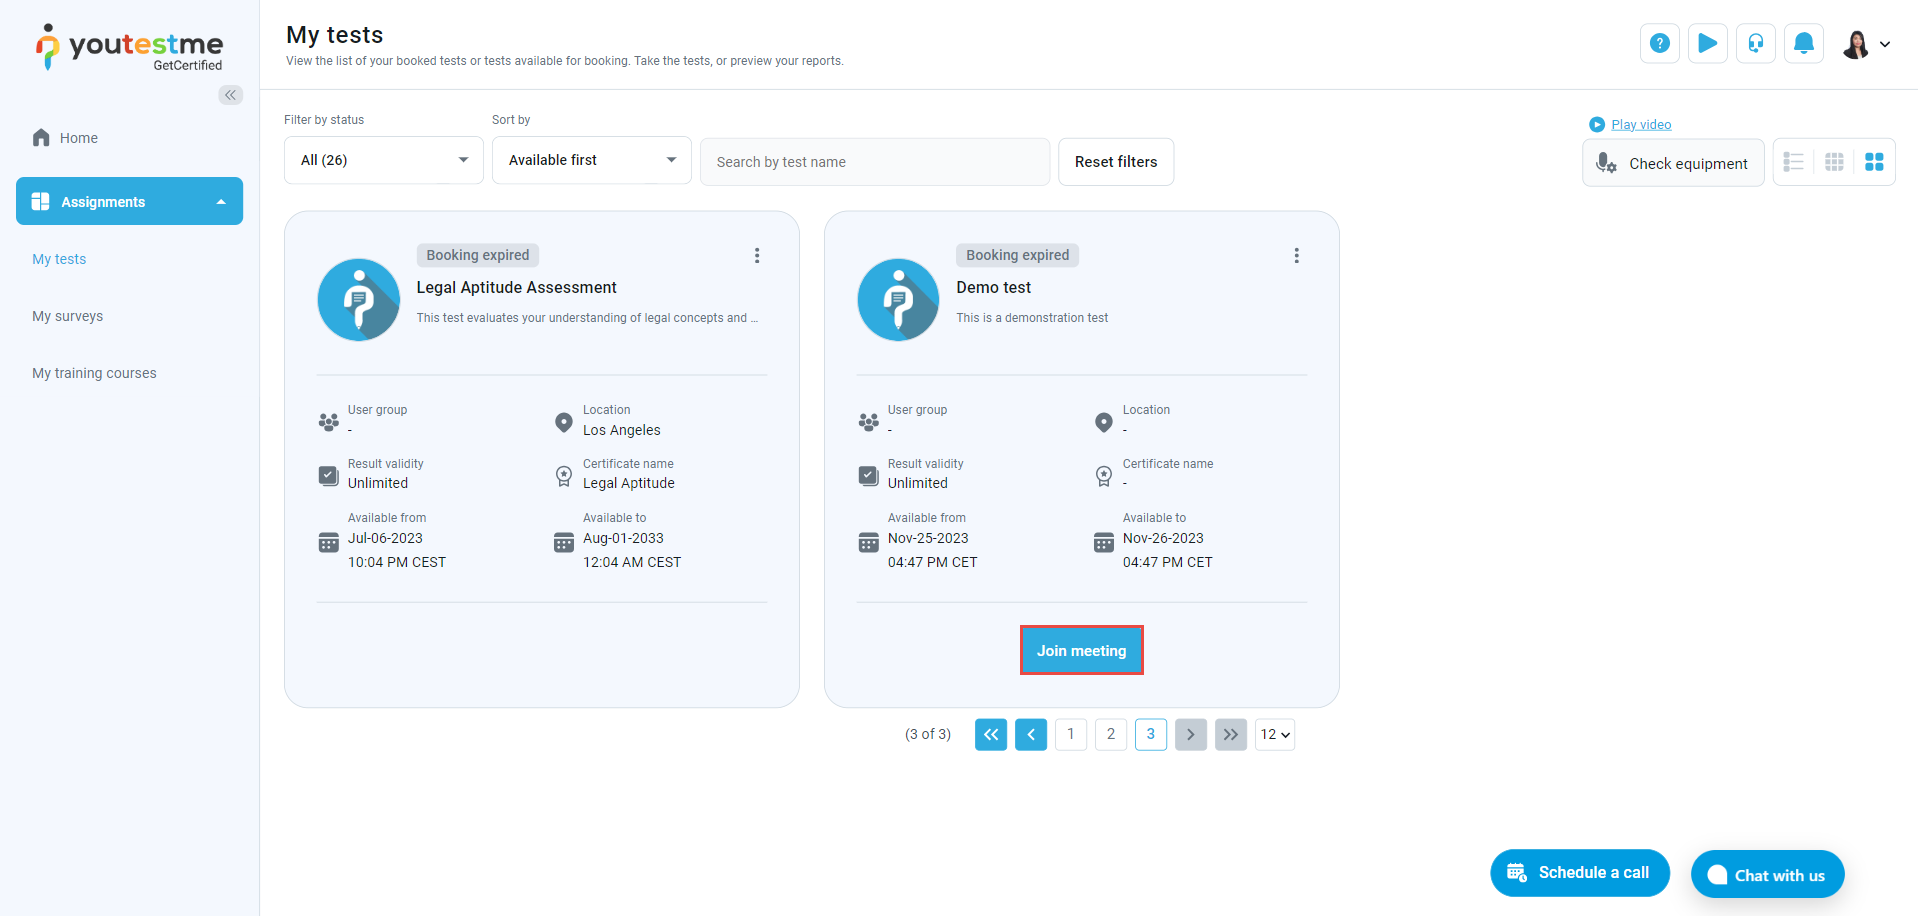
The candidates should use the Join Meeting button when the session becomes available, redirecting them to the meeting platform and initiating the exam as per the proctor’s instructions.
Accessing Results Reports #
Proctor has a full overview of testing session analysis, candidate results, and reports in the YouTestMe application.
For more information about proctoring using meeting tools, please see:


