Creating a test #
There are two options for creating a test:
- Navigate to the “Tests” option in the application’s main menu and then select the “New test” option.
- Select the “Create test” quick action button form the home page
Step 1 – Test information #
- Enter the test name
- Click the “Next” button to proceed.
Step 2 – Test settings #
This is the part of the Test Wizard where you should set all the settings for your test.
- Define which settings your test should have.
- Click the “Next” button to proceed.
Step 3 – Add certificate #
In this step, you can add a Certificate to your test or click the “Next” or “Skip” button to proceed further.
Step 4 – Method #
On this page, you need to select the method for adding questions to your test.
- Add questions manually – This method creates a unique version of the test.
- Use the test generator – This method allows the creation of any number of test versions of the same test.
- Upload test from a file – You can download a predefined Excel template and upload questions from it.
In this tutorial, we will explain the “Add questions manually” method. You can see the details in the text below.
Step 5 – Add questions #
Click on the “Select” button in the “Add questions manually” section.
It will redirect you to Step 5 in the Test Wizard where you can choose one of the two options:
- Add new question – Create a new question manually.
- Import from pool – Import questions from a previously made question pool (This option will be explained in this tutorial).
To add questions to a test from an existing question pool, follow the steps below:
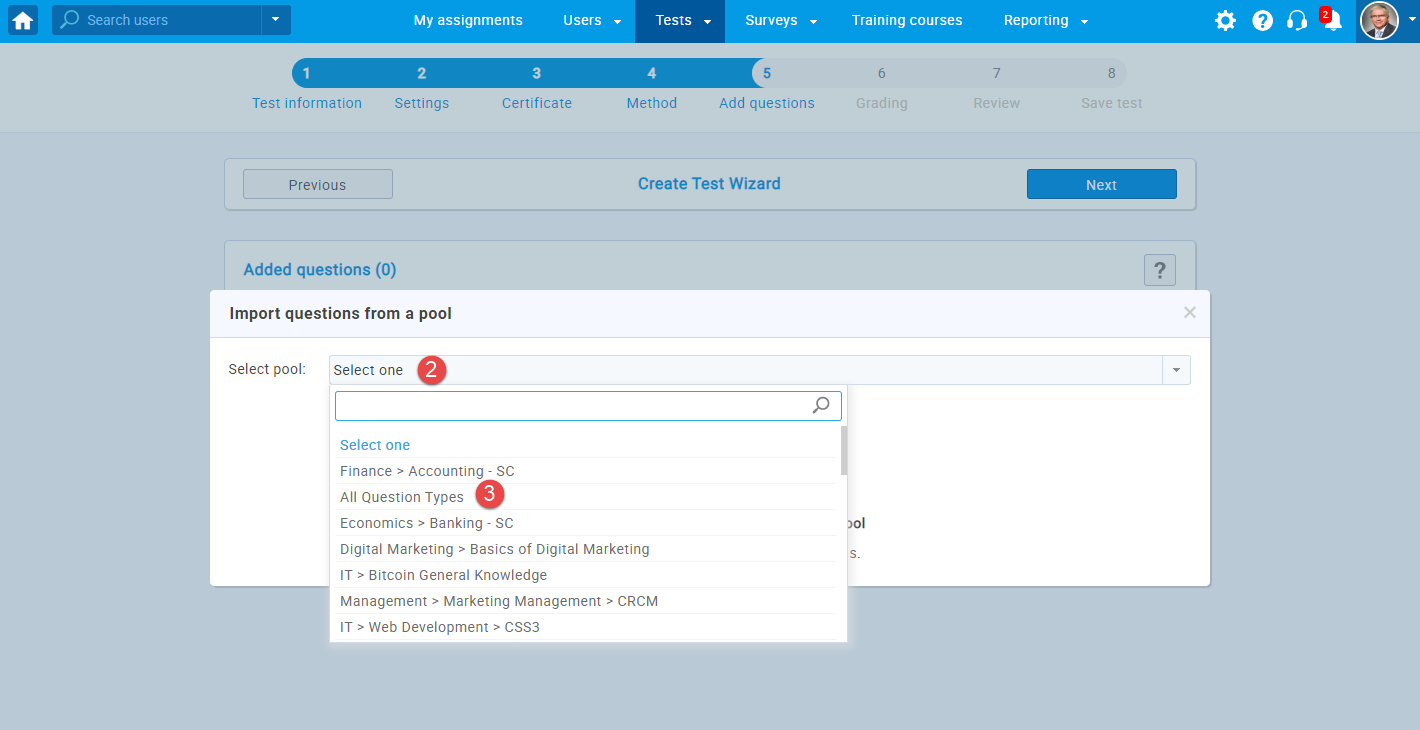
- Select the “Import from pools” option.
2. Click on the dropdown menu to view all available pools. You can choose only the pools you created or manage.
3. Select the desired question pool.
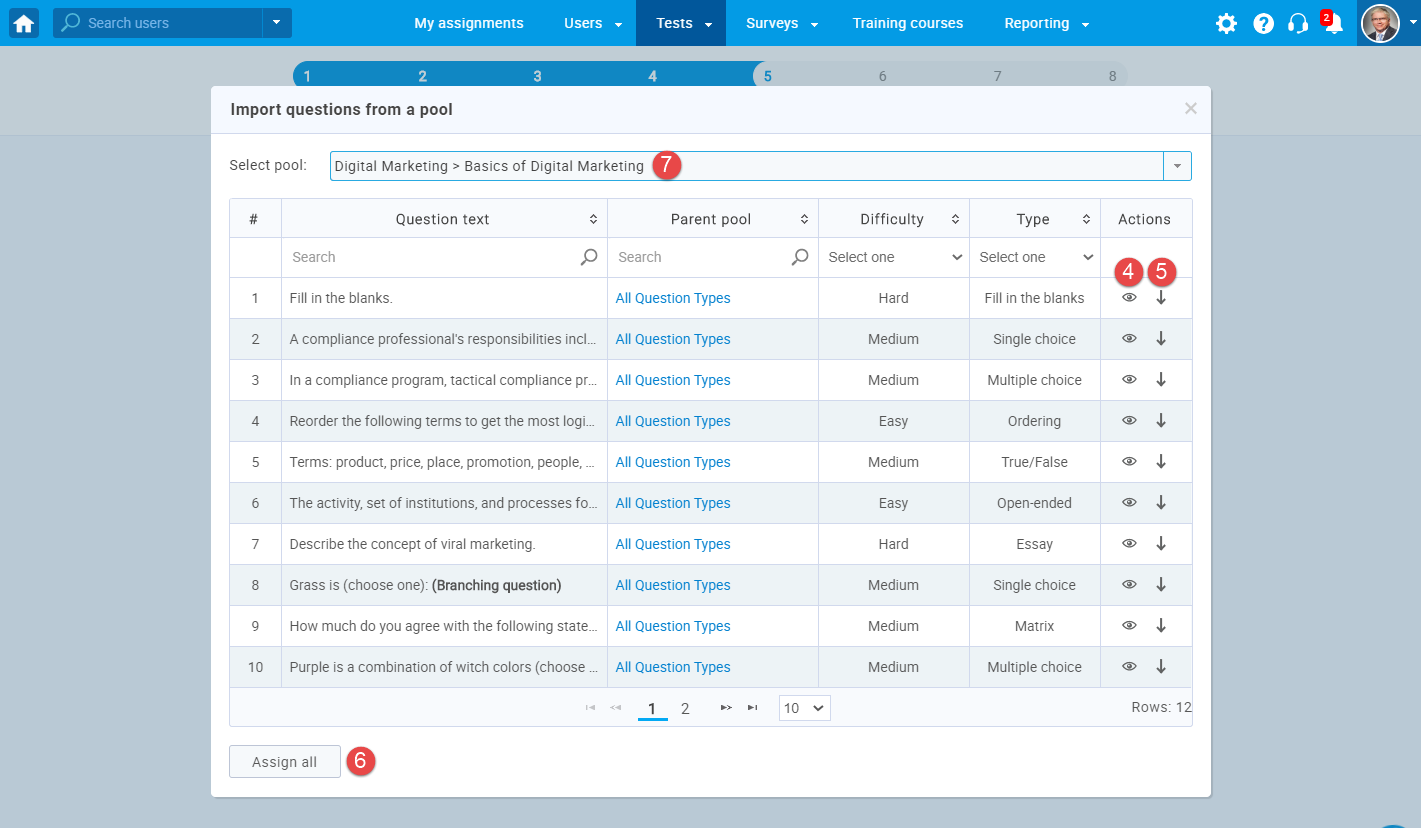
Once you choose a pool, you can:
4. Preview each question.
5. Import a single question from the selected pool.
6. Import all questions from the selected pool.
7. Change the question pool. All questions assigned from the previously selected pool remain in the test.
Once you have added questions to the test from the pools, click the “Next” button to proceed.
Step 6 – Grading #
The “Grading” step allows you to set the grading options for the test.
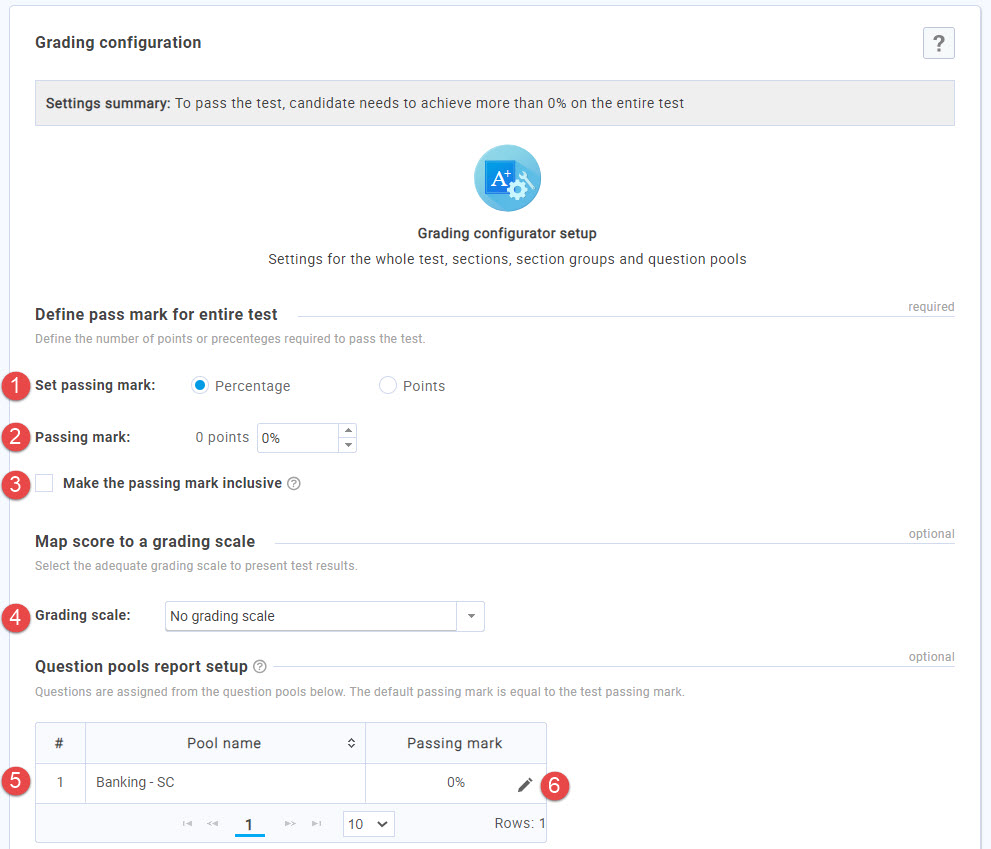
Here you can:
- Choose whether the passing mark will be expressed in points or percentages.
- Set the value of the passing mark.
- If the “Make the passing mark inclusive” option is checked, users will pass the test if they gain a score equal to or higher than the passing mark.
- From the dropdown menu, you can select one of the previously created grading scales. For more information, please visit Grading scales.
- See the list of all question pools used in the test.
- Edit the passing mark for each question pool separately. (This passing mark will not affect the test passing mark and is used mainly for organizational and reporting purposes).
Step 7 – Review #
The “Review” step contains a summary of the test settings and a list of question pools used.
After you have checked everything, you can press the “Next” button to continue with the test creation process. If you want to make any changes, you can still go back to any test creation step.
Step 8 – Save test #
This is the last step in the “Test wizard” where you can:
- Save the test as a draft by clicking the “Finish wizard” button.
- Save the test settings and pool configuration as a test template for later use.
Once you click the “Finish wizard”, your test will be saved as a draft and can be edited entirely again as long as it’s not published.


