This article aims to provide a complete guide, from creating a test to organizing a test that can be linked to your website and accessed from there.
Adding users
There are four ways to create profiles for users:
- Bulk-import large number of users.
- Create one by one account.
- Allow users to self-register
- Integrate with External system – contact YouTestMe Customer Success Team for more information.
Test creation
To create a test using the Test creation wizard. This will lead you through the step-by-step process of creating a test.
Select the Tests/Manage tests tab and the New test button to access the test wizard.

Please check out this article to see how to create a simple test.
To create a securely generated test, do the following:
- Select the Tests/Manage tests tab.
- Select the desired test.
- Select the Schedule option.

- Create a new session or edit the existing one.
- Select the desired browser lockdown option.


By enabling this option, the users cannot cut, copy, save, or print anything from the screen during the test-taking process. Also, the web browser will be in full-screen mode, and if the users try to minimize it, the test attempt will be terminated. It disables candidates from switching screens and tabs, right-clicking, or making screenshots.
Please watch this video to create a test using a test generator.
By enabling this option, you will prevent students from copying the entire answer sheet / multiple-choice tests are, without a doubt, the easiest to cheat on.
Creating a testing session
The Testing sessions feature gives you flexibility when organizing tests for different groups of users in various locations. For more information on scheduling a testing session, please visit this article.
After creating a testing session, select the Copy guest link to clipboard option form the Sharing option.

Created guest link provides access to unauthorized users to the test session without creating profiles.
To see how to schedule tests through testing sessions, please watch this video.
Create a Test
To create a test using the Test creation wizard. This will lead you through the step-by-step process of creating a test.
Please check out this article to see how to create a simple test.
How to create a testing session with a direct access link
This article explains how to provide candidates with easy and immediate test access by enabling the self-enrollment option and generating a direct link to the testing session.
When you create this session, you will see the link that will appear. You can place it on your website or send it by email. That link provides direct access to the test.
Pulling reports
The reporting module provides over 40 types of predefined reports on users and tests and an indefinite number of custom-tailored reports generated using our Report builder and advanced search options.
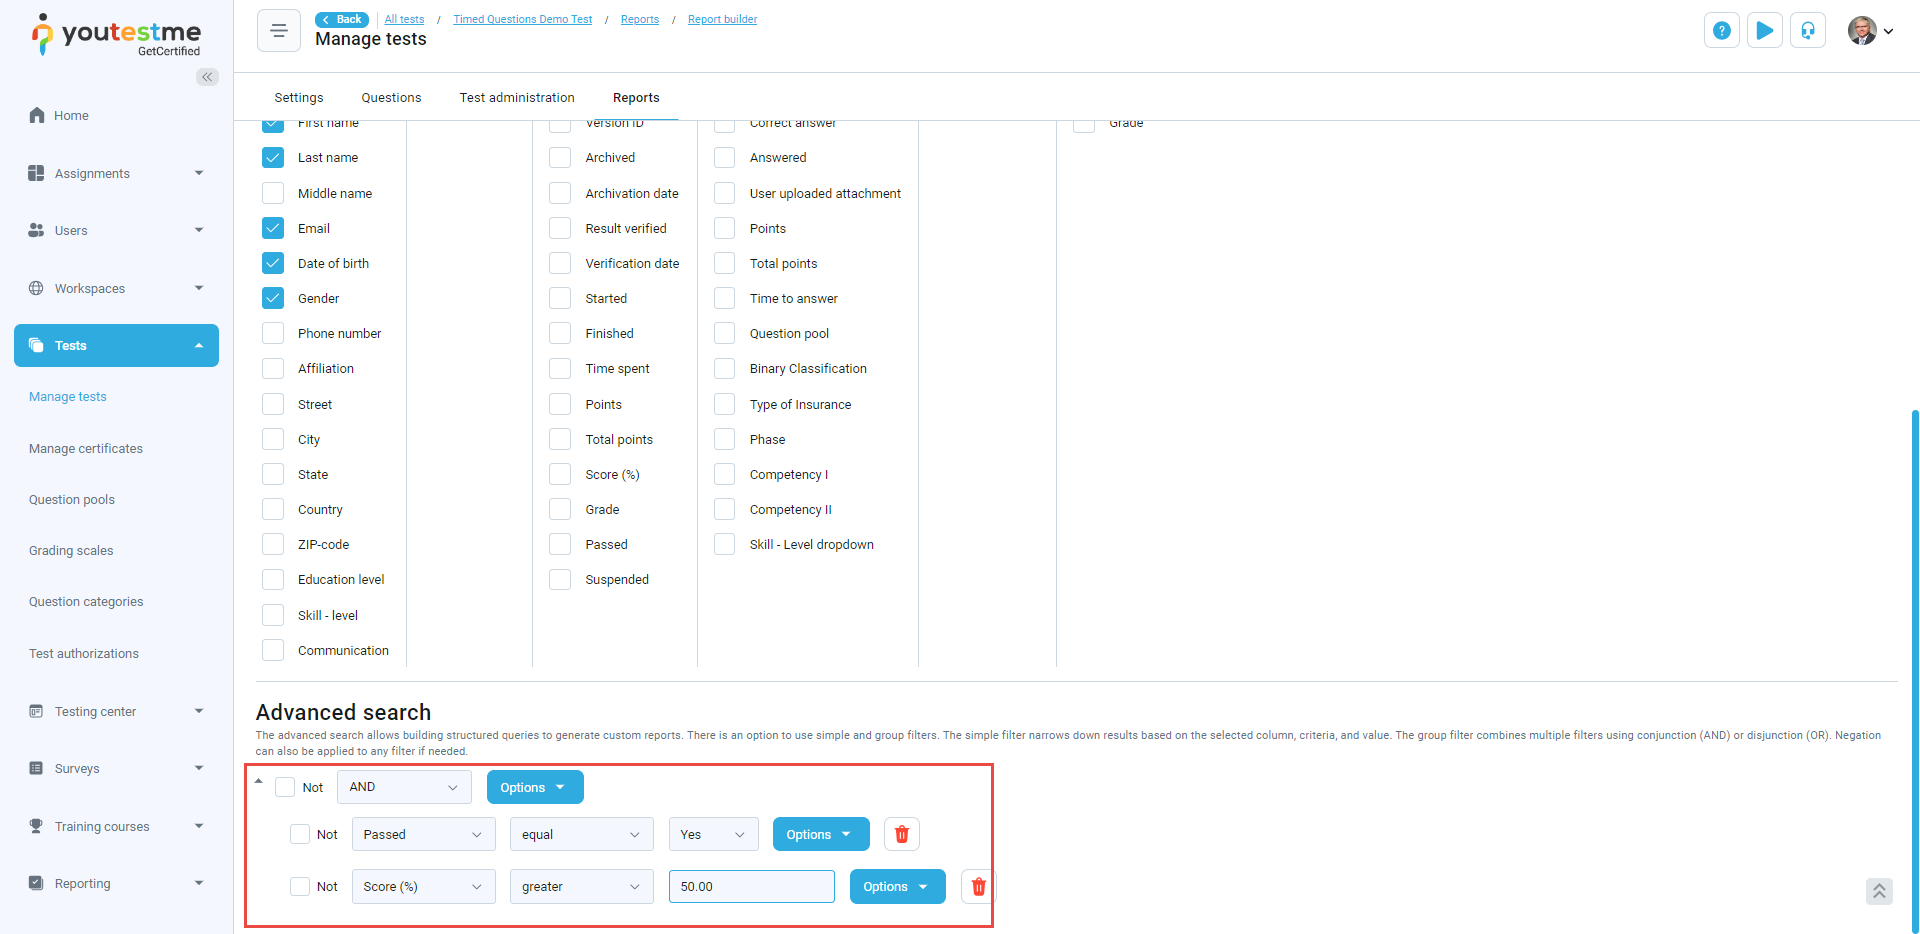
Select the Open report builder button in the Tests/Manage tests/Reports tab of the desired test to access the report builder.

In the Report builder tab, you can:
- Load the report columns’ settings from a saved report template.
- Create a new custom report by checking the options from the list. Each selected option will be featured as a column in the report table.

Advanced search
The advanced search allows you to build structured queries. The simple filter displays the results according to the chosen column, criteria, and value. The group filter represents more filters’ conjunction (AND) or disjunction (OR). Negation can be applied to any filter.
To see an overview of available reports, please watch this video.


