This article will explain how to plan and schedule multiple test sessions, allowing one candidate to take different tests within that session. This approach makes the testing process easier and ensures a well-structured and streamlined experience for both candidates and administrators, resulting in increased efficiency.
Creating a multiple tests session
To create a multiple tests session, navigate to the Testing center page in the left-side menu, select the Testing sessions option and click on the New test session button.

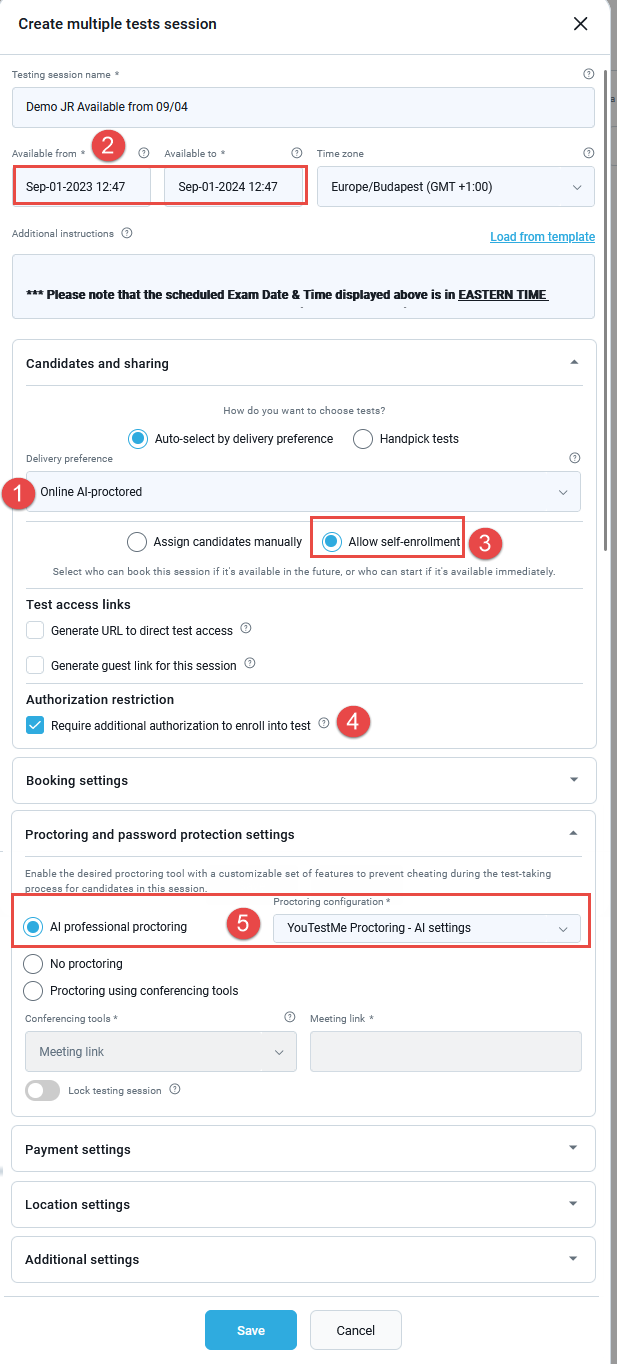
The pop-up window will show up where you should:
- Define the session’s status as either Active or Inactive. An active session is visible to candidates during its availability period, while an inactive session is not visible even during its availability period. Please note that the test must also be published for active sessions to be visible during their availability period. Additionally, notifications will be sent to all assigned users for an active session upon test publishing.
- Enter the Testing session name.
- Upon clicking, you can include tests based on delivery preference or handpick them.
- Delivery Preference: This allows you to flag a group of tests and organize a single testing session for all of them, avoiding the manual creation of individual sessions for each test. Delivery preference is defined during the test creation process, specifically in the second step named “Settings.” If the Auto-select delivery preference option is enabled, you can specify the test delivery preference from this drop-down list. The default delivery preference for each test is set to “Online.”
- Handpick Tests: You can manually select which tests will share the testing session. These tests do not need to have any common characteristics to be included in the same session.
- Location – Select a testing location from the options provided. This field is optional.
- Specify the session’s start and end times to define the period during which the test will be available.
- Time zone – The field indicates the time zone of the user creating the session. Dates and times are determined based on the selected time zone.
- Toggle the Allow self-enrollment option to turn it on or off.
- When enabled, users can independently book, purchase, or start the test without manual assignment by the manager. Additionally you can select one of the following options:
- Any user from the application: Select this option to allow all users from the application to have access to the testing session.
- Member of a user group: Select this option to allow access to users who belong to the selected user group.
- Member of a training course: Select this option to allow access to users who belong to the selected training course.
- Also, you can specify seat booking options
- A deadline by which a testing session must be booked and another deadline before which a booking can be canceled by a candidate.
- Capacity – Specify the number of candidates allowed in the testing session.
- When disabled, the test manager must manually add candidates to the testing session.
- When enabled, users can independently book, purchase, or start the test without manual assignment by the manager. Additionally you can select one of the following options:
- Require additional authorization to enroll into test – If enabled, only users with a valid authorization for the test scheduled in the testing session can be assigned to it.
- Manually Add candidates to the testing session by selecting users from the list of all users or a specific user group.
- Proctoring – Prevent cheating and maximize security by enabling proctoring to supervise the test-taking live or by AI. Choose the proctoring configuration. If this module is disabled, this option will not be displayed.
- Enable the Browser lockdown option and choose between Built-in protection or Safe Exam Browser (SEB). In either case, the browser will enter full-screen mode during testing, with certain actions like cutting, copying, pasting, using the print screen key, and right-clicking disabled. If the Safe Exam Browser option is selected, the default configuration is used, but you can upload your own with a .seb extension. Candidates starting a test with Safe Exam Browser option enabled must install the SEB browser to begin.
- Define Access password to prompt candidates to enter a password when starting the test. This option may be useful when tests are conducted in physical locations, allowing you to provide the password to candidates at the designated time for starting the test. Additionally, this option is automatically enabled when the test is monitored using conferencing tools to ensure that only authorized users can start the test.
- Define additional Instructions for candidates. Write additional instructions and rules that candidates must follow during the testing session. This information, along with the test instructions, can be added to the email notification sent to candidates. Customize notifications under System/Settings and customization/Notifications.
- Enter the External ID used for integration with external systems.
- Enter the External name, an optional name used for integration with external systems.
- Click on the Save button to create the session.

Once the session is created, it will be displayed on the Testing sessions page, where you can use a search bar to find the desired session.

- Managing existing multiple tests session
- Editing a multiple tests session
- To edit a previously created session, find the three dots in the top right corner of the created session, and then select the pencil icon from the drop-down menu.

- The edit pop-up window will appear, allowing you to modify all the session settings except for the delivery preference and location.
- Deleting a multiple tests session
- Click on the Delete testing session option to delete the previously created session.

- The session can be deleted only if no candidates are assigned.
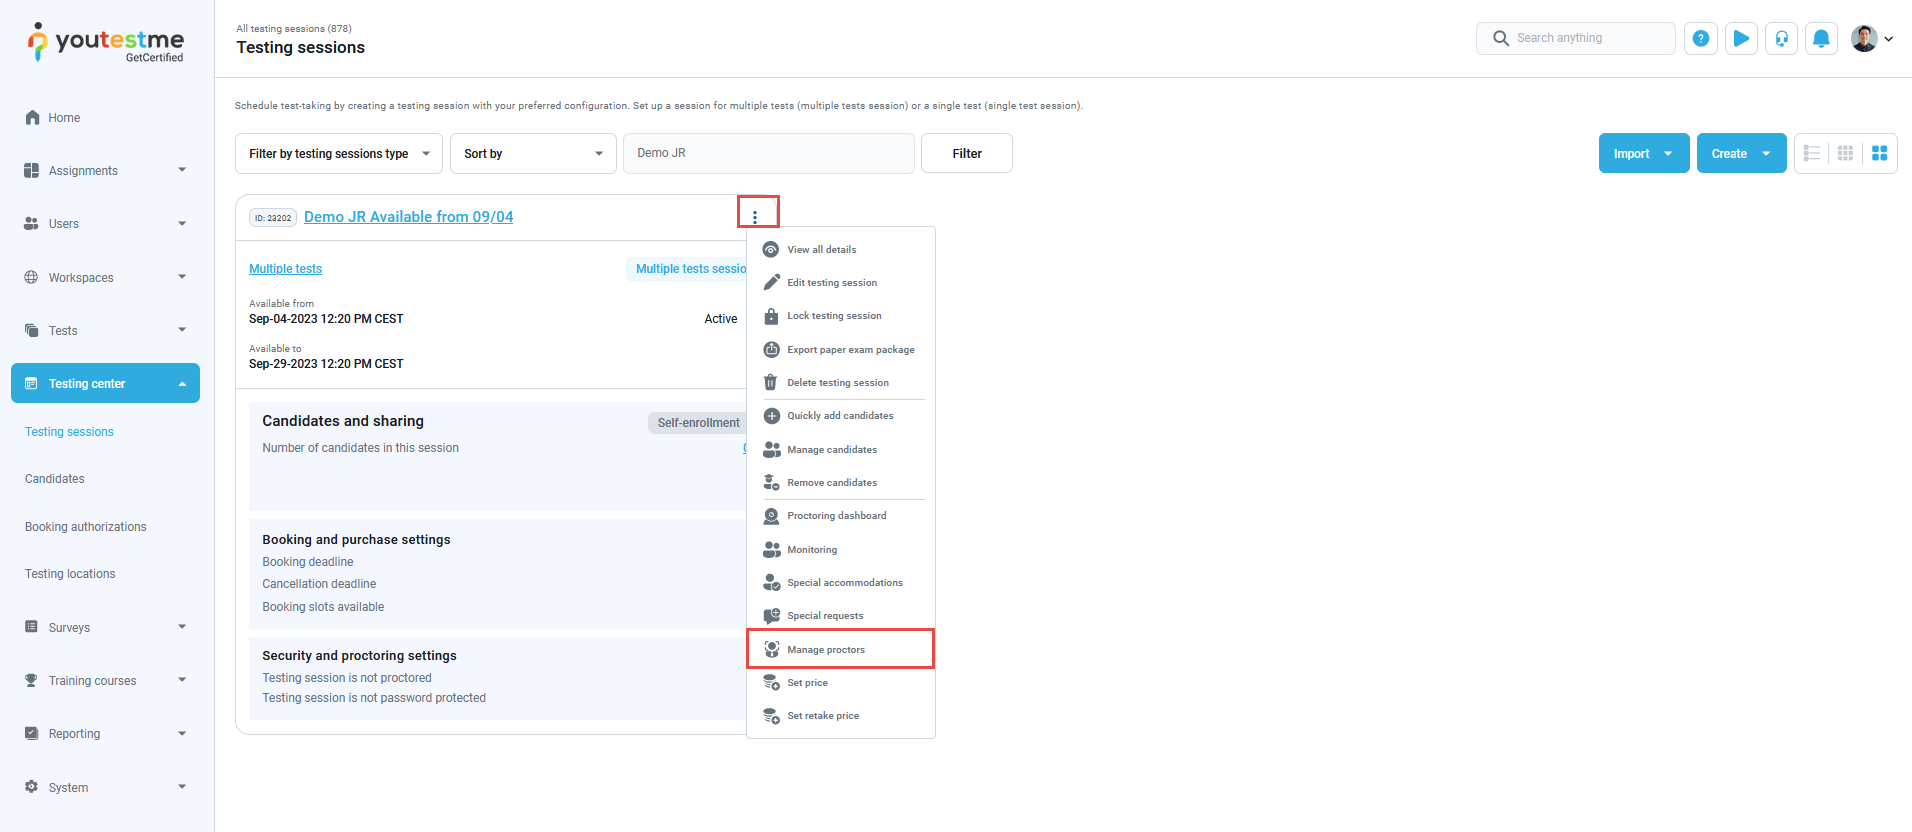
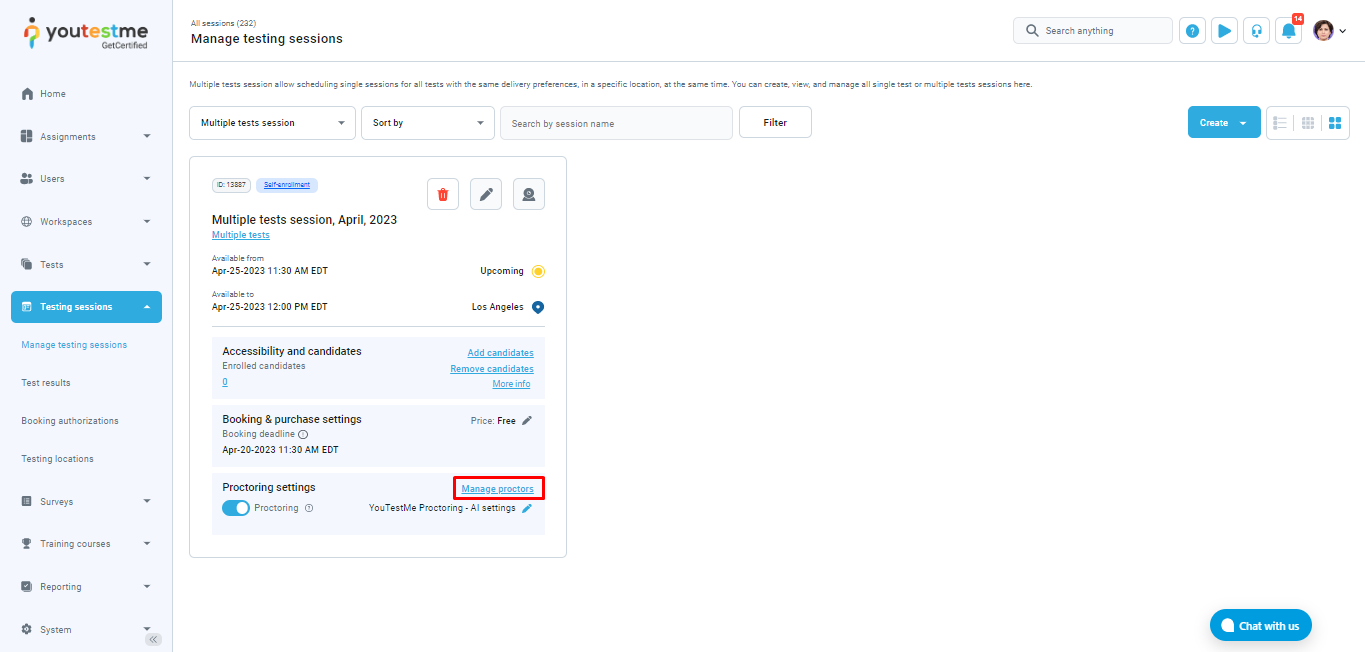
- Assigning proctors
- To assign proctors to a previously created session, click on Manage proctors option.
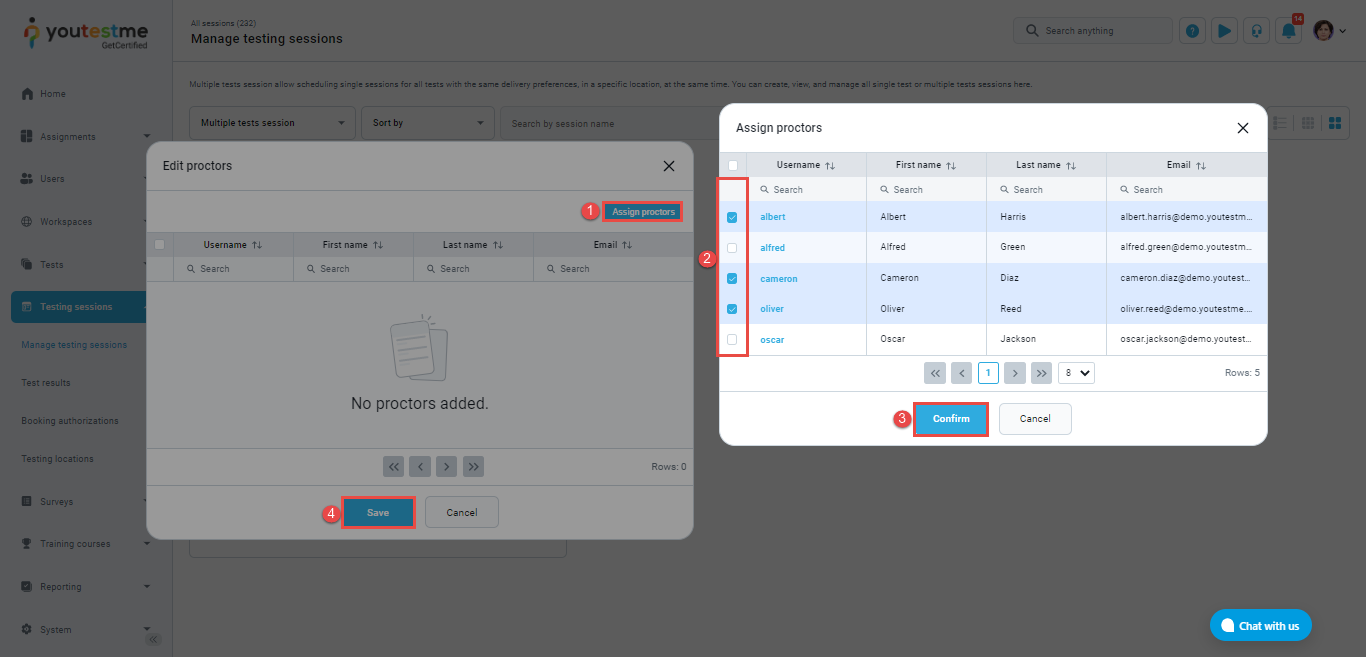
- After the pop-up window appears:
- Click on Assign proctors button, and the list of users will appear.
- Check the users you want to assign as proctors.
- Click Confirm button.
- Click on the Save button.


