
Article verified for Release 15.1 on December 22, 2025.
This article explains how to create multiple, unique test versions. The test versions can contain independent combinations of questions imported from pools and manually created questions.
Creating test versions
While creating a test, consult this article for more information on creating a simple test and proceed with the next steps within the test wizard:
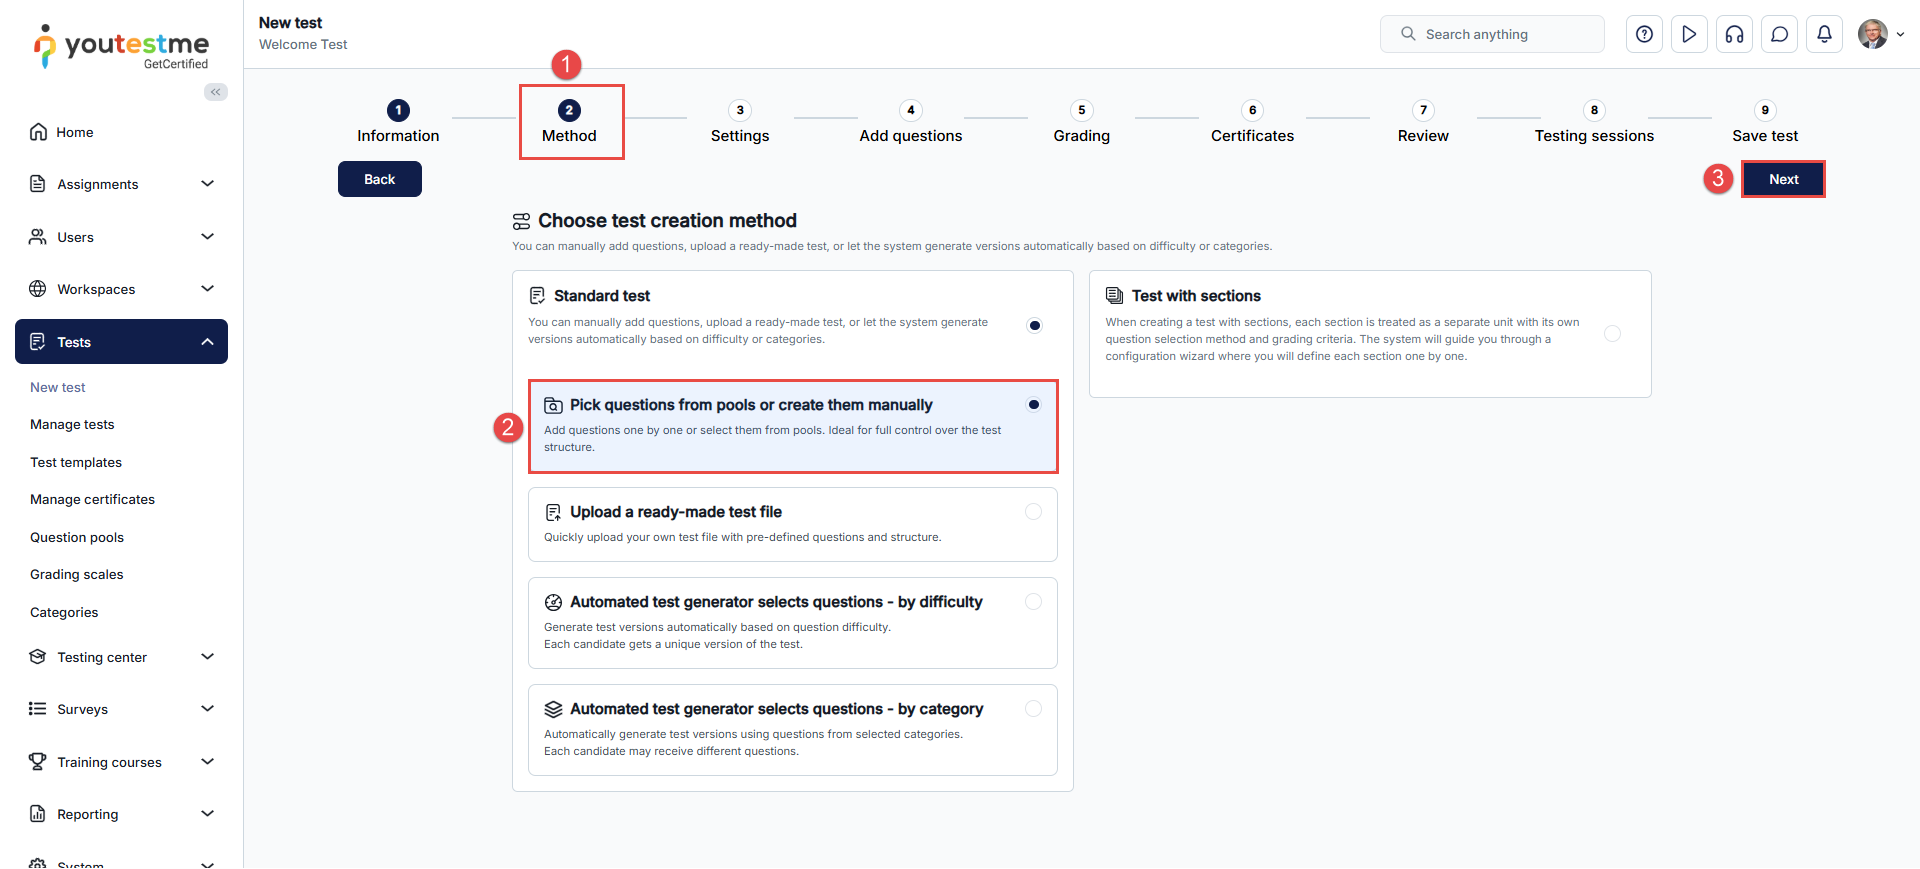
- Go to the step Method.
- Select Pick questions from pools or create them on the spot.
- Click on the Next button.
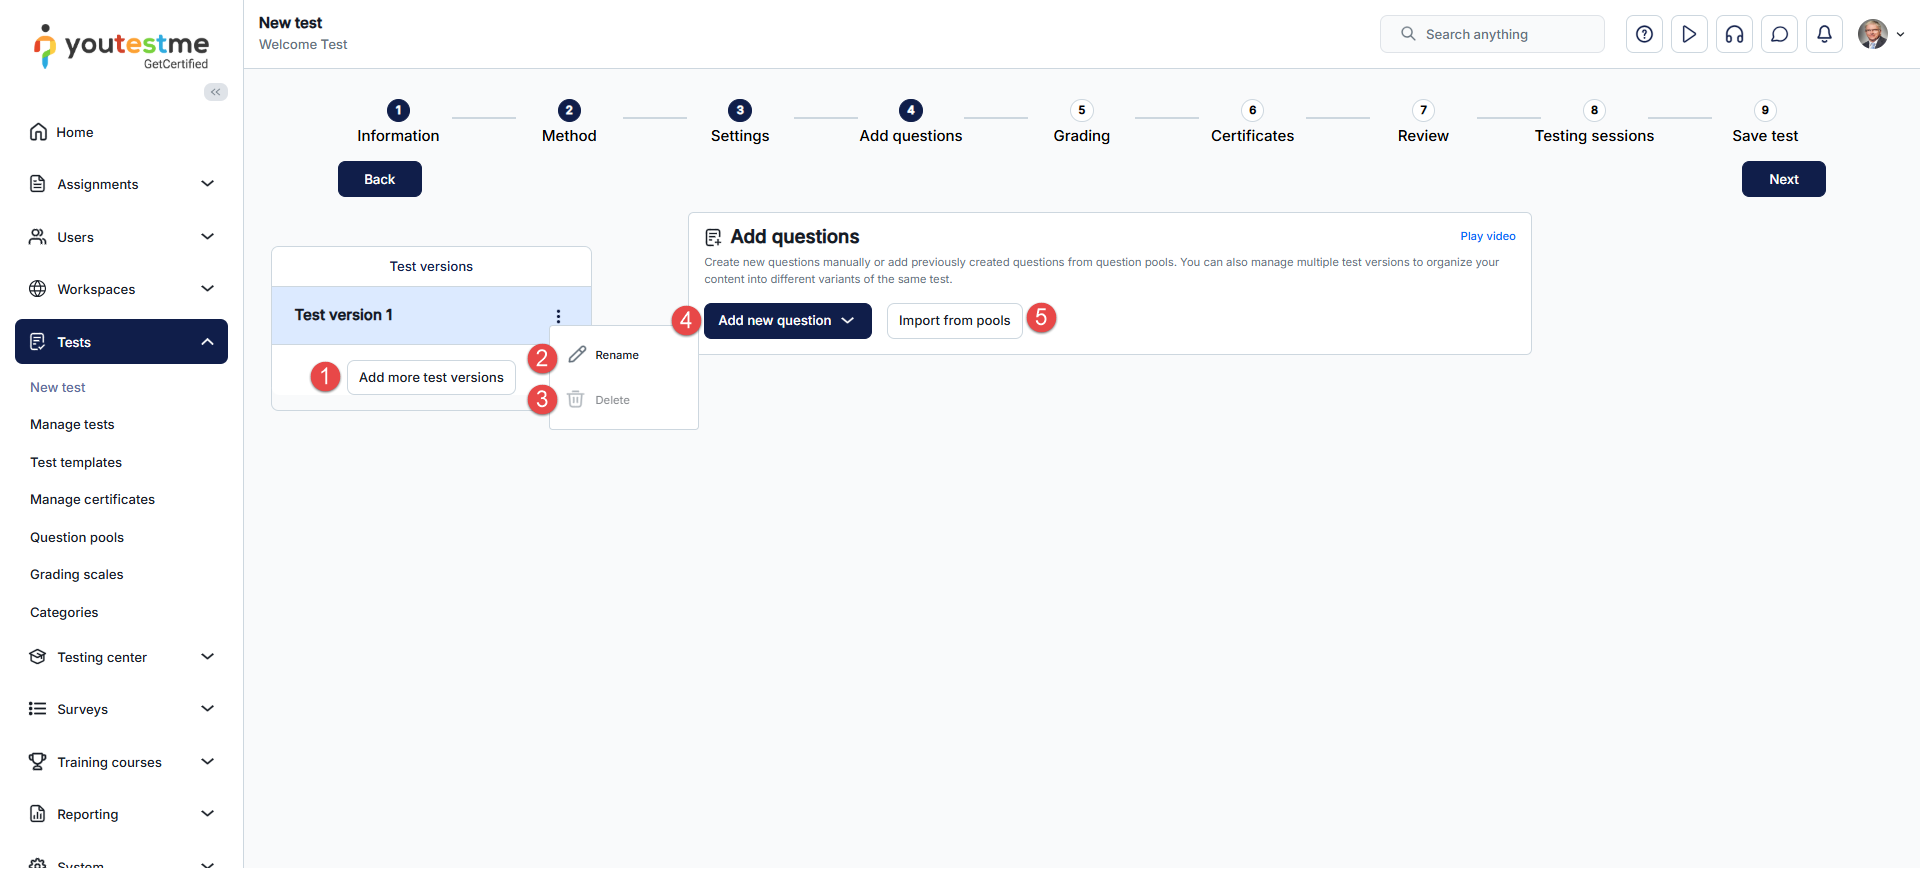
In the next step, do the following:
- Click on the Add more test versions button to add a new test version.
- To rename a test version, click the Rename button, then edit the current version’s name and unique version code.
- To delete a test version, click on the Delete button and click on the Yes button in the pop-up window.
- Add manually created questions in the test version.
- Import questions from pools in the test version.
 2
2
Grading
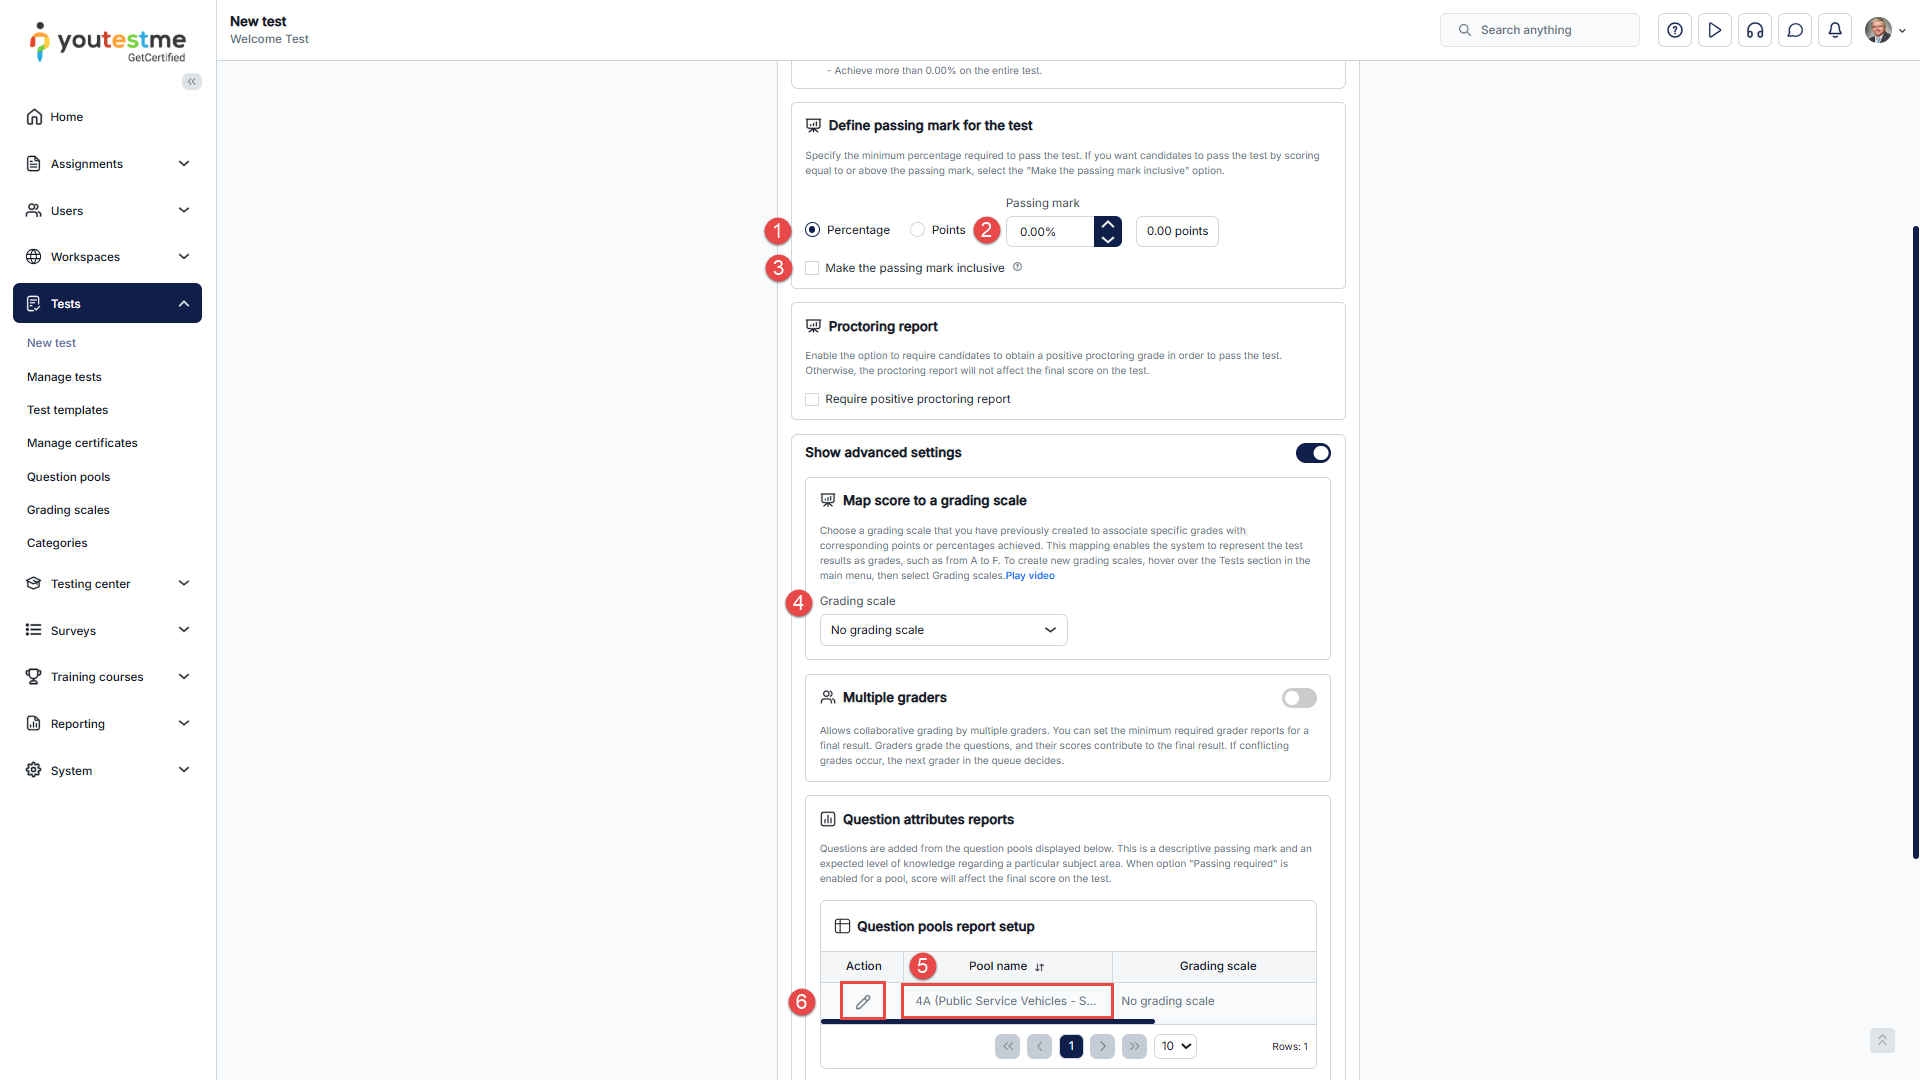
The Grading configuration step allows you to set the grading options for the test. Here you can:
- Define whether the passing mark is expressed as points or as a percentage required to pass the test.
- Set Passing mark – Define the number of points or percentage required to pass the test.
- Make the passing mark inclusive – If this option is checked, users will pass the test if they gain a score equal to or higher than the passing mark.
- Grading scale – You can select one of the previously created grading scales from the drop-down menu.
- See the list of all question pools used in the test. All used question pools will be listed in the table if there are more test versions.
- Edit the passing mark for each question pool – This setting helps reports show scores on a terminal learning objective or provide a simple overview of a candidate’s knowledge.
Review Test
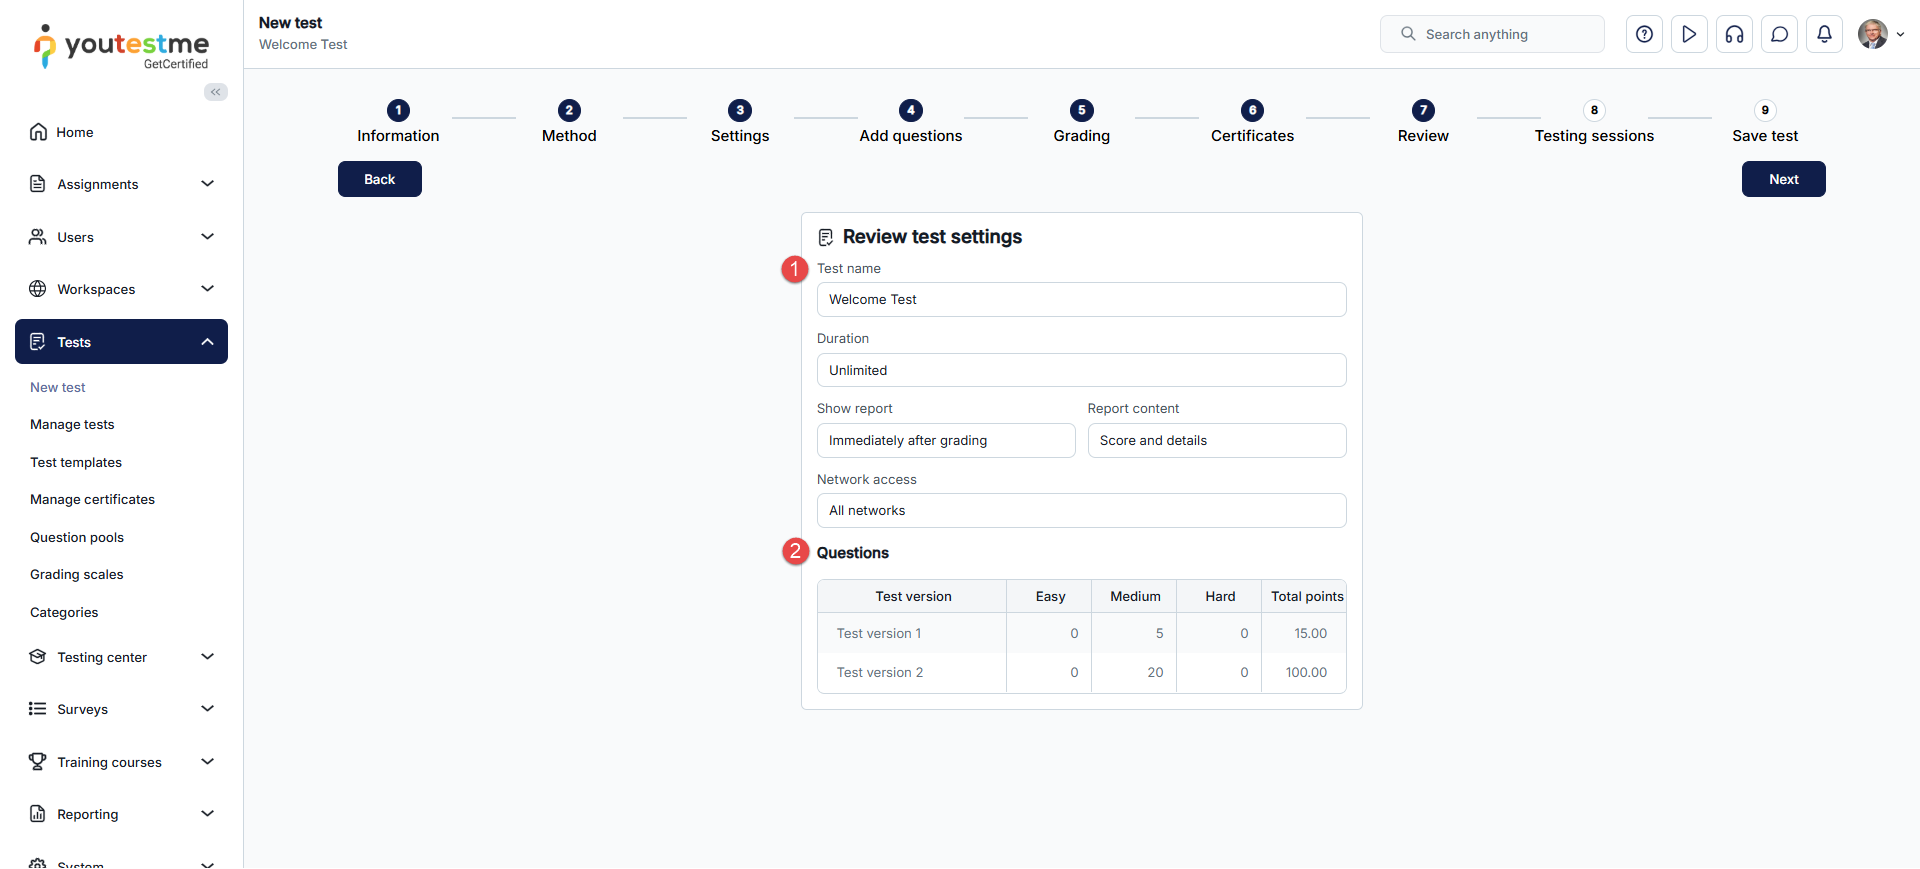
The Review step contains the following:
- Summary of the test settings.
- List of all test versions that are created.
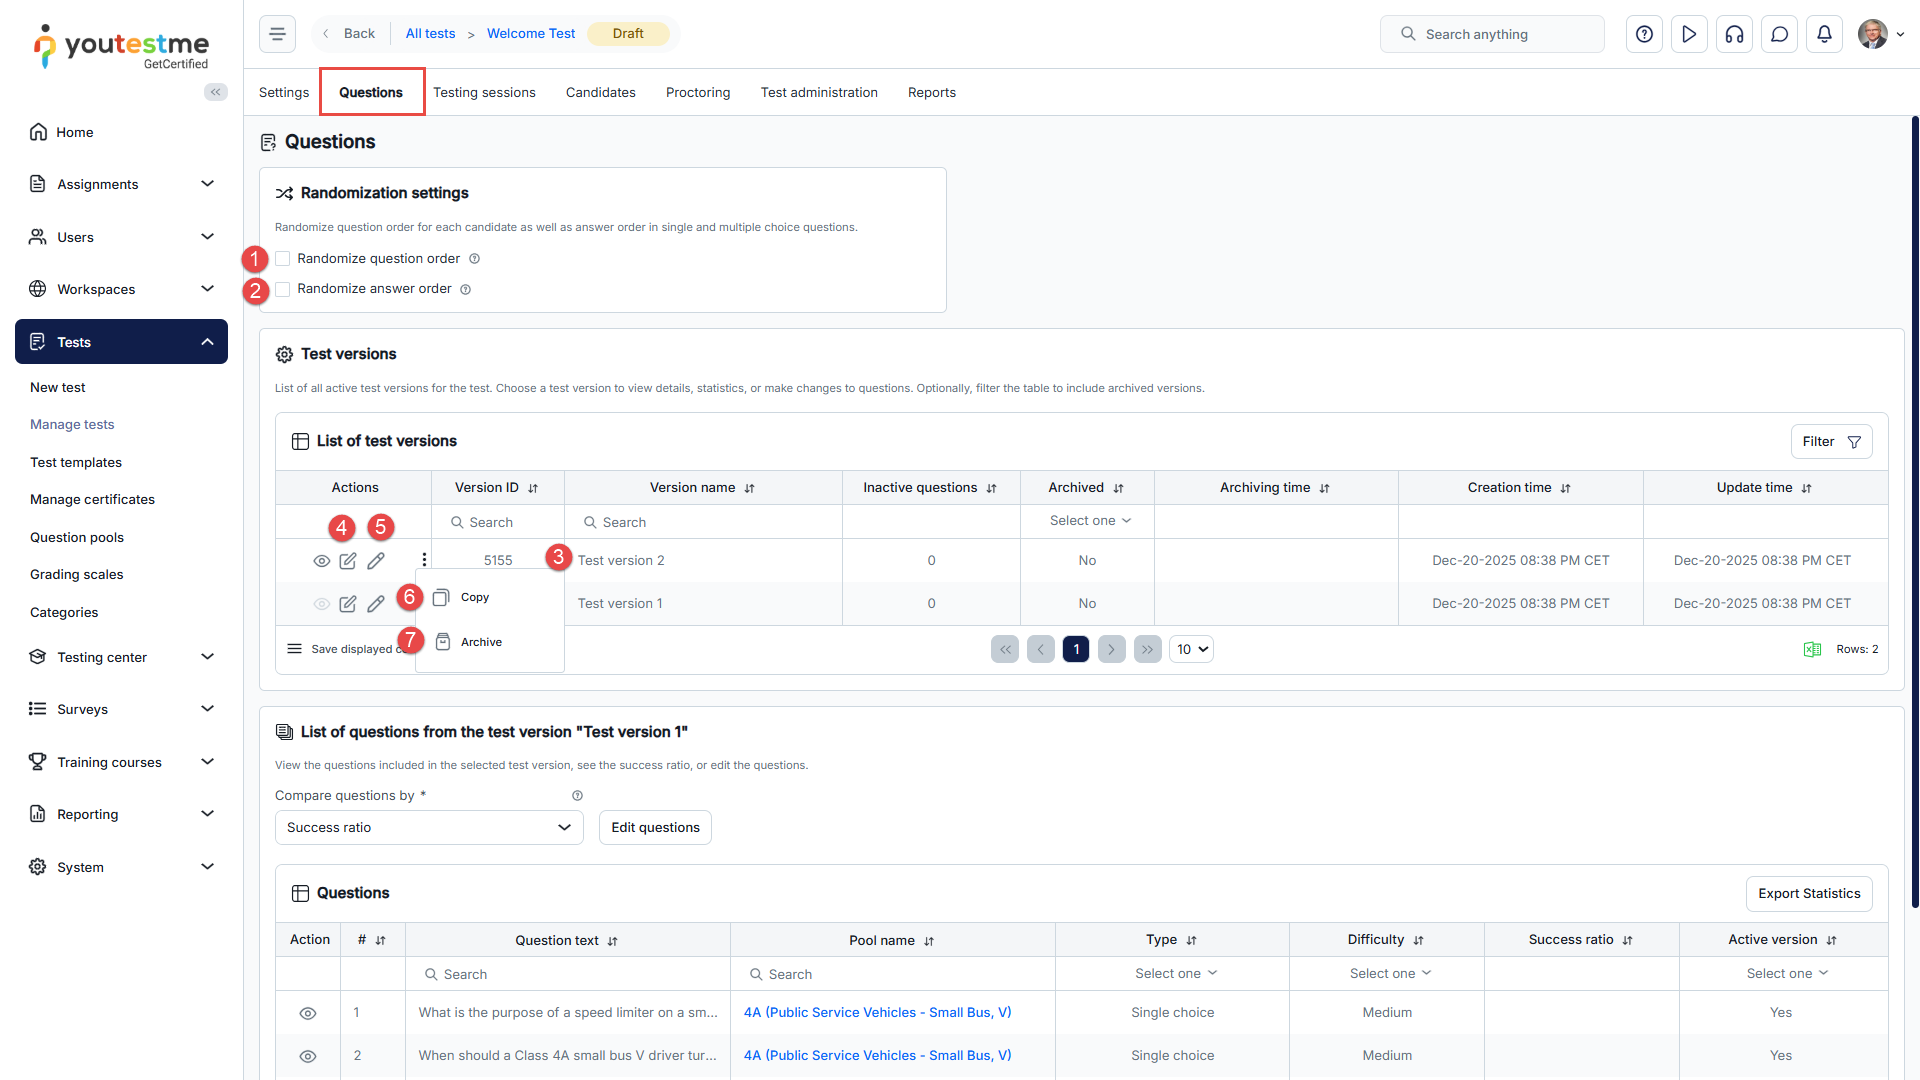
The Questions tab features
After you finish the Test Creation Wizard, navigate to the Questions tab.
The following options are available:
- Randomize question order – Randomize the questions for the entire test. Each user will get questions in a different order.
- Randomize answer order – Randomize the order of answers for each question for the entire test. Each user will get a different answer order for the same question.
- In the drop-down menu, see the list of all created test versions.
- Rename the test version.
- Edit test’s version unique code.
- Copy the test version – When the test is copied, all its test versions will also be copied, but will not have unique codes.
- Archive the chosen test version – The archived test version will not be assigned to candidates in the future.
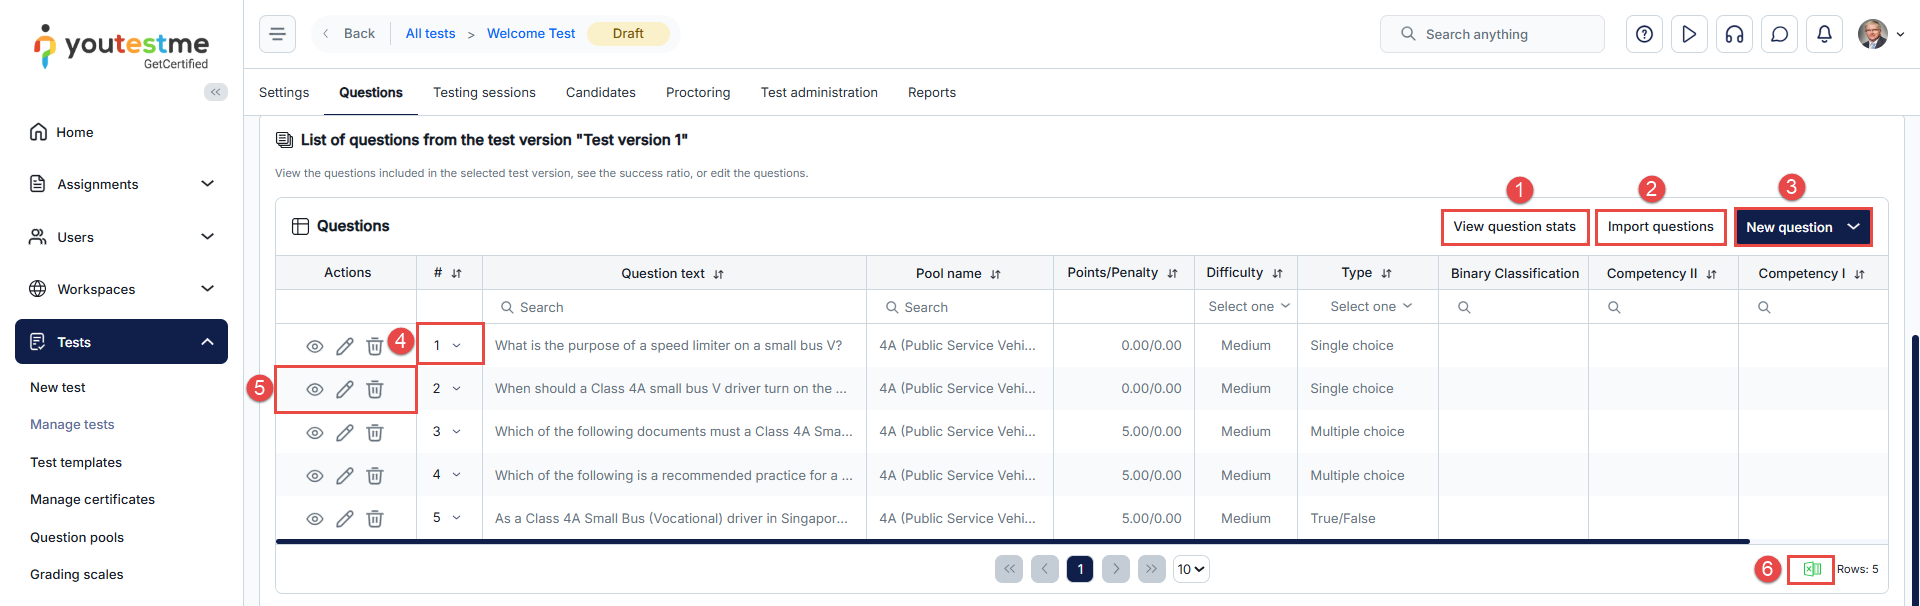
- View question stats – View the question statistics in the selected test version, see the success ratio, or edit the questions.
- Import questions – Add additional questions from pools (groups of questions). You should choose the desired pool and the questions you want to add.
- New question – Add new questions to the test manually.
- Reorder the questions by changing the numbers in the field.
- These options let you preview, edit, or delete the questions you’ve added.
- Export the list of questions.
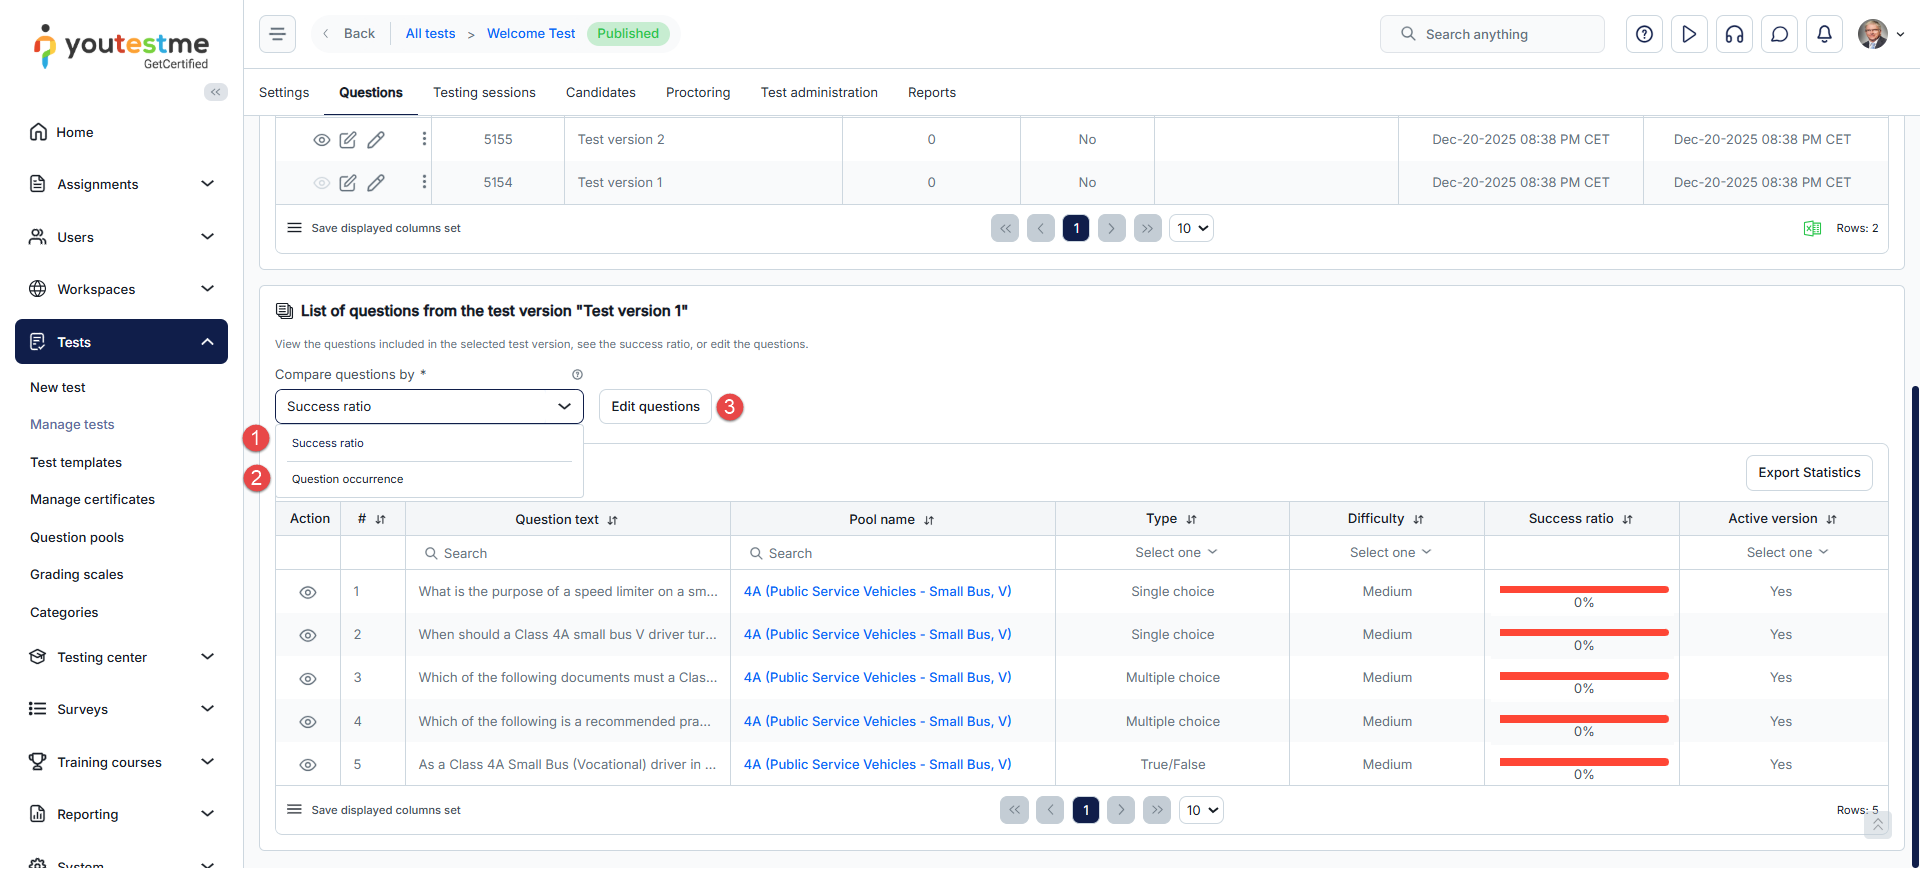
When you click on the View question stats button, the following options are available:
- Compare questions by Success ratio – Percentage of users who answered the question correctly.
- Compare questions by Question occurrence – Percentage of test versions that contain the question.
- Edit questions – Although you have published a test, you can add, delete, or edit questions at any time. The previous test version will be saved for candidates who have already taken the test, and a new version will be created and given to candidates who take the test after the changes. The confirmation dialogue with this message will appear.
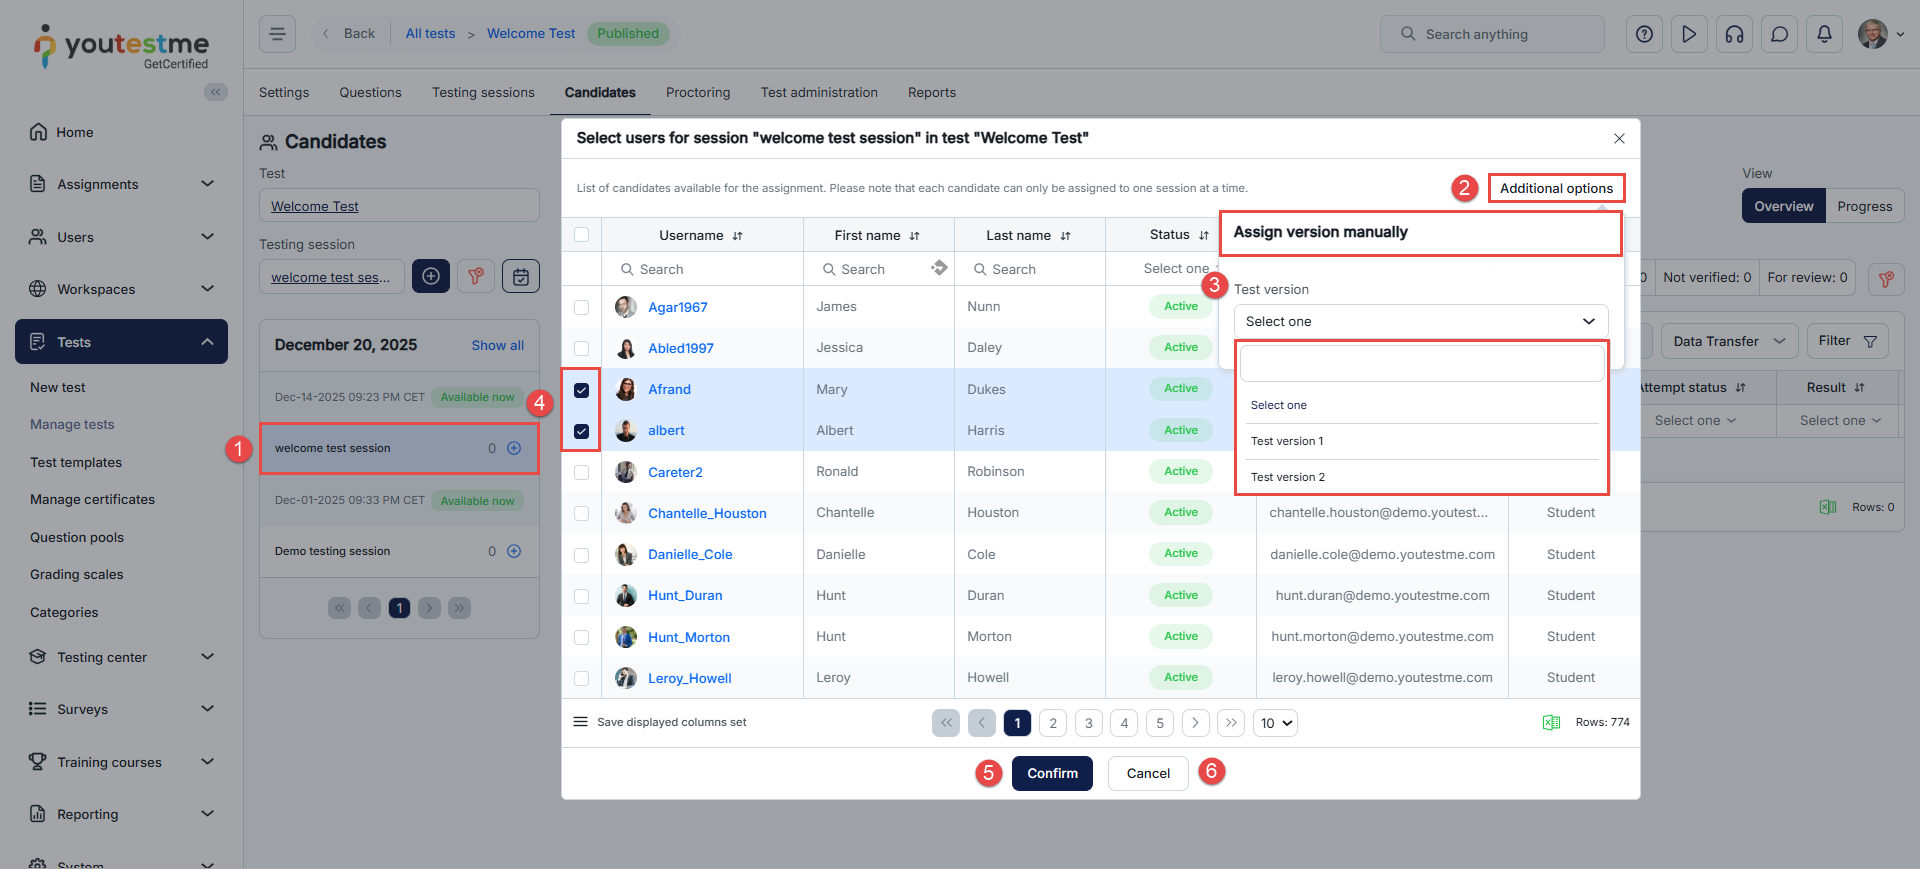
Assign test versions to candidates
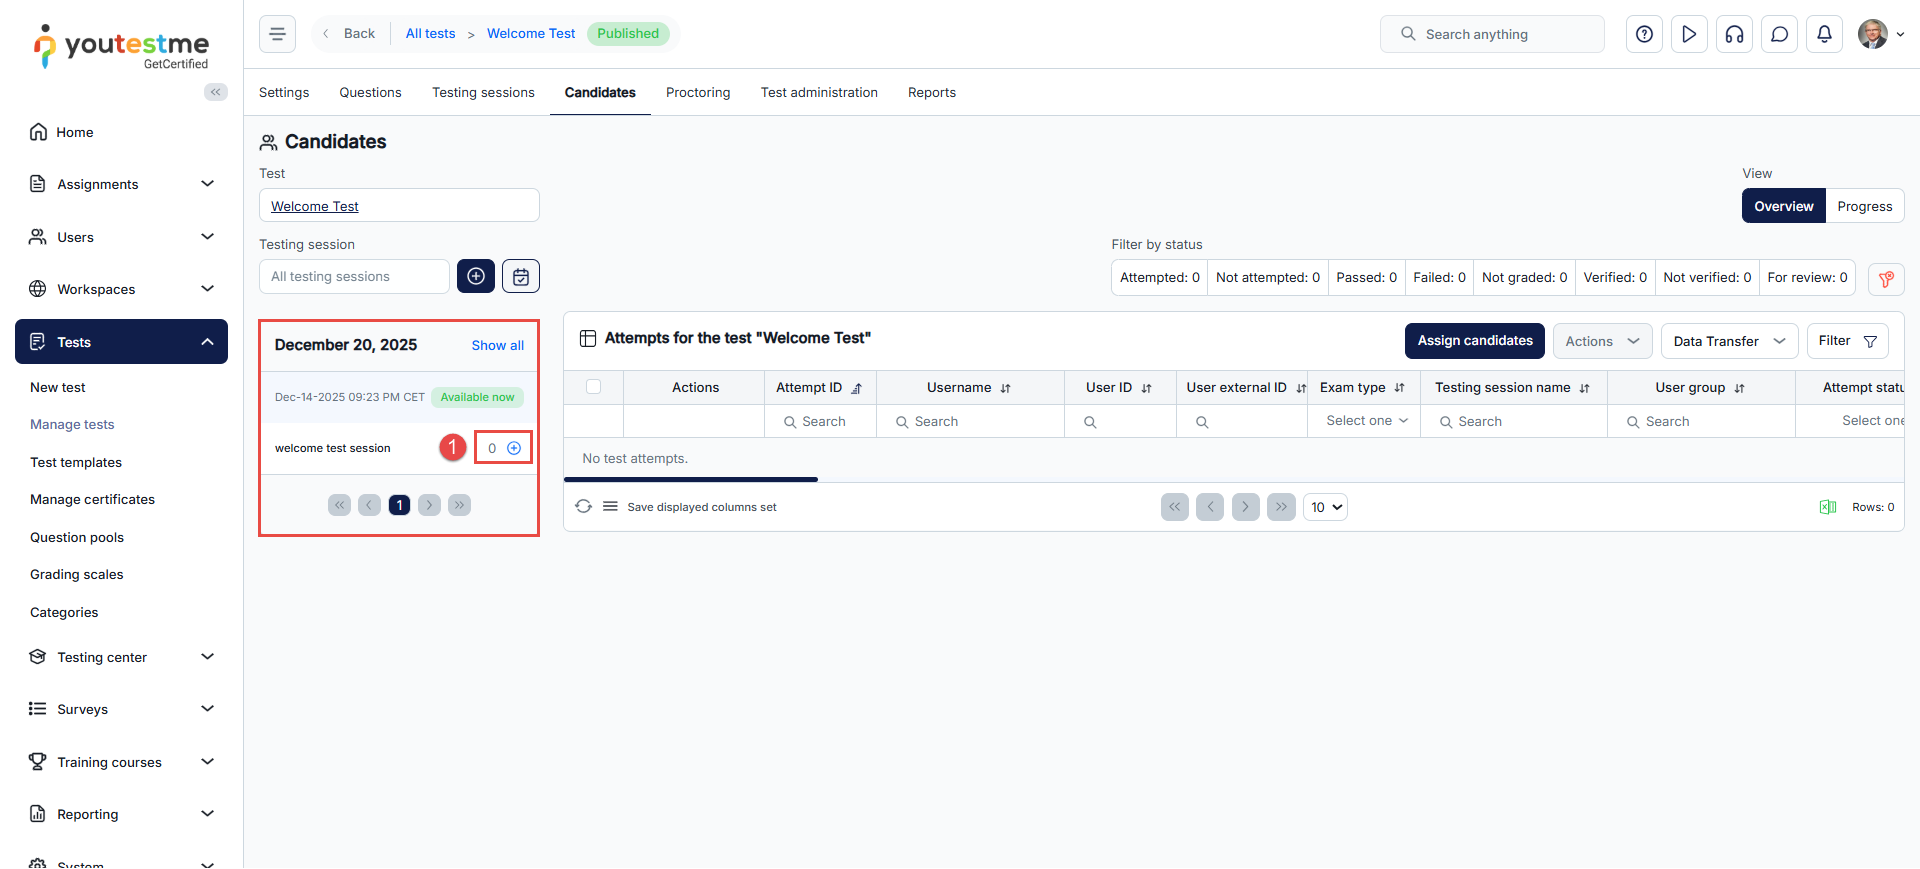
After creating a test, the next step is adding candidates to the testing session.
To assign a test version to the candidate, do the following:
- Click on the Add button next to the desired session.
A pop-up window will appear where you should:
- Ensure that the correct Testing session is selected.
- Enable the option to manually assign specific test versions.
- Click Additional options, then select the test version you want to assign to the user.
- Select the users you want to add to the session.
- Click the Confirm button to save the changes.
- Click the Cancel button to disregard the changes.
For more detailed information on assigning candidates to testing sessions, please see this link.
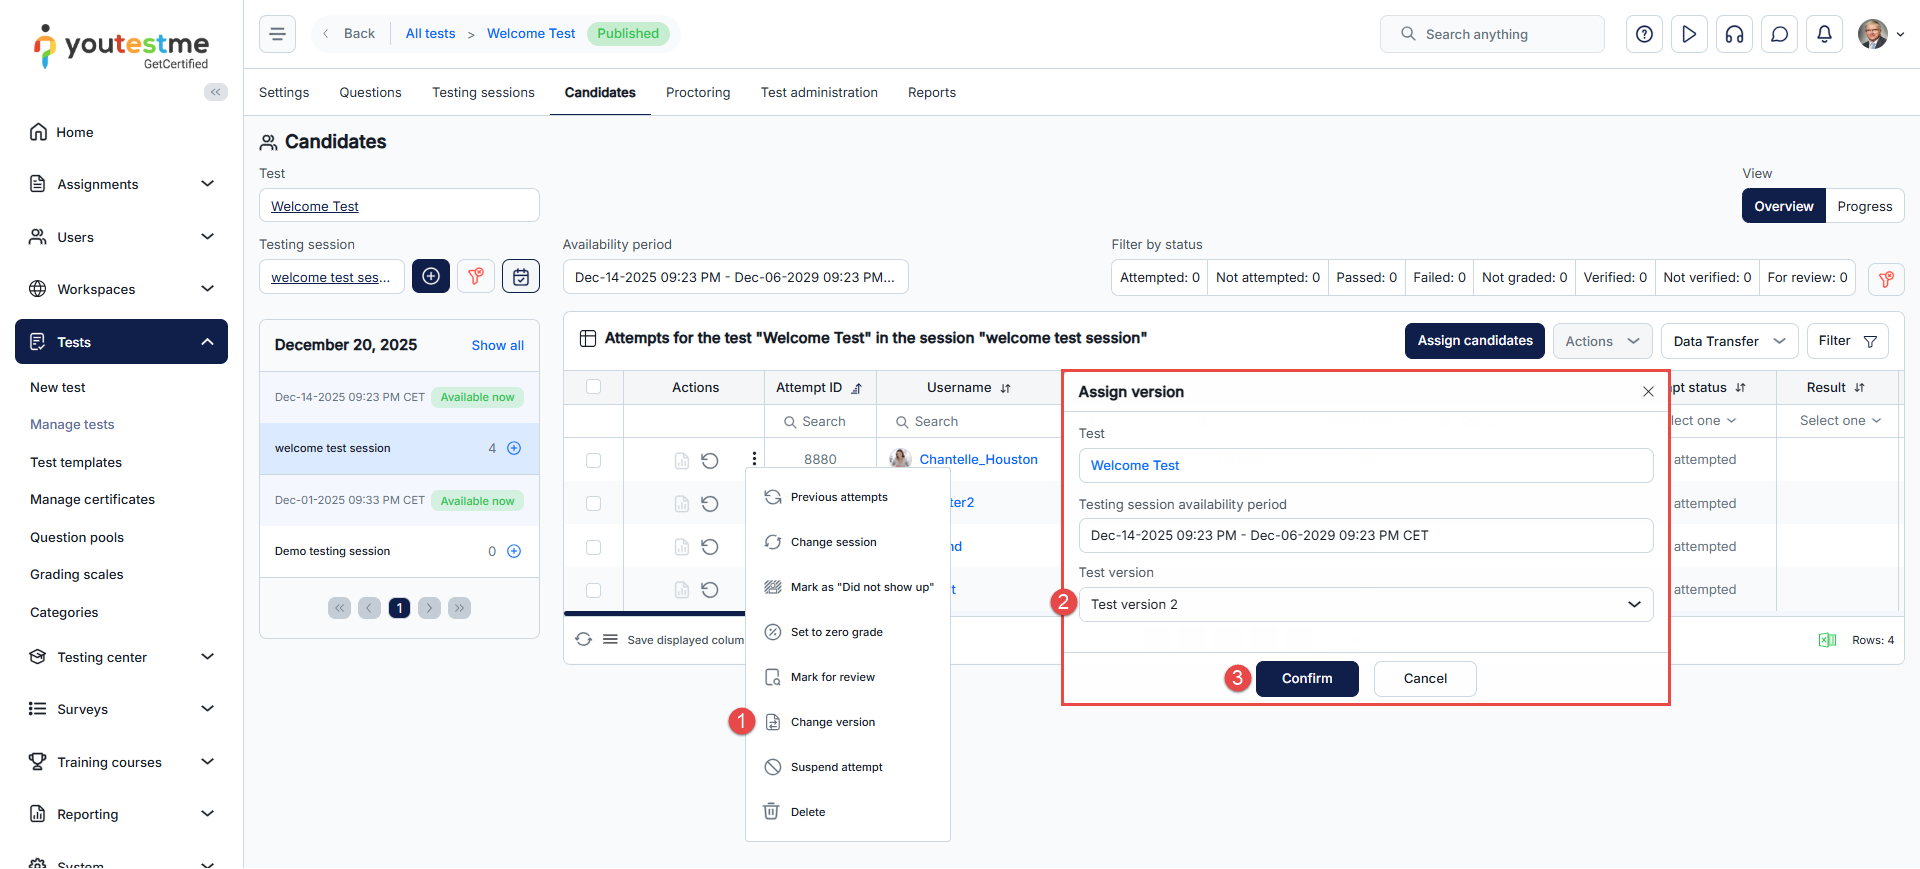
Additionally, once the candidate has completed the test, you can switch to a different test version. In doing so, the previous attempt will be suspended, allowing the candidate to restart the test with a different test version. To do so, in the Candidates tab:
- Choose the desired candidate, then click the three dots to find the Change version option.
- In the pop-up window, you can enable the option to manually assign specific test versions and choose the test version the candidate will attempt. Note: If you want the candidate to be in a different testing session, reset the session and select the desired one before changing the test version.
- Click on the Confirm button to save changes.
Note: For further information, please watch this video tutorial on how to create a test with sections that can represent different areas of knowledge, set different settings, assign candidates to it, and publish it.
