

Article verified for Release 14.1 on February 28, 2025.
This article will explain how to change the application theme, the login page appearance, the logo, and the favicon.
Application theme
Theme refers to the color scheme of the application that can be changed by navigating to the System and choosing Setting and Customization.

Create or Modify Themes
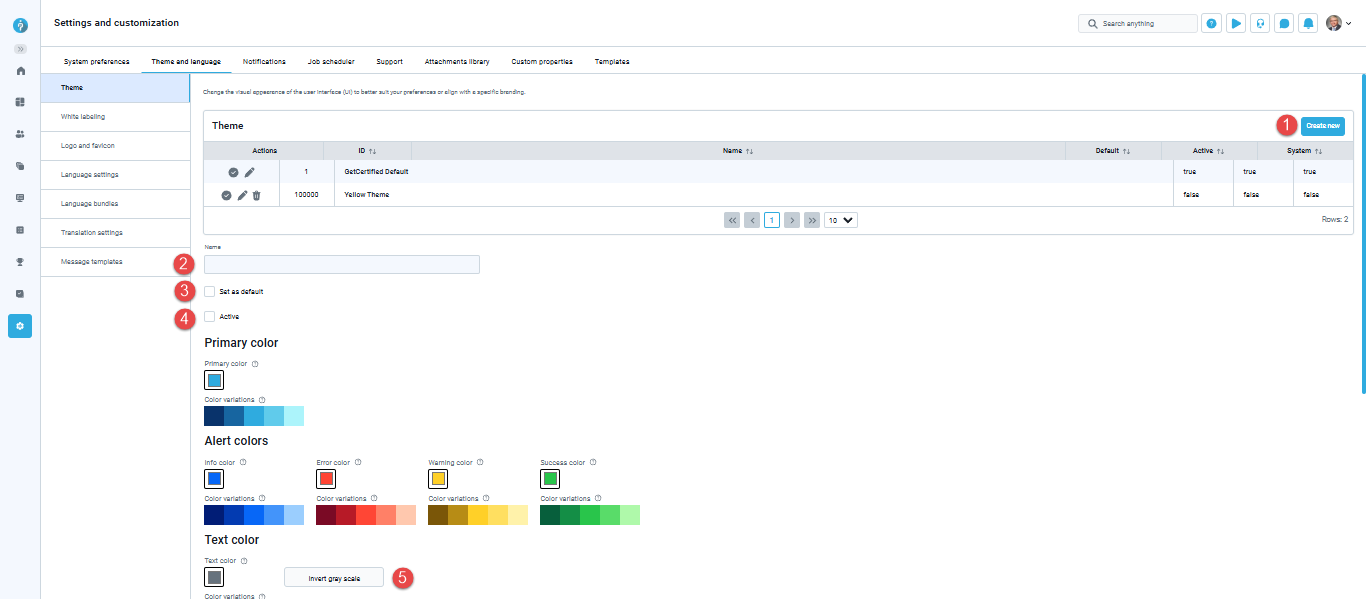
Navigate to Theme and Language, then to the Theme tab.
- View Existing Themes:
- The Default column indicates the theme applied during login.
- Active themes appear in user profiles for selection.
- System themes (predefined) cannot be deleted.

Create New Theme:
- Click Create New Theme.
- Name: Assign a unique theme name.
- Set as Default: Only one default theme is allowed. Requires the theme to be Active.
- Active: Enable to display the theme in user profiles.
- Invert Grey Scale: Toggle to reverse grayscale values (e.g., dark to light).

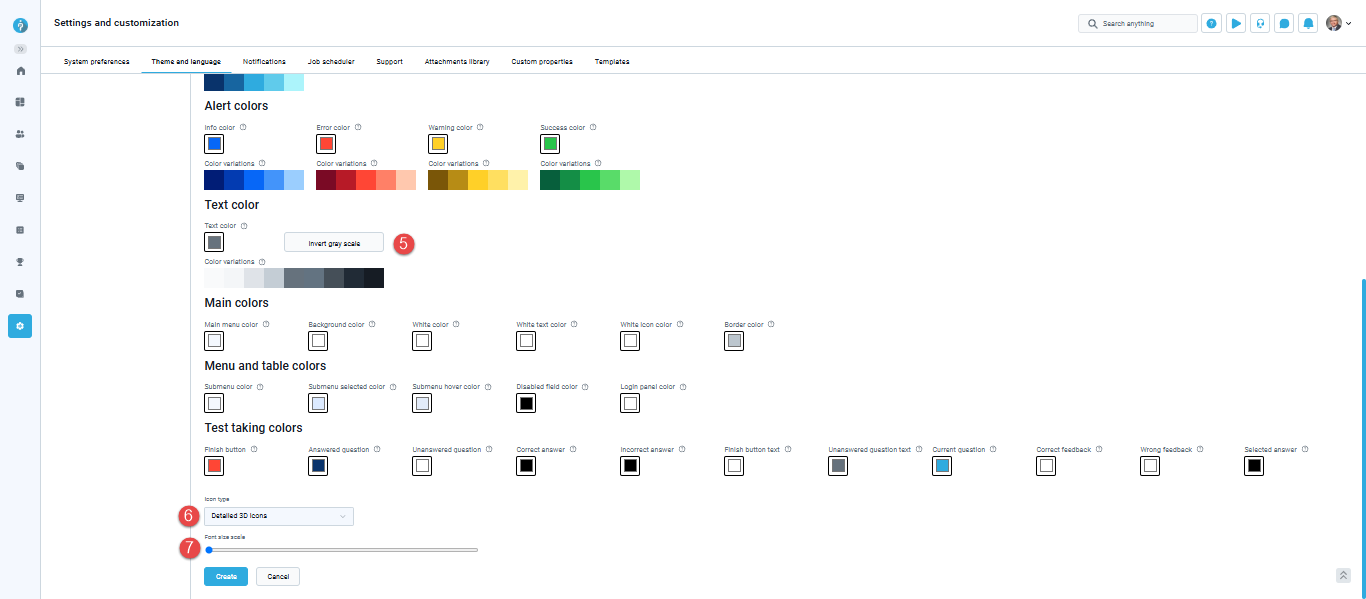
- Icons: Choose between 3D icons or simple flat icons.
- Font Size: Drag the slider to adjust system-wide text size.
Theme Color Customization
- Primary Colors:
- Change primary color – The primary color is typically the dominant color used for buttons, links, menu items, and other key elements.
- Color variations – Different shades of a color. Usually used on buttons for a click and hover.

- Alert colors:
- Change info color – The color used for informative messages that appear in the top right corner when performing specific actions, such as confirming the saving of test settings changes.
- Change error color – The color for error messages that appear in the top right corner.
- Change warning color – The color for warning messages appearing in the top right corner, for example, a note indicating that you must select a test to perform a certain action.
- Change success color – The color used to indicate important labels (e.g., the Passed label on tests or testing sessions that are currently available) or actions (such as the Start button on the My tests page, the Test preview action, etc.).

- Text color:
- Change text color – The color of all text in the application except for white text.
- Color variations – Most text in the application uses the middle color. The darkest color is mostly used for titles.

- Main colors:
- Change menu color – The background color of the main menu.
- Change background color – The background colors, such as the colors of the pages, tabs, and header names.
- Change white color – The interior color of buttons, dropdown menus, tab headers, the background of odd table rows, etc.
- Change white text color – The color of white text, for example, when the menu title is selected.
- Change white icon color – The color of white icons, for example, icons for menu titles.
- Change border color – The color of borderlines.

- Menu and table colors:
- Change Submenu color – color of submenu in the application
- Change Submenu selected color – color of selected submenu in the application
- Change Submenu hover color – color of items in the submenus that the mouse hovers over.
- Change Disabled field color – color of disabled inputs.
- Change Login panel color – color of the background of the login panel.

- Test taking colors:
- Change Finish test button color – color of the finish test button.
- Change answered questions color – color of the answered questions in the test summary.
- Change the unanswered questions’ color – color of the unanswered questions in the test summary.
- Change the correct answer color – color of the correctly answered questions in the test summary.
- Change the incorrect answer color – color of the incorrectly answered questions in the test summary.
- Change the finish button text color – color of the text on the finish test button.
- Change the answered question text color – color of the text on an answered question in the test summary.
- Change the unanswered question text color – the color of the text on an unanswered question that is currently selected in the test summary.
- Change the feedback text box for correct answers color – color of the questions feedback for correctly answered questions. This color will also apply to answer and question feedback text boxes.
- Change the feedback text box for incorrect answers color – color of the question feedback for incorrectly answered questions. Please note that this color will also apply to both the answer and question feedback text boxes.
- Change the color of the selected answer – color of the selected answer in the test within the test-taking process.

The application appearance can be configured only by the administrator role, while changes are visible to all system users.
White labeling
White Labeling refers to the customization of the text on the login page, privacy policy display, links, system naming, and more that can be changed by navigating to Theme and Language, then to the White Labeling tab.
The following options are available:
- Web browser’s tab title – Modify the application name in the web browser tab title right beside the favicon.
- – Modify the acknowledgment text presented on the instructions screen before the test begins. Additionally, this text can be customized for each test separately under the Test Instructions dialog settings. To include an acknowledgment checkbox for candidates, make sure to enable the Require instructions acknowledgment option.
Note: Changing the application language will result in the translation of the default text. However, modifying the default text itself will not be translated when altering the application language. - Emails sender – The name entered here will be presented as the sender’s name in the email body, replacing the $from$ parameter.
- Application link – The URL entered here will be used to generate necessary links for email notifications. The YouTestMe team will update this link if you have configured a custom application domain. This ensures that the email links will be presented using the new custom domain.
- Login instructions – Provide detailed guidelines or include useful links for users to be displayed on the login screen.
- Display privacy policy – Enable this option, and a privacy policy link will appear on the user registration page.
- Privacy policy link – Enter your custom privacy policy link instead of the default one.
- Display personal report animation – Show/Hide animation on the left side of the candidate’s personal report page.


Logo and favicon
Logo and favicon refer to the customization of the logo and favicon of the application, which can be changed by navigating to Theme and Language and then to the Logo and favicon tab.
- Click the Change logo button to upload a logo representing your company or organization. The recommended image size is 270 x 69 pixels.
- Click Reset to default to restore the application logo to the default one.
- Click the Change favicon button to replace the favicon displayed in the web browser’s tab title.
- Click Reset to default to restore the favicon to its default setting.

