
Article verified for Release 15.1 on November 26, 2025.
GetCertified can act as a Service Provider via the SAML 2.0 protocol, enabling the exchange of authorization data with an Identity Provider. GetCertified supports OneLogin, Okta, SSO Circle, and many other Identity Providers.
SAML 2.0-based Single Sign-on (SSO) can be configured for multiple identity providers simultaneously. You need to create an SSO configuration and define the identity provider’s parameters. Each SSO configuration you create includes an assertion consumer service endpoint that processes the SAML response.
Configuring the SSO
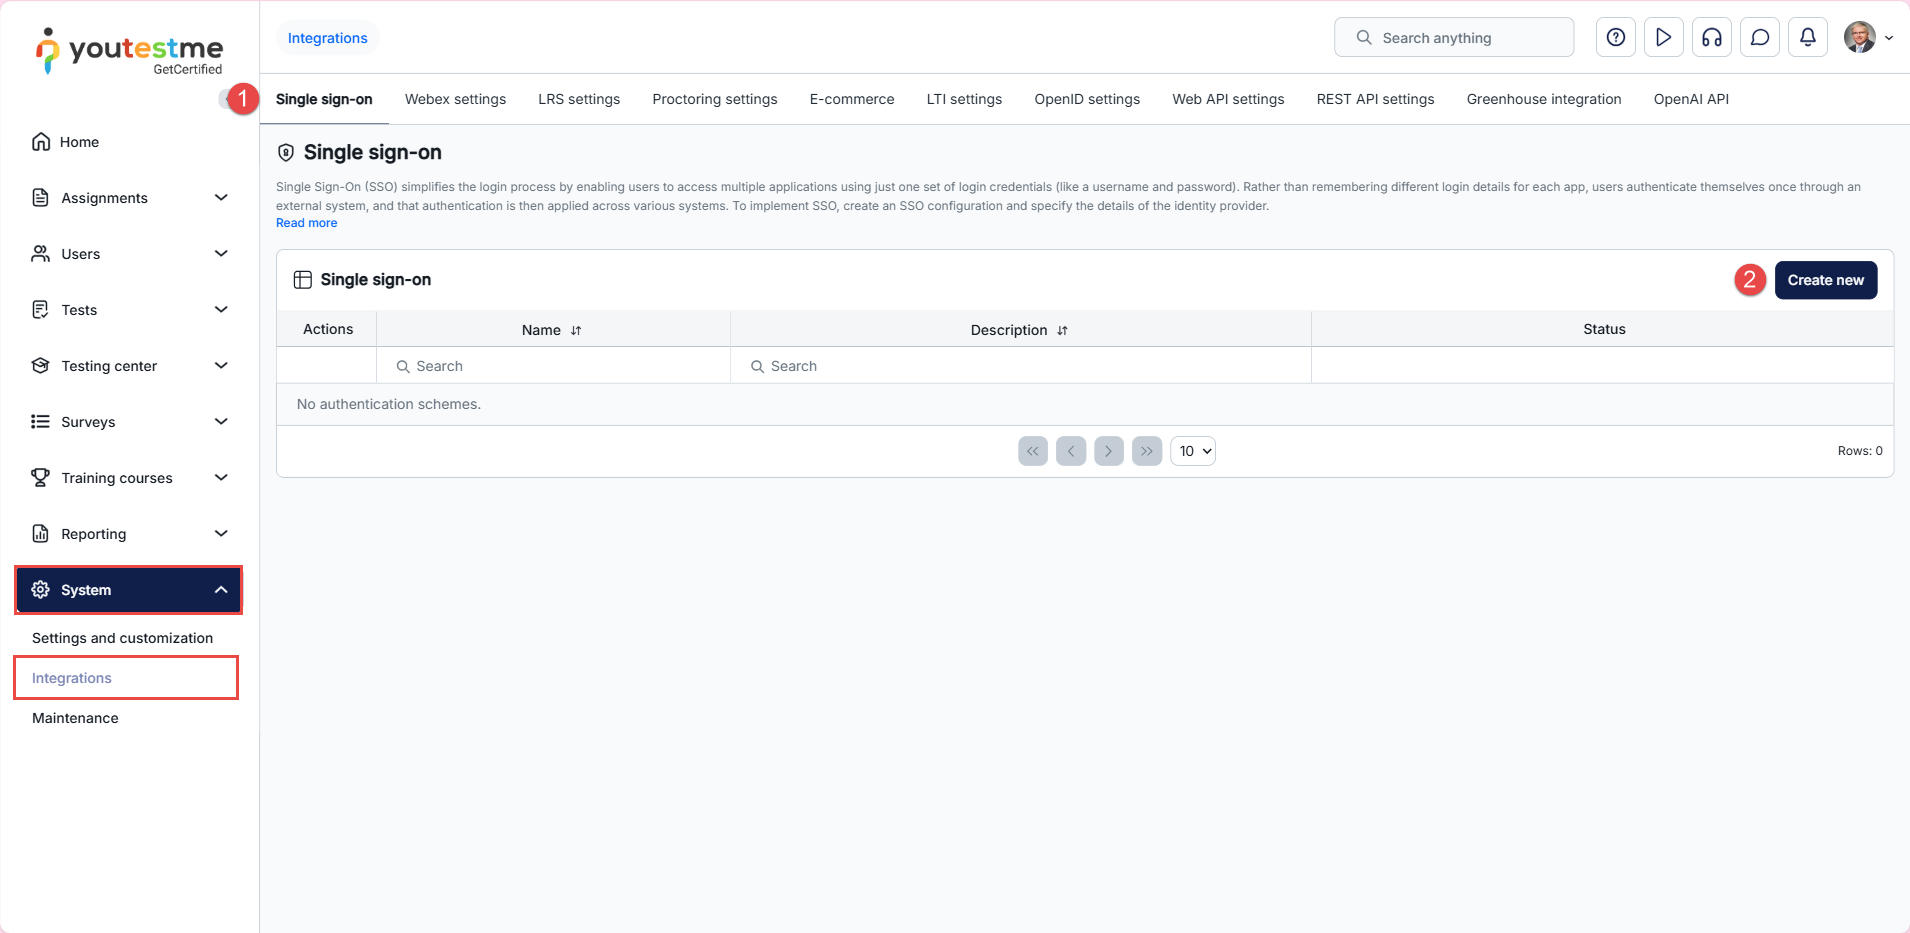
Navigate to Systems and select Integrations.
- Click the Single sign-on tab.
- By clicking the Create new button, a new pop-up window will appear where you can enter the parameters of the new SSO configuration.
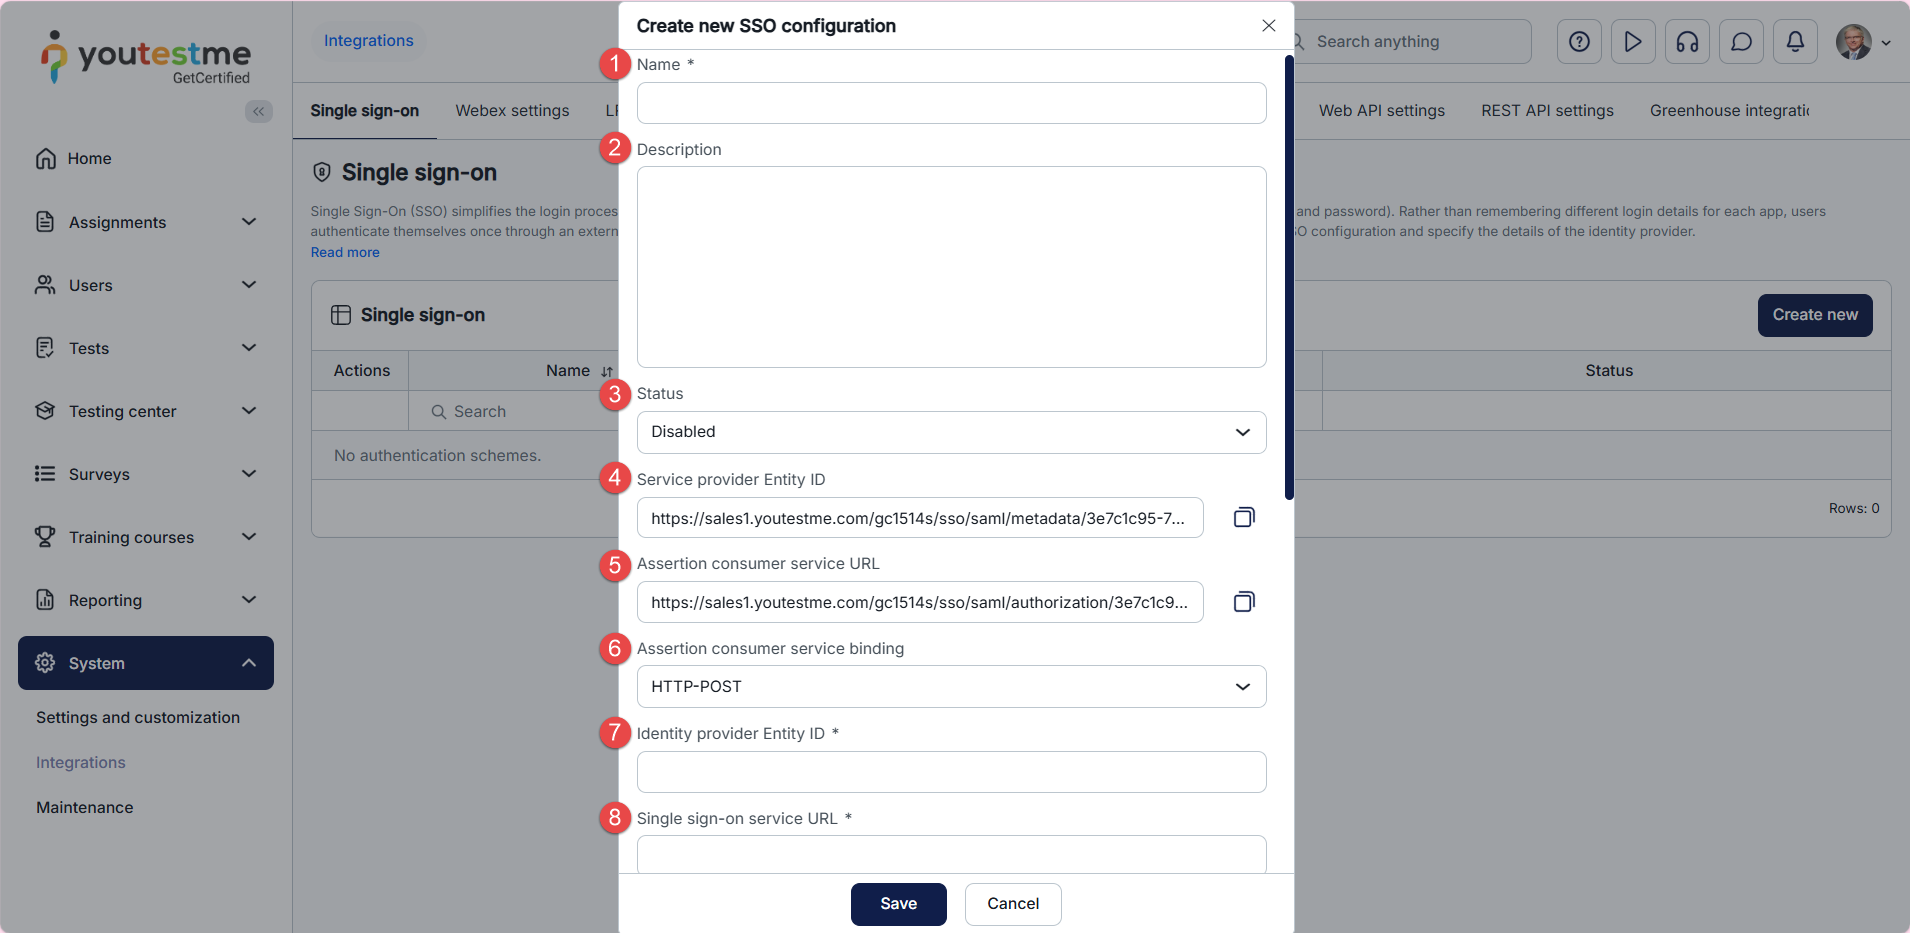
When creating a new SSO configuration, you need to enter the parameters for configuring the service provider’s side. GetCertified provides the parameters that you need to configure the identity provider’s side.
- Enter the Name of the SSO configuration. The name must be unique for each SSO configuration, as it identifies that configuration.
- Optionally enter the Description of the SSO configuration.
- Choose the Status of the SSO configuration. If the status is Enabled, users can sign in using the identity provider specified in the configuration. Otherwise, they will not be able to do so.
- Use the provided Service provider Entity ID URL to configure the service provider on the identity provider’s side. The value represents the service provider’s identifier.
- Use the provided Assertion consumer service URL to configure the service provider on the identity provider side. The field’s value represents the endpoint URL, where the SAML response from the identity provider will be returned.
- Choose the Assertion consumer service binding that is suitable for the identity provider. The field’s value represents the SAML protocol binding when returning the SAML response from the identity provider.
- Enter the Identity provider Entity ID, the identifier of the provider entity. The entered value must be a URL.
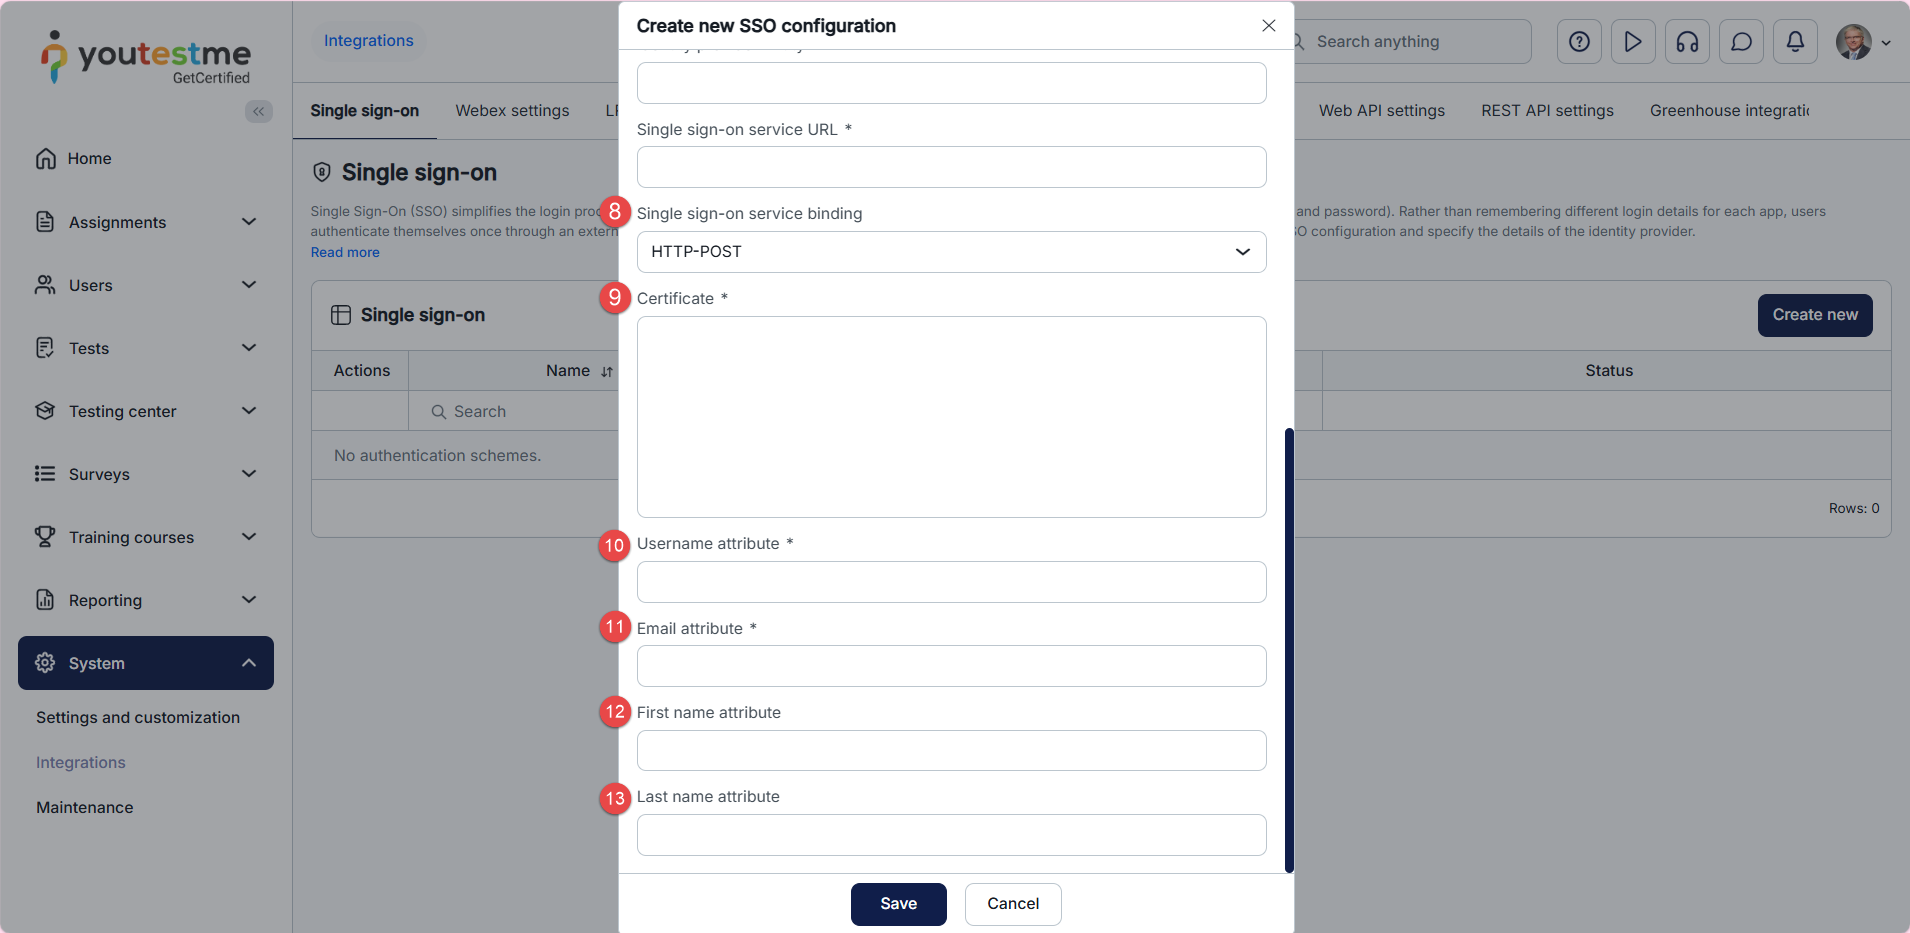
- Enter the Single Sign-On service URL, a URL of the identity provider’s single sign-on service endpoint, where the service provider will send the authentication request.
- Choose the Single sign-on service binding, a SAML protocol binding, when the service provider sends the authentication request to the identity provider.
- Input the Certificate, the public X. 509 certificate of the identity provider. The certificate must be in a string format without headers. Use the tool on the following link to convert the certificate to a string format without headers.
- Enter the Username attribute, the name of the assertion in the SAML response whose value will be used as the GetCertified user’s username.
- Enter the Email attribute, the name of the assertion in the SAML response whose value will be used as the GetCertified user’s email.
- Optionally enter the First name attribute, the name of the assertion in the SAML response whose value will be used as the GetCertified user’s first name.
- Optionally enter the Last name attribute, the name of the assertion in the SAML response whose value will be used as the GetCertified user’s last name.
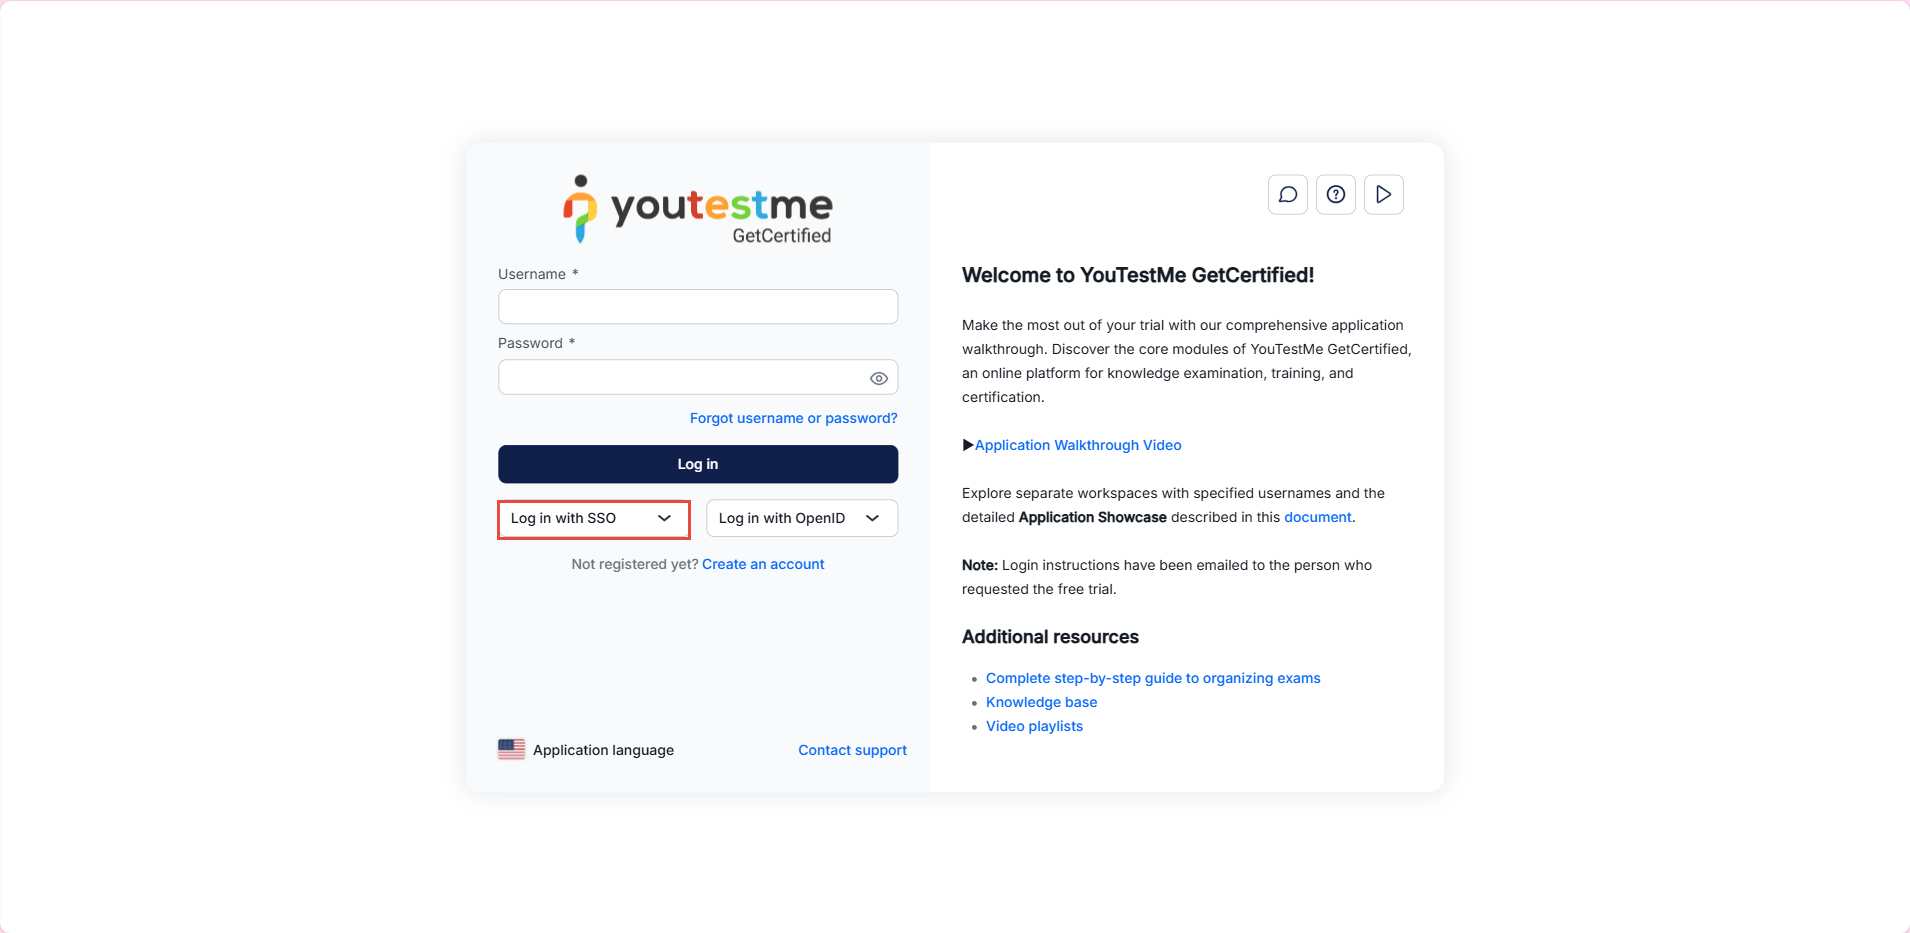
If you configured everything appropriately, the option to sign in with SSO should be visible on the login page.
NOTE: Please contact our support team at support@youtestme.com if you have trouble configuring your SSO.
