How to Include a Direct Link in Results Email Notifications

This article provides instructions on informing candidates of their results through email notification, including a link that grants candidates direct access to the results section.

Tailoring the Email Notification for Results #

Users with an Administrator role can personalize the email notifications sent by the application to candidates.

To edit the results email notification, please follow the following instructions:

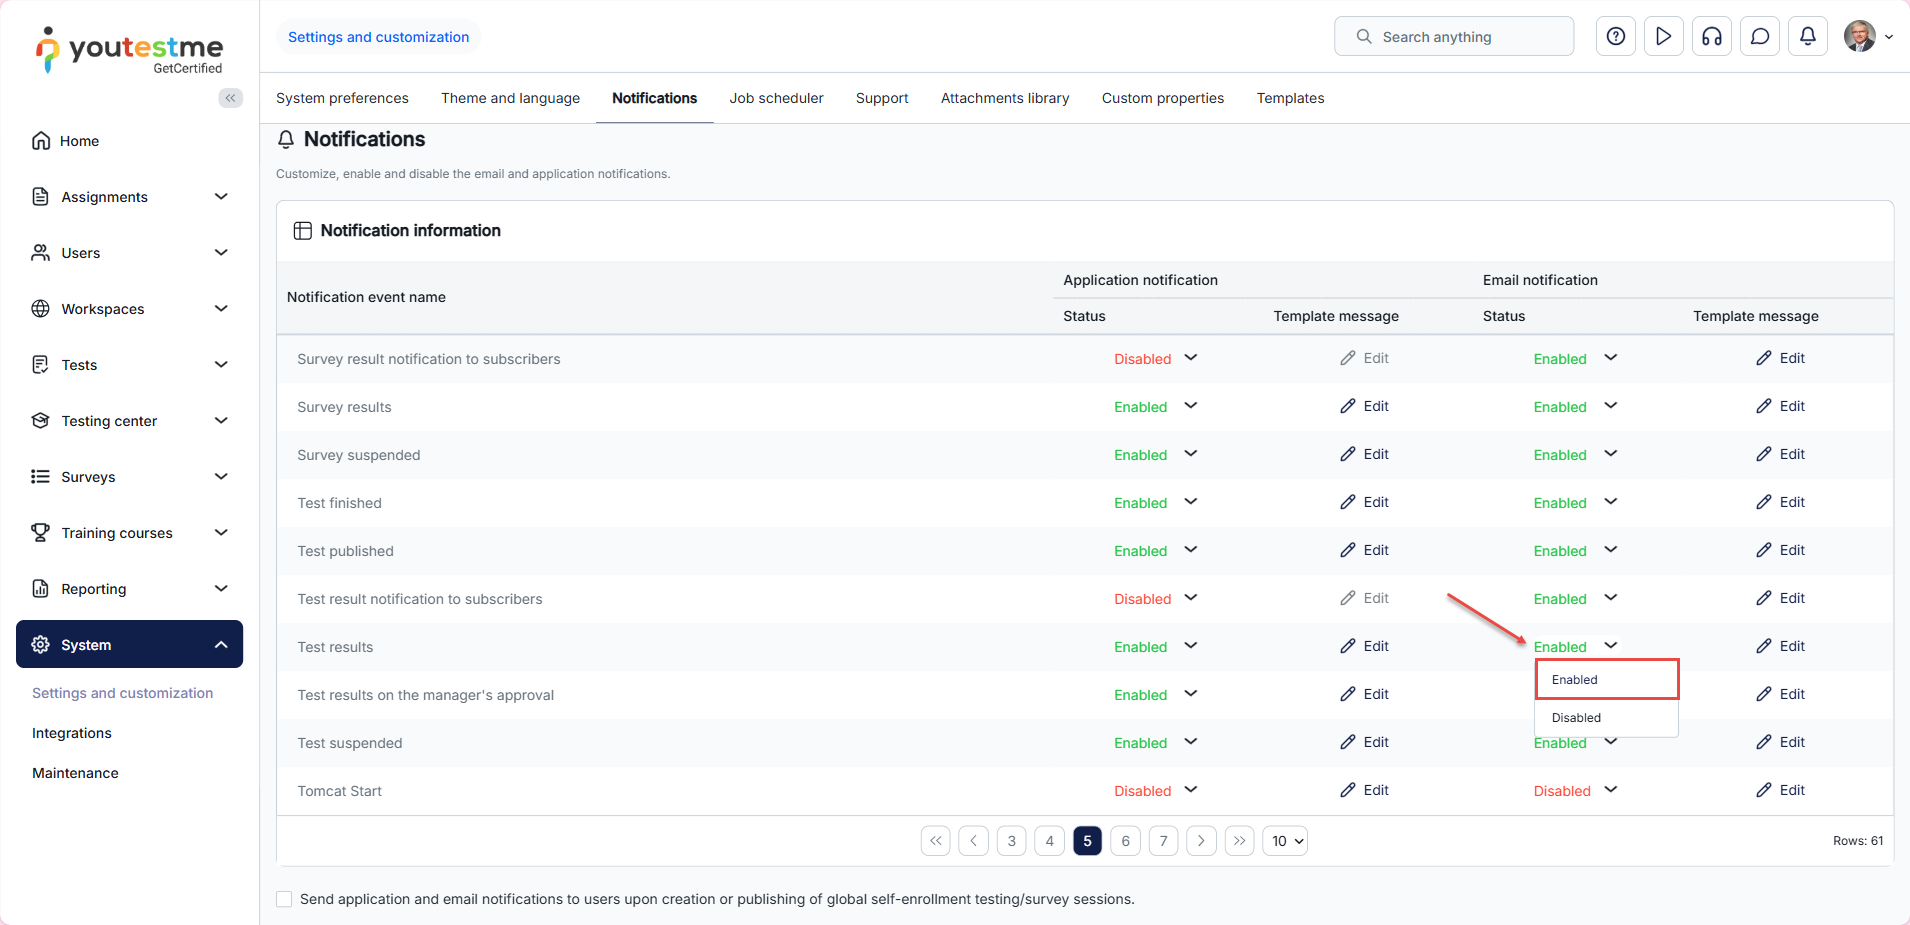
  1. Select System from the main menu and choose Settings and Customization.
  2. Navigate to the Notifications panel.
  3. Find the Test results notification and click on the Edit option in the e-mail notification column.

System- Settings and customization - Notifications

Include the $directLink$ variable in the email notification template, make the necessary adjustments, and then click the “Save” button to save the modifications.

Edit email template- Direct Link

Make sure the email notification is Enabled.

The email notification from the candidate’s perspective #

Upon the availability of results, candidates will receive an email notification inclusive of a direct link that grants them immediate access to their results, eliminating the need to log into their accounts.

Link to personal report

Testing the results email notification #

Before releasing the results, it is crucial to conduct a thorough examination from a student’s standpoint, using a dummy student account linked to your email address, in order to ensure that the email notification settings have been configured correctly.

To assess this feature, please adhere to the following guidelines:

  1. Select the Tests/Manage tests tab.
  2. Select the Candidates tab.
  3. Assign the test to the student account, and then log in as a student using that account to complete the test.

Depending on the test result settings, notifications can be dispatched to candidates either upon completion or after an administrator reviews and approves the results for release. If the On manager approval option has been selected, it may be necessary for you to review the candidate’s results and subsequently publish them:

  1. Once you finish the test as a student, log in as an administrator, and navigate to the Testing center/Candidates tab.
  2. Find your student using the search option in the Username column.
  3. Select the Report icon.

Click on the Show button. This will trigger the email notification you prepared earlier, but only for your student.

Students perspective #

  1. Search for the email notification sent by the system.
  2. Make sure to check your Spam and Trash folders.
  3. If you didn’t receive the notification, wait for a few minutes and refresh your mailbox.

If you still didn’t receive the email notification, sign in as an administrator and check the mail server, and the sent emails.

    Checking the personal report as a student #

    If you received the notification, click on the direct link in the notification.

    Check if everything you want to display to the students is displayed in the personal report.

    If it is not, use another web browser to access the application as an administrator.

    1. Find your test and open the Settings panel.
    2. Click on the Personal Report settings.
    3. Check/uncheck the options you would or wouldn’t like to display in the student’s personal report.
    4. Click on the Save option.
    5. Returning to the browser where you are logged in as a student, refresh the page. This will immediately update the personal report according to your latest settings.

    Checking the awarded certificate(s) as a student #

    Next, check if the student was awarded the certificate(s) they were supposed to.

    1. Click on the Export certificate button.
    2. Choose Export as a PDF option.
    3. Check if the certificate contains all the information you want to include in it.

    If the student wasn’t awarded the certificate they were supposed to or the certificate does not contain all the information you wanted, use another web browser to access the application as an administrator.

    1. Find your test and open the Settings/Certificates tab.
    2. Check if you attached the certificate to the test. It should be visible on the Certificates panel if you did.
    3. Check if the condition for receiving the certificate is set up properly. Click on the Options (three dots) and select Edit condition to see the condition you specified for awarding this certificate in this test. Contact our support team for assistance if you didn’t attach and set up certificate(s) properly. Attaching the certificate at this point and changing the conditions will not affect students who previously attempted the test, only future ones.
    4. To change the information on the certificate, click on the Options (three dots) and select Edit. Update the parameters you want and click on the Save button. Confirm that you want to change the certificate, but remember that this will apply the modifications across the system, which you should consider if you attach this certificate to other tests.

    Returning to the browser where you are logged in as a student, refresh the page.

    1. Click on the Export certificate button.
    2. Choose Export as a PDF option.
    3. Check if the certificate contains all the information you want to include it.
    4. Select the Sign-out option.

    It is important to sign out before accessing the application as another user because the system is not intended for logging in with multiple users at the same time using the same web browser, and this can cause Error screens to appear.

    Checking the awarded certificate(s) of a real student #

    Before publishing the results, the final check should be using the profile of a real student who attempted the test.

    1. Use another web browser to access the application as an administrator and select the Tests/Manage tests tab.
    2. Find your test and open the Candidates tab.

    3. Select one student.
    4. Select the Report option.

    5. Check if they received the certificate(s) they were supposed to.

    Releasing the test results #

    1. If you went through all these checks, click on the Show button.
    2. Confirm that you want to release the results to the students.

    This action will send the notification only to the students whose results have not yet been released.

    If some students previously attempted the test, and you released their results to them, they will not receive any email notification.

    Checking if the emails were sent #

    As a final check, check if the emails were sent.

    Powered by BetterDocs