
Article verified for Release 15.1 on October 3, 2025.
This article explains how to enable or disable the instant self-registration module that allows new students to register without waiting for the administrator’s approval.
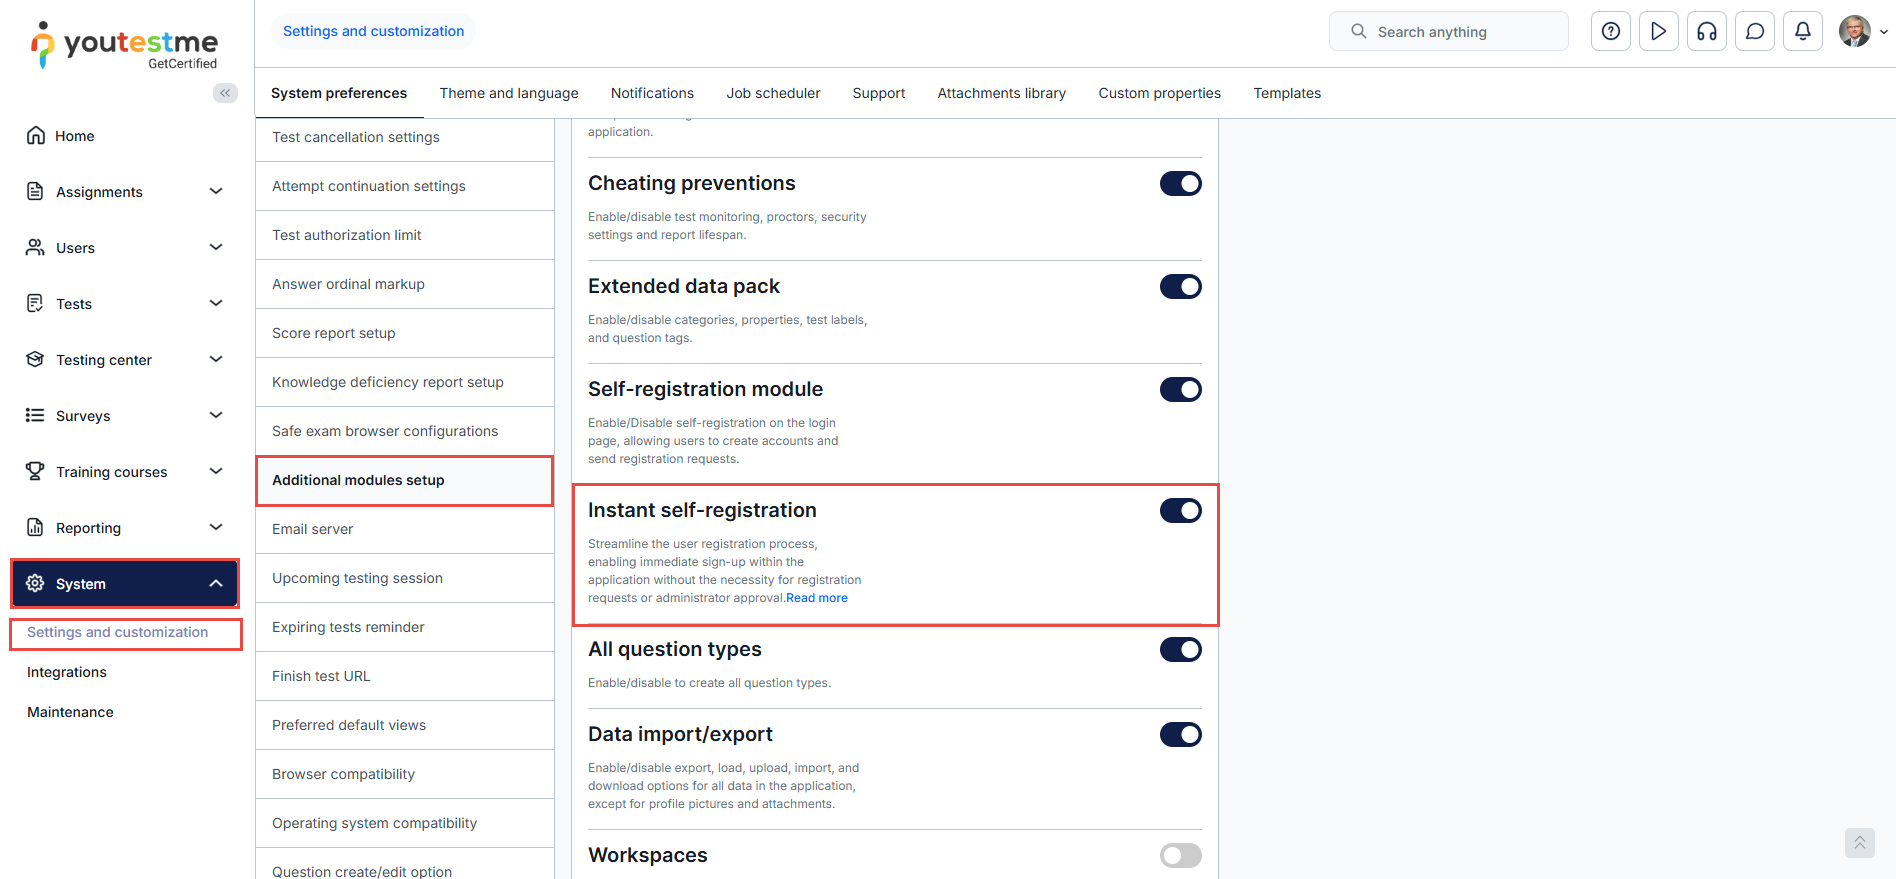
Enabling Instant self-registration Module
To enable the Instant self-registration module, go to the System section in the left-hand menu, select Settings and Customization, and navigate to the Additional Modules tab. Here, activate the self-registration module by toggling the corresponding button. Once enabled, the Instant self-registration option will appear and can also be activated by clicking its toggle. To disable it at any time, toggle the button off.
Approving registration requests if Instant self-registration is disabled
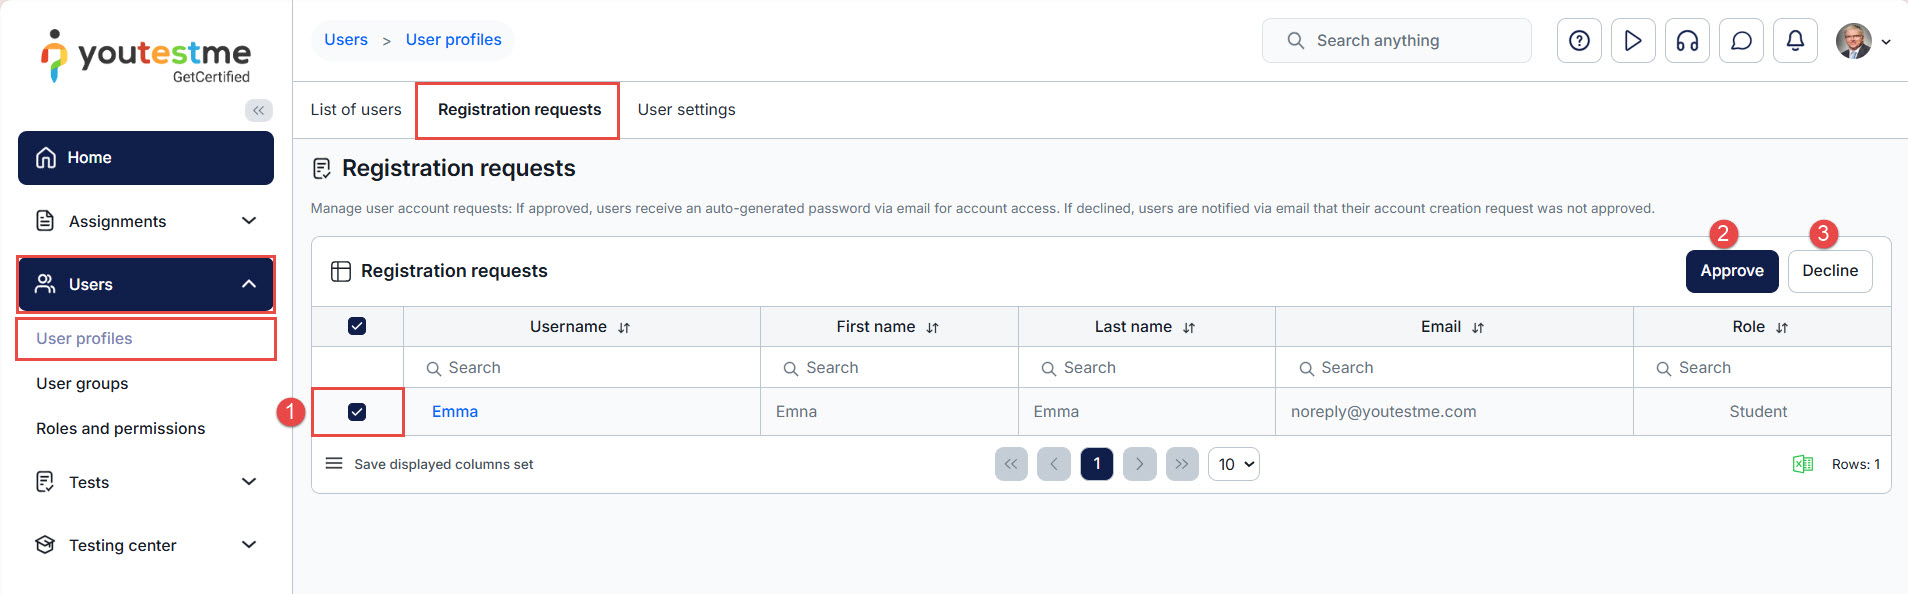
Administrators must manually approve or decline new registration requests if you disable the instant self-registration module.
Click the Users on the left-side menu, select User profiles, and select the Registration requests tab.
To approve or decline registration requests:
- Tick the box next to the student’s username.
- Approve – to approve the registration request and permit the user to become a student
- Decline – to decline the registration request and prevent the user from becoming a student.
A student will consequently receive an email notification containing a generated password. To learn how to configure these notifications, please read the How to configure email and application notifications article.
The other way to approve or decline the registration request is through the notifications panel.
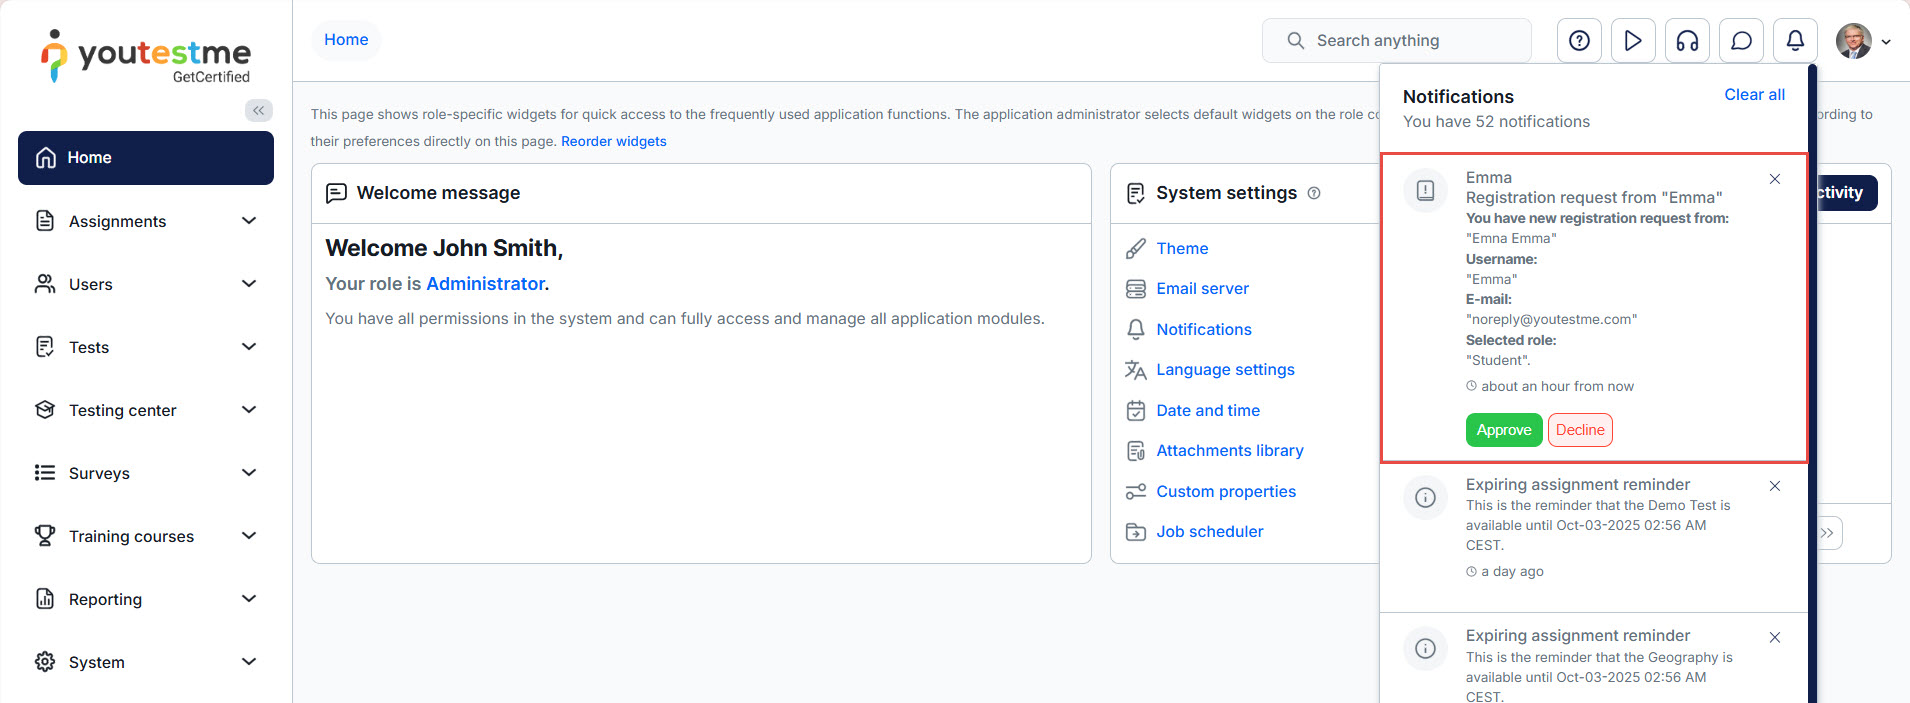
Note: When an administrator approves the request, the registration process for that student is finished.
For more related instructional material, please visit:
