
Article verified for Release 15.2 on March 23, 2026.
This article provides a comprehensive guide to creating a paper-based test in the YTM application, exporting it for candidates, and efficiently importing the completed test results back into the system using Remark.
Creating a Paper-Based Test
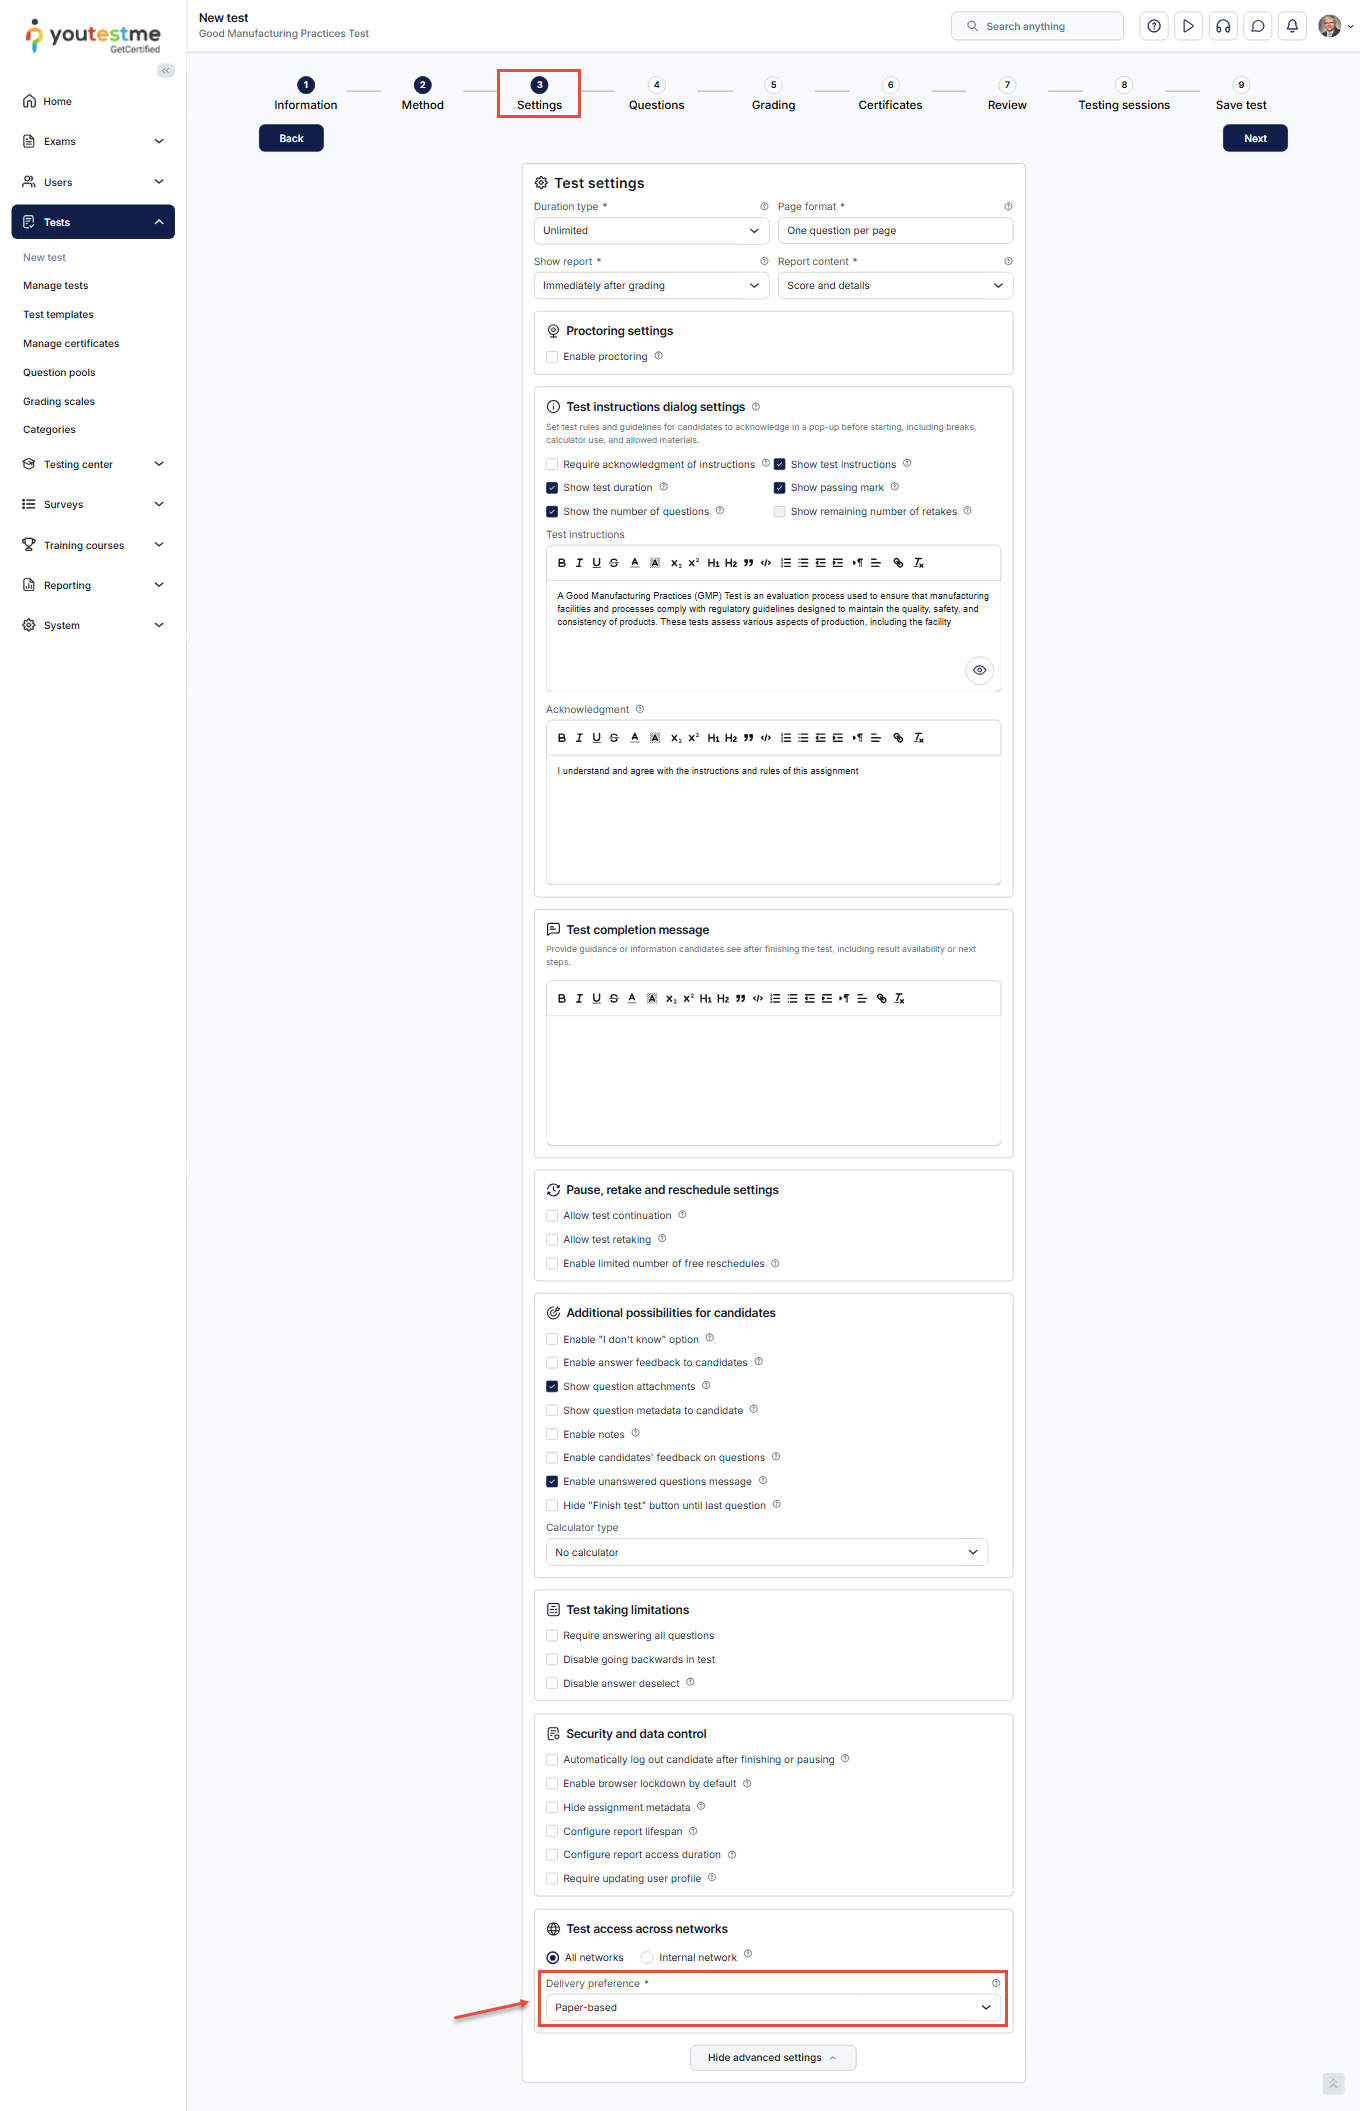
To create a paper-based test, select Paper-based as the delivery preference in the third step of the Test creation wizard.
Note: Remark Office OMR supports only three question types:
- Single-choice questions
- Multiple-choice questions
- True/False questions.
Ensure your questions follow these formats for seamless integration. For more information on how to create a test with questions, please visit this article.
Exporting the Test Package
Once you’ve created a test in the application, the next step would be to export the test package. To access the testing location page:
- Navigate to the Testing sessions tab.
- Select the three dots option.
- Select the Sharing option.
- Click on the button to export the test package.
- In the pop-up confirmation dialog, click the Confirm button.

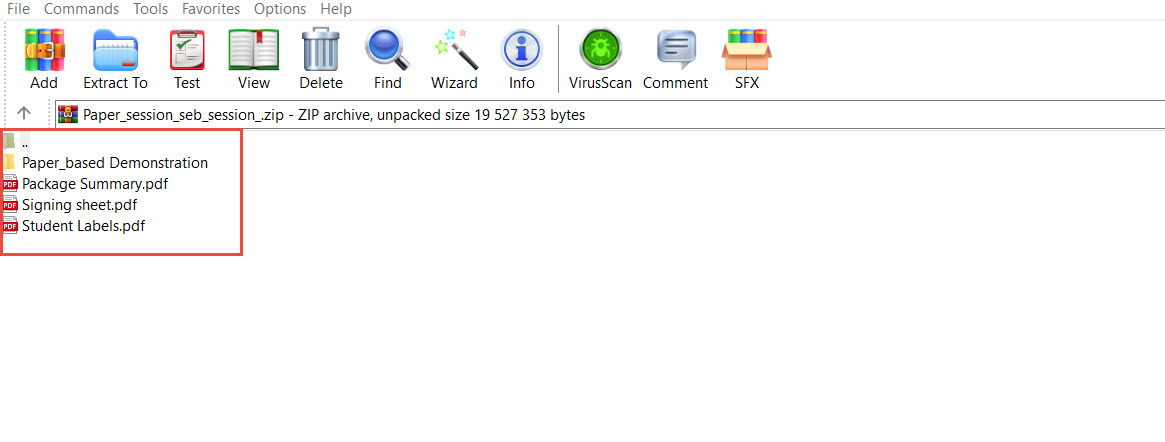

Exporting the Bubble Sheet Only
- Navigate to the Basic information tab.
- Click on the Options.
- Choose Export options.
- Select Export as PDF.
- When the pop-up window appears, choose the export type – Download the blank bubble sheet.
- Use the Export button to finish the action.
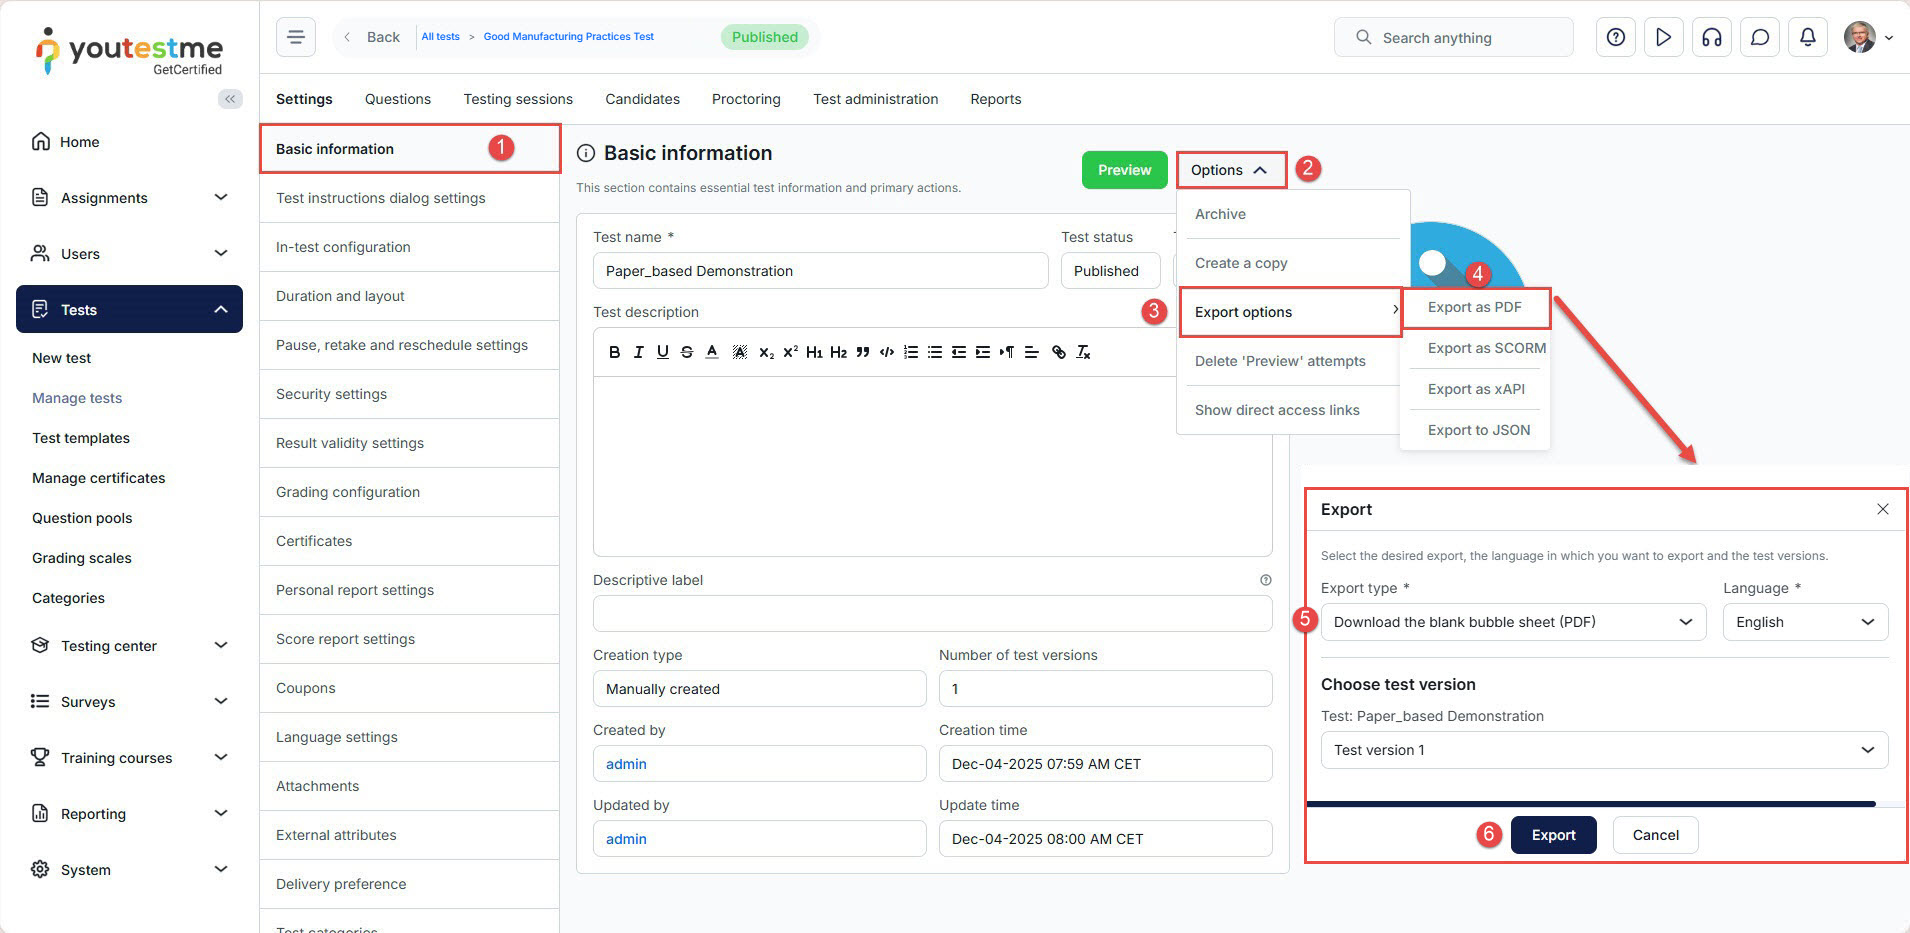
The exported bubble sheet contains blank circles and can be printed for candidate use.
Candidates perspective
From the candidate’s perspective, taking the test should look like this.
- Candidates complete the test: They should use a pen to circle their answers on the paper.
- Scan the completed tests: Once all candidates have finished, use a scanner to capture their answers for processing.
Recommended Scanner Equipment
Any commercially available scanner can be used. However, for optimal performance with Remark Office OMR and YouTestMe, the following specifications are recommended:
Scanner Type
- Multifunctional scanner (flatbed or sheet-fed)
- An Automatic Document Feeder (ADF) is preferred for higher throughput
Minimum Technical Specifications
- Scan resolution: 300 dpi or higher
- Speed: At least 20 pages per minute
- Supported page size: Minimum A4
- Integration: TWAIN driver support or direct compatibility with Remark Office OMR
- Connectivity: USB or secure network connection (LAN or Wi-Fi)
Example Models
- Devices that meet the above requirements include:
- Brother ADS Series
- Epson WorkForce Series
- Canon DR Series
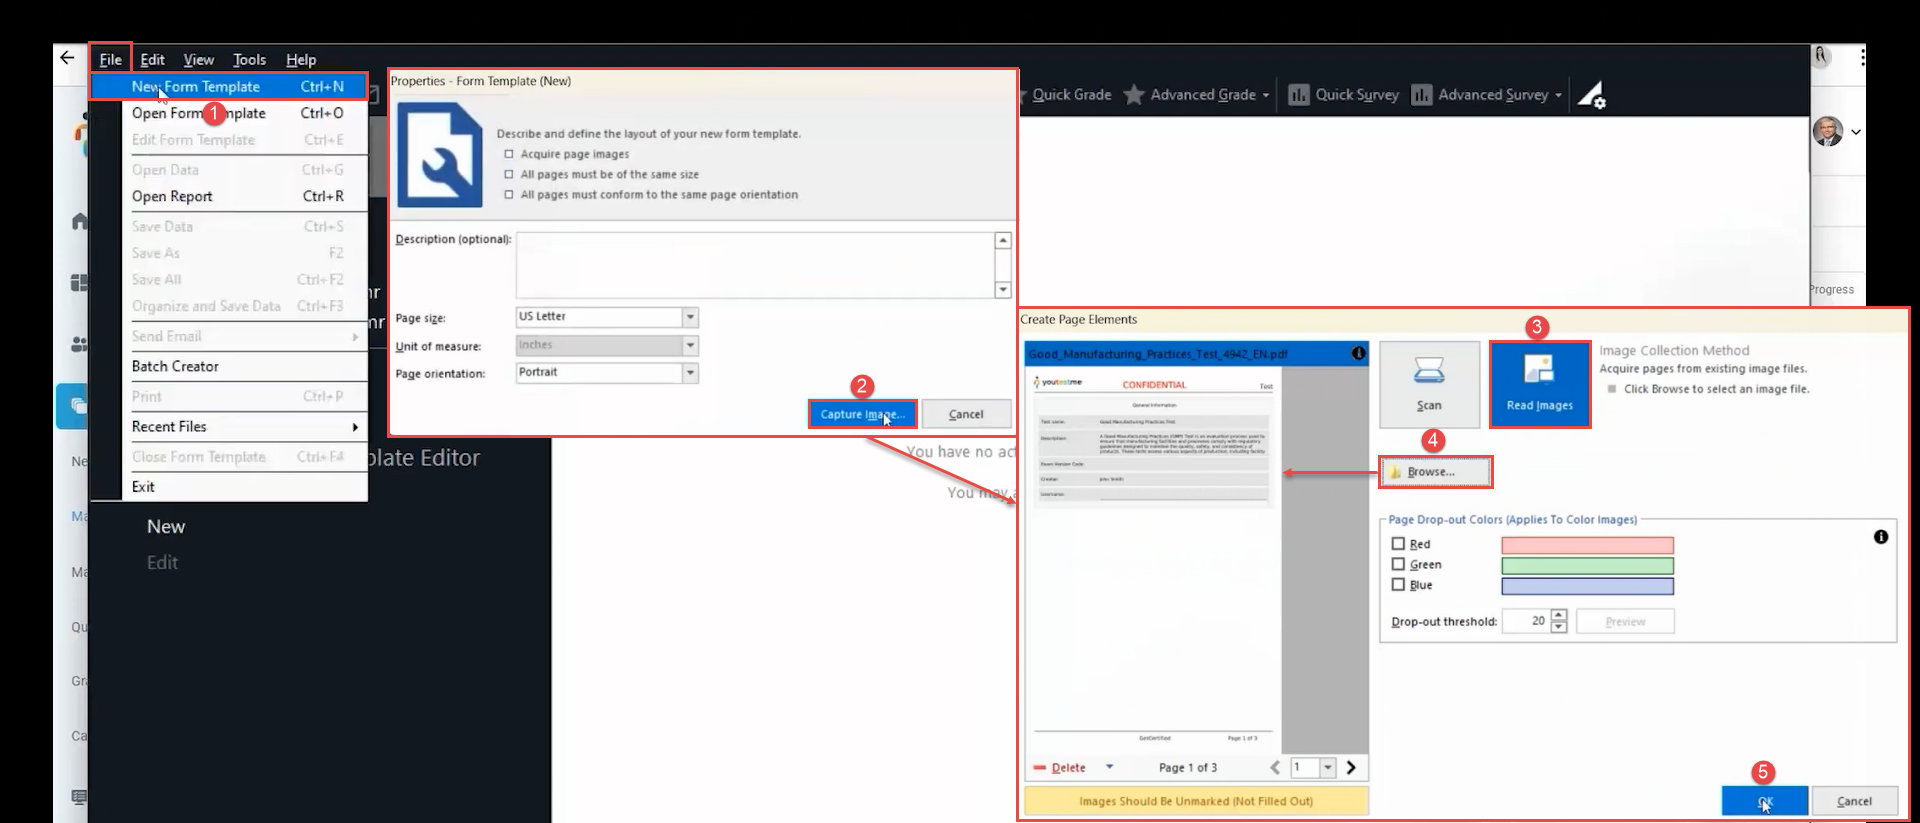
Creating a New Template in the Remark software
Remark Office OMR is a software used to recognize and analyze paper forms and surveys. It allows you to scan, digitize forms, automatically recognize data, create databases, and analyze the collected information to optimize business processes. The next step is to create a new template in Remark, which is essential for accurately scanning and processing paper-based test results. The template ensures the system correctly reads and imports the candidates’ answers.
To do so:
- Select the File option and select New Form Template.
- Select the Capture Image button and wait for a Create Page Elements pop-up window.
- Select the Read Images option.
- Browse through your personal files until you find the exported PDF you want to import into Remark.
- Wait for it to finish importing, and then click the OK button.
Once the software reads the template we imported, it’s important to explain the functionalities that we will be using in the software first.
In the Remark Office OMR software, you can mark your answers and questions using a special tool to identify the regions. OCR stands for Optical Character Recognition, which allows you to read machine-printed characters. Click and drag the purple section next to the ‘Username’, for instance, for the username.

A pop-up dialog will appear, and you will input the region name. We’ll call it Username. The OCR type should be Legacy, which means reading text discovered using invasive techniques within a rectangular window area. Click OK.

Next, we’ll go to the second page, where our questions and answers are located. Click on the OMR option and drag it onto the field where the answer bubbles are. OMR allows you to read any fill-in-the-bubble type forms. We’ll type out Answer 1 in the region name, and we’ll leave the OMR type the same. The region orientation should be changed to the column, and then you can type out the labels in the table below.

In the advanced region properties, we should set multiple responses as not allowed. Set the replace with field to nothing and flag blanks with never. Repeat the same for all the other answer bubbles.

These settings apply to single, true, and false question types. For multiple choice questions, the OMR region definition settings stay the same, but in the advanced region properties, the settings will be different.
In multiple responses, we’ll enable the allow all option. Minimum responses are not required. Blank response exceptions will remain the same as the previous question types. Let’s save this template next and save it in a designated place on our desktop.

After finishing the changes, save the template in the File/Save.
Candidates perspective
From the candidate’s perspective, taking the test should look like this.
- Print the test: Ensure the test is printed clearly and legibly for candidates.
- Candidates complete the test: They should use a pen to circle their answers on the paper.
- Scan the completed tests: Once all candidates have finished, use a scanner to capture their answers for processing.
Recommended Scanner Equipment
Any commercially available scanner can be used. However, for optimal performance with Remark Office OMR and YouTestMe, the following specifications are recommended:
Scanner Type
- Multifunctional scanner (flatbed or sheet-fed)
- An Automatic Document Feeder (ADF) is preferred for higher throughput
Minimum Technical Specifications
- Scan resolution: 300 dpi or higher
- Speed: At least 20 pages per minute
- Supported page size: Minimum A4
- Integration: TWAIN driver support or direct compatibility with Remark Office OMR
- Connectivity: USB or secure network connection (LAN or Wi-Fi)
Example Models
- Devices that meet the above requirements include:
- Brother ADS Series
- Epson WorkForce Series
- Canon DR Series
Applying the Remark template
After scanning the test results, open the saved Remark template, click Open Form Template, and select the template you previously created.

When you open it, you will gain access to a structured digital document. And the next step you need to take is to click on the Read button above the sheet. Click on read images and then the Next button. Select the file you will import into the database and click on Add selected and Read.

In the table, you’ll see that the fields have been filled with the appropriate data. When all selected answers have been read and processed through the template, you can click on any field to view them in more detail.

Afterward, you’ll save the data from the File drop-down menu and await a new pop-up window. Give it a file name in this field, choose where to save it, and make sure that this file is saved as a CSV to allow us to import it back into the application.

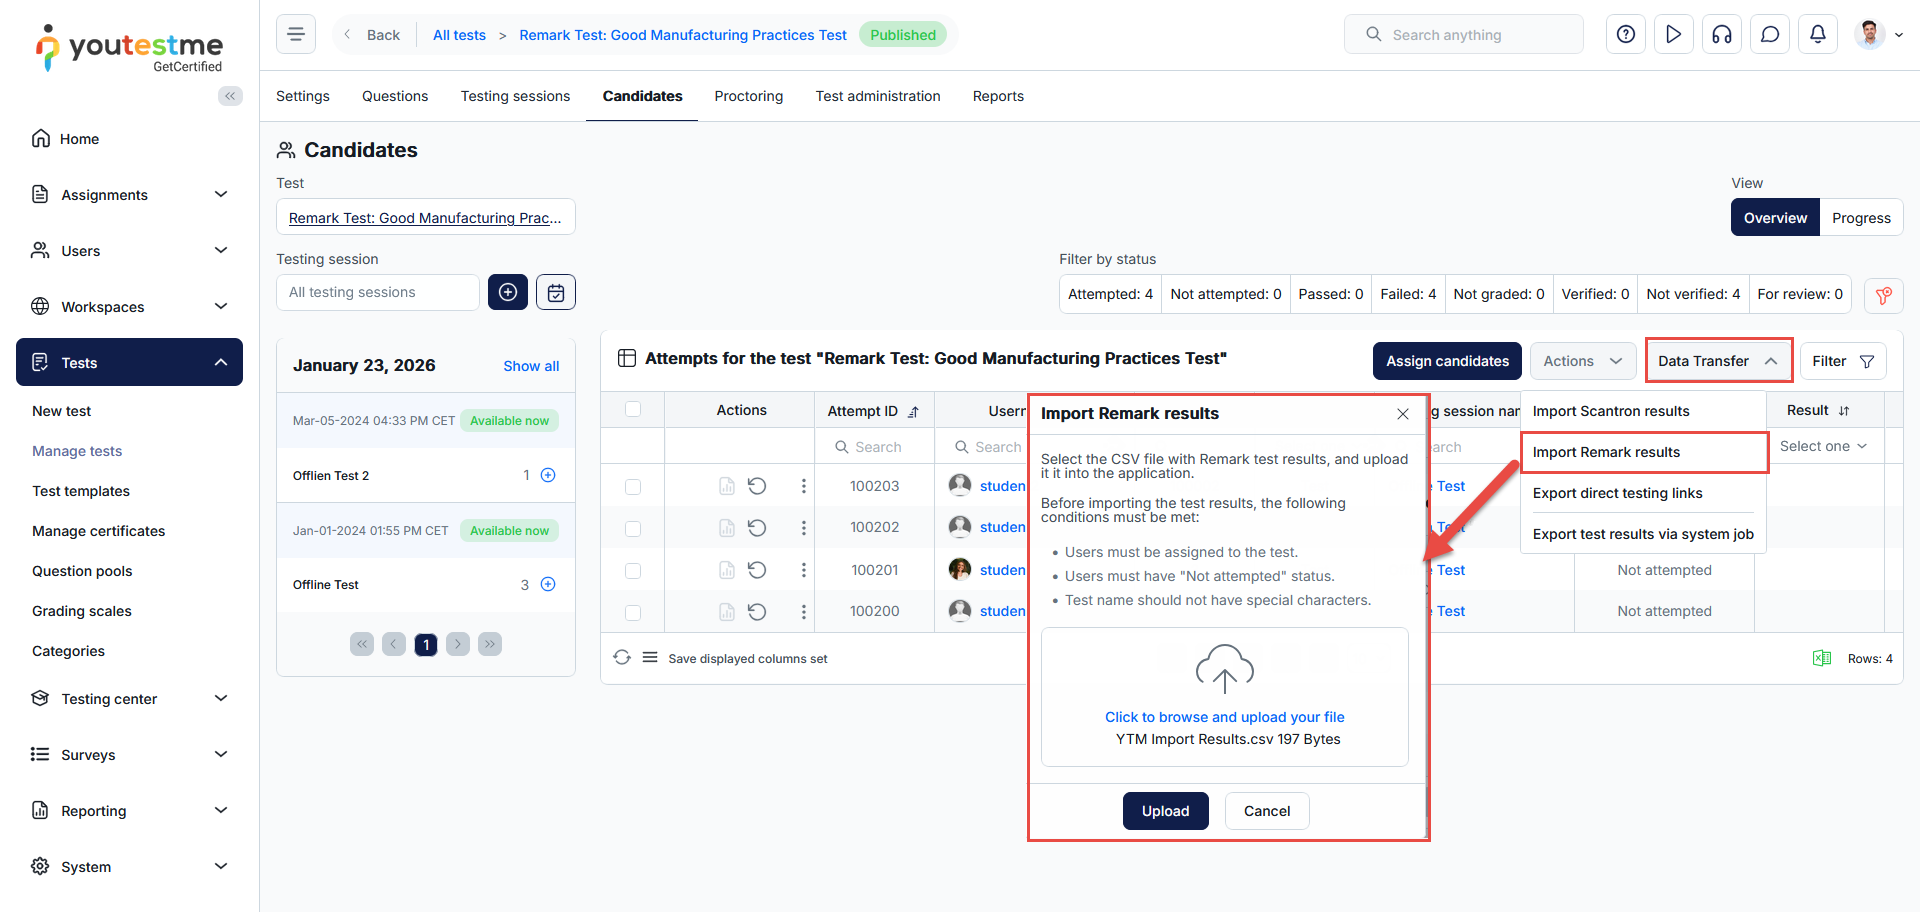
Sending the test results back to the application
Now that you’ve saved your CSV file, you should go to the Candidates tab and then locate the Data Transfer button. You can import the results by clicking the Import Remark results button and selecting the right file.
Results can be imported as long as the users already exist in the application, are assigned to the test, and have a Not Attempted status.
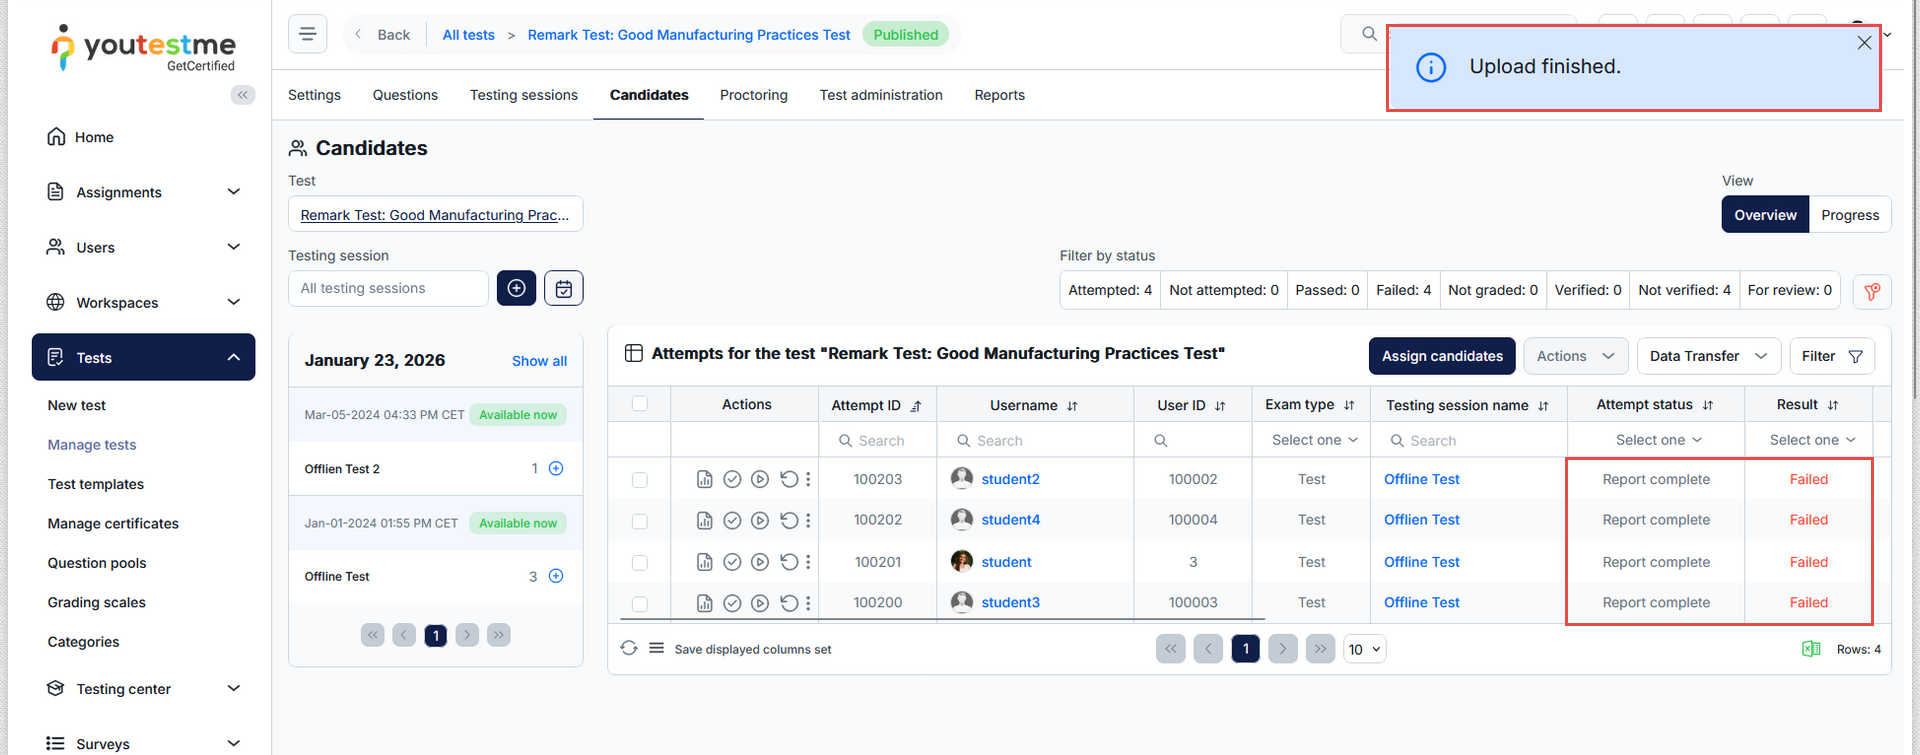
This will successfully send the results back to the application. Note: Users do not need to belong to the same testing session. A single test can include multiple sessions, and the imported results will be applied to each assigned user individually, regardless of the session they are part of.
For more related instructional materials, please visit:
