
Article verified for Release 15.1 on February 17, 2026.
This article explains how to use performance assessment and comparative analysis tools to evaluate performance, compare results, and gain useful insights. It lets you assess progress thoroughly using data-driven visuals.
Creating Categories
To create question categories, follow these steps:
- Navigate to the System section in the left-side menu and select the Settings and Customization page.
- Click the Custom properties tab.
- Choose Categories.
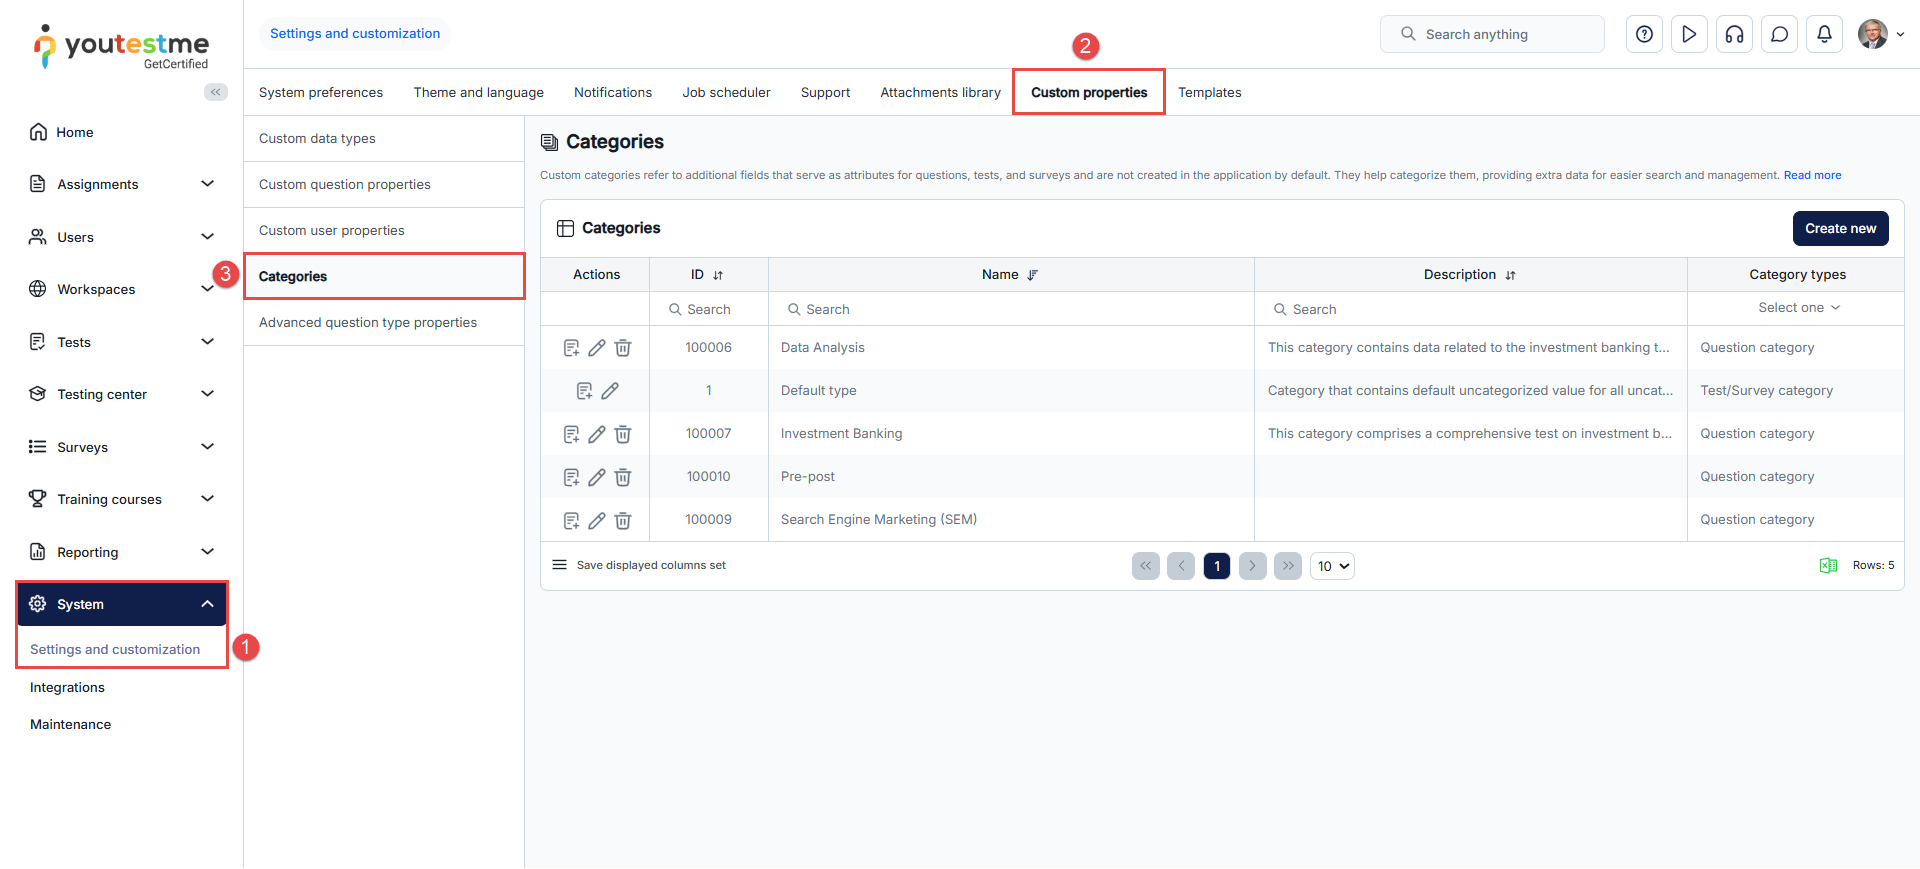
Note: You can also create a new category from the Tests section on the Categories page.
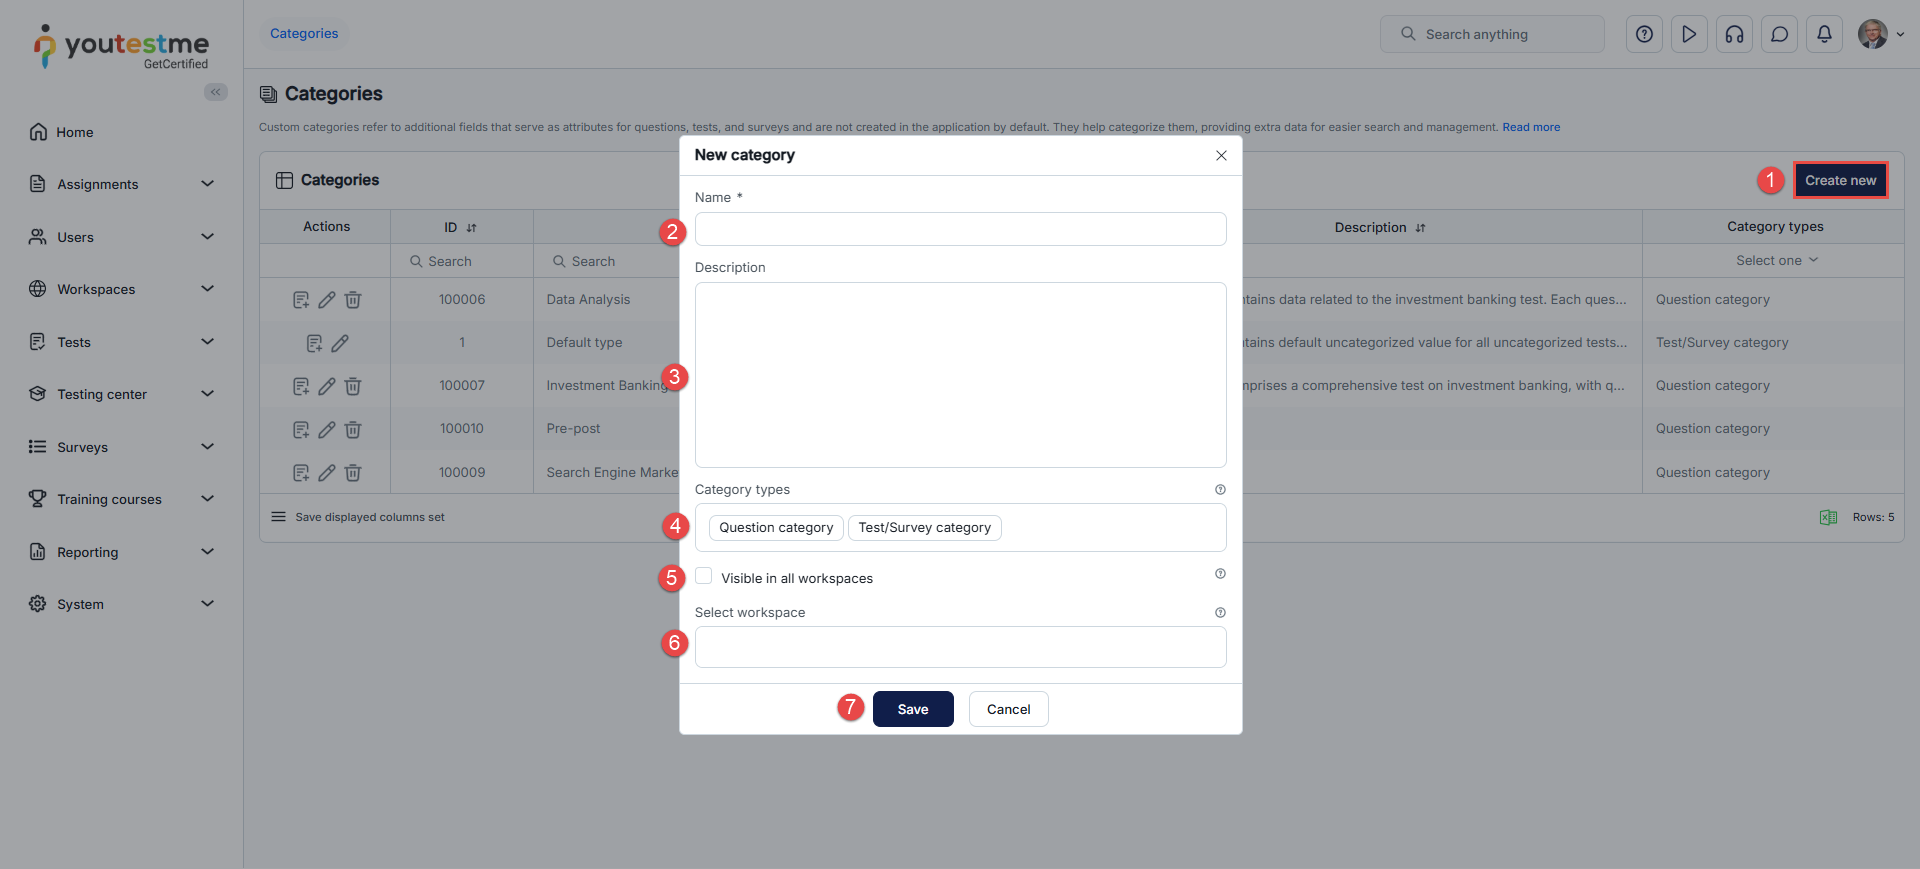
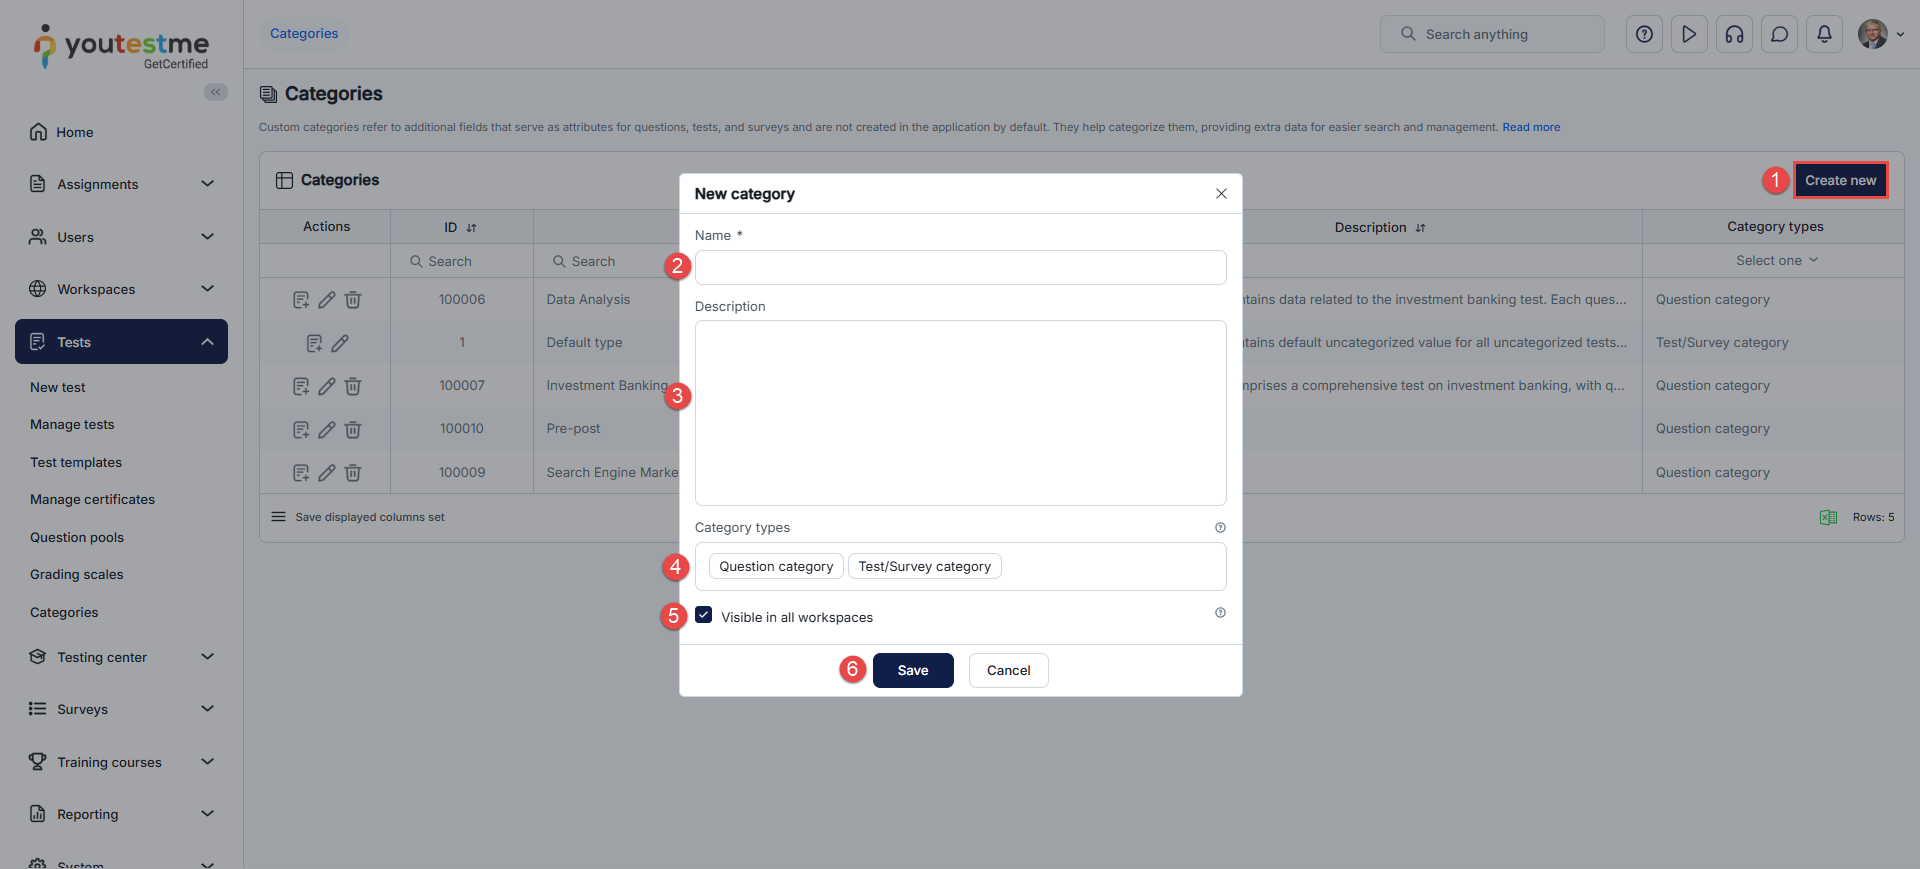
- Click the Create new button.
- Enter the category’s Name, e.g., “Entrepreneurial Competencies.
- Optionally, add a Description.
- Select the Category type for categorizing questions, tests/surveys, or both.
- If this option is enabled, the category can be used in all workspaces.
- Optionally, select the Workspace.
- Save the category.
 Once a new category is created, you should add values by following:
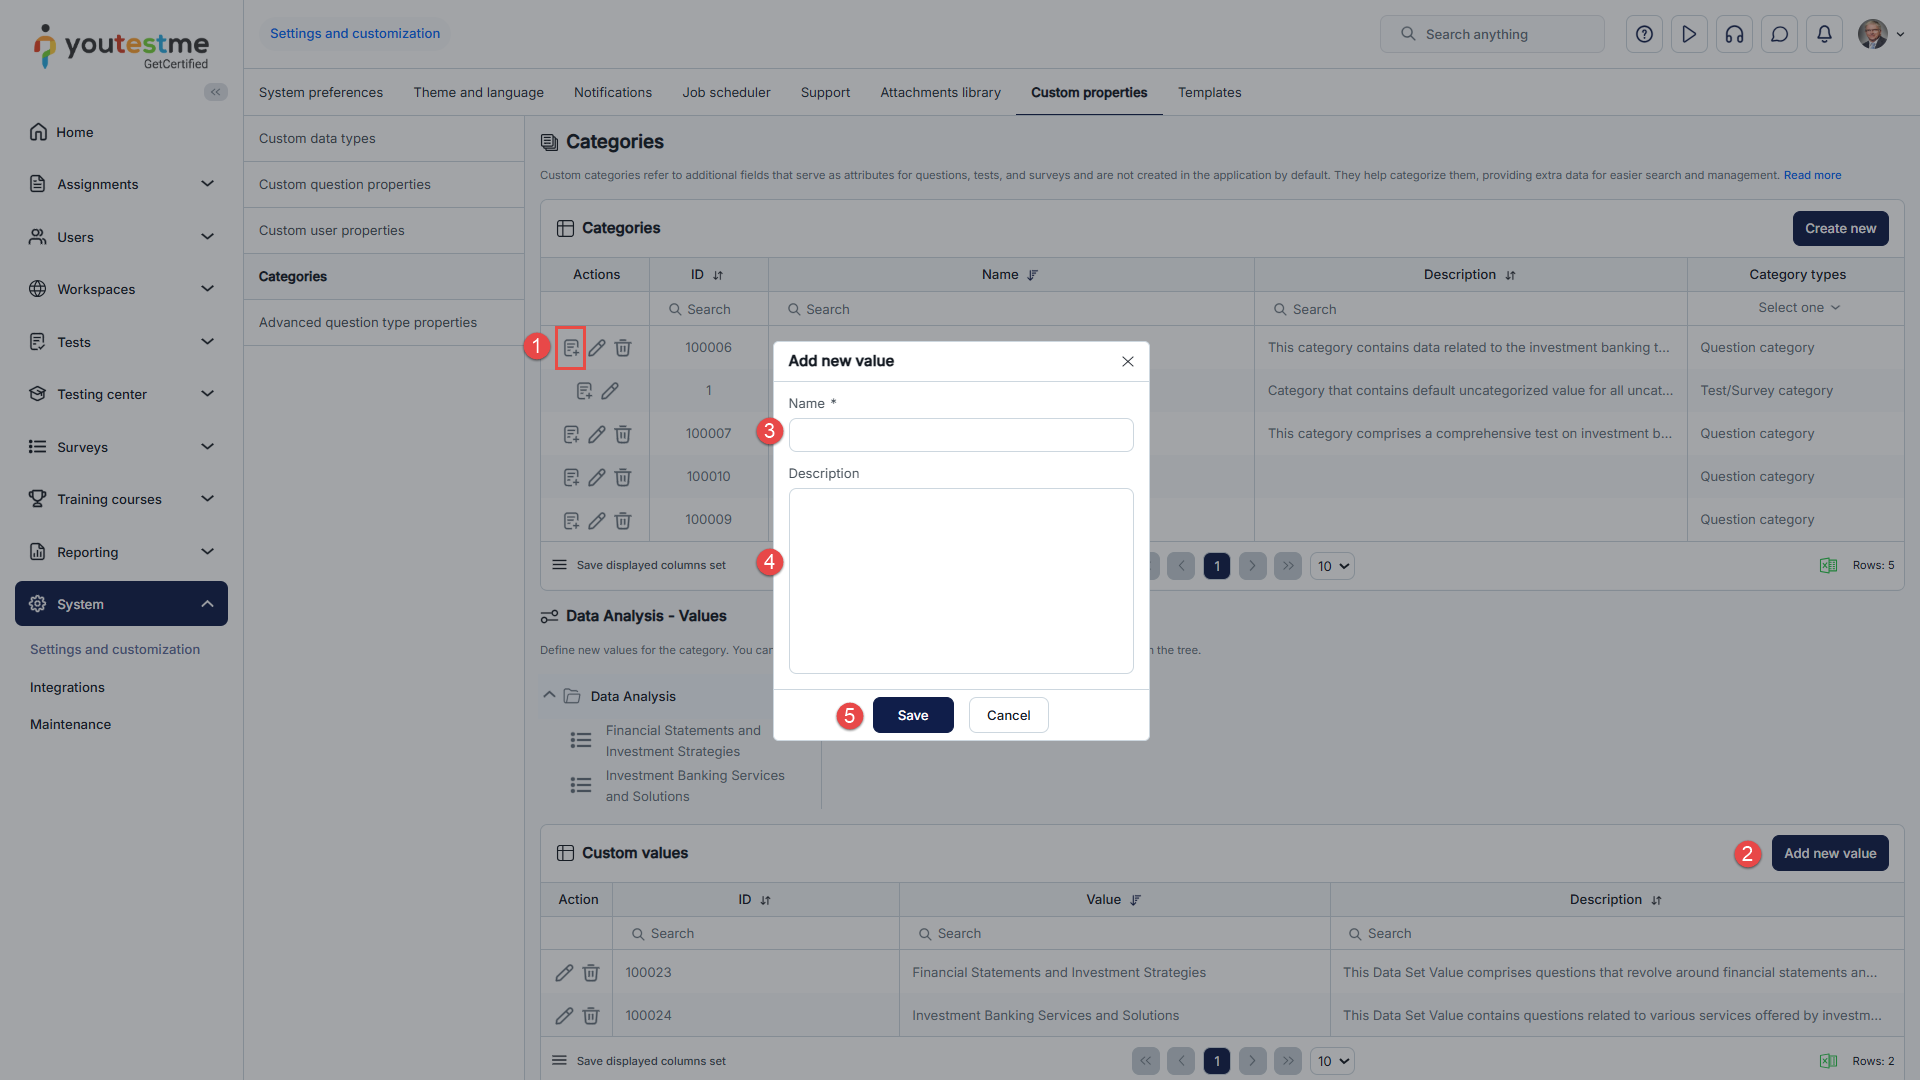
- Click the Define values button.
- Click the Add new value button.
A pop-up window will appear. Follow these steps: - Enter the value’s Name.
- Optionally, add a Description.
- Click the Save button.
 Note: Follow the same steps for all values.
After you create all values for the new category, you should create a new pre-post category:
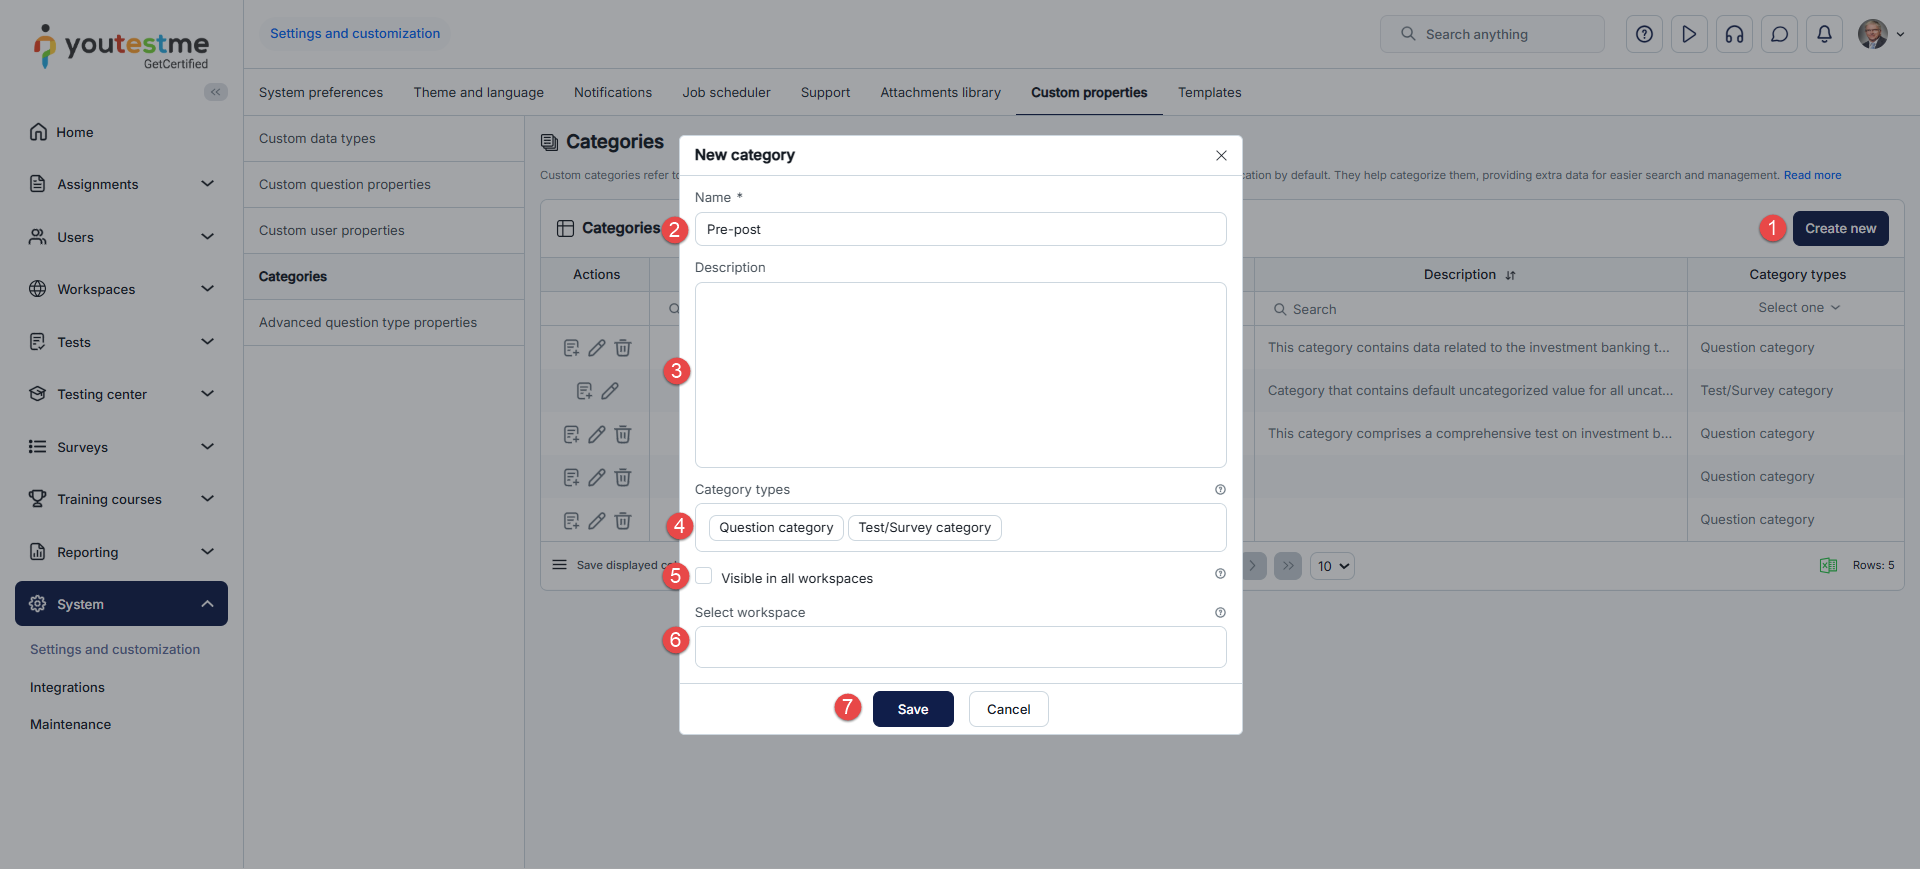
- Click the Create new button.
- Enter the category’s Name.
- Optionally, add a Description.
- Select the Category type for categorizing questions, tests/surveys, or both.
- If this option is enabled, the category can be used in all workspaces.
- Optionally, select the Workspace. For detailed instructions on question category workspaces, refer to this article.
- Save the category.
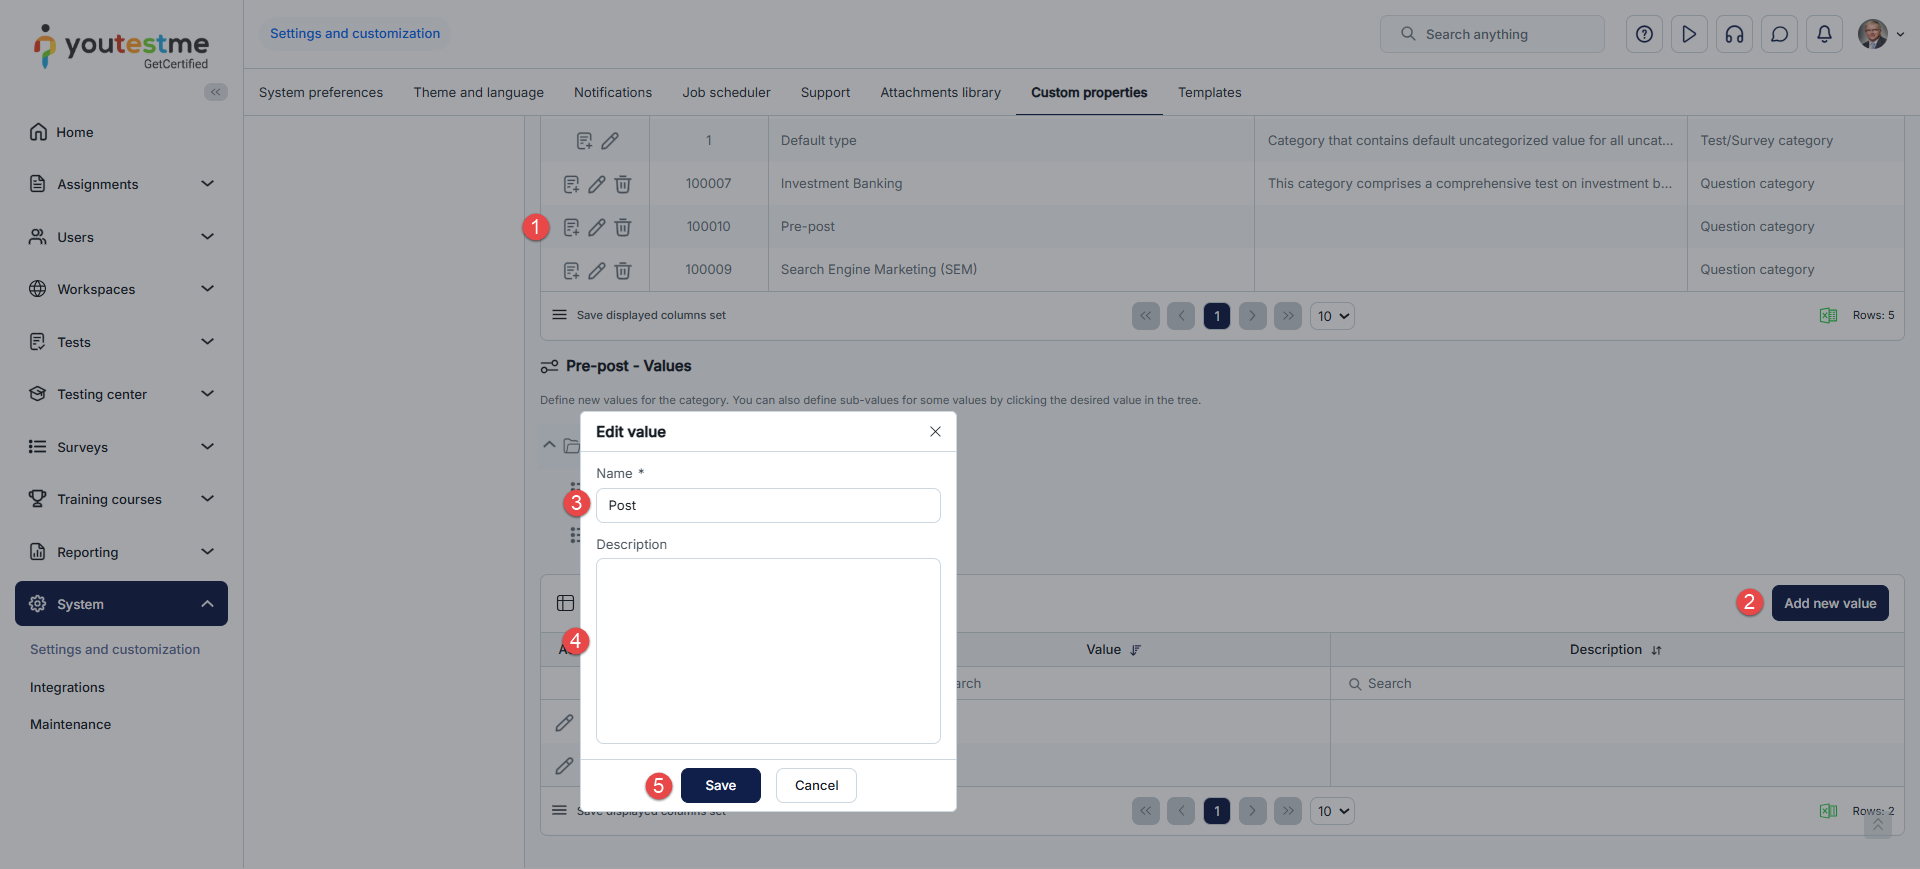
To create pre-post values, follow these steps:
- Click the Define values button.
- Click the Add new value button. A pop-up window will appear. Follow these steps:
- Enter the value’s Name. e.g., “Post.”
- Optionally, add a Description.
- Click the Save button.
 Note: Follow the same steps for the “Pre” value.
Labeling Questions
Once you create both categories, you should label the existing or new questions with their values. To do so, you should:
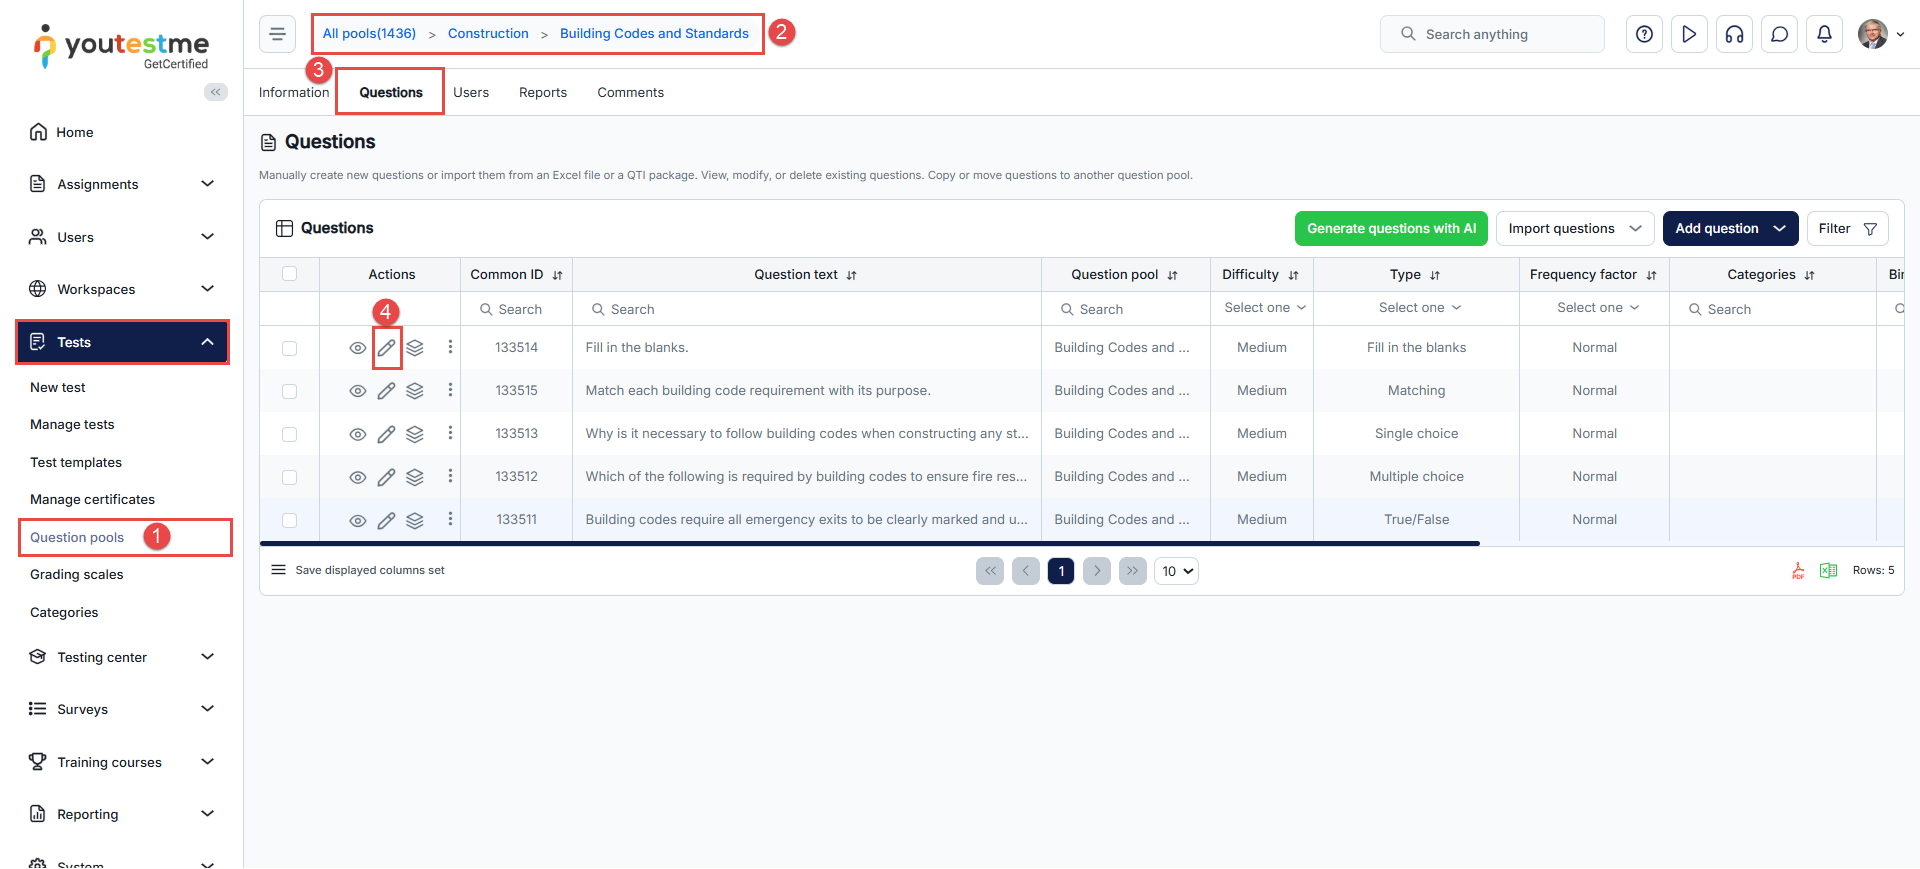
- Go to the Tests section in the left-side menu and click on the Question pools page.
- Select the desired question pool.
- Open the Questions tab.
- Click the Edit icon.

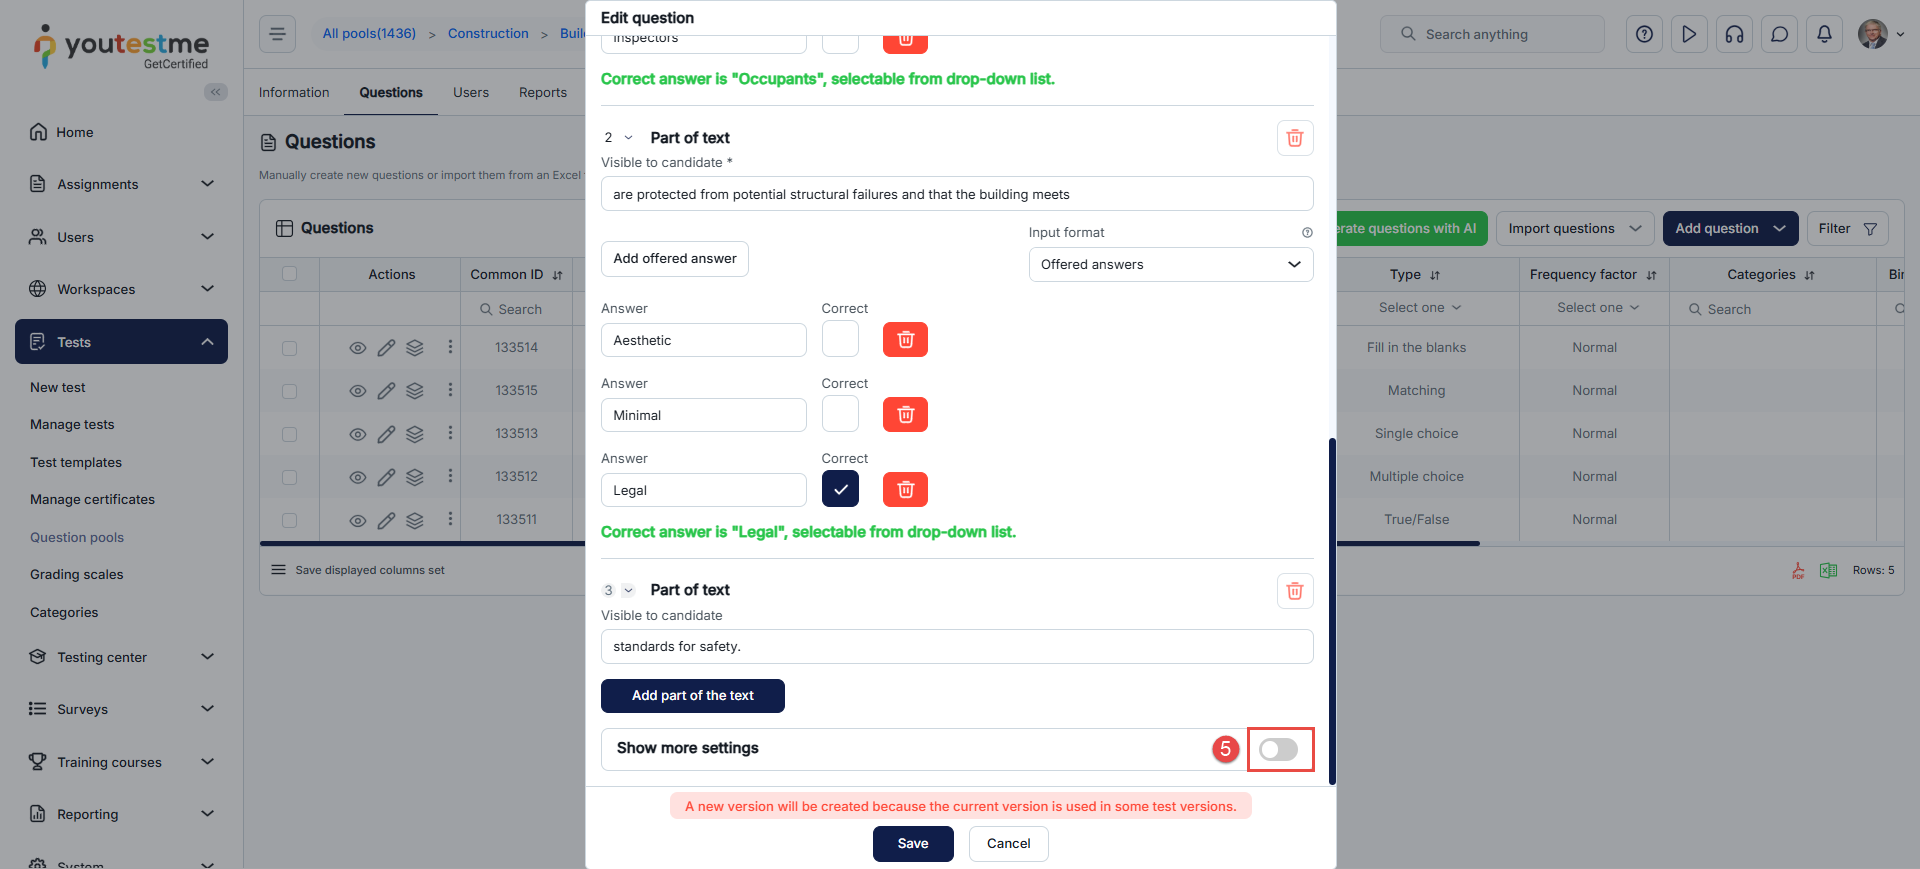
- Click the Show more settings button.
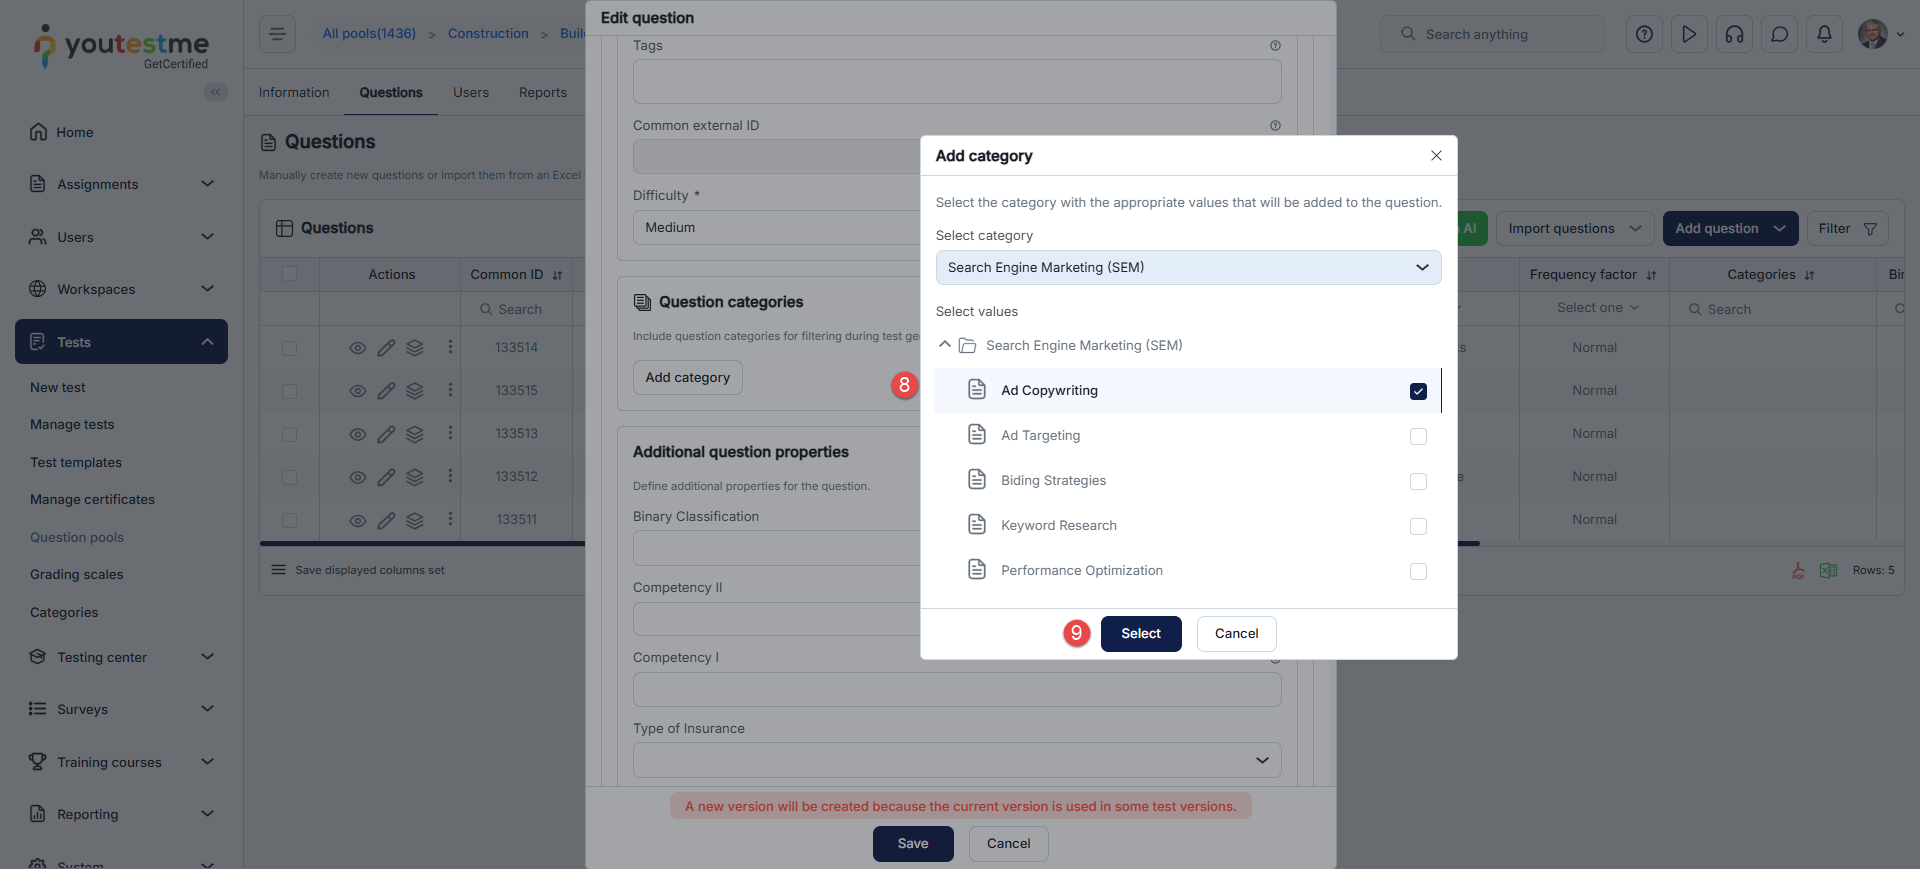
- Select Add category.
- Select the previously created category.
- Select the value that belongs to that question.
- Click the Select button.
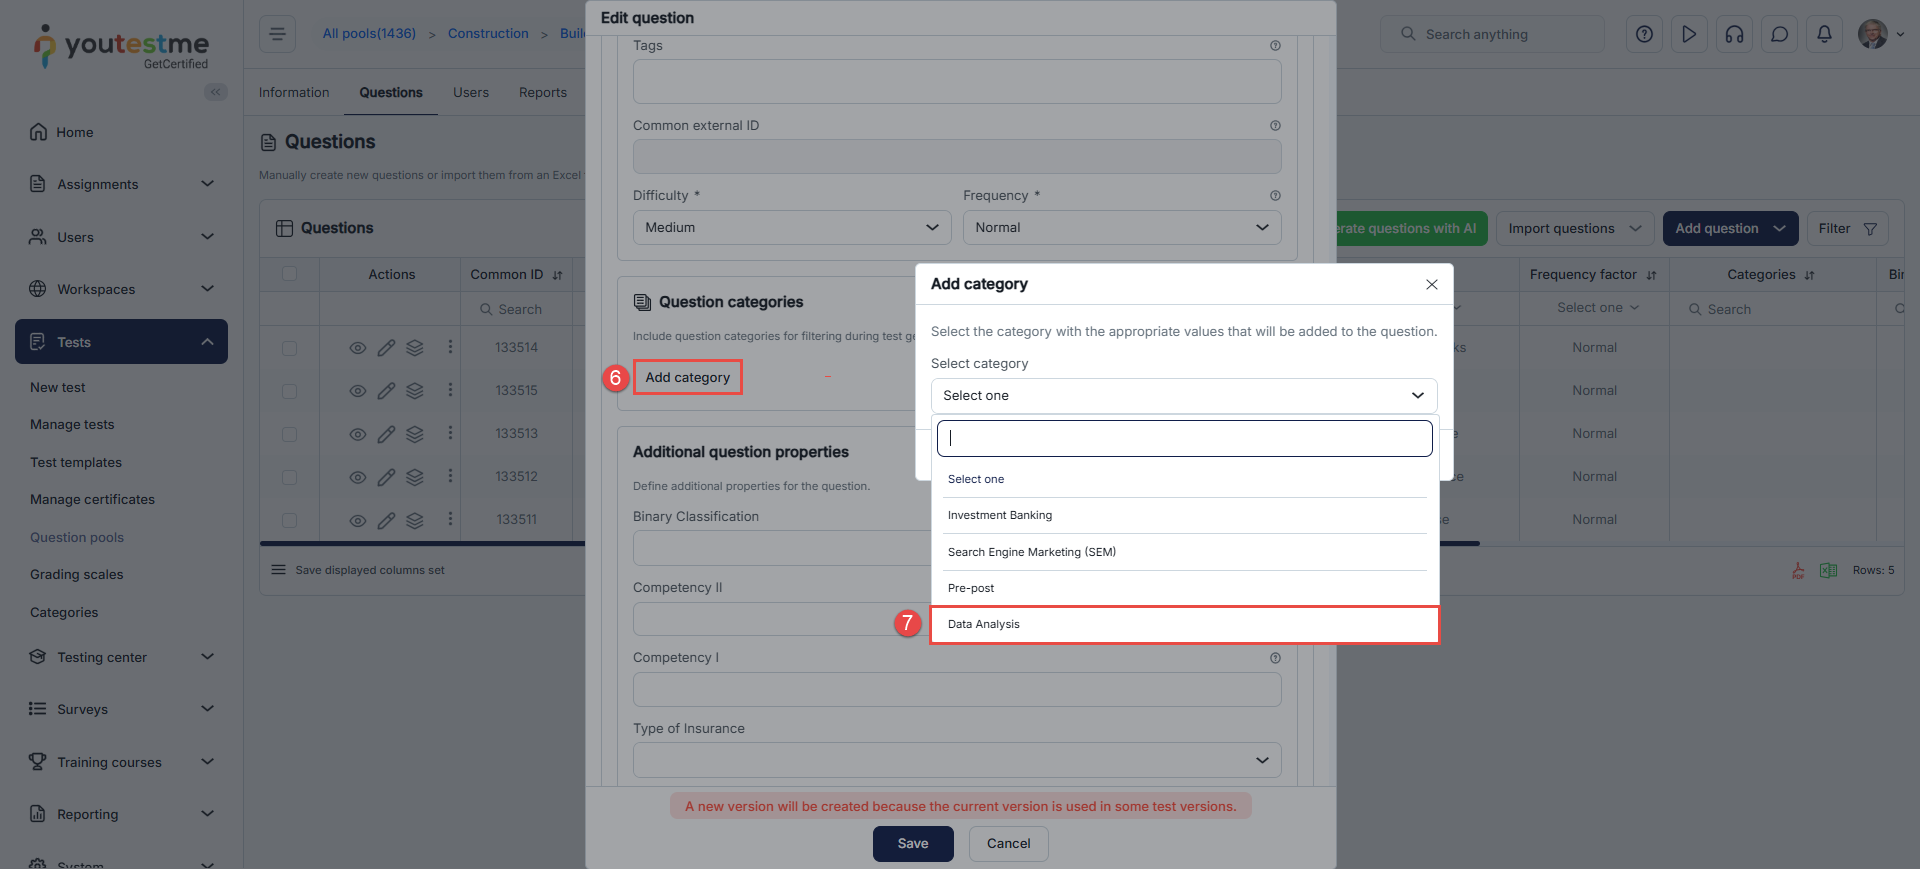
After you set the “Data Analysis” category, you should do the same with the “Pre-post” category.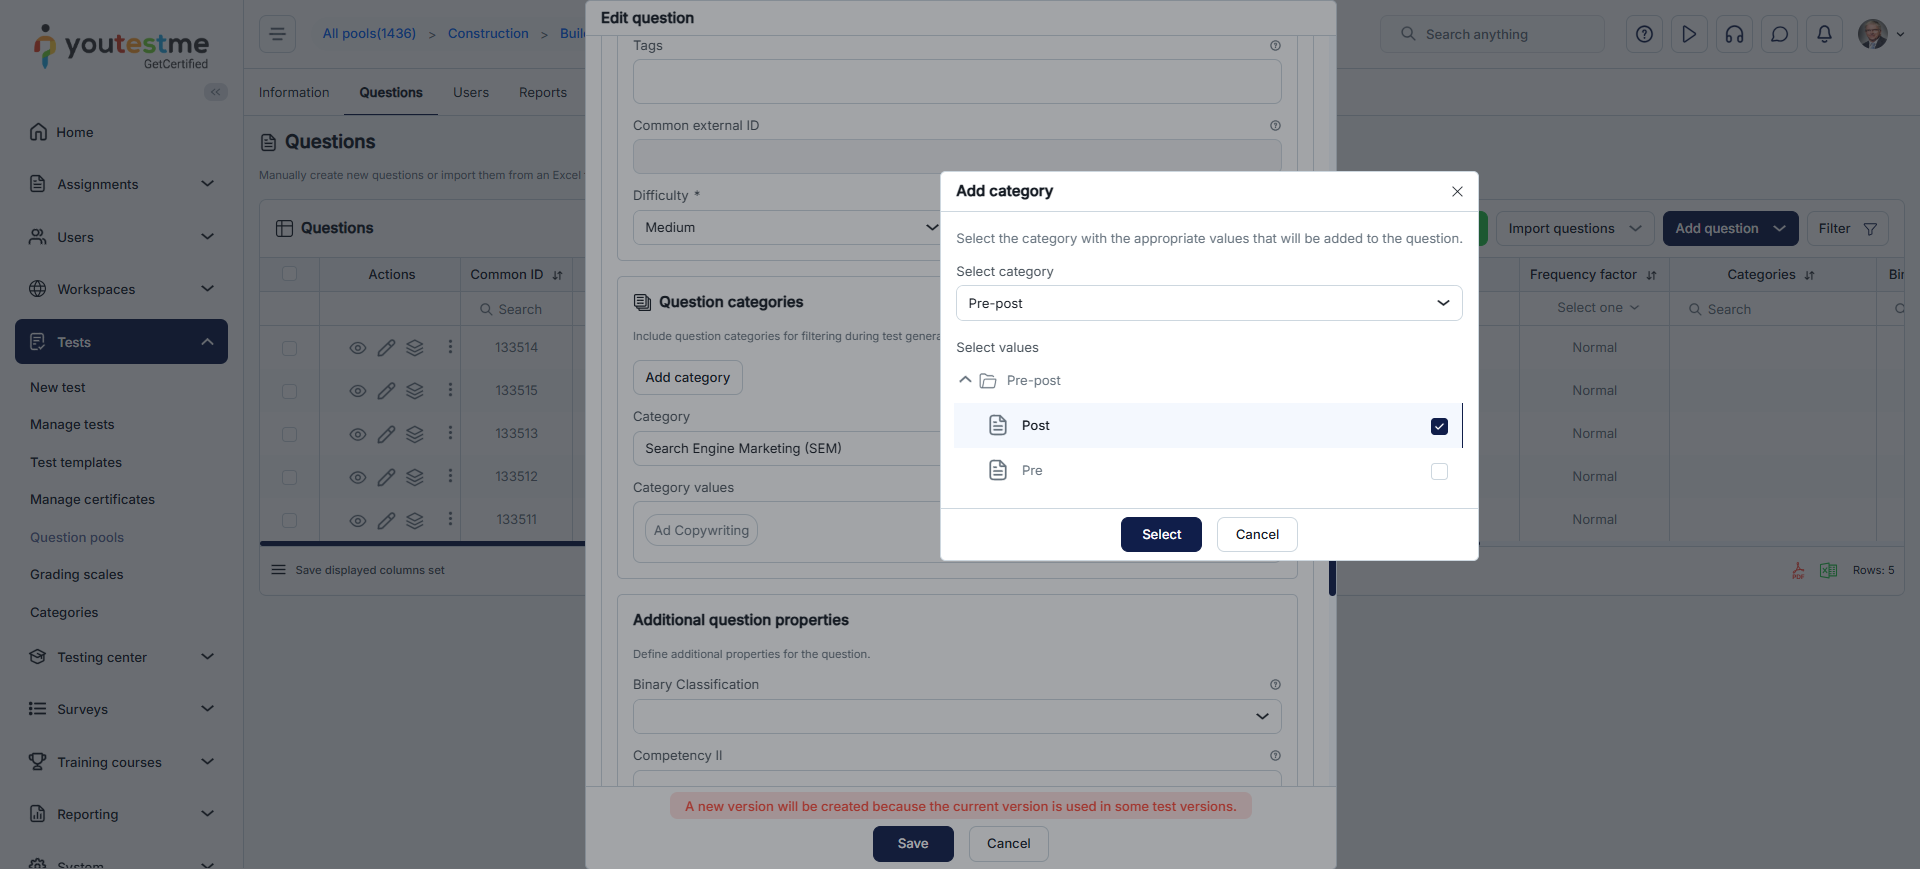
Click the Save button once you’ve set all the categories for that question.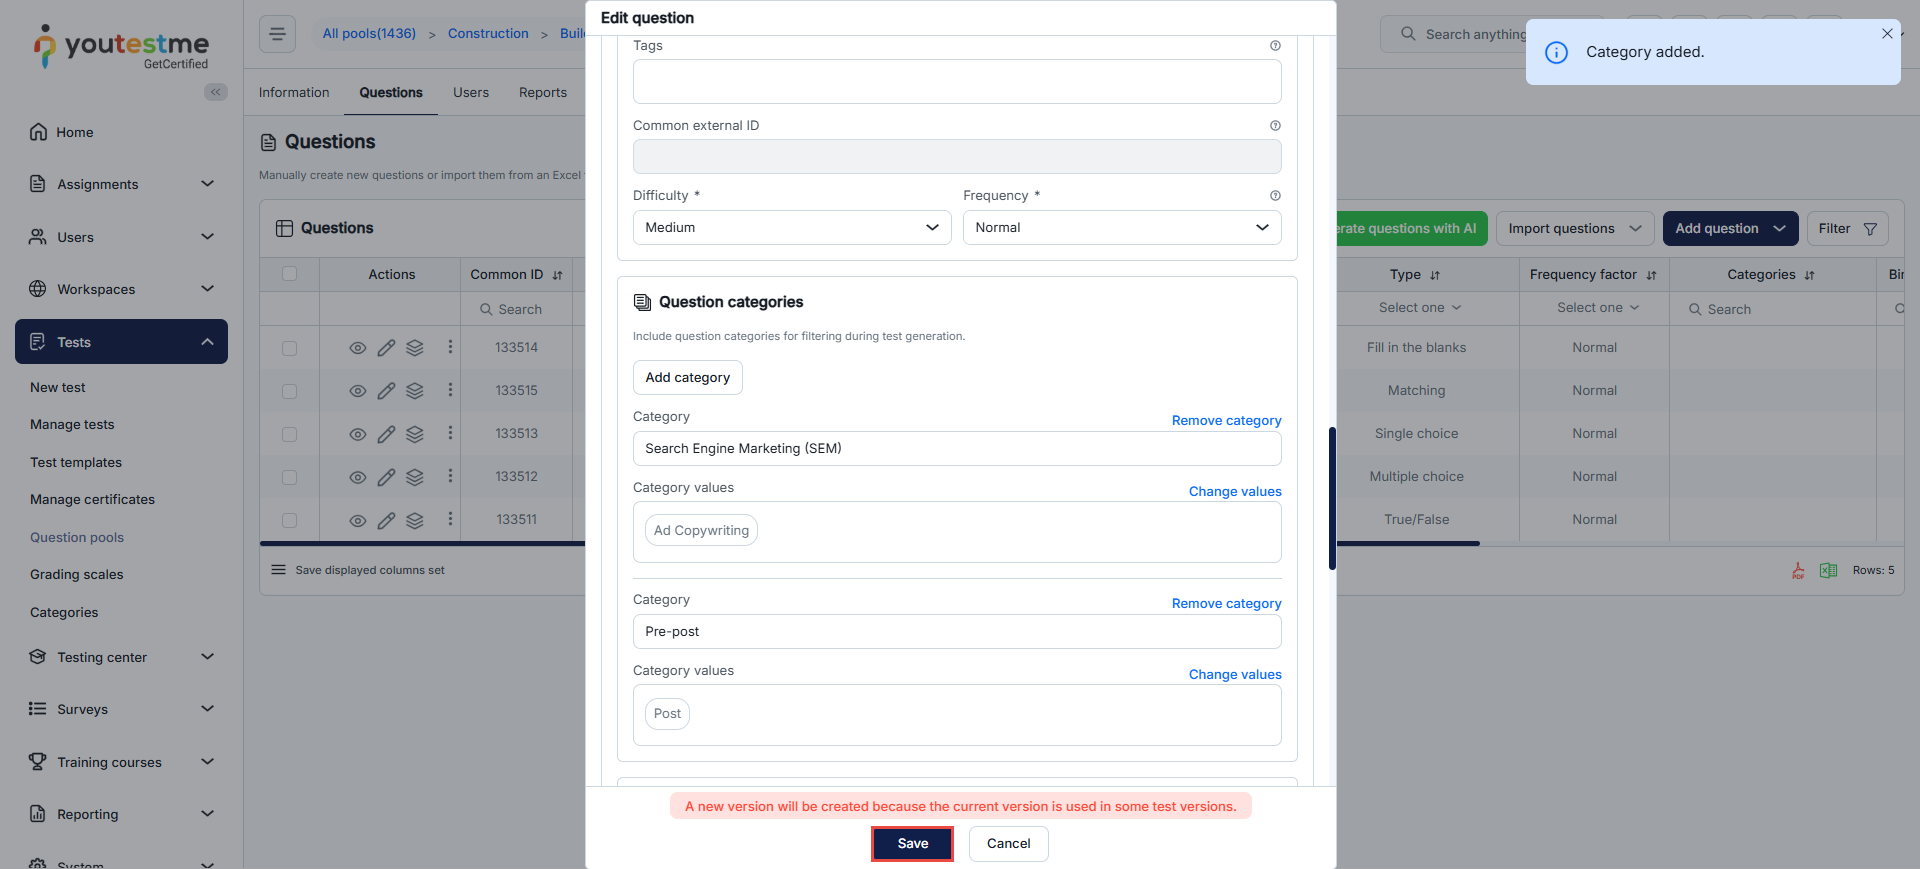
Note: Please follow the same steps for all questions.
Creating a Radar Chart
After you’ve labeled all the questions, the next step is to create a radar chart. To create the radar chart, you first need to create a survey/Test or use an existing one. For more instructions on creating a survey or a test, please refer to the following articles:
Once you have the desired survey/test set up, you can proceed to create the radar chart by following these steps.
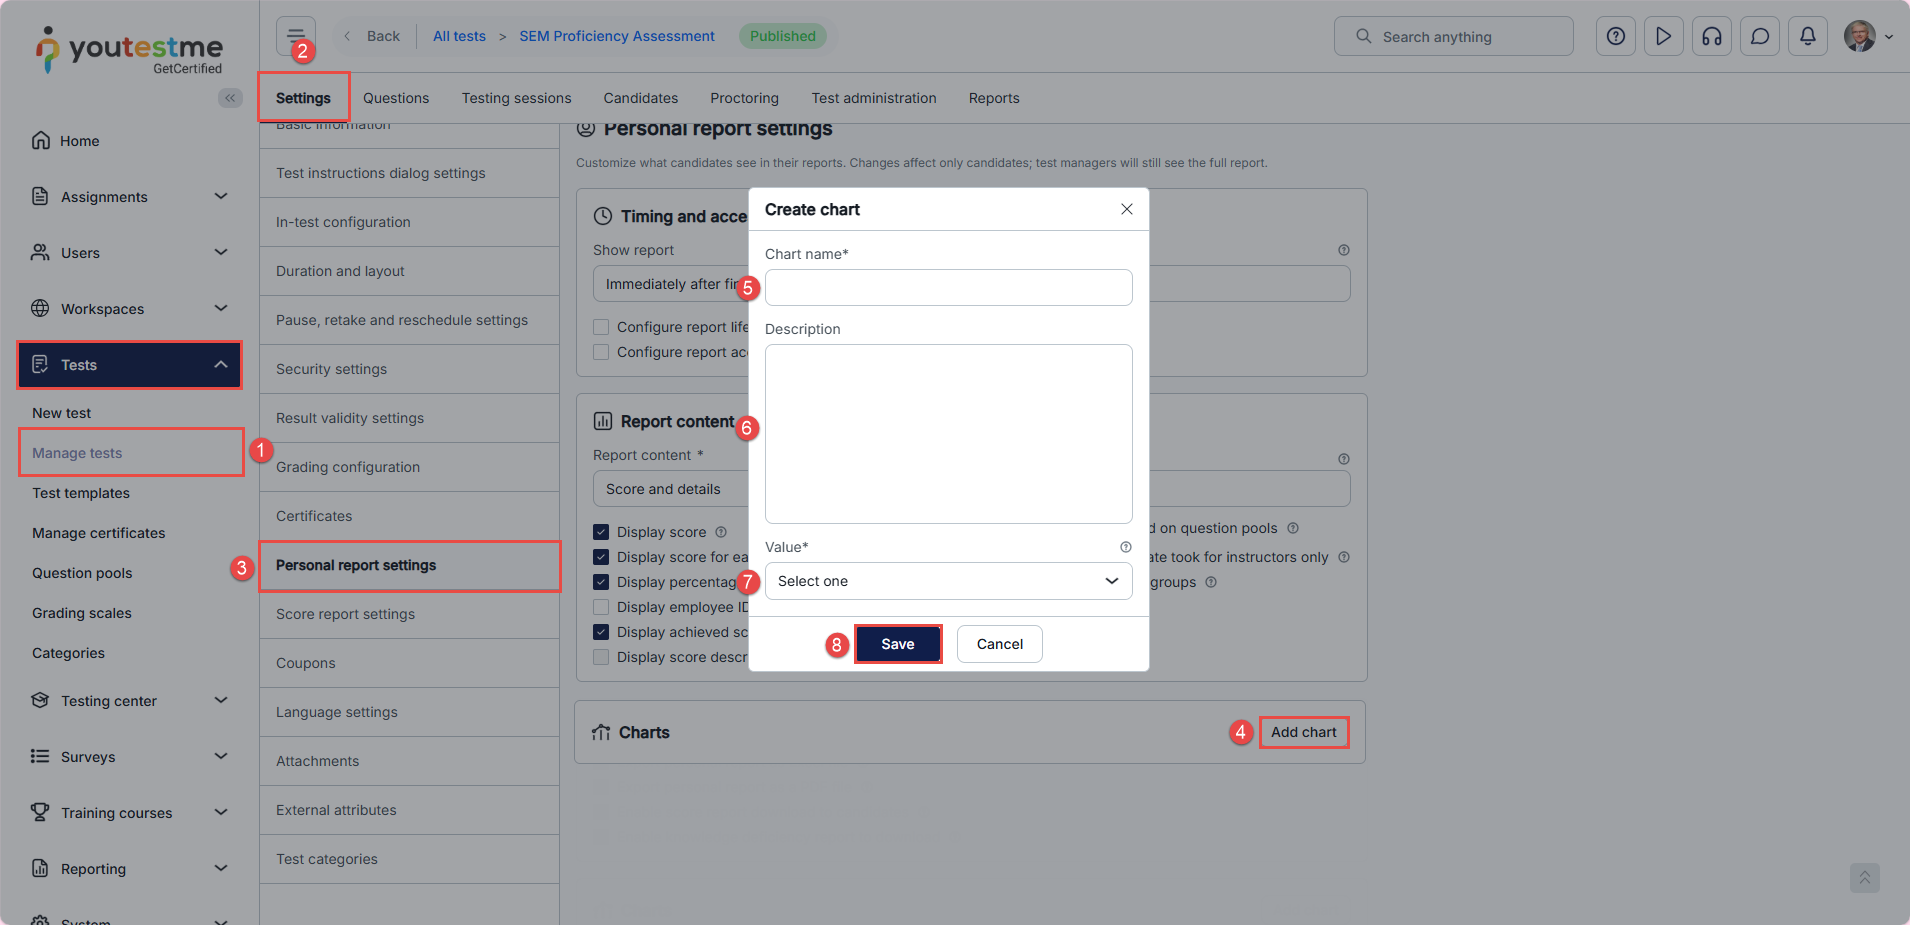
- Go to the Tests/Survey section in the left-side menu and click on the Manage tests/Manage Survey page.
- Open the desired survey/test and then click on the Settings tab.
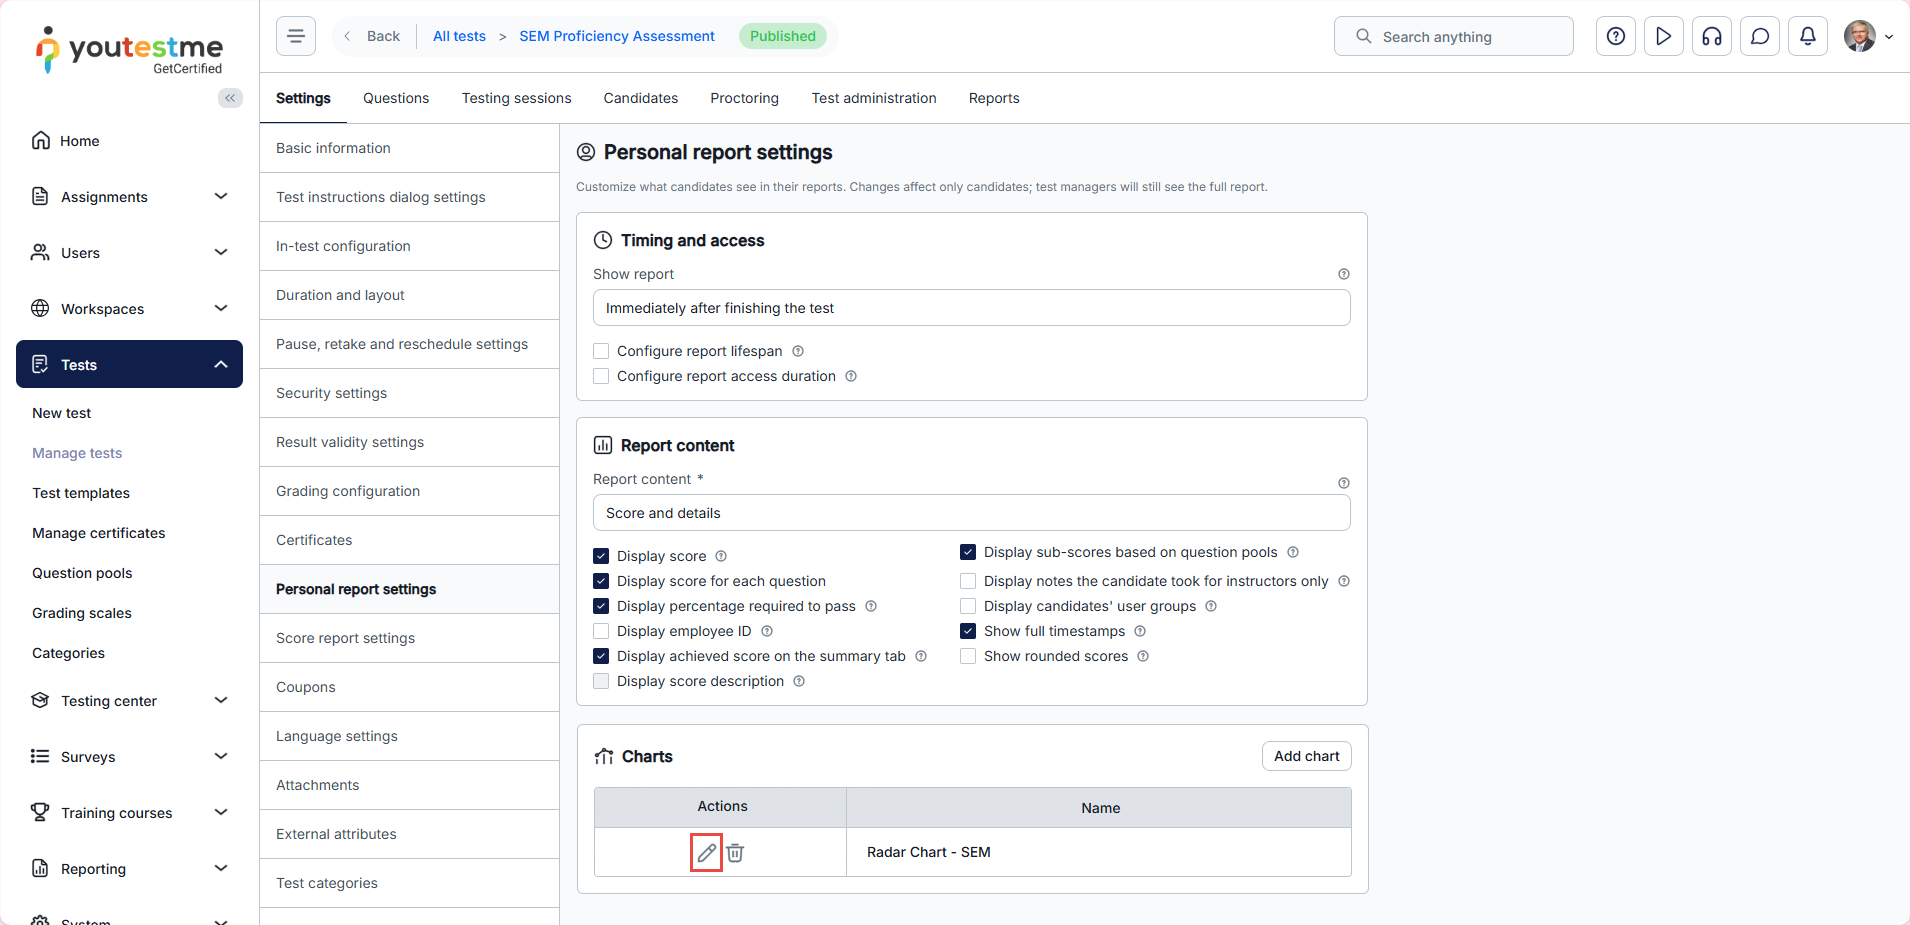
- Open the Personal report settings tab.
- Click the Add chart button.
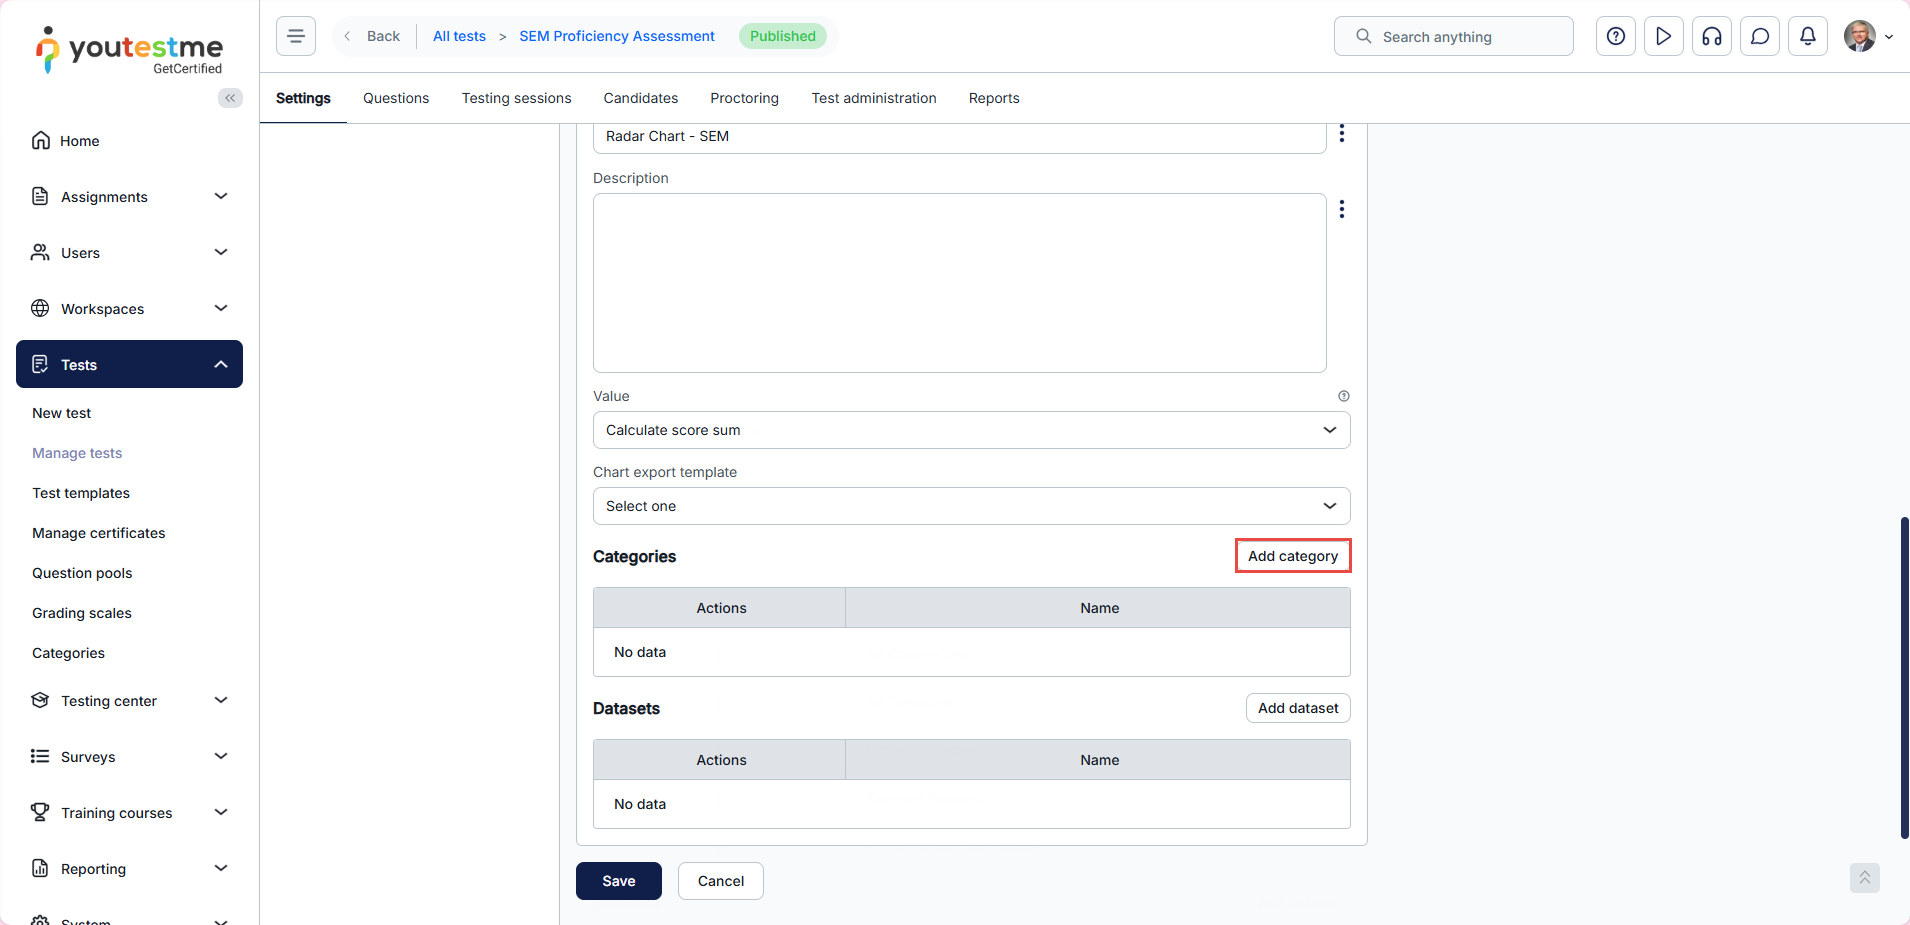
A pop-up window will appear. Follow these steps: - Enter the chart name.
- Optionally, add a description.
- Choose the value that will be displayed in the chart. Selected question points can be calculated as a sum or average value. In this example, we will select the Calculate average score option.
- Save the chart.
 After creating the chart, click the Actions button, then select Edit.
Click the Add category button. A pop-up window will appear.
Follow these steps:
- Enter the Category name.
- Optionally, add a description.
- In the filter option, set Category values, Contains, and select the value.
- Click the Save button.
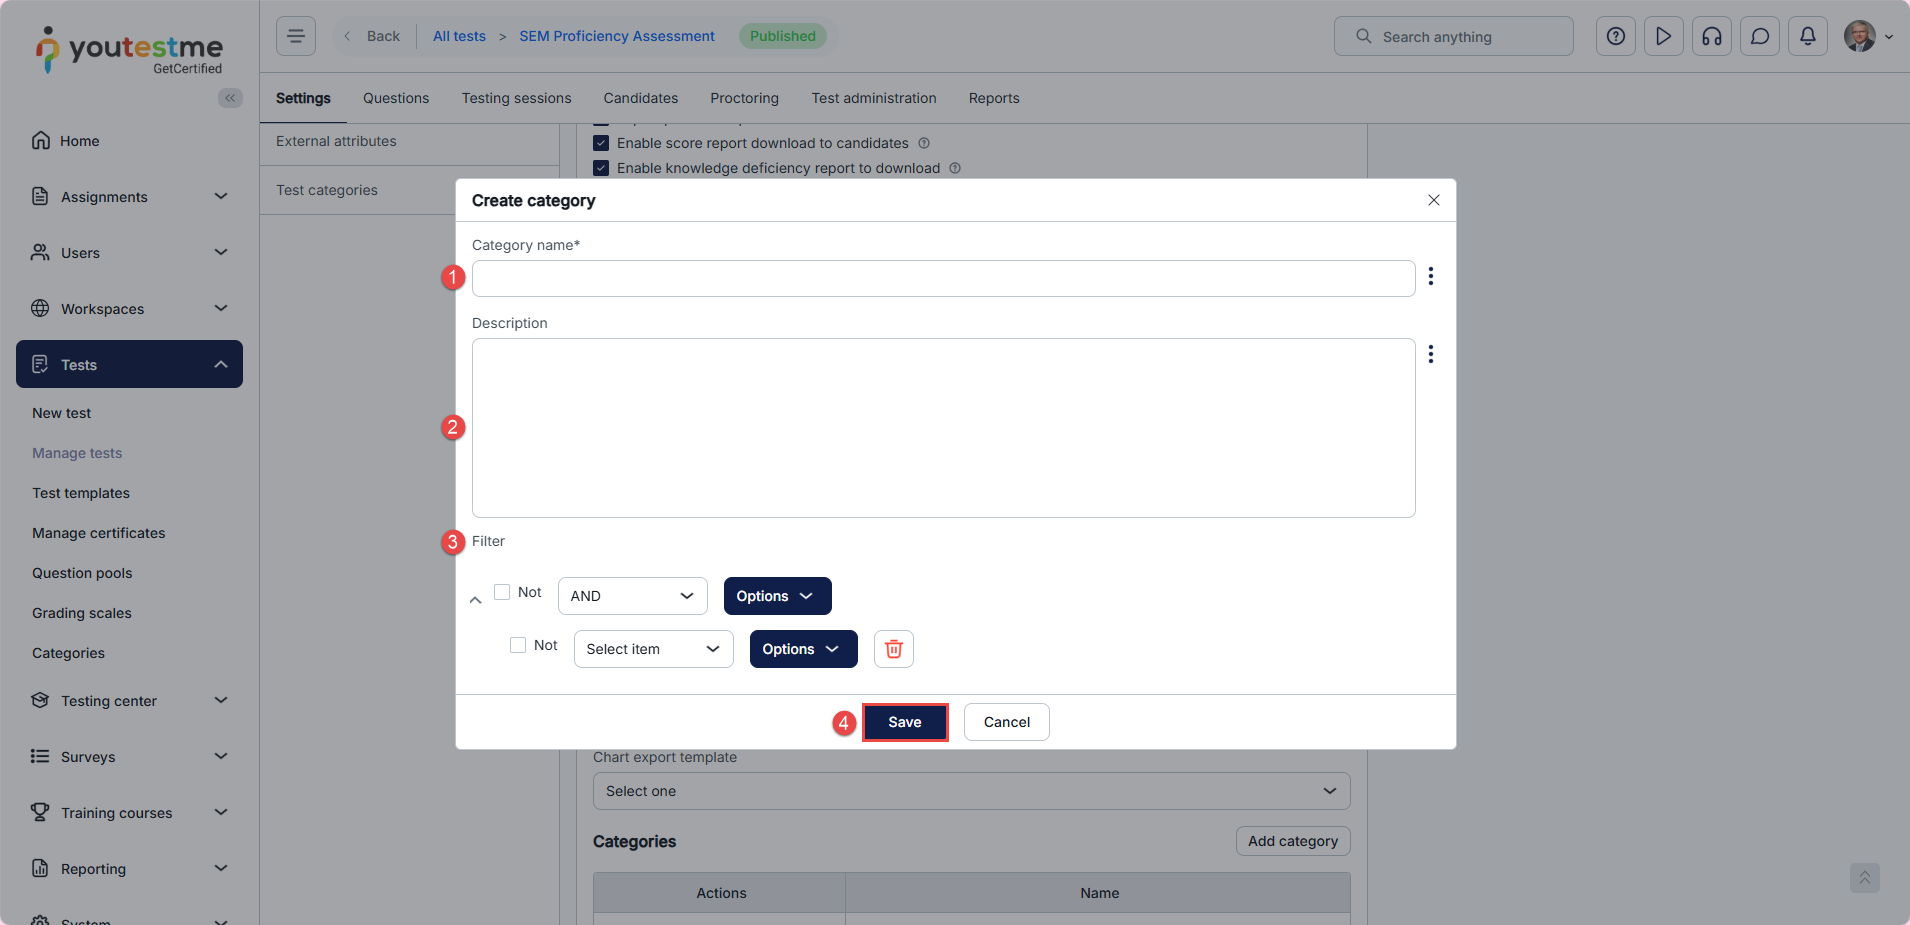
Note: Follow the same steps for all “Entrepreneurial Competencies” category values.
You should add a pre-post dataset once you have defined all the categories. To do this, click on the Add dataset button.

A pop-up window will appear. Follow these steps:
- Enter the Dataset name.
- Enter the optional description.
- Choose the color of the dataset. Datasets should have different colors to differentiate them from each other.
- In the filter option, set Category values, Contains, and select the value.
- Click the Save button.
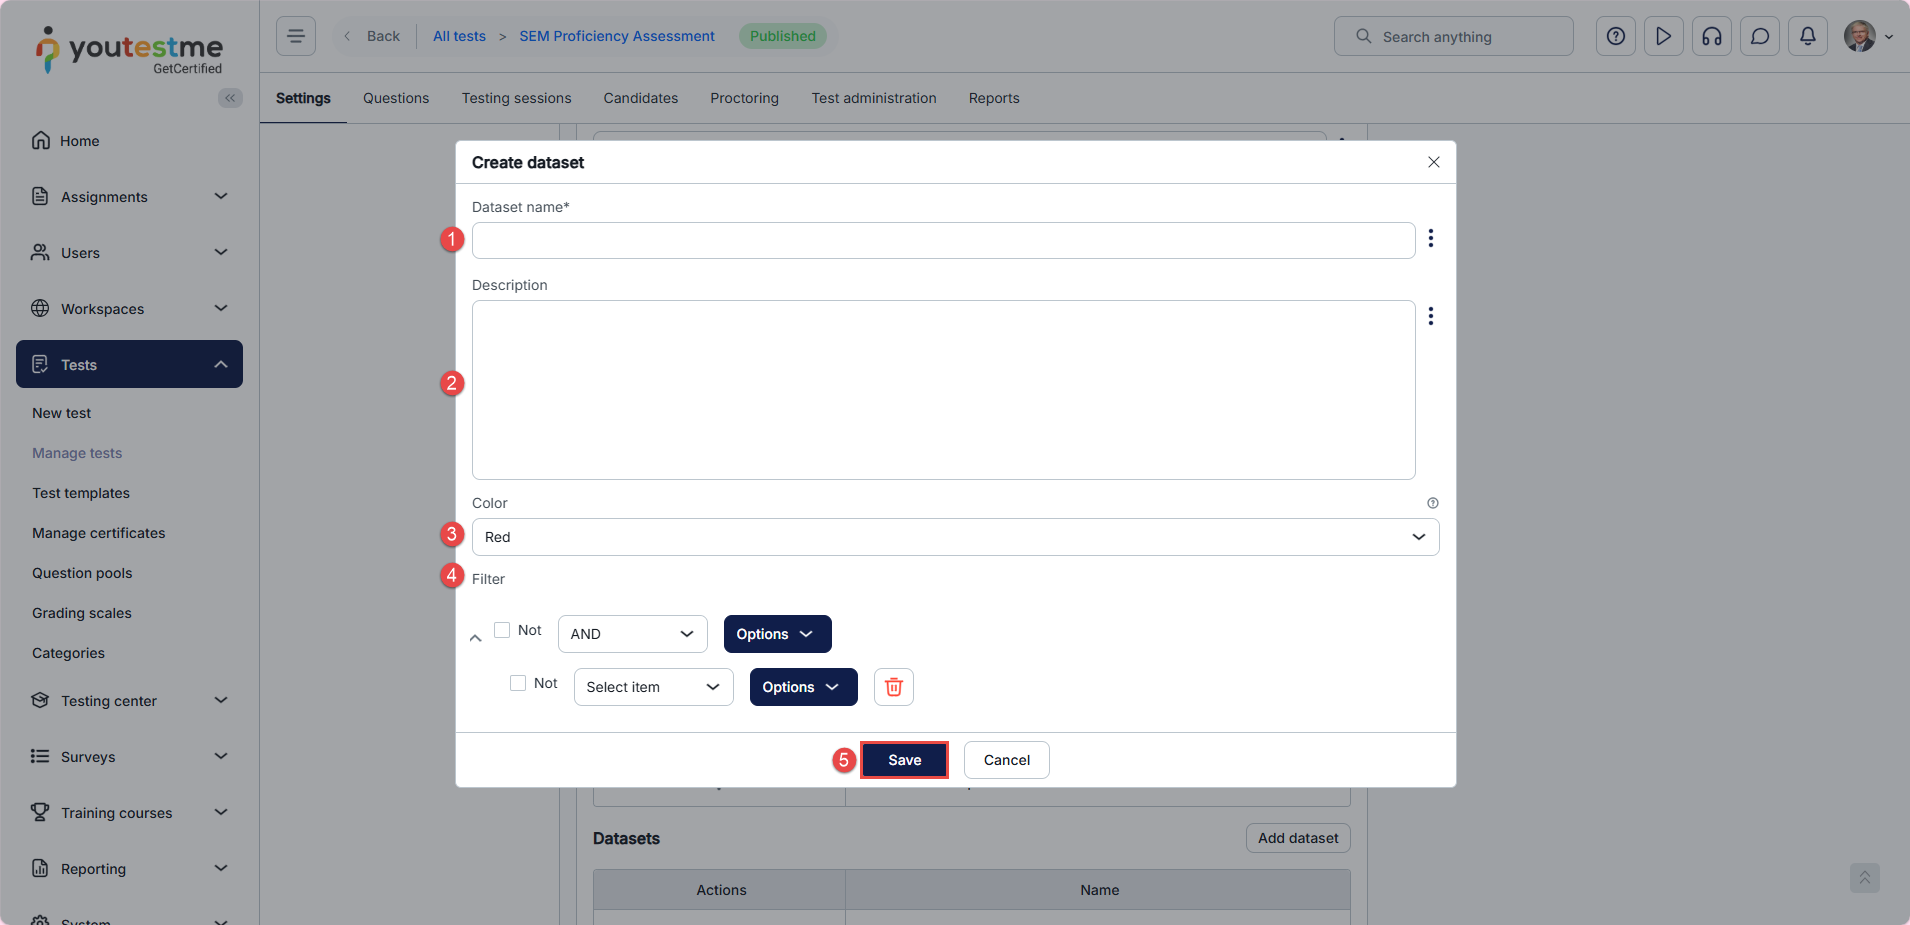
Note: Follow the same steps for the “Post” dataset.
After you’ve finished setting up everything, click the Save button to save the radar chart configuration.

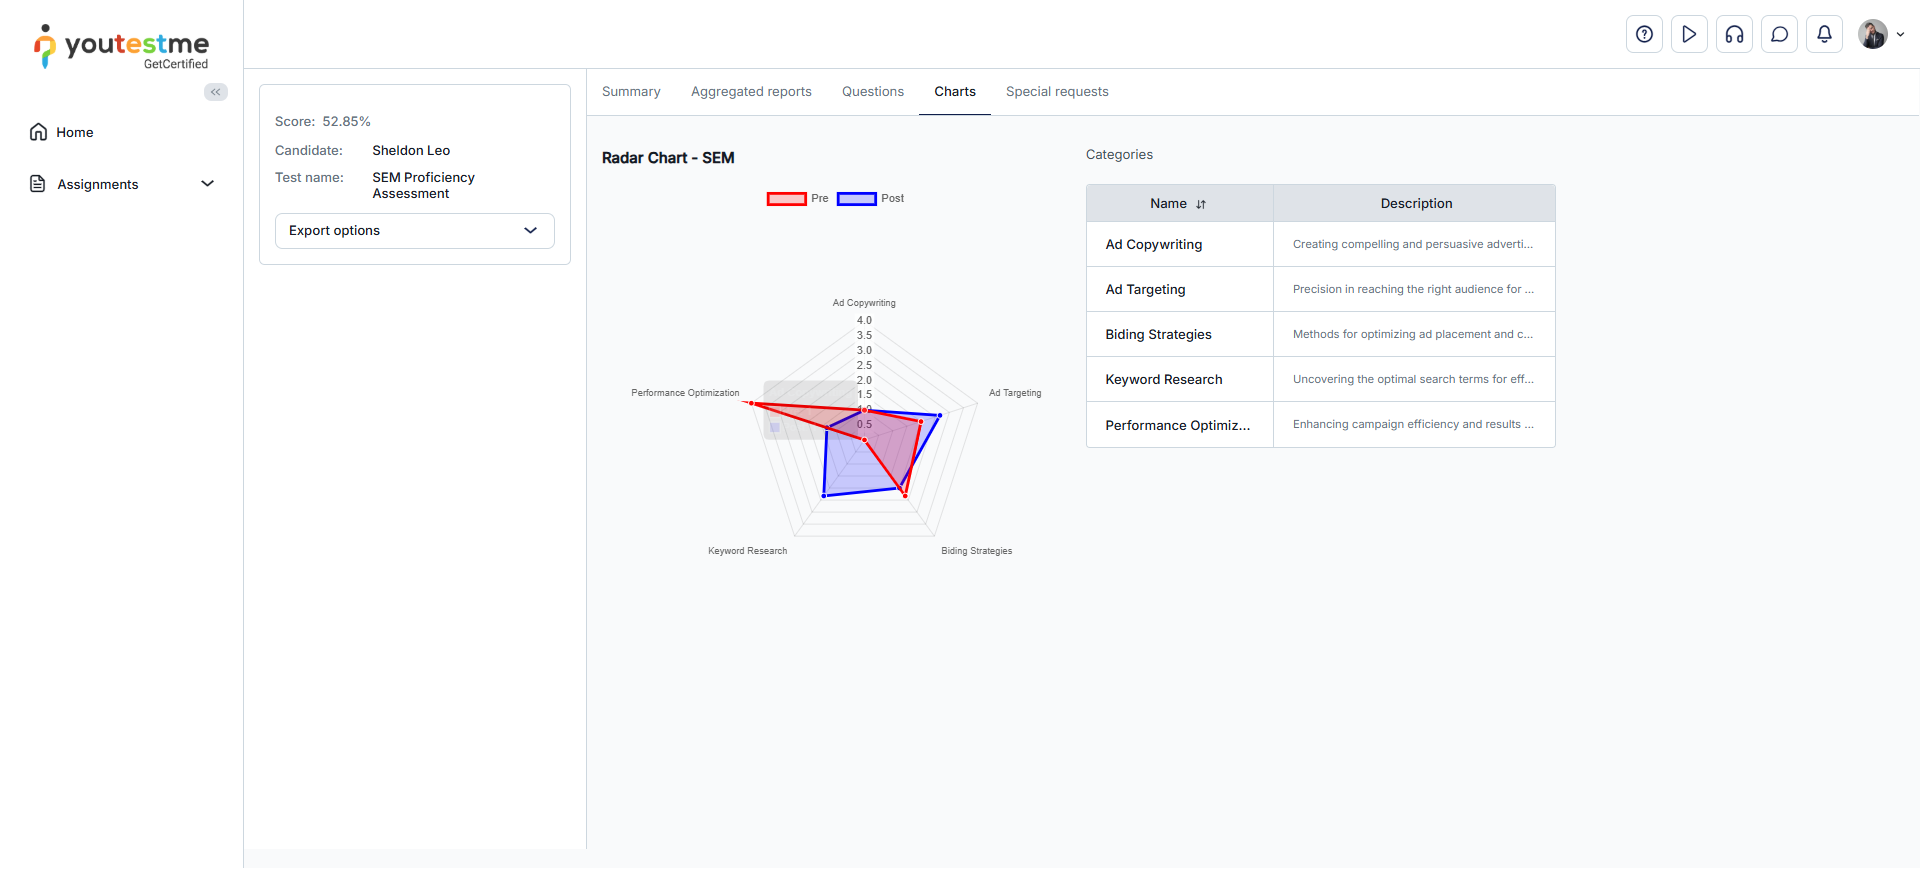
Preview of Radar Chart in Personal Report
Once students complete the exam, they can access the radar chart by opening the Charts tab within their personal reports.
