
This article provides support for resolving common camera-related problems that may occur during proctored tests.
Common Issues with the Webcam Check
At the start of a proctored exam, the system performs an equipment check to confirm device compatibility and authenticate the test-taker’s identity.
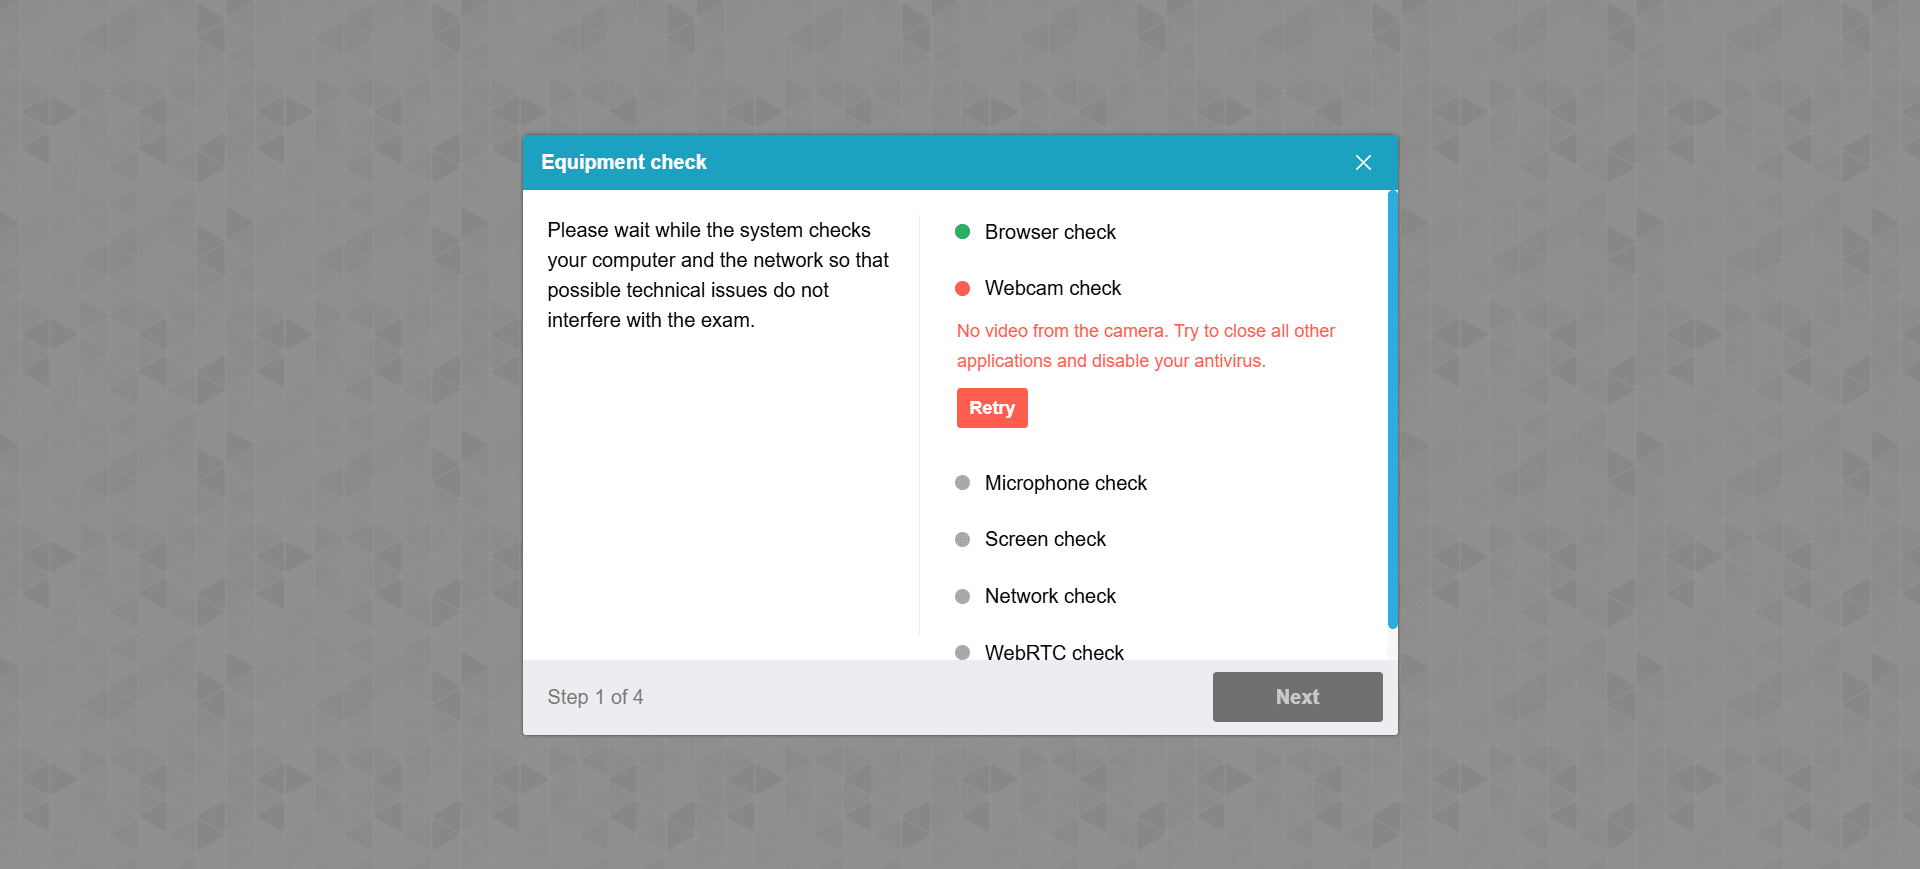
Below are common issues that may prevent the successful completion of the webcam check, along with their resolutions:
- Another Program is Using the Webcam: Close any application currently accessing the webcam, such as video conferencing tools.
- Camera is Covered: Some devices, like HP laptops, have a physical button or cover for the camera. Ensure the camera is uncovered and functional.
- Antivirus or Windows Firewall Blocking Access: Some antivirus software includes webcam protection that restricts access. Temporarily disable webcam protection through the antivirus settings or turn off antivirus protection and the Windows firewall.
- Using an Undetected USB Camera: If your USB webcam isn’t recognized by the system, refer to the specific troubleshooting steps in this chapter.
- Camera permission is not enabled: Please make sure the browser can access your camera. For specific troubleshooting steps, refer to this chapter.
- Camera drivers are outdated (Windows): Please update your camera drivers or Windows system.
Note: Troubleshooting webcam issues often requires administrative privileges to modify device settings. If you’re using a work-provided laptop, ensure you have admin permissions, or consider using a personal device for smoother resolution.
Allow Camera Permission
Allow the Browser to Use the Webcam
The browser will prompt you for camera access when you begin the exam. To enable this, click Allow.

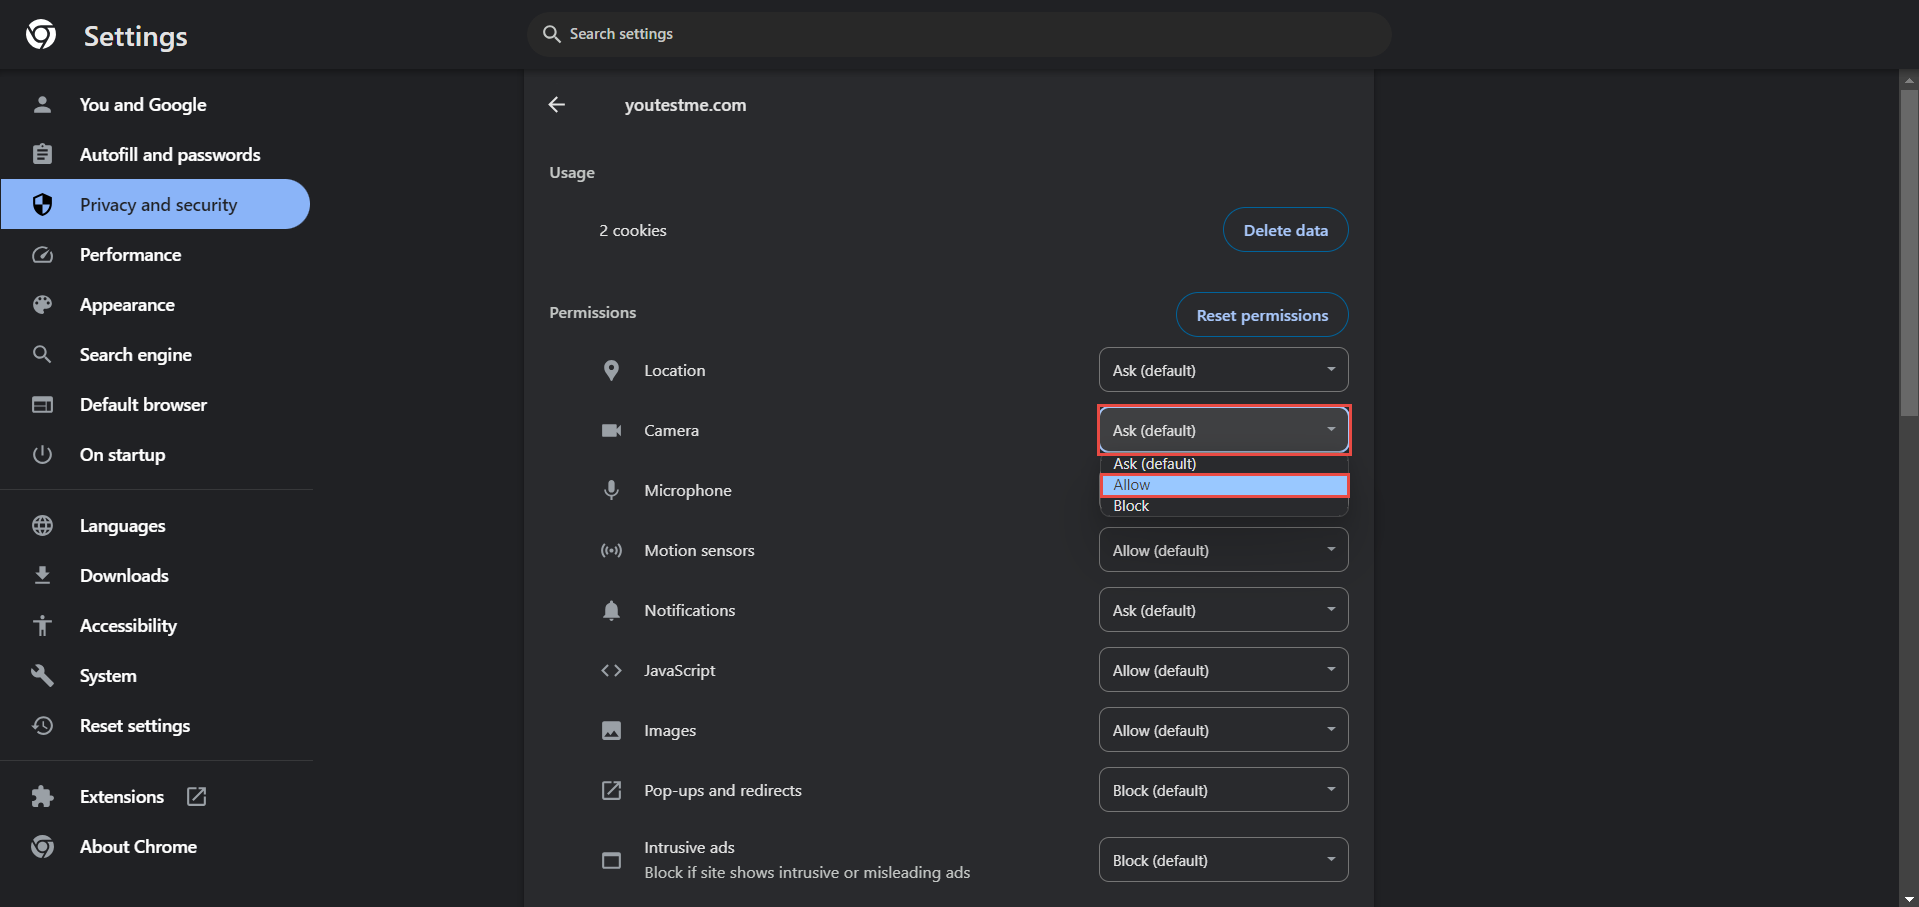
Using Google Chrome
If you are using Google Chrome and you need to allow the browser access to the webcam manually, follow these instructions:
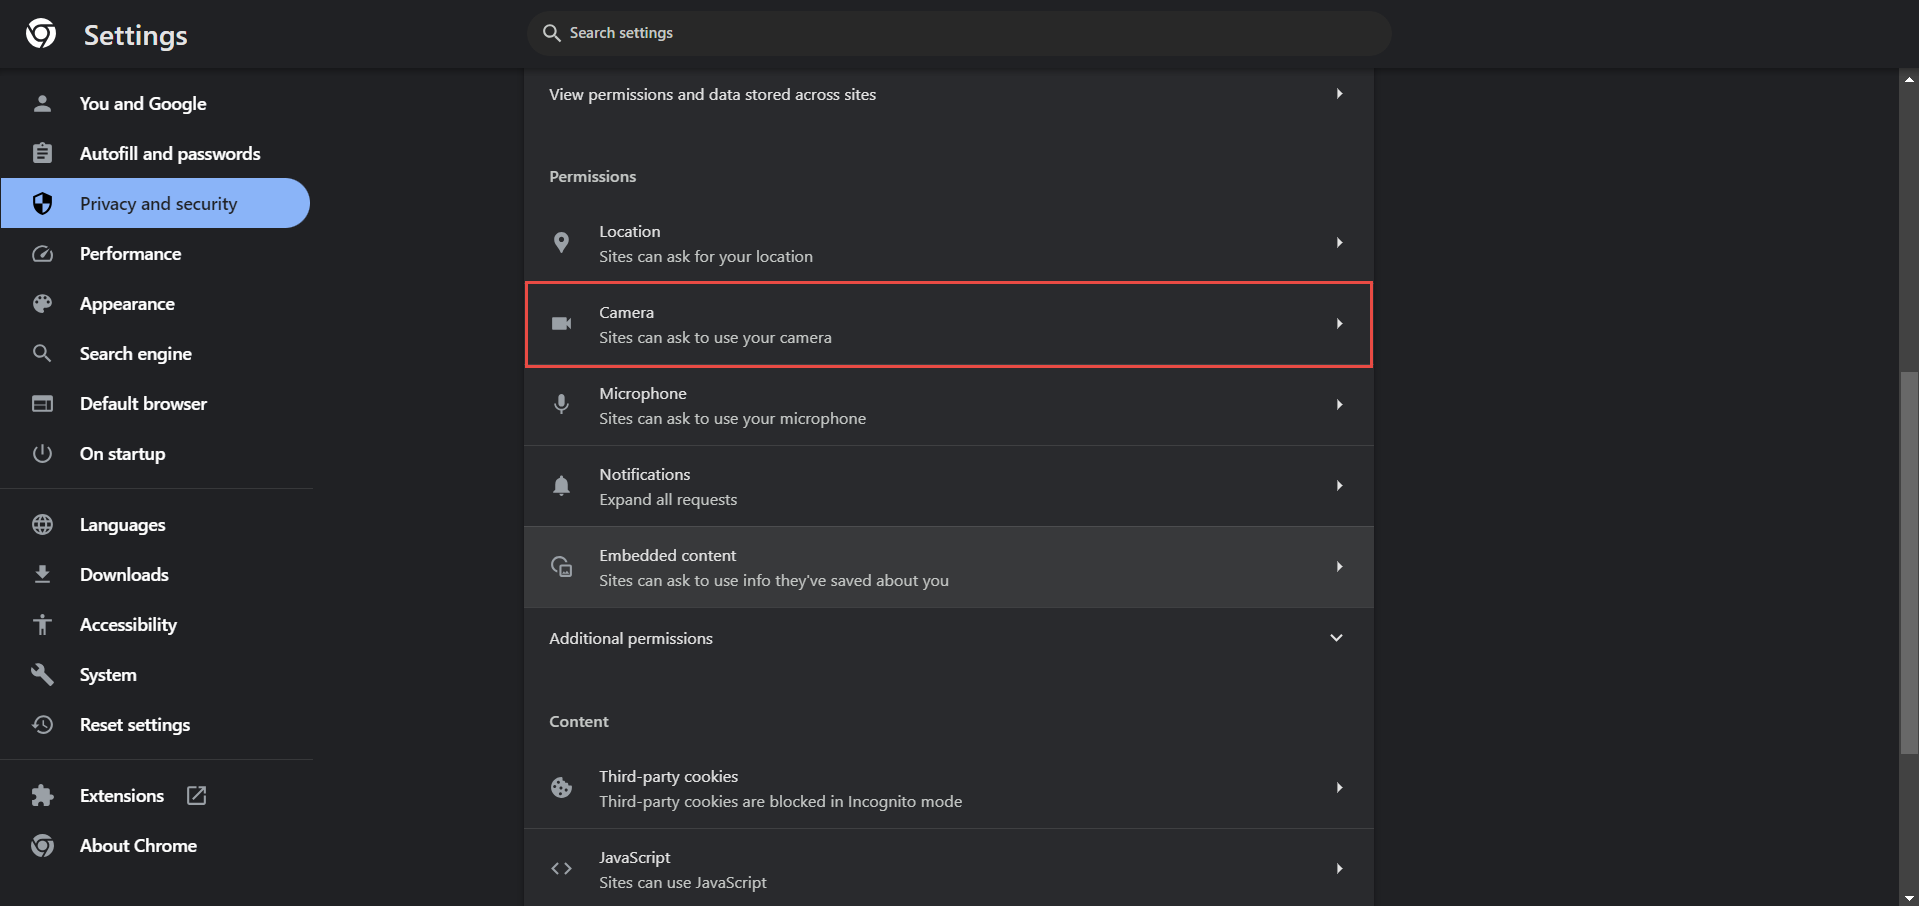
- Click the site information icon in the left corner of the address bar.
- Select the Site Settings option.

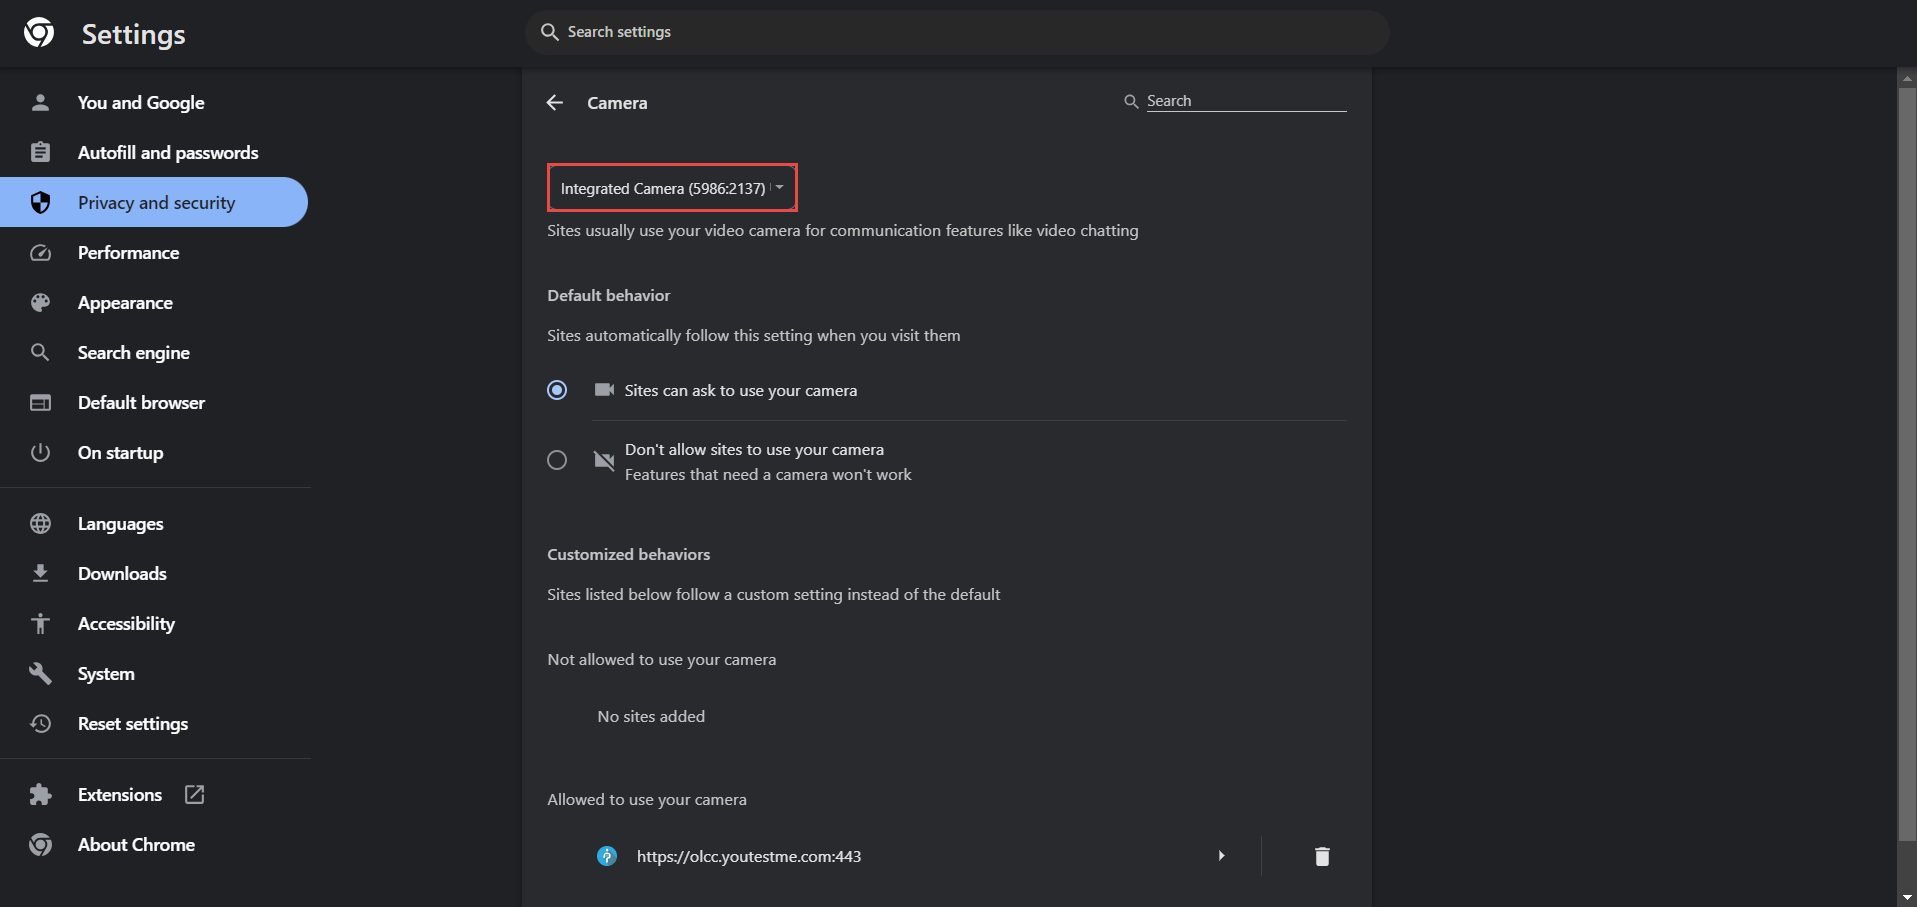
- In the Site Settings webpage, click the dropdown menu next to the camera icon and select Allow.
Using Mozilla Firefox
You can enable or block sites from accessing your device’s cameras from Firefox:
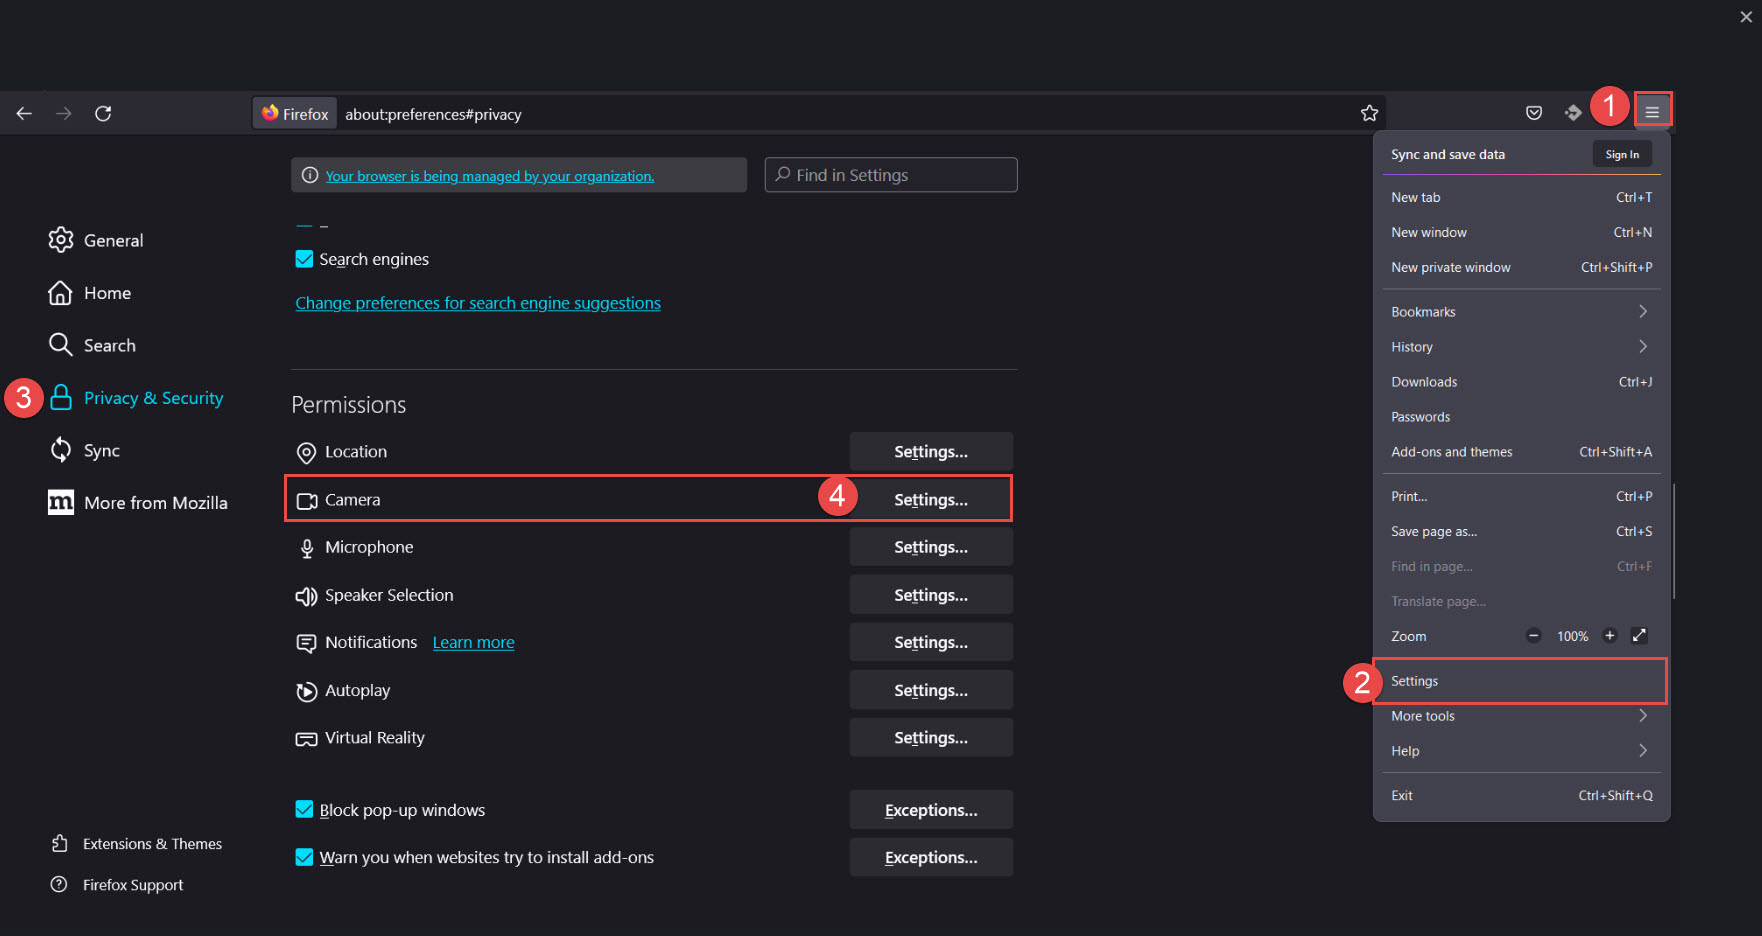
- Click the menu button
 .
. - Select .
- Select Privacy and Security
- Scroll to the Permissions section and click the Settings button.
 .
.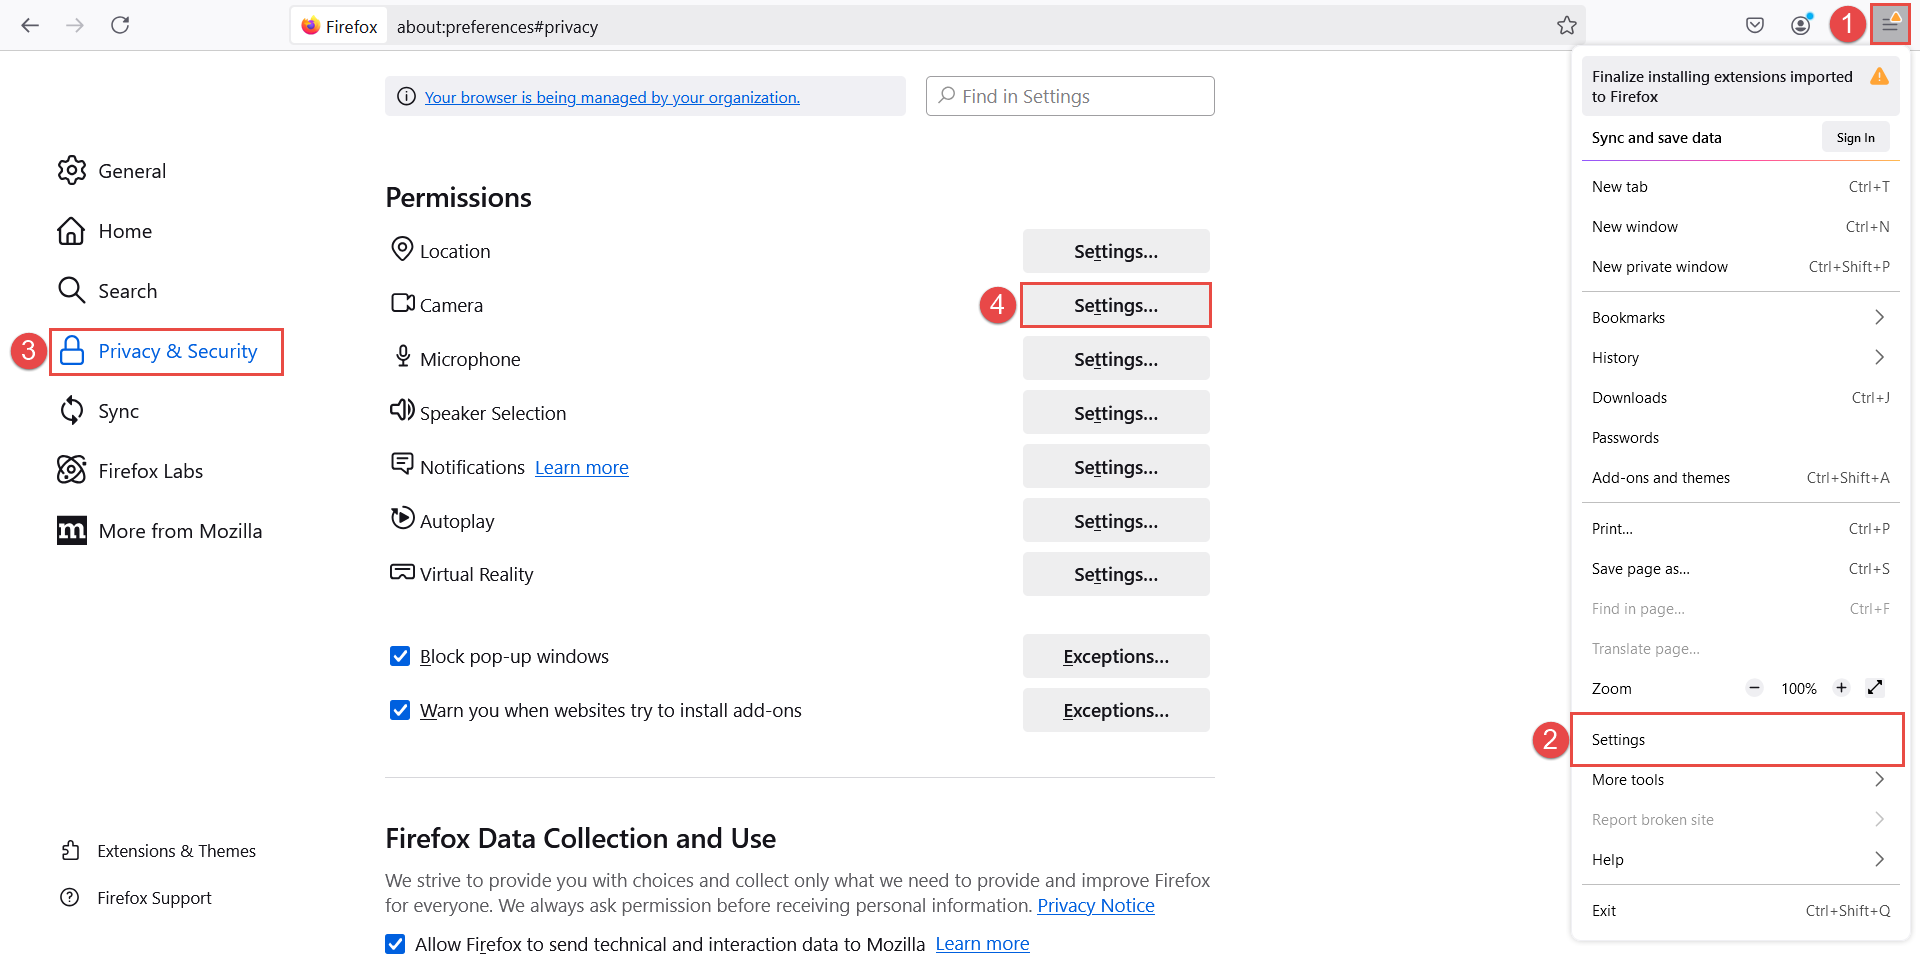
Find the exam website in the webcam permission dialog and select “Allow” or “Always Ask.”

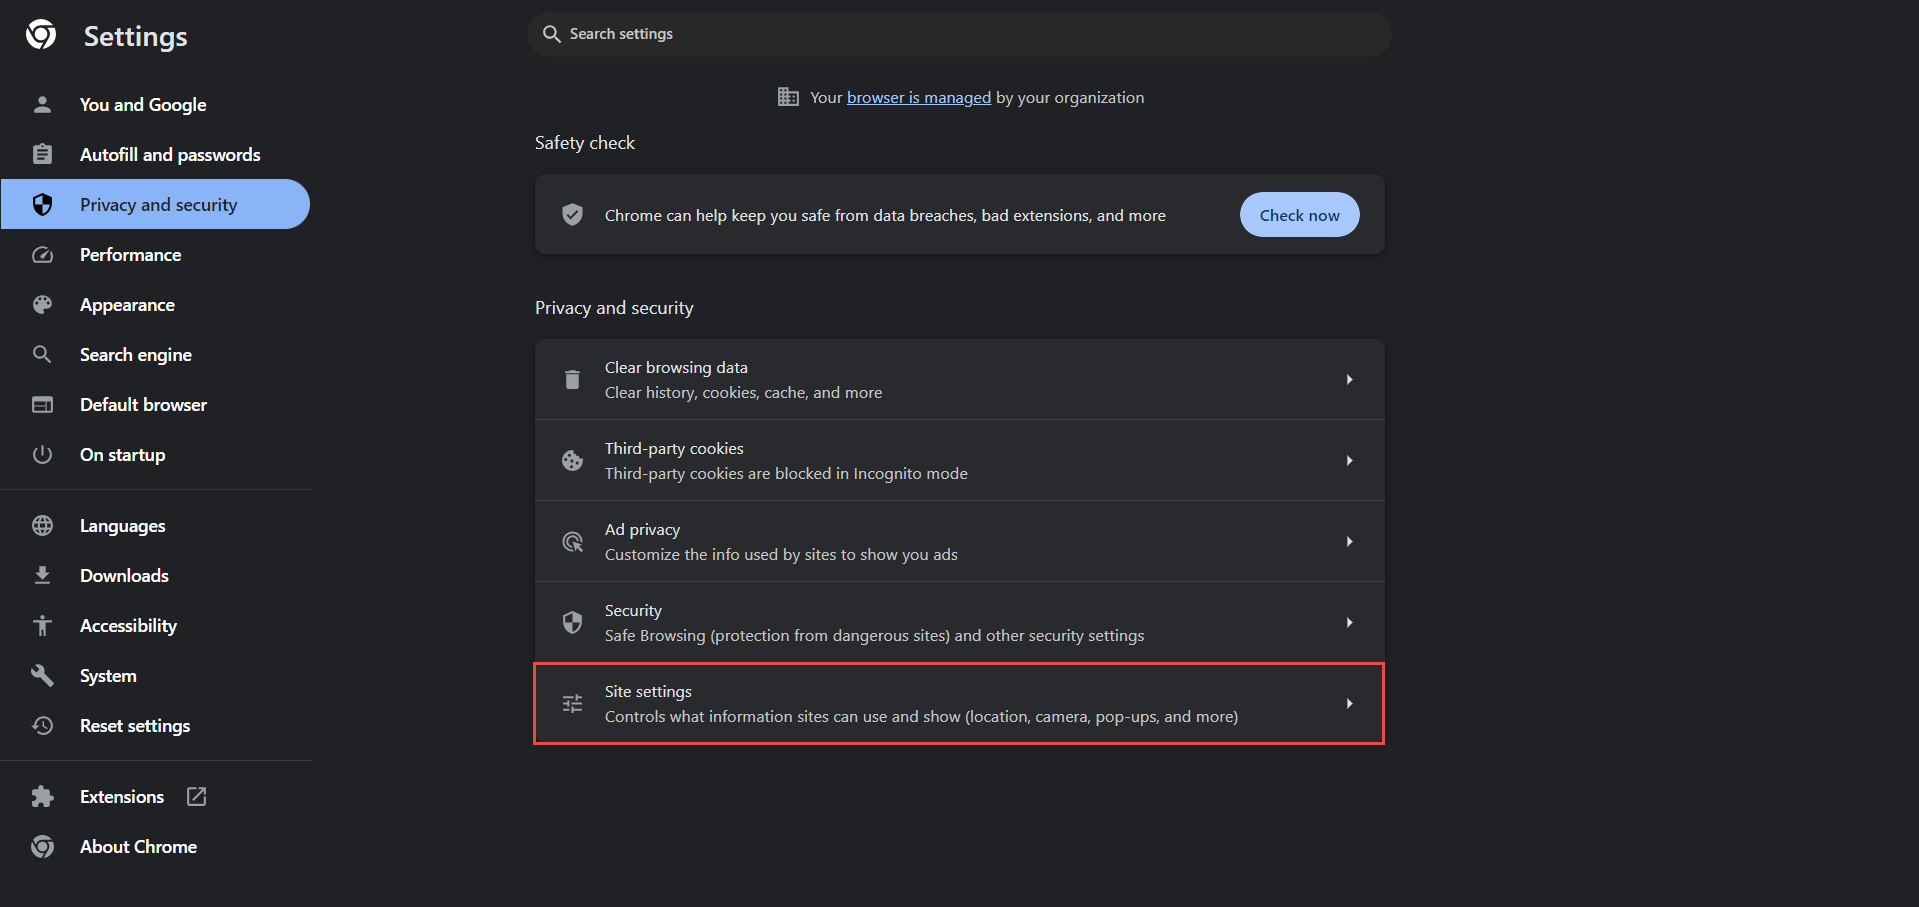
Checking Camera Permission in Your Computer’s Settings – Windows
In addition, you can also allow camera usage in your computer’s settings:
- Open Camera privacy settings.
- Confirm that camera usage is allowed.
- Scroll down the page and confirm that camera usage is permitted for the browser you are using for taking a test.
Checking Camera Permission in Your Computer’s Settings – MacOs
- Choose the Apple menu

- Click Privacy & Security
 in the sidebar.
 - Click Camera.
- Turn access to the camera on for the browser you use to take the exam.


Using a USB Webcam
Using Google Chrome
If you are using a USB Webcam, you may need to change the default camera used by the browser. To select the correct camera that Google Chrome should use, follow the steps below:
- Click the three dots icon in the top right corner of your browser window.
- Navigate to Settings.
- On the left side, select Privacy and Security.

- Select Site Settings.
- Navigate to the permissions section and select Camera.
- In the drop-down menu, select the desired camera.
Using Mozilla Firefox
If you are using Mozilla Firefox, follow these instructions:
- Click the three-line icon in the top right corner of your browser window.
- Navigate to the Settings.
- On the left side, select Privacy & Security.
- Scroll down to find camera settings and click on the Settings button. When the pop-up window appears, you can specify which websites can access your camera.

Changing the used camera in Your Windows’ Settings
To use an external camera, you may need to manually change the selected camera in your system settings by following the steps below:
- Press Windows + X, and click Device Manager.
- Click Camera devices.
- Right-click on the integrated webcam.
- Click Disable device and ensure your external camera is recognized.

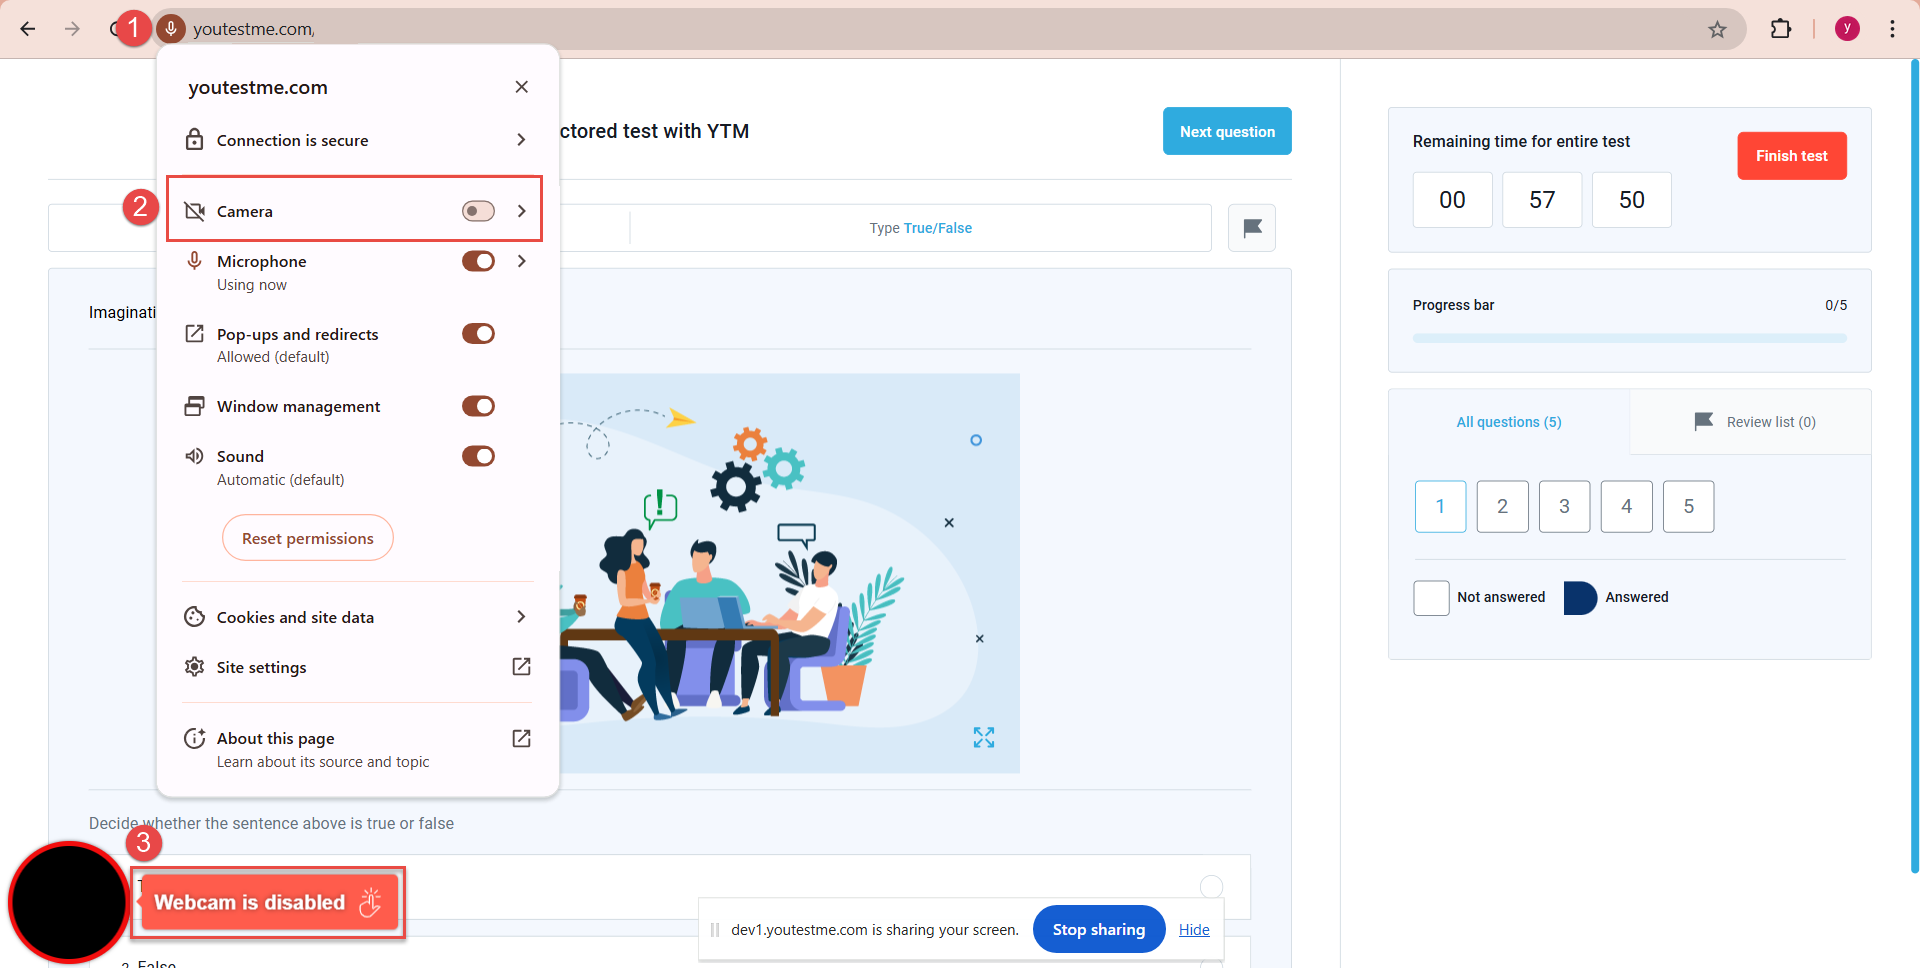
The webcam is disabled during the test
Best Practices and Tips
- If none of these solutions work, you may want to consider using an external camera or another laptop.
- It’s advisable to use your personal device for the test, as company devices may have security restrictions that block access to the camera. Without administrator permission, changing these security settings to allow the website to use your camera is impossible.
- Please watch the video for more information on the test-taking process from the candidate’s perspective.
- To see frequently asked questions about proctored tests, please see the FAQ.
