
Article verified for Release 15.2 on January 20, 2025.
This article explains how to configure and test the mail server in the application, which is used to send system notifications, alerts, and other automated emails.
On this tab, you can configure email servers used to send notifications from the application. There is no limit to the number of email servers that can be configured; however, only one email server can be active at a time.
By default, an email server is preconfigured in the application, but you can configure a custom server if needed.
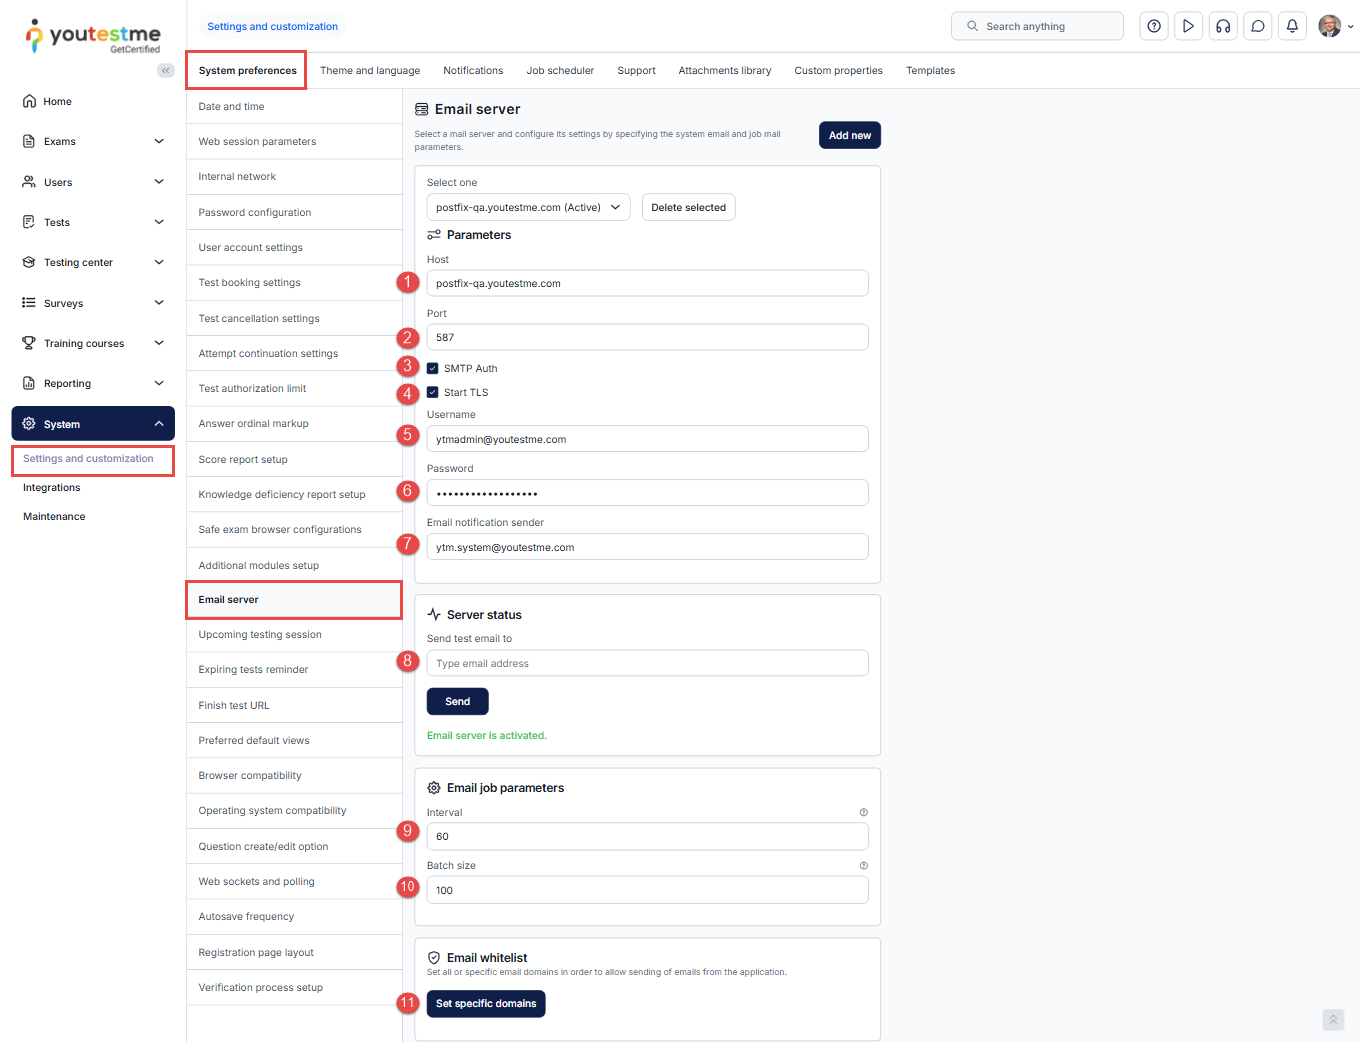
To configure the email server, navigate to System> Settings and Customization from the main menu. On the System Preferences page, open the Email Server tab.
Configure the following settings:
- Enter the host name of the mail server.
- Enter the port number of the mail server.
- Enable SMTP authentication if authentication with the SMTP server is required.
- Enable Start TLS to use TLS encryption for secure email delivery.
- Enter the username for the mail server.
- Enter the password for the mail server.
- Enter the sender’s email address. Replies to notification emails will be sent to this address.
- Enter a test email address. After activating the email server, a test message is sent to confirm the configuration.
- Enter the interval, which defines the number of seconds between two successive executions of the mail job.
- Enter the batch size, which defines the maximum number of emails sent during a single mail job execution.
- Click Set specific domains to specify allowed email domains, or leave this option unchanged to allow all domains.
Checking the Mail Server and Sending a Test Email
To check the mail server configuration and send a test email:
- Navigate to System and select Settings and Customization.
- Open the System Preferences tab.
- Select the Email Server tab.
- Review and update the mail server parameters if necessary.
- Enter the email address to which you want to send a test message.
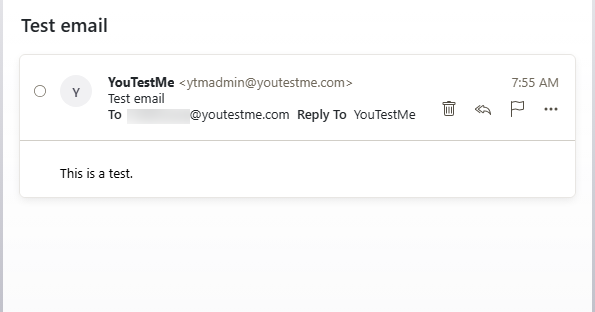
- Click Send.
You should receive the test email from the application.
Check the status of the emails in the Sent emails report
Select the Reporting tab, click the Predefined reports tab, and select the User reports page.
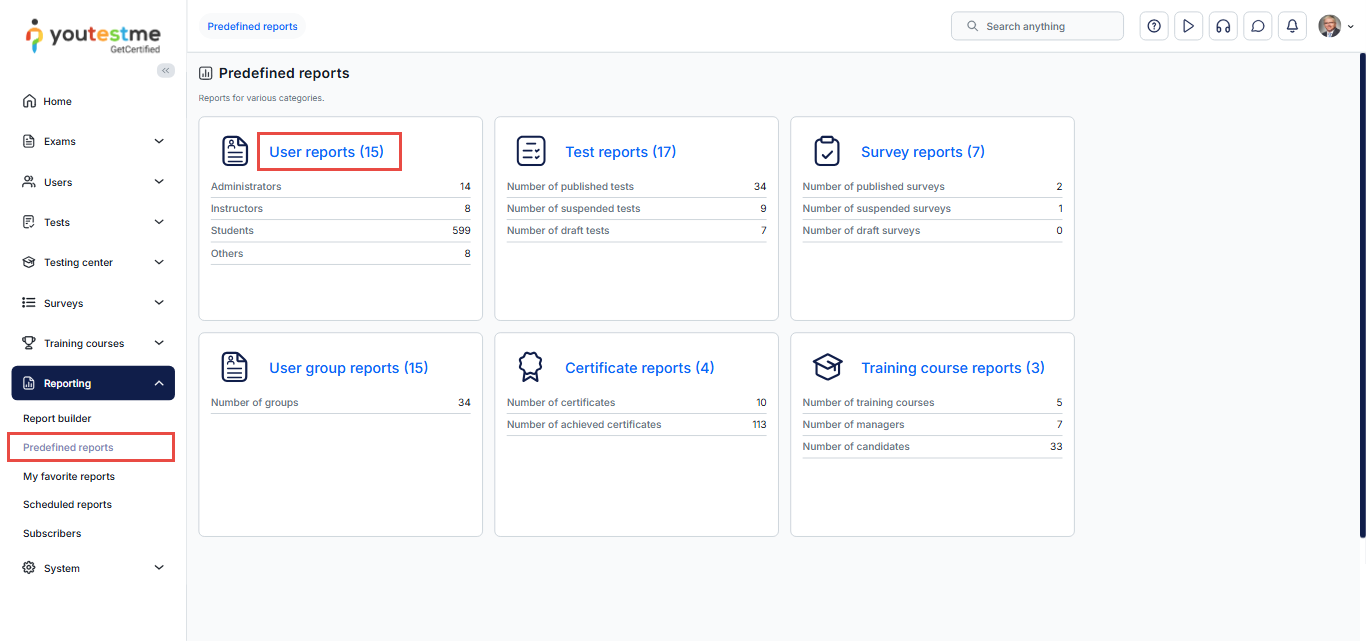
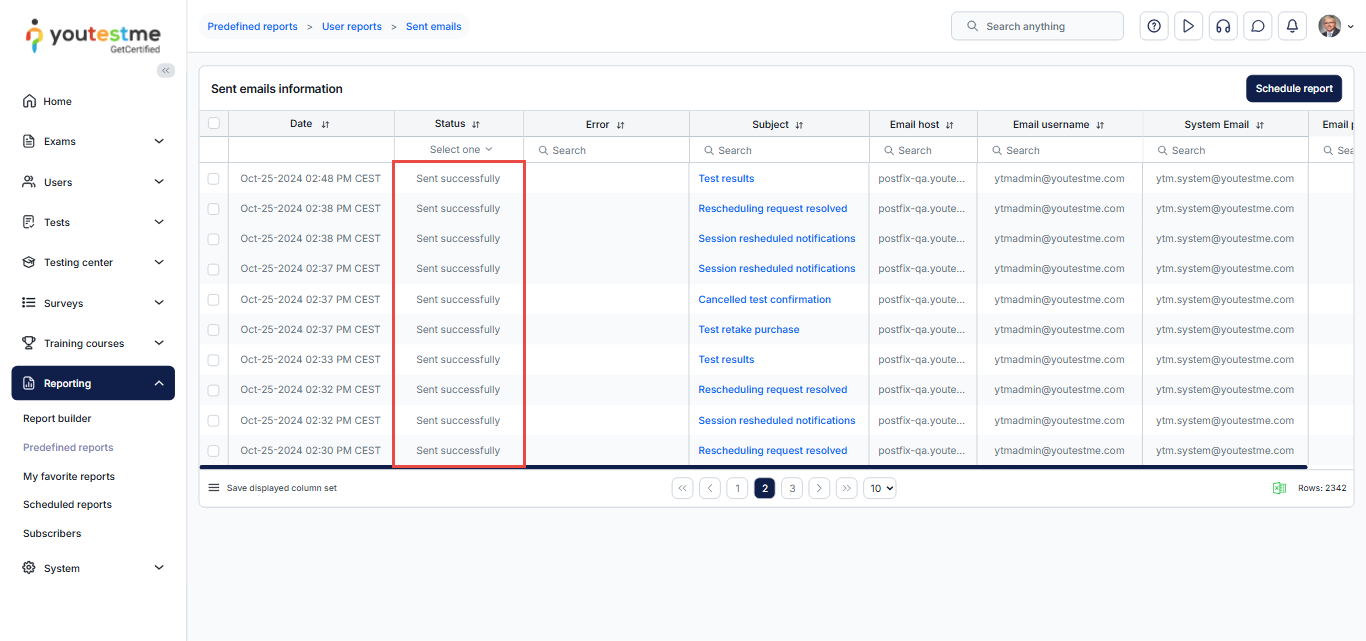
Open the Sent emails report. In the report, you can see the status of all emails from the application. The status should be Sent successfully if the mail server is set well.
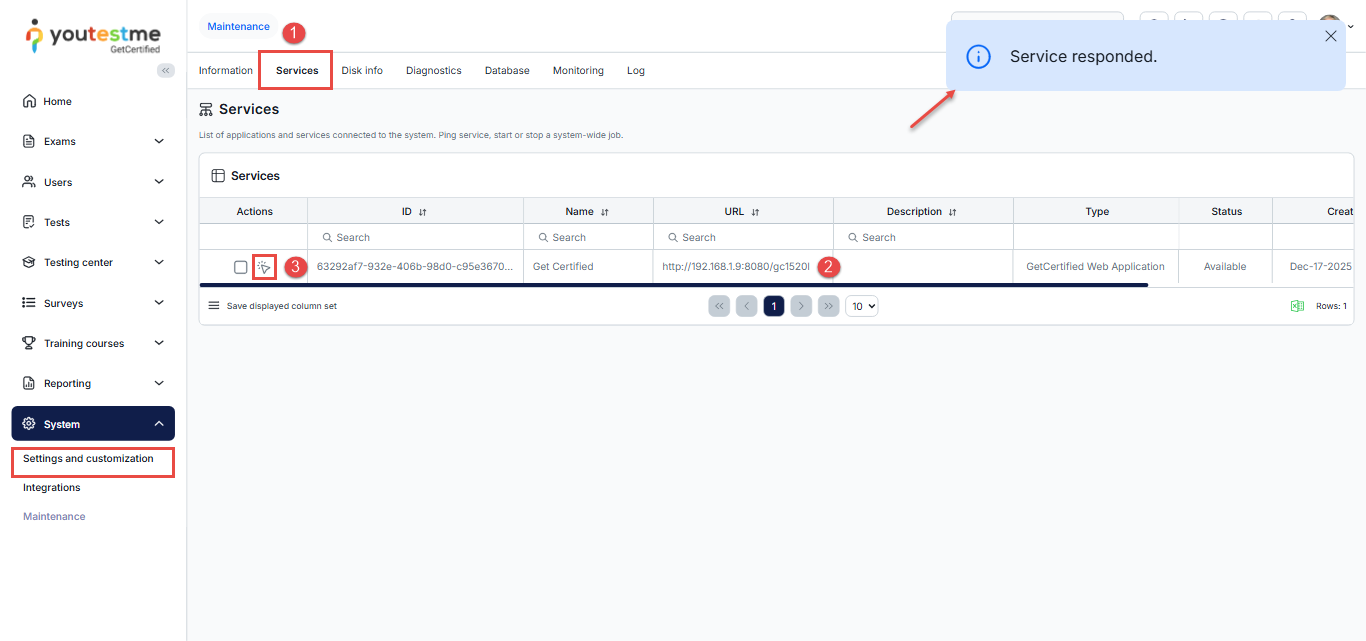
Check the service that is connected to the system
Select the System/Maintenance tab. When the page opens:
- Click on the Services tab
- Find the service with the context of your application URL
- Check whether the system-wide jobs are enabled and responding using the Ping icon.
If the service is enabled, the confirmation message should appear.
Google Mail Service Setup
If you are using the Google Mail service (probably on Google Workspace) with your domain, note that Google is limiting the usage of mail accounts in other applications.
Official Google links are: https://support.google.com/mail/answer/185833?hl=en
Additionally, to set this configuration, you have to configure the 2-Step Configuration: https://support.google.com/accounts/answer/185839?sjid=9092980971749574418-EU
Here is a procedure from the steps in the links above:
- Log in to your Google account (the one you want to use in the application) at https://myaccount.google.com/ and go to the Security tab on the left menu.
- Click on 2-Step Verification.

- If 2-Step Verification is not configured, follow the configuration instructions.
- After 2-Step Verification is configured, there will be an option at the bottom of the page (you could always search for “App passwords” on the https://myaccount.google.com/)

- Click on it and generate a password for the application. It will be shown only once, so save it in a safe place or create it again if it is lost.

Additionally, here are the parameters used for Google Mail in the GetCertified application:
- Host: smtp.gmail.com
- Port: 587
- SMTP Auth: Yes
- Start TLS: Yes
How to set up Yahoo Mail
To set up Yahoo Mail for use with your application, follow the steps below. Similar to Gmail, Yahoo also requires App Passwords and specific configuration settings, especially if you enable two-step verification.
- Step-by-Step Setup for Yahoo Mail in Your Application:
- Enable Two-Step Verification (if not already enabled):
- Log in to your Yahoo account at login.yahoo.com.
- Click on your profile picture in the top-right corner and select Account Info.
- In the left menu, click on Account Security.
- Scroll down to Two-step verification and enable it by following the instructions.
- Generate an App Password:
- Once Two-Step Verification is enabled, go back to Account Security.
- Scroll down to App Password and click Generate app password.
- Select your app type (choose “Other” if your app is not listed) and click Generate.
- Important: Save the generated password because it will only be shown once.
- Configure Yahoo Mail Settings in Your Application:
- Use the following parameters in your application’s email configuration:
- Host: smtp.mail.yahoo.com
- Port: 587 (for TLS) or 465 (for SSL)
- SMTP Authentication: Yes
- Encryption: TLS or SSL
- Username: Your full Yahoo email address
- App Password: The app password you generated earlier
- Use the following parameters in your application’s email configuration:
Additional Resources:
Yahoo’s guide to set up third-party apps
By following these steps, you can securely configure Yahoo Mail for your application while ensuring compatibility with Yahoo’s security policies.
For more useful instructional materials, please visit:
