
Article verified for Release 15.1 on October 2, 2025.
This article focuses on creating a test with attachments and importing questions containing attachments. If you want to learn how to add attachments to questions in the question pool, please refer to this article.
Creating a new test
For more information on how to create a test, please visit this article.
Test attachments
Create a new test attachment
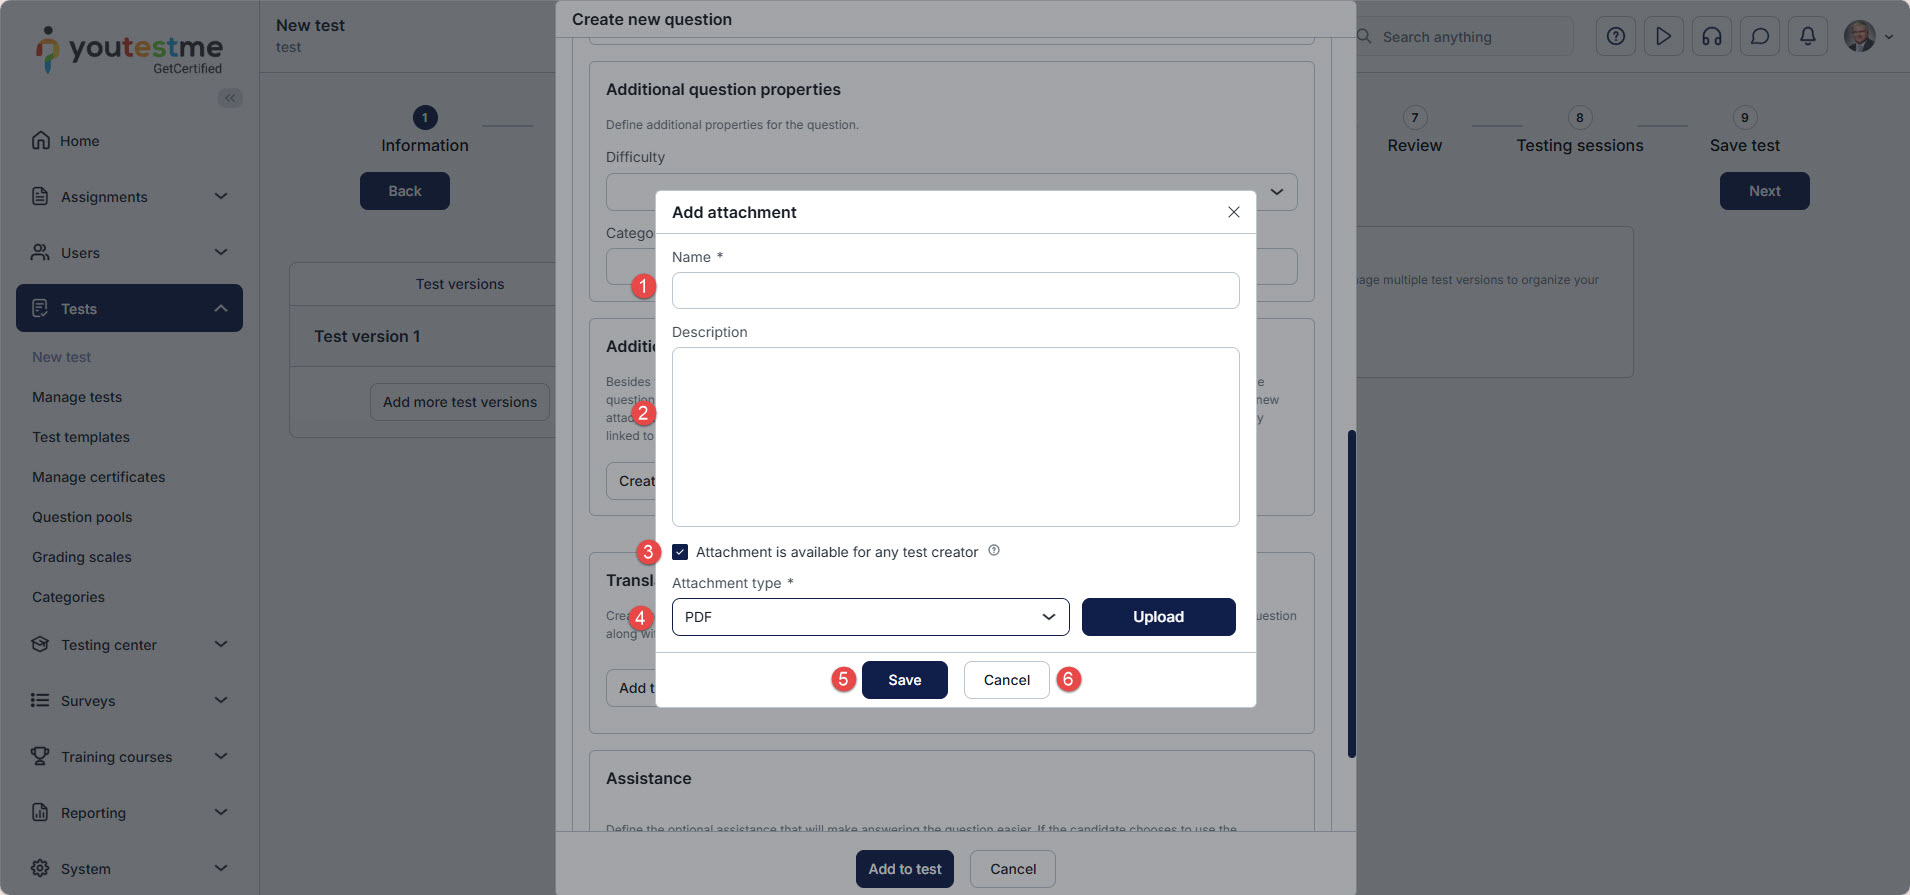
If you select the Create new button, the new window will appear where you should:
- Enter the name of the attachment.
- Optionally enter the description.
- Specify whether the attachment is private (only you can use it in other tests and questions) or public (other users can use it, but cannot edit or delete it).
Note: Users with roles that have the Manage any attachment permission can access and edit all attachments in the system, regardless of attachment privacy. - Choose the attachment type and either upload the file or provide a link.
Note: Only the first five Link attachments will be visible and accessible to the candidate. - Click Save to add this attachment to the test and store it in the attachment library.
- Click Cancel if you don’t want to add an attachment.
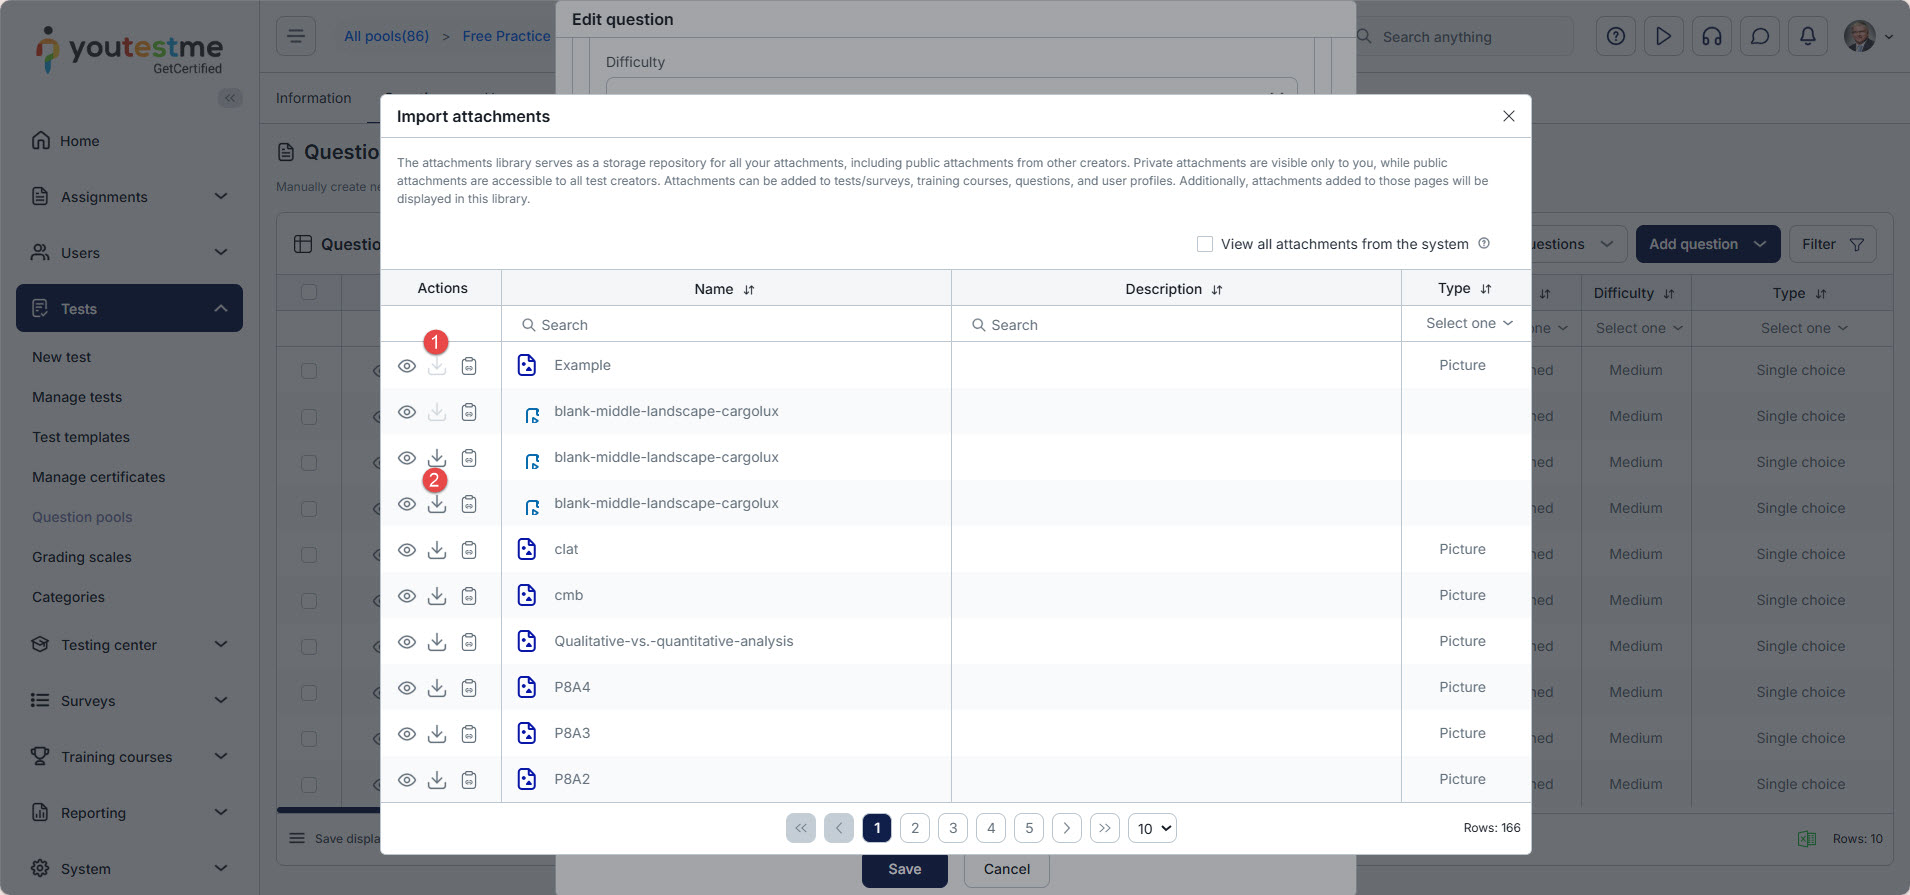
Import test attachments
Once you have selected the Import attachments button, a new window with the attachment library will appear, where you can view all previously created attachments and public attachments from other creators stored in the library. To learn more about accessing and managing the attachment library, refer to this article.
- The attachment you created for this test cannot be imported again since you have already added it.
- The attachment is stored in the library – You can add it to the test by clicking the Arrow icon.
Editing test with attachments
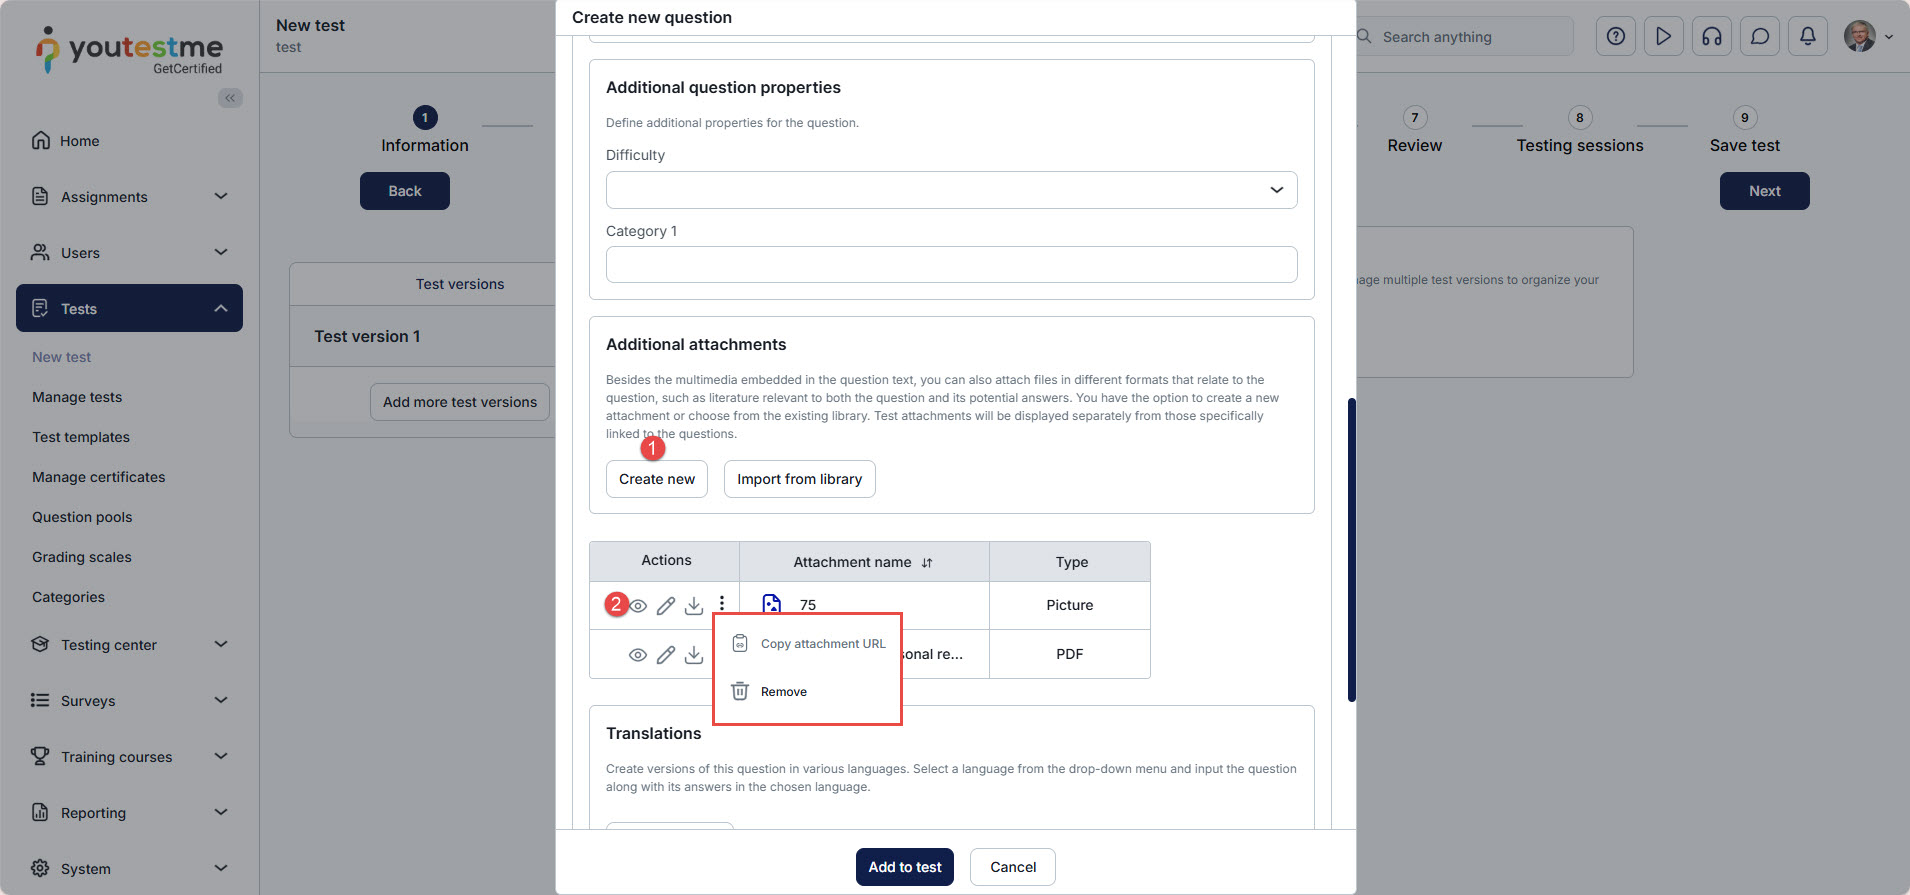
Add attachments containing instructions or useful materials in various formats. Depending on the test settings, attachments can be accessible either only at the beginning or throughout the entire test-taking process. Test attachments will be presented independently from those attached to the questions themselves. You can create new attachments or import existing ones from the library. An explanation of all fields for attachment creation and import can be found in the System/Settings and customization/Attachment library.
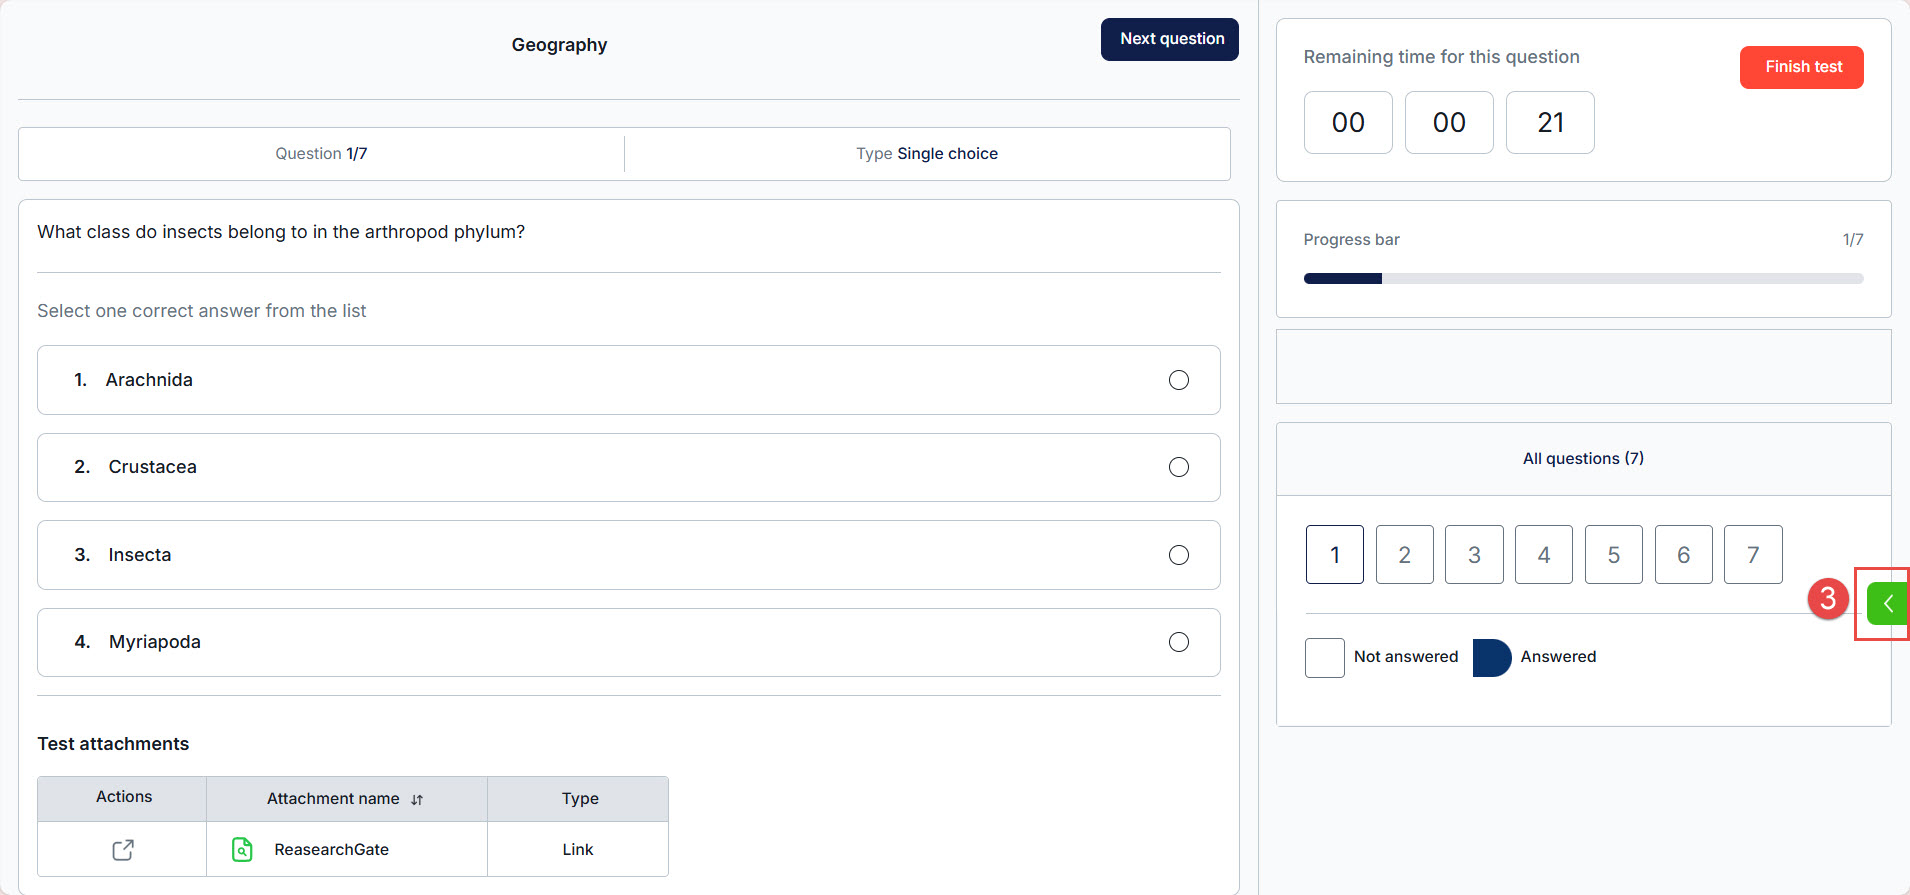
All test attachments will be presented in a table, allowing you to view, edit, download, or remove them by clicking the corresponding icon.
Candidate’s perspective of test with attachments
Attachments can be added to questions, sections, and/or tests. Next to each attachment, there is an option to view it. Clicking the View button opens the attachment in a pop-up window.
Note: In browser lockdown mode, only pictures, links, text, and video attachments (playable during the test) are supported. For link attachments, we recommend avoiding Mozilla Firefox with the Lockdown Browser, as its security policies may terminate candidates’ attempts.
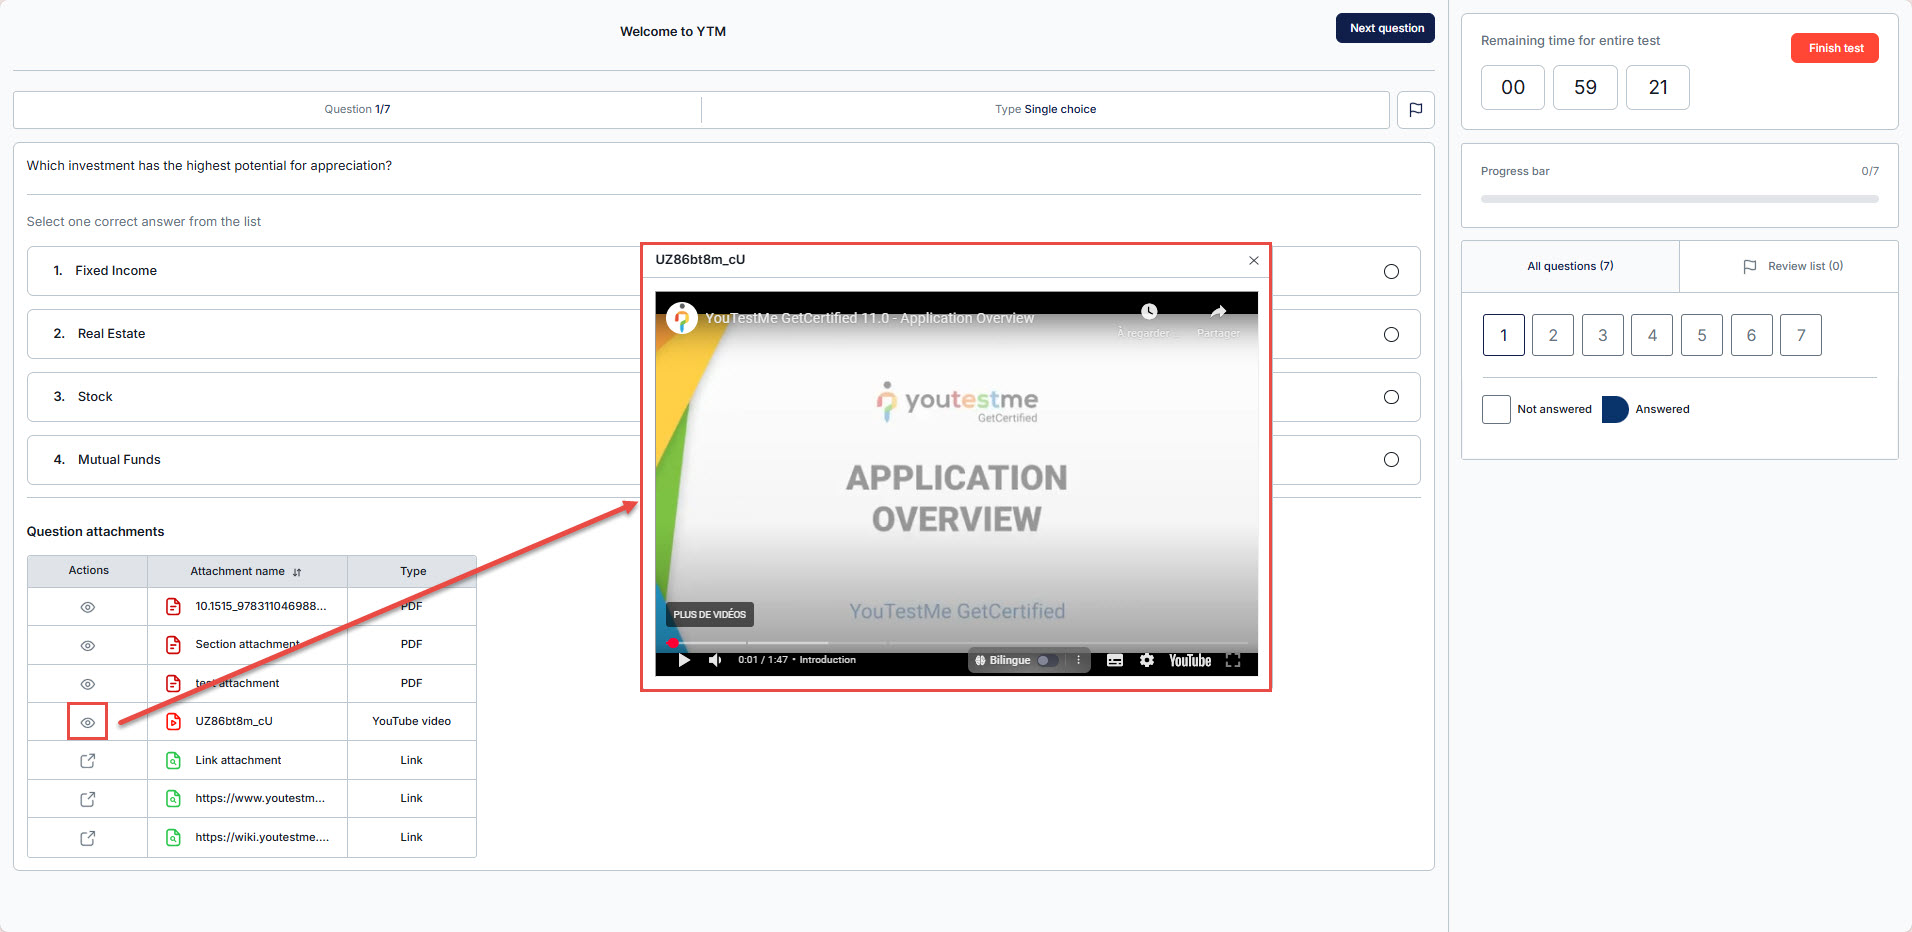
Additional interactions with attachments include:
- View: Candidates can view the attachments.
- Opening in a new tab: If the browser lockdown is disabled, link attachments can also be opened in a separate tab.
- Sidebar access: Link attachments are available in the sidebar on the right-hand side.
Note: This applies only to test-level and section-level attachments.
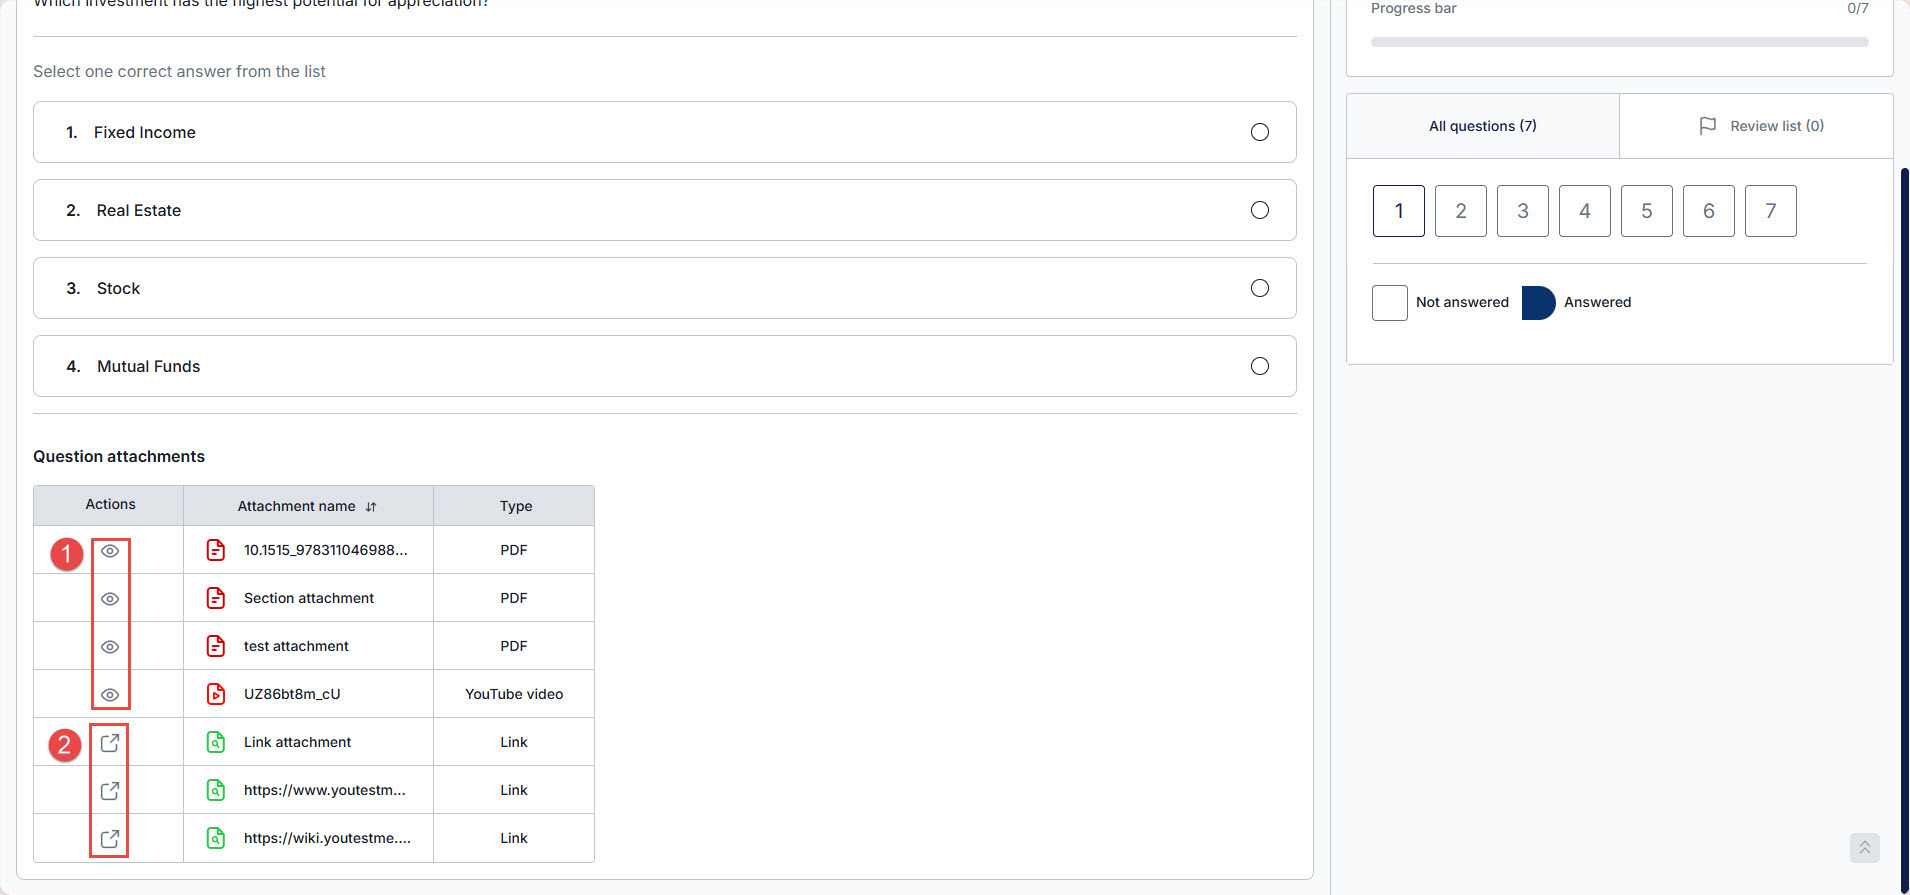
Once opened, link attachments can be easily closed by clicking the arrow icons.
![]()
