
Article verified for Release 15.1 on March 18, 2026.
This article explains how to import tests that candidates completed offline into the application. With YouTestMe GetCertified, you can generate tests for offline use, print hard copies, and, after candidates complete them, enter the test attempts back into the system. Test attempts will be automatically graded, just like tests conducted online.
Creating a CSV file
Once you have created and published the test (for more information on how to create a simple test, please visit How to Create a Simple Test), you can import the test responses using a Scantron machine or CSV files. This allows you to transfer results from paper to electronic form.
To do this:
- If you use a Scantron machine, scan the results and convert them to CSV files.
- If you do not have a Scantron machine, create an Excel file manually and follow the instructions:
- In the first column, enter the usernames of all candidates who took the test.
- Leave the next two columns blank.
- The fourth column should contain the answer a candidate gave to the first question in the test.
- The fifth column represents the answer to the second question, etc.
- If the candidate answered with the first offered answer, enter the letter A. If the candidate selected the second answer, enter B, etc.
- In the CSV file, spaces between answers are optional, as both formats (with or without spaces) are supported.
- After entering the answers to all questions, save the file as CSV.
Note: Ensure that the preferred delimiter, usually called “List separator,” is set to be “,” (comma) so the file can be successfully uploaded. This setting is located in the Regional Settings / Additional Settings of the Control Panel on your computer.

Adding the test results to the application
To import a CSV file into the application, follow the instructions below:
- Navigate to Tests > Manage tests.
- Select the desired test.
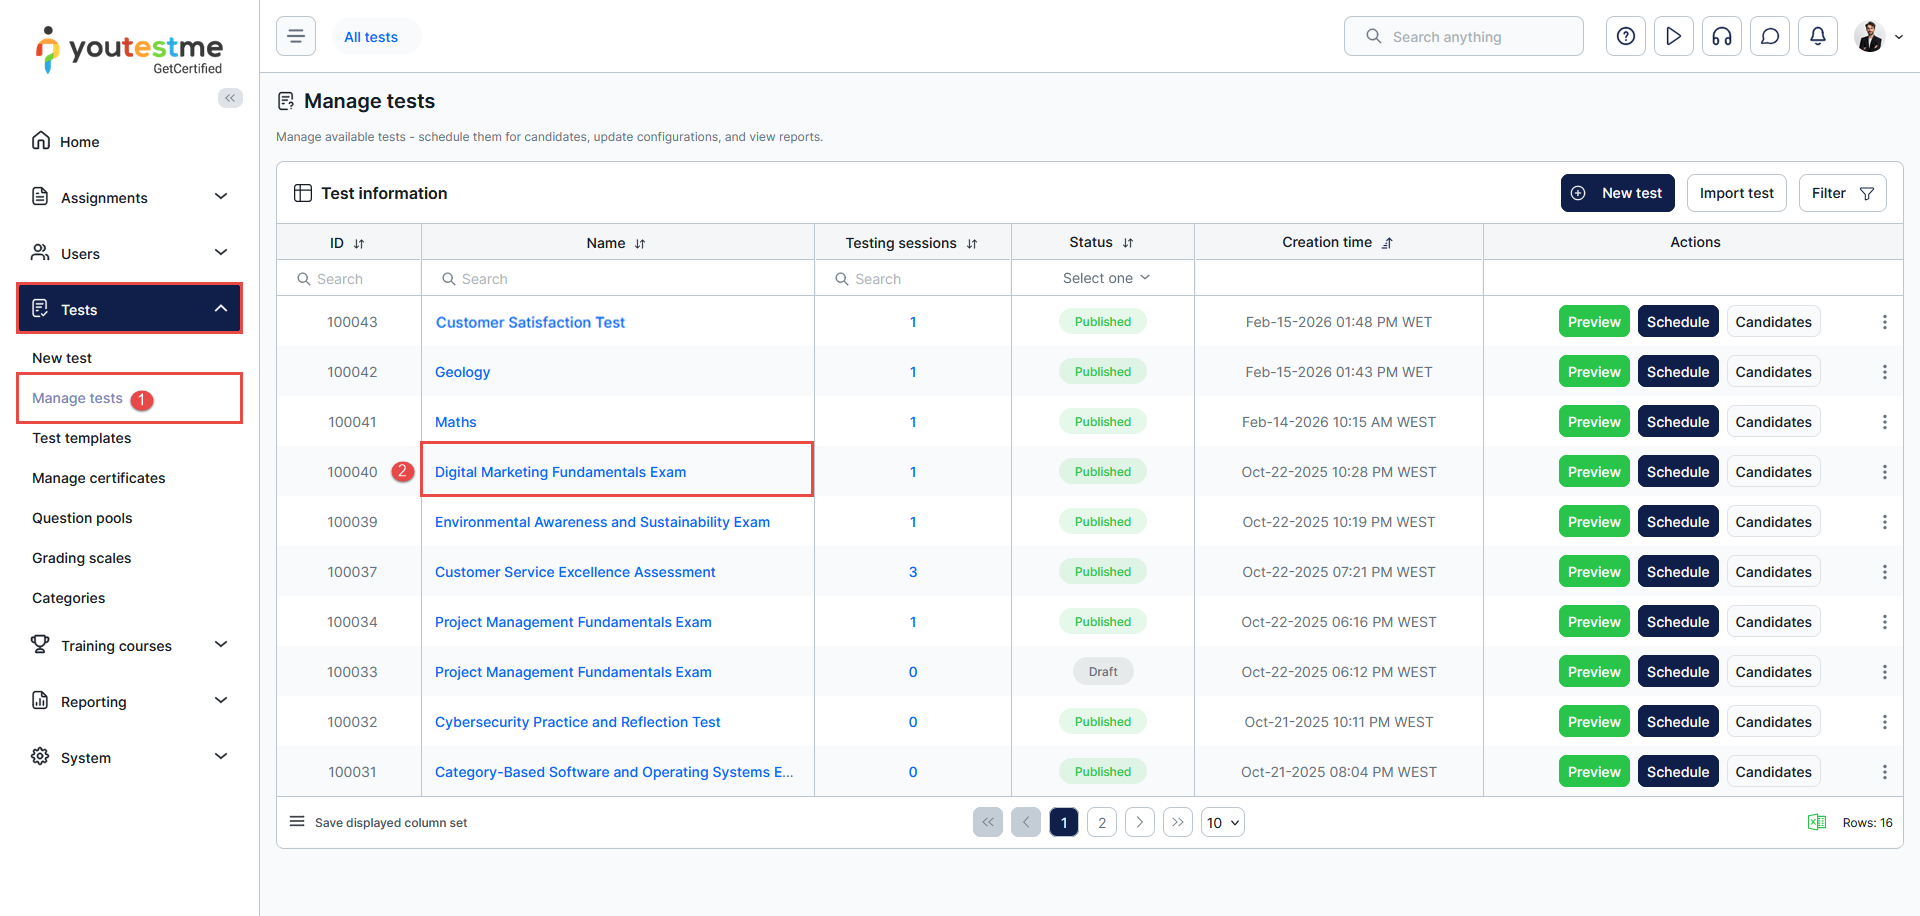
- Navigate to the Candidates tab.
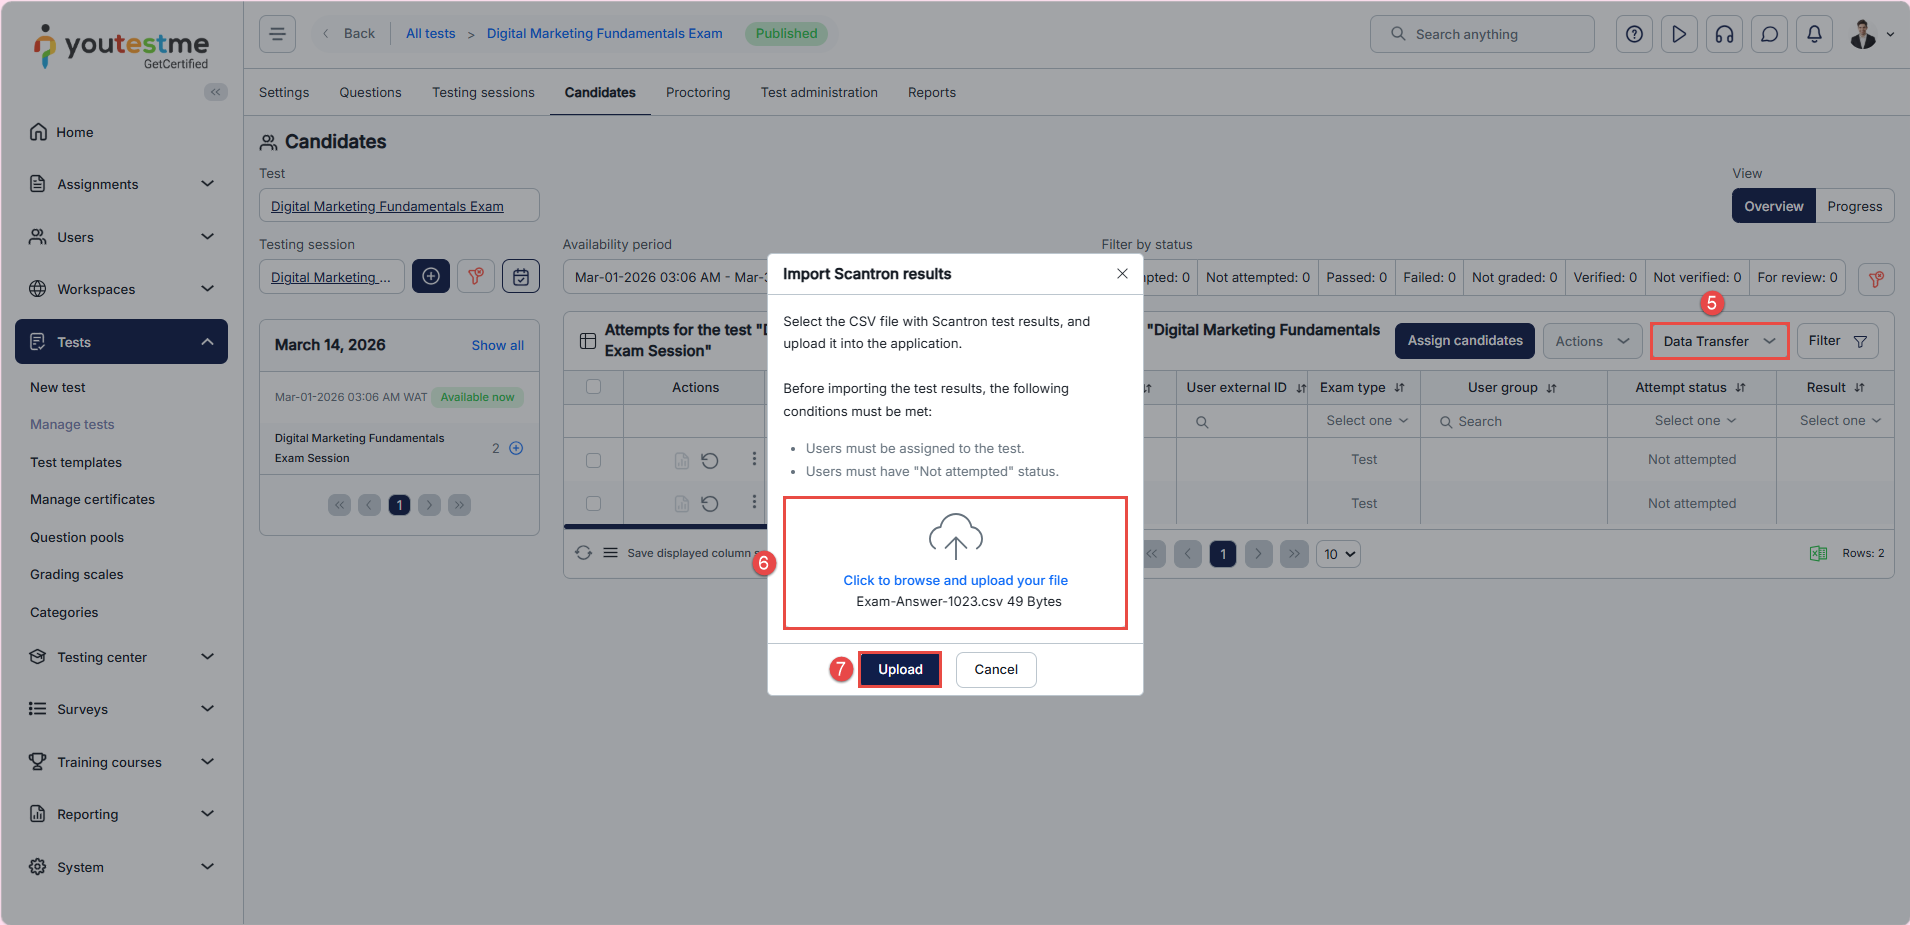
- Select the desired session, and the list of candidates will be displayed. Ensure that the order of the candidates in this session matches the order of the candidates in the CSV file.
- Click the Data Transfer button and select the Import Scantron results from the dropdown menu.
Note: If you do not see the Import Scantron results option, the test contains question types that are not supported. It is possible to import test results for single-choice, multiple-choice, and true/false questions, but only for a test without sections.
- Click the Select file button to choose the CSV file.
- Click the Upload button to import the test responses.
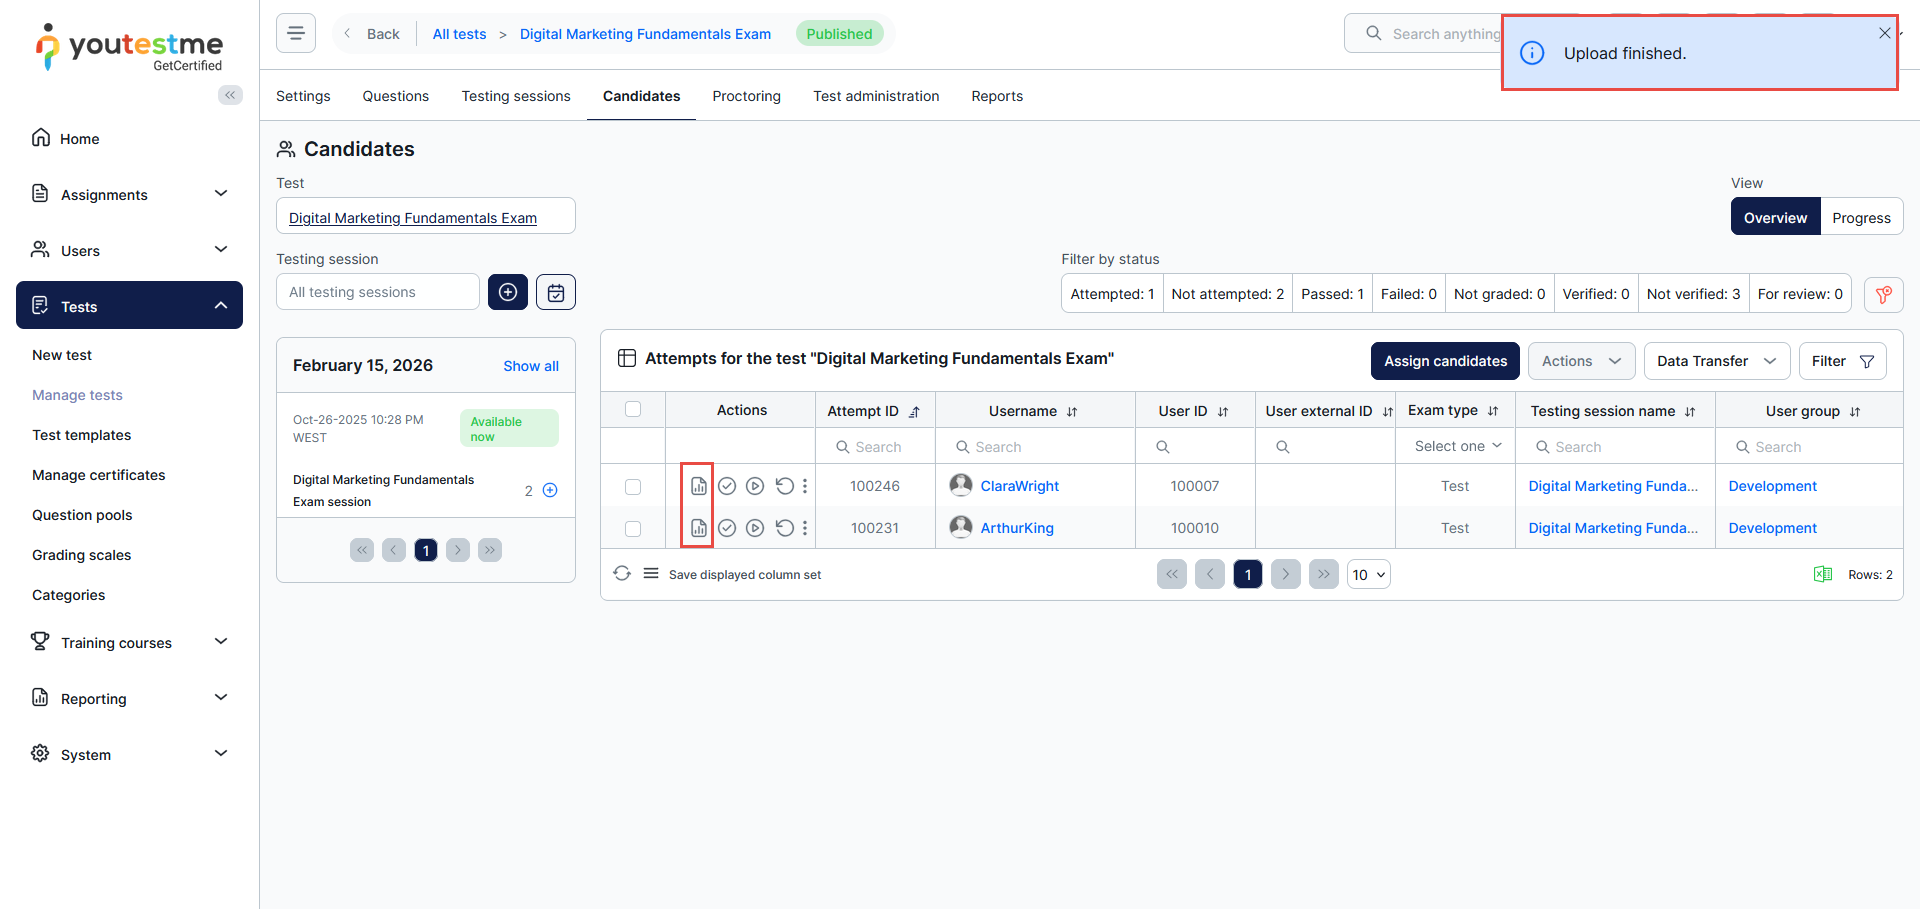
After uploading, you can see the reports of the candidates whose results you have added.

For video instructions, please watch this video.
