This article explains how to use section selection in your test settings. With this feature, test managers can assign specific sections to candidates. When enabled, candidates only get the sections they qualify for when starting or booking the test.
Accessing the page
To access the specific settings to enable the option:
- Select the Tests/Manage tests tab.
- Select the desired test under the Settings/Basic information tab.

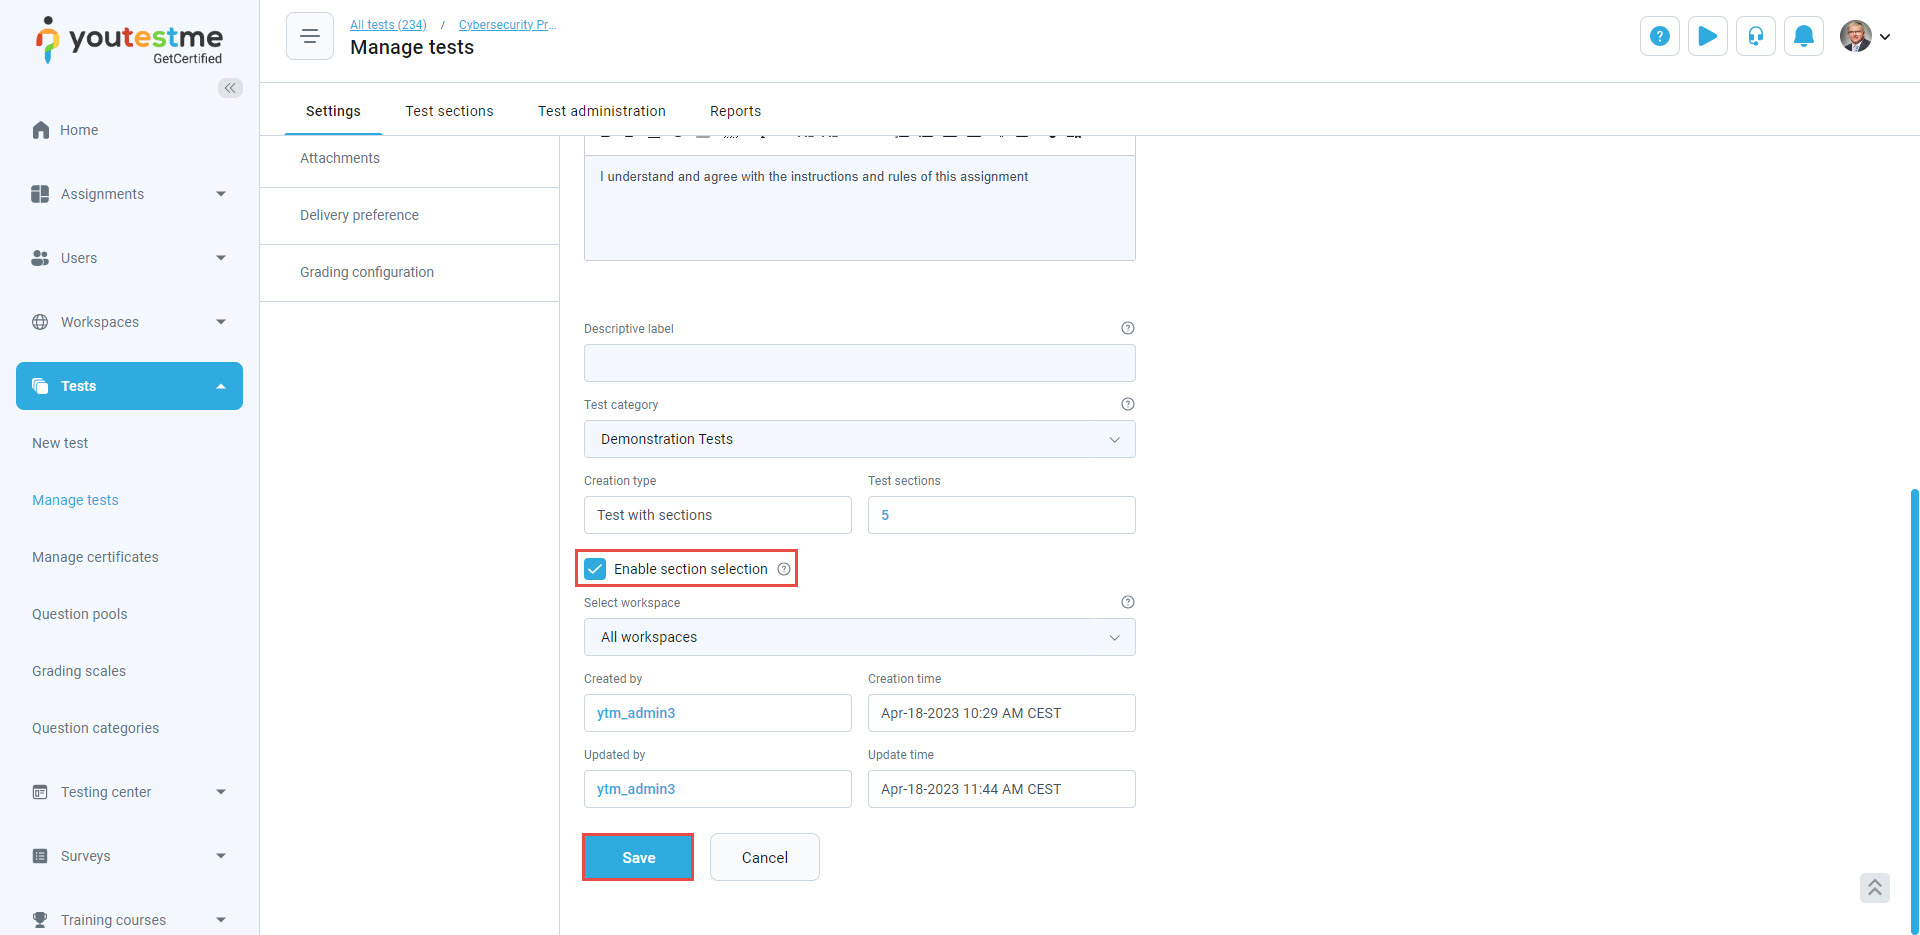
Enabling section selection
Creating a testing session with authorization
To create a single test session through the testing session dashboard, navigate to the Testing center page in the left-side menu and:
- Select the Testing sessions tab.
- Select the New testing session button.
- Enter the testing session name.
- Available from/Available to – enter the start/end date and time when the session will be available to the user.
- Add optionally Time zone – the field displays the time zone of the user creating the session. The dates and times below are defined according to this time zone.
- Additional instructions – an optional label for a session instruction. For more information on how to create and use session instructions templates, check this article.
- Allow self-enrollment – select who can book this session if it’s available in the future or who can start if it’s available immediately. If you enable the Allow self-enrollment option, the Booking settings option will appear. Booking deadlines can be set manually or automatically. To set the booking deadline manually, select the booking deadline for this session and define the date until the candidates can book assignments. Cancellation deadline – The cancellation deadlines can be set manually or automatically. To set the cancellation deadline manually, select the cancellation deadline for this session and define the date until the candidates can cancel assignments. Session capacity – limit the number of candidates in this session.
- – If this option is enabled, only those users who have authorization for the test within the testing session can book or start it.
- Proctoring settings – Enable the desired proctoring tool with a customizable set of features to prevent cheating for candidates in this session during the test-taking process. Choose AI Professional proctoring to prevent cheating and maximize security by enabling proctoring to supervise the test-taking live or by AI. Enable the meeting link by so candidates can join the live meeting before starting the test (Choose between the Webex meeting and the Meeting link if you want to use any other conference tool – Zoom, Skype, or Google Meet). If the testing session uses the Meeting tool option, you should allow the candidate to join the test as soon as he joins the meeting.
- Lock testing session – if this option is enabled, the candidates can start the test within this session only after entering the password.
- Select a previously created location (optional). Each location can either be a physical room or a virtual space with a pre-defined time zone, offering improved organization of testing sessions. Please read the How to create a new testing location article for more information.
- Click on the Save button to create a session.

For more information on creating a testing session, please visit this article.
Setting Section Conditions
To set section conditions, select the Test sections tab and click the Details button in the Actions column.

Select the Section settings tab, and locate the Section auto-assignment tab within. In this section, you can define the criteria for section assignment. If users fail to meet these specified conditions, they will be restricted from accessing the designated section.
To elaborate further, you can employ both AND/OR conditions based on your requirements. When utilizing the AND condition, all the specified conditions must be met to grant access to the section. On the other hand, if you opt for the OR condition, fulfilling just one of the specified conditions is sufficient to gain access to the designated section.
For example, if a section mandates membership in a particular user group according to predefined criteria, the user will only be able to access that section in the test if they belong to the group meeting those conditions. This flexible approach allows for precise control over section access, ensuring that users meet the necessary criteria for entry.

Another method to establish section conditions is through the Test administrators/Authorizations tab. You will find a checkbox labeled Enable conjunction of section conditions. When activated, the conditions of all sections will be linked to this test authorization condition and cannot be manually altered. If conditions are set via the Authorizations tab, executing the system job is necessary for specific candidates to access designated sections.

Executing the job
After defining conditions for the desired sections, select the System/System and customization tab and the Job scheduler tab.

Select the Assign authorization job or create a new one and execute it. Select the Execution history and logs tab and the preview button to preview the log of the executed job. You can find information that contains the number of users that satisfy the condition.

Returning to the Authorizations tab, you will be presented with the number of users that satisfy the conditions.
Student Perspective

Once the candidate finishes answering the questions in a section, they can proceed to the next section by using the Next section button or opt to conclude the section using the Finish section button to select the subsequent section.

Assigning sections and their versions manually


Student’s perspective


