
Article verified for Release 15.1 on November 27, 2025.
This article provides a step-by-step guide to creating and scheduling automated jobs for seamless data exchange with external systems. By using the Job Scheduler, you can configure recurring or one-time tasks that import data into the platform or export data from it. These jobs allow you to streamline workflows, reduce manual work, and ensure that information stays synchronized across systems. The following sections explain each part of the job creation process, including job information, scheduling options, and specific parameters for importing or exporting data.
Note: On the Jobs scheduler tab, you can create jobs that will be executed at the scheduled time as many times as you require. The job allows you to automatically import the data from an external system into the YouTestMe GetCertified and export data from the YouTestMe GetCertified to an external system.
To create and schedule a new Job:
- Navigate to the Settings tab in the left side menu and select the Settings and customization tab
- Navigate to the Job scheduler tab.
- Click the Create new button.
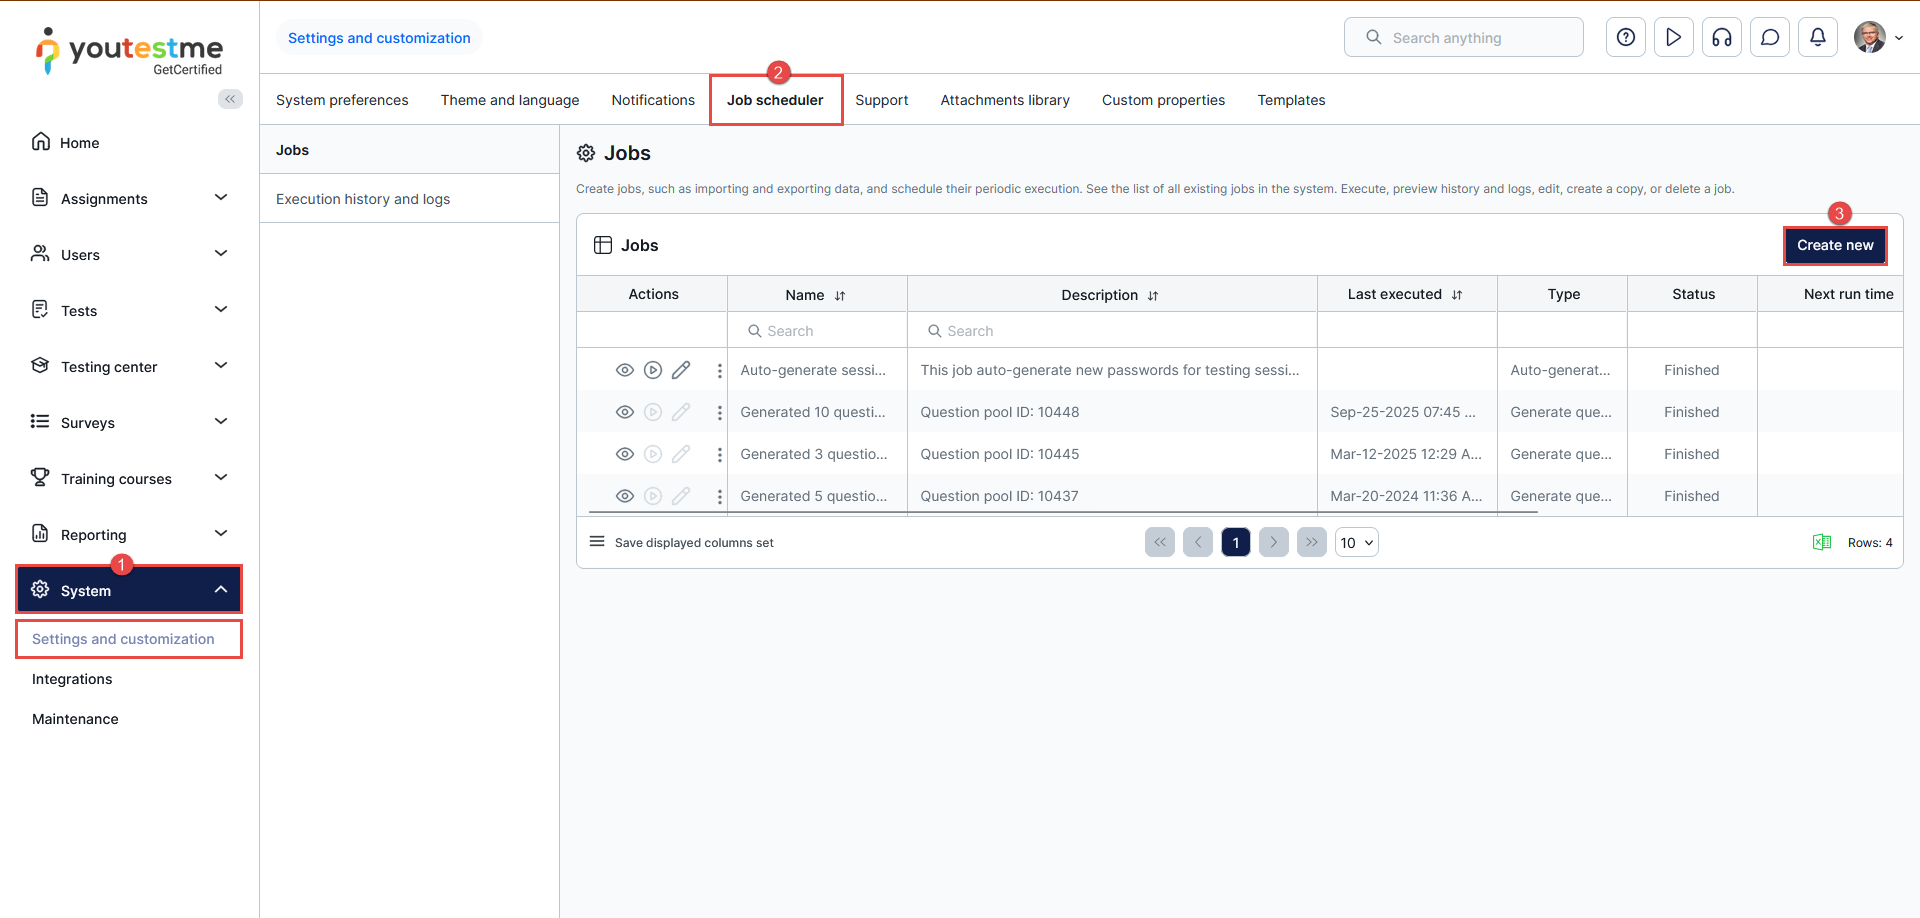
A pop-up window will appear where you should enter all the necessary information to create and schedule a job.
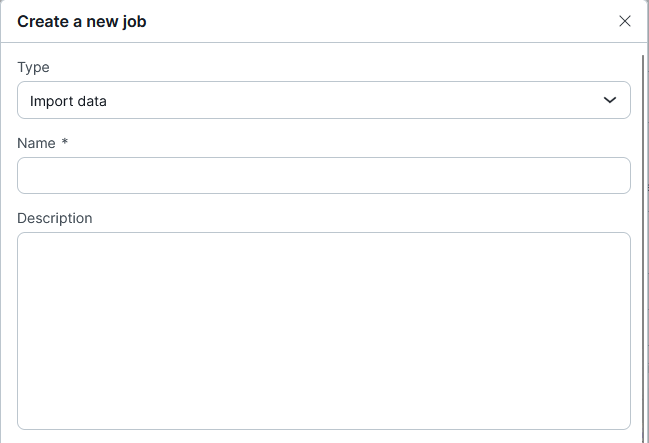
The new job consists of the following three sections:
- Job information – General information about the job, including type, name, and description.
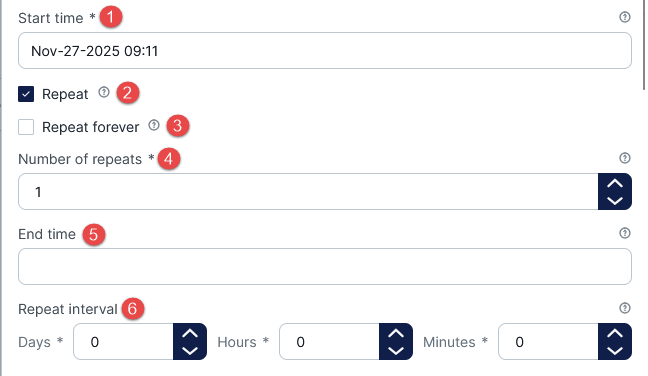
- Schedule settings – Parameters of the schedule, start time, end time, repeat interval, and the number of repeats.
- Job parameters – Parameters that are specific to the particular job.

Job Information
This part is the same for each job, regardless of the type you choose.
- Choose whether you want to import or export data from YouTestMe GetCertified.
- Enter the job name.
- Optionally enter the job description.
Schedule settings
This part is the same for each job, regardless of the type you choose.
- Choose the start time for the job’s first execution. If the chosen start time is in the past, the first execution will occur next time according to the schedule, or it will not occur if the job does not repeat.
- Check the Repeat option to run the job periodically at equal intervals after the start time. If it is unchecked, the job will execute only once at the start time.
- Check the Repeat forever option to repeat the job indefinitely or until the specified end time.
- Enter the number of repeats after the first job execution at start time
- Enter the time at which the job will no longer execute (otherwise, the end time is indefinite)
- Enter the time of the repeat interval between two consecutive job executions
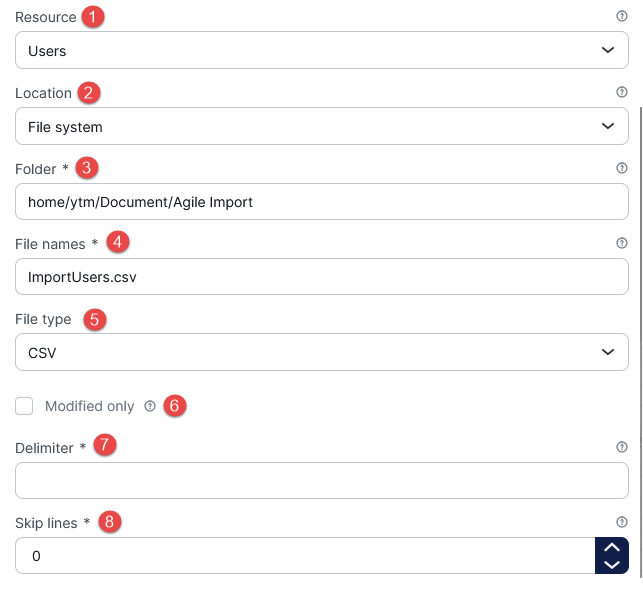
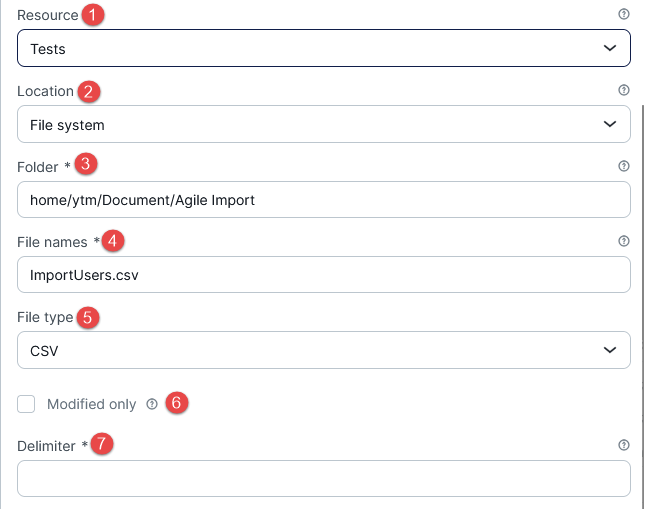
To create a new Import data job, do the following:
- Choose the type of data to import. You can choose between:
- Users (User accounts).
- Tests (Items).
- Testing sessions (Scheduled offerings).
- Session candidates (User enrollments).
- Choose the Location from which you will import the files with data. You can choose between:
-
- File system – import data from files located in the server’s file system folder.
- SFTP server – import data from files located in the SFTP server folder. For the SFTP server, additional parameters have to be specified.
- Enter the absolute path to the folder in the chosen location to import files from.
- Enter the regex expression to match the names of the files to import from the folder. For example, the regex expression “Users_.*\.csv” will match all the files whose name starts with Users_ with the .csv extension.
- Choose the file type from the drop-down menu.
- Check the Modified only option to import files created or modified after the previous job execution. Leave it unchecked to import all files from the folder satisfying the File names regex expression.
- Enter the character to use for separating entries in the CSV file.
- Enter the number of lines in the CSV file to skip before reading. Usually, it is set to one to skip the first line, which represents the header.
Export data job parameters
- Choose the data type from the drop-down menu to export, referred to as Resource.
- Choose the Location from which you will export the files with data. You can choose between:
-
- File system – export the file to the folder on the server’s file system.
- SFTP server – export the file to the SFTP server folder. For the SFTP server, additional parameters have to be specified.
- Enter the absolute path to the folder in the chosen location to export data.
- Enter the file name prefix of the file to export. The name of the exported file will be in the format: #{file_name}_#{timestamp}.#{file_type_extension}.
- Choose the file type from the drop-down menu.
- Check Modified only to export records created or modified after the previous job execution. Otherwise, all records will be exported.
- Enter the character that will be used for separating entries in the file.
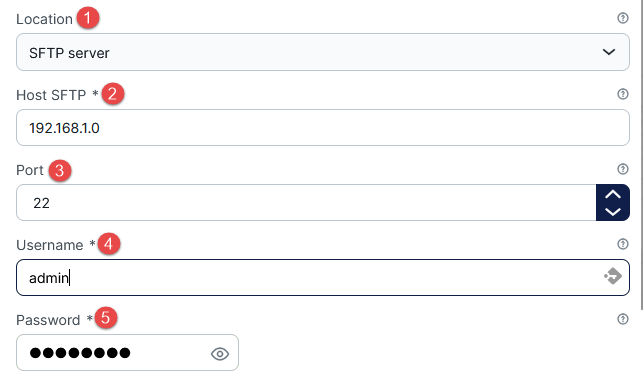
SFTP server parameters
- Location – Choose the SFTP server.
- Host – Enter the hostname of the SFTP server.
- Port – Enter the port of the SFTP server.
- Username – Enter the username of the SFTP server user.
- Password – Enter the password of the SFTP server user.
-
The remaining options are the same for each location and type.
Additional resources:
