
Article verified for Release 15.1 on December 16, 2025
In this article, we’ll guide you through the process of configuring test results notification templates. This involves customizing the content of both email and in-app notification templates, ensuring that candidates receive personalized messages when their results become available.
Accessing the Notifications settings
To configure the test results’ notification template:
- Navigate to the System and then to Settings and customization.
- Select the Notifications tab.

- Find the Test Results notification in the notification event list.
- Select the Edit icon under the Application notification column to edit the notification that will be sent to the user in the application.
- Select the Edit icon under the Email notification column to edit the notification that will be sent by email.

Enabling notifications sending
To enable the automated sending of notifications:
- Navigate to the Status column.
- Select the status from the drop-down list (Enabled or Disabled).

Customizing the Template for Test Results Application Notifications
Within the Edit Application Notification Template pop-up window, you have the ability to customize the test results notification that candidates can access through the application’s bell icon. To do so:
- Choose the template language from the drop-down list.
- Specify the Notification Title – The text entered in this field will appear as the notification title in the notification panel.
- Select the variables to include in both the notification title and text – These variables will be substituted with the relevant data. For example:
- Variables such as $recipientUsername$, $recipientFirstName$, $recipientFullName$, and $recipientLastName$ allow you to address the user appropriately.
- The $quizName$ variable allows including the name of the test in the notification.
- Enter the notification text – You can modify the notification text and apply styles. The variable ($quizName$) relates to the test name. You can add variables that suit your user case scenario. Please check the list of variables to get to know their use.

Candidate perspective

Customizing the Template for Test Results Email Notifications
You can edit the email notification template in the Edit email template pop-up window. To do so:
- Select the template language from the drop-down list.
- Enter mail subject name – Modify the email template name. This name will be used as a subject in the system emails.
- View the list of all variables – the variables used in the Template preview.
- Edit the Template preview – modify the existing email template, apply styles and formatting. The variables will be replaced with the specific value:
- The $from$ variable allows adding the sender of the email (YouTestMe).
- The $directLink$ variable allows including a link that grants candidates direct access to the results.
- The $applicationURL$ variable allows including the application URL.
- Click the Save button to save the changes.
- Click the Cancel button if you want to discard changes.

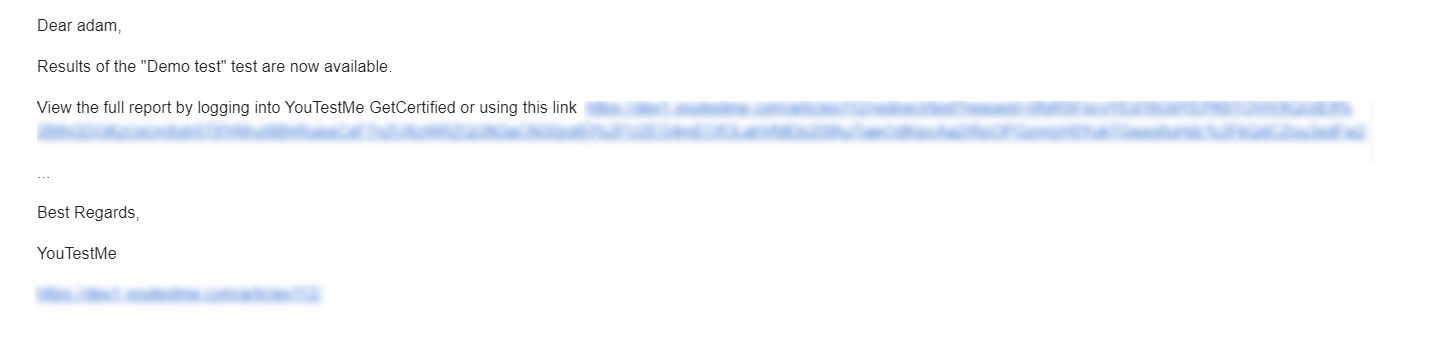
Candidate perspective
For video instructions on how to configure notifications, you may watch this video.
For more related instructional materials, please visit:
