
Article verified for Release 15.1 on November 26, 2025.
This article explains how to generate direct access, direct registration, and guest links for a testing session. These links provide candidates with quick, simplified access to tests without requiring them to navigate through the application manually. They are especially useful when communicating with large groups of test-takers, sending test invitations, or sharing access details via email or external communication channels. To learn how to create a testing session, please visit this link.
Generating the link for the testing session
After the testing session is created, there are two ways to generate the links that can be shared with candidates for easier test access:
-
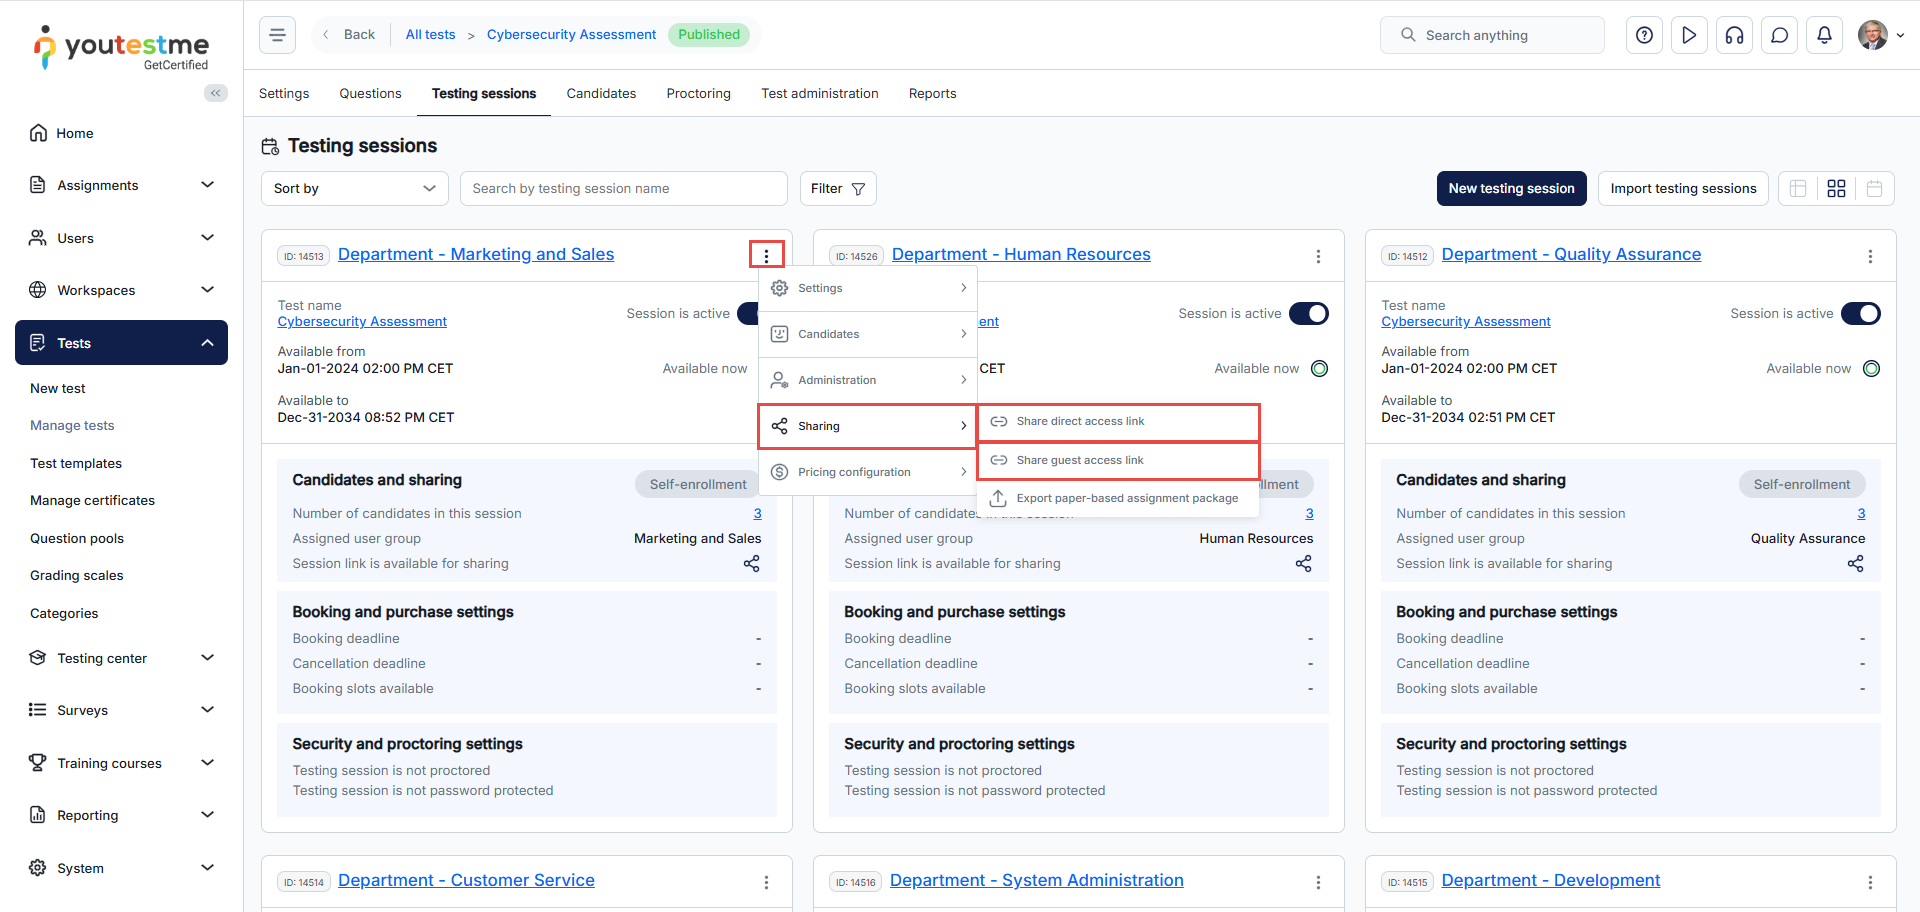
Editing already created session
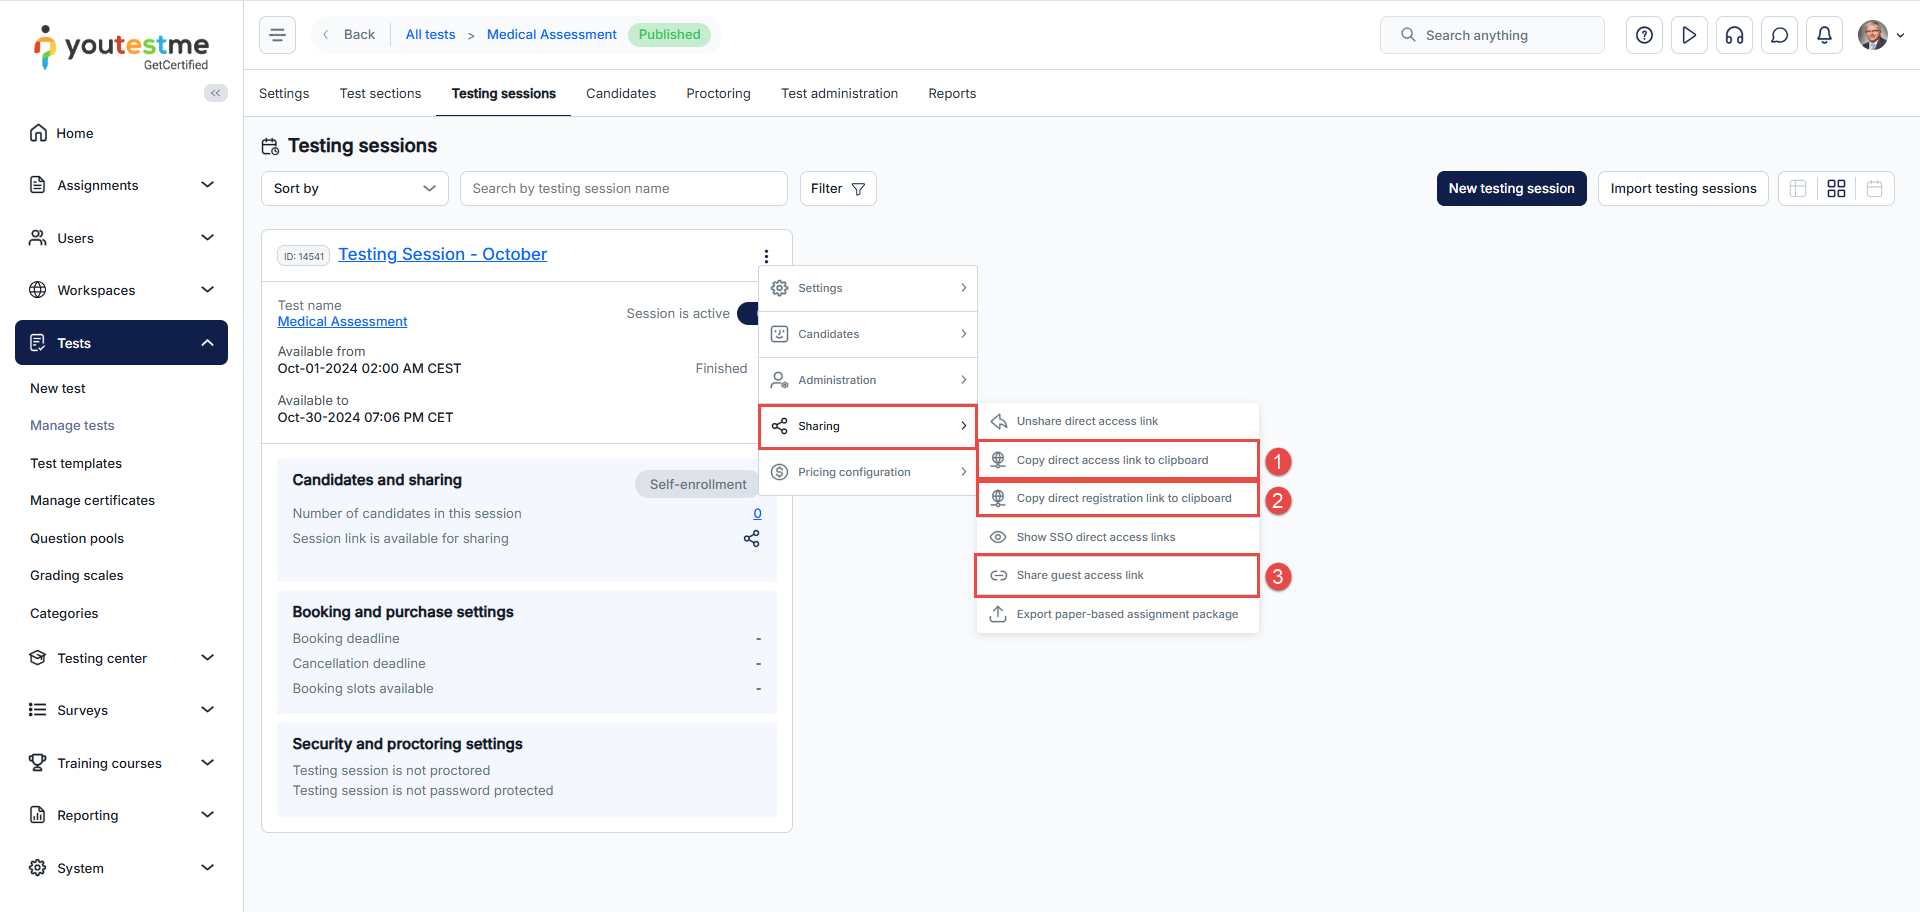
To generate a link for an available session, click the three dots icon and select the Sharing/Share direct access link or the Sharing/Share direct guest link option.
-
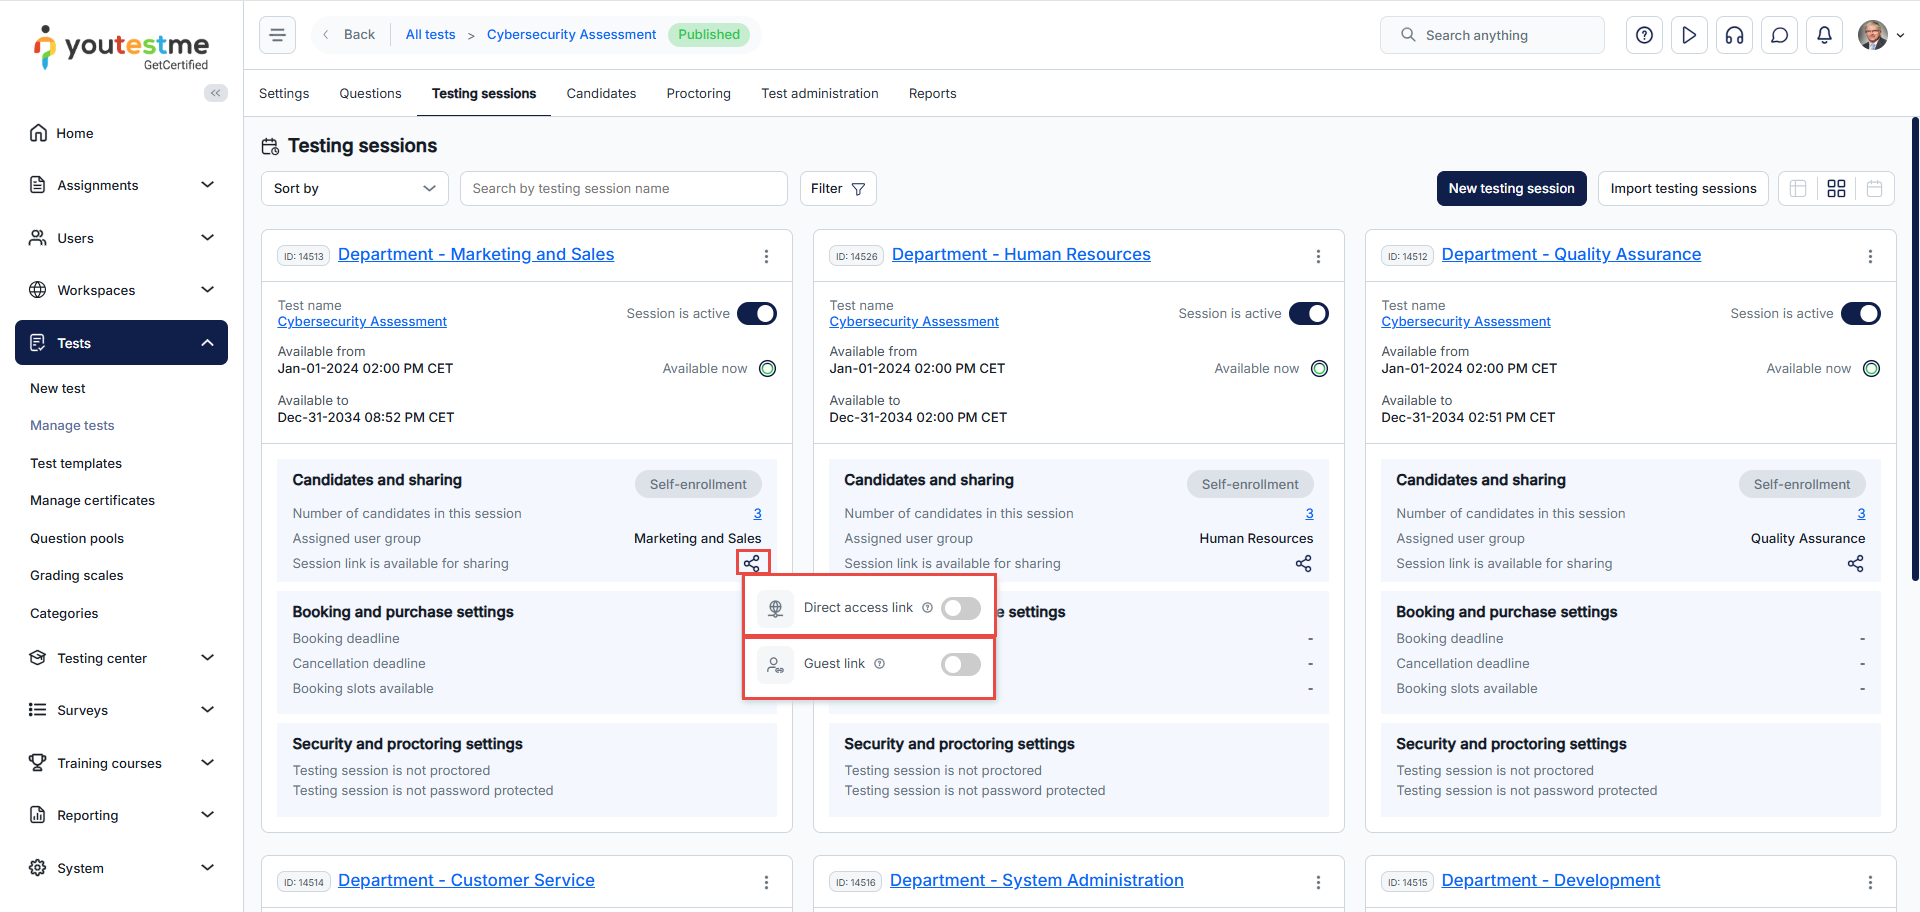
Share test option
To generate a link for an available session, click on the Share option and select either the Sharing/Direct access link or the Sharing/Guest link option.
Copying the link for the testing session
There are three different types of links:
- Direct access link
- Direct registration link
- Guest access link
-
Direct Access Link
When this link is shared with candidates, they will be redirected to the login page.
Candidate perspective:
-
Direct Registration Link
When this link is shared with candidates, they will be redirected to the registration page.
Note: When generating a direct registration link, it is essential that the following conditions are satisfied:
-
- A testing session must be available.
- A testing session should allow candidates to self-enroll.
- Instant self-registration should be enabled in the system settings. For additional information on how to do this, please refer to the following link.
Candidate perspective:
Note: If a session has a user group defined, using the direct registration link will only create an account for the user but will not enroll them in the user group. As a result, they will not be automatically assigned to the test or have access to it.
-
-
Guest link
-
When this link is shared with candidates, they will be immediately redirected to the test without requiring login.
Candidate perspective:
Based on the exam settings, candidates accessing the provided link will either be redirected to the exam instructions or prompted to update their profile information. No login will be required.

The links can be emailed to students to enter the testing session.
Additional useful material:
