
Article verified for Release 15.1 on February 24, 2026.
This article provides practical guidelines and steps for creating a job satisfaction survey, a crucial tool for understanding the needs and perspectives of your employees. Discover how to create a survey that looks deeper into your team’s dynamics, identifies challenges, and enhances the overall work experience within your organization. Follow our steps to optimize job satisfaction and instigate positive changes efficiently.
In this article, we’ll guide you through creating a grading scale and question pools. We’ll then assist you in importing this data into a survey that captures employee feedback and offers insights into job satisfaction.
Creating Grading Scale
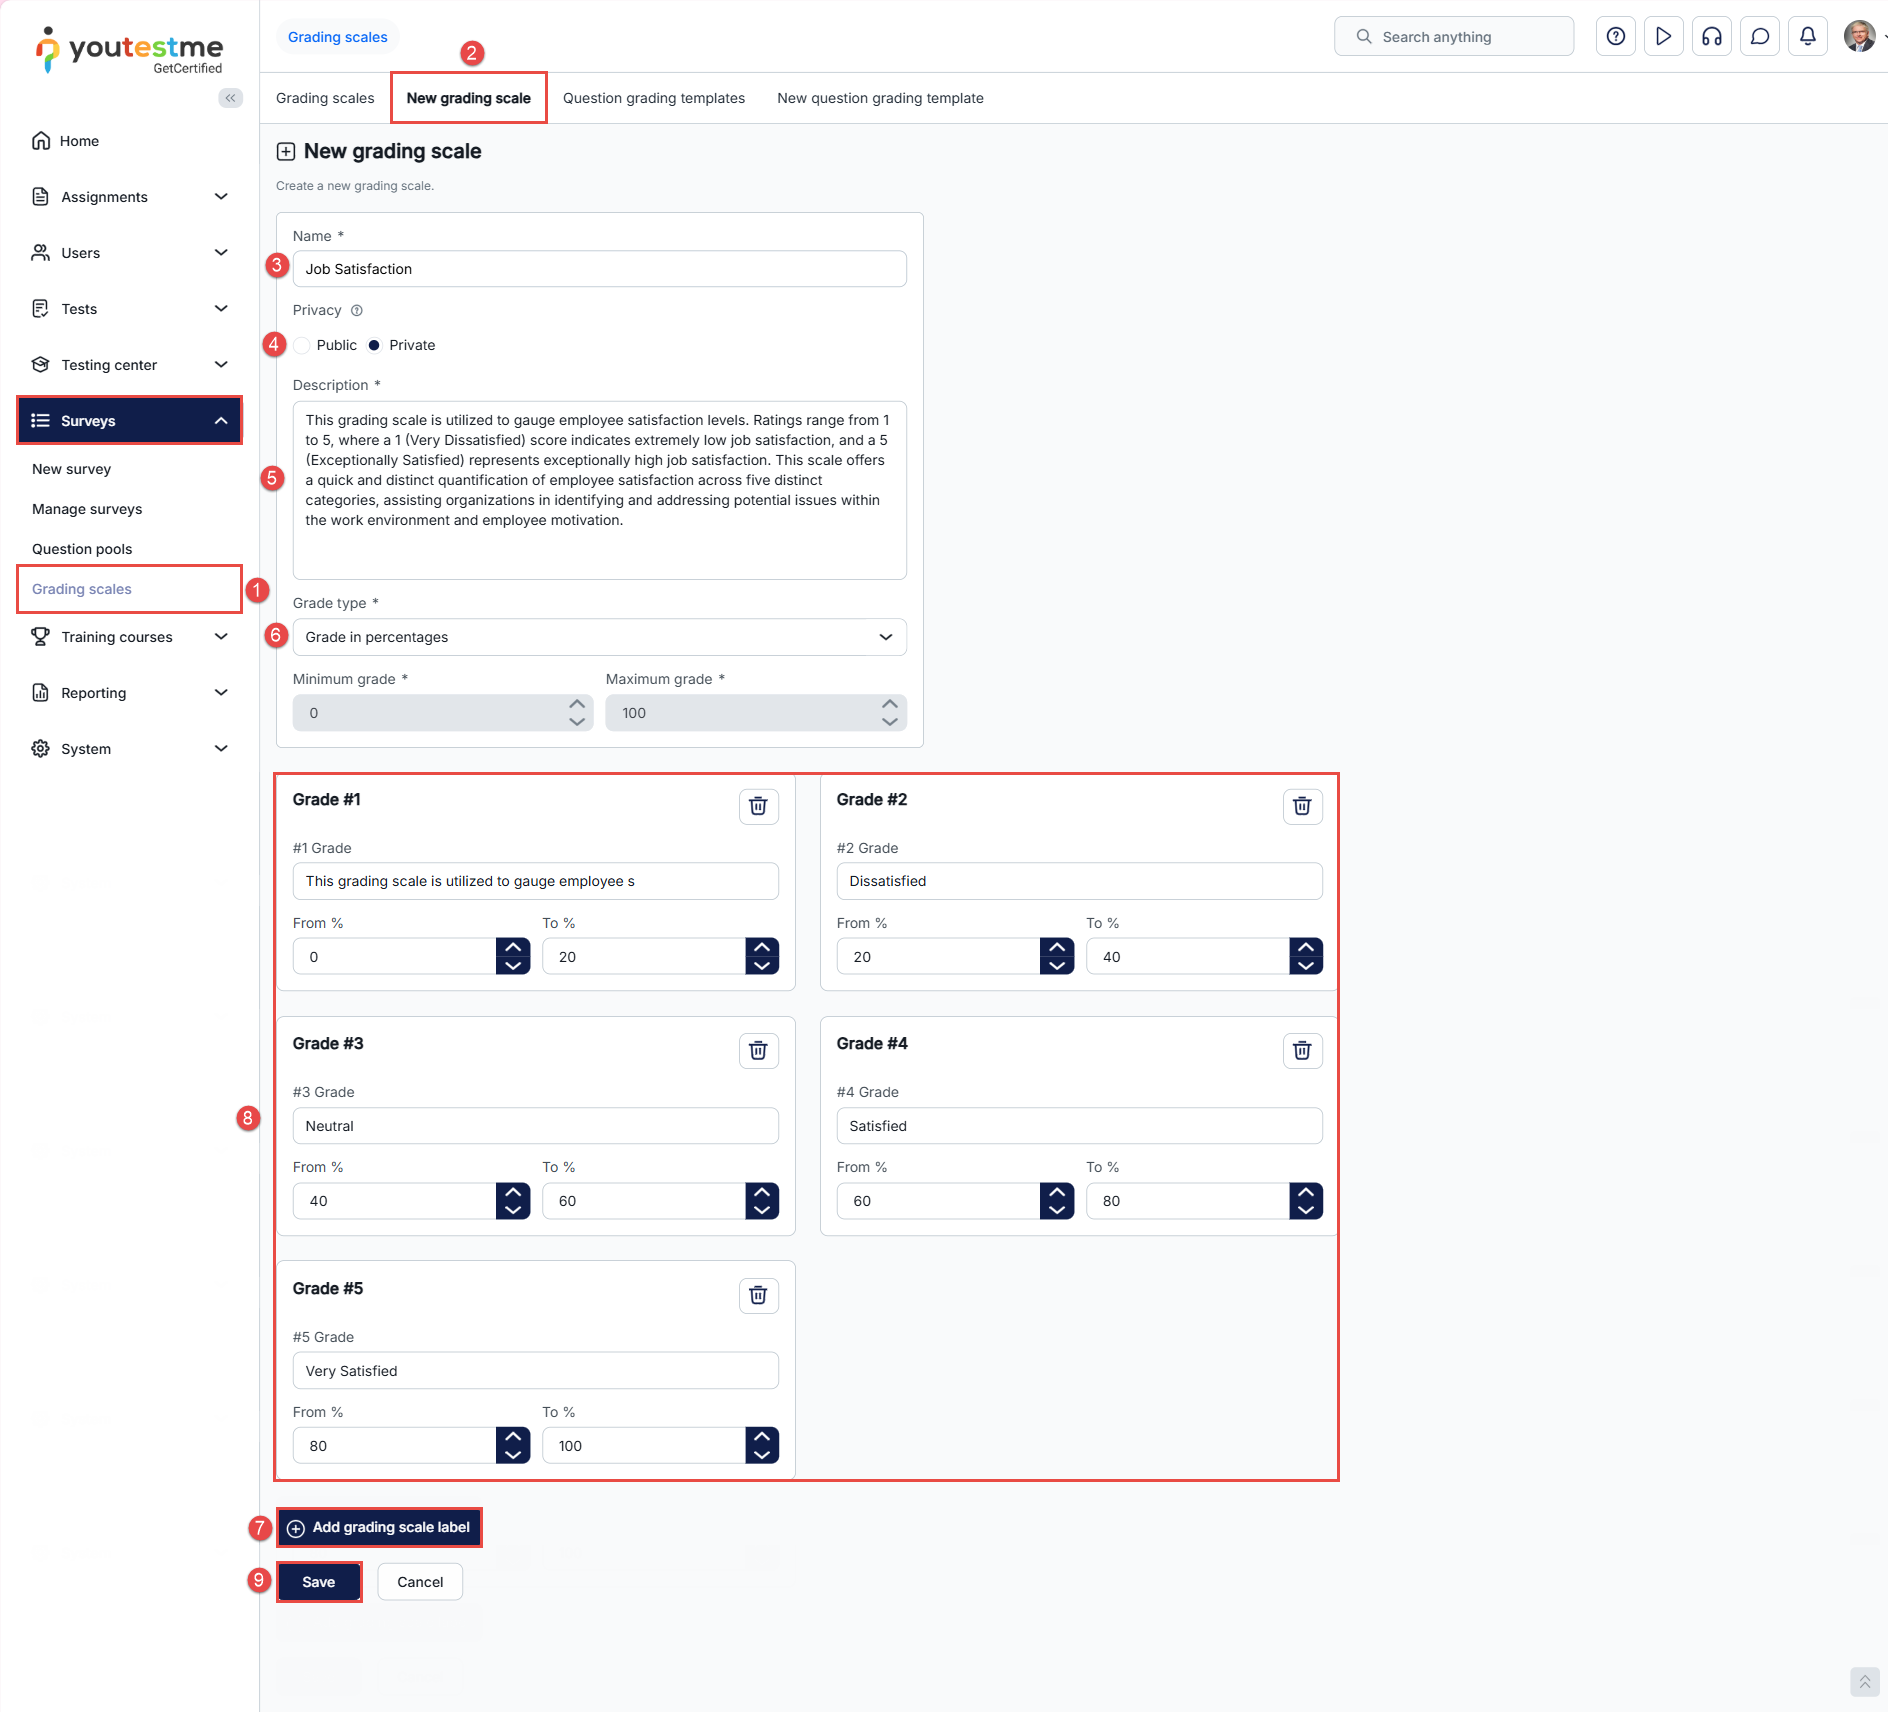
Before diving into the survey creation process, creating a grading scale complete with defined grades is essential. This grading scale will be utilized to gauge employee satisfaction levels.
To create a grading scale and grades, follow these steps:
- Navigate to the Surveys section in the left-side menu and select the Grading scales page.
- Click the New grading scale tab.
- Enter the name of the grading scale.
- Set its privacy to determine which users can use or edit the grading scale.
- Enter the description of the grading scale.
- Determine whether grades will be associated with percentages or the number of points achieved. Keep in mind that the minimum grade in percentages is 0, and the maximum is 100. Alternatively, in point-based scales, the minimum is 0, and the maximum is the total points achievable on the test. In this example, we will opt for the grade type as a percentage.
- Grading scale labels allow you to define grades and their respective ranges. You can add as many labels as needed. In our example, we will add 5 grading scale labels.
- Once you’ve added grading scale labels, specify the grade names and their corresponding percentage ranges as follows:
-
- Grade 1: Very Dissatisfied (0-20%)
- Grade 2: Dissatisfied (20-40%)
- Grade 3: Neutral (40-60%)
- Grade 4: Satisfied (60-80%)
- Grade 5: Very Satisfied (80-100%)
9. Click the Save button to complete creating a new grading scale.
Creating Question Pools
When you create a grading scale, you need to create a Question Pool. This can include one main (parent) Question Pool and additional sub-pools organized by topic. After creating the parent pool and its sub-pools, you should add questions within each sub-pool. The questions must be directly related to the topic indicated by the name of the sub-pool in which they are created.For detailed instructions on how to create a Question Pool, add sub-pools, and create questions within them, please refer to the following article.
Creating a Survey
Now that you’ve created a Grading Scale and Question Pools, you can create a Job Satisfaction Survey and import the data you’ve created. When selecting the grading scale, ensure you choose the grading scale you previously created to associate specific grades with corresponding percentages achieved.
For detailed instructions on how to create and configure a survey, please refer to the following article.
After completing the wizard, consult this article for guidance on scheduling and publishing your survey. For information on assigning candidates in a testing session, please refer to this article.
Once scheduled, published, and assigned to candidates, the survey will be visible on the My surveys page, allowing candidates to participate within the specified date and time parameters you’ve set.
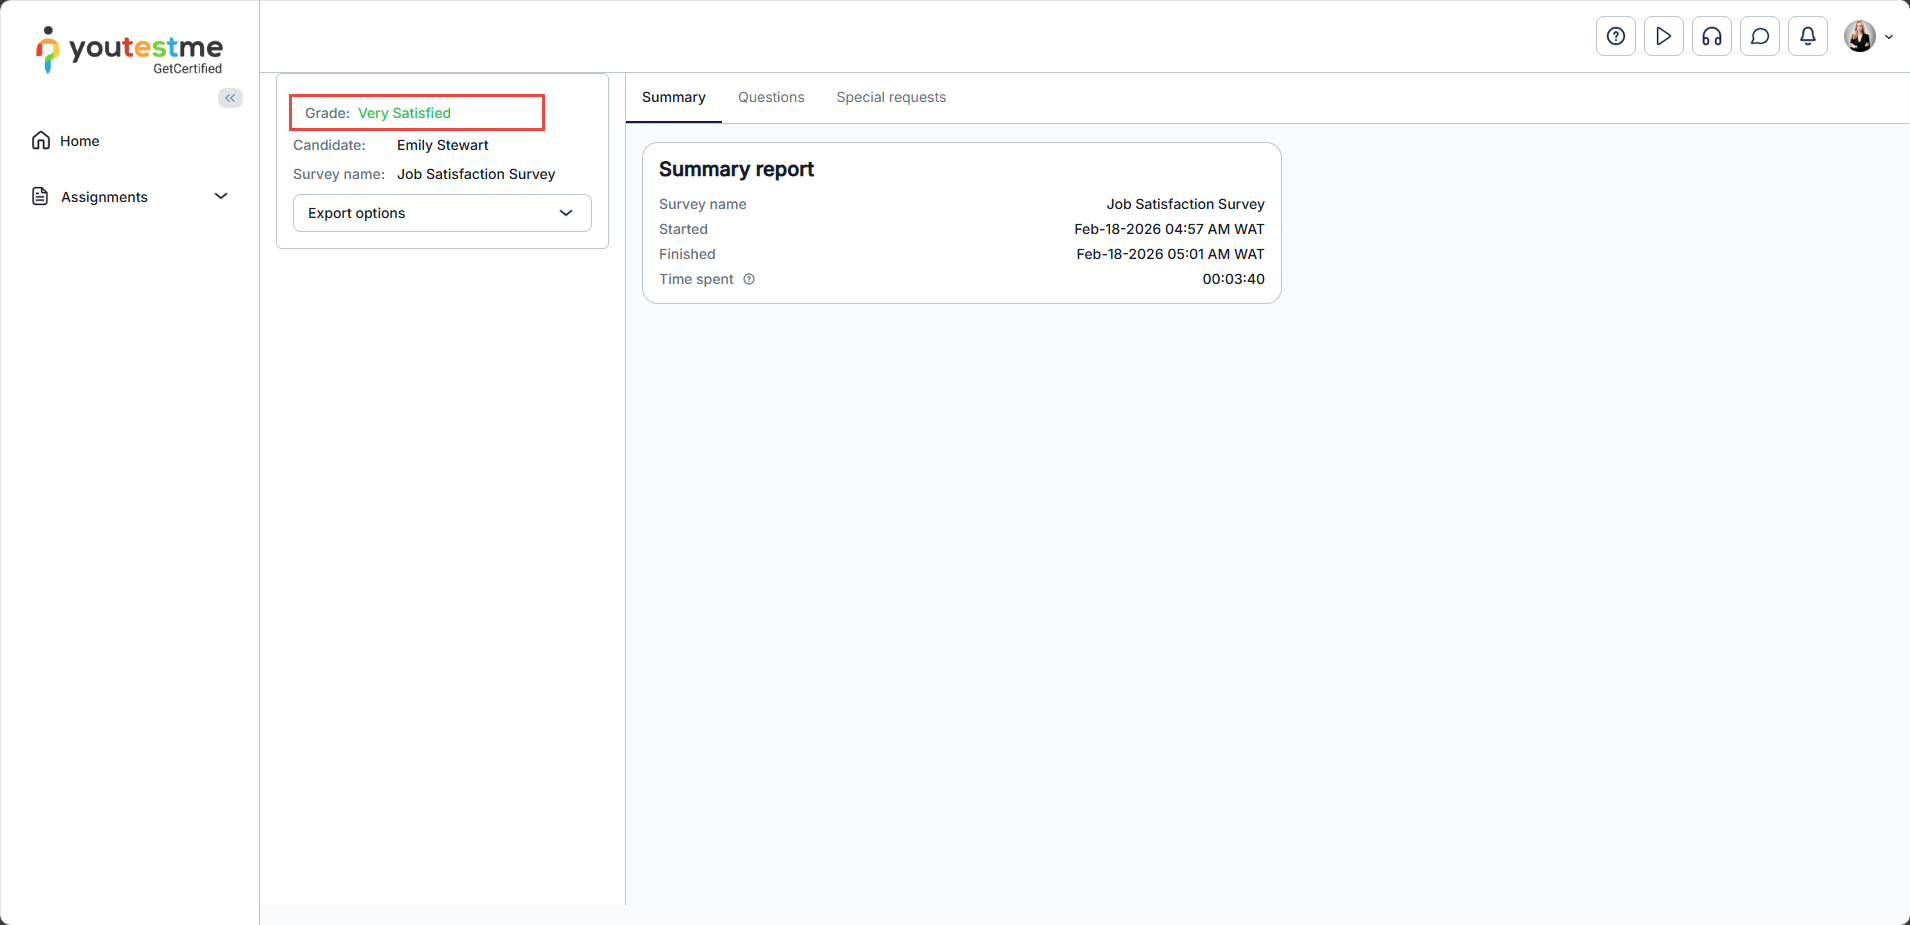
Personal report – Candidate’s perspective
In this example, we present a personal report for a candidate who has completed the survey and received an appropriate grading scale based on the points earned.
This guide on creating a job satisfaction survey provides practical steps for goal-setting, selecting questions, and analyzing results, enabling organizations to gain deeper insights and enhance employee satisfaction.
For additional helpful resources, please refer to these articles:
