This article explains how to create additional fields – question categories in the application. Based on those categories, you can later generate tests. The steps for creating question categories are elucidated below in two distinct methods:
- Creating question categories in the Tests/Question Categories section.
- Creating question categories in the System/Settings and Customization section.
Creating question categories in the “Tests/Question Categories” section #
To create categories in the Tests/Question Categories section, allowing you to define questions, two distinct approaches are available:
- Global Question Categories: These categories operate globally, making them accessible to all individuals authorized to manage question categories across the system. Any user with the appropriate permissions can view and manage these categories.
- Workspace Question Categories: This option restricts access to the question categories within specific workspaces. Only workspace members authorized to manage question categories within that workspace can see and access these categories.
To create categories in the Tests/Question Categories section, follow these steps:
- Click the Tests section in the left-side menu, then choose the Question Categories page.
- Click the Create new button.
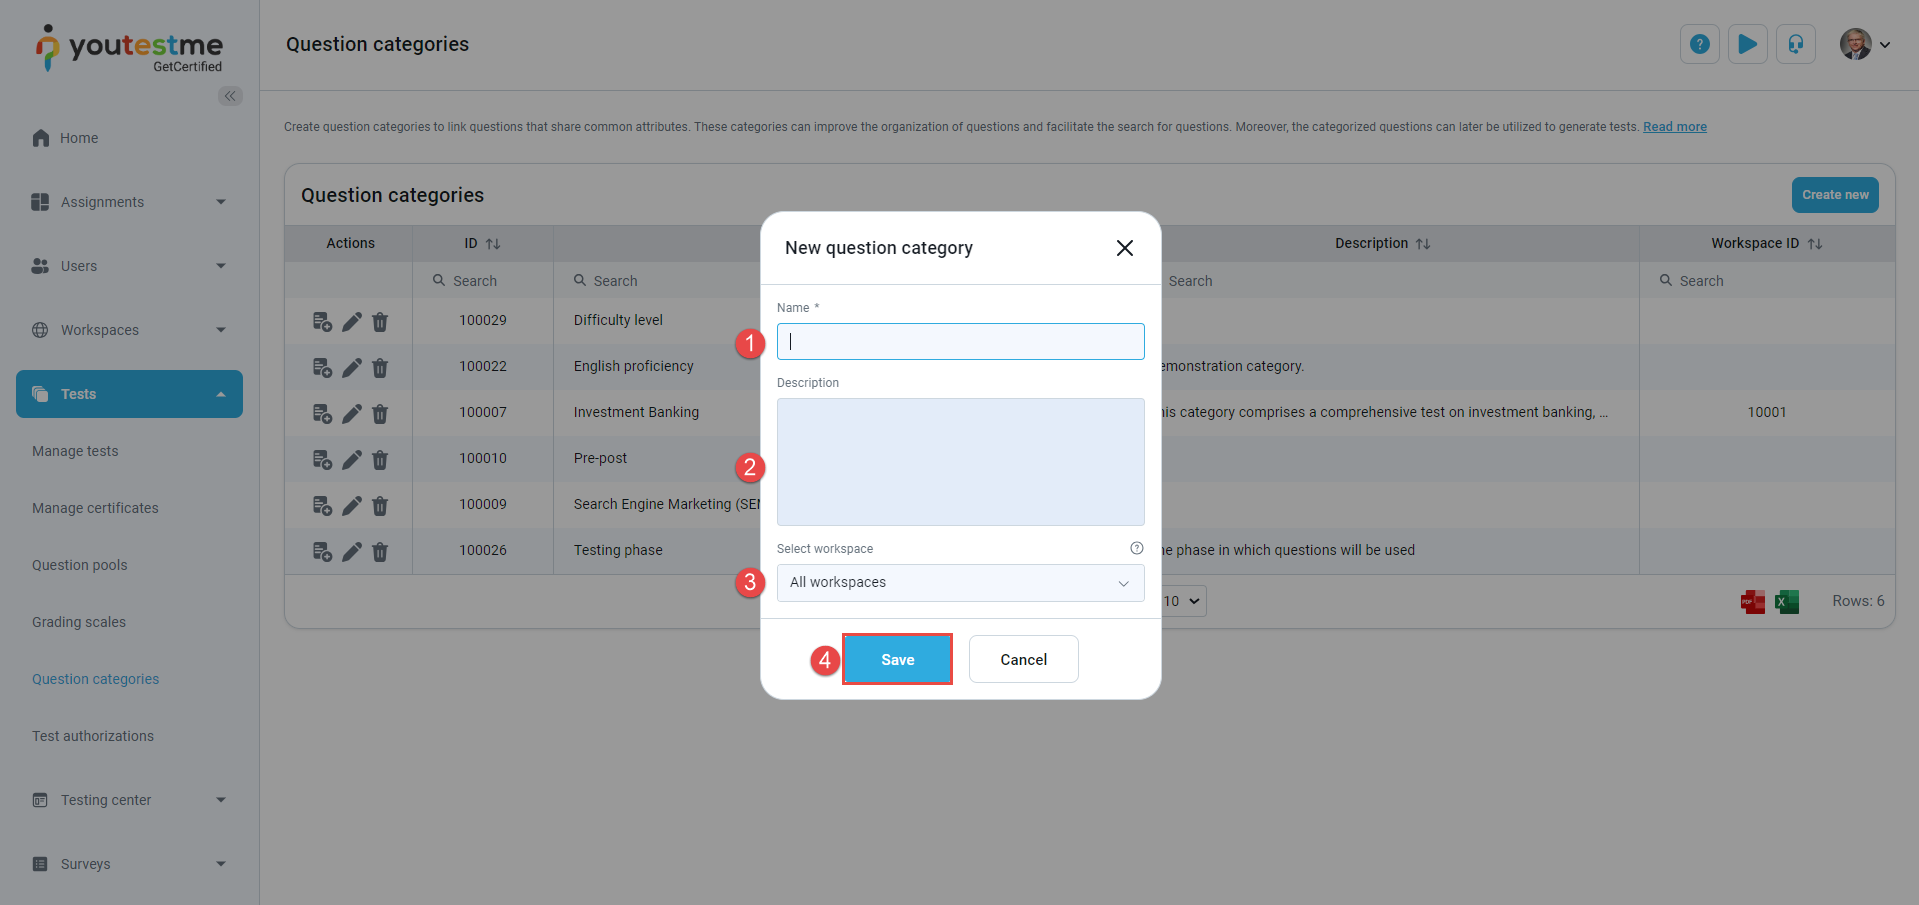
A pop-up window will appear, and you need to input the following:
- Enter the category name.
- Optionally, enter the description.
- Choose All Work Spaces to grant access to all individuals authorized to manage question categories system-wide, or select a specific workspace to access and manage categories.
- Click the Save button to preserve all the changes.
To add the desired values for the created category:
A pop-up window will appear, and you need to input the following:
- Enter the name for the value.
- Optionally enter the description for the value.
- Click the Save button.
Note: You can add as many values as you want.
Additionally, you can add sub-values as well:
- Select the node on the left side.
- Click the Add new Value button.
A pop-up window will appear, and you must follow the same steps to create the main value.
Note: You can create as many values and sub-values as you want.
Global admin vs. Workspace admin view #
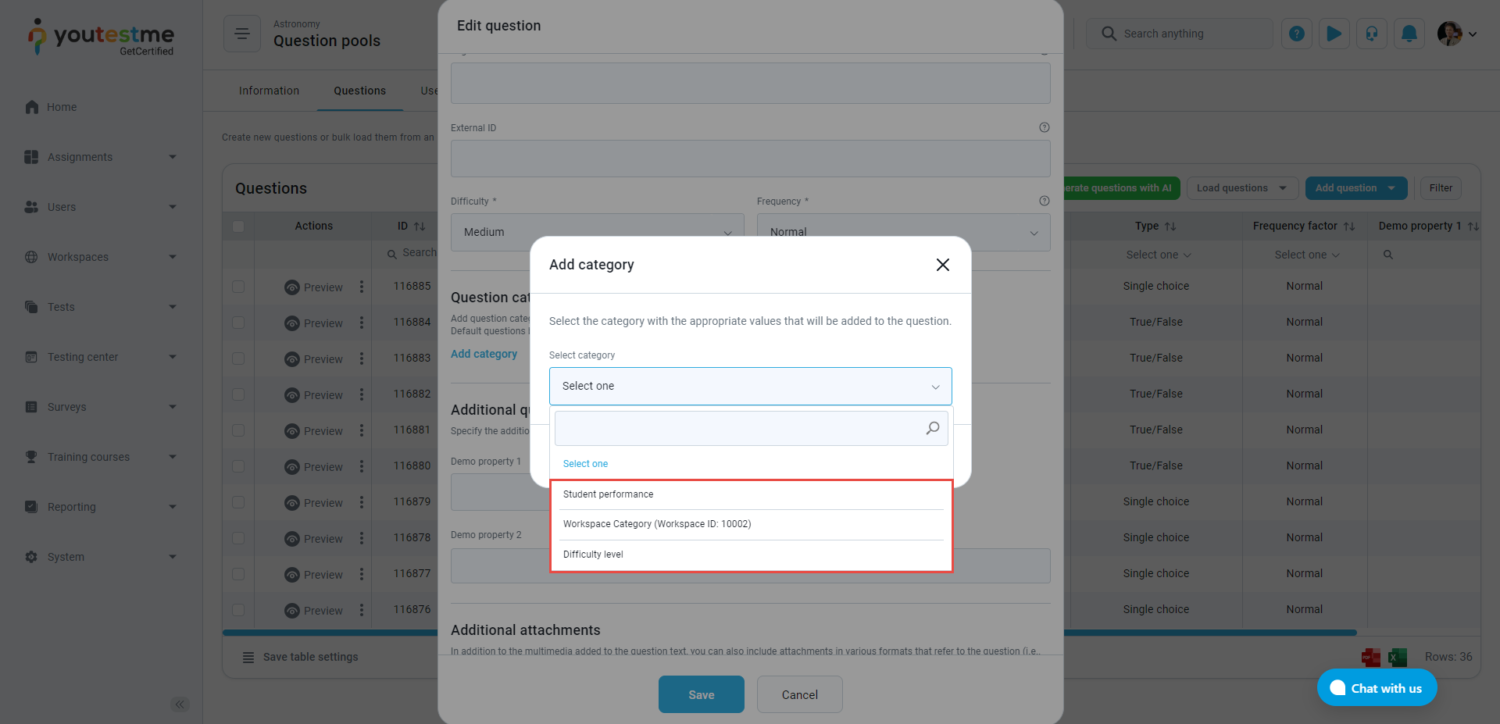
When accessing the application, the global admin will be presented with a list of all question categories within the system, including workspace-specific question categories.
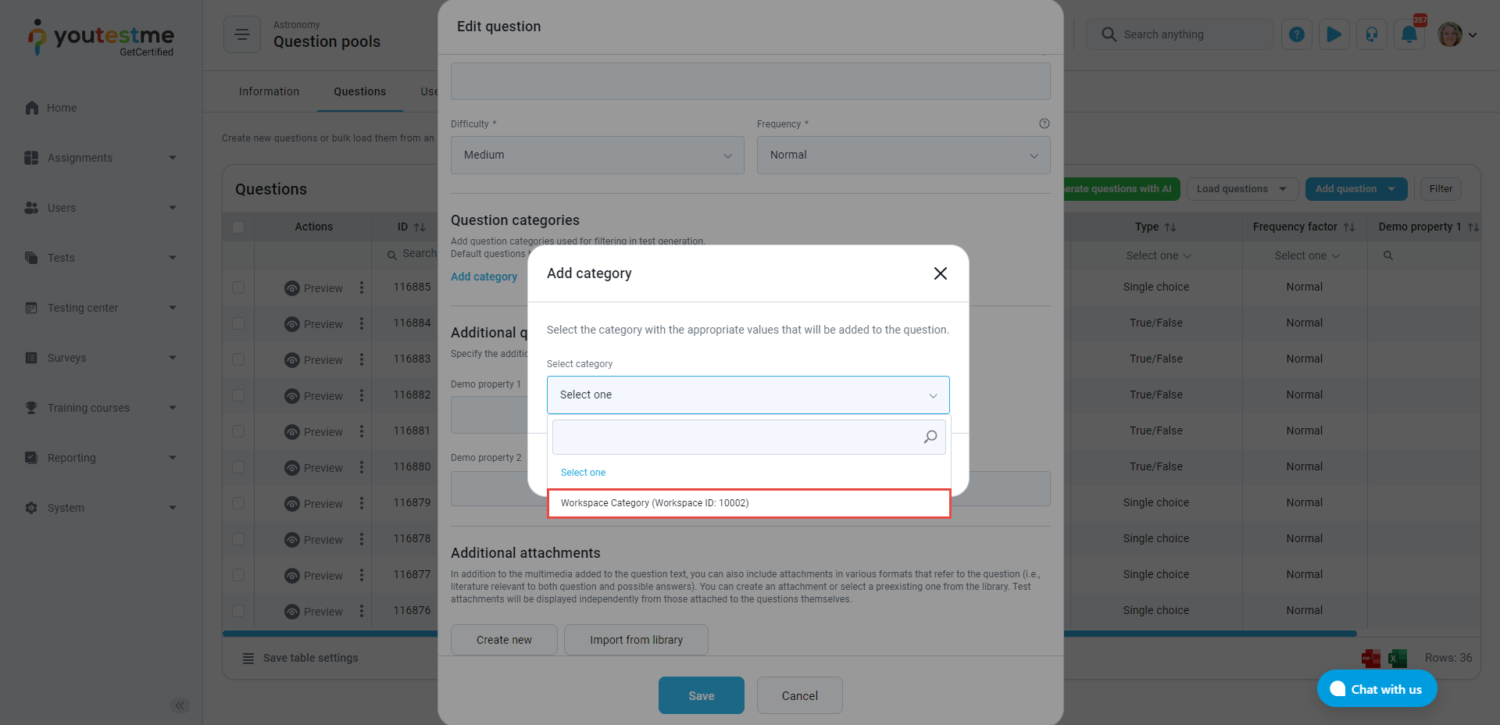
When accessing the application, the workspace admin will have a list of all question categories within the specific/assigned workspace.
Creating question categories in the “System/Settings and Customization” section #
To create categories in the System/Settings and Customization section, enabling you to define questions, two identical methods as in Tests/Question categories are available: Global Question Categories and Workspace Question Categories.
To create categories in the Tests/Question categories section, follow these steps:
- Click the System section in the left menu, then choose the Settings and Customization page.
- Navigate to the Custom Properties tab.
- Navigate to the Question Categories in the side menu.
- Click the Create New button.
Note: Creating categories and adding values and sub-values follow the same steps as in the “Test/Question Categories” section. For more detailed instructions on creating global and workspace categories, values, and sub-values, refer to the chapter on Creating Question Categories in the “Tests/Question Categories” section.


