
Article verified for Release 15.1 on September 28, 2025
YouTestMe supports several registration methods to help administrators and organizations onboard users efficiently. These include:
- Manual registration – Admins can create user accounts directly in the system.
- Self-registration – This feature allows users to create their own accounts through a public registration form. Administrators can configure this feature to either allow instant registration, where users are automatically added to the system upon submitting the form, or require approval, where each registration request must be reviewed and either approved or declined by an administrator.
- Registration links – A powerful option allowing users to register using a unique URL that automatically assigns them predefined roles, group memberships, and training courses.
This article explains how to utilize registration links in YouTestMe to streamline user organization by automatically assigning roles and group memberships during registration.
Registration links
The Registration Link feature allows administrators to easily invite new users to join the system through a customized registration link. Each link acts as an invitation and can be configured to automatically assign specific settings to users upon registration.
When creating a registration link, administrators (or other permitted users) can define:
- The user role that will be assigned upon registration
- The user groups where the new user will be added as a member or manager
- The workspace to which the user will belong (a workspace represents an independent sub-environment with separate data)
- The training courses in which the user will be automatically enrolled as a student
- The link expiration date
- The fields that will appear in the registration form for that specific link
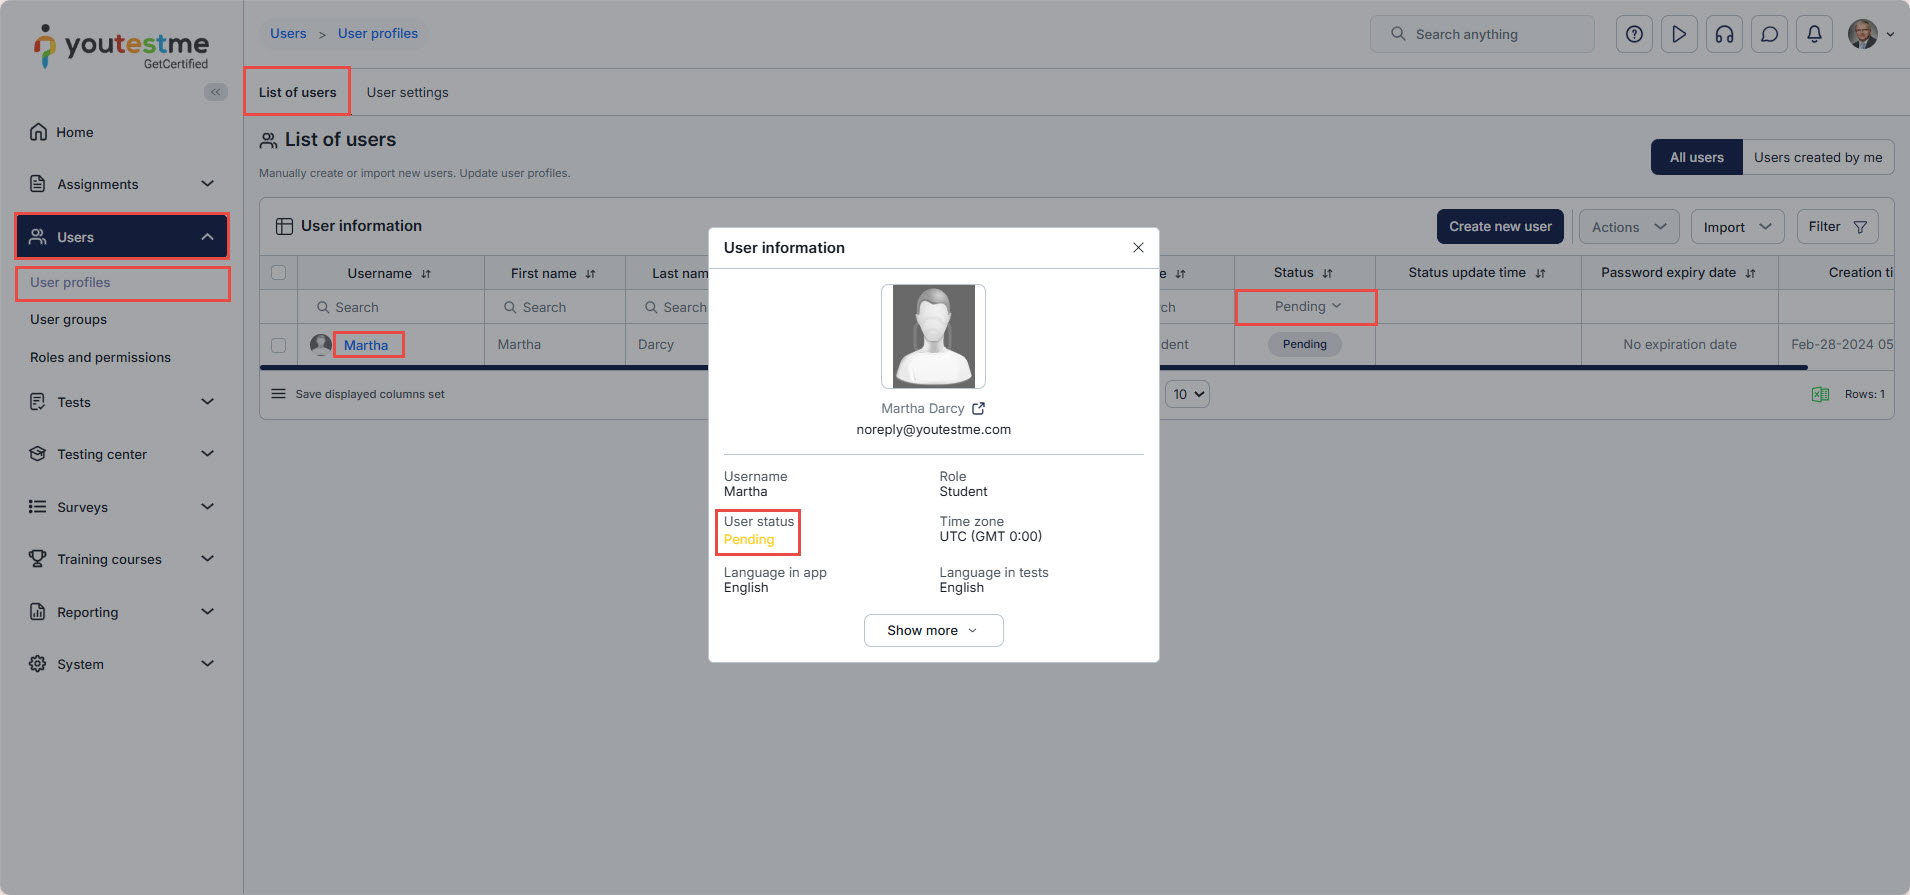
Note: If registration requires a manager’s approval, users will still submit their registration request using the registration link. Even before approval, the user will appear as a member of the user group specified by the link configuration. However, when you view the user’s profile, their status will be shown as ‘Pending’ until the registration is approved.
Creating registration links
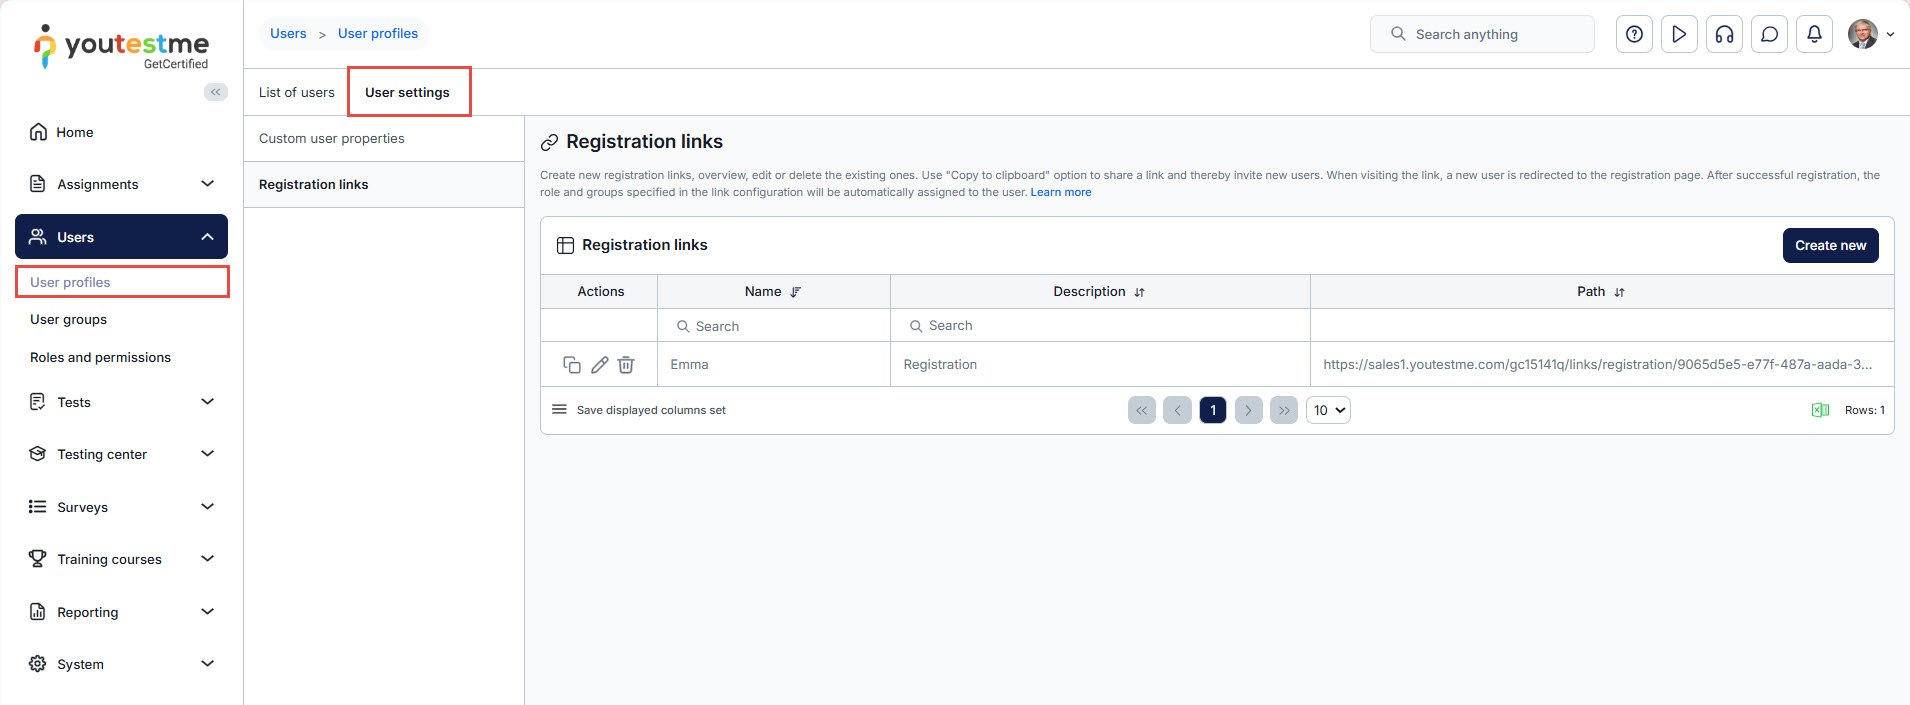
To create a registration link, navigate to the “Users module“, select “User Profiles“, and then go to “User Settings“.
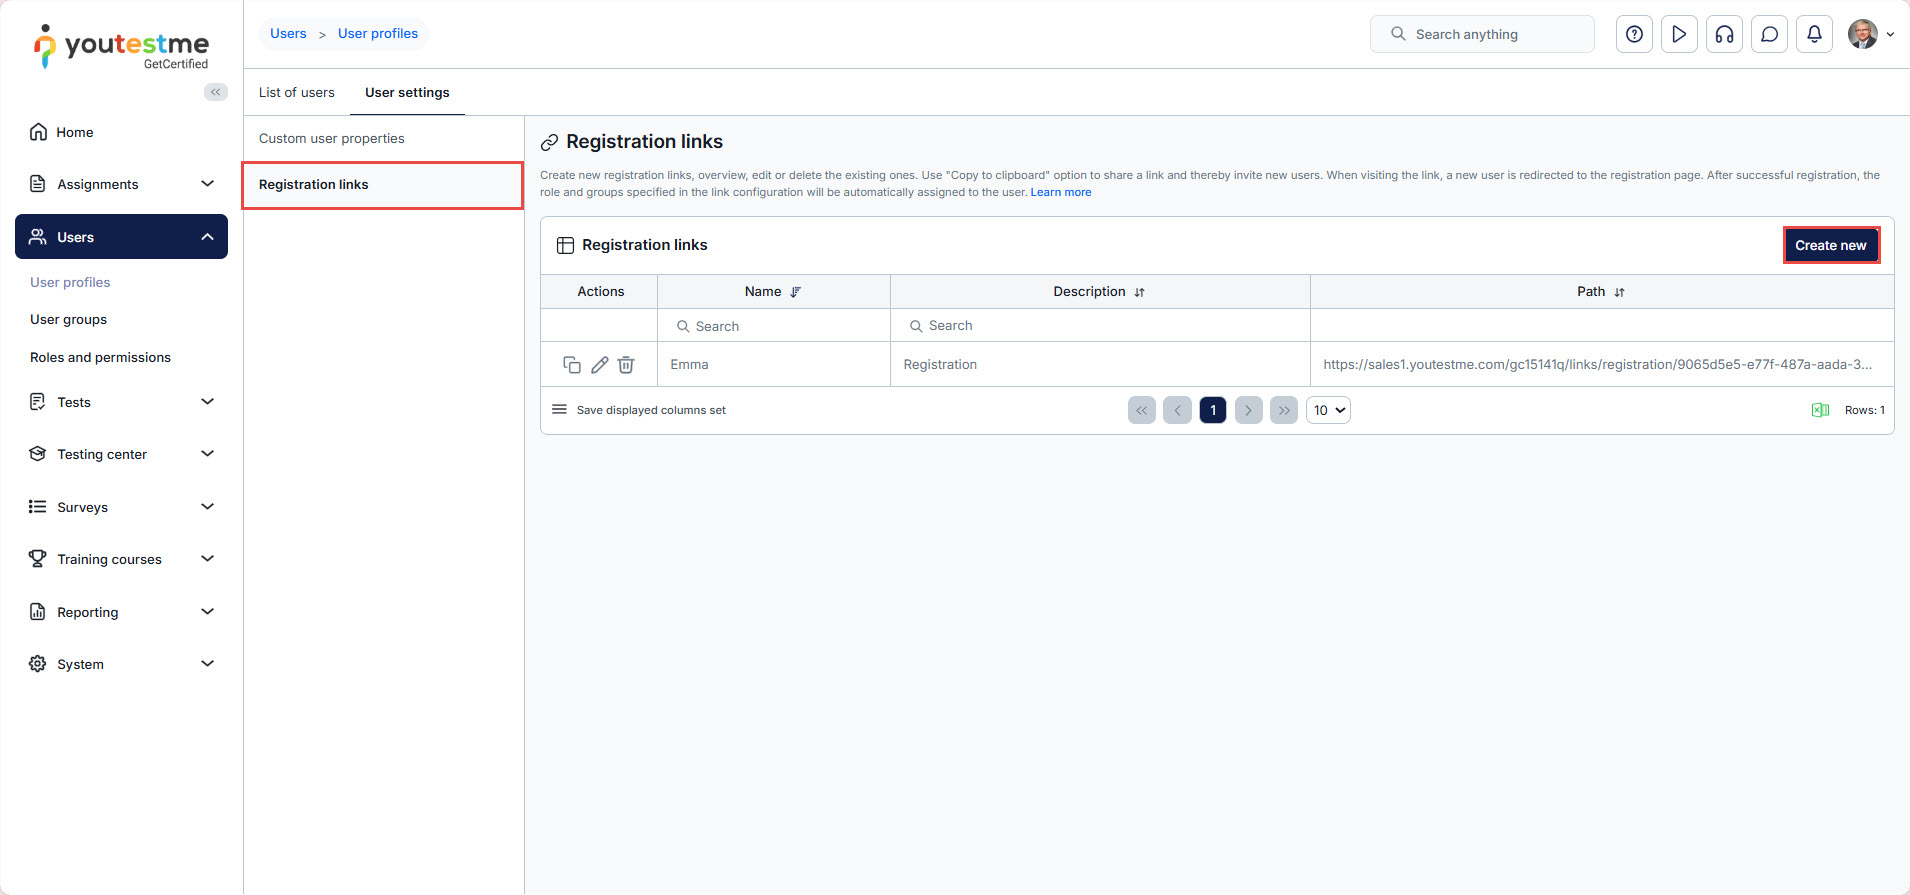
In the User Settings tab, select the “Registration Links” option and click the “Create new” button.
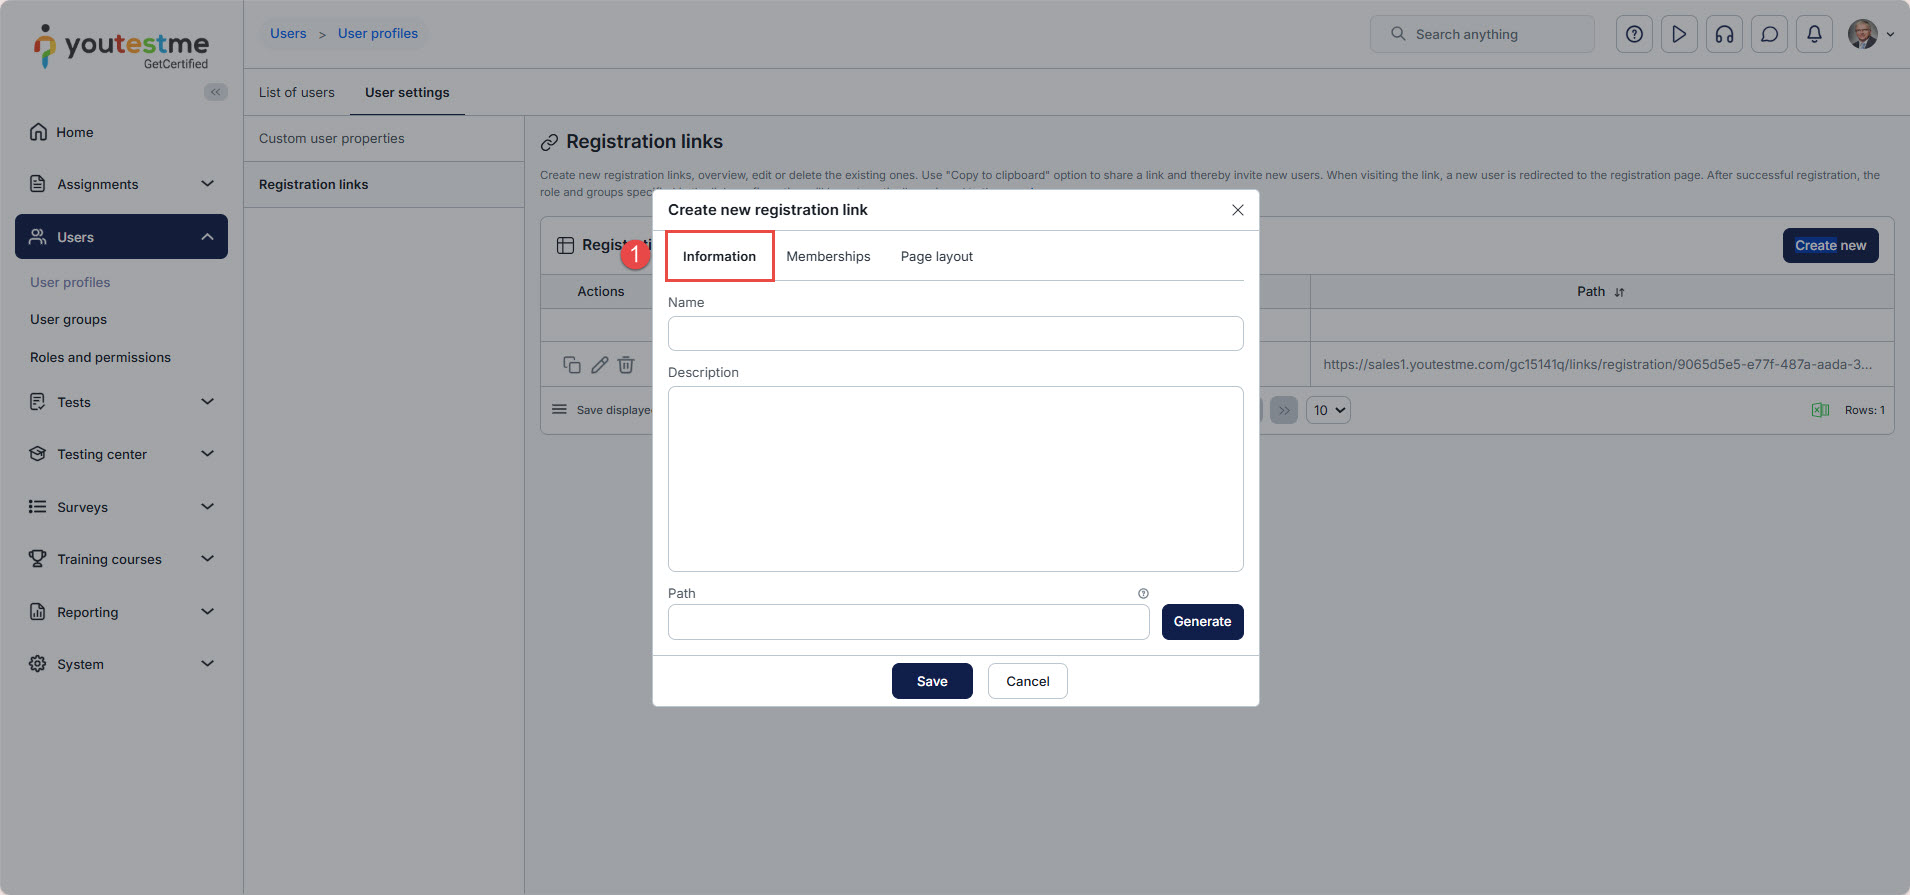
 You will be prompted with the “Create New Registration Link” dialog, which includes three tabs for defining the registration settings:
- Information: In this tab, you need to:
- Define the registration link name and description.
- Generate the registration path (URL).
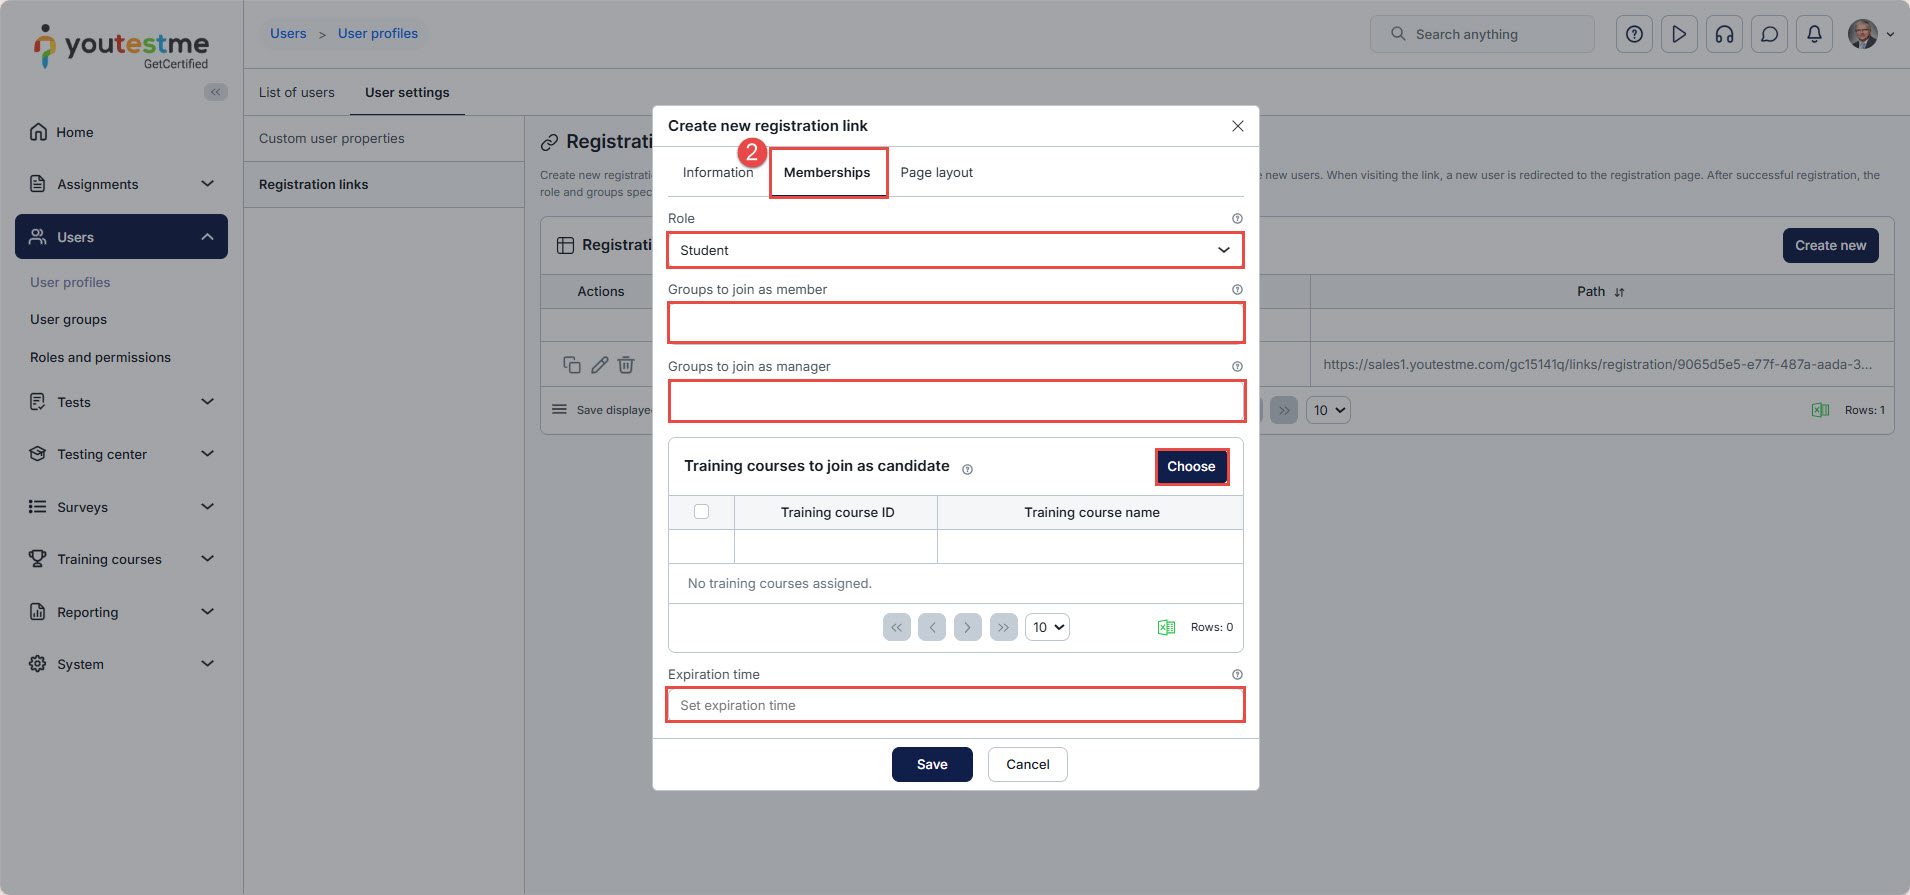
- Memberships: In this tab, you need to define the:
- Role: Select the role to be automatically granted to users registering through the link.
- Group to Join as Member: Choose the user groups the registrant will join as a member.
- Group to Join as Manager: Select the user groups the registrant will manage.
- Workspace to join: Select the workspace to which the user will be automatically added upon registration via the link.
- Workspace role: Choose the specific role the user will have within the selected workspace.
- Training Courses to Join as a Candidate: Assign training courses that will automatically be available to the user.
- Expiration Time: Set the validity period of the link, defining how long it will remain active for user registration.
- Page Layout: Choose the fields to display on the registration page when users access it via the link.
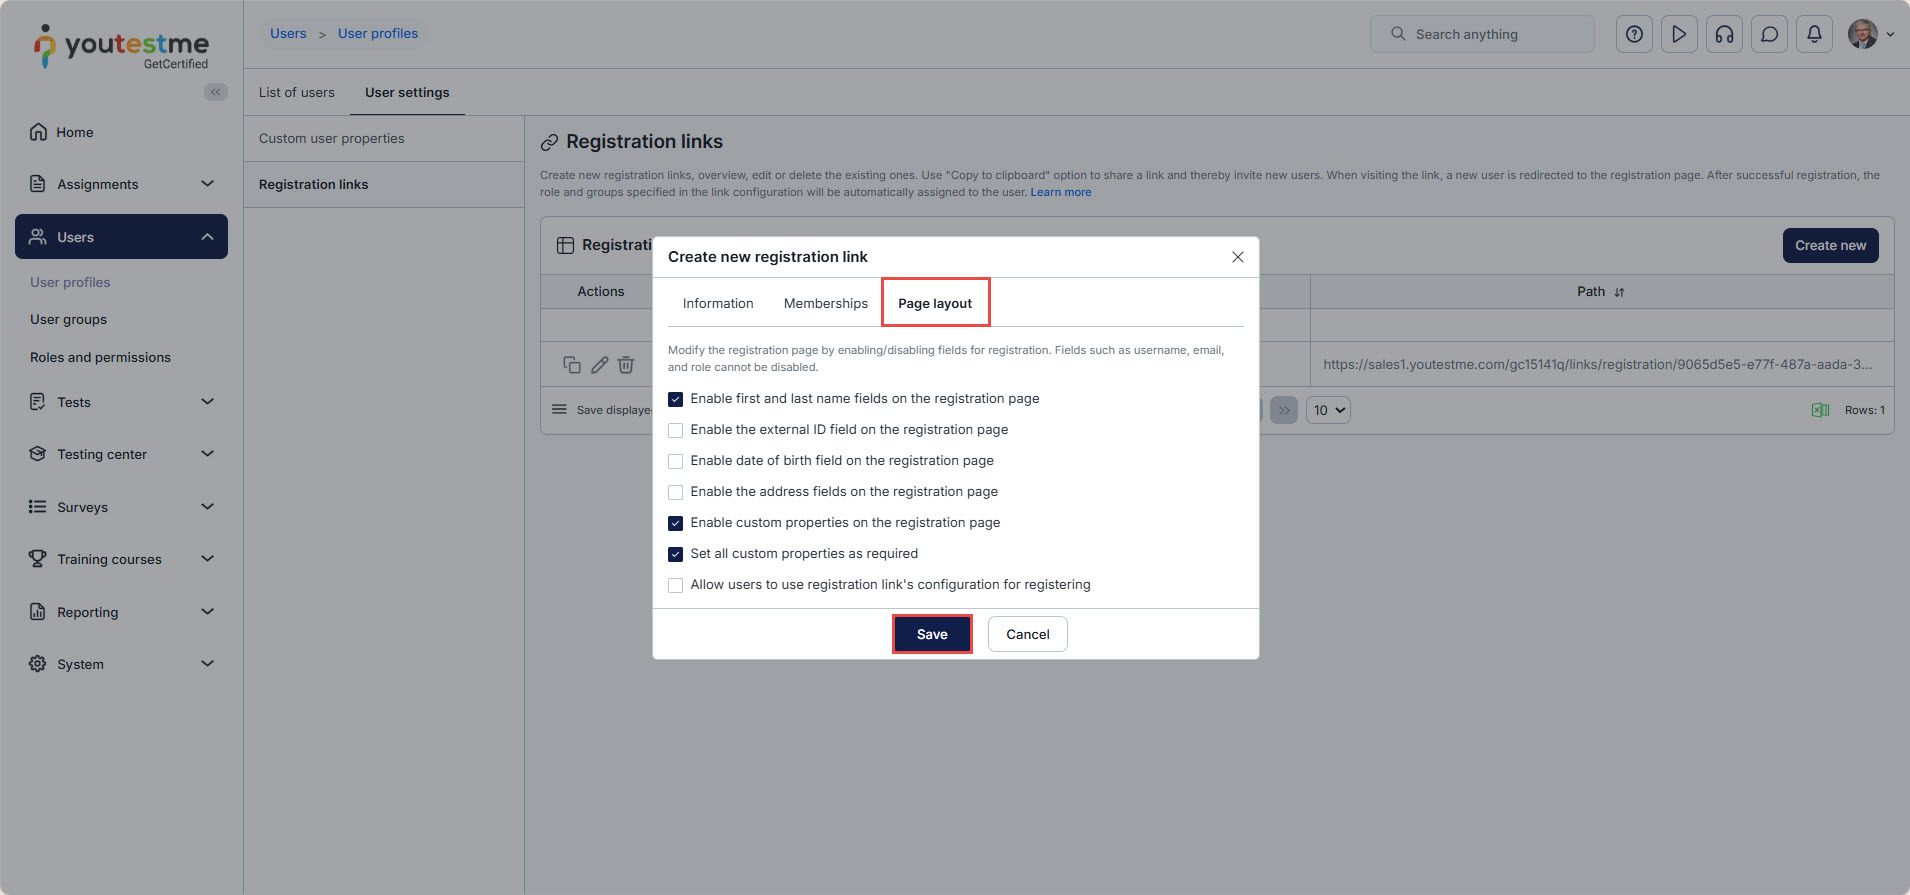
Click the Save button to add the registration link.
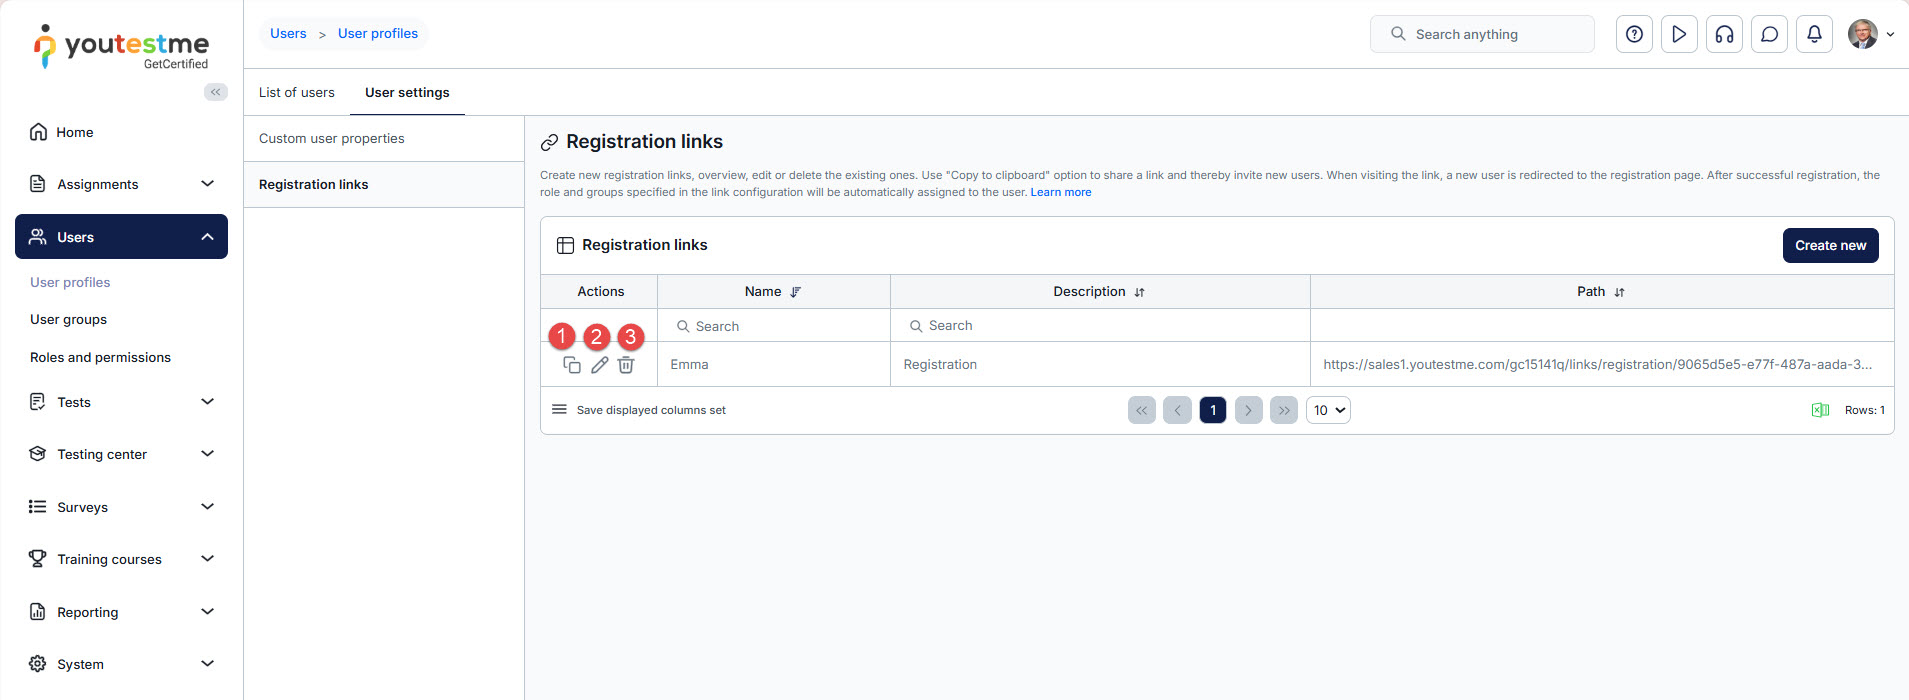
Managing the Registration Links
The available Actions on the Registration links page are:
- Copy the link path: Allows you to copy the registration link to share with users in an invitation email.
- Edit registration link: Allows editing the registration link.
- Delete registration link: Permanently delete the registration link.
Using the registration links
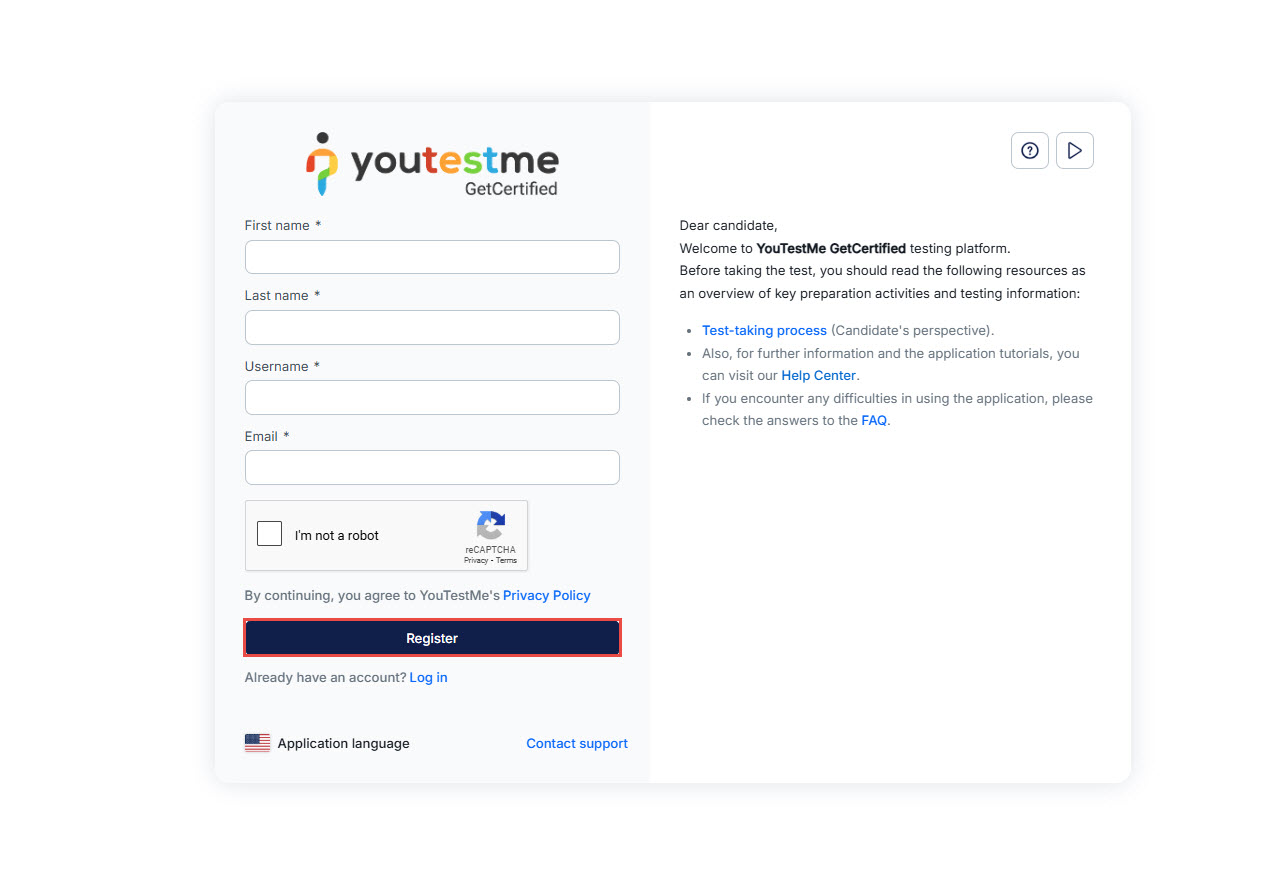
When users use the registration link, they are redirected to a registration form where they must complete the required fields defined in the layout settings of the registration link.
When users click the “Register” button, they will either gain immediate access to their accounts or, if registration requires manager approval, their request will be submitted for review and must be approved before access is granted. Please refer to this article for more details.
A user who registers via the registration link will automatically become a member of the user group selected during the creation of the link and will gain access to the assigned training courses.
To conclude, the registration process via registration links ensures a seamless experience for new users. It facilitates the effortless creation of user accounts with predefined roles, groups, or training courses, thereby simplifying the onboarding process and improving user efficiency.
