
Article verified for Release 15.1 on December 13, 2025
This article explains how to change users’ personal information. Users with administrator roles can edit any user’s personal information within the system.
Accessing the User Profile
To access a user profile and edit personal information and account details, please follow the steps below:
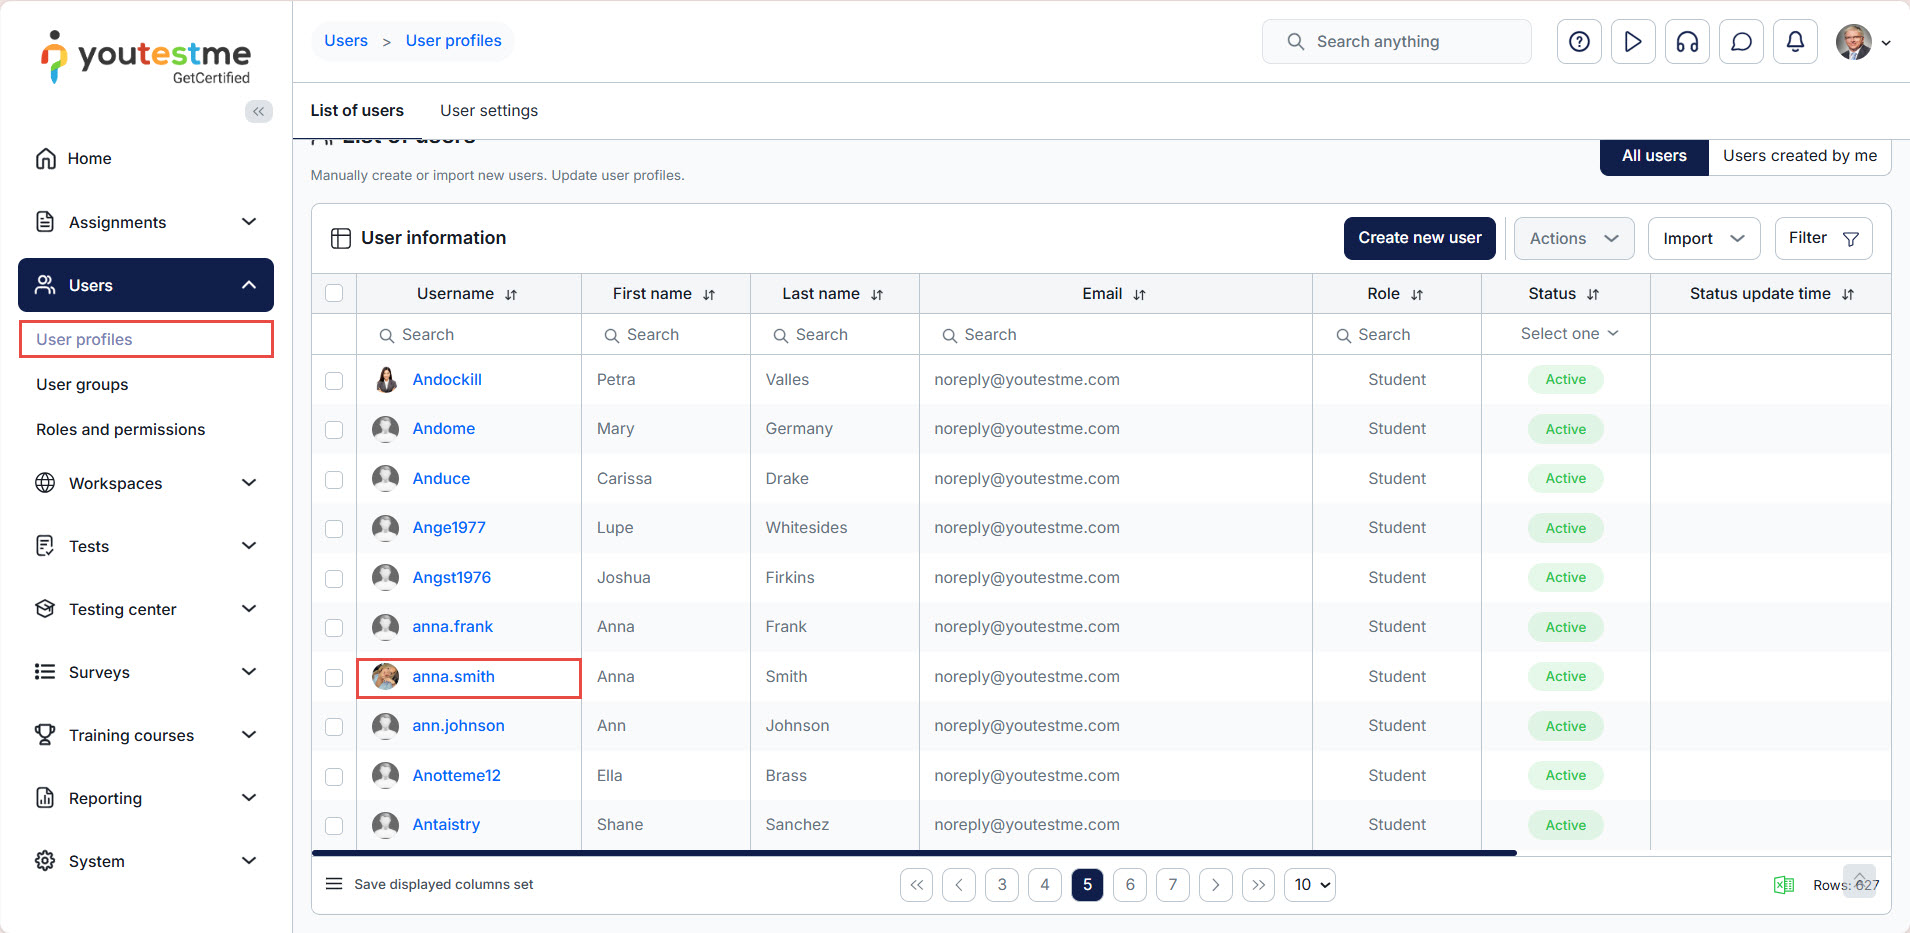
From the main menu, select Users, navigate to the User Profiles module, and click on the username of the desired user.
In the User Information dialog, click on the link to expand the user’s profile details.

Changing the user’s personal information
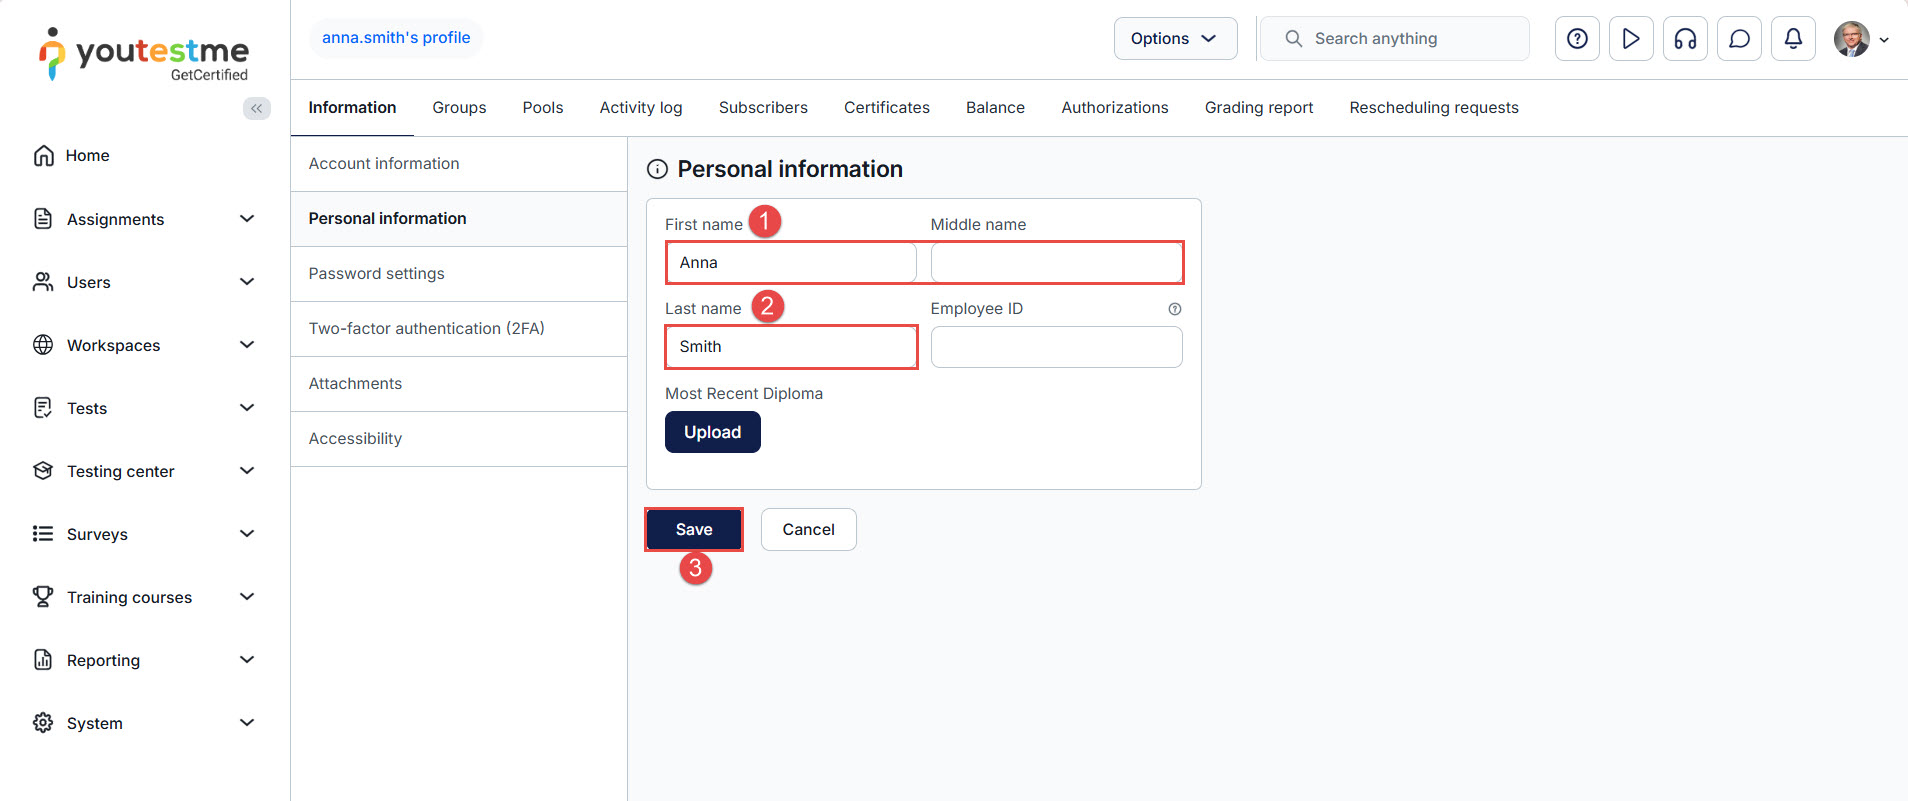
Navigate to the Personal Information tab to change the user’s personal information.
In this tab, you can:
- Change the user’s first name, middle name, or last name.
- Change the employee ID.
- Click the Save button to save the changes.
Note: If your organization has enabled custom user properties, they will also appear in this tab.
Refer to the How to create Custom User Properties article for more information.
Updating Account Information
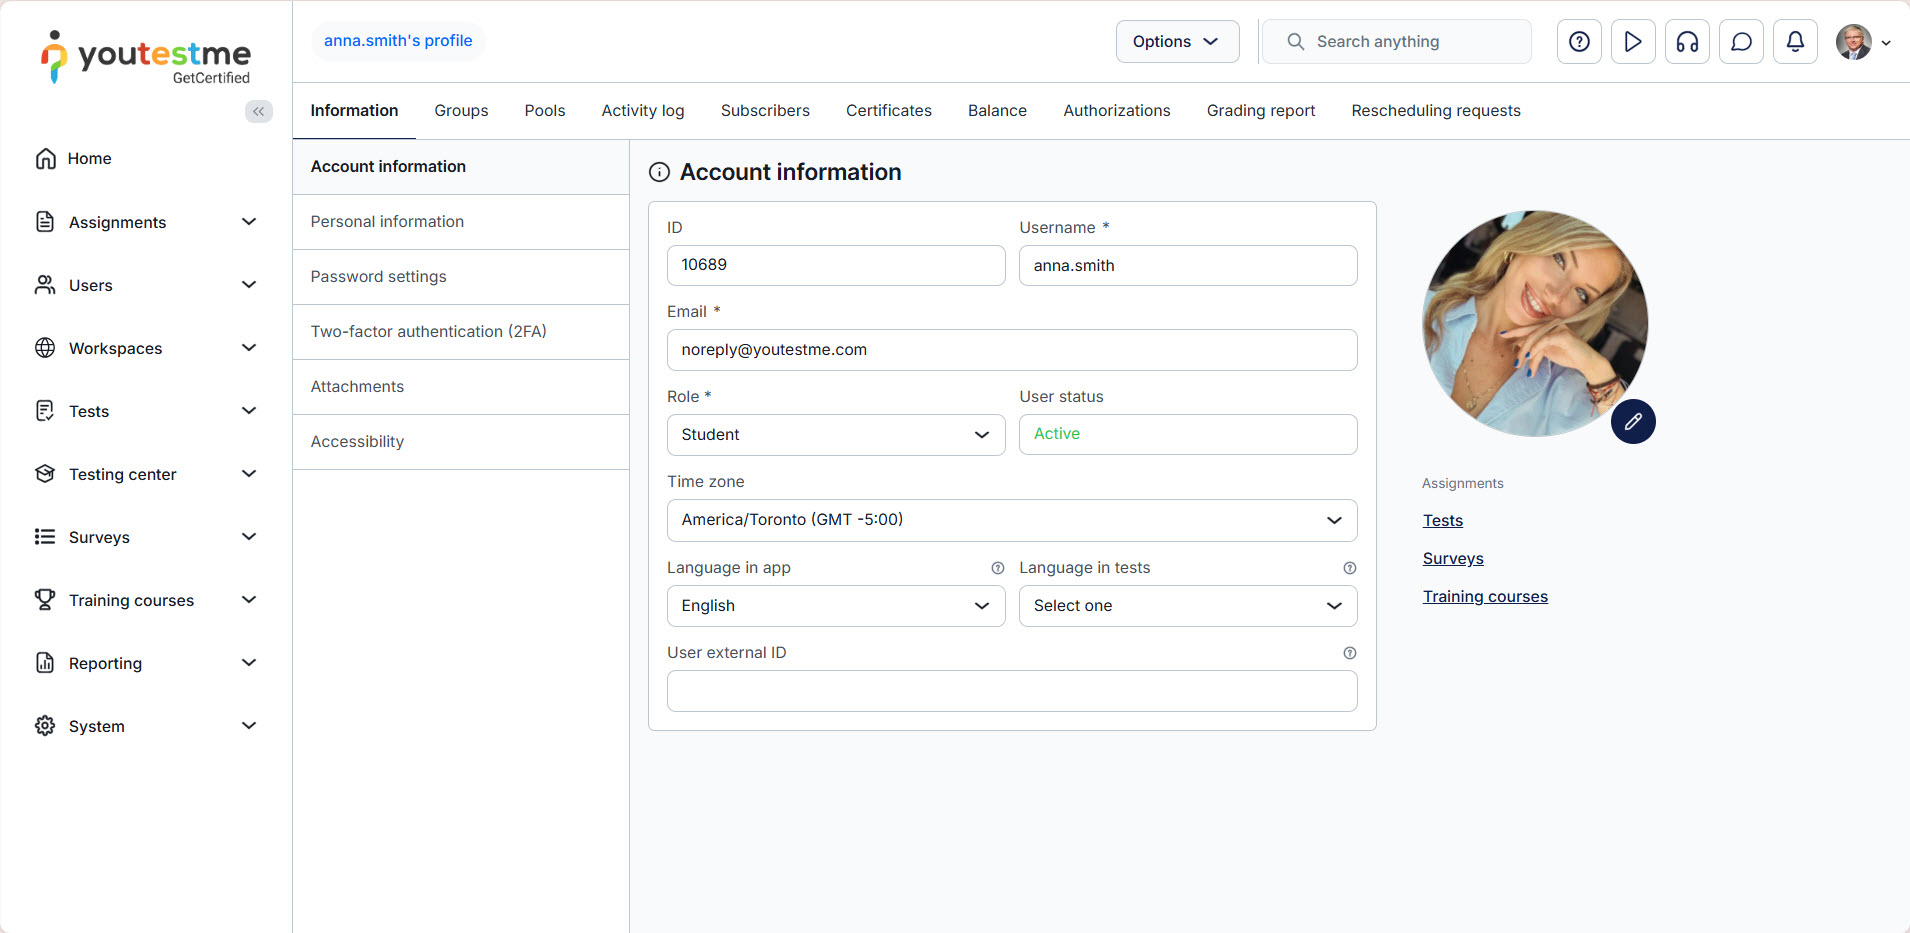
Under the Account Information tab, administrators can update:
- ID.
- Username.
- Email.
- Role.
- User status.
- Time zone.
- Language in app and language in tests.
- User external ID.
Attachments
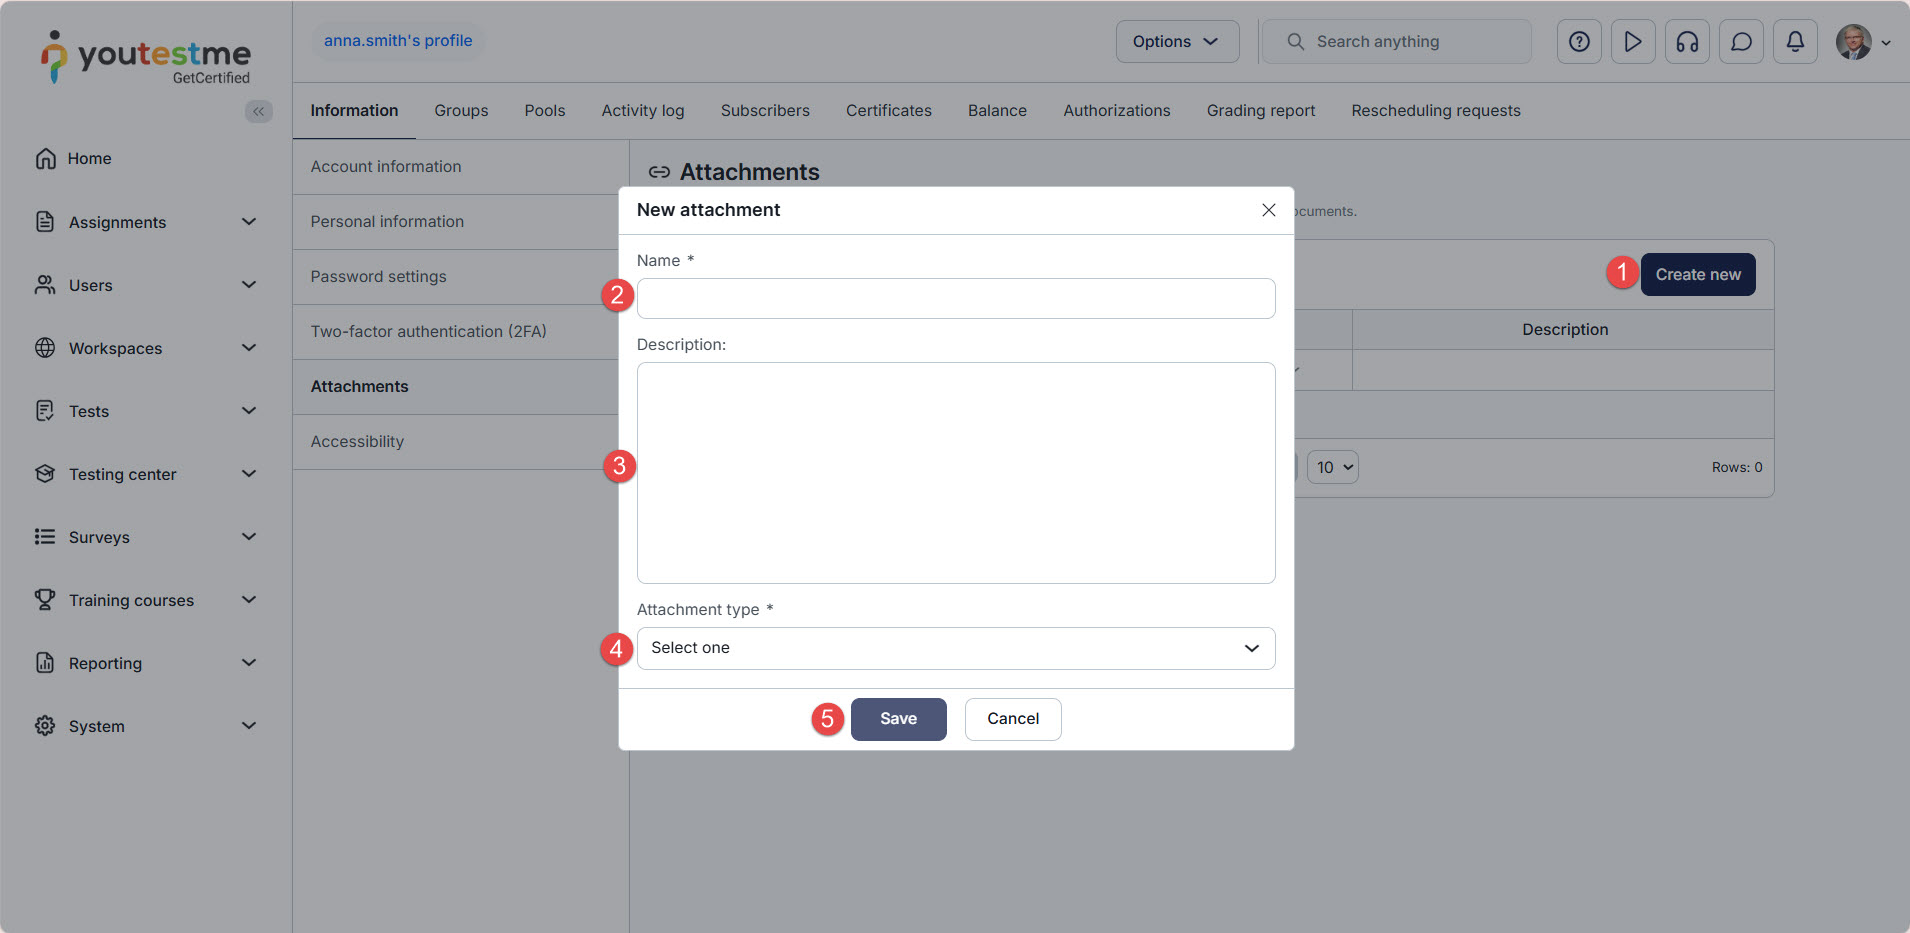
This section stores documents in various formats, including CVs, certificates, and other files.
To add an attachment:
- Click the Create new button.
- Enter the attachment name.
- Provide an attachment description.
- Select the attachment type and either upload the file or provide a link.
- Click the Save button.
Additional Functionalities
Details about the following functionalities are available in separate articles:
