
Article verified for Release 15.1 on October 7, 2025.
This article serves as a comprehensive guide to exploring proctoring within your own personalized demo environment. In the following sections, we’ll take you through the entire process of experiencing proctoring in your demo environment, including the record and review process and an explanation of how to explore the live proctoring capabilities.
Record & Review
In your demo environment, we have already prepared a test, and one candidate has already taken the exam, resulting in a stored recording that you can explore by following the instructions below.
Accessing the Test
To check an already stored recording, you should open your demo application and log in using the following credentials:
- Username: proctor
- Password: Password for the proctor account provided by YouTestMe
The admin account can be used to access the exam and preview the recording; however, only the account assigned as the proctor for the exam session is authorized to rate the recording. In your demo environment, this is the proctor account.
Click here to learn more about Roles and Permissions.
After you are logged in:
- Click on Tests in the side menu and select Manage tests.
- Find the “Cybersecurity – Proctored Test“.
- Click on the test name to open it.


Once you open the exam, follow these steps:
- Click the Proctoring tab.
- Click the camera icon next to the candidate to open the recording.

Recording Overview
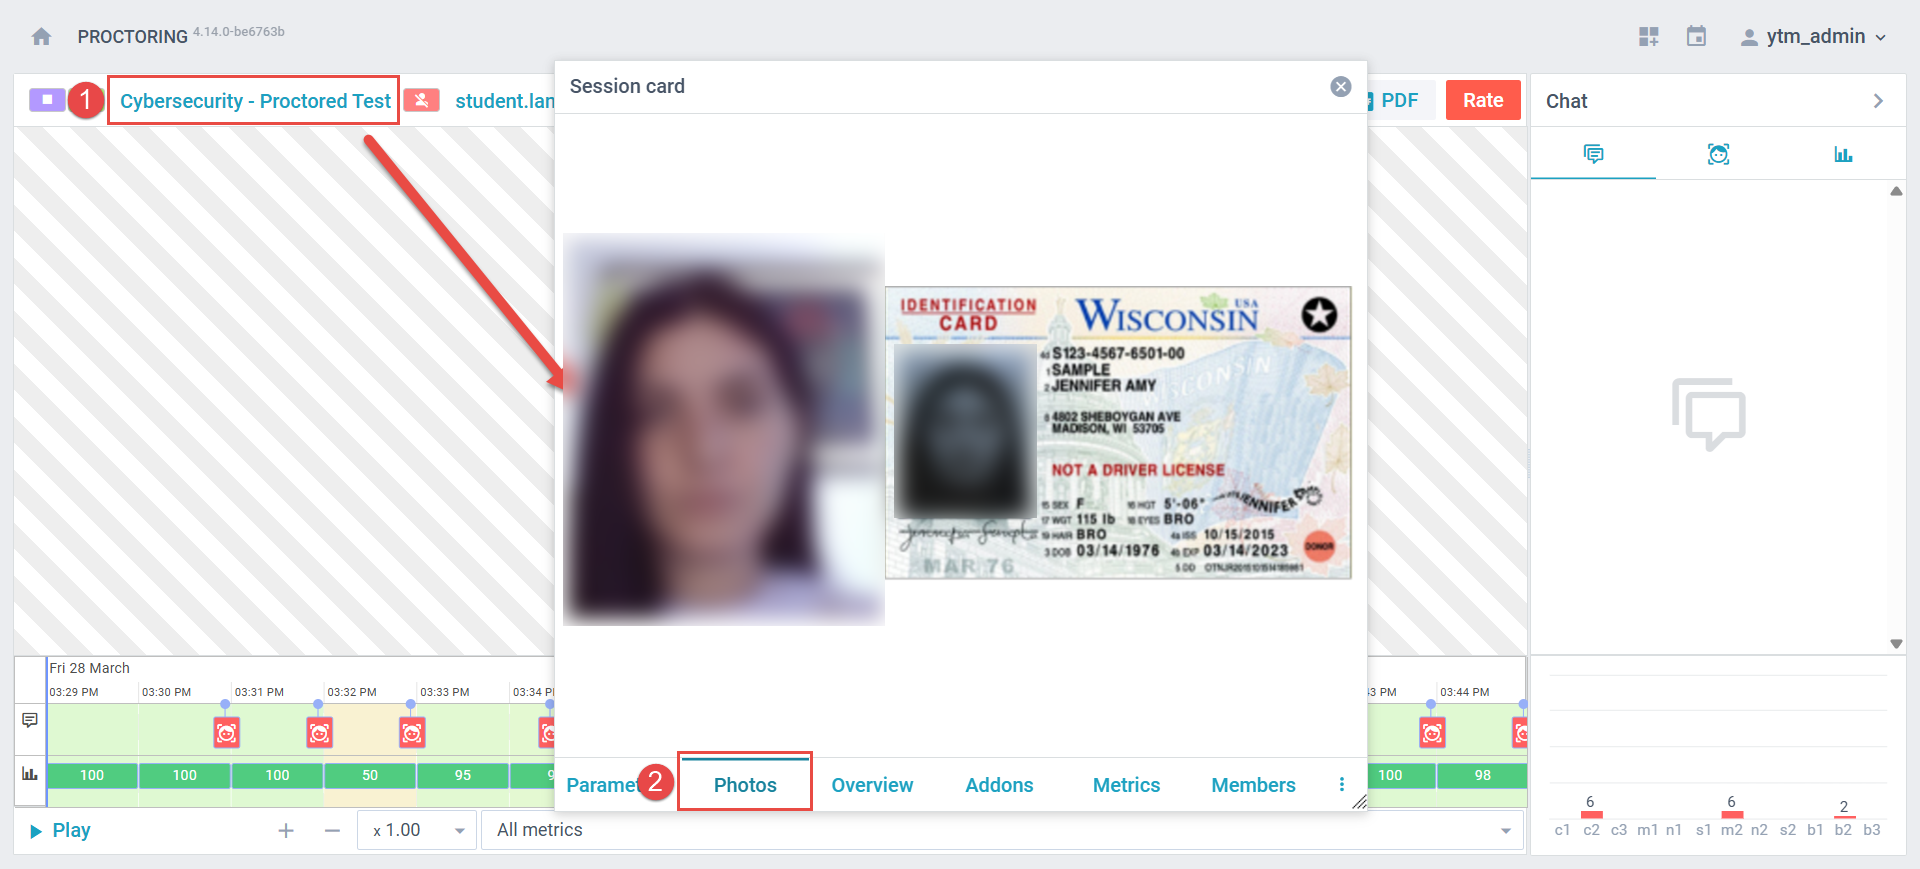
When you click on the camera icon, the recording overview page will open. To verify the student’s ID and view the recording of the exam environment, follow these steps:
- Click on the test name.
- Click the Photos tab, where you will see the candidate’s face photo and ID photo.
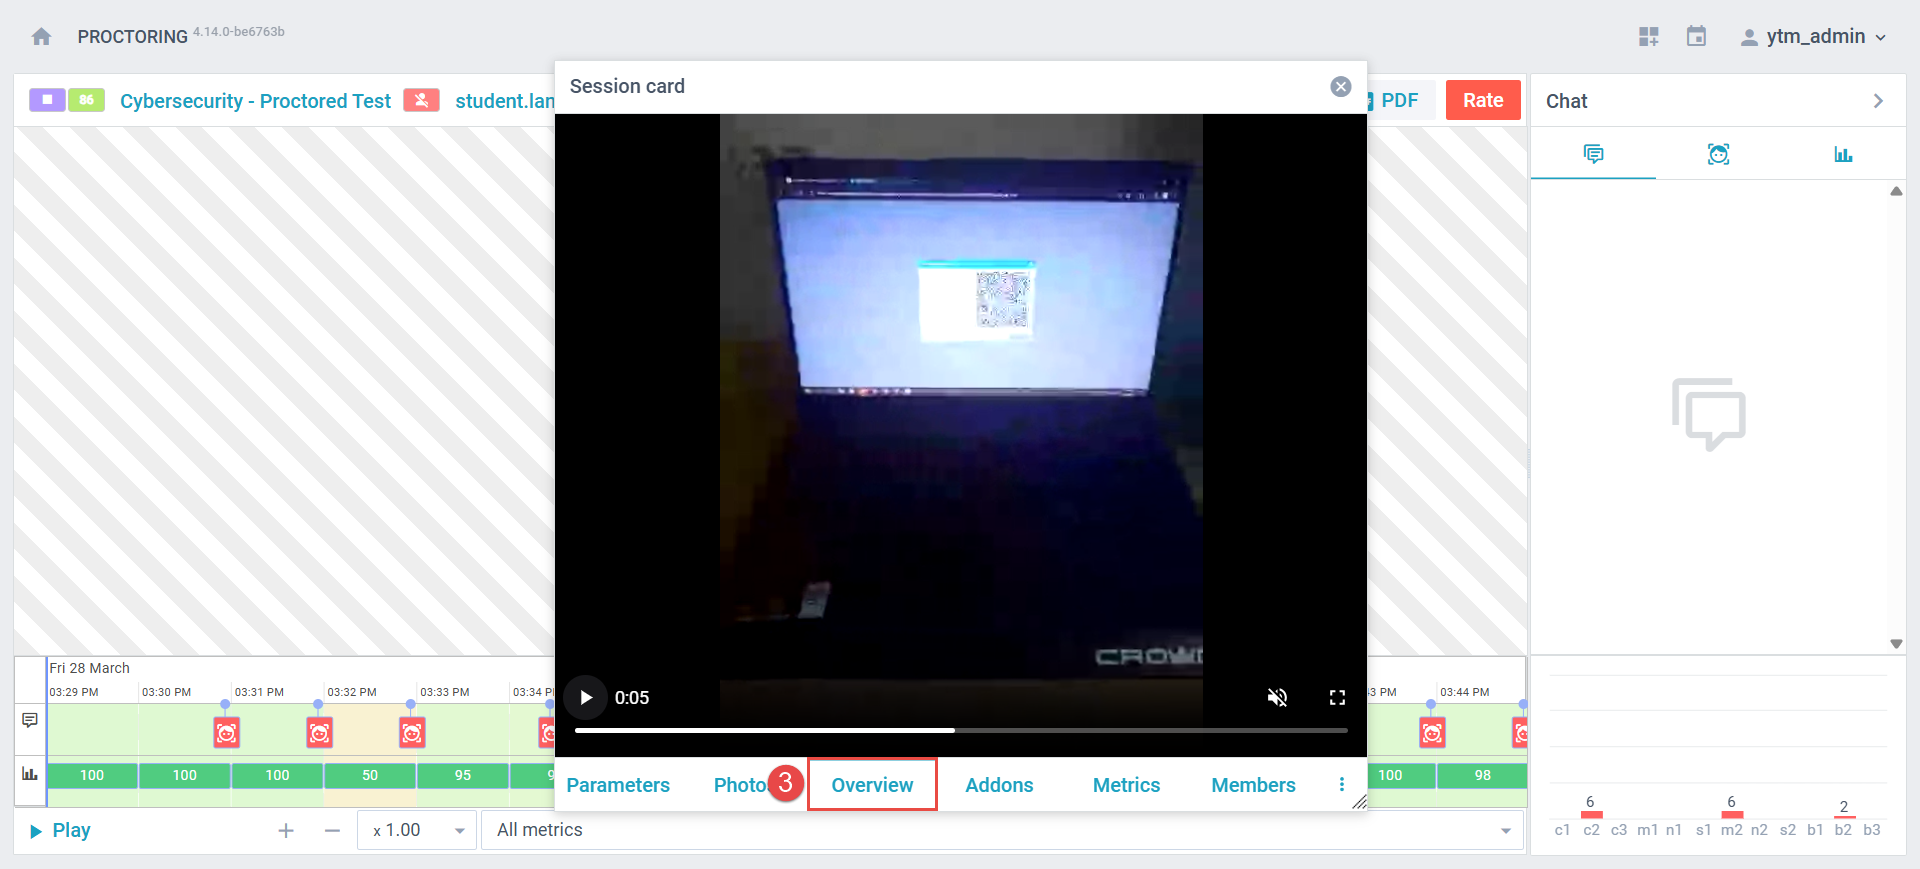
- Click the Overview tab to see the recording of the environment.
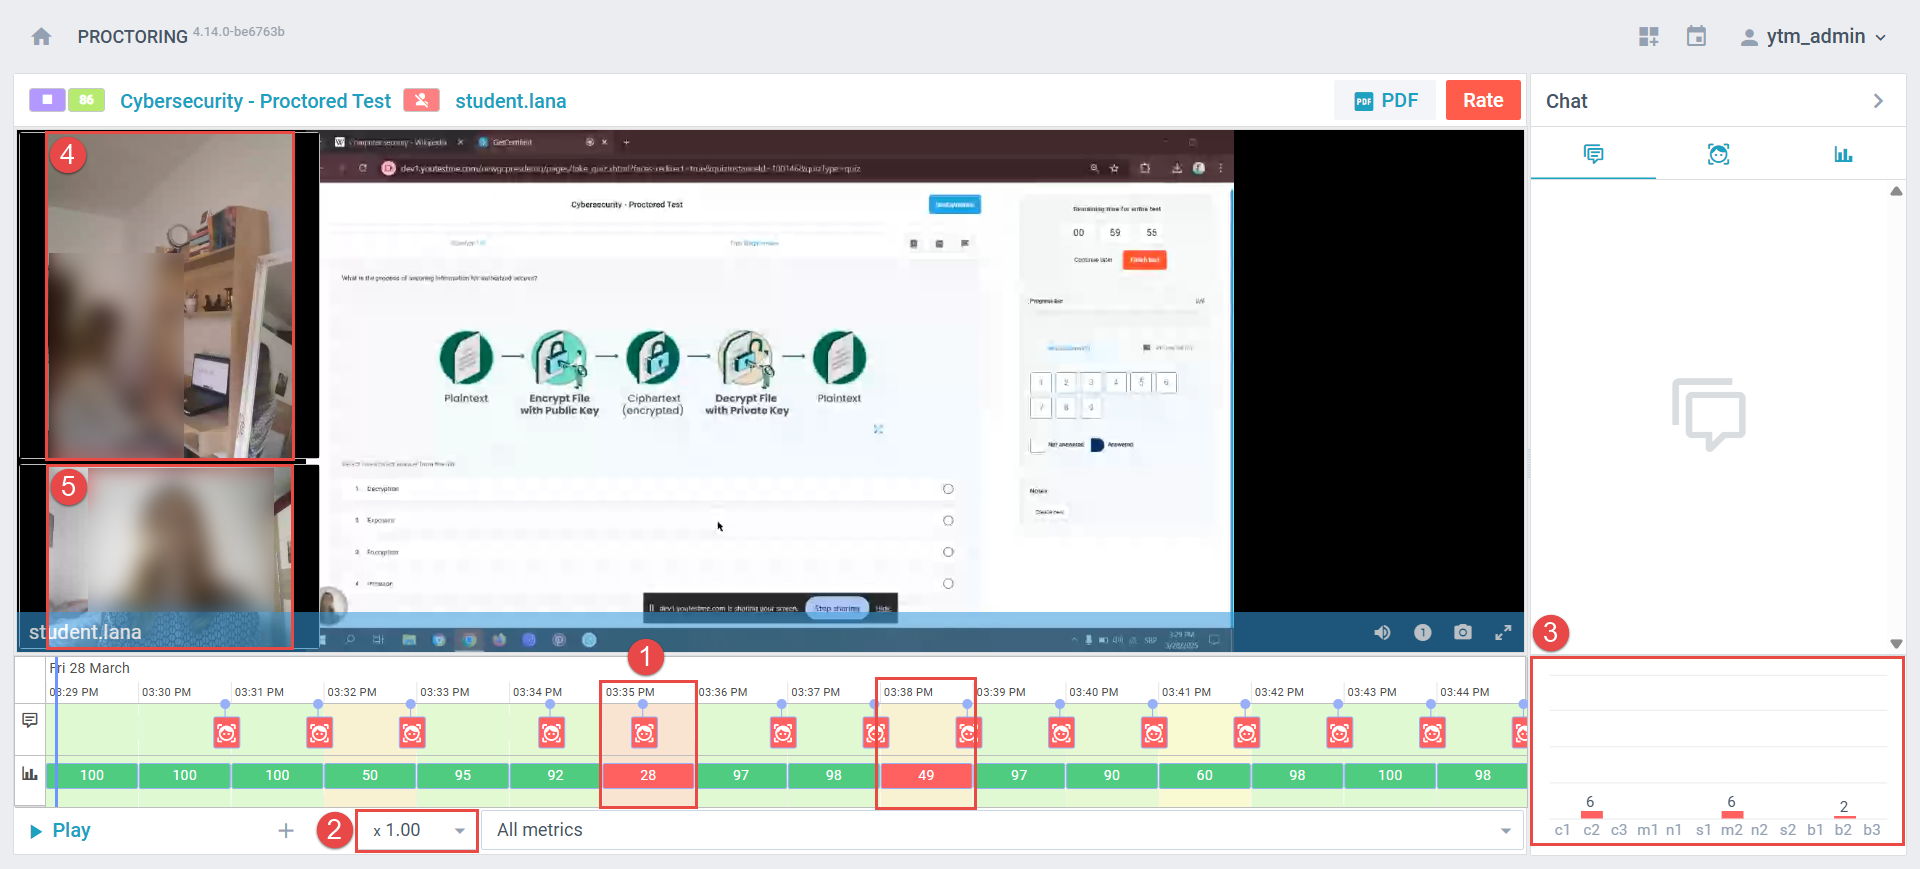
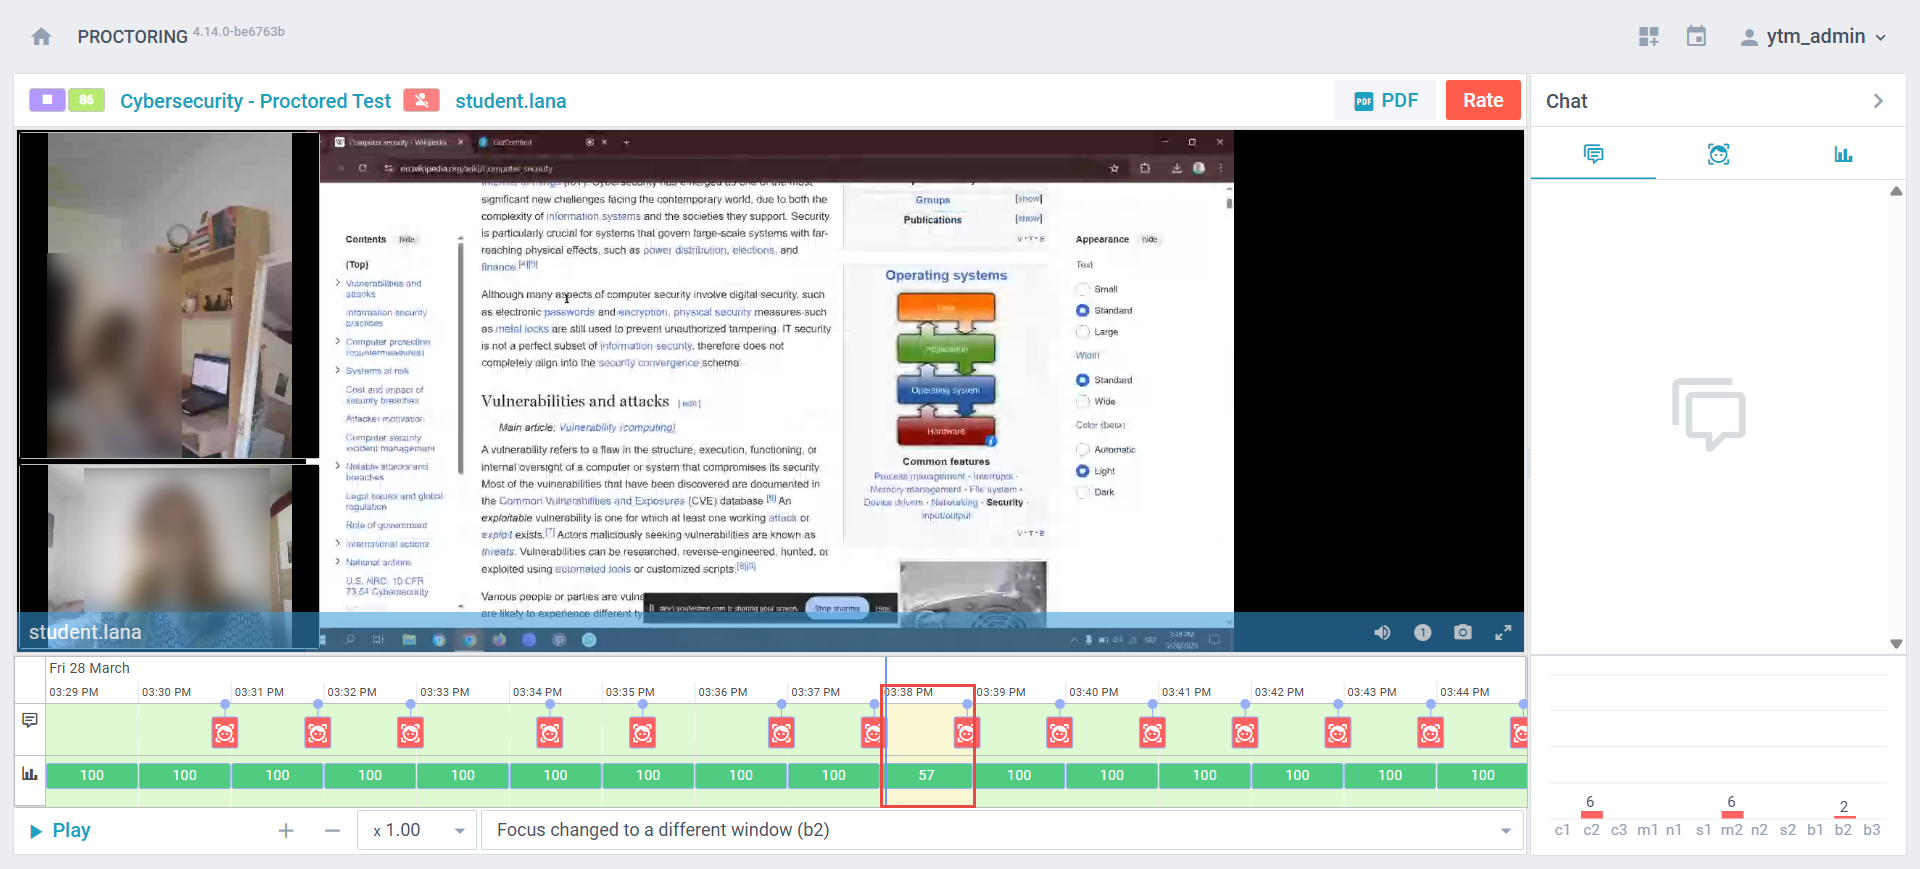
Once you play the video recording, you will be able to:
- Track the violation using the session metric track. The different colors can help you identify the critical moments when the violation occurred. The colors are separated by minute, where green indicates no violations, orange indicates violations during that time but not for a full minute, and red means that the student violated the rules for almost a full minute.
- You can change the playback speed and watch the entire video at a faster pace.
- A histogram showing the percentage of each violation, calculated over the entire exam attempt duration, will be displayed in the chat section.
- You can switch the focus to the candidate’s second camera view by clicking on it to expand the video.
- Similarly, you can switch to the candidate’s webcam view by clicking on it to enlarge it.
You can filter the session metric to display colors per specific violation.
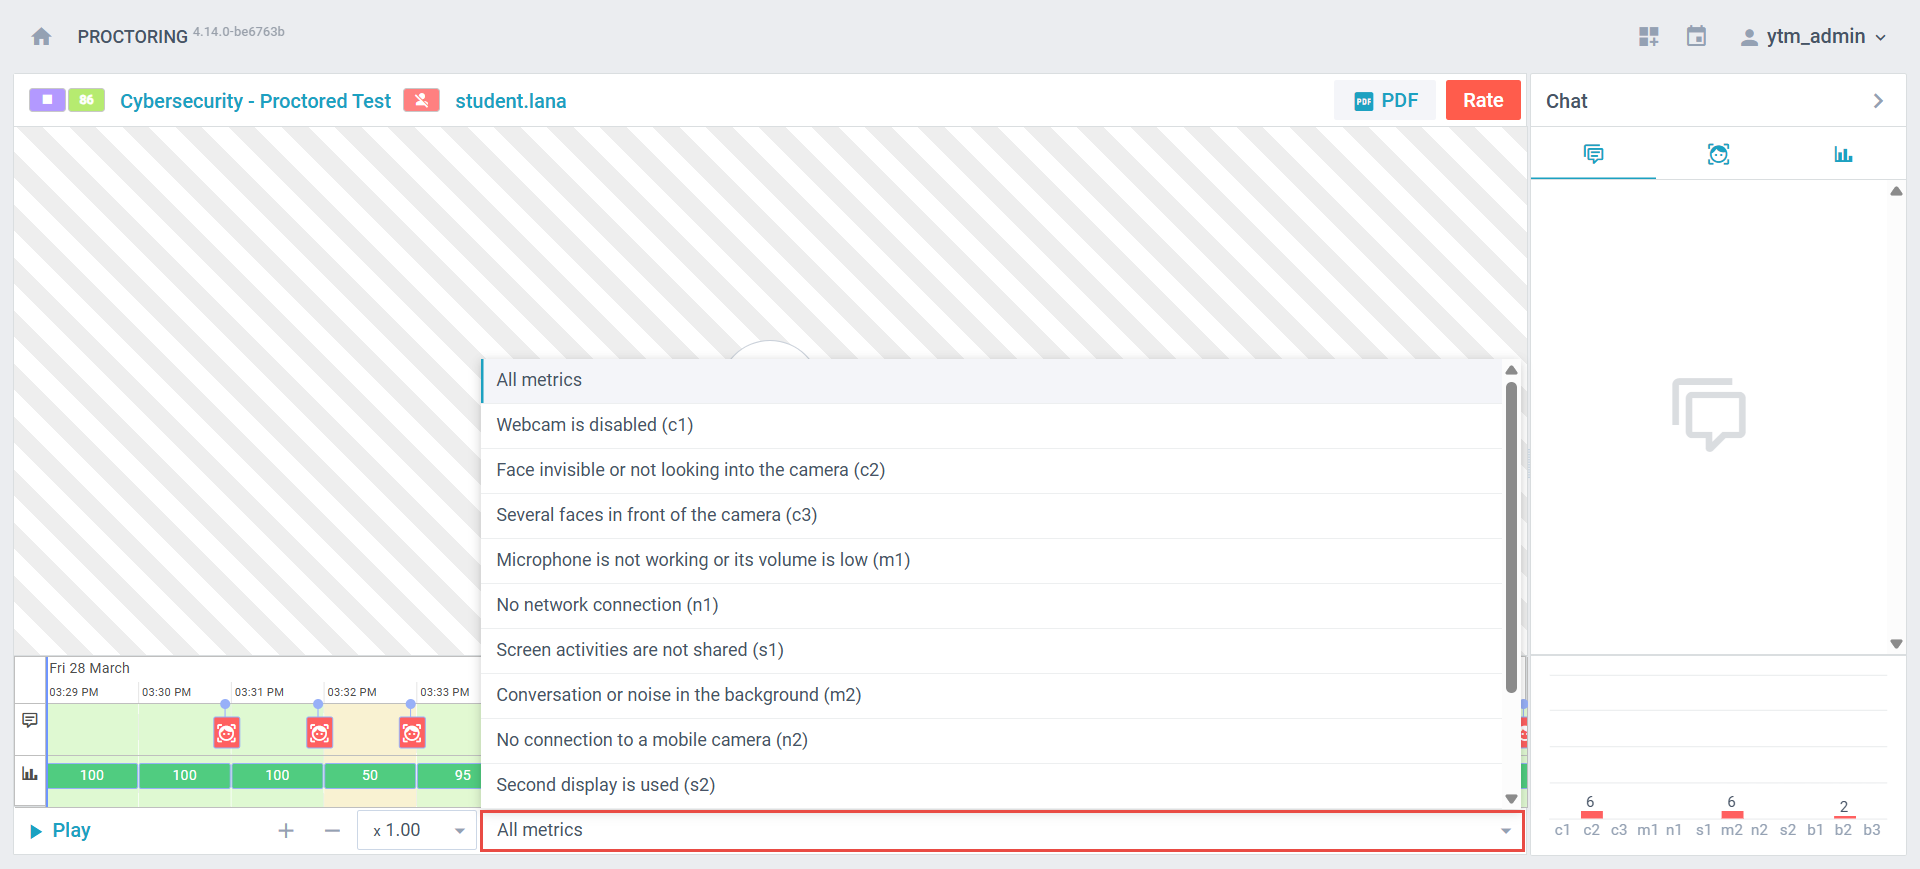
When a specific metric is selected, for example, the “Focus changed to a different window” metric, the timeline will display only the periods during which this specific violation was detected.
By clicking on the red segment in the session metric and switching the focus to the screen view, you can observe that the candidate was viewing Wikipedia at that moment.
During the test-taking process, the system records video clips capturing the moments when a violation is detected, making them available for your review.

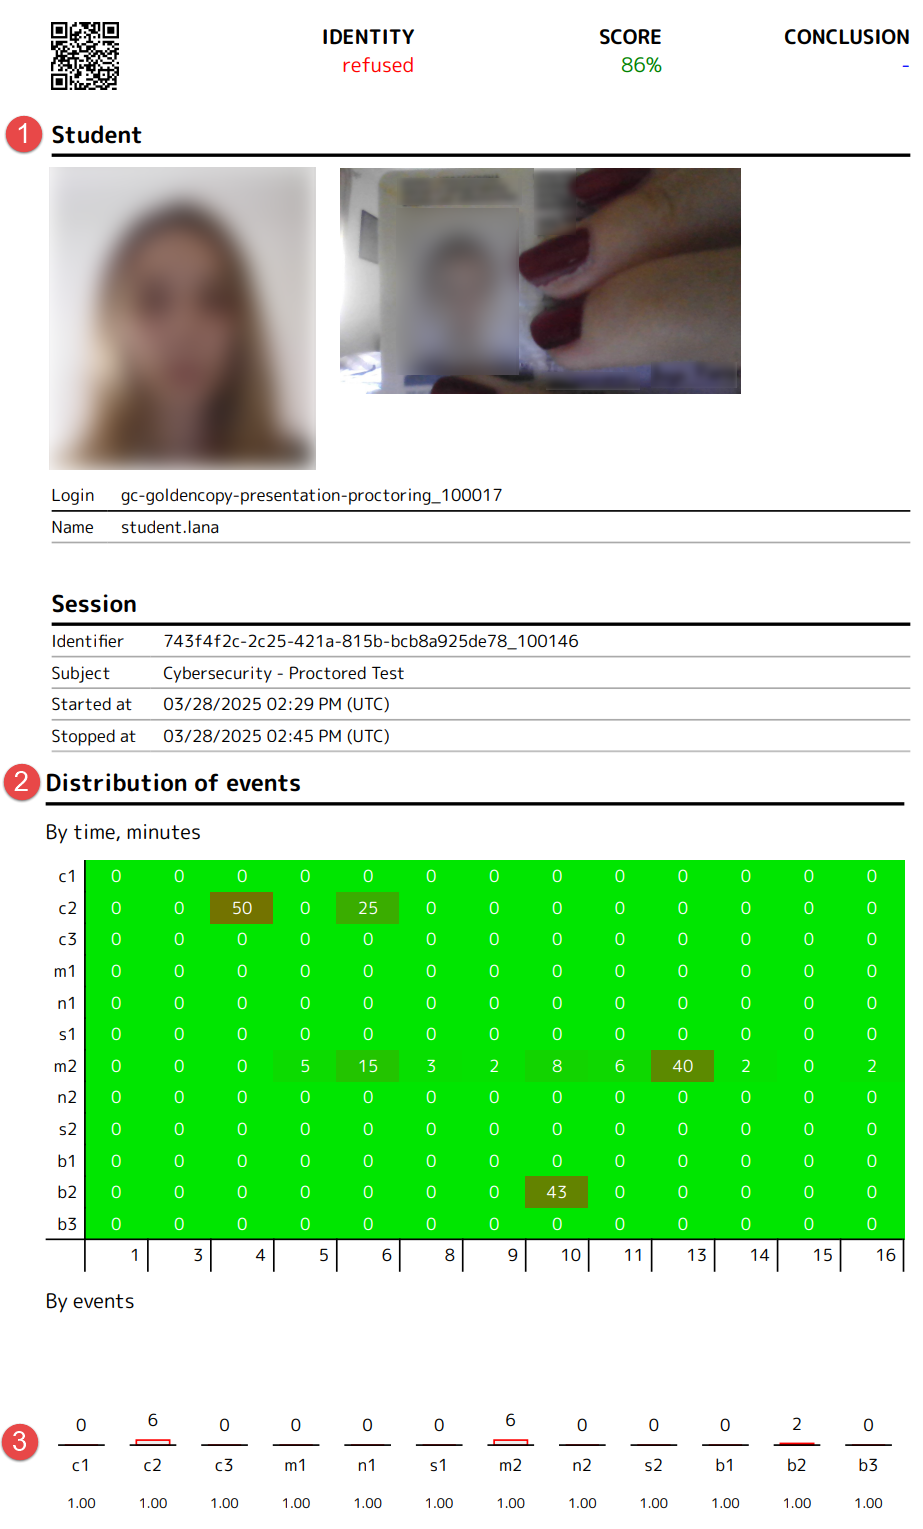
The system generates a PDF report for each candidate, which can be downloaded for review.
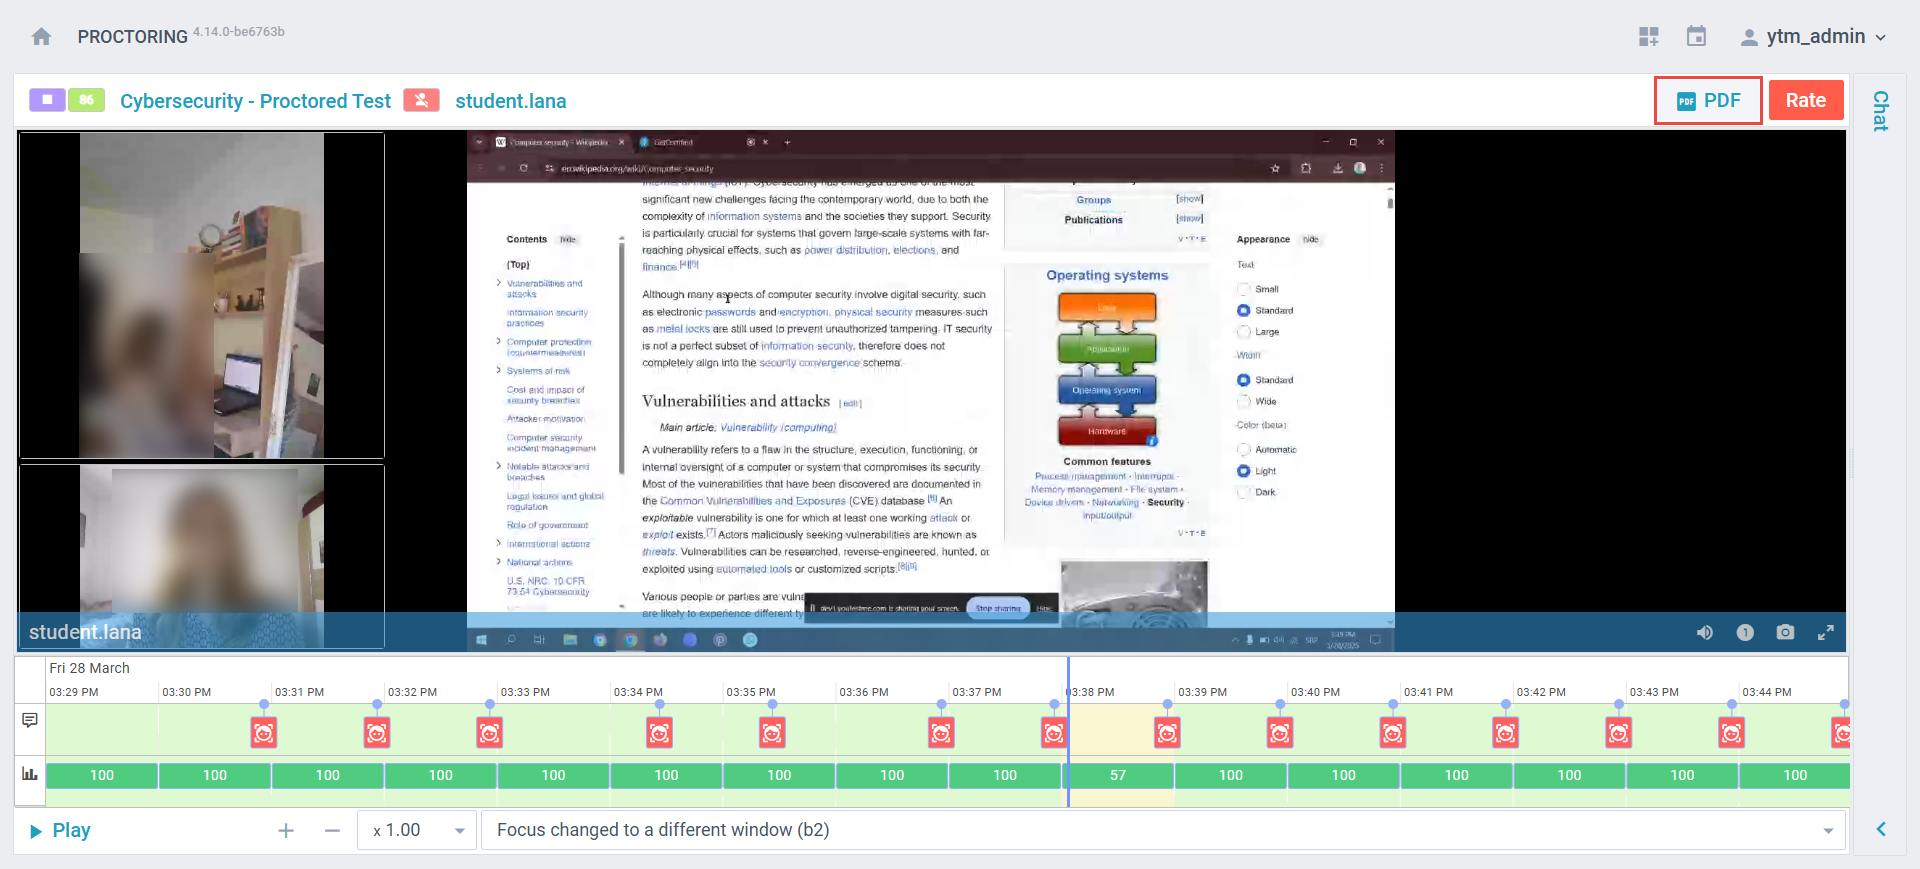
This report includes:
- The candidate ID and face photos.
- Violations percentages per minute.
- Additionally, it includes a violations chart with a legend.
Note: To explore the candidate’s perspective, please refer to the “Candidate’s Perspective” chapter below.
Candidate’s Perspective
You can experience the candidate’s perspective during a proctored exam by taking the Cybersecurity – Proctored Test using the student account in your demo environment.
To begin, log in to your demo environment using the student account credentials provided by YouTestMe.
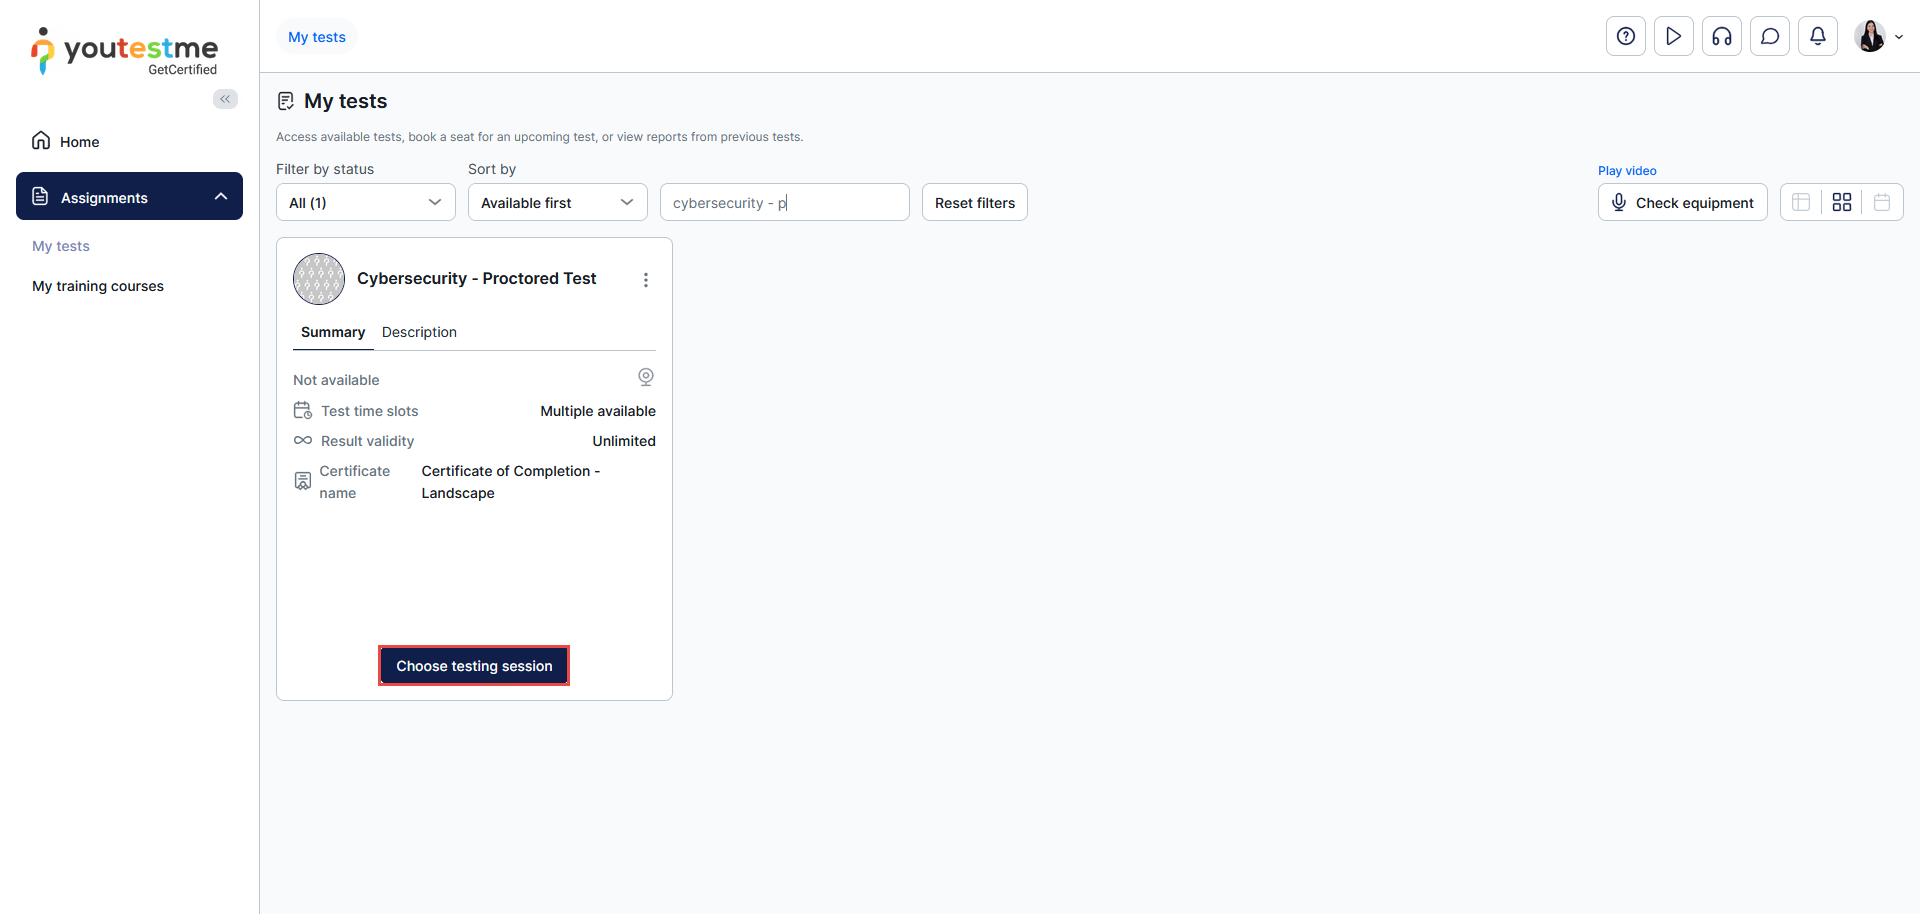
Upon logging in, you will be automatically redirected to the My Tests page. Use the search bar to locate the “Cybersecurity – Proctored Test.”
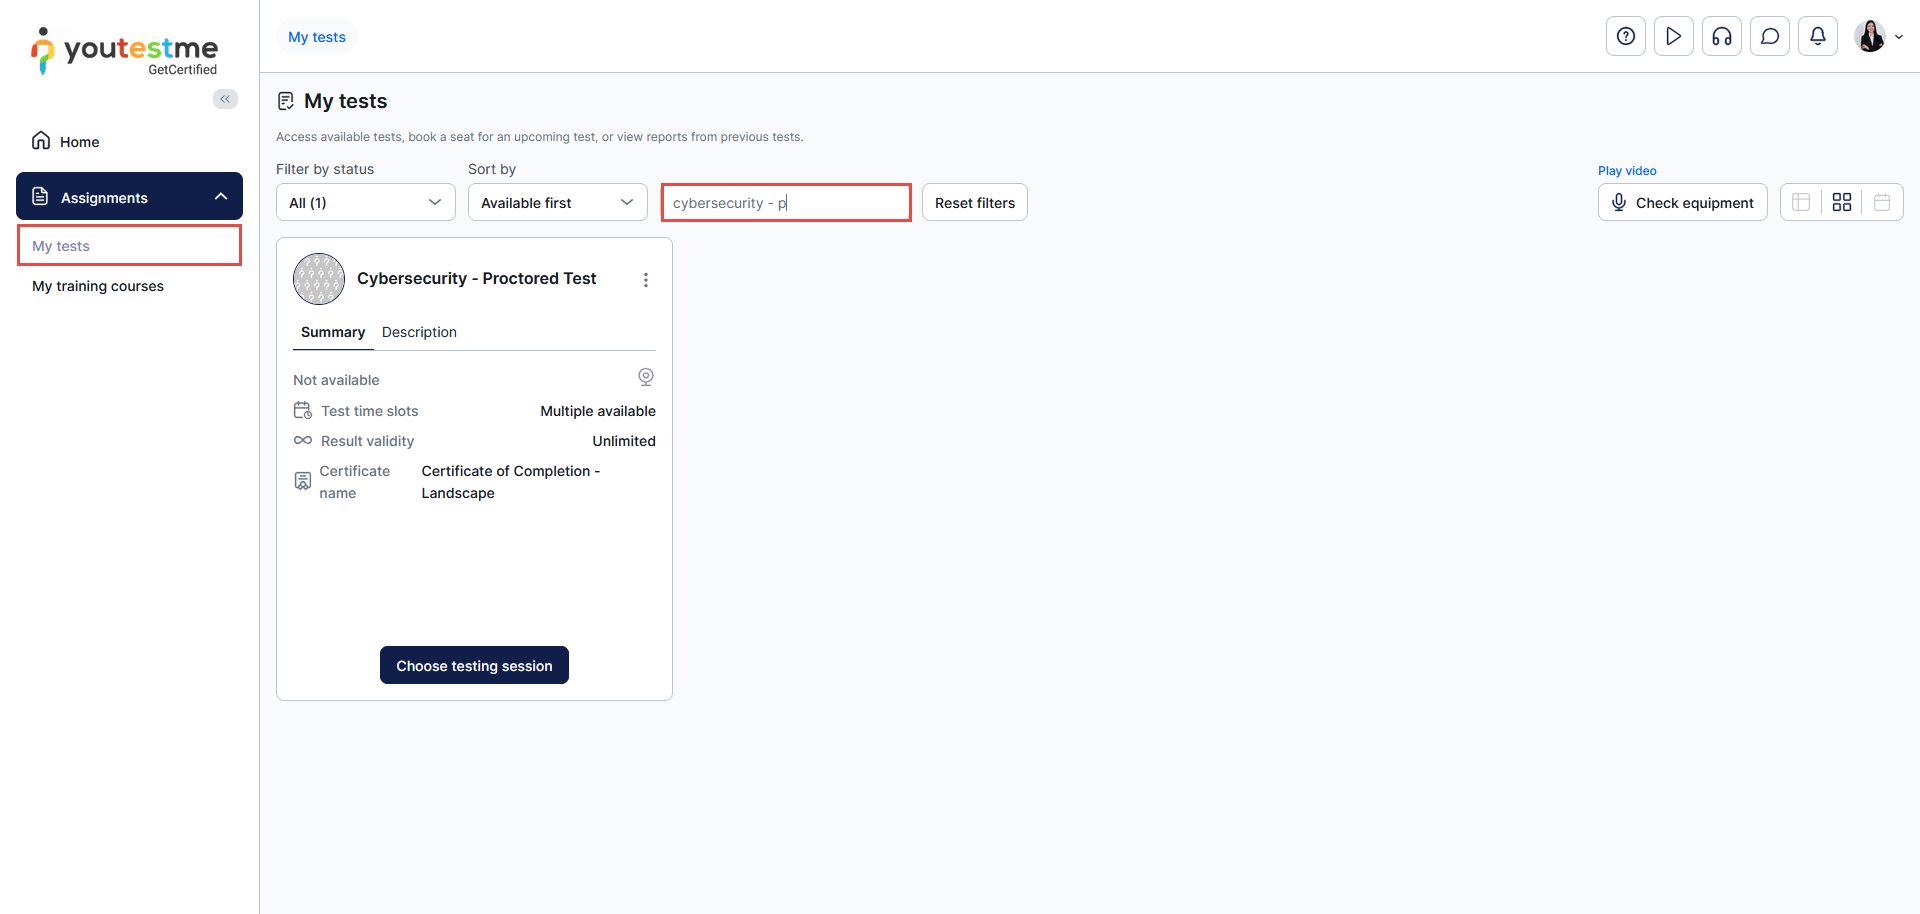
Click the “Choose testing session” button to choose a session. Two test sessions are available, each demonstrating different proctoring settings:
- Proctored Testing Session: This session uses only the webcam to monitor the test-taker during the exam.
- Proctored Testing Session with Additional Camera: This session includes both the webcam and a mobile camera, providing full 360-degree coverage of the testing environment and helping eliminate blind spots.
To select the desired session, click the “Start” button in the actions column next to the session’s name.

On the exam instructions dialog, ensure you acknowledge the exam rules and click the “Start” button to start the equipment check process.
Kindly refer to this article, where you can find detailed instructions on how to get ready for a proctored exam.

Live Proctoring
Assigning proctors
The live proctored exams require the presence of a human proctor to monitor the test-taker during the exam-taking process.
The admin should assign the proctor’s account to monitor the desired session by following the instructions below:
- Click on Tests in the side menu and select Manage tests.
- Find the “Cybersecurity-proctored Test” and click on the test name to open it.
- Navigate to the “Testing sessions” tab.
- Click the kebab menu on the desired session card
- Expand the “Administration” menu and select the “Manage proctors” option


- Use the “Assign proctors” button to select the desired users to monitor the live session, and then click “Save.”
Note: Only the assigned accounts as proctors will be able to monitor the candidates.

Candidate’s perspective
You can explore the candidate’s perspective of a live proctored exam in your demo environment by taking the proctored test using the student account on one computer and logging in as a proctor using another computer.
Alternatively, you can arrange for multiple individuals within your organization to simulate the student’s perspective and one person to simulate the proctor’s perspective.
Follow the instructions described above to start the exam during one of the available sessions.
Proctor’s Perspective
Log in to your demo environment using the proctor account.
- Click on Tests in the side menu and select Manage tests.
- Find the “Cybersecurity-proctored Test” and click on the test name to open it.
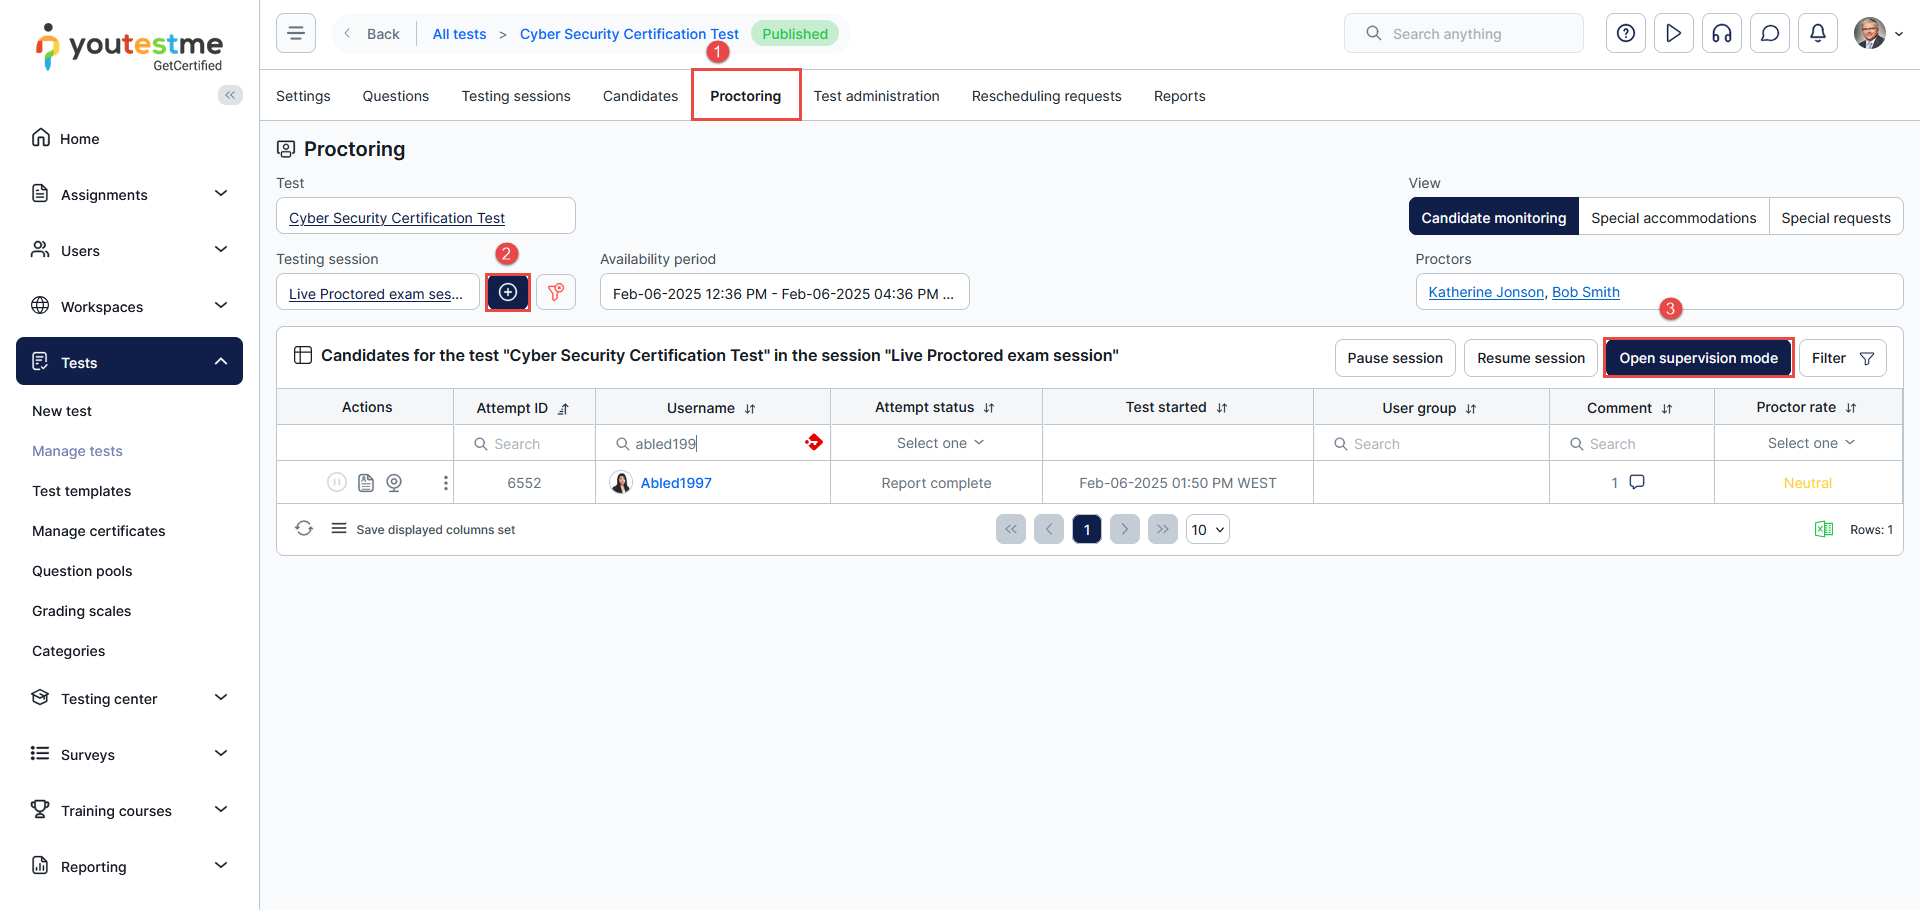
Once you open the exam, follow these steps:
- Click the “Proctoring” tab.
- Click the (+) button to select the session.
- Click “Open supervision mode” to open a live proctoring dashboard where you can monitor multiple candidates live by following these instructions.

After the candidate completes the exam, the recording will be stored, allowing you to follow the steps for the Record & Review process again if you prefer.
