
Article verified for Release 16.0 on March 16, 2026.
This article explains how to connect YouTestMe with Moodle, one of the most widely used open-source learning management systems. Integrating the two platforms enables a seamless experience, allowing candidates to access tests directly through Moodle while instructors manage assessments in YouTestMe.
Moodle Installation
Before candidates can access tests and other course materials through Moodle, it is a prerequisite that a teacher or administrator installs Moodle on a web server or on their PC to prepare and integrate Moodle with YouTestMe. Candidates must have access to computers or other devices with internet connectivity and a web browser. No additional software installation on their computers is necessary. They can easily log in to the Moodle platform through their web browsers to access tests and other educational resources. Moodle is deliberately designed to offer a straightforward user experience, eliminating the need for complex installations on personal computers.
Test Creation
To begin creating a test, please refer to the instructions in the following article.
Note: After configuring the primary test options, be sure to:
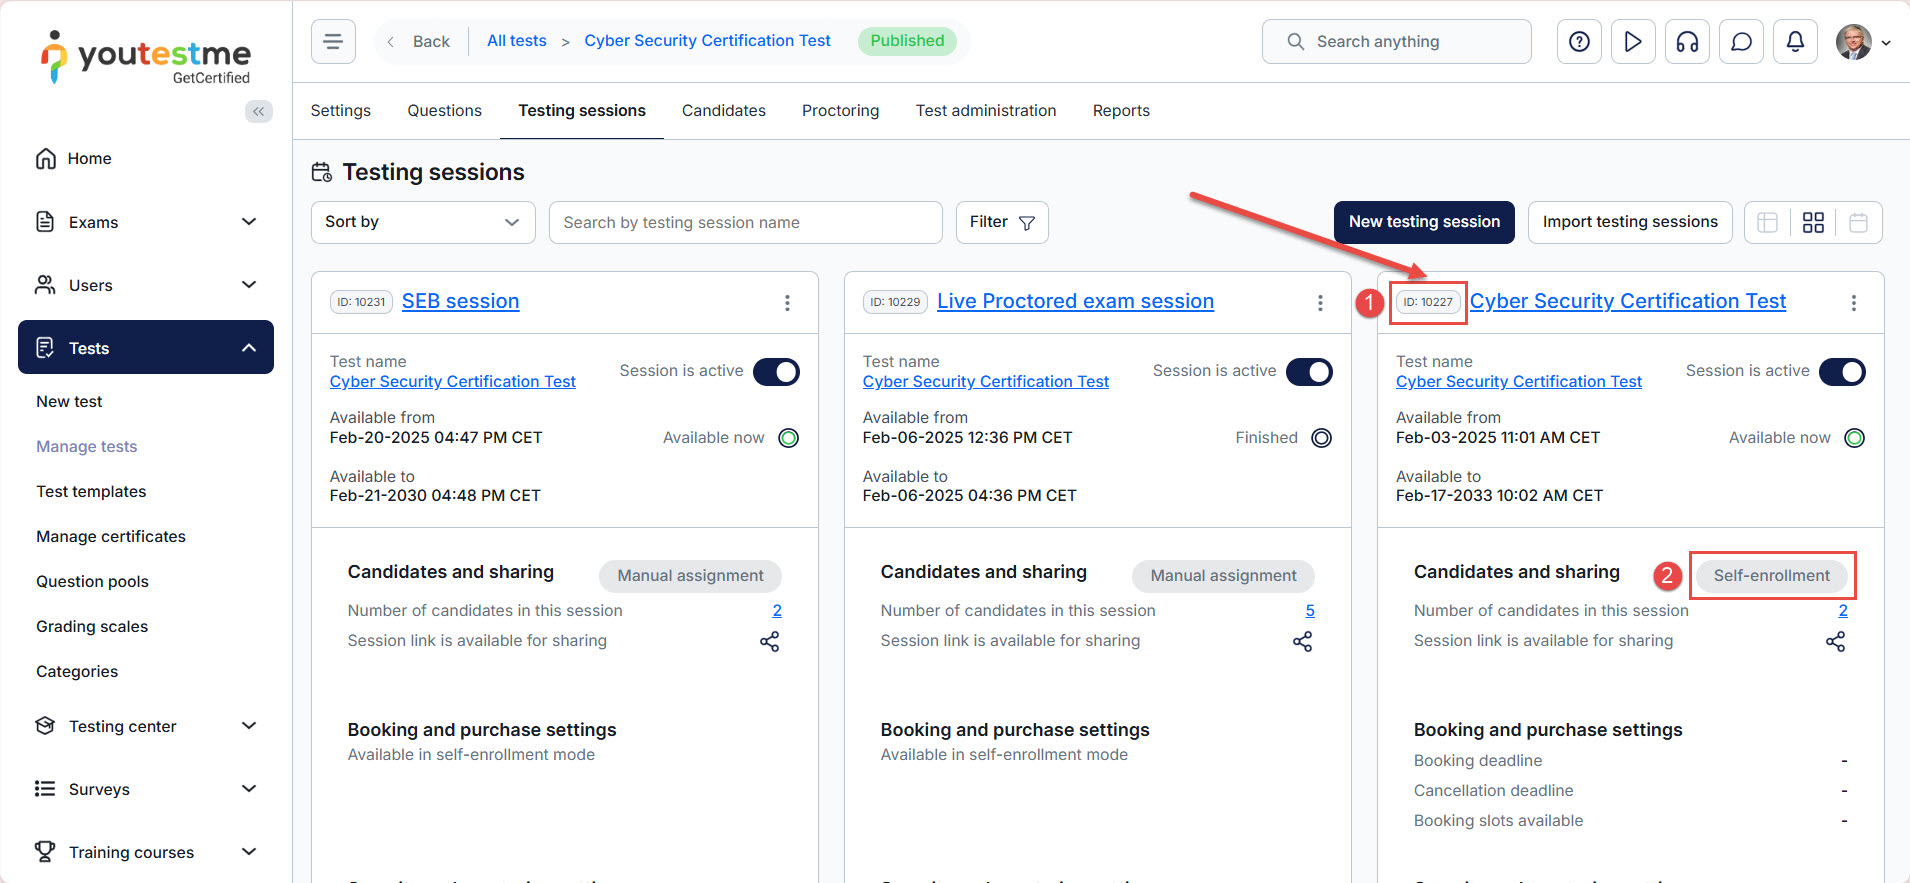
- After creating a testing session, you will utilize the session ID to integrate the test directly with Moodle.
- Activate the Allow Self-enrollment option while creating a testing session. In that way, candidates will be able to enroll in the test via Moodle.
Once you finish creating the test, it needs to be published so the candidates can start.
Configure Moodle Integration in YouTestMe
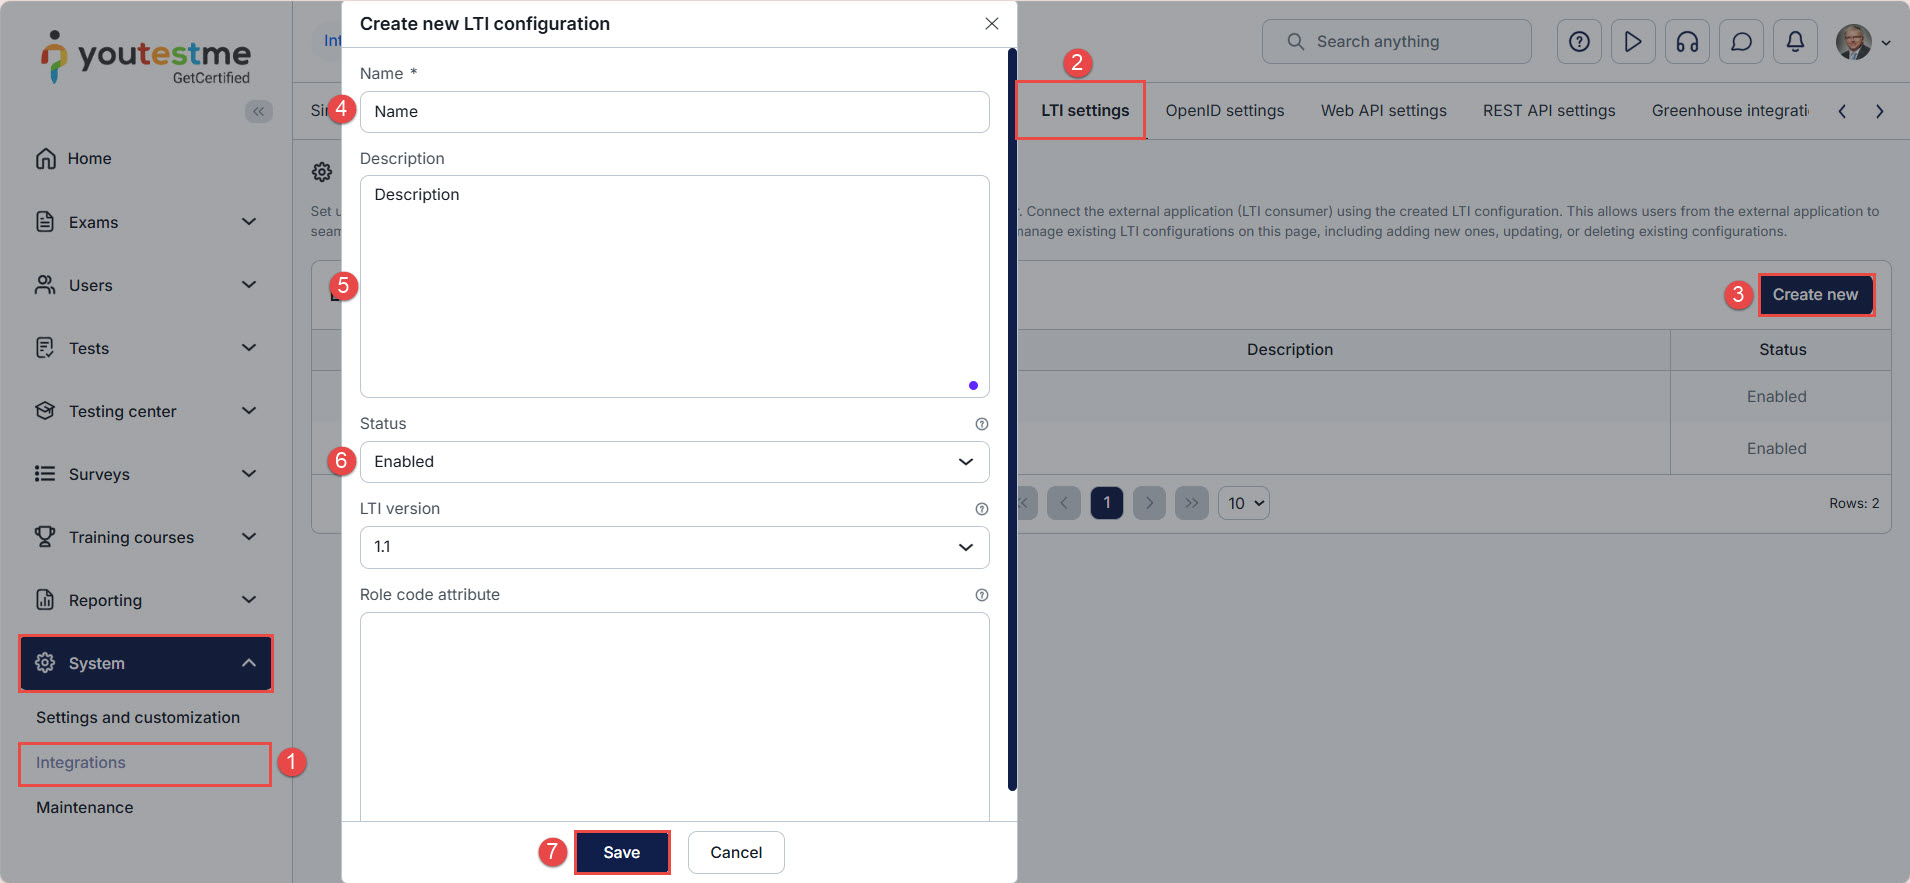
- Click on the System page and select Integrations.
- Navigate to the LTI settings tab.
- Click on the Create new button.
- When the pop-up window appears, enter the name of the new LTI configuration.
- Optionally add description.
- Set status to Enabled.
- Click on the Save button.
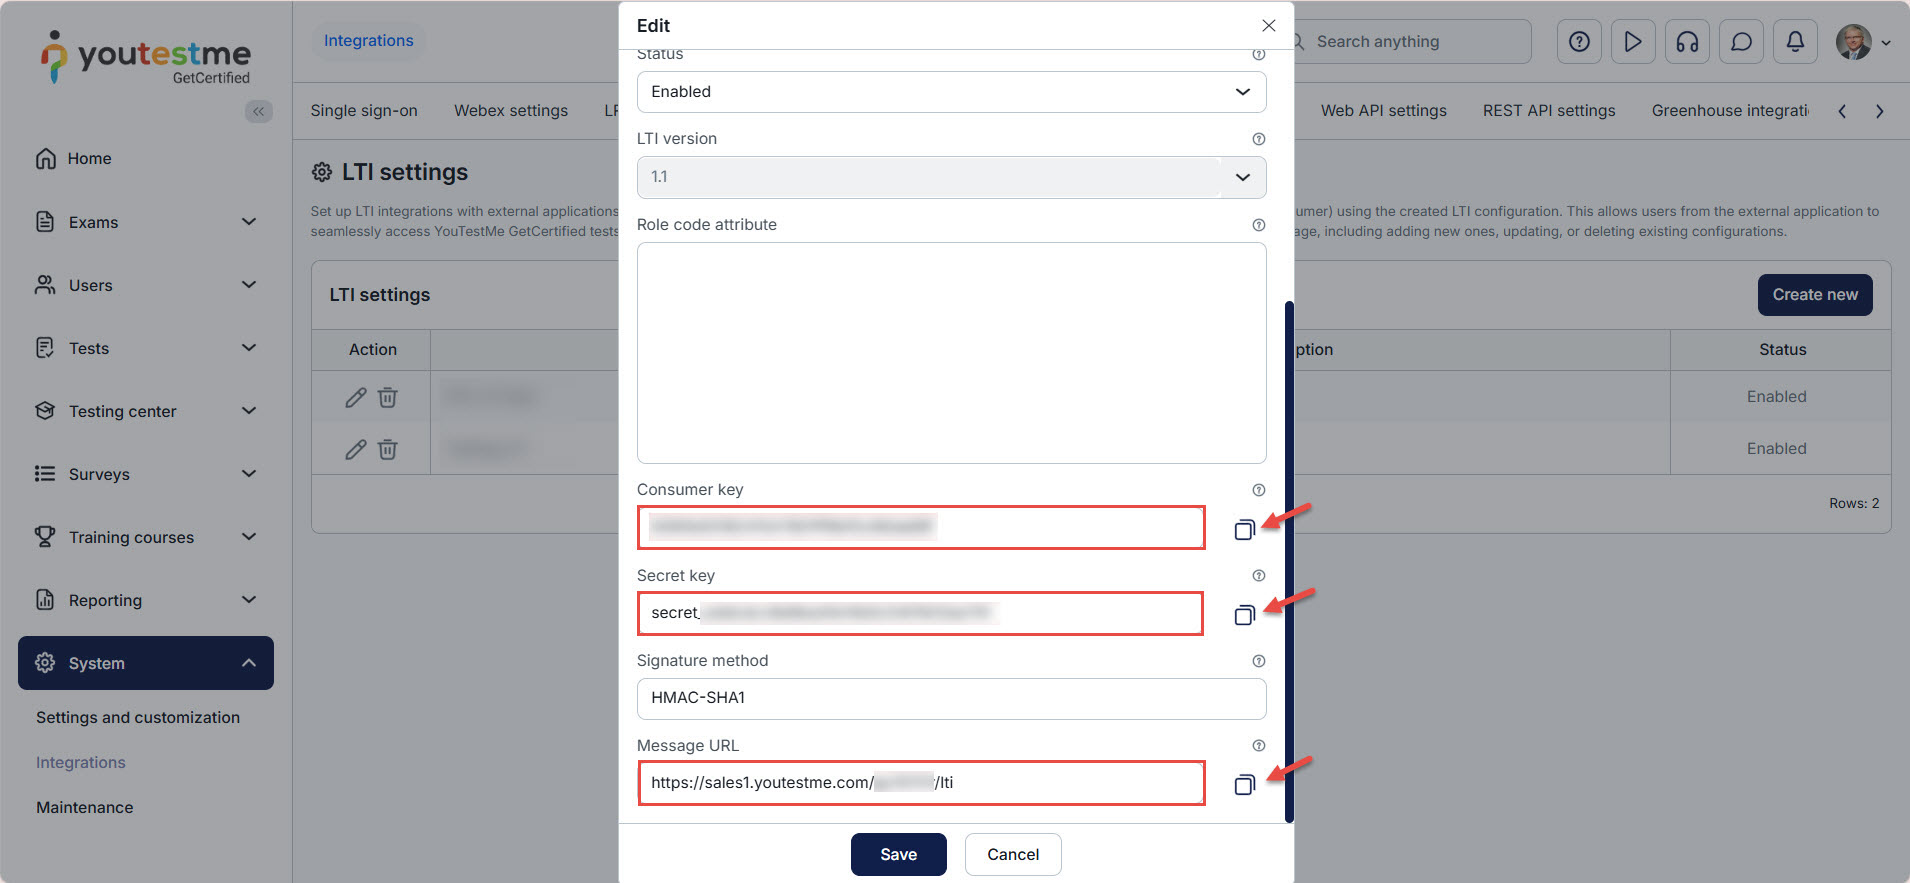
After saving the integration, click on the edit pen icon to access the parameters. The Consumer key, Secret key, and Message URL will be displayed, and this data will be used in the following steps.
Creating External Tool
Log in to your Moodle account and follow these steps:
- Enable Edit mode.
- Navigate to the Site administration tab.
- Go to the Plugins tab.
- Select the Manage tools option.
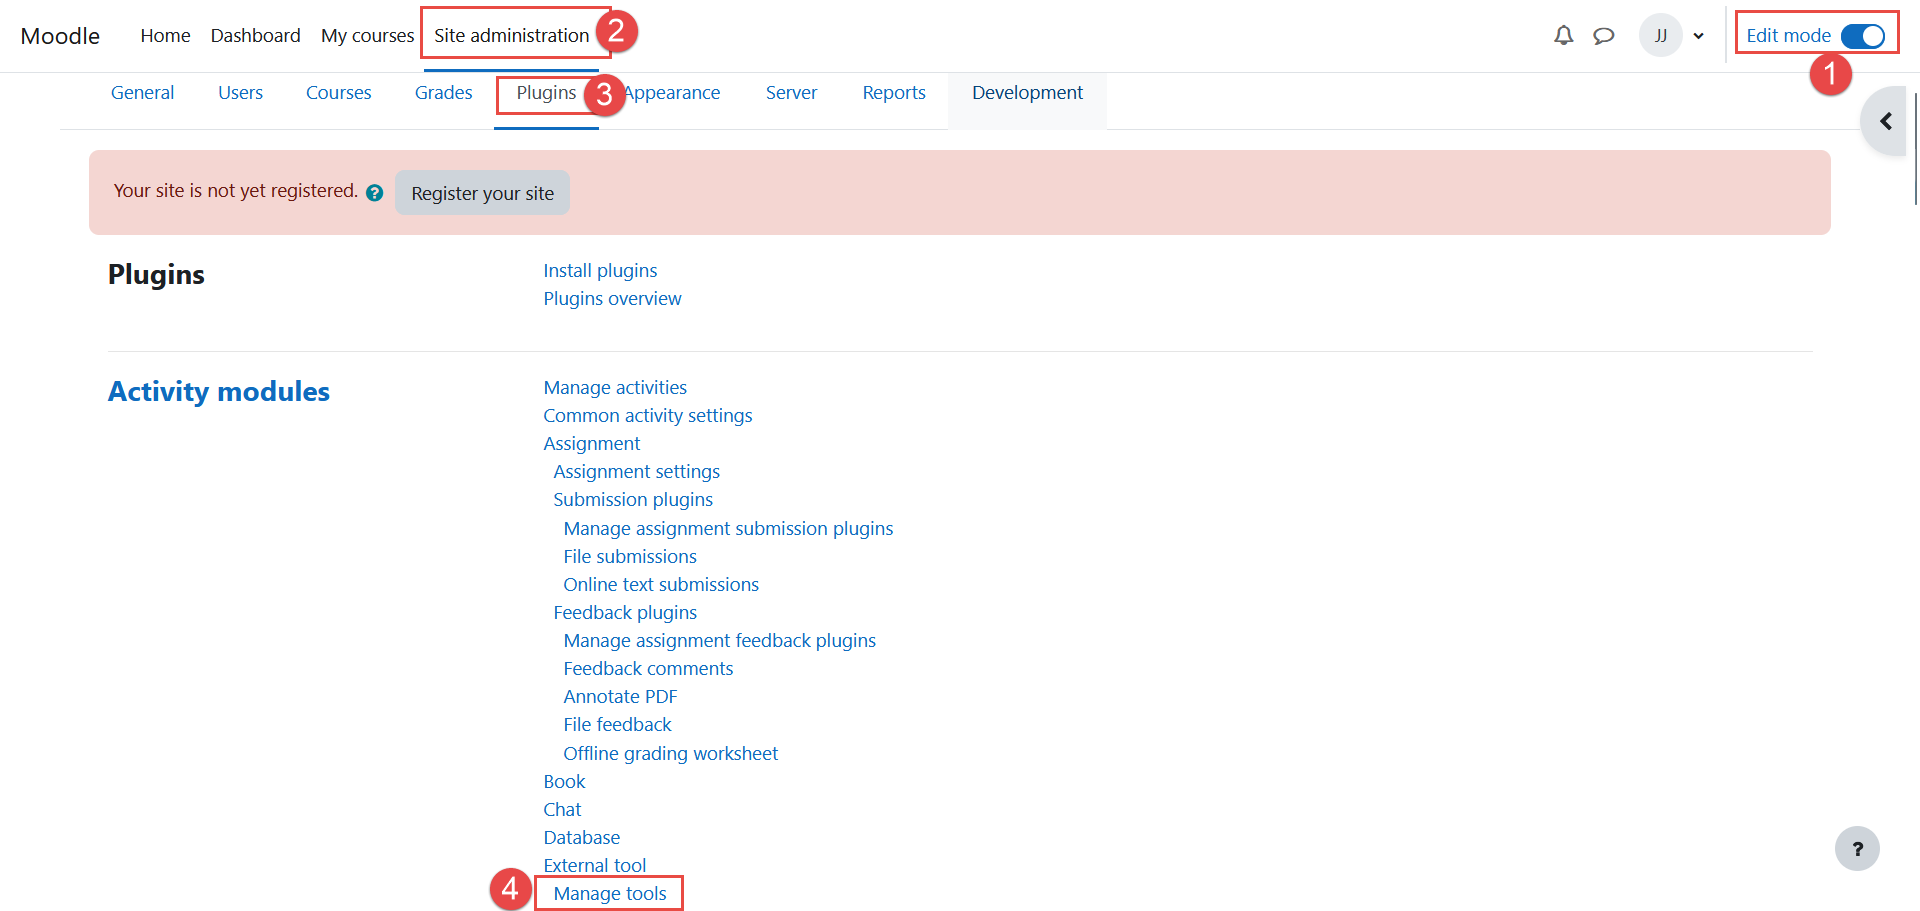
A page will open where you need to click on the Configure a tool manually option to create an LTI integration with the YTM application.

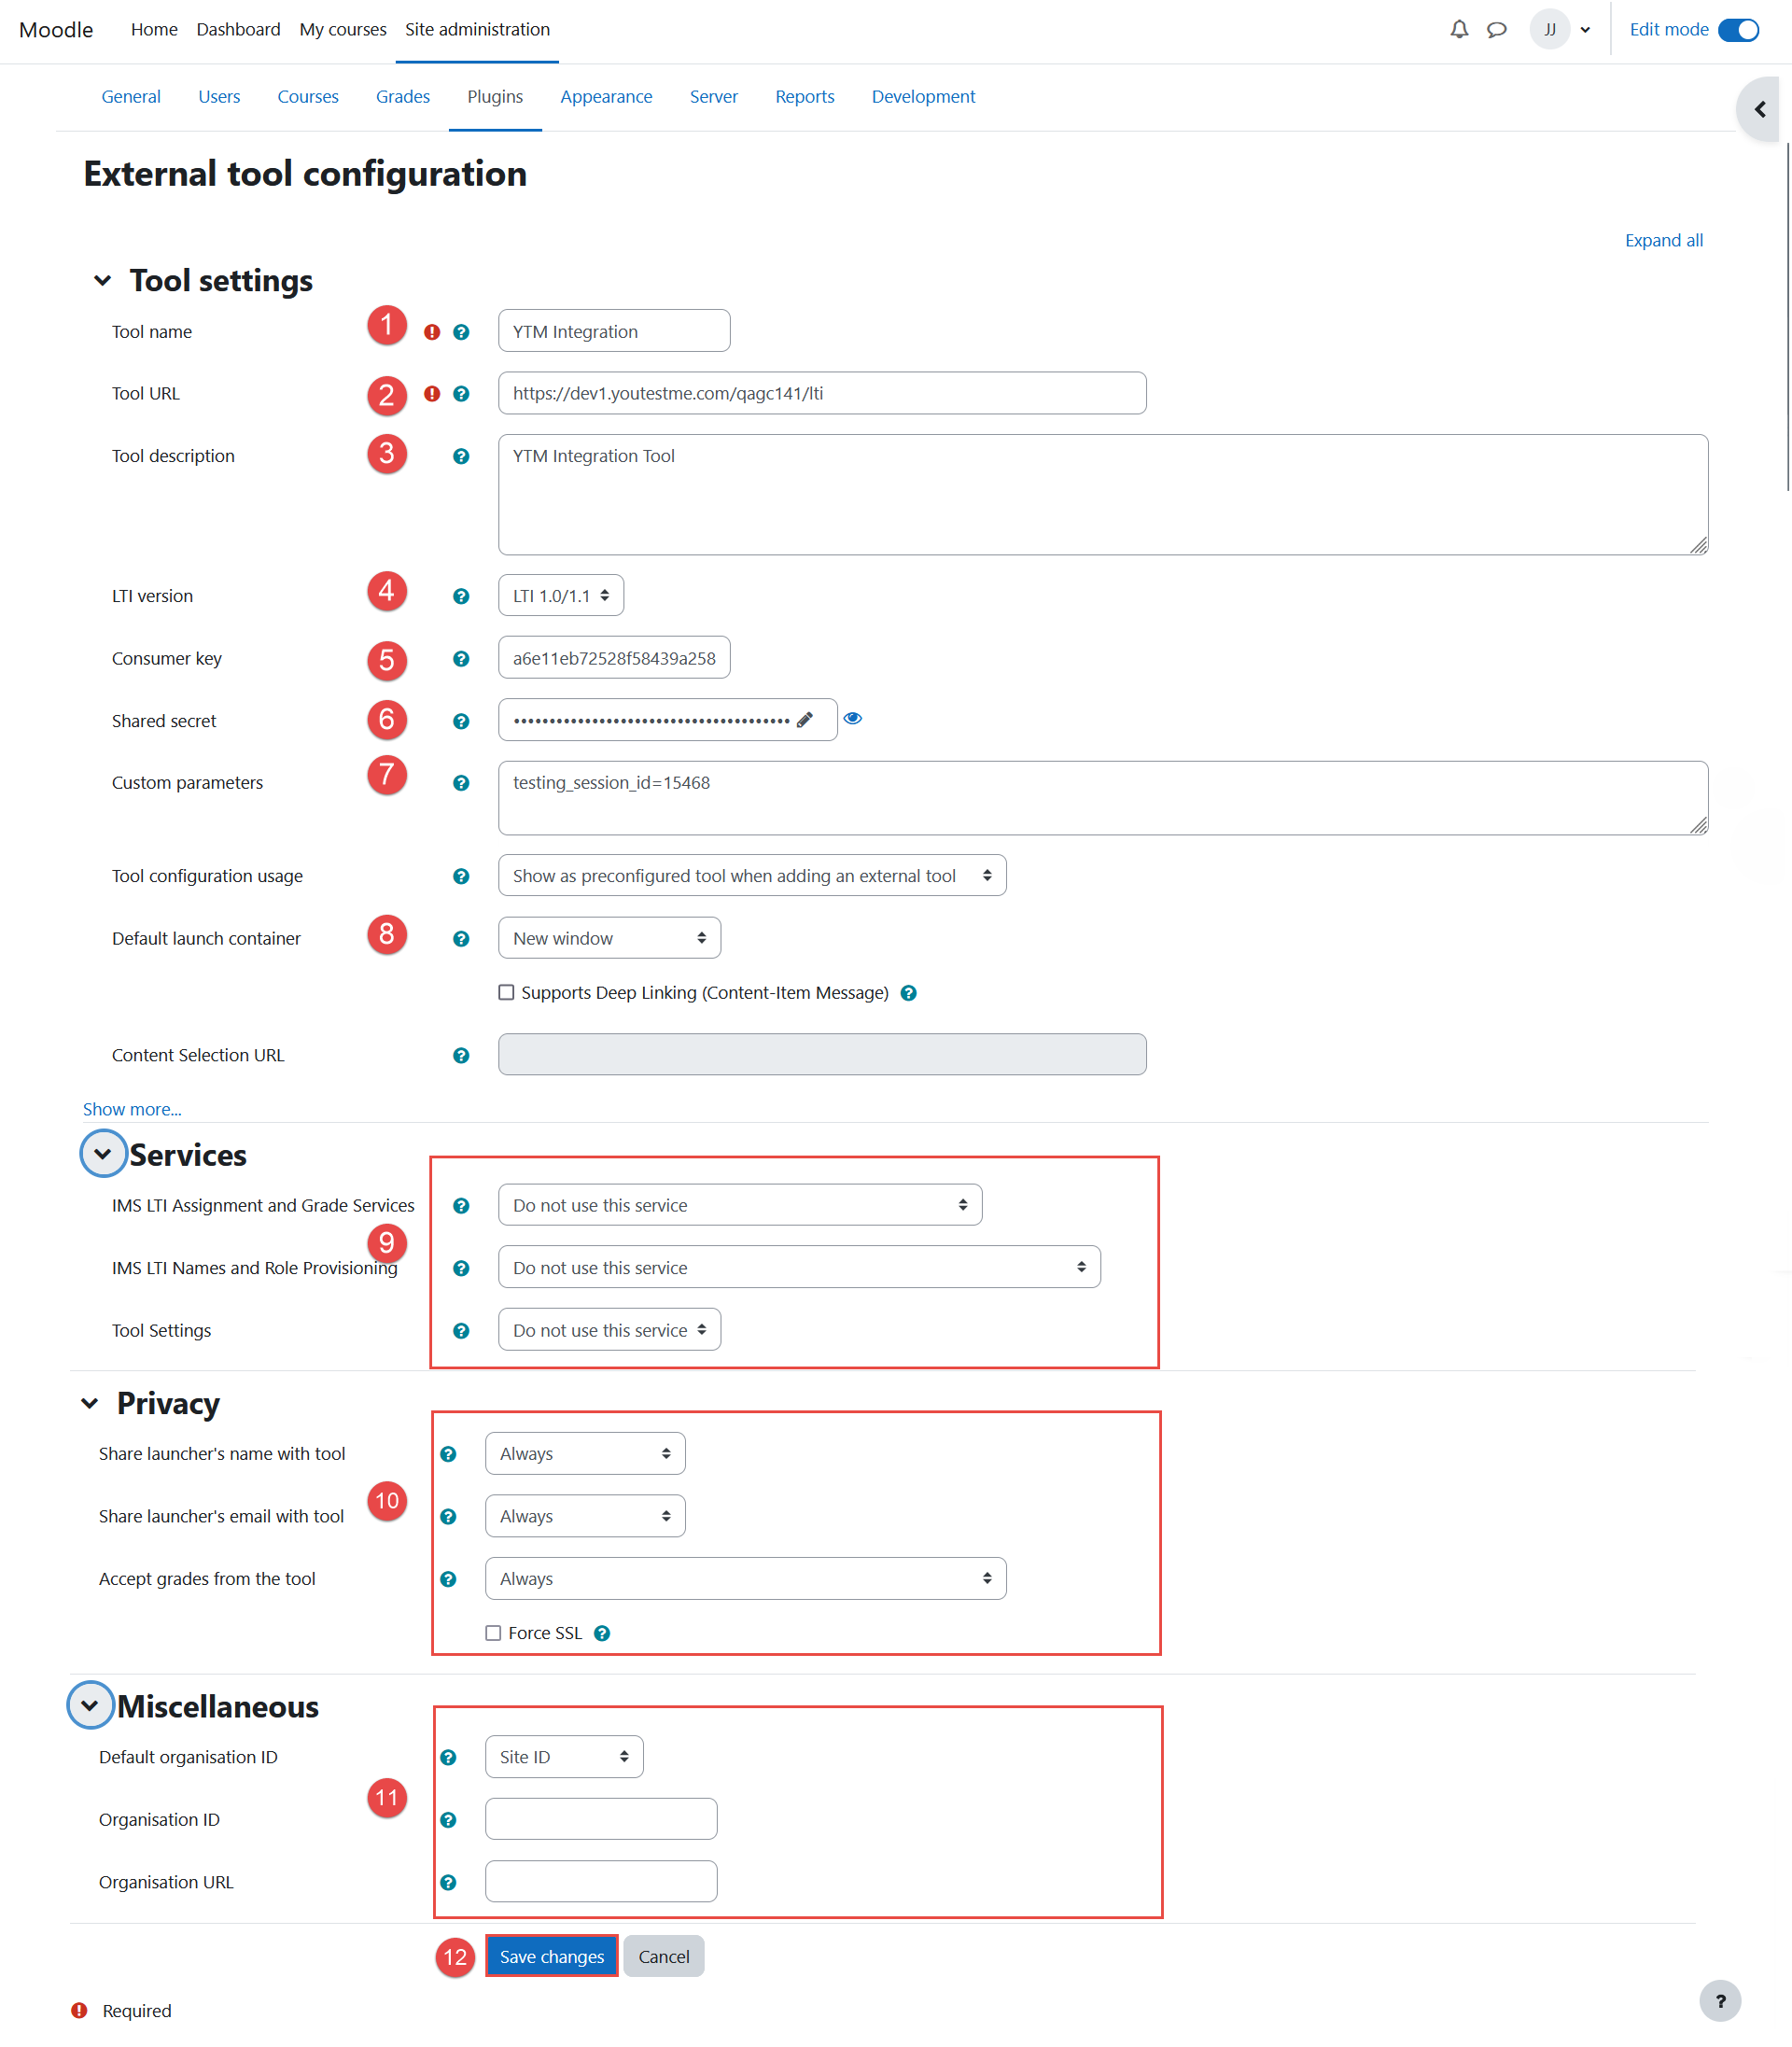
External Tool Configuration
- Provide a name for the tool.
- Copy the Message URL from the YouTestMe application and paste it into the Tool URL field.
- Add an optional brief description for the tool, denoting the version or context of its use.
- Keep the LTI Version set to LTI 1.0 as displayed. That is the version that specifies the compatibility standards for integration.
- Copy the Consumer key from the YouTestMe application and paste it into the Consumer key field.
- Copy the Secret key from the YouTestMe application and paste it into the Shared secret field.
- In the Custom parameters field, enter ‘testing_session_id=‘ and paste the ID of the testing session created in YouTestMe.
- The preferred method for displaying the tool is, in this case, opening it in a new browser window.
- Under Services, make sure to choose the values from the image below.
- Under Privacy, make sure to choose the values from the image below.
- Under Miscellaneous, make sure to choose the values from the image below.
- Click Save changes.
Configuring Details in Moodle and Establishing the Connection to YTM Test
- Navigate to the My courses module.
- Click to enable editing mode.
- With editing mode enabled, select the Option icon.
- Select the New course button.

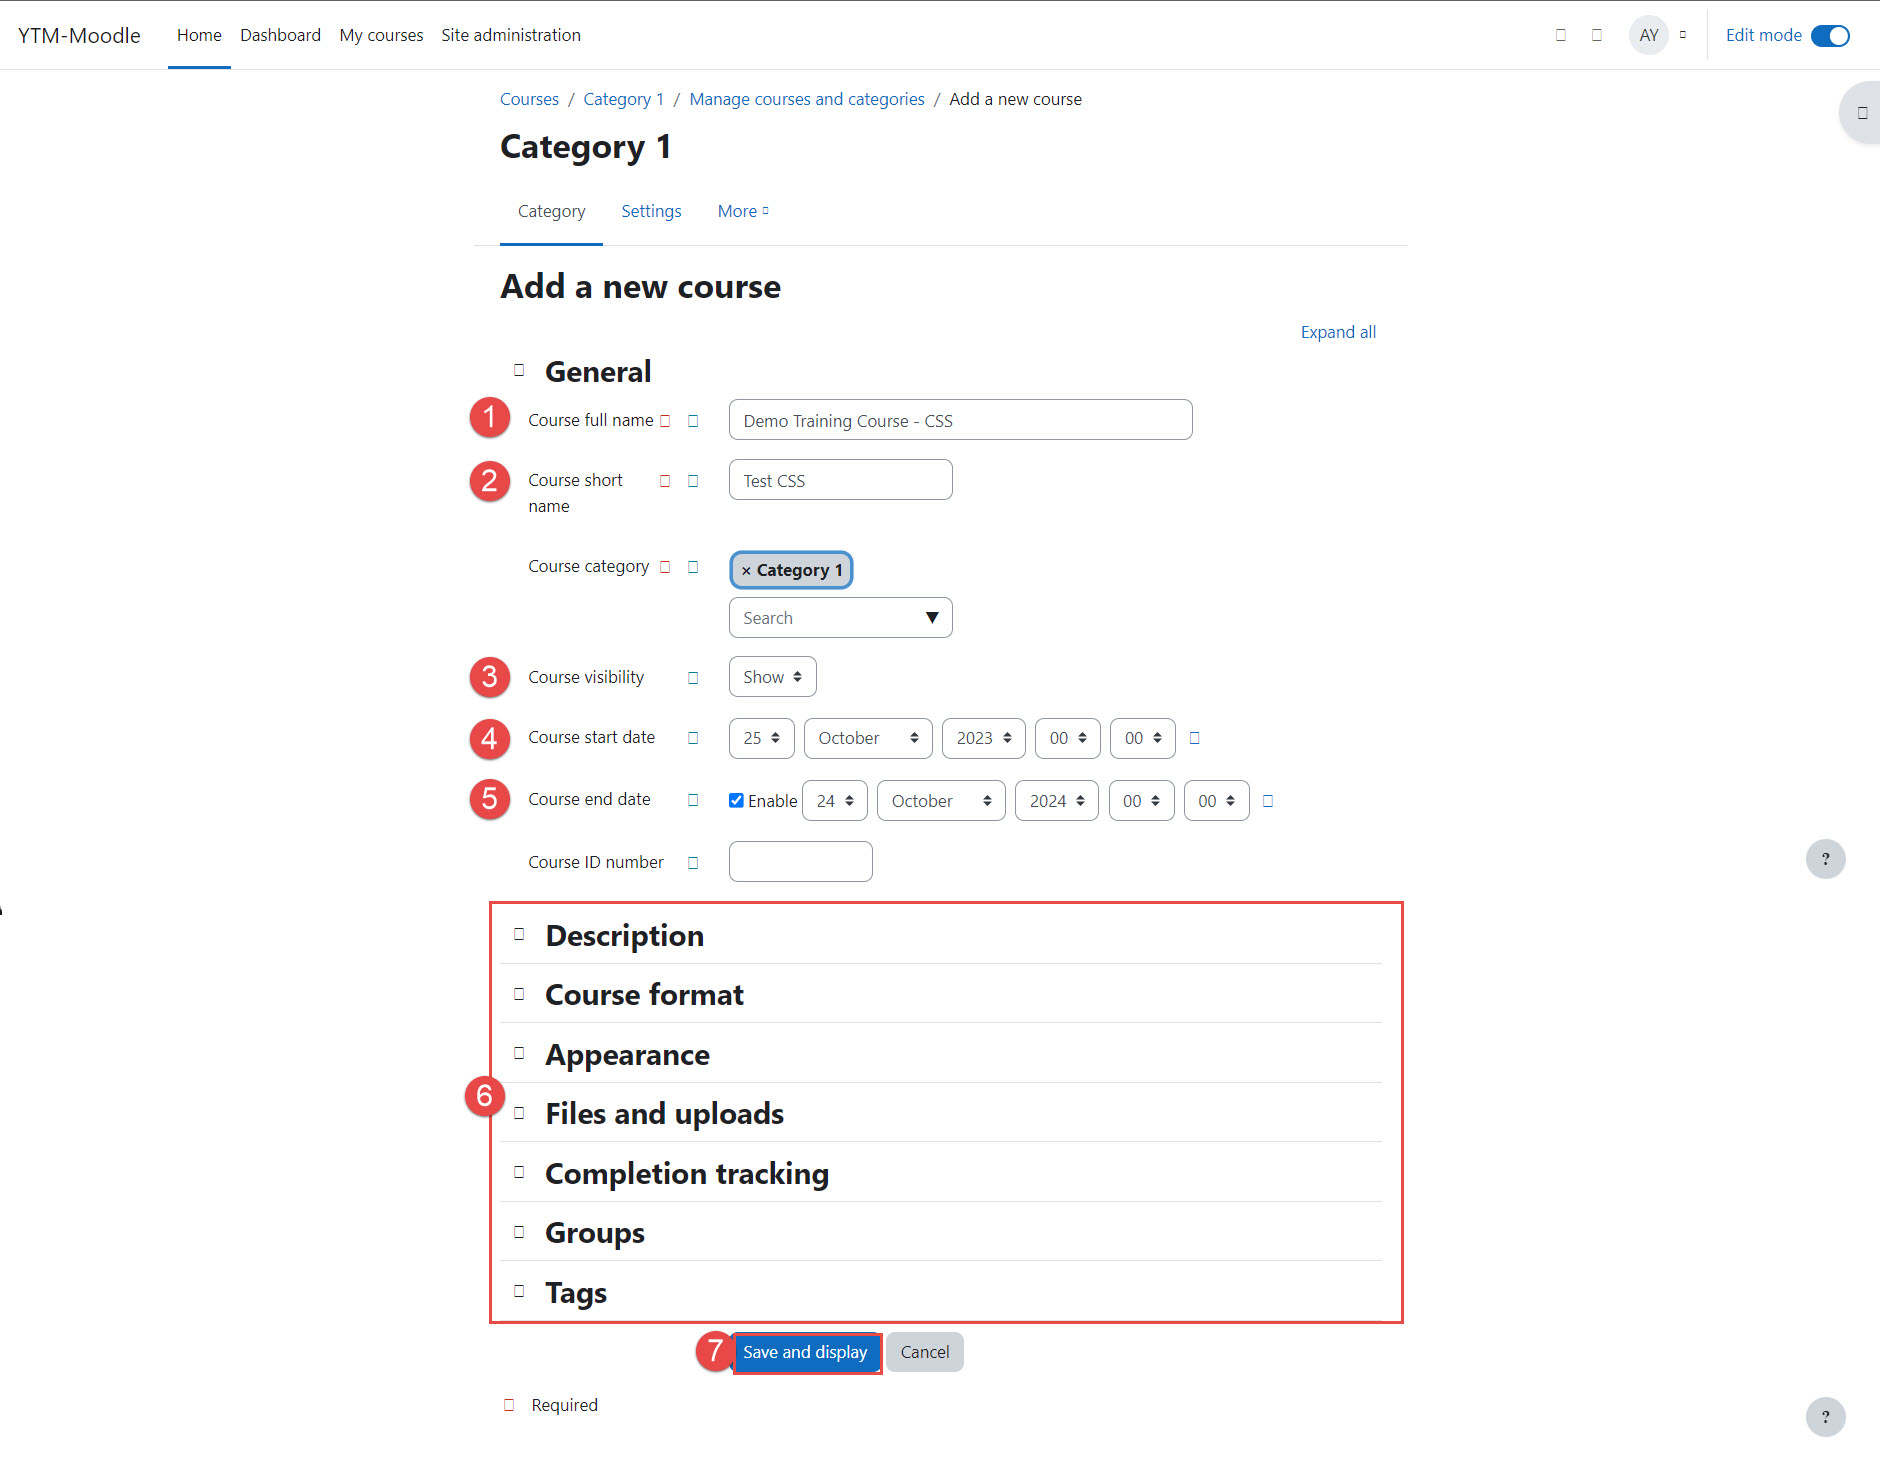
Add new course details by:
- Providing a full name.
- Entering a short name.
- Optionally selecting course visibility.
- Optionally specifying the course’s start date.
- Optionally specifying the course’s end date.
- Check and modify any other optional additional information as needed.
- Click on the Save and display button to save the course settings.
Adding a new External tool to Activity
After creation, the new training course should be visible, and you should proceed with the setup by clicking on the Add an activity or resource:
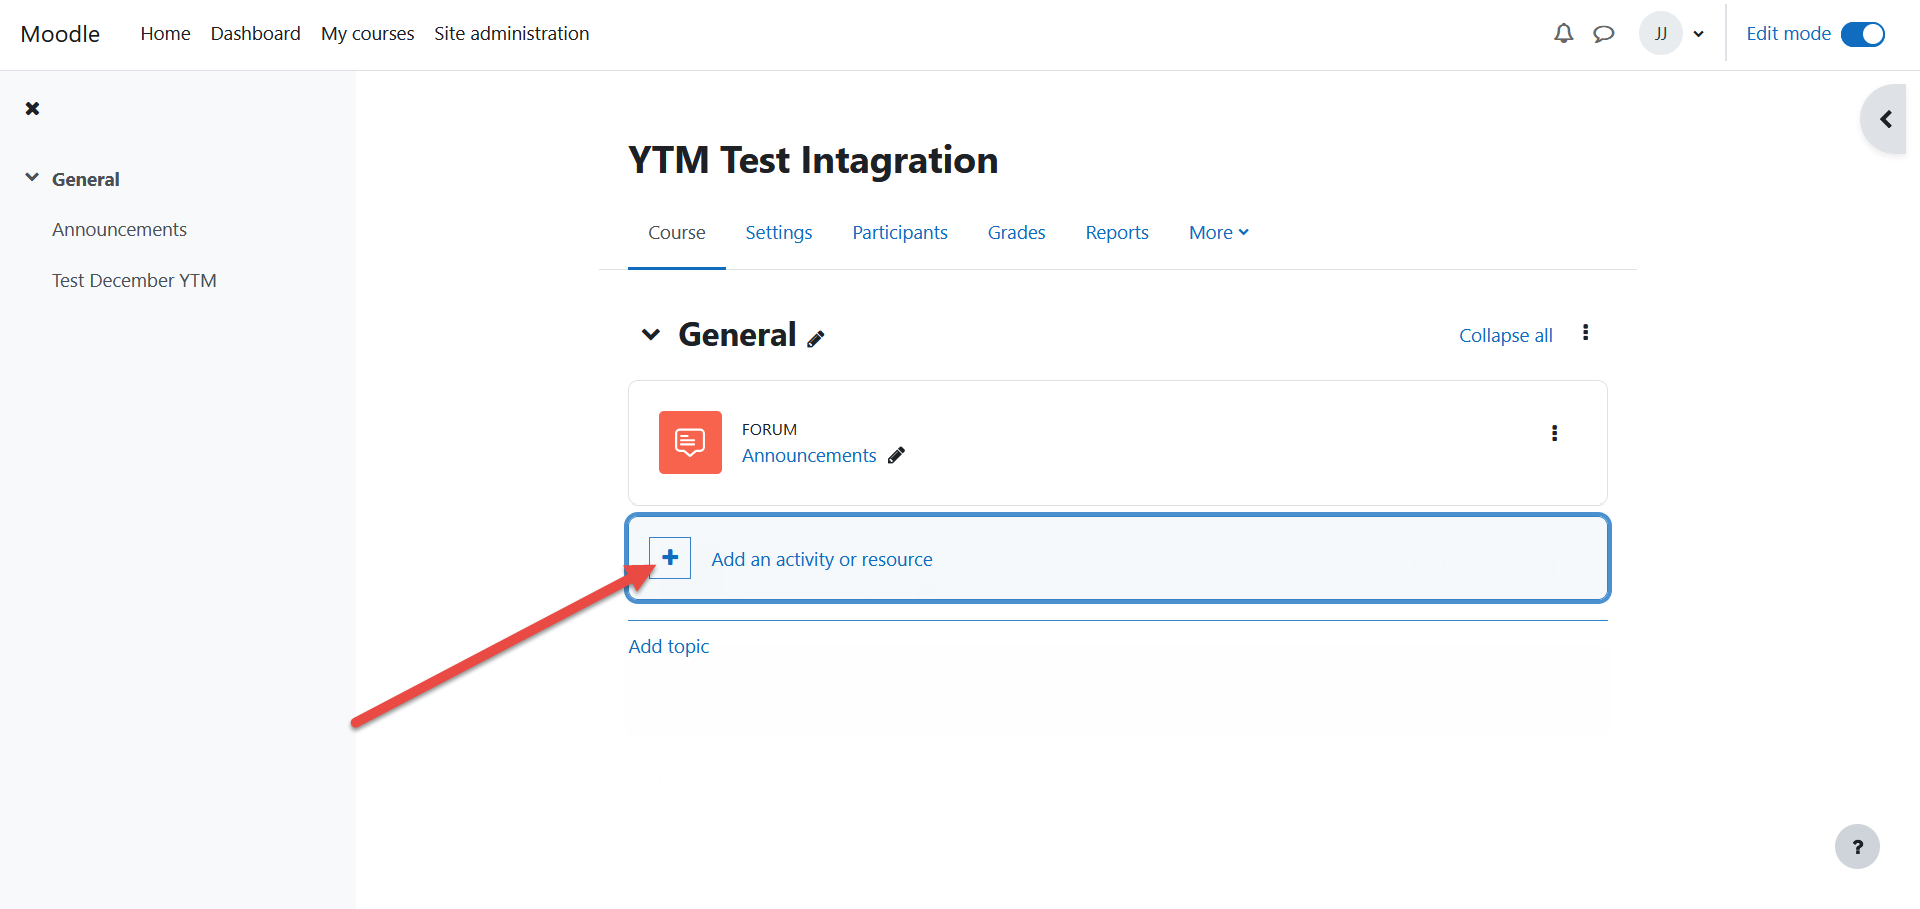
Choose the External tool option.

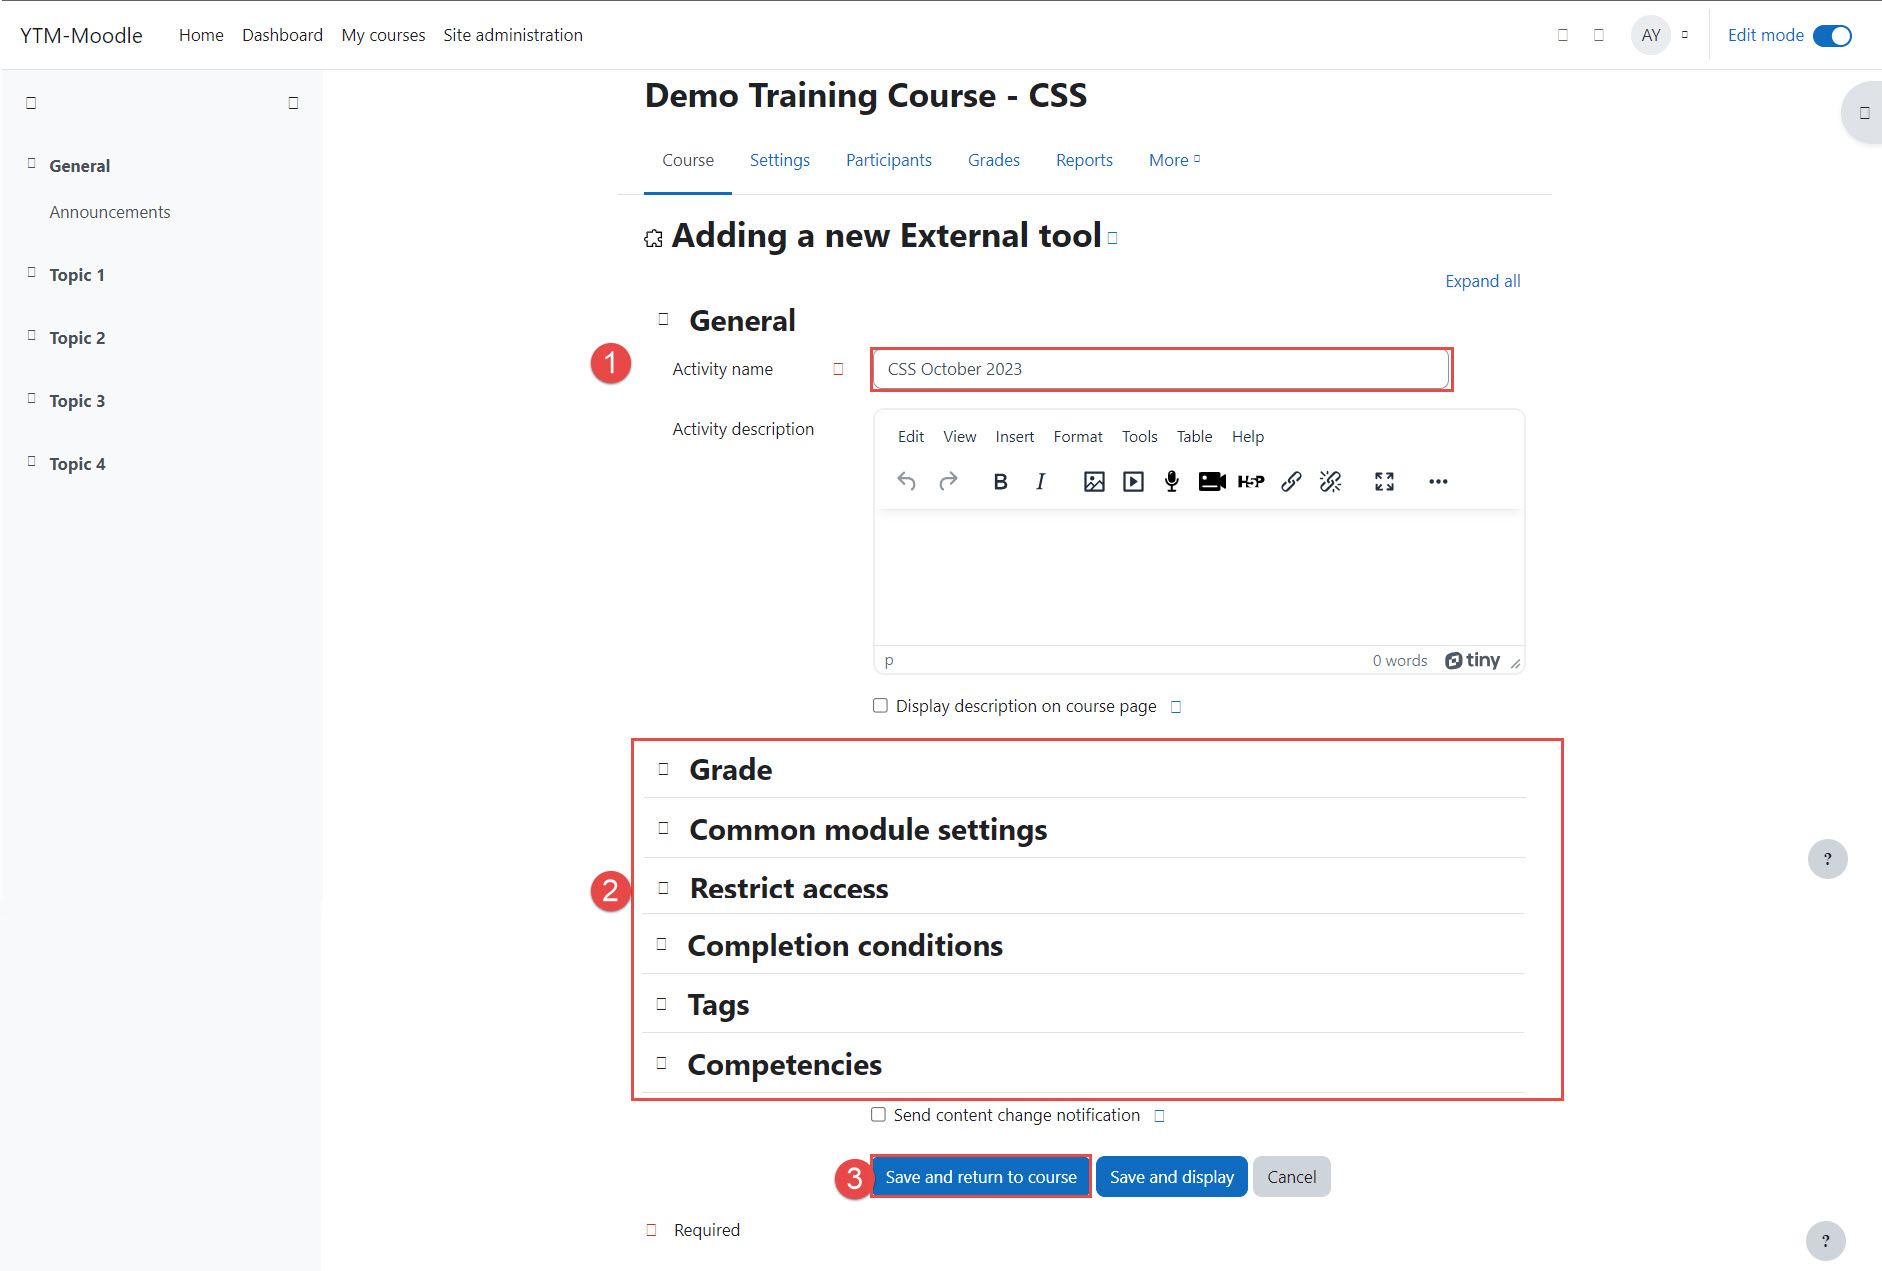
On this page:
- Add activity name.
- Choose a previously created External tool.
- Check and modify any other optional additional information as needed.
- Click on the Save and return to course button to save the settings.

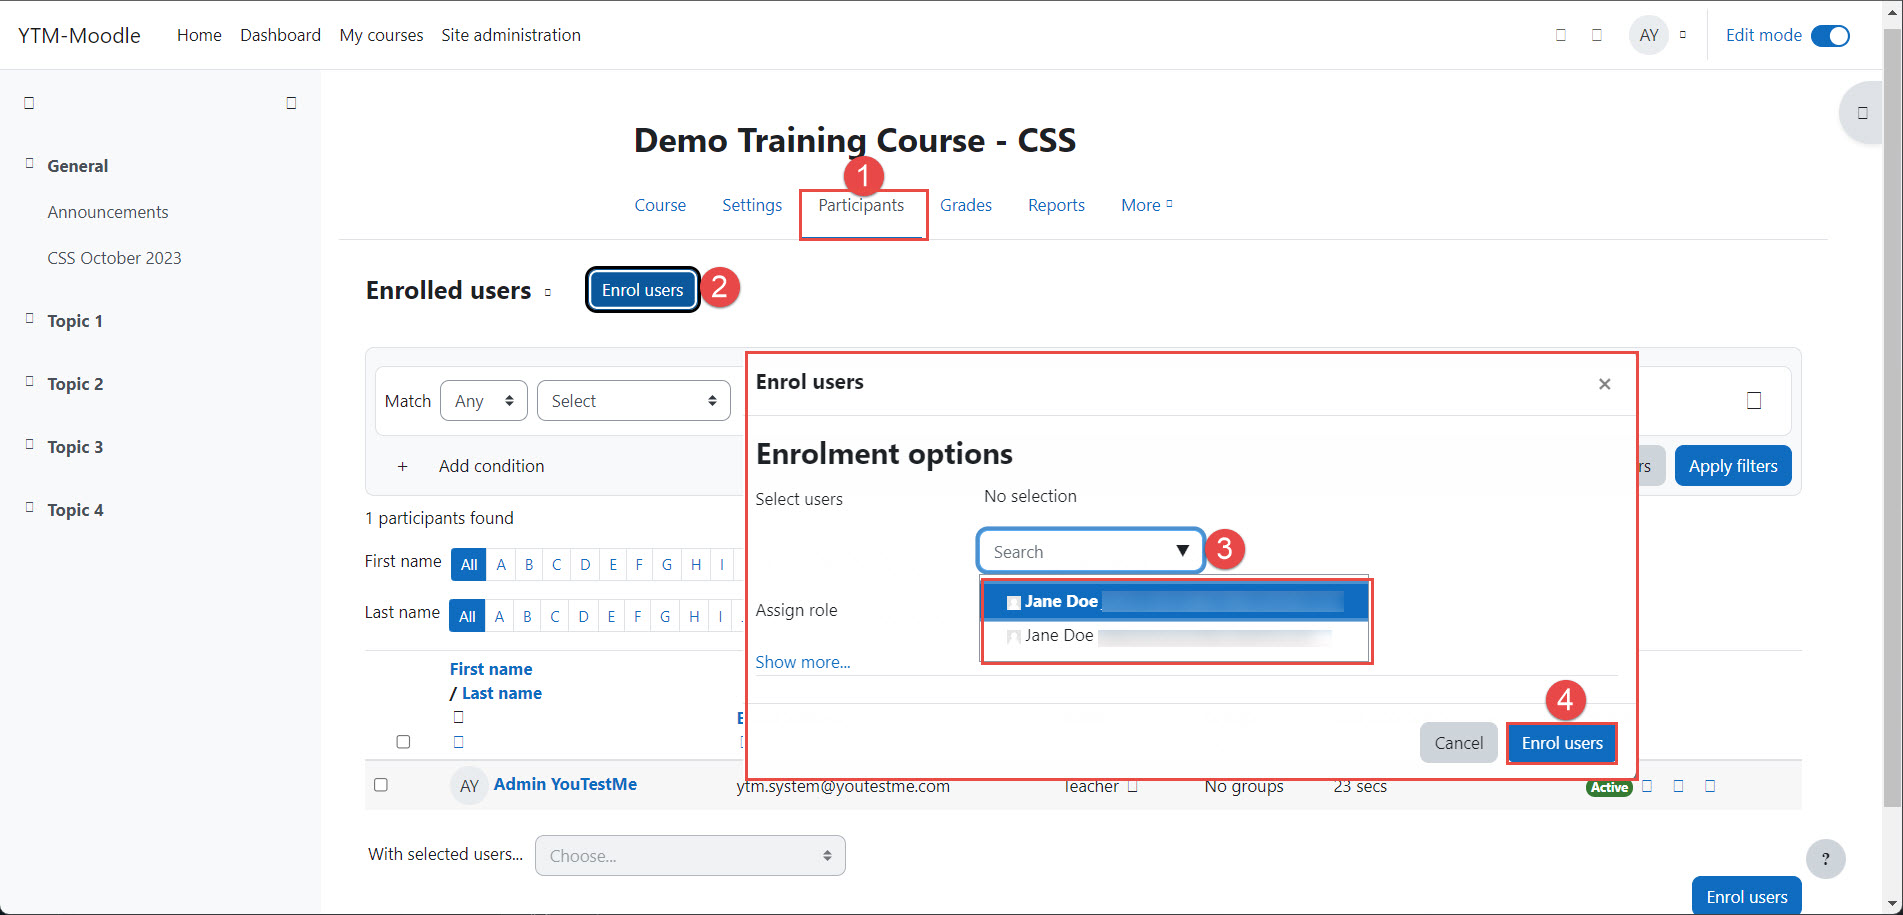
Enroll Candidates
- Click on the Participants tab.
- Click on the Enroll users button.
- Once the pop-up window appears, choose the desired users for the test.
- Click on the Enroll users confirmation button.
Candidate’s Perspective
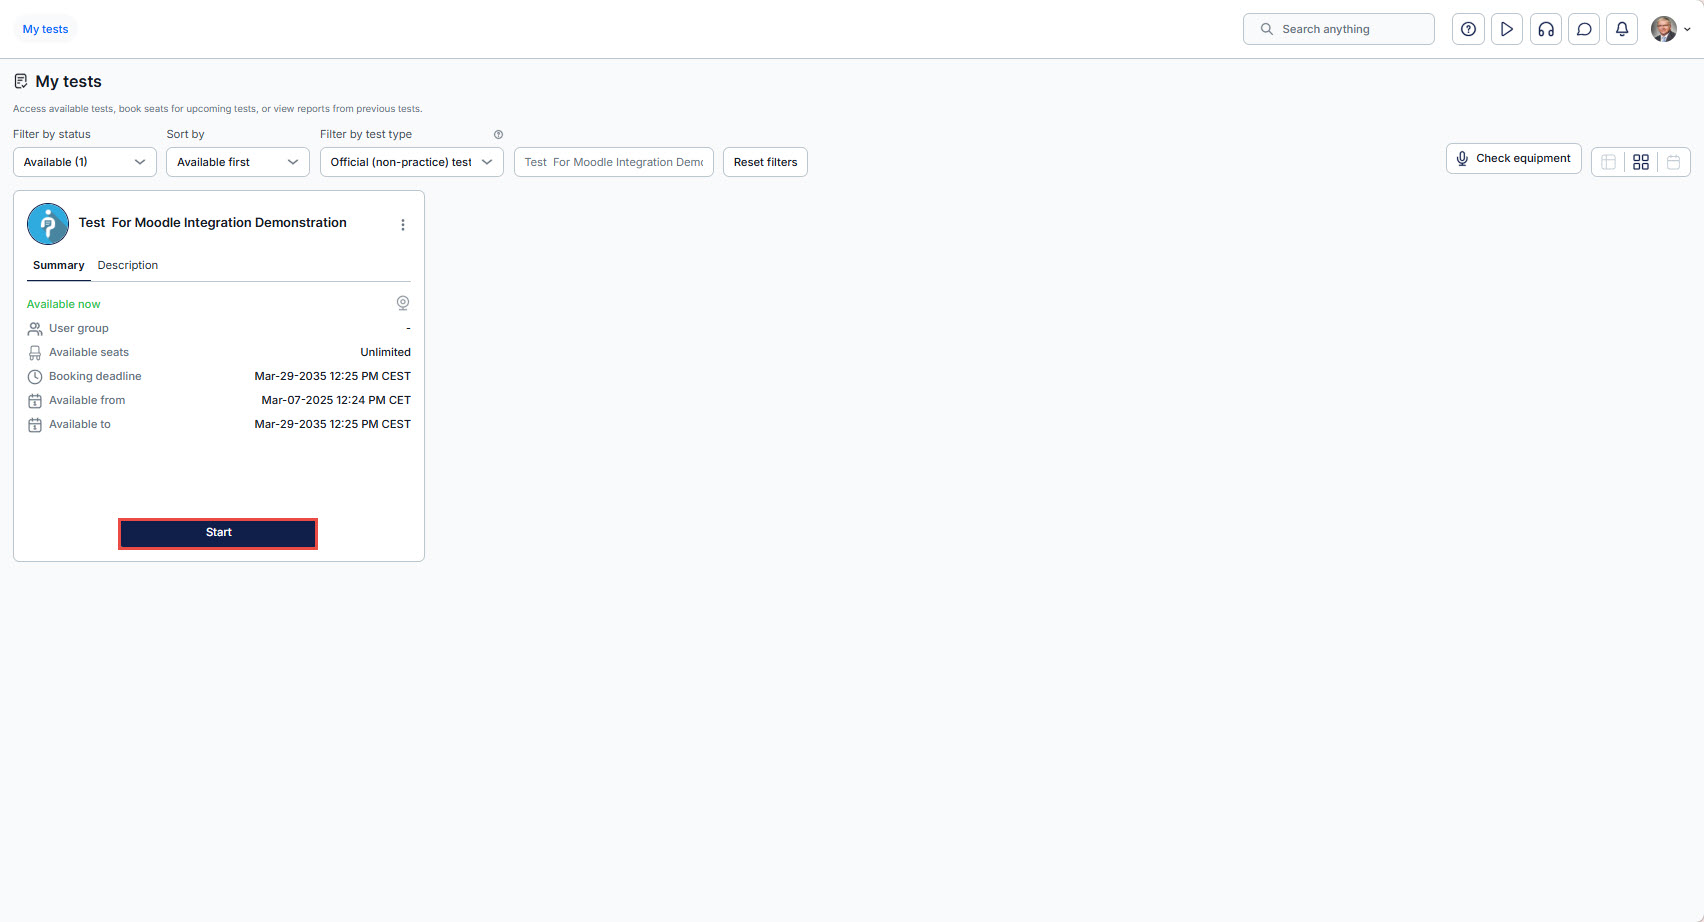
Candidates will be able to locate the course you’ve created on the My courses page and enter it.

Candidates can begin the test by clicking on the Start button.
By integrating YouTestMe with Moodle, candidates can benefit from taking well-designed tests created on the YouTestMe platform, resulting in an enhanced user experience and seamless use of Moodle.
