
Article verified for Release 15.2 on January 19, 2025.
The Special request option enables users to request specific documents or information from candidates at any point, both before and after a test. This article explains how instructors, proctors, and support can send special requests to candidates, such as re-uploading their ID verification photos within a defined period.
For example, before a test, candidates must submit their IDs. However, immediate verification by the proctor is impossible, and the process occurs afterward. If the proctor considers the provided ID invalid, they can use the special request option to request an updated, valid ID from the candidate. This prevents the test attempt from being canceled due to an invalid ID.
Sending a special request
To send a special request to the candidate:
- Navigate to Testing sessions from the Testing center page.
- Enter the desired testing sessions by clicking on the number of candidates.
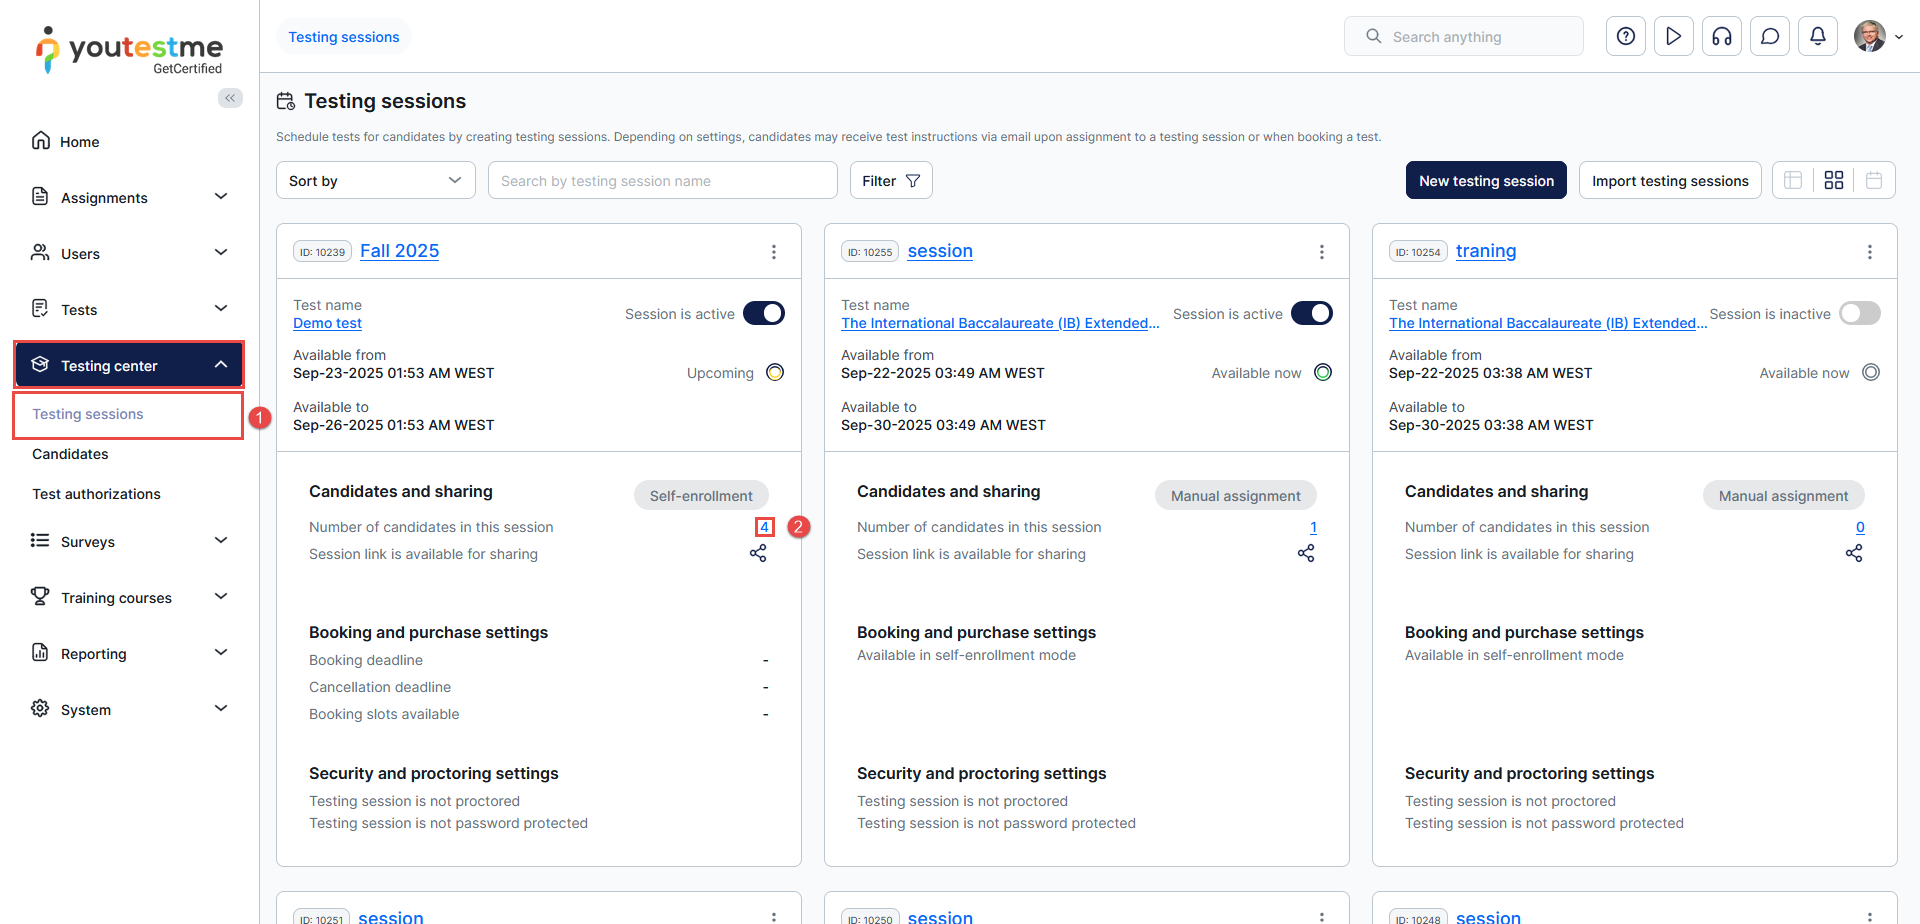
Then:
- Navigate to the Proctoring tab.
- For the desired candidate, click on the three dots.
- Select the Create or edit special requests option.
- A special requests pop-up dialog should appear.
- Click the Create request button.
- A new pop-up dialog should appear where you should enter the message that will be sent to the candidate.
- Send the message.
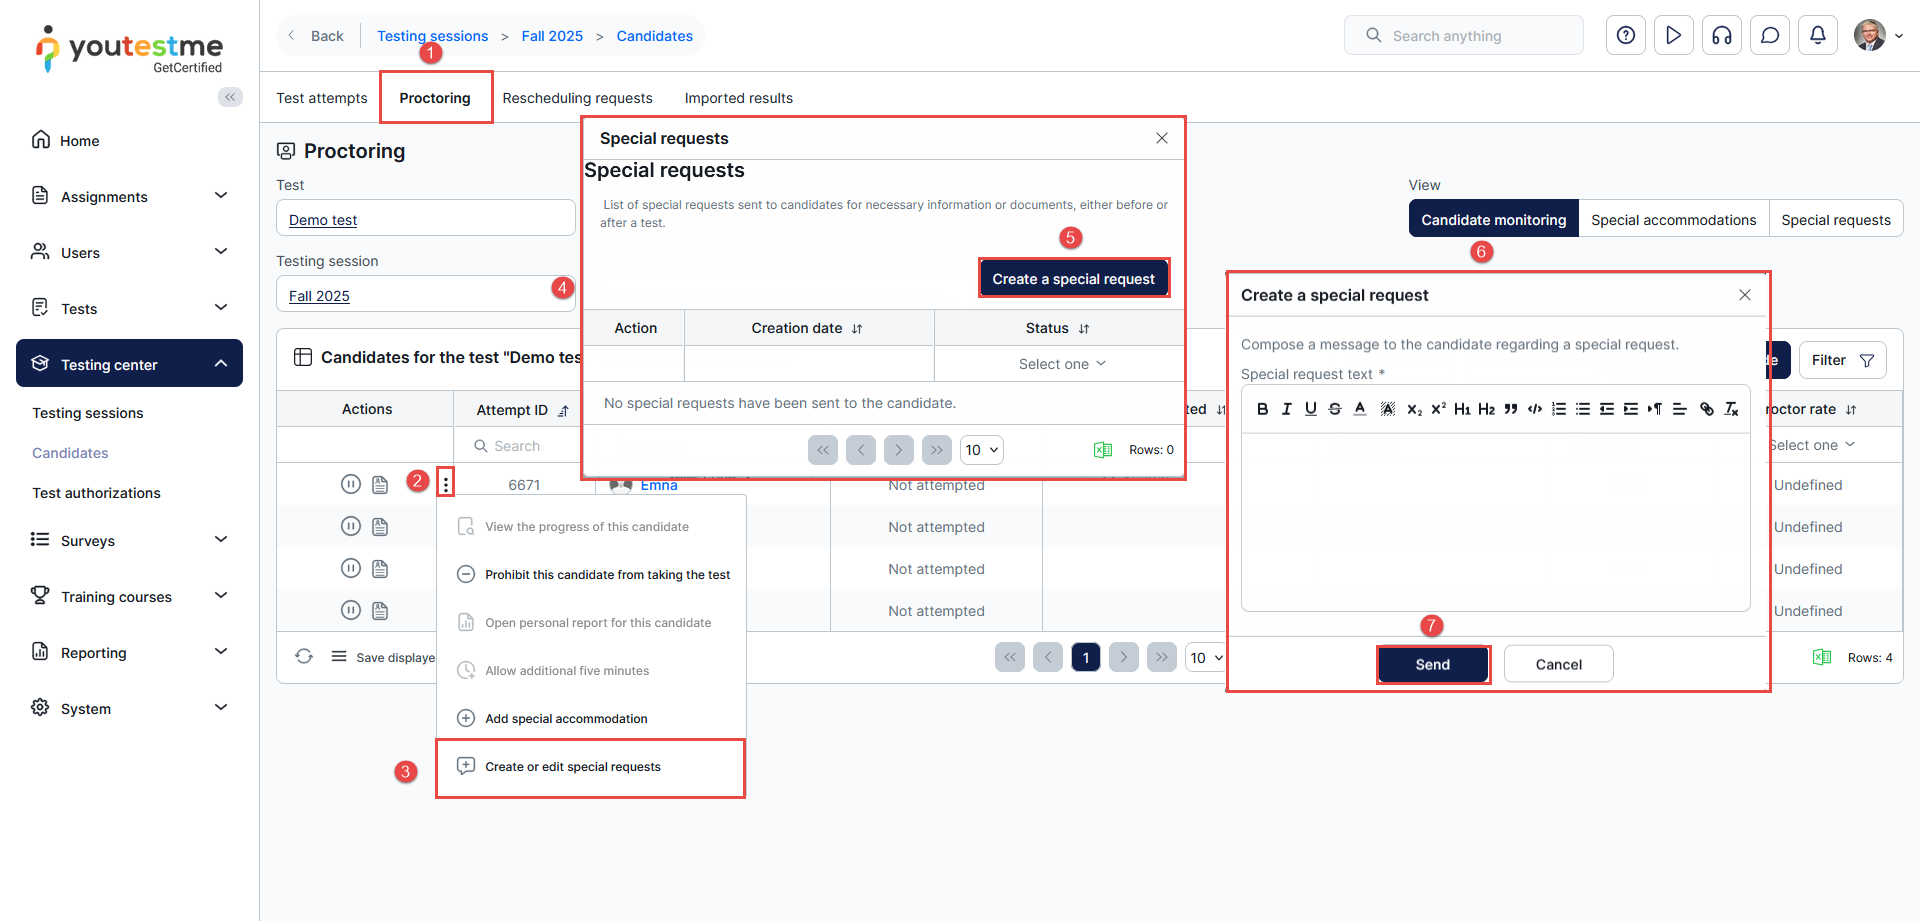
This action will result in the following:
- A special request will be created with the Pending response status.
- The candidate will receive an email notification informing them of the additional documentation or information they must provide to avoid invalidating their test attempt.
Responding to special request – Candidate’s perspective
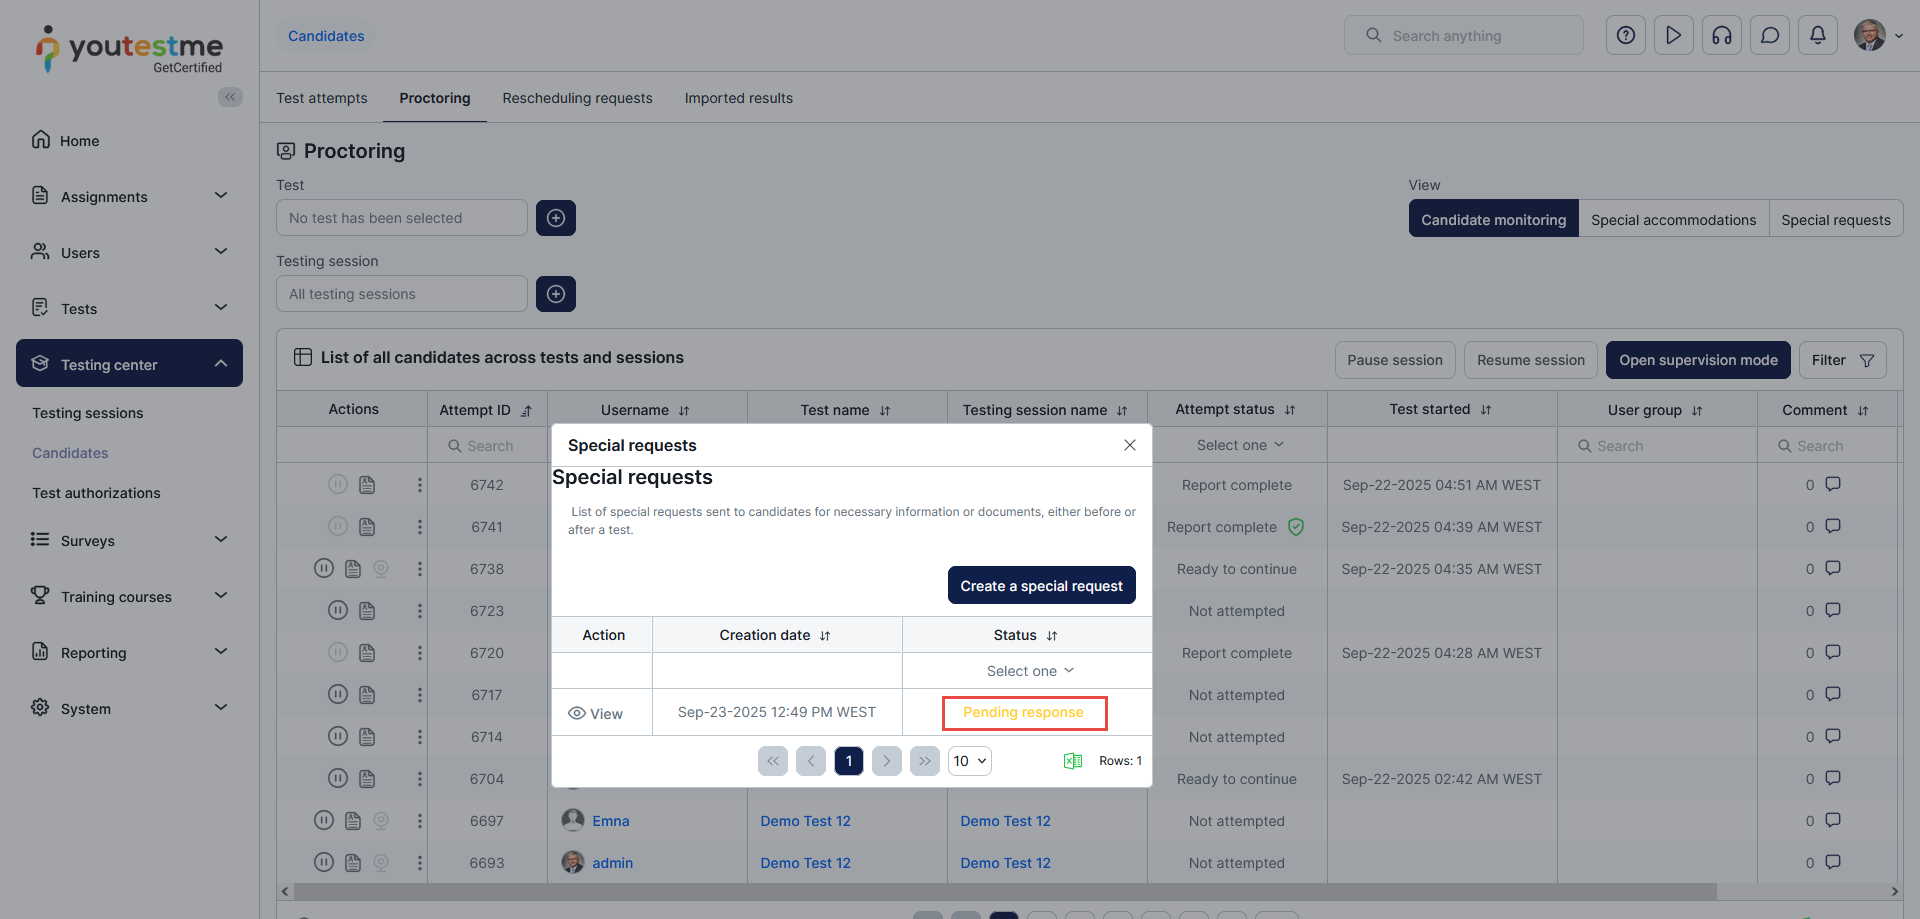
Once the request is sent to the candidate, they will receive an email notification informing them about it.
This email notification can be customized. For more information on how to do that, please read this article.
Example of email notification:
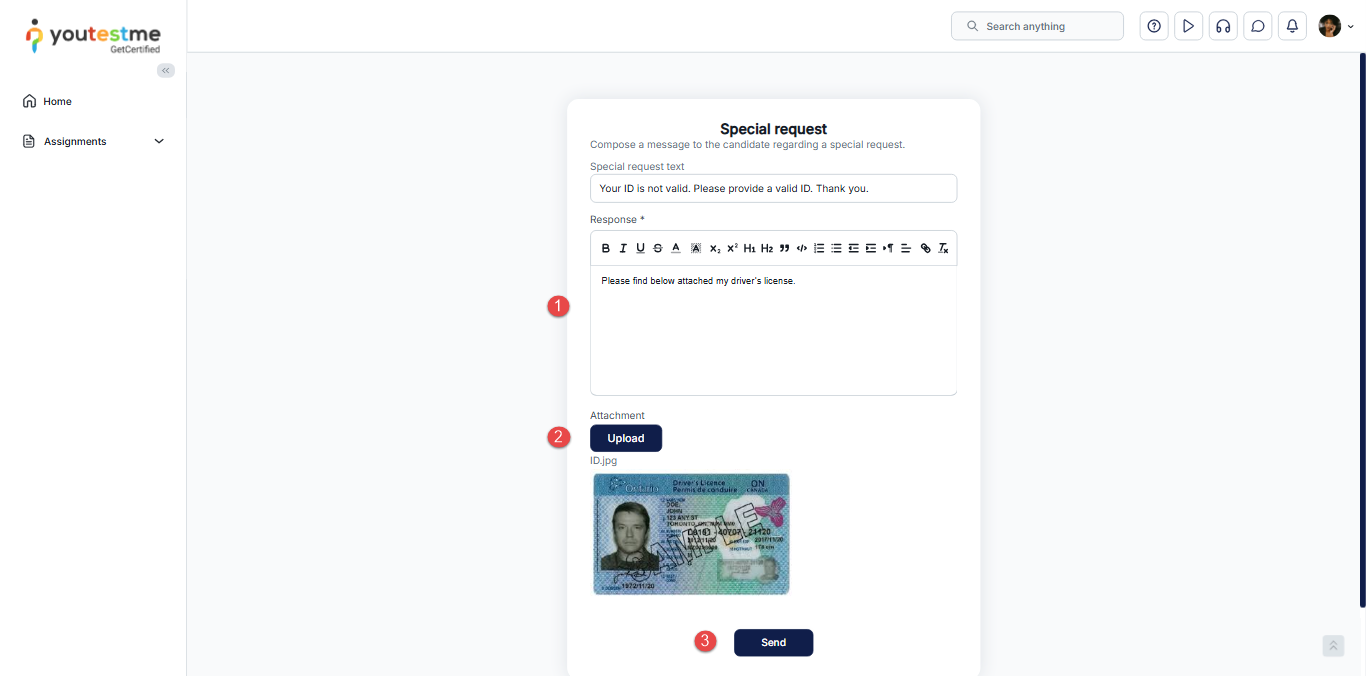
To respond to the special request, the candidate should click on the direct link from the email and do the following:
- Add the response.
- Upload a document (a valid ID, for example)
- Click on the Send button.
This action will result in the following:
- A special request will be updated with the Pending review status.
- The test proctor will receive an email notification that the candidate has responded to the request and requires review.
Resolving special request
After the request is submitted, the designated role responsible for handling such requests (typically the proctor) will receive an email notification to inform them about the response.
Example of email notification:

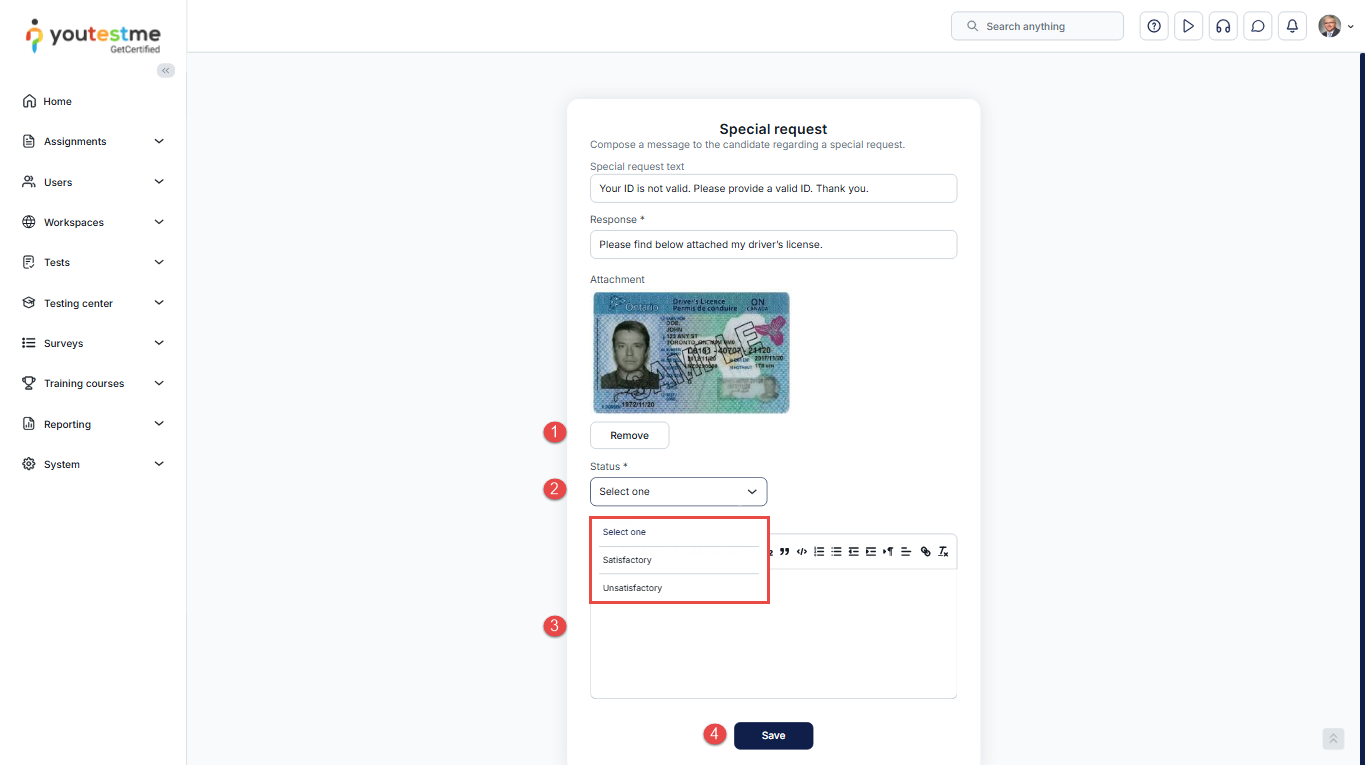
To resolve the special request, the proctor should click on the direct link from the email:
- Check the provided document; if needed, click Remove to delete it.
- Select a status to Satisfatory if the provided documentation is appropriate. If not, set it to Unsatisfactory.
- Add a comment.
- Click on the Save button.
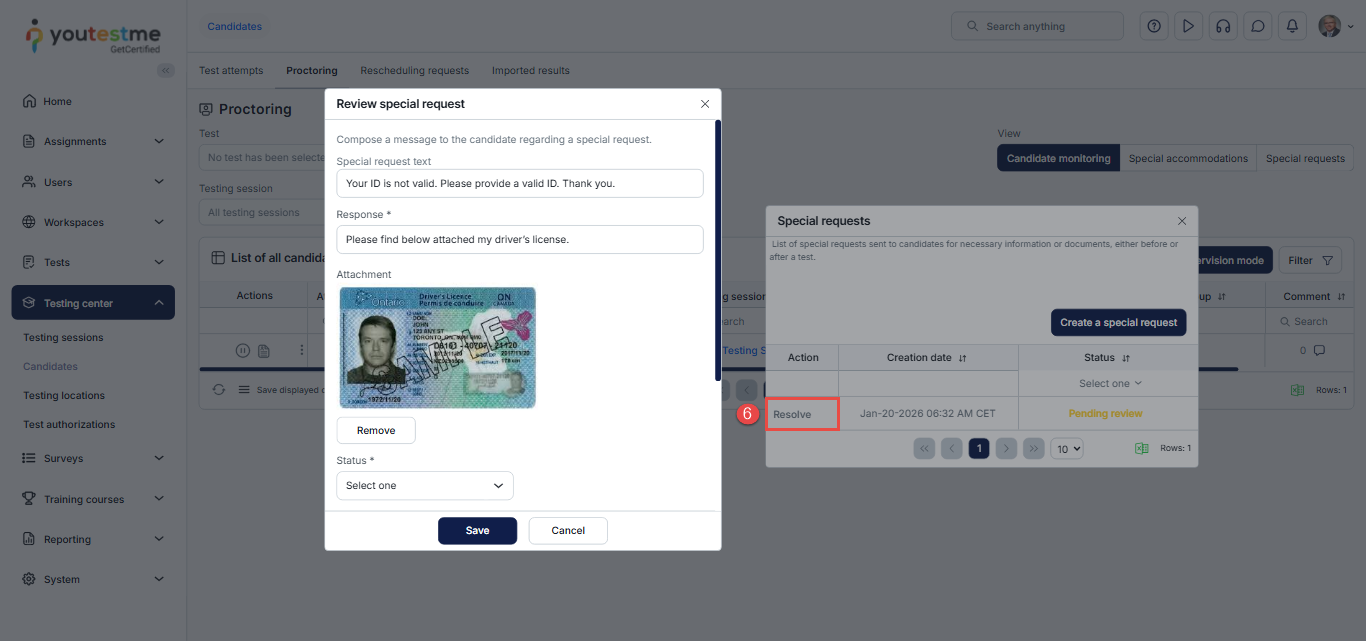
You can also view and resolve special requests through the Testing Center by following these steps:
- Navigate to Candidates.
- Select the Proctoring tab.
- Use the filters or search by username to locate the desired candidate.
- Click the three dots in the Actions column.
- Select “Create or Edit Special Request”.
- In the pop-up dialog, click the “Resolve” button.

