This article provides a comprehensive guide on enhancing user profiles by adding custom fields for recording additional data. Learn how to create dropdown menus for these fields, set custom properties for user registration, and manage them efficiently to align with your organizational needs.
Introduction to Custom User Properties
What Are Custom User Properties
Custom user properties are additional fields added to user profiles to collect specific information beyond default registration information. They align data collection with organizational needs, improve data organization, and simplify reporting.
Accessing the custom user properties tab
- Navigate to the Users section in the left side menu and select User Profiles.
- click on User settings then Custom User properties tab.

Creating Custom Data Types
How to add custom fields to record data
To create a custom data field:
- Click the Create new button.
- Enter the title that will be displayed on the user profile.
- Optionally insert a description.
- Choose the type of custom field from the dropdown menu.

The list of available custom property types:
- Yes/No
- Text
- Date
- Timestamp
- Number
- Dropdown – Representing a field that can be customized in the system settings. To learn how to create the dropdown custom property type, see the instructions in the chapter Creating Custom Data Type.
Available options for custom user properties
The list of available options:
- A remaining number of custom property fields you can create.
- By enabling/disabling the custom property, you can control the column’s visibility on the user profile page. If the custom column is disabled, all stored values in the property are preserved but not displayed.
- You can edit the title and description of a property or delete the property altogether by clicking the corresponding icon from the Actions button.

Creating a custom data type
To create a custom data type
- Navigate to the System section in the left-side menu and select Settings and Customization.
- Navigate to the Custom Properties tab and do the following:
- Navigate to the Custom Data Types page.
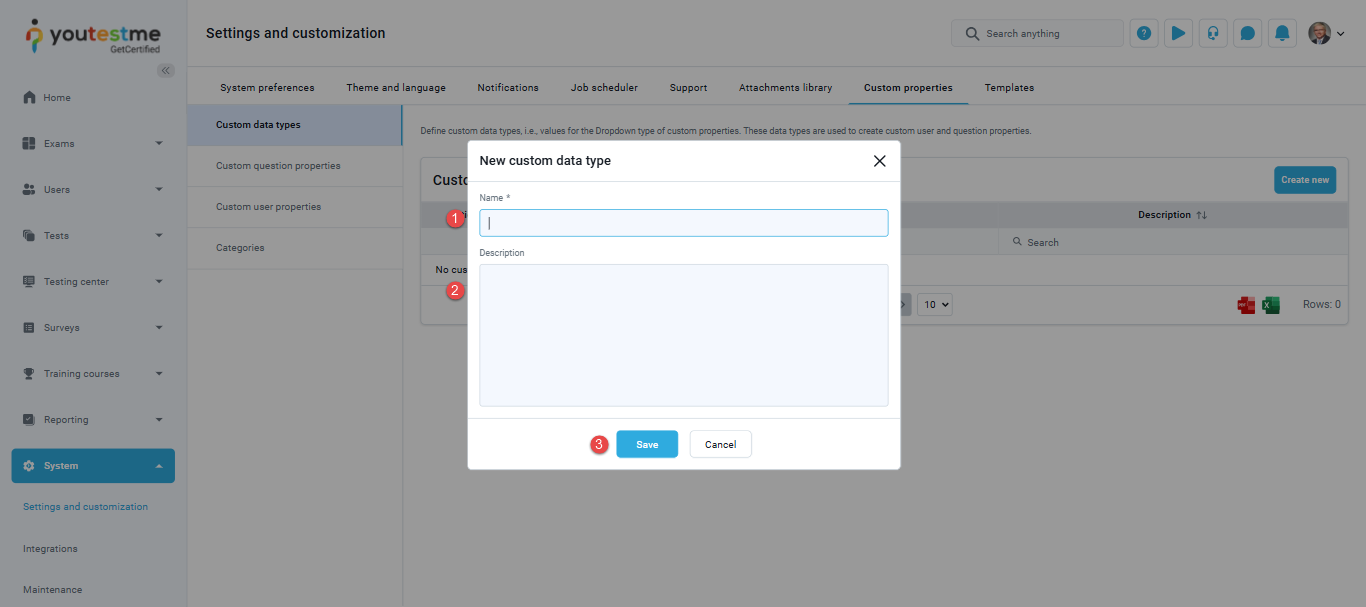
- Click the Create new button to create the dropdown type of custom user property.

A pop-up window will appear where you should do the following:
- Enter the name of the custom data type. The name must be unique.
- Optionally insert a description.
- Click the Save button to create a custom data type.
Creating values of the custom data type
Once you create a custom data type, you should add new values by doing the following:
- Click the Define values icon from the Actions tab to display a table of values for the selected custom type.

- Click the Add new value button
- Enter the name of the value. The name must be unique.
- Optionally insert description.
- Click the Save button to add a new value to a custom data type.

Managing Custom Types and Values
Editing and deleting custom types and their values
Custom types for custom user fields
- At any moment, you can edit the existing custom type by clicking the Edit icon from the Actions tab.
- You can delete the existing data type only if there are no custom user properties of this type. If you want to delete the custom data type, you will need to delete the custom user property of this type first.
- You can export the list of custom data types as XLS, PDF, CSV, and XML files.

Values of custom fields data types
- At any moment, you can edit the existing value by clicking the Edit icon from the Actions tab.
- You can delete the existing value only if there are no custom user properties of this type. In case you want to delete the value, you will need to delete the custom user property of this type first.
- You can export the list of custom data type values as XLS, PDF, CSV, and XML files.

Creating a custom user property with custom data types
Once you create custom data types, you can add custom user properties of that type to the user’s personal information.
Navigate to the Users section in the left side menu and select User profiles. From there, proceed to the User Settings tab, and then select Custom Properties.
- Click the Create new button.
- Enter the title that will be displayed on the user profile.
- Optionally insert a description.
- Choose Dropdown as the type of property.
- Select an existing custom data type from a dropdown.
- Click the Save button to create a custom user property.

Previewing and Enabling Custom Fields
Preview custom fields
Once created and enabled, custom user properties will be displayed on users’ profiles.

Enabling and requiring custom properties on the Registration page
To enhance the registration process and gather specific user details, you can enable custom properties and make them mandatory.
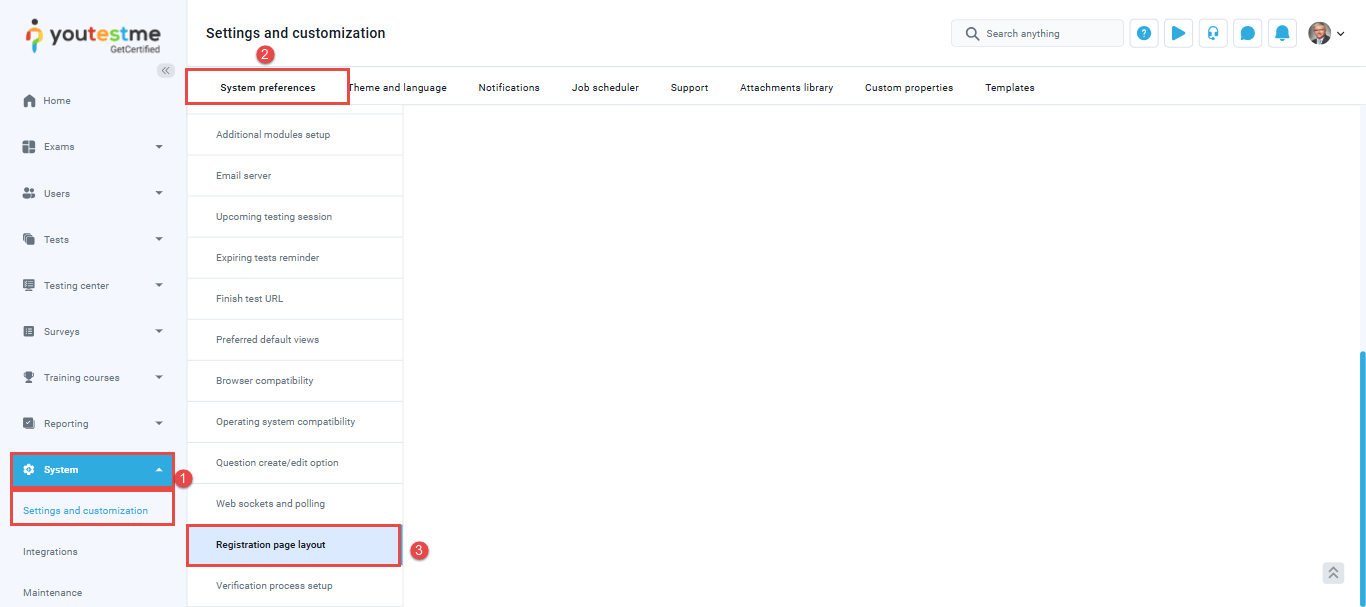
- Navigate to System then Settings and customization
- Within the Settings and Customization section, locate and select System Preferences tab.
- In the System Preferences menu, find and click on the Registration page layout.
- Within the Registration page layout settings, find the option labeled Enable Custom Properties on the registration page. Check the box to enable custom properties for the registration page.
- Once you’ve enabled custom properties, an additional option will automatically appear – Set All Custom Properties as Required. This step will ensure that all custom properties added to the registration page are mandatory for users to fill out during registration.
- Click on the Confirm button to save the changes.

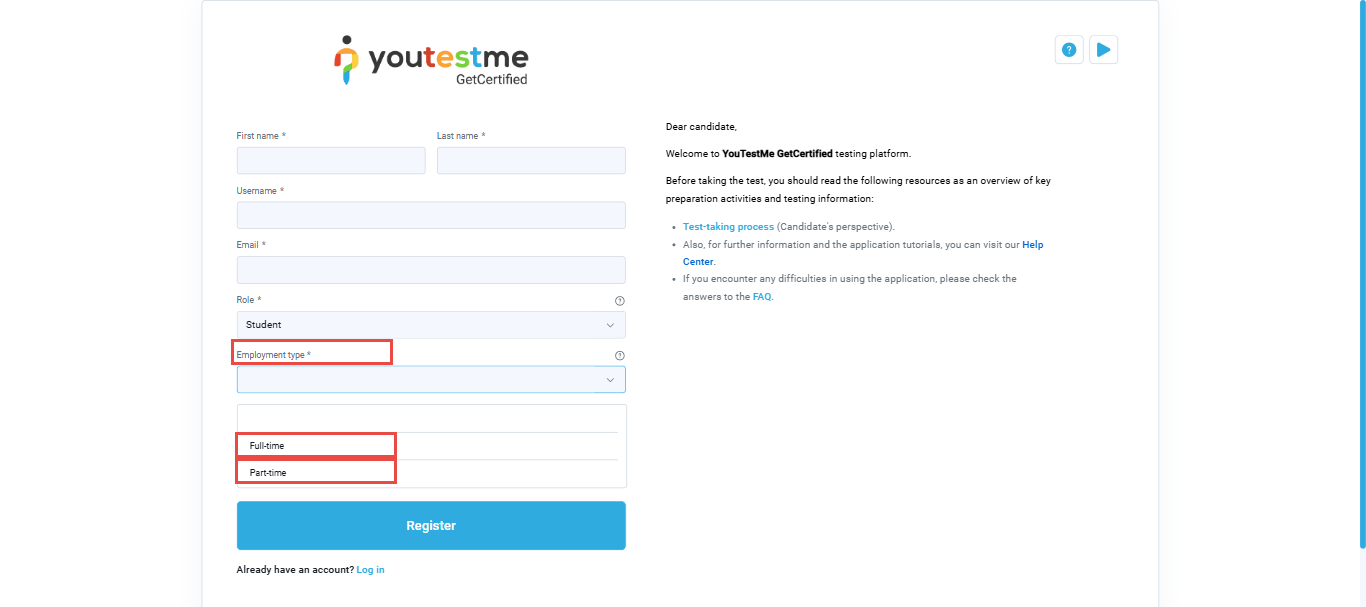
Candidate Perspective
When new users register, they will be prompted to complete the newly added custom field(s). This ensures that the necessary information is gathered at the time of registration, aligning with the specific requirements of your organization.
By following these steps, you will successfully enable custom properties on the registration page and set them as required, enhancing the information collection process during user registration.
For a video tutorial on how to add custom fields for the user’s profile, please watch the video.
For more useful instructional materials, please visit:


