This article explains how to upload testing sessions for multiple tests.
Choosing testing sessions and downloading the Excel template #
Navigate to the Tests and choose the “Manage tests” option from the main menu.
The list of all tests will show up when we reach “Manage tests”.
- Find the ID column and remember the ones which you need
- Click the “Load” icon
- Choose the “Testing sessions” option
Click on the blue, linked text “Excel template” to download an empty excel template for uploading sessions.
Finding the Location ID and filling the template #
Navigate to the Tests and choose the “Testing locations” from the main menu.
The list of already created locations will appear. Find the ID column and choose the ones you need.
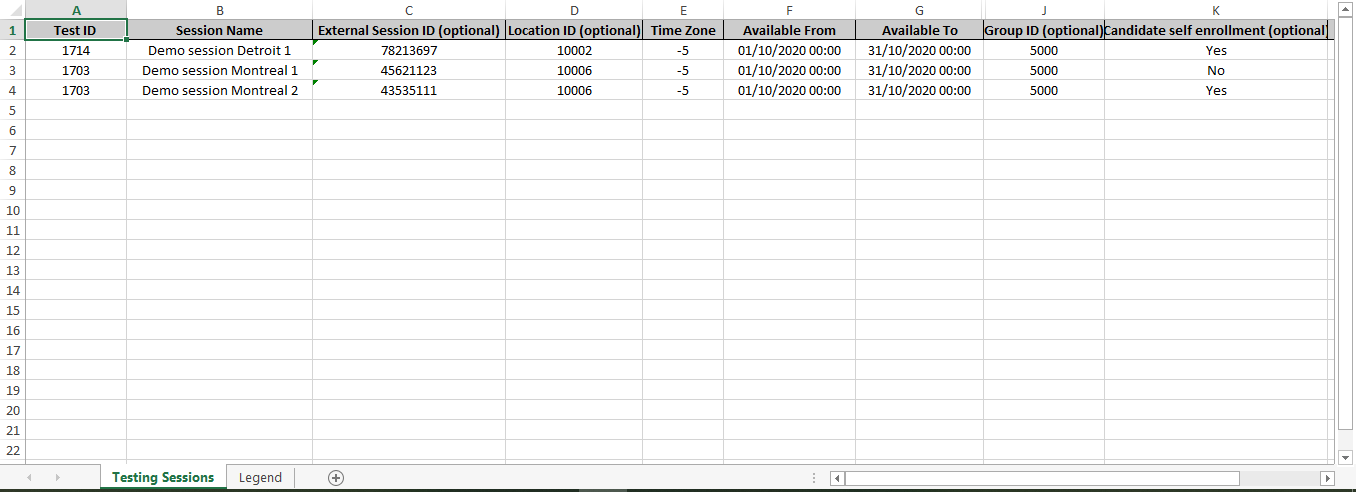
Filling an Excel template with all necessary information #
You can choose whether you want to hand-pick candidates from a group, or to make a test visible for all the
candidates that are part of a group by setting the “Candidate self-enrollment” option.
Previewing testing sessions in the application #
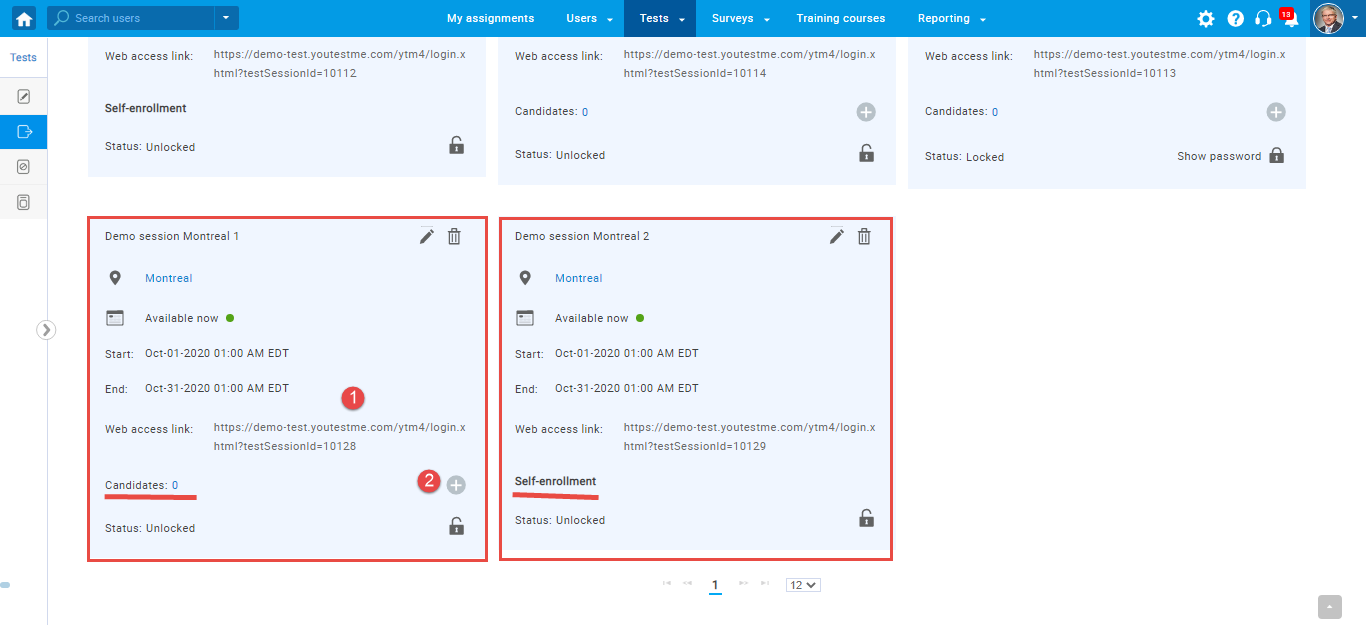
Navigate to the test to check if the Testing Session is uploaded.
As you can see, the first session was “Demo Session Detroit 1”, with the ID for the Detroit location, and was
self-enrollment.
The other two were for the other test, with the ID for the Montreal location.
For the first testing session in this test, the self-enrollment option was set to “No”, and now you have two
options:
1. Send the “Web access link” to the users from a group who need to attend the test.
2. Hand-picking the users from a group.
The second one is self-enrollment, which means that access is granted to the whole group automatically.
For more related instructional materials, please visit:
For a video tutorial on how to create a test with sections please watch the video.


