
This article is a step-by-step guide on how to create a test with sections.
YouTestMe gives users the ability to create tests with sections, where each section has its own settings. This feature allows users to:
- Define a different score for each section.
- Set a different duration for each section.
- Attach different files and instructions to each section.
- Require passing certain sections in order to pass the test, and much more.
Test creation wizard
Step 1: Test Information
To create a test with sections, follow the steps below:
- In the main menu, select the New Test sub-menu under Tests.
- Enter the test name.
- Optionally, enter a description.
- Enable the Test With Sections option.
- Upload a test logo if needed.
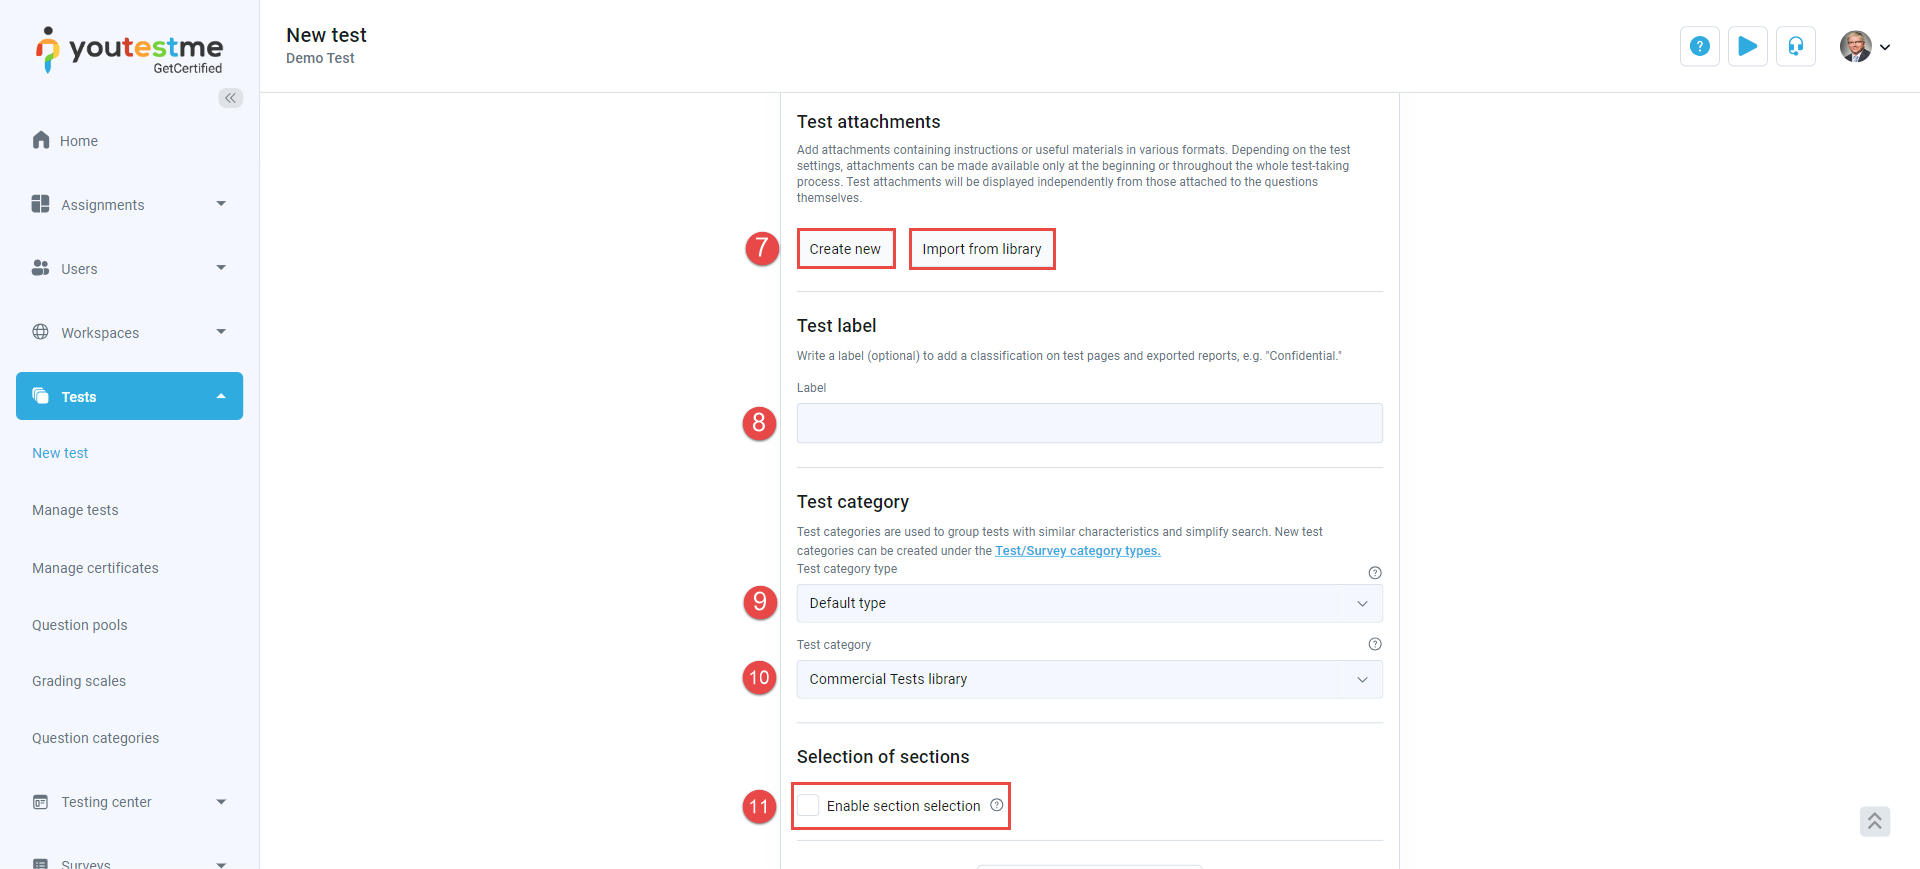
- Click the Show Advanced Settings button to define additional settings (please see the next paragraph).

In the advanced settings section, you can:
- Add test attachments by importing a new one using the Create New button or from the library using the Import from Library button. Please check this article for more details about test attachments.
- Add a test label to help organize the tests. The label is optional and can be used to classify the tests.
- Select a pre-created test category type. Please check this article for more details regarding test categories.
- Select a pre-created test category.
- Enable section selection to allow candidates to select the sections they want to work on independently of their order.
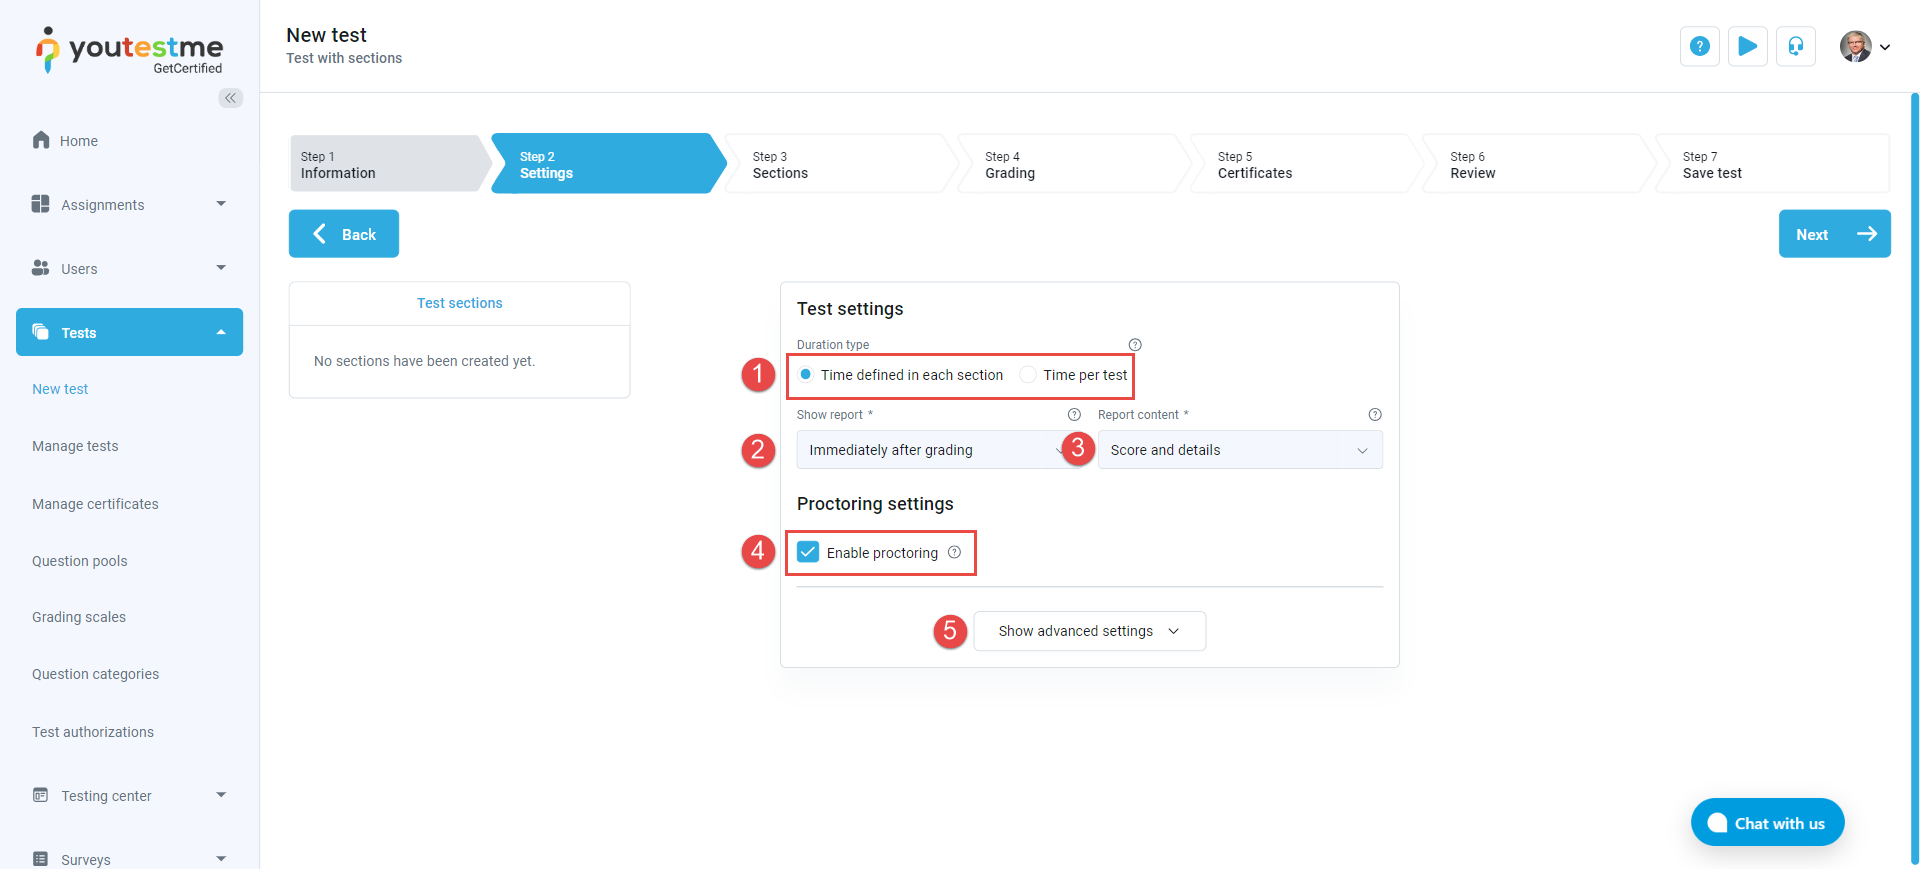
Step 2: Test Settings
In the test settings tab, you need to set up the following test settings:
- Duration Type:
- Time Defined in Each Section: Select this option if you want to set a duration for each section.
- Time Per Test: Select this option if you want to set a duration for the entire test.
- Show Report:
- Immediately After Grading: Select this option to make the results available to candidates after grading the attempt.
- Immediately After Finishing the Test: Select this option to make the results available immediately after the candidate finishes the test.
- Immediately After Result Verification: Select this option to make the results available upon verifying the candidate’s report.
- On Manager’s Approval: Select this option to make the results available upon the test manager’s approval.
- Real-Time Grading: Select this option to allow candidates to see their grades immediately after answering each question while taking the test.
- Report Content:
- Score and Details: Select this option if you want to allow the candidate to see the details of the correct and incorrect answers
- Score only: Select this option if you want the candidate to only be able to see their score without the questions details
- Proctoring Settings: Enable this option if you want the test to be proctored.
- Show Advanced Settings: Click this button to define the test instructions, retake settings, security, and access settings.
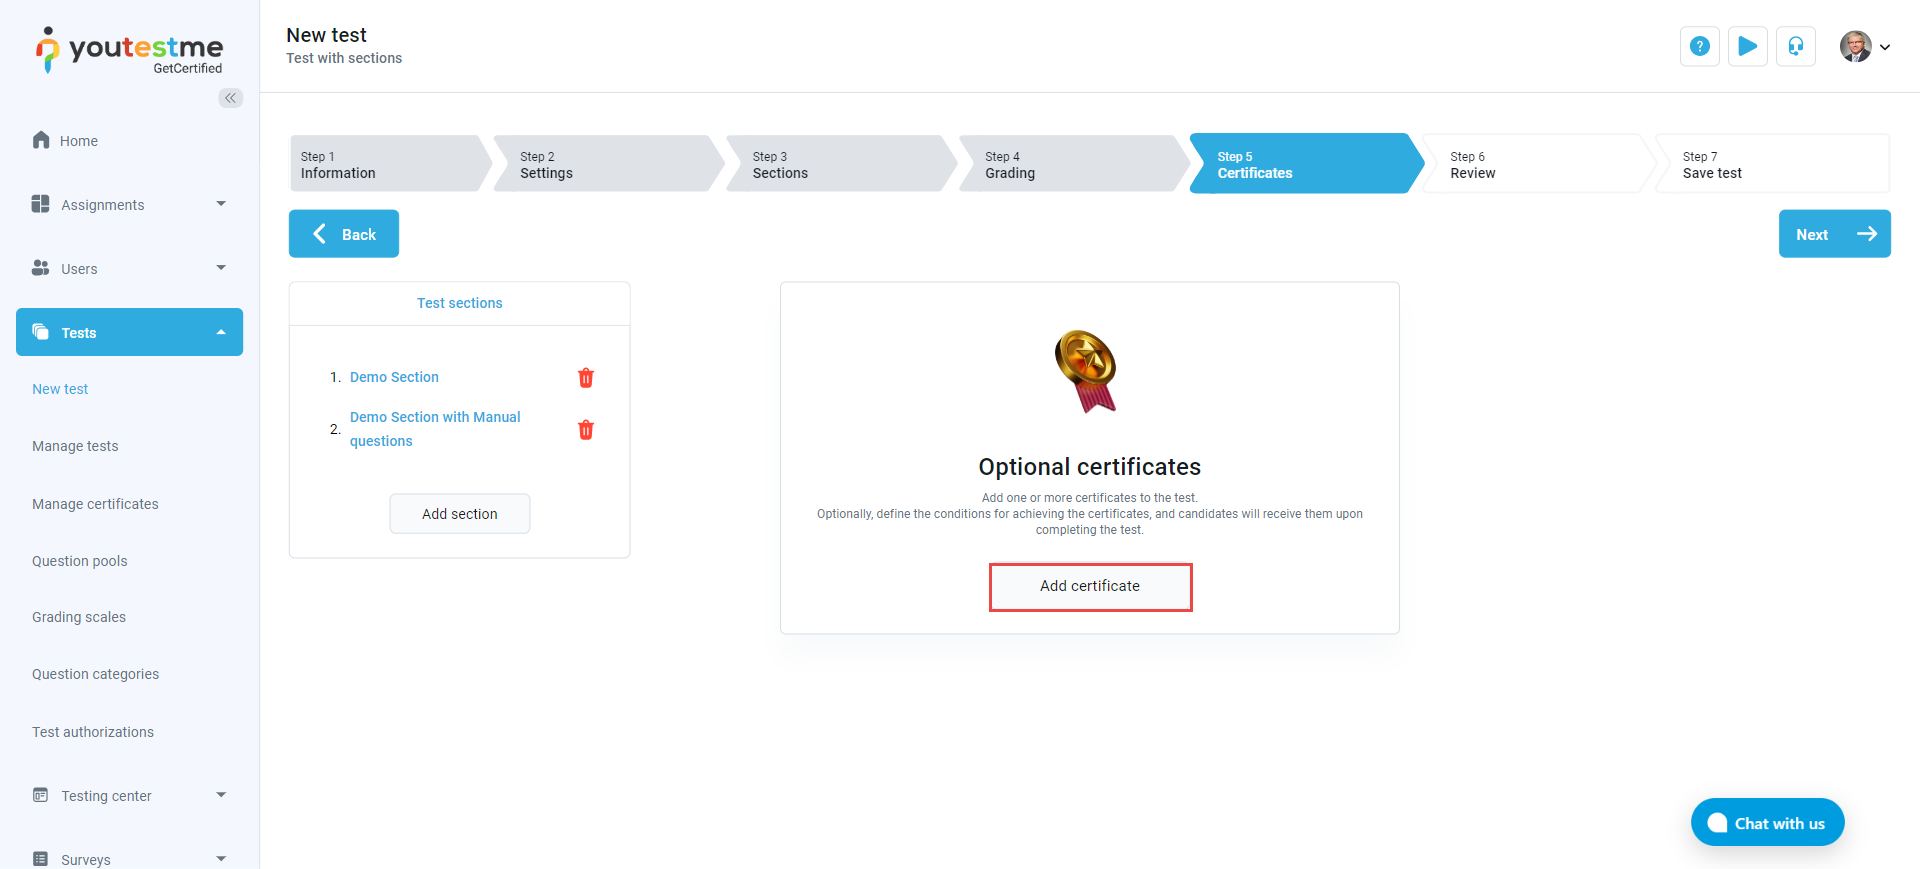
Step 3 – Creating Sections
At this step, you can start creating the test sections. To add a new section, click the Add Section button.

Using the Add Section button, you will be redirected to the section wizard, where you can define the section settings.
Step 4 – Grading
Once you finish creating the test sections following the instructions in this article, you will be prompted to:
- Define the passing mark:
- Select Percentage if you want the passing mark to be a percentage.
- Select Points if you want the passing mark to be in points.
- Enter the passing mark in the selected format (number of points for points and percentage for percentage).
- Make the passing mark inclusive: Enable this option if you want candidates to pass only when they achieve a score equal to or higher than the defined score.
- Require a positive proctoring report: If the test is proctored, you can enable this option to require a positive proctoring report to pass the test.
- Click the Show Advanced Settings to:
- Define passing marks for each section.
- Add a descriptive passing mark per question pool.
- Define passing marks based on custom properties assigned to the questions.

Step 5 – Certificate:
At this stage, use the Add Certificate button if you wish to attribute a certificate to the candidate based on predefined rules such as the passing mark or participation.
Step 6 – Review:
At this stage, you will be presented with the exam settings. You can use the Back button to edit the exam settings. Click the section name if you want to return to a certain section and edit its settings.

Step 7 – Save Test
At this stage, you can finalize the creation of the test with sections by clicking on the Finish button.

Section Creation Wizard
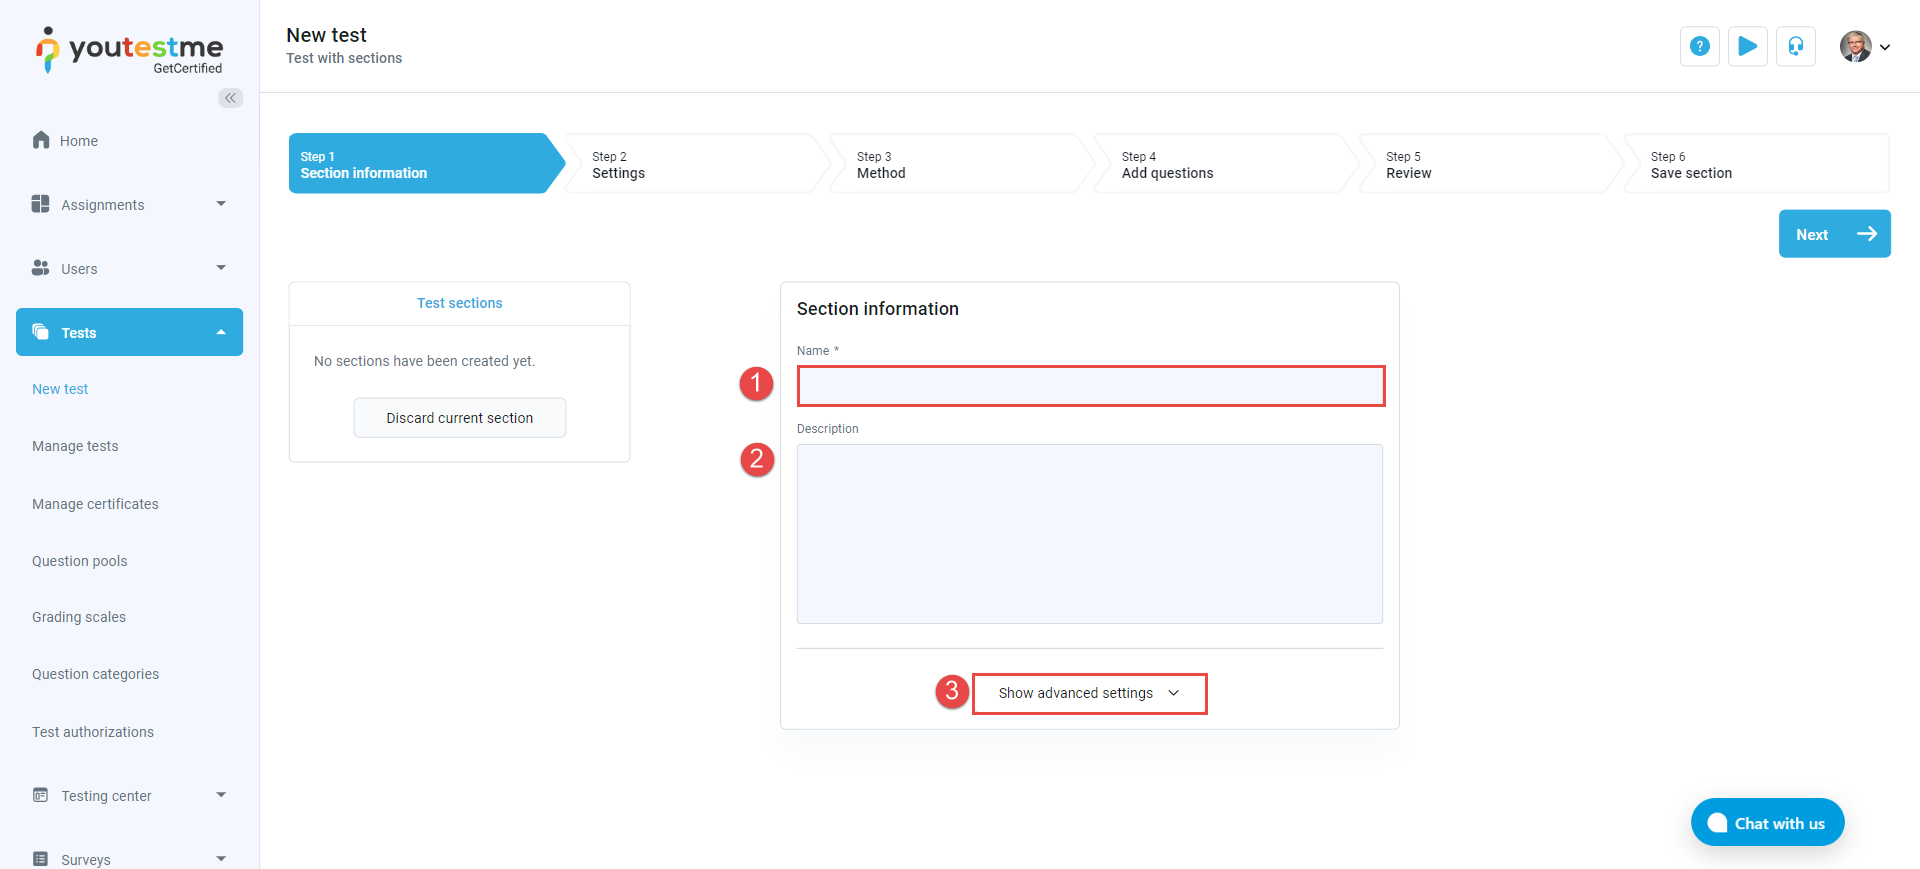
Step 1 – Section Information
At this step, you will be invited to:
- Enter the section name.
- Optionally, add a section description.
- Click Show Advanced Settings to add a section attachment.
Step 2 – Settings
At this step, you will be invited to:
- Optionally, use a predefined section template.
- Select the duration type, which can be:
- Unlimited: The candidate will not have a time limit to finish the section.
- Time per question: Choose this option if you want the section duration to be based on the time allotted for each question.
- Time to answer all questions: Choose this option if you want to define the overall time required to finish the section, independent of the time reserved for each question.
- Page Format: Select whether you want to show all the questions on one page or one question per page.
- Use the Show Advanced Settings button to define additional possibilities for candidates, such as enabling notes and question feedback, test-taking limitations, and security and data control settings.

Step 3 – Method
At this step, you will need to define the method that will be used to create the section:
- Pick questions from pools or create them manually: Select this option if you desire to manually create new questions or select certain questions from a question pool.
- Let the automated test generator select questions: Select this option if you want the generator to randomly select questions from the desired question pool based on their difficulty or category.
 Depending on the selected method, the subsequent steps of the section creation wizard will vary. If you choose to use the generator, please refer to the next chapter of this article. If you select the manual method, please proceed to Step 4 – Add Questions Using the Pick questions from pools or create them manually.
Step 4- Adding Questions Using the Automated Test Generator Based on Question Difficulty
To add questions to the test section, please follow these steps:
- Click the Select Question Pool button to choose the desired question pool from which the generator will automatically pull questions.
- Enable Allow Different Points in Test Versions if you want to use the scoring method defined for each question. By enabling this option, you can include branching questions and questions using the By Answer Weight scoring method.

- Select the Question pool.
- Select the number of questions to be included for each difficulty level.
- Click the Save button.

- Include the Frequency Factor: Enable this option if you want the generator to consider the frequency factor defined for each question.
- Use the Add Question Pool button if you want to use another question pool for this section.

Step 5 – Generator
This step is only available when using the Automated Test Generator. At this step, you will be invited to select the score and penalty for each question if you did not enable Allow Different Points in Test Versions.
- Define the score and penalty for all the questions.
- Test Versions: Enable Generate Test Versions Dynamically if you want the system to create a new version for each user automatically. If not enabled, specify the number of versions that should be created.
- Practice Test: Enable this option if the section is part of a practice test.

Step 4 – Add Questions Using the Pick questions from pools or create them manually
Using the Pick questions from pools or create them manually Method
If you select the Pick Questions from Pools or Create Them Manually method, the section wizard will contain just three more steps. Steps 5 and 6 of the section creation wizard in this situation are the same as for using the generator.
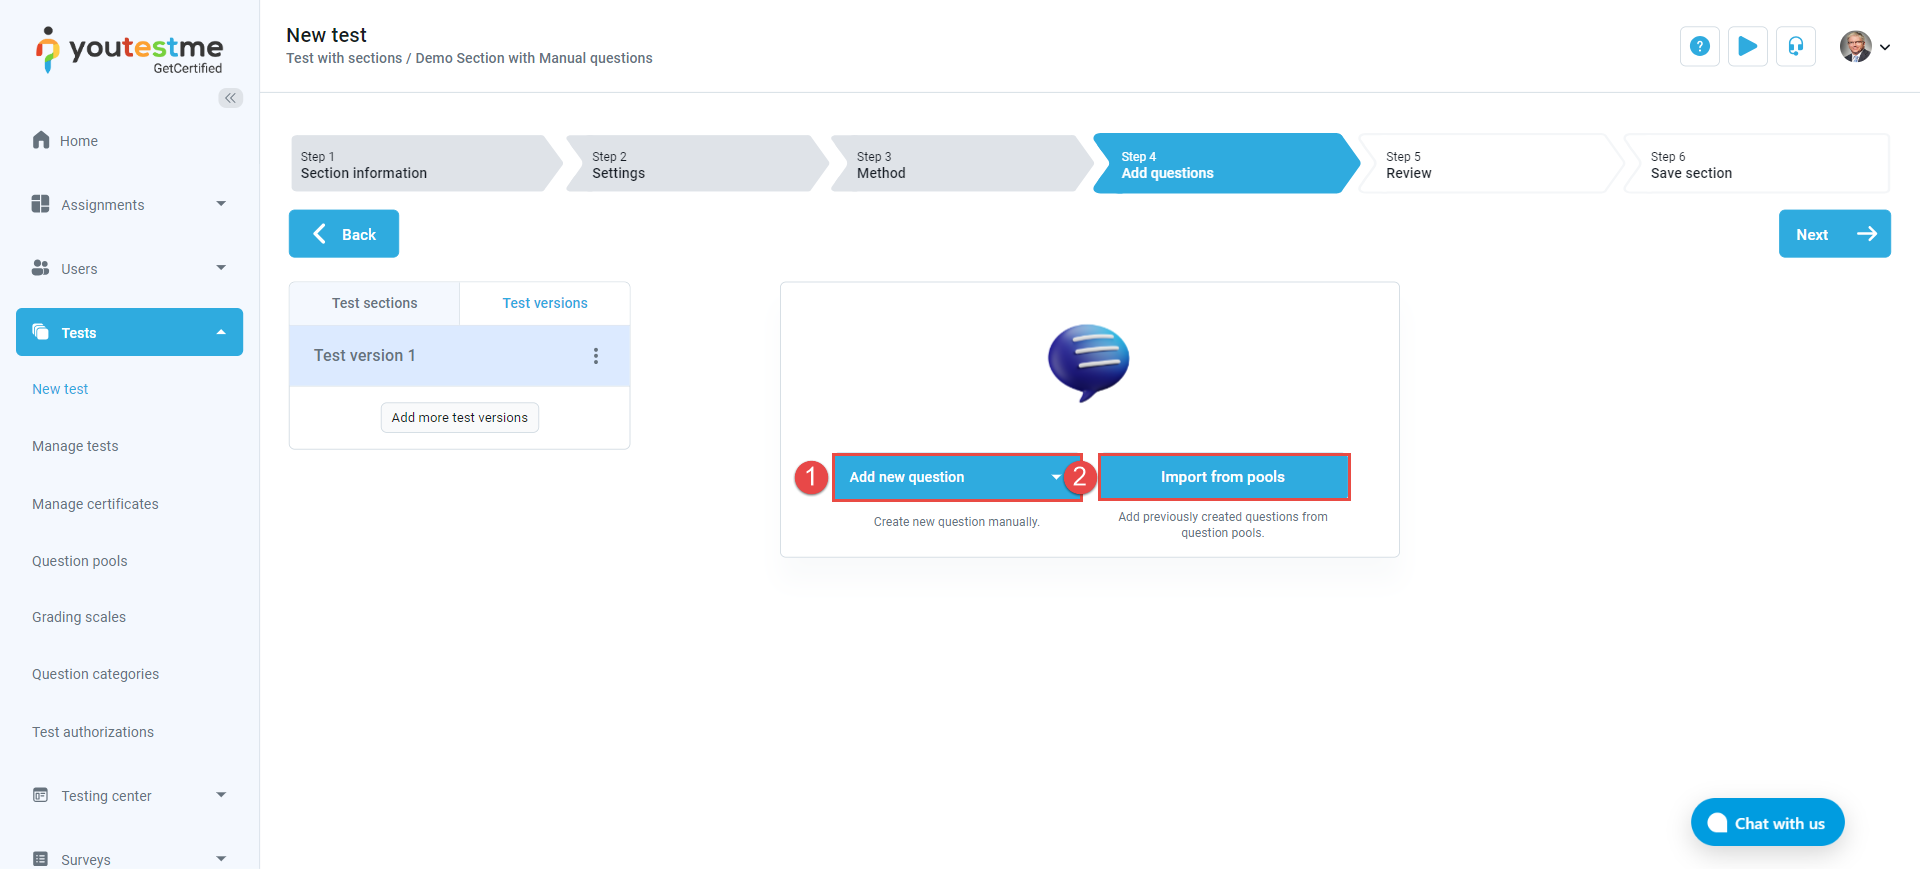
At this step, you can:
- Manually create new questions on the spot using the Add New Question button.
- Manually select questions from the desired question pool using the Import From Pool button.
Importing Questions from the Question Pool
To manually select questions from a question pool:
- Select the question pool.
- Use the Import All button to import all the questions in the question pool.
- Select the desired questions from the list and use the Import Selected button to import only the desired questions.

Step 6 – Review
At this step, you will be invited to review the section settings.
- If you want to edit the settings, use the Back button.
- If you want to save and continue the test creation, use the Next button.

Step 7 – Save Section
At this step, you can:
- Use the Add Another Section button to create a new section.
- Use the Save and Continue button to return to the Test Creation Wizard.

Once you finish creating the test sections, you will be returned to the test creation wizard, where you can complete the test’s setup.
