This article aims to explain the process of Zapier integration setup with GetCertified and explain the instructions on how users can create a Zap.
Introduction
Zaps are the services that provide a connection with many different applications that have been integrated with Zapier. Setting up the Zapier integration with your chosen application is needed to create a workflow and the new Zaps.
To create Zaps using the YouTestMe application, you can choose one of the integration options. You can create a Zap to perform one of the actions offered (create, update, or delete users). The most effective way to connect with the application is by using triggers.
Zap workflow will execute each time user creates, updates, or delete the user, and the administrator will receive a notification regarding the event.
Sign in to Zapier
Navigate the YouTestMe Zapier integration link. You can sign in to Zapier using:
- Google account.
- Facebook account.
- Microsoft account.
- Work email.

Create an account using the work email option
To create a new Zapier account :
- Enter the work email.
- Enter the first name.
- Enter the last name.
- Enter password.
- Click the Sign up with email button.

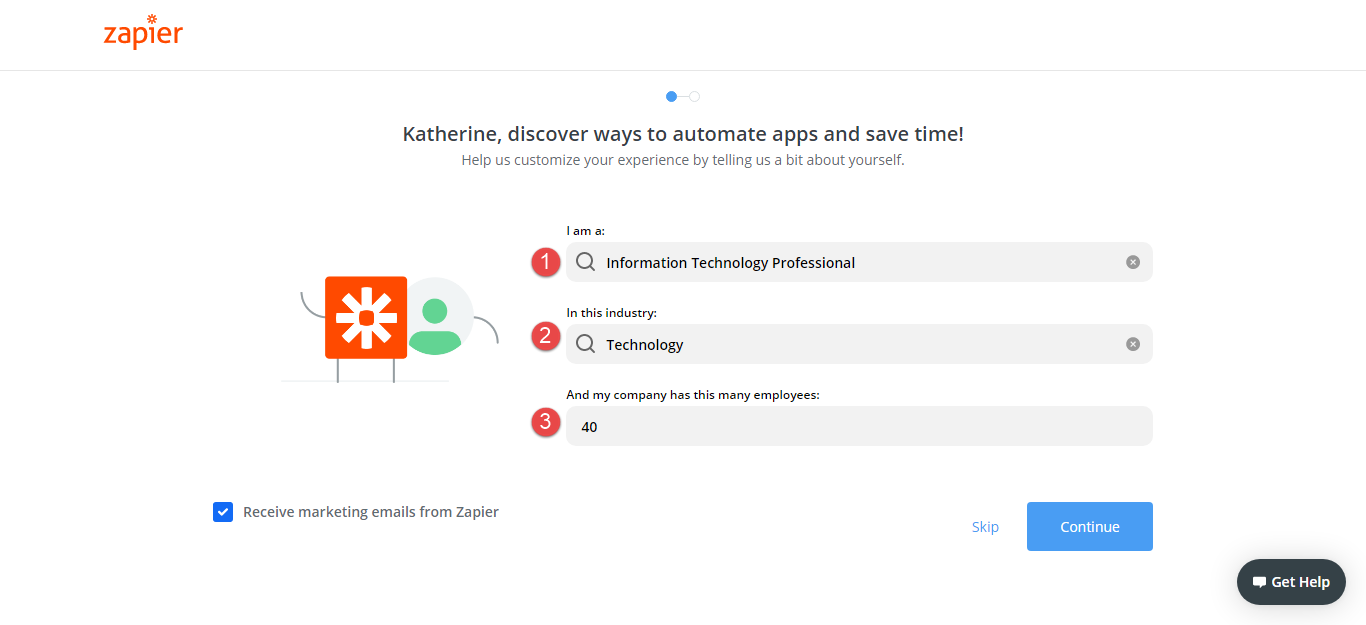
Set up the additional information:
- Choose your profession.
- Choose the industry.
- Enter the number of employees.
- Click the continue button.
Zapier integration with YouTestMe GetCertified
To create the Zapier workflow:
- Navigate the YouTestMe Zapier integration link.

2. Choose the action and the triggers.
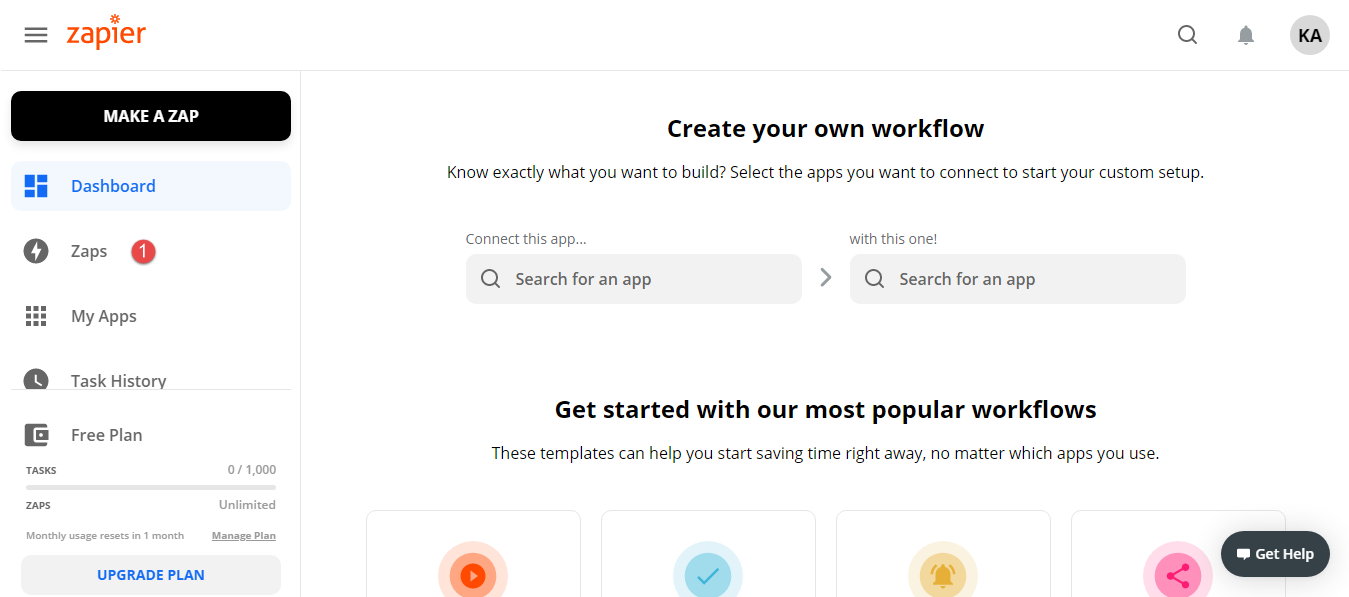
Create a Zap
To create Zaps:
- Select the Zaps option on the left-side menu.

- Click the Create Zap button.

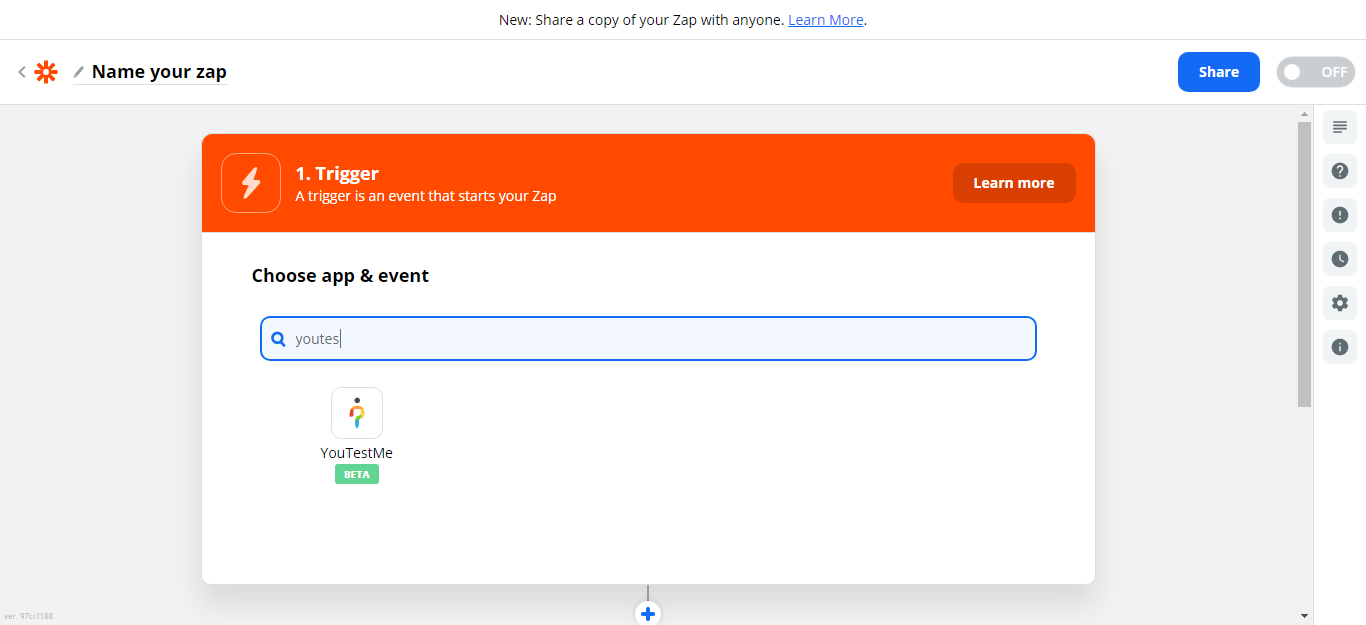
- Set up trigger – an event that starts your Zap.

- Search for your application.
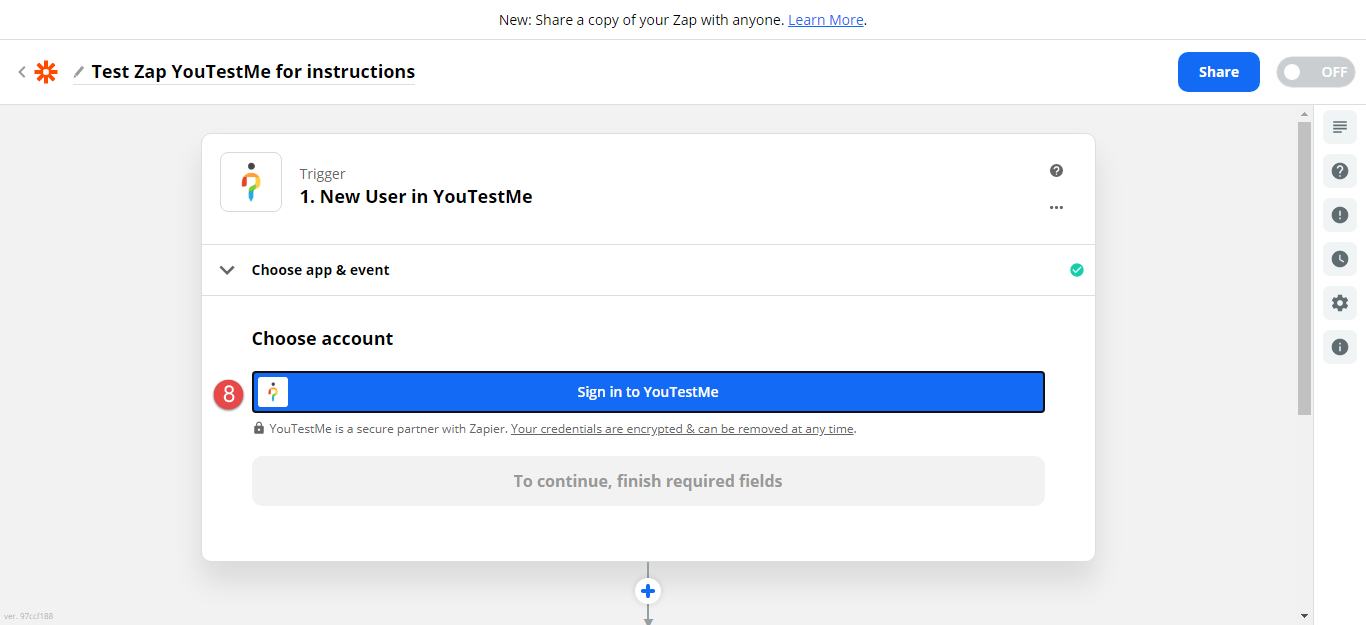
- Select the application – YouTestMe.
- Choose the trigger type, New user.
- Click the Continue button.
- Click the Sign in to YouTestMe button, and the pop-up window will show.


In the pop-up window:
- Enter username.
- Enter password.
- Enter the API URL.

After logging into YouTestMe GetCertified:
- Click the Continue button.
- Then, click the Test trigger button.Note: You will receive the information about the last created user on the server.

- Then, click the Continue button to configure the action.Note: An action is an event a Zap performs after it starts. Choose the app you will use for the event. For example, choose Slack.


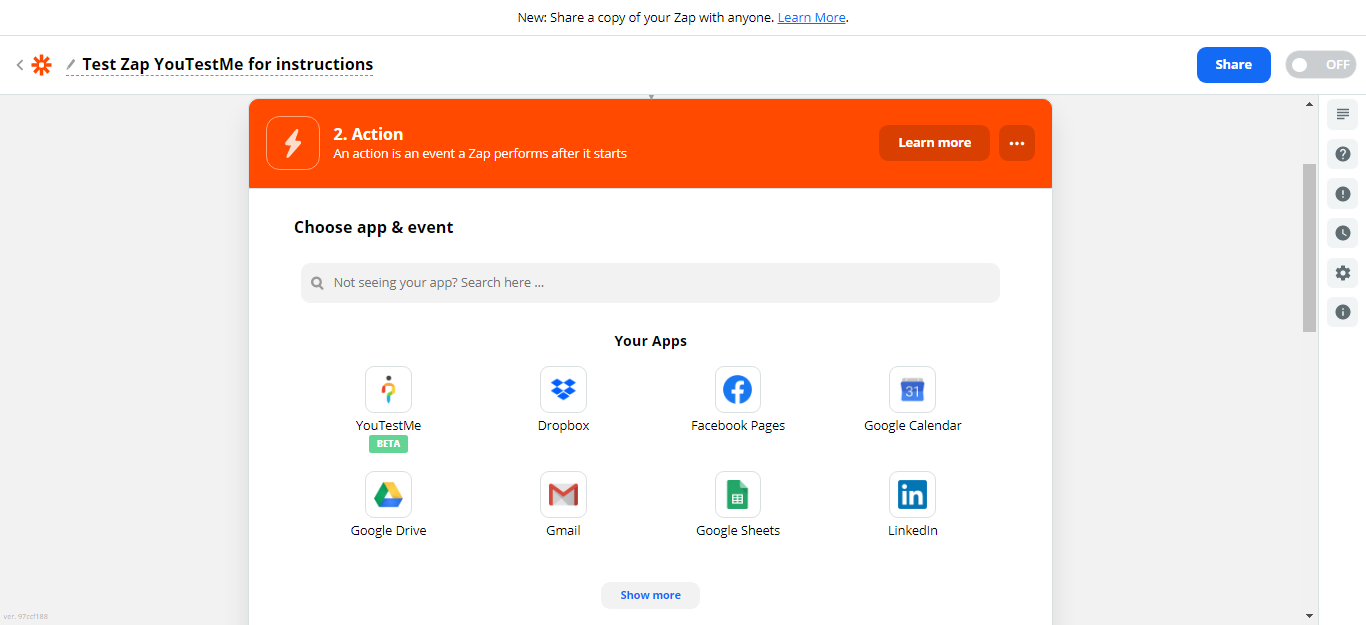
Click Continue and choose the account.

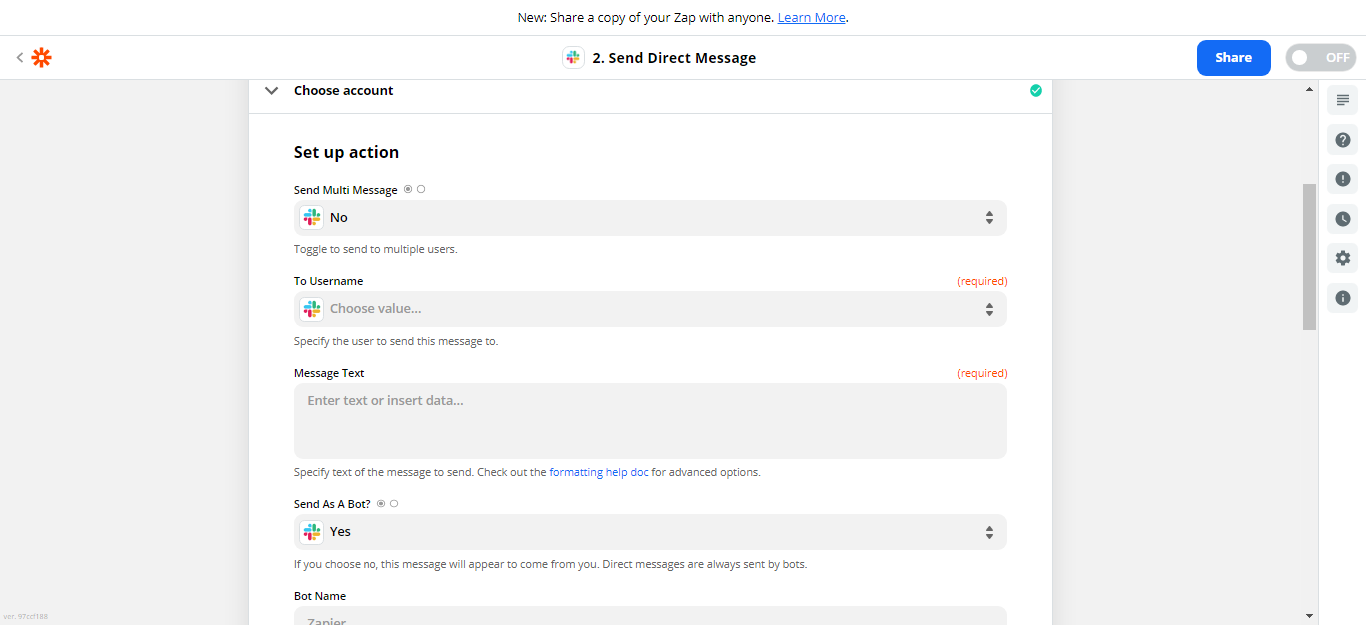
Sign in to Slack, and allow Zapier to access the Slack workspace. Then choose the account to send the direct message and click the Continue button.

Set up an action (sending direct message to Slack).
Configure the following parameters:
- Send multi-message – choose Yes or No.
- Specify the user that will receive a direct message.
- Message text – Specify the text of the message. You can enter the text and data.
- Send a message as a bot? – Choose Yes or No.
- Specify the bot name, which appears as a bold username above the message – the default name is Zapier.
Note: There are other useful settings available.
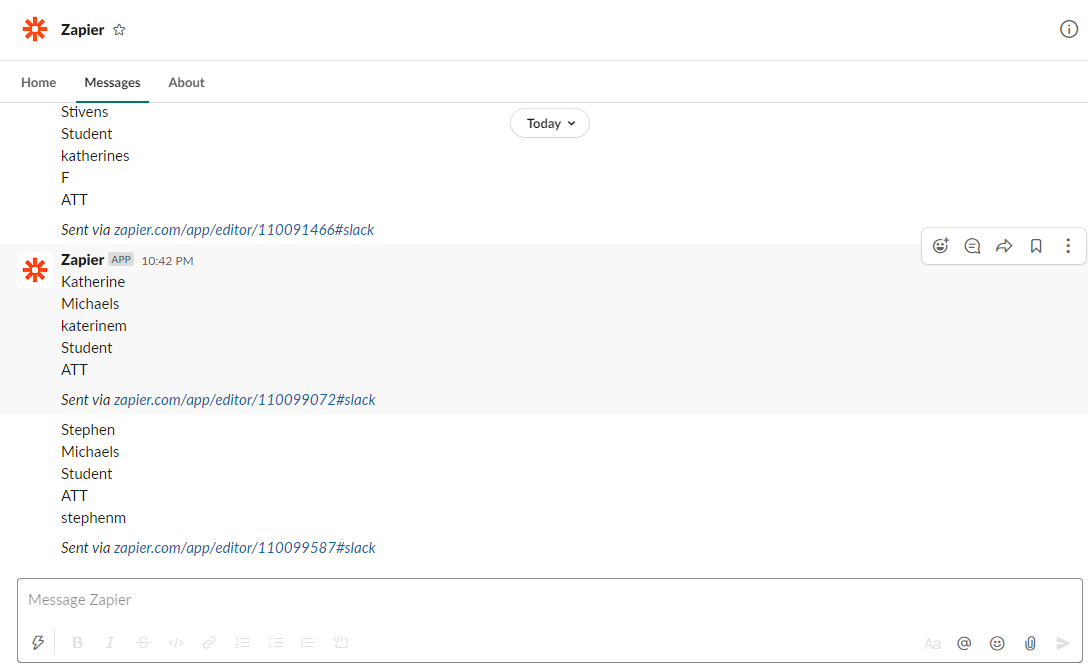
Set up a message text
- The message contains the text and selected user data.Note: You can customize the message text and data per your wish.
- Select a Slack username from the dropdown list to send the message.

- Test sending the direct message.
- Click the “Test & Continue” button.


Note: You will see the confirmation that the message has been sent to Slack.
- Click the Continue button.
- Preview the message data.