
Article verified for Release 15.1 on September 20, 2025.
This article explains how to set a limit on rescheduling requests and how to review and manage them.
Students may reschedule their testing session free of charge up to a limited number of times. Once they have used their free reschedule(s), any additional requests must be submitted for review and approval by the test administrators, who may approve or decline the request.
Limiting the free reschedules
To limit the number of free reschedules a candidate can make:
- Select the Tests tab, then Manage tests.
- Click on the name of the desired test and navigate to the Settings tab.
- Select the Pause and repeat settings option.
- Enable the Limited number of free reschedules option.
- Set the number of free rescheduling requests allowed per candidate. (For example, you can set it to one free reschedule.)
- Click the Save button to apply the changes.

In the example above, we allowed one free reschedule. This means candidates can reschedule once without restriction. If the candidate needs to reschedule the test more than once, they will be presented with a rescheduling request form, where they must provide a valid reason. Once the candidate submits a rescheduling request, the administrator will receive a notification and can choose to approve or decline it.
How to approve or decline requests
To manage rescheduling requests:
- Navigate to the Reschedule requests tab.
- In this tab, you can find the list of all the rescheduling requests along with their respective status, which can be:
- Approved: The request has been approved, allowing the candidate to reschedule the test at no additional cost.
- Declined: The request has been declined. The candidate should take the test during the session they selected before sending the rescheduling request.
- Pending: The request is still unresolved. The test administrator or any permitted user should review and resolve it.
- The administrator can click on the View button available in the Action column to review the request and make a decision.

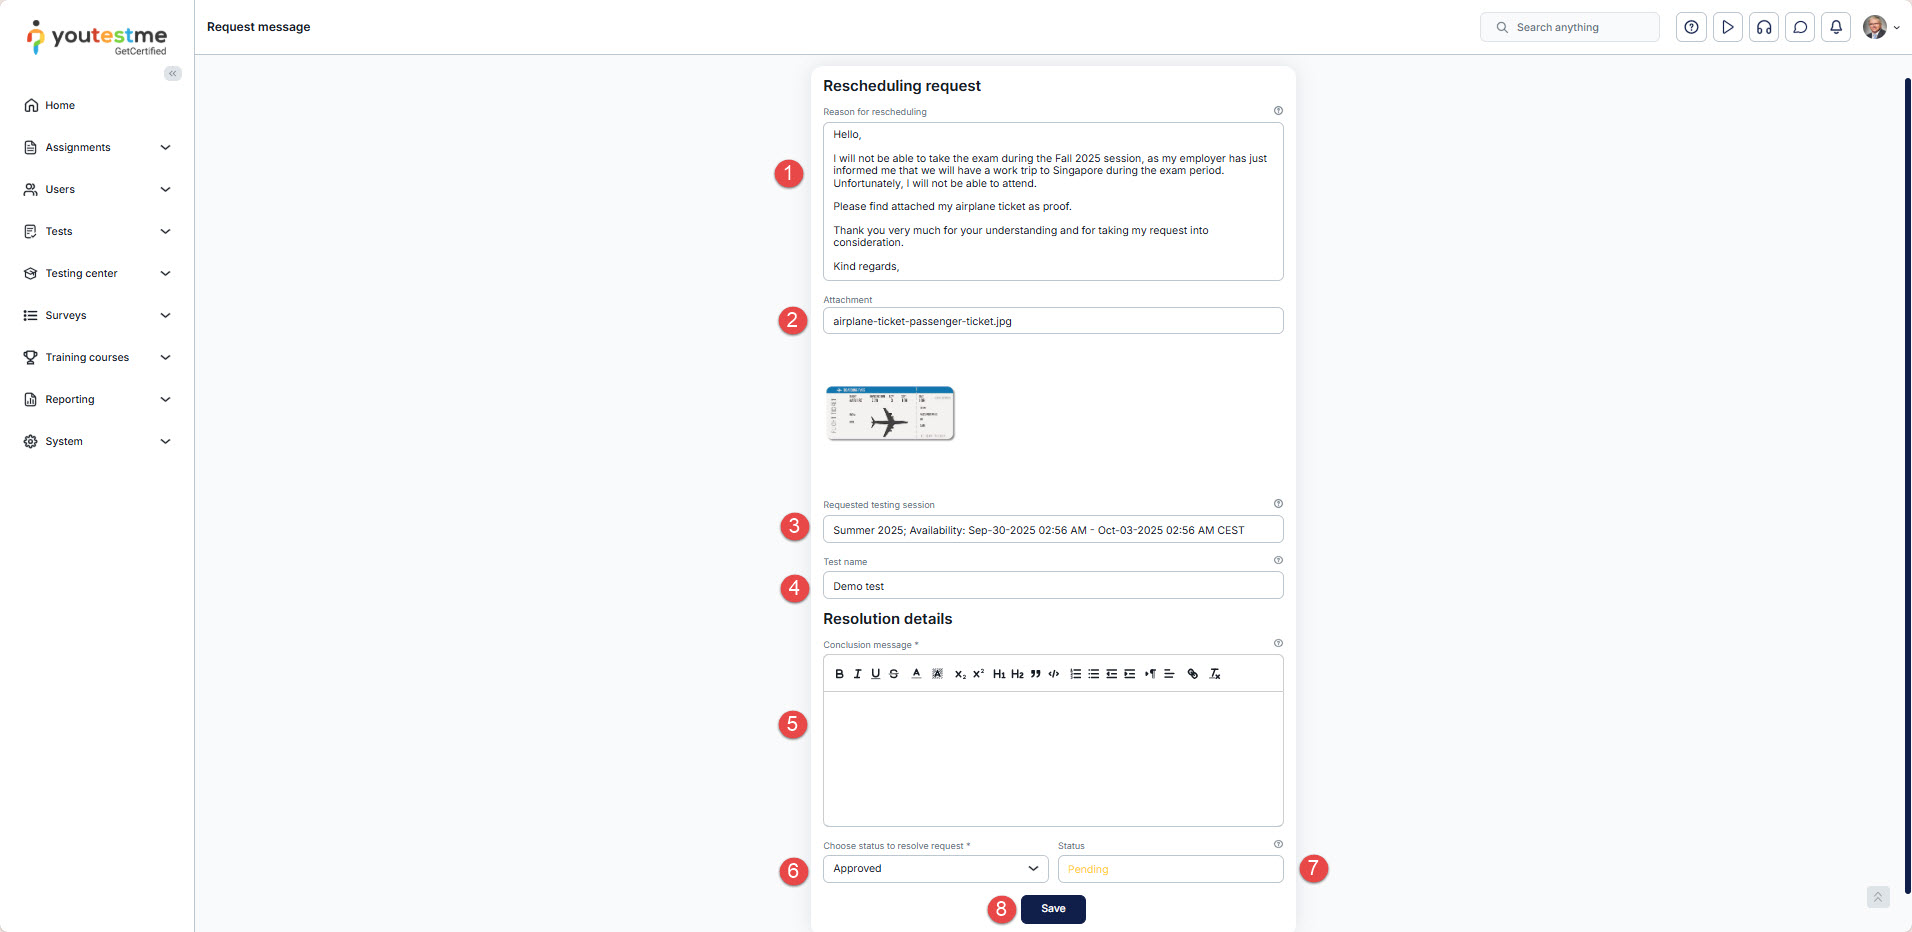
The Reschedule request window will display the following details:
- Reason for Rescheduling: The rescheduling reason provided by the candidate.
- Attachments: Any attachment provided as proof, such as a doctor’s note or flight ticket.
- Requested Testing Session: The testing session during which the candidate desires to take the test.
- Test name: The name of the test the candidate should take.
- Conclusion message: In this section, the test manager can enter any additional information or instructions that will be presented to the candidate along with the decision.
- Choose a status to resolve the request: Update the status to approve or decline the request.
- Status: Current status of the request.
- Click on the Save button.
For more useful instructional materials, please visit:
