
Article verified for Release 15.1 on November 18, 2025.
This article will introduce you to the Record & Review proctoring model.
Record and Review proctoring is an assessment model in which exams can be taken asynchronously, with candidate behavior monitored and recorded for later evaluation. AI detects predefined actions based on configurable thresholds, while additional security tools such as browser lockdown and secondary cameras can be enabled for greater oversight. Human proctors then review the session, confirm any violations, and assign the final rating used for grading or validation.
Exam-taking process from the candidate’s perspective
From the candidate’s perspective, taking a Record and Review proctored exam begins with a straightforward check-in process made up of steps defined by the proctoring template in the testing session settings. For more details, please refer to the related article.
The template determines which add-ons are required and how violations will be detected and evaluated.
Depending on the configuration, candidates may complete one to four check-in steps:
- Step 1: Equipment check – The system verifies browser compatibility, internet stability, webcam and microphone functionality, and screen-sharing capabilities. Candidates must grant the necessary permissions so the system can record their audio, video, and screen during the exam.
- Step 2: Face photo – A face photo is captured for identity confirmation.
- Step 3: ID verification – Candidates can either take a picture of their ID using the webcam or upload an image.
- Step 4: Environment overview – Candidates record a short 360-degree video of their surroundings using the webcam, or, if a secondary camera is required, by scanning a QR code and using their mobile device. When a secondary camera is mandatory, QR-code scanning is required both to record the environment overview and to connect the mobile camera for use during the exam.
Once the check-in process is complete, candidates can take the exam at any time, without needing to coordinate with a live proctor, offering both flexibility and strong exam security.
Exam requirements
To ensure a smooth and secure Record and Review proctored exam experience, candidates must meet the following requirements:
- Laptop or desktop computer (mandatory) with:
- Webcam
- Microphone
- Screen-sharing capability
- Supported systems:
- All recent versions of Windows, macOS, and Linux
- All recent versions of major browsers (Chrome, Firefox, Edge, Safari)
- Stable internet connection capable of supporting video, audio, and screen recording.
- Permissions required:
- Camera access
- Microphone access
- Screen recording/sharing
- Identification:
- Valid government-issued photo ID
- Ability to capture or upload a clear photo
- Secondary camera (if required):
- Smartphone or tablet capable of scanning a QR code
- Used for environmental overview and additional monitoring
- Environment:
- Quiet, well-lit room
- No other people present
- Clean desk; ability to record a 360° room scan (if required)
Accessing the recordings
After a candidate completes their exam, the system securely stores all proctoring data, including their ID verification photo, the environment overview recording, and the full exam recording, which captures both the candidate and their shared screen. These files are encrypted and accessible only to authorized users, such as designated proctors.
By default, and in accordance with our data privacy policy, exam recordings remain available in the system for 30 days.
To support timely reviews, the system can be configured to notify the assigned proctor as soon as a new recording becomes available. This optional notification ensures that proctors can begin the review process promptly, allowing candidates to receive their results sooner and facilitating the swift handling of any potential violations.
Accessing the exam recordings is straightforward. The proctor simply needs to follow these steps:
- In the main menu, select Tests and navigate to the Manage tests tab.
- Select the desired test.

- Select the Proctoring tab.
- Filter the test attempts listed in this tab by selecting the desired testing session.
- To review the recording, click on the Proctoring report option. This will take you to the recording view, where you can review the video footage of the test-taker.

Rules for reviewing the recording
The proctor must check three key aspects of the recording to ensure that the assessment process is fair, transparent, and reliable.
Firstly, the proctor must verify the student’s ID and ensure that the candidate who completed the exam is the same person who registered for it. This is important to prevent any identity fraud or impersonation during the exam.
To verify the ID of the student initially uploaded, click the test name and select the Photos tab.

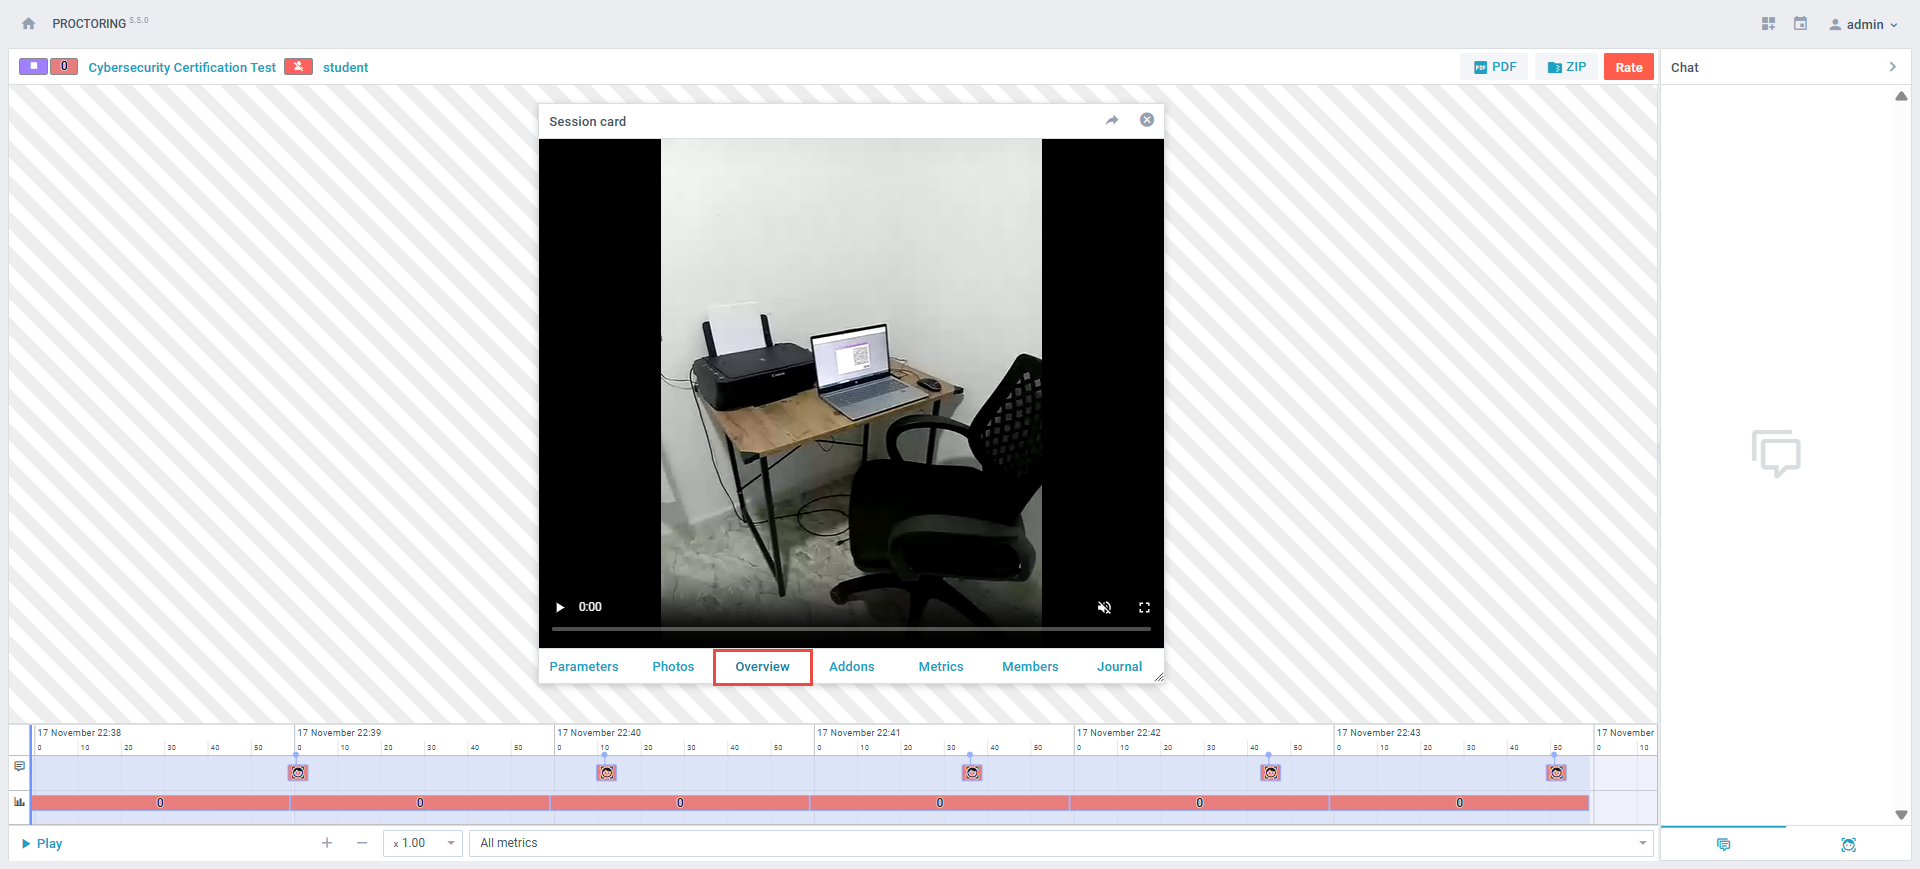
Secondly, the proctor must review the recording of the candidate’s surroundings to ensure that no unauthorized materials or persons are present. This helps to prevent cheating during the exam and ensures that the assessment process is conducted under fair conditions.
To see the candidate’s surroundings, click on the test name and select the Overview tab.
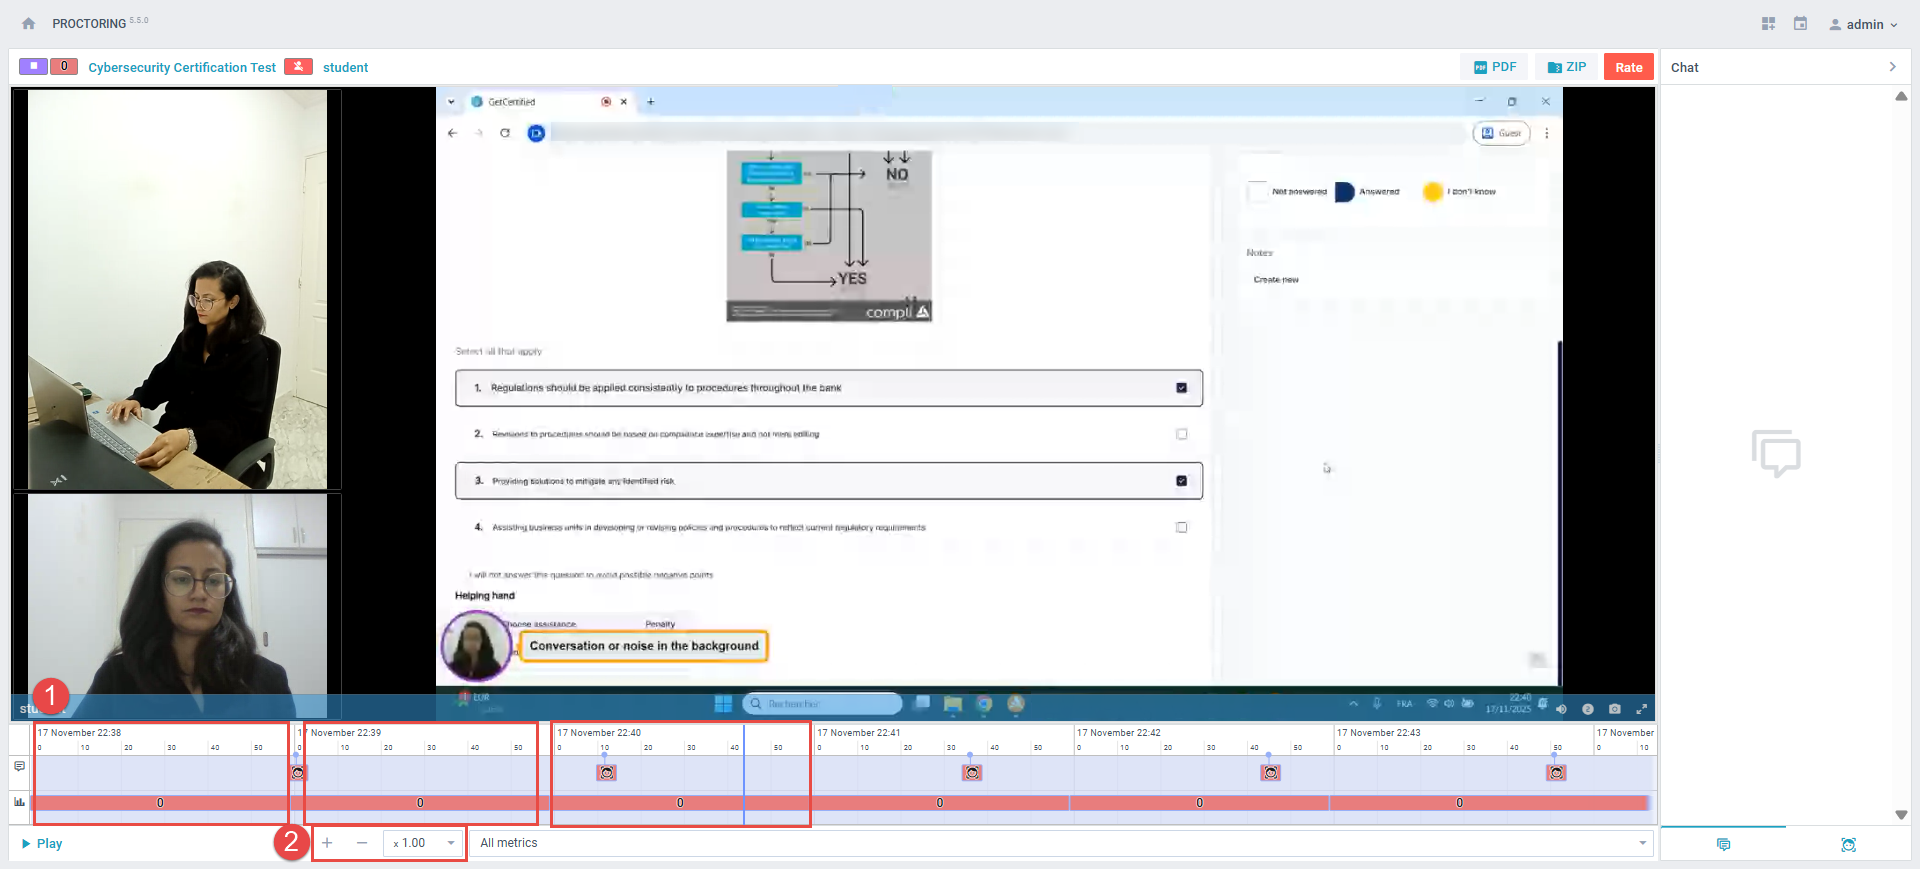
Finally, the proctor must review the video of the candidate taking the exam to ensure that there are no violations or suspicious behavior during the exam. This includes checking for the opening of new tabs or windows, as well as other forms of cheating.
When a mobile secondary camera is enabled, the proctor must verify that the candidate’s surroundings are free from unauthorized individuals or materials.
To review the recording, the proctor should:
- Check all spots marked red – those spots the system detected as suspicious. These may include instances where the test-taker looked away from the screen, covered their face, or had someone else in the room.
- Speed up the video and review it thoroughly, just in case. This will help you identify any other suspicious behavior that may have been missed.
By checking these three key aspects, the proctor can ensure that the assessment process is conducted fairly, transparently, and reliably. The Record & Review process provides an efficient and secure way of administering exams, enabling educational institutions to maintain the integrity of the assessment process even in remote, unsupervised testing environments.
Writing a Proctoring Report
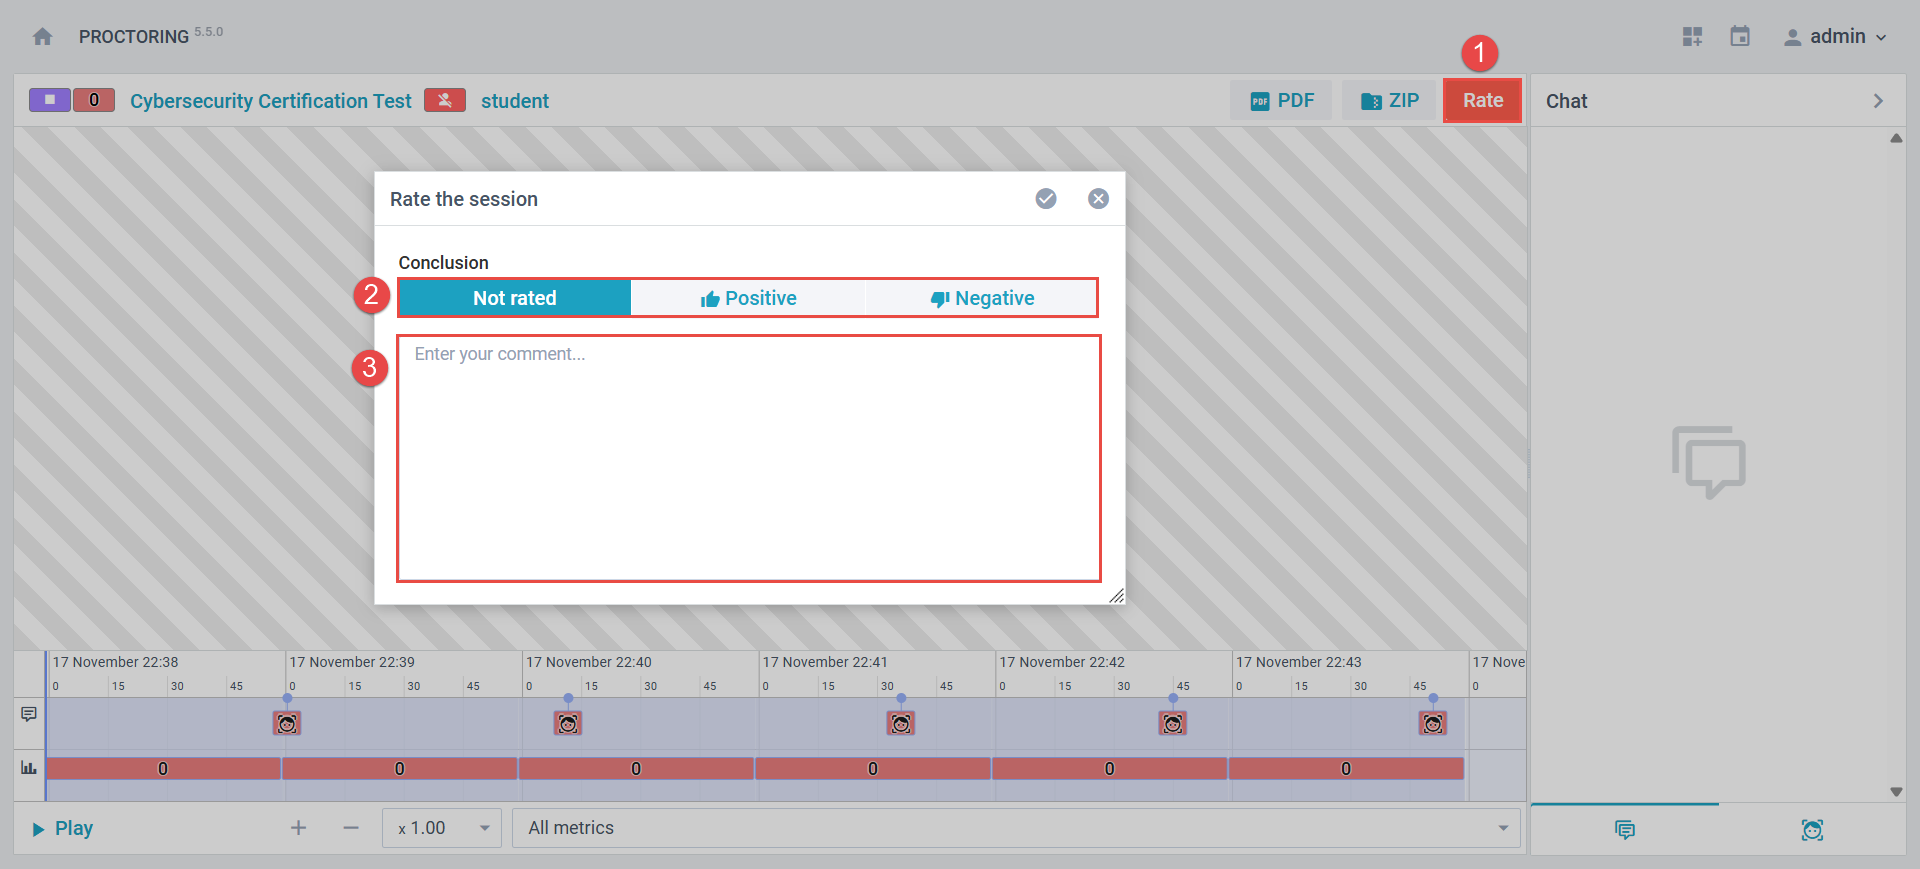
After reviewing the recording, the proctor should resolve all proctoring reports by rating them and entering a comment for each one.
To grade a proctoring report, follow these steps:
- Click the Rate option.
- In the Proctoring report dialog, select the appropriate rate: Positive (0 violations), Negative (if there were violations and incident messages), or Neutral (if a decision needs to be made by the exam manager).
- Enter a summary of the detected violations in the comment section. The comments should include a brief description of the incident. This information will be useful for instructors and administrators who need to review the report and take necessary action.
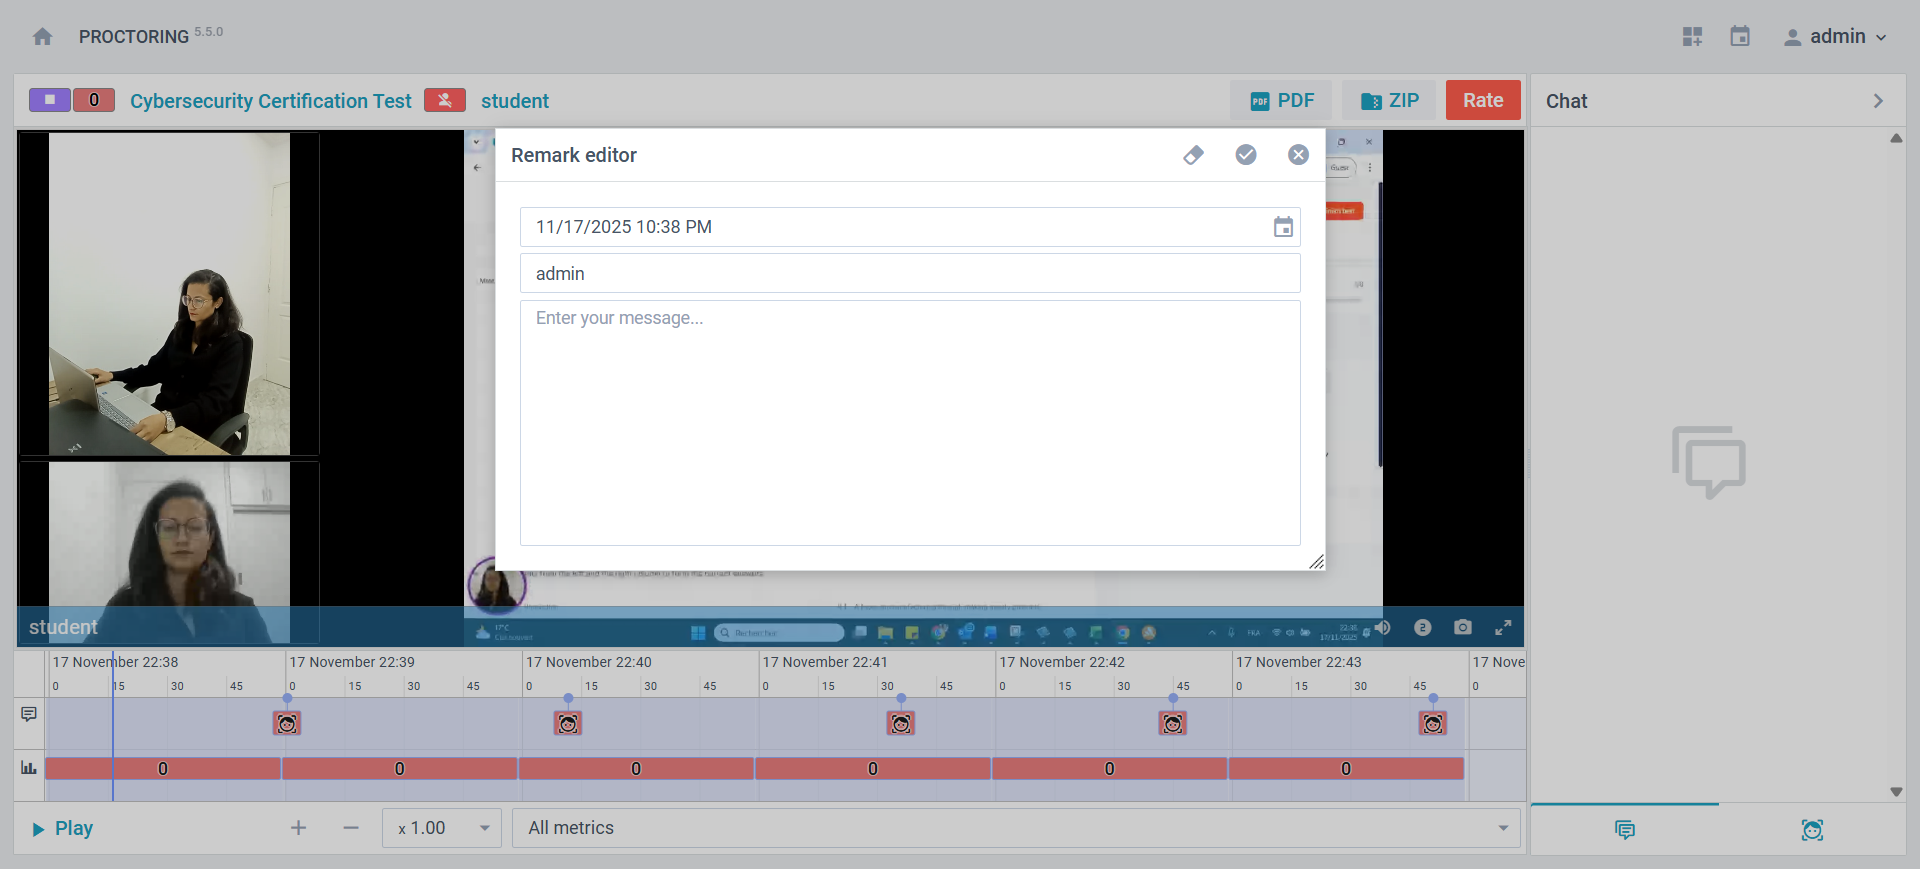
Note: You can also assign a specific behavior for a particular time frame. Right-click on the specific time where the candidate committed a violation. A pop-up dialog will appear, allowing the proctor to add comments.
Exporting Reports
The system allows exporting:
- A PDF report summarizing detected violations and the score evaluated based on predefined metrics and their thresholds.
- A ZIP folder containing the screen recording, webcam recording, secondary camera footage, ID, facial pictures, and the generated report.

Reading the PDF report
In the PDF report, the system presents a matrix of tracked behaviors, also referred to as metrics over a timeline, along with a corresponding score for each metric.
Each metric score ranges from 0 to 100 and is calculated based on its defined threshold. The score reflects the proportion of time during which a violation is detected, relative to the total exam duration, from the moment the candidate starts the test until they click the finish button.
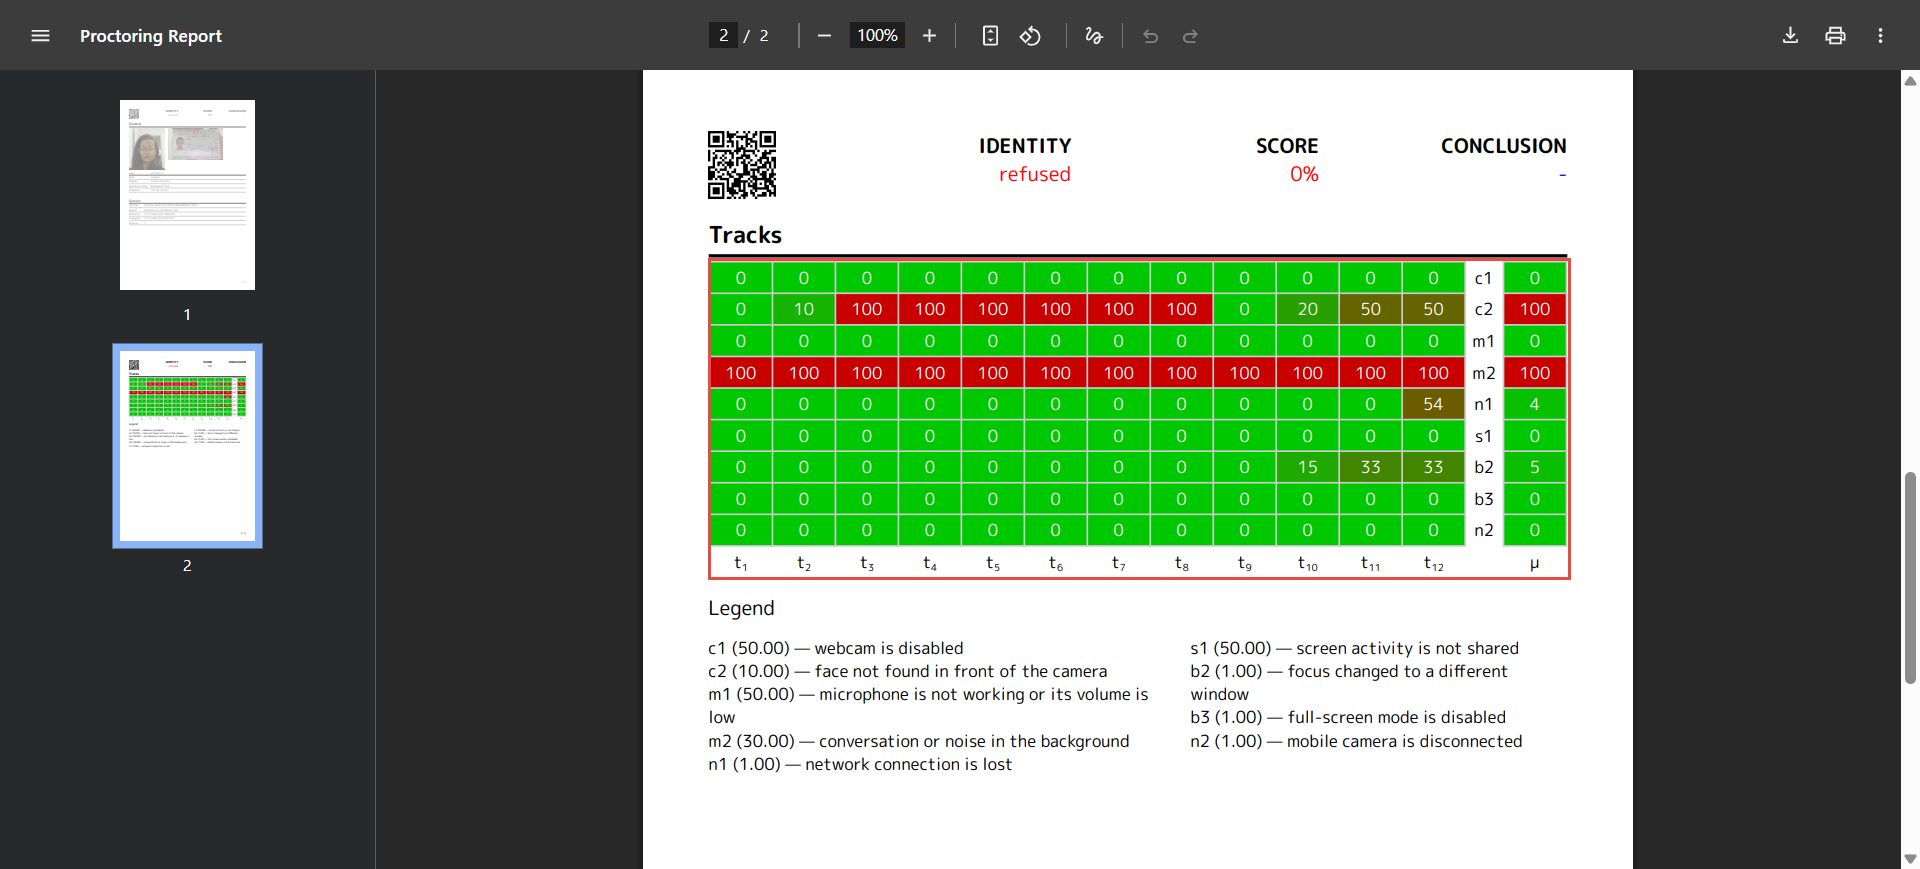
The metrics the system can track are:
- Browser is not supported (b1)
- Focus changed to a different window (b2)
- Full-screen mode is disabled (b3)
- Webcam is disabled (c1)
- Face not found in front of the camera (c2)
- Several faces in front of the camera (c3)
- Unidentified face in front of the camera (c4)
- Found a similar profile (c5)
- Face does not match the profile (c6)
- Microphone is not working or its volume is low (m1)
- Conversation or noise in the background (m2)
- Network connection is lost (n1)
- Mobile camera is disconnected (n2)
- Records are not saved (n3)
- Screen activities are not shared (s1)
- Second display is used (s2)
Conclusion
This method of administering exams is gaining popularity, particularly in the current climate of remote learning and online education. With the Record&Review process, educational institutions can ensure that the assessment process is fair, transparent, and reliable, even when proctors are not present during the exam.
