
Article verified for Release 15.2 on January 5, 2025.
This article explains how to enable and configure Polling and Web Sockets, two synchronization methods used to keep the server and client in sync during test execution.
Understanding Web Sockets and Polling
Web Sockets and Polling settings are pivotal for ensuring real-time updates and data retrieval within specific monitoring dashboard features, including:
- Pause/Resume attempts.
- Adding extra time to an attempt.
Here, we delve into the two synchronization methods:
- Web Sockets: This method involves the server instantly pushing events to the client. However, network settings may occasionally block web sockets. In such cases, it’s prudent to use polling alongside web sockets.
- Polling: With polling, the client periodically checks for new server events at specified intervals. This method ensures event delivery even when web sockets are obstructed.
Configuring Web Sockets and Polling
To configure Web Sockets and Polling effectively, follow these streamlined steps:
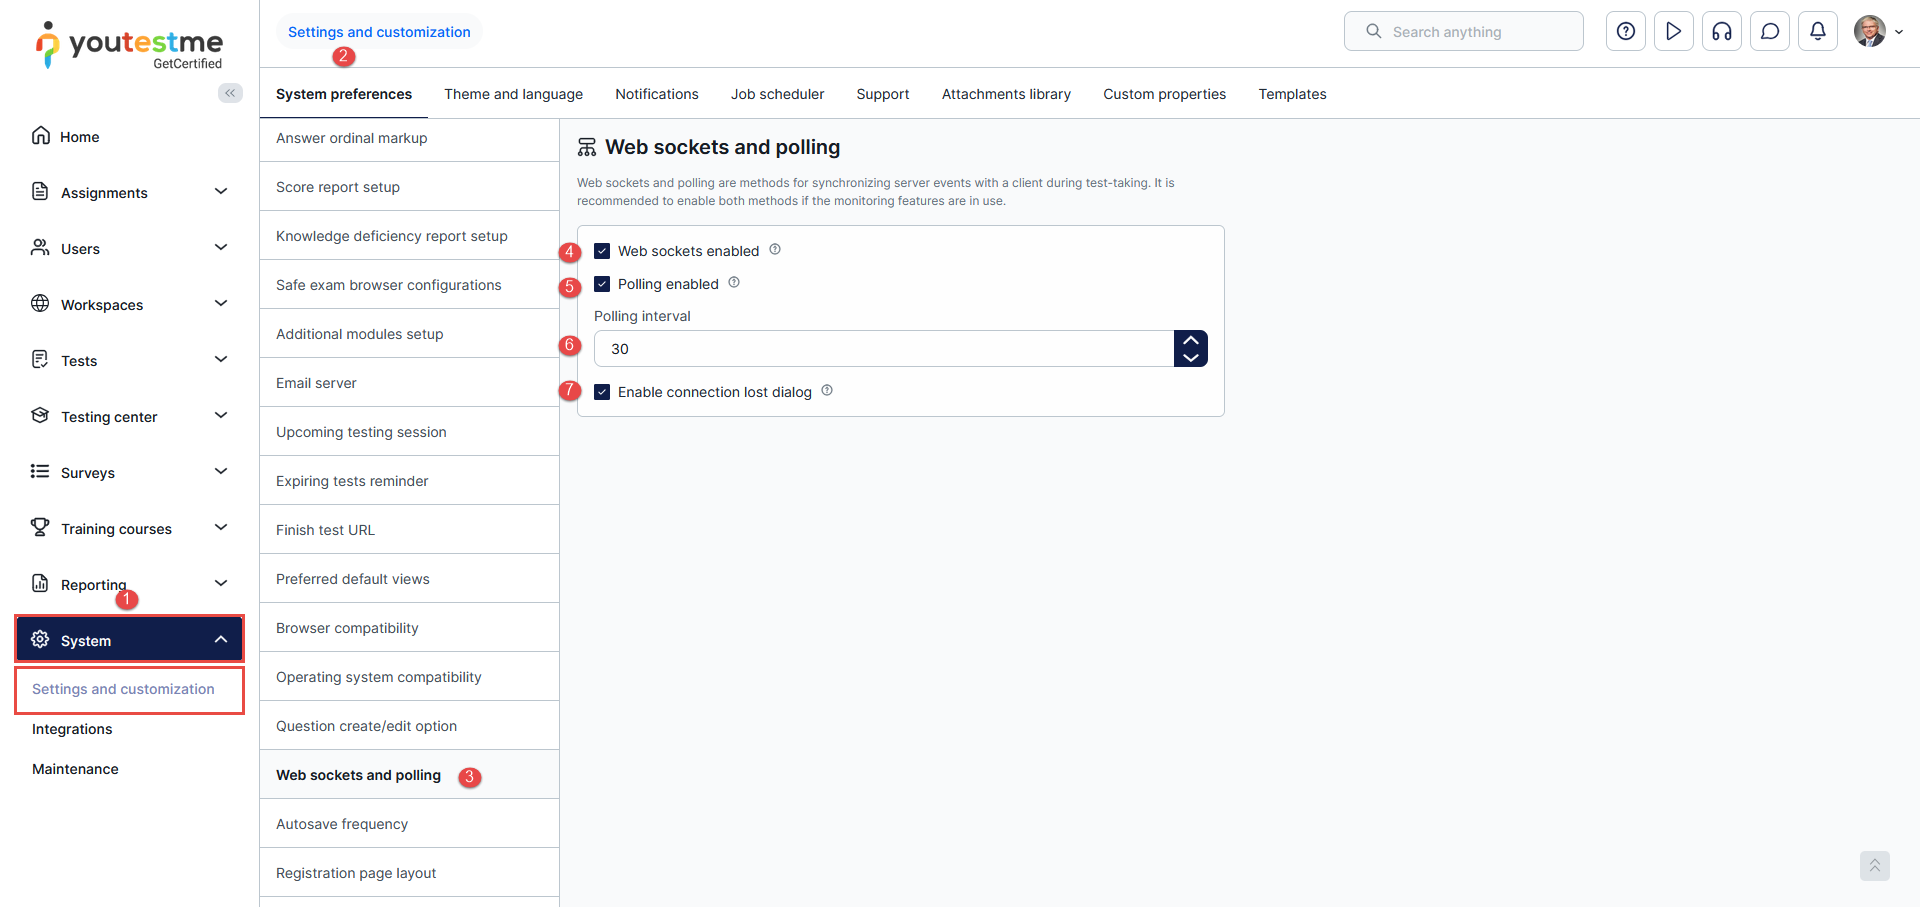
- Click on the System page and select Settings and customization.
- Navigate to the System preferences tab.
- Scroll down and select Web Sockets and polling.
- Web sockets enabled – Enable this option when monitoring is in use. If not, it’s wise to disable it to avoid impacting system performance and capacity.
- Polling enabled – Similar to Web sockets, activate polling if monitoring is enabled. For non-monitoring scenarios, disabling polling prevents any unintended performance impacts.
- Polling Interval – Specify how often the client checks for new server events. An ideal interval is 30 seconds or greater, ensuring optimal system performance.
- Enable connection lost dialog – in case of internet connection problems or unexpected errors during the test taking, the dialog will cover the page until the issue is resolved.
The Connection Lost Dialog
If enabled in the system, candidates may see a “connection lost” or unexpected error dialog during certain situations in a test session. This usually occurs due to a temporary interruption, such as unstable internet connectivity or another unexpected communication issue between the browser and the platform.
The dialog is designed to:
- Notify the candidate that an interruption occurred,
- Allow the session to recover,
- Help administrators and support teams analyze unexpected situations more effectively.
Can Candidates Continue the Test?
Yes. In most cases, candidates can resume their session and continue the test normally after the interruption is resolved.
Why Does the Dialog Suggest Reloading the Page?
The reload option is provided as a recovery mechanism in case the page becomes temporarily unresponsive. Without this option, the candidate could remain stuck on the same screen without a clear next step.
In practice, reloading the page helps restore the session and allows the candidate to continue working.
Does Reloading Remove the Candidate From the Test?
No. Reloading the page does not automatically terminate the test session. The platform is designed to allow candidates to return to the active test session after temporary interruptions or unexpected errors.
What Happens if a Crash or Interruption Occurs During the Test?
Responses are continuously saved on the server after each submission, rather than locally on the candidate’s device.
The system automatically detects temporary communication issues and resumes operation once connectivity is restored. Additionally, infrastructure redundancy helps ensure continuity in the event of a server failure, allowing candidates to continue the test session without interruption whenever possible.
By understanding and configuring Poling and Web sockets with precision, you can optimize your test monitoring, ensuring a seamless experience for both administrators and test-takers.
For more related articles, please visit:
