
Article verified for Release 15.1 on September 19, 2025
YouTestMe allows administrators to efficiently import multiple testing sessions for one or more tests using the Excel template. In addition to creating and configuring sessions, the template also enables the bulk upload of users and proctors. This guide explains how to use the Excel template to upload sessions and manage their assignments.
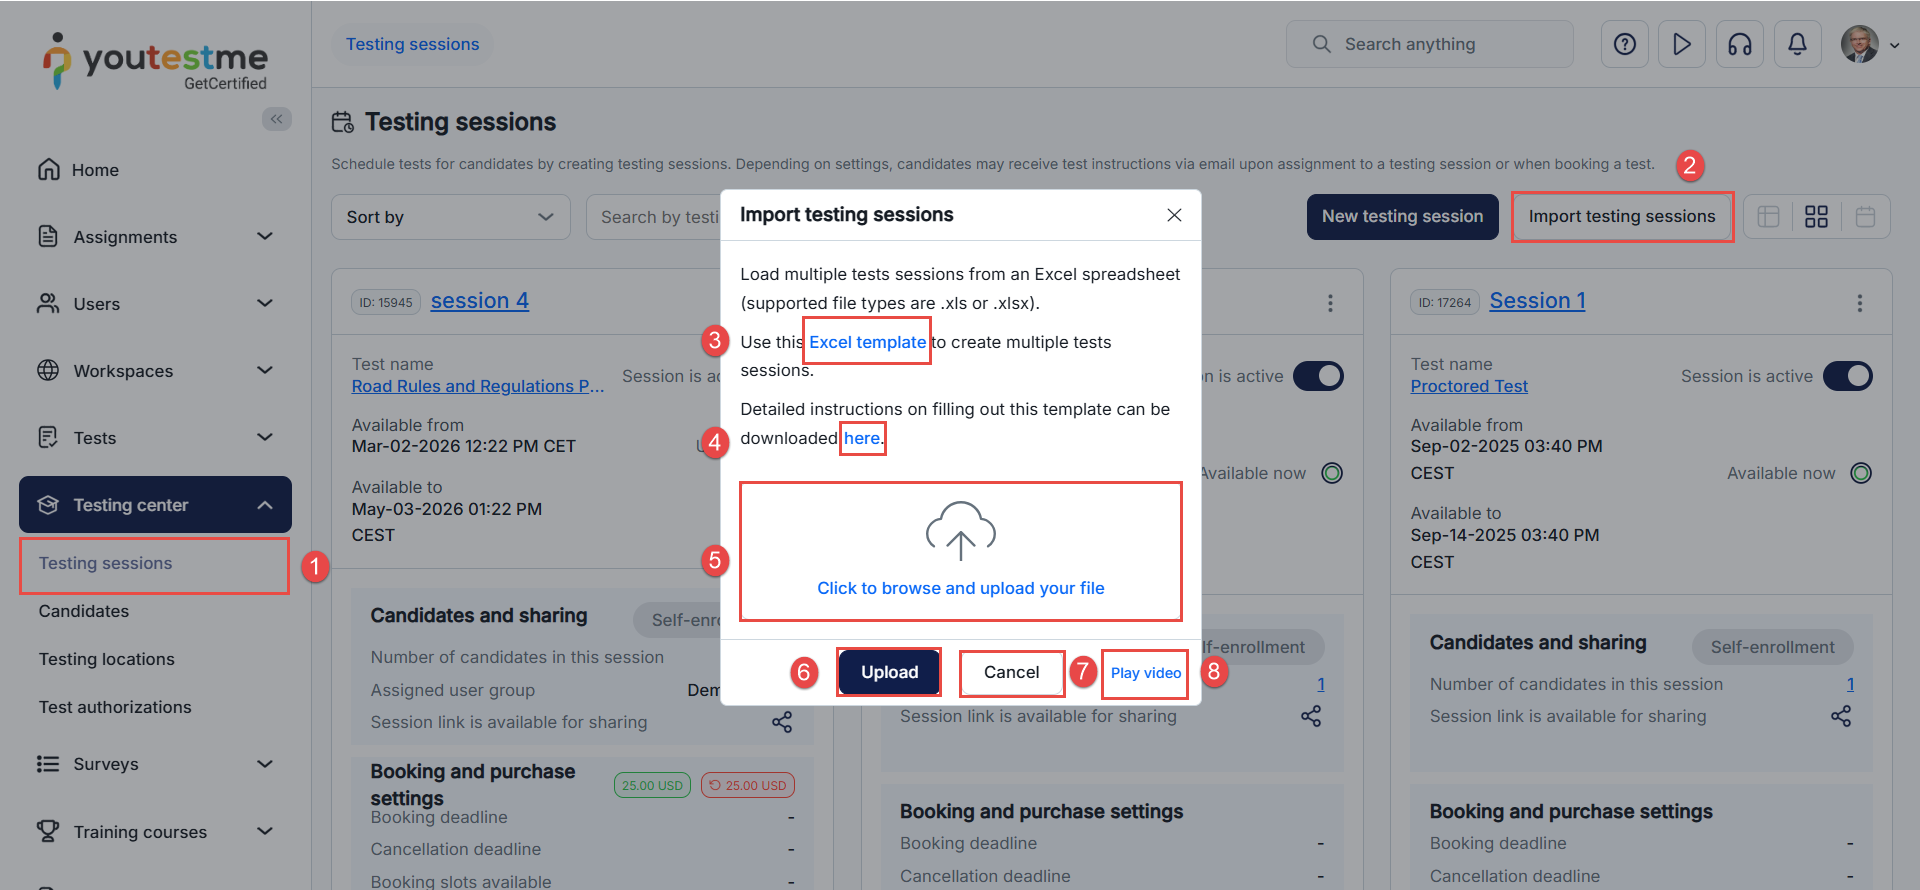
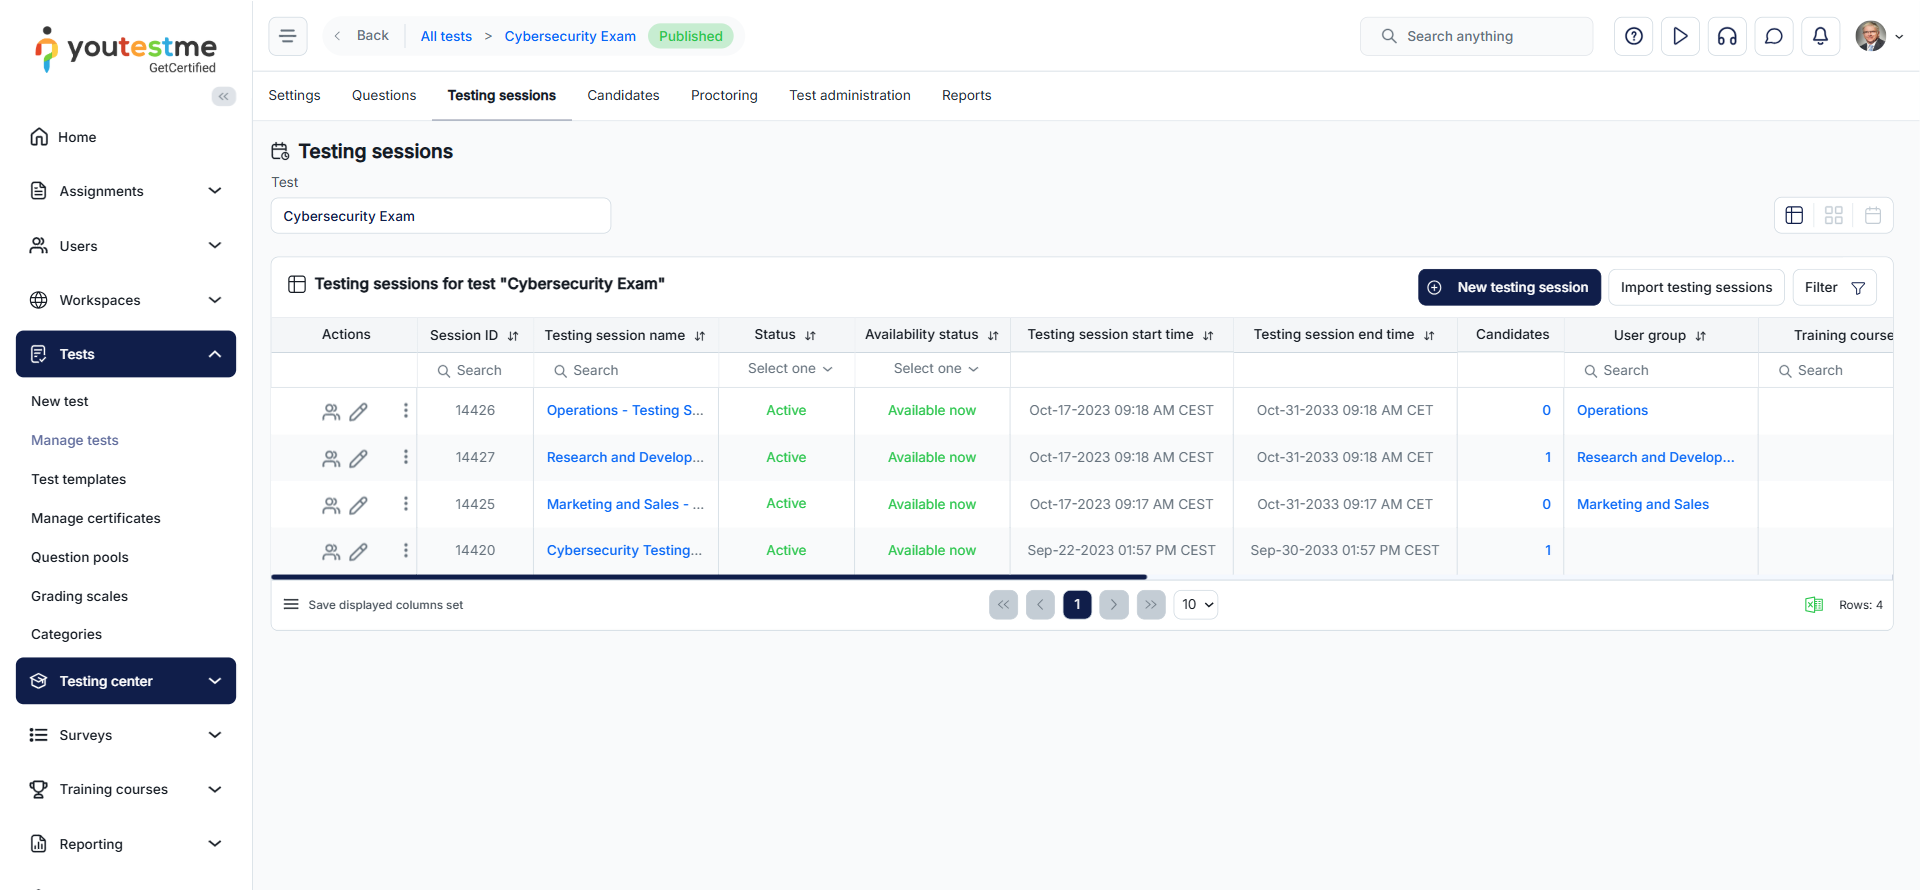
Upload testing sessions
-
Testing sessions – From the side menu, click Testing Center > Testing sessions.
-
Import testing sessions – Click Import testing sessions to open the import window.
-
Excel template – Download the Excel template to create multiple sessions, a single session with multiple tests, or just one test.
-
Instructions – Click here to download detailed instructions for filling out the template.
-
Upload file – Click the upload area or drag & drop your Excel file .
-
Upload – Press Upload to import the selected file.
-
Cancel – Click Cancel to stop the process.
-
Play video – Click Play video to watch a step-by-step tutorial
Filling in the Excel template
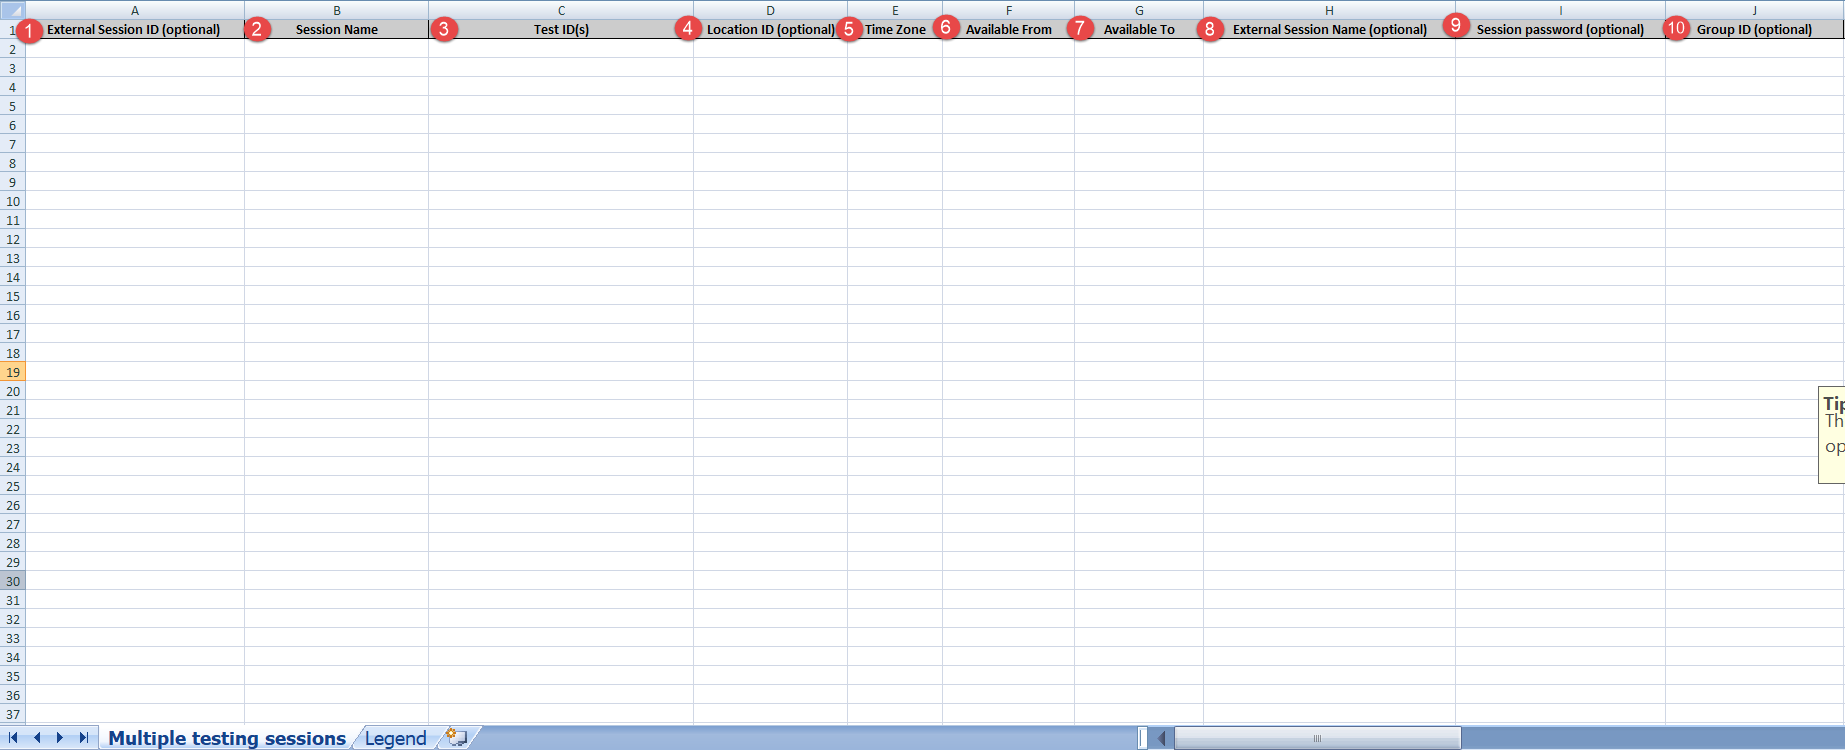
When using the Excel template, you’ll need to complete the required fields
-
External Session ID (Optional):
A unique text identifier for the session. Useful if you want to reference this session later in reports or integrations. -
Session Name (Required):
A clear and descriptive name for the testing session. -
Test ID(s) (Required):
One or more test IDs assigned to this session. If multiple tests are included, separate them with commas. -
Location ID (Optional):
A numeric value representing the physical or virtual location of the session. -
Time Zone (Required):
Use the appropriate time zone code as listed in the Legend sheet. -
Available From (Required):
The session’s start date and time in the format:dd/mm/yyyy hh:mm. -
Available To (Required):
The session’s end date and time in the format:dd/mm/yyyy hh:mm. -
External Session Name (Optional):
If applicable, provide the session name already used in an external system. -
Session Password (Optional):
A password for locking/unlocking the session.
Note: If this field is filled, the Locked field must be set to Yes. -
Group ID (Optional):
Assigns the session to a specific group using a numeric ID.
Note: Candidates not part of the group will not be imported. -
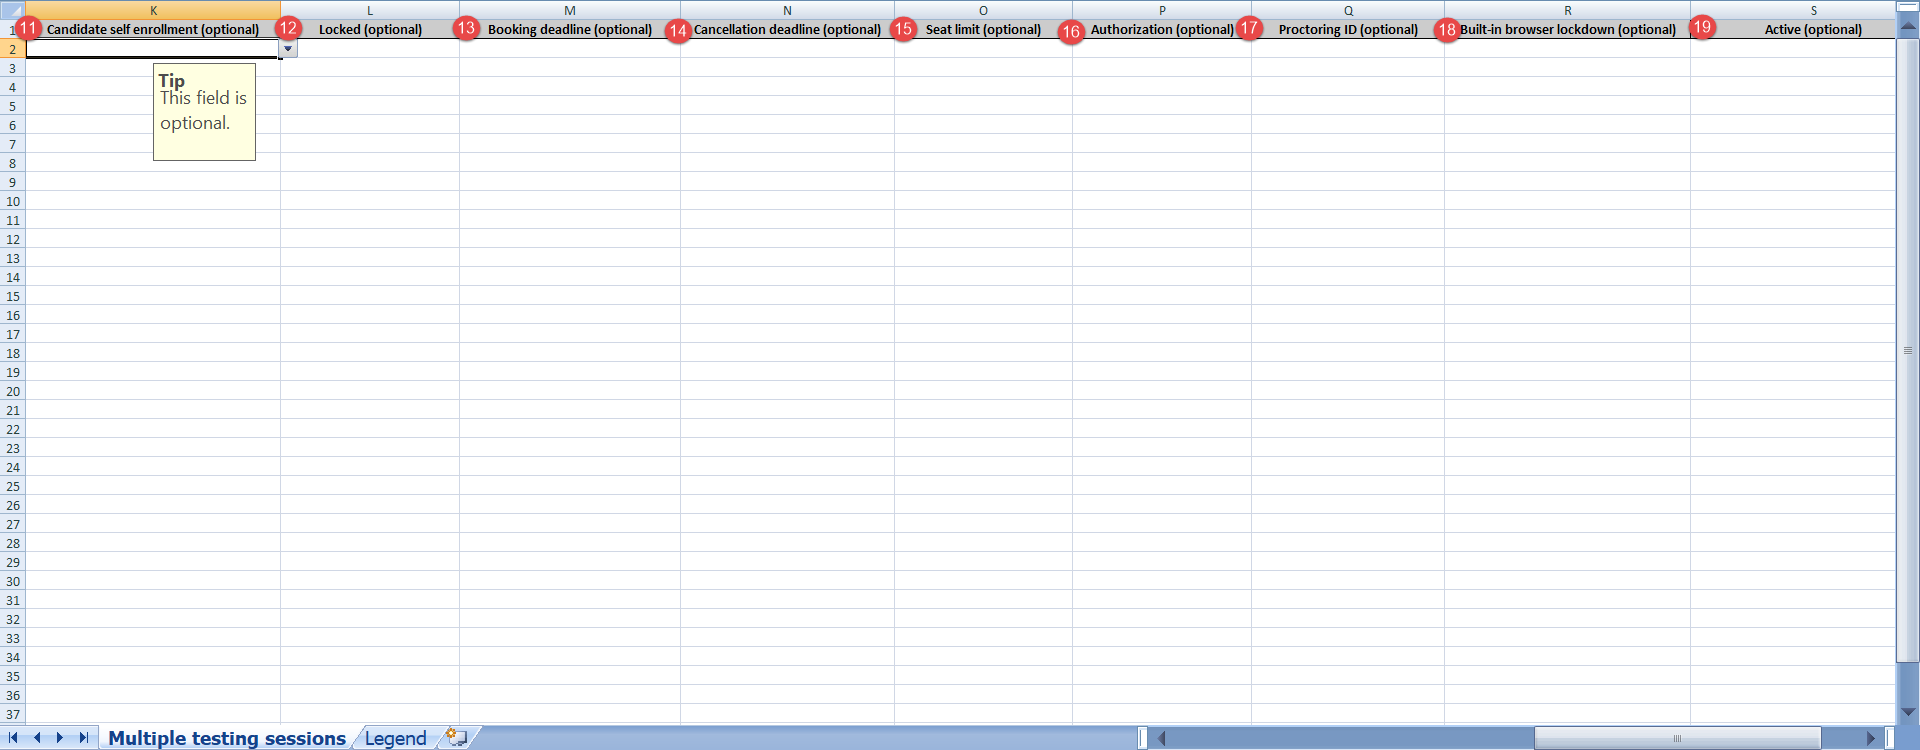
Candidate Self-Enrollment (Optional):
Accepts Yes or No.-
Yes = Candidates can enroll themselves in the session.
-
No = test manager must manually assign them.
Invalid values will trigger a system error.
-
-
Locked (Optional):
Accepts Yes or No (default).-
Yes = session is locked (requires password if set).
-
No = unlocked.
-
-
Booking Deadline (Optional):
Last date and time candidates can book the session. Format:dd/mm/yyyy hh:mm.
After this, no new bookings are allowed. -
Cancellation Deadline (Optional):
Last date and time candidates can cancel their booking. Format:dd/mm/yyyy hh:mm.
After this, cancellations are not allowed. -
Seat Limit (Optional):
Maximum number of candidates who can book the session. Enter a numeric value. -
Authorization (Optional):
Accepts Yes or No (default).-
Yes = candidates need authorization before starting the test.
-
-
Proctoring ID (Optional):
ID from the proctoring configuration under Integrations → Proctoring Settings. -
Built-in Browser Lockdown (Optional):
Accepts Yes or No (default).-
Yes = test runs in full-screen mode with restricted browser actions.
-
-
Active (Optional):
Accepts Yes or No (default).-
Yes = marks the session as active.
-
No = session remains inactive.
-
Detailed guidelines can be found in the Instructions or Legend sheet within the template.
To upload candidates to a session, follow these steps:
- Open the Users sheet in the Excel file.
- Enter the exact usernames in the Username column.
- Provide the corresponding session External Session ID

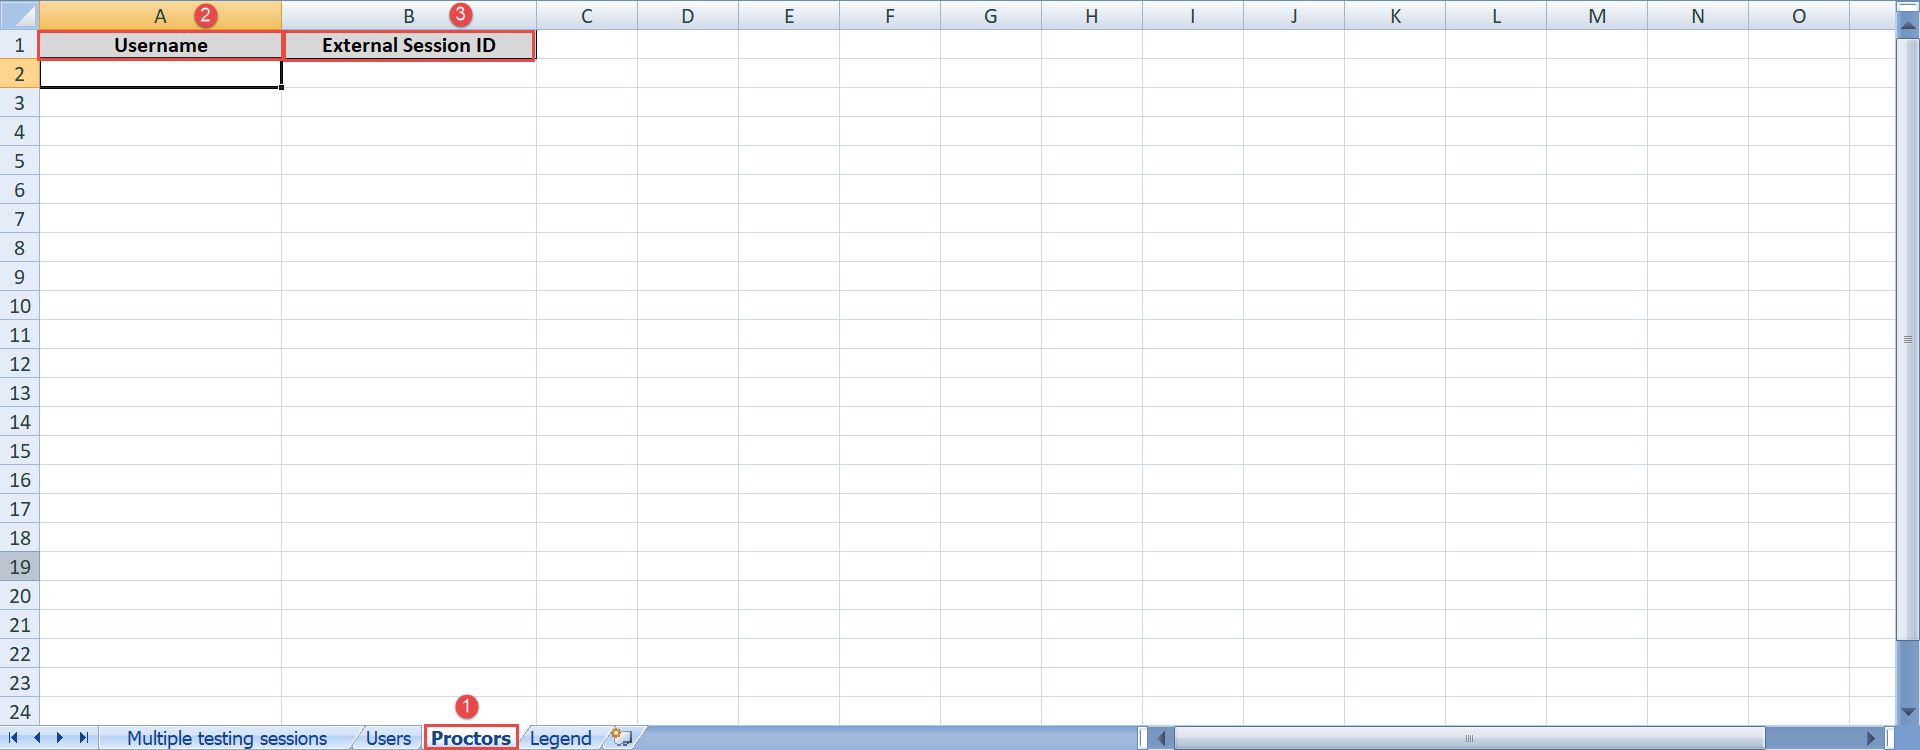
To upload proctors to sessions, follow these steps:
- Open the Proctors sheet in the Excel file.
- Enter the exact usernames in the Username column.
- Provide the corresponding session External Session ID in the next column.
Previewing testing sessions in the application
For more related instructional materials, please visit:
