
Article verified for Release 15.1 on December 9, 2025.
The system provides several methods for creating user accounts, designed to suit different organizational needs and volumes. This article provides an overview of the available options, explains when to use each method, and shows how to get started.
Manually Creating a User
Manual user creation enables administrators to add individual users directly to the system, providing complete control over their account details and settings. This method is ideal for small-scale onboarding, such as registering a few users or handling specific role-based assignments. It offers flexibility in customizing user information, assigning roles and groups, and configuring language, time zone, and login credentials. Once created, users can receive a customizable email notification with access instructions, provided that notifications are enabled, the user account is set to active, and the administrator has opted to send the notification during account creation.
To manually create a user:
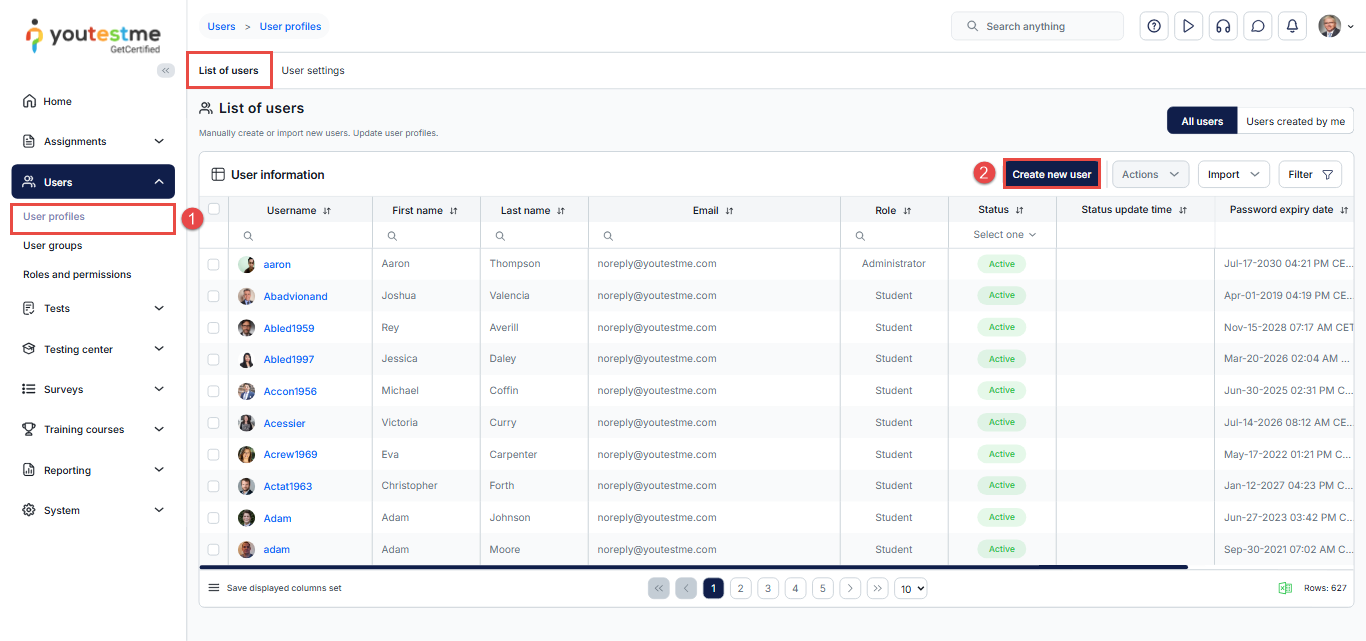
- Select the Users tab, then User Profiles.
- Select the Create new user button.
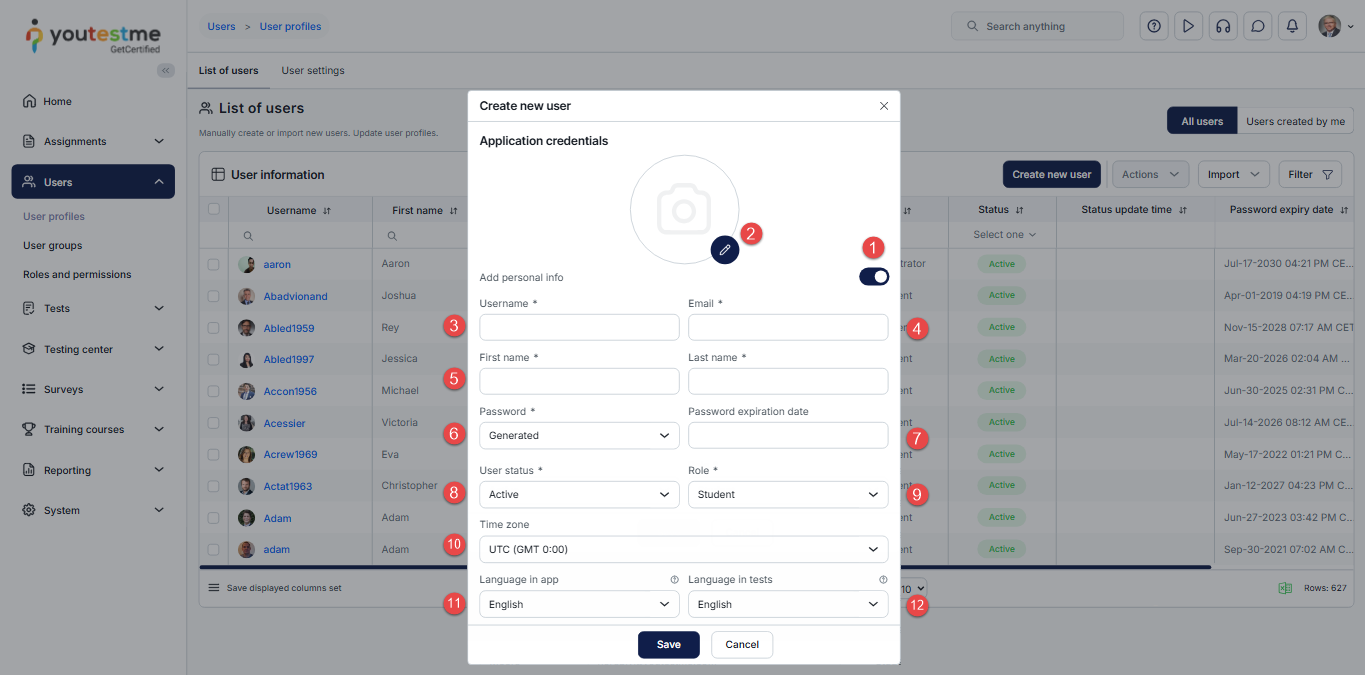
You will be prompted with a form to configure the user’s information, including:
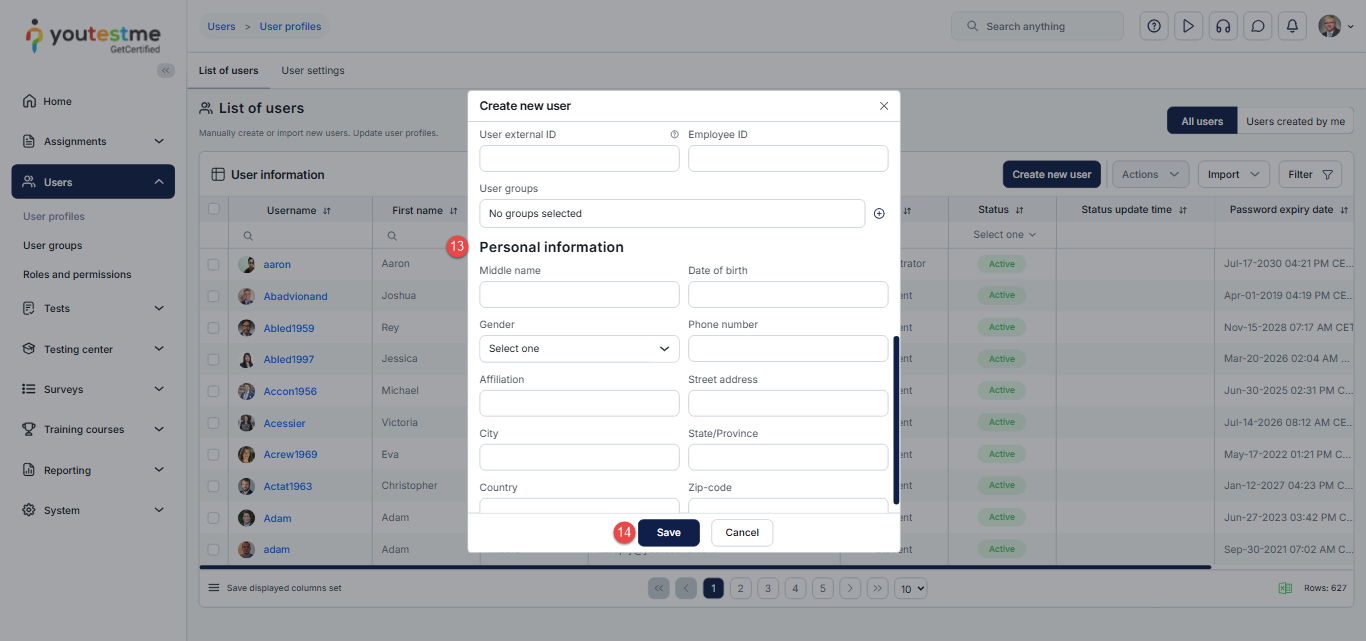
- Add Personal Information – If you enable this option, additional fields will become visible, including any custom user properties you have created:
- External ID: An optional field can be used to cross-reference with external systems, if any.
- Employee ID: An optional field used to specify the employee identification number, typically assigned when the user is a member of the organization’s staff.
- User Groups: If you need to add a user to user groups.
- Additional personal information (Middle name, date of birth, Gender, phone number, Affiliation, address details, etc.)
- profile picture: Optionally upload a photo to be displayed in the user’s profile.
- Username: A mandatory field used to identify the user within the system. Enter the username the user will use to log in.
- Email: Enter the user’s email address.
- First name and Last name: Mandatory fields where the user’s legal name should be entered. Note that the system uses the first and last name when generating certificates, so the full official name should be provided instead of nicknames.
- Password: Choose the desired option for the password creation:
- Generated if you want the system to generate a password automatically.
- Manually inserted if you want to enter a password manually.
- Password Expiration date: Set the Expiration date after which the password must be renewed.
- User Status: Select the user’s account status.
- Role: Set the user’s role in the system. You can select between the predefined roles or create a custom role. For more information, refer to the “Roles and Permissions” video.
- Time Zone: Define the user’s time zone. Assignment availability will be automatically converted to the defined time zone in the user profile.
- Language in app: Select the preferred language for the application interface.
- Language in tests: Select the preferred language for test content display (if translations exist).
- Enter the additional personal information if needed
- Click the Save button to create a profile.
When enabled, an automated email notification will be sent to the email address you provide, informing the user of their newly created account and providing them with the necessary credentials for access.
This email notification is fully customizable, allowing you to include login instructions and a direct link to the user’s profile. Please read this article to learn more about How to Configure Email and Application Notifications.
Bulk Uploading Users via Excel Template
The bulk import feature is designed for efficient large-scale user onboarding, making it ideal for institutions, companies, training programs, or academic sessions that require the addition of numerous users at once. This method enables administrators to prepare user data in a predefined Excel template that includes all mandatory fields and optional fields, such as gender, date of birth, group assignments, location, and custom properties. Once completed, the file can be uploaded through the Users module.
For step-by-step instructions and Excel formatting guidelines, please refer to the following article: How to Bulk Import Users with an Excel Template
Self-Registration – Allow Users to Create Their Accounts
YouTestMe provides the option to enable self-registration, allowing users to create their accounts by completing a registration form defined by the administrator. Administrators can configure various registration settings, including the form structure and whether registrations require approval.
Based on these settings, users can either gain instant access to their accounts upon submitting the form or submit a registration request that an administrator or manager must approve.
This feature is ideal for scenarios where open access is required, such as publishing a publicly available assignment or course on a website, without the need for manual account creation for each participant.
To enable self-registration:
- Navigate to System and select Settings and Customization.
- Under System Preferences, select Additional Modules Setup.
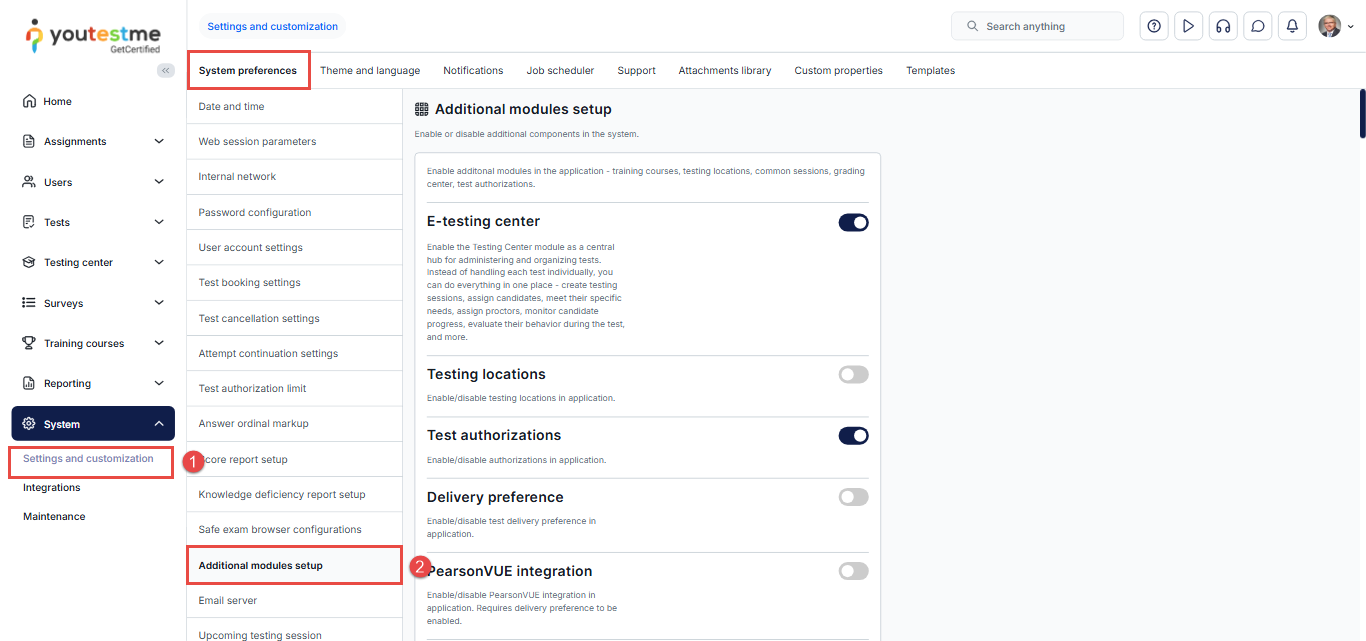
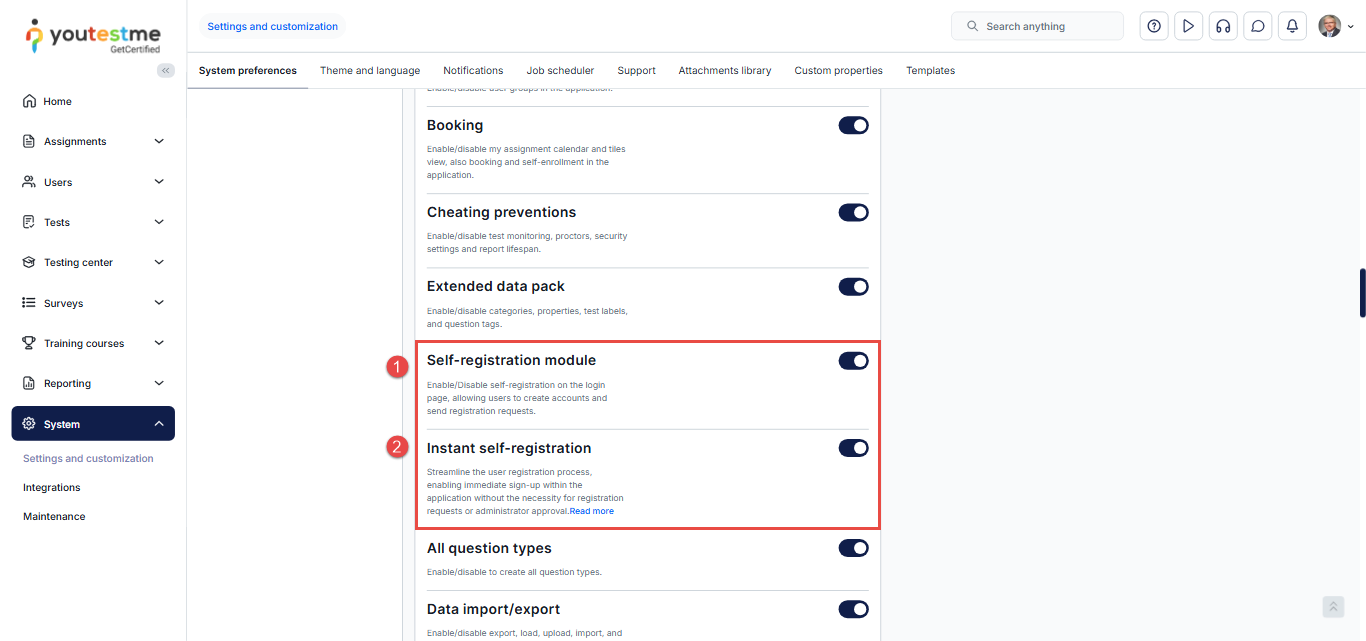
Scroll down to the Self-registration settings section and enable the following:
- Self-registration module – Allows users to create their accounts via a registration form.
- Instant self-registration – Allows users to gain instant access to their accounts.
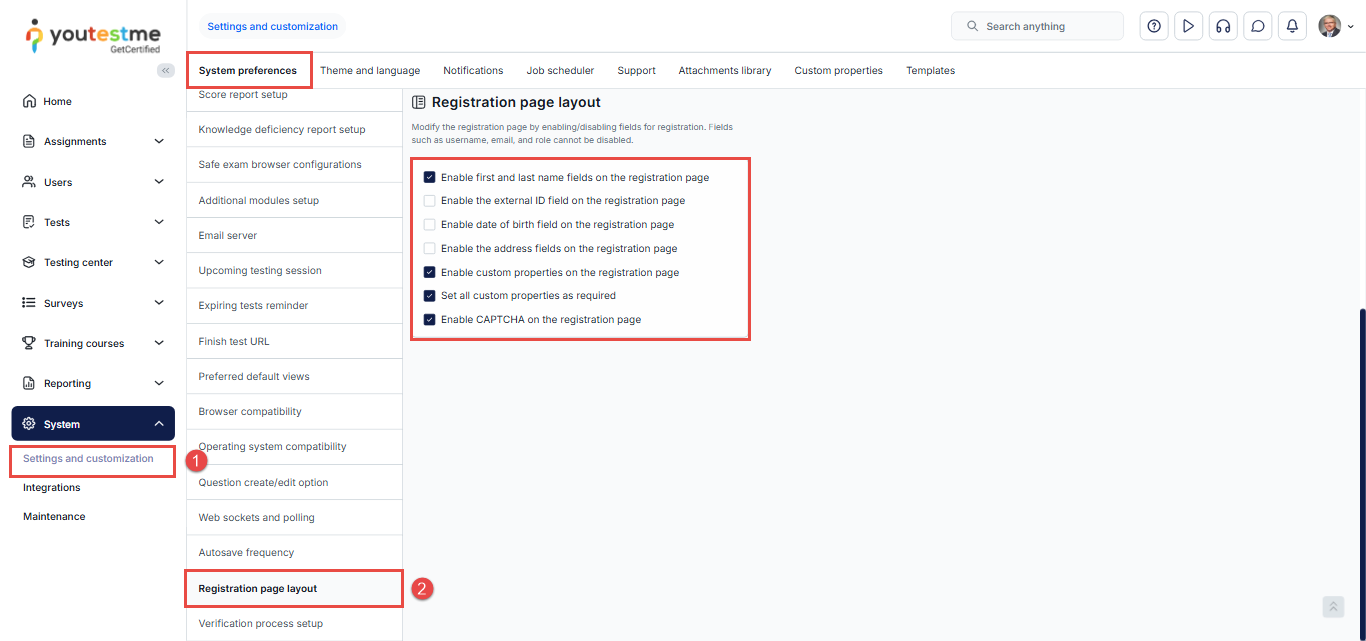
To customize the registration form:
- Navigate to System and select Settings and Customization.
- Under System Preferences, select Registration Page Layout, where you can choose the fields you want to display in the registration form, tailoring it to collect the specific user information you need.
This article explains how to register for the application and guides you through the steps to approve or decline registration requests, so you can manage user access efficiently How to Register with Self-Registration Module Enabled or Disable
For more details, refer to the following articles:
