
Article verified for Release 15.1 on December 22, 2025.
This article explains how administrators can configure the default layout candidates see when accessing the My Tests and My Surveys pages. By selecting an appropriate default view List, Calendar, or Tile administrators can control how tests and surveys are presented, helping candidates quickly locate relevant sessions, understand availability, and take action more efficiently.
Configuring the default view
For the My Tests and My Surveys default view, you can choose one of the following options:
- List – Presents a comprehensive list of all tests and surveys.
- Calendar – Presents assigned tests and surveys in a calendar format with available sessions.
- Tile – Presents a visual display of all tests and surveys, showing essential information.
To customize the default view on the My Tests and My Surveys pages, follow these steps:
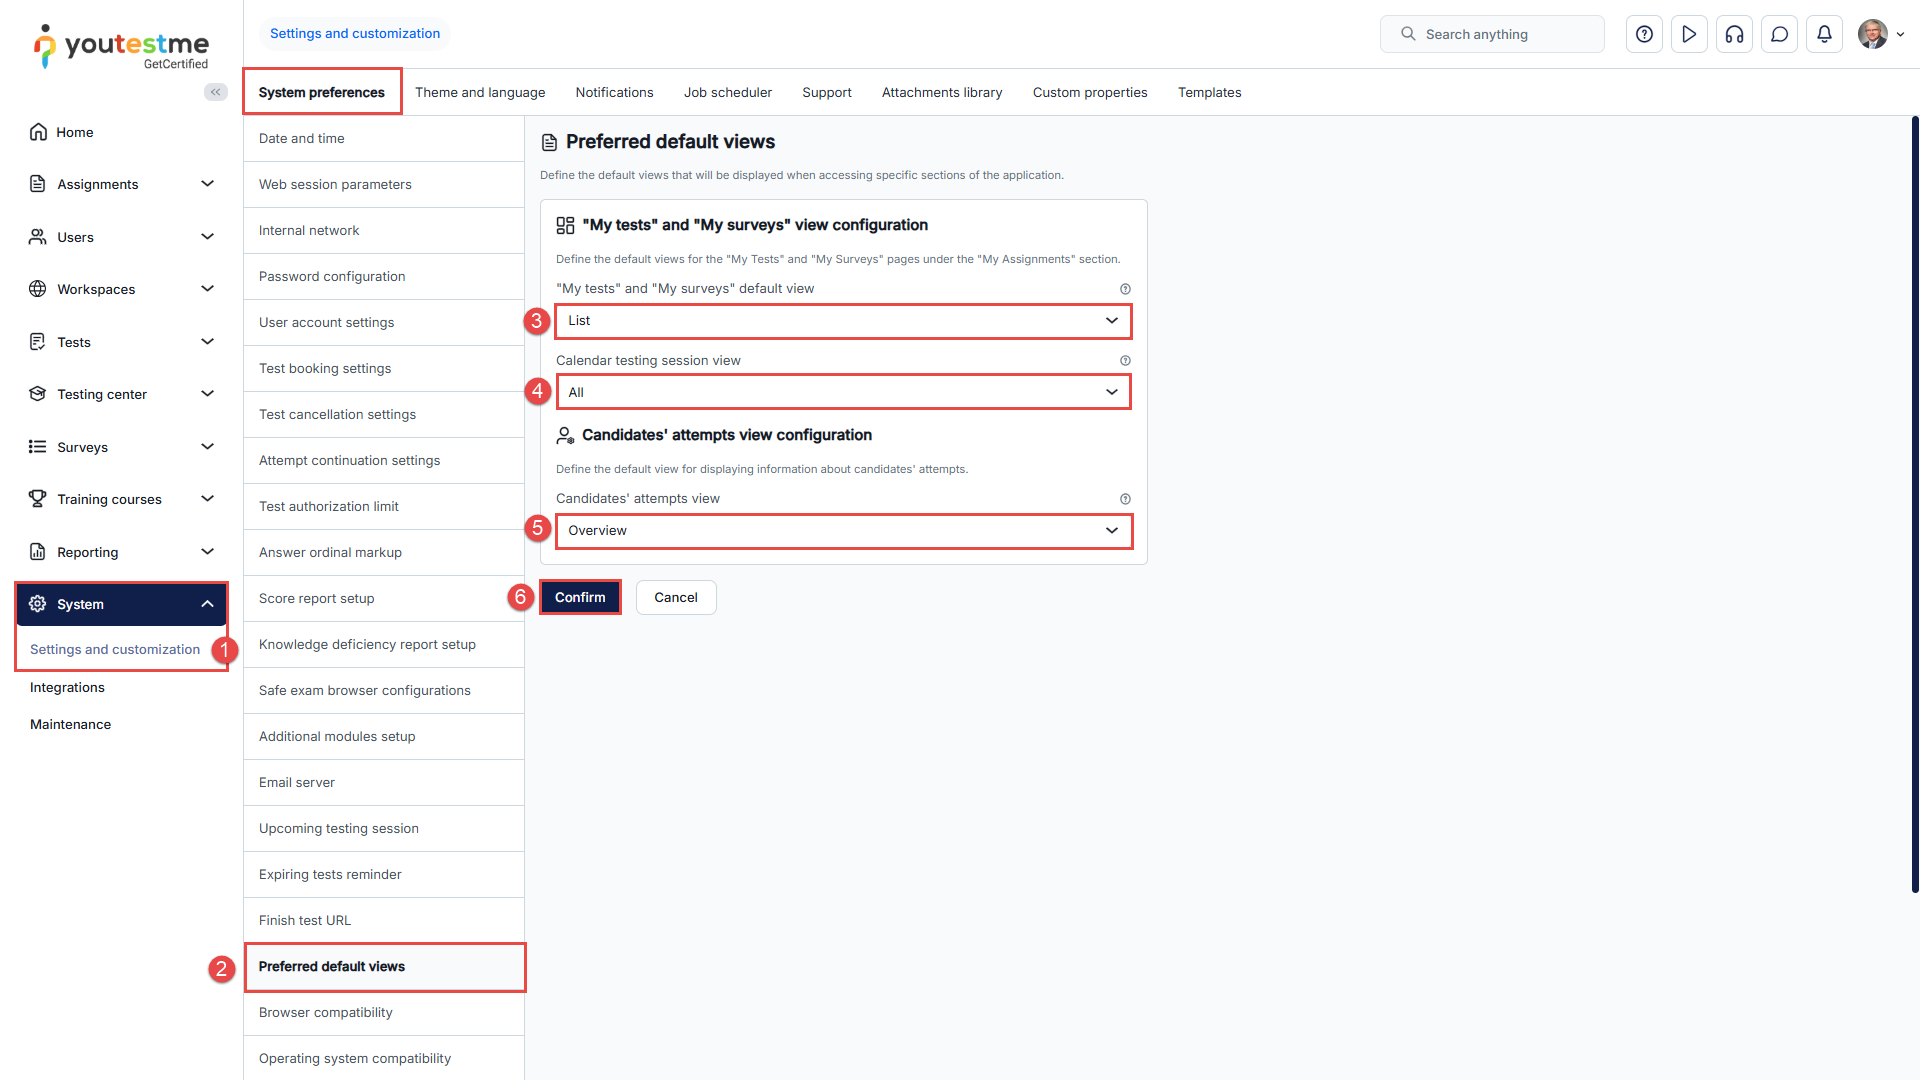
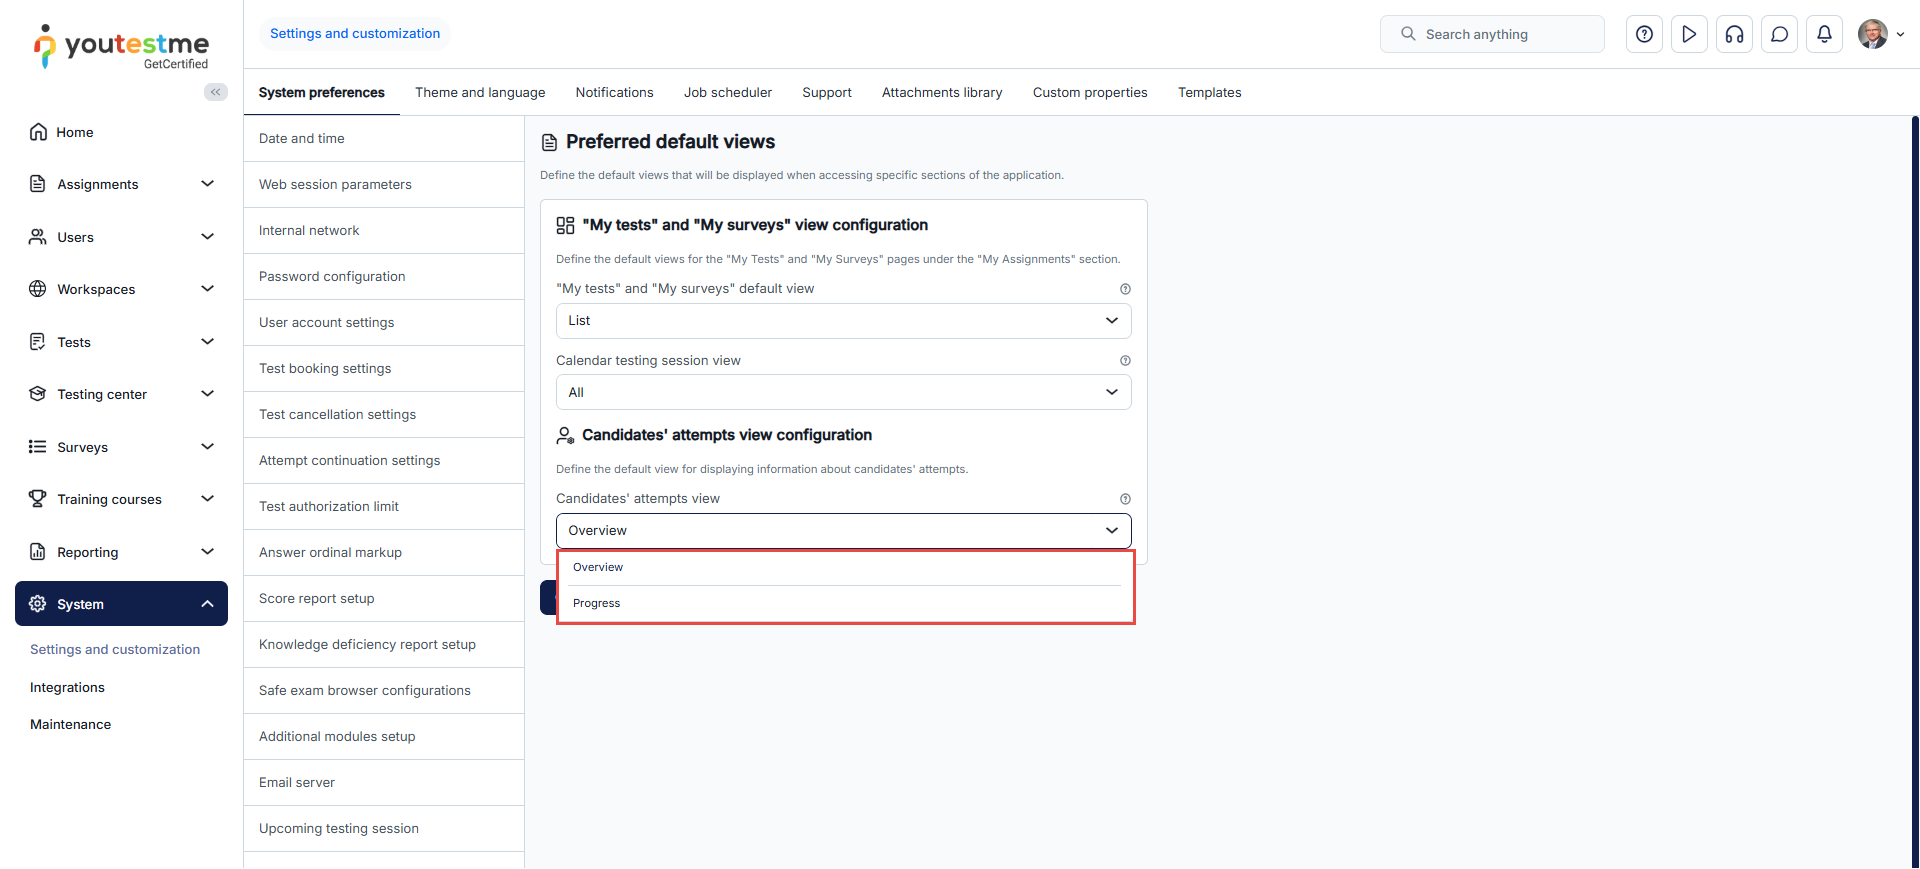
- Navigate to the System page and select the Settings and Customization sub-menu.
- Select the Preferred default views in the System Preferences tab.
- Select My Tests and Surveys’ default view from the dropdown list.
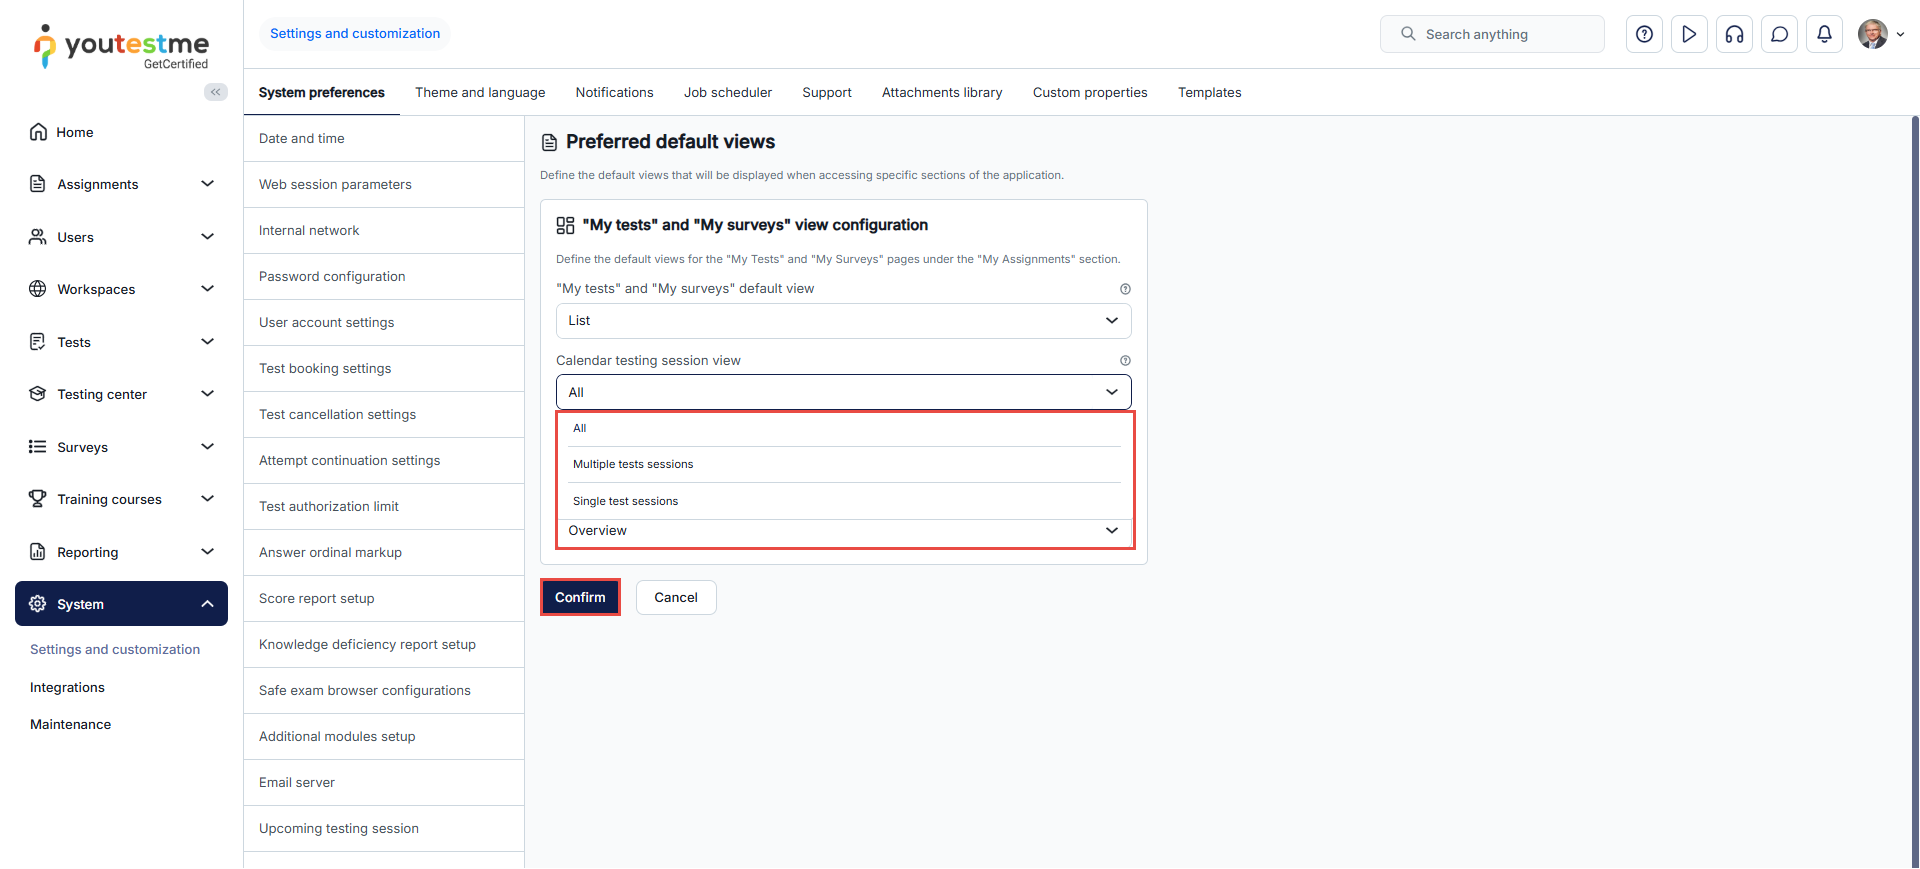
- Calendar testing session view – Customize further the way test sessions are displayed on the calendar based on their type:
- All – This option displays all sessions, including both common and individual sessions.
- Multiple test sessions – Display only common sessions.
- Single test session – Display only individual sessions.
- Candidates’ attempts view – Define the default view for displaying candidates’ attempt information.
- Click the Confirm button to save the changes.
Calendar testing session view
In the Calendar testing session view, all testing sessions are displayed by default. However, you can customize the default display of testing sessions on this page to show either Multiple test sessions or Single test sessions, depending on your preference.
Candidate’s perspective
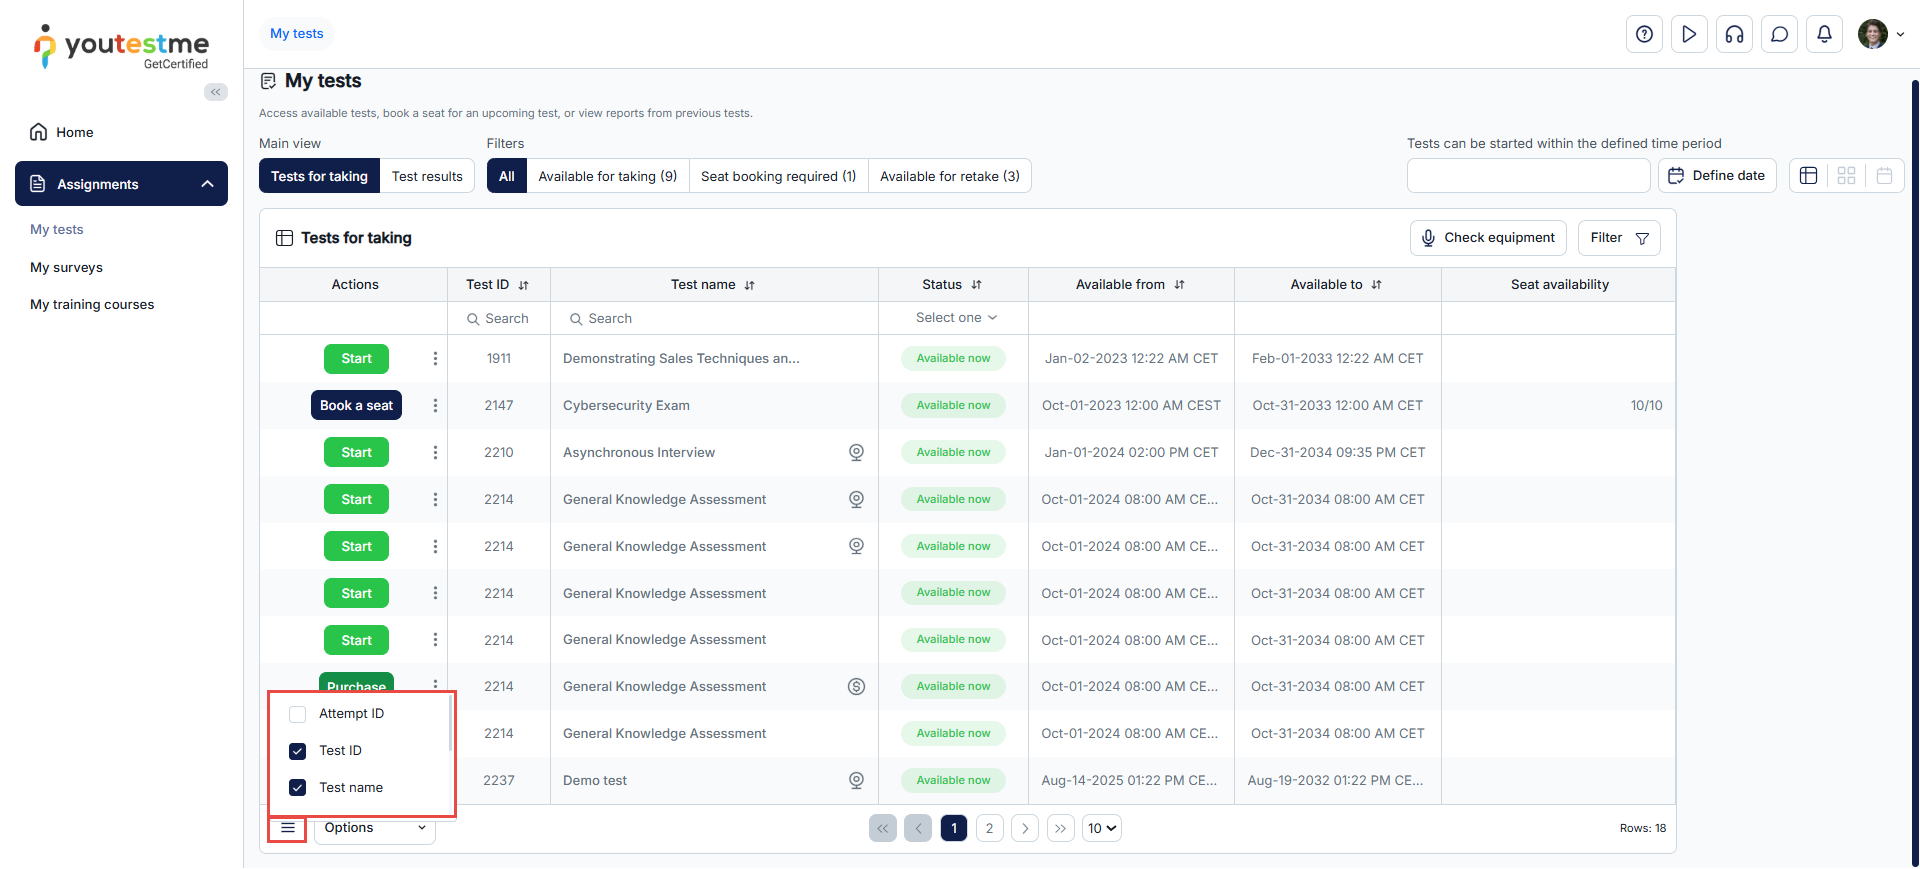
List view
In this view, the candidates can:
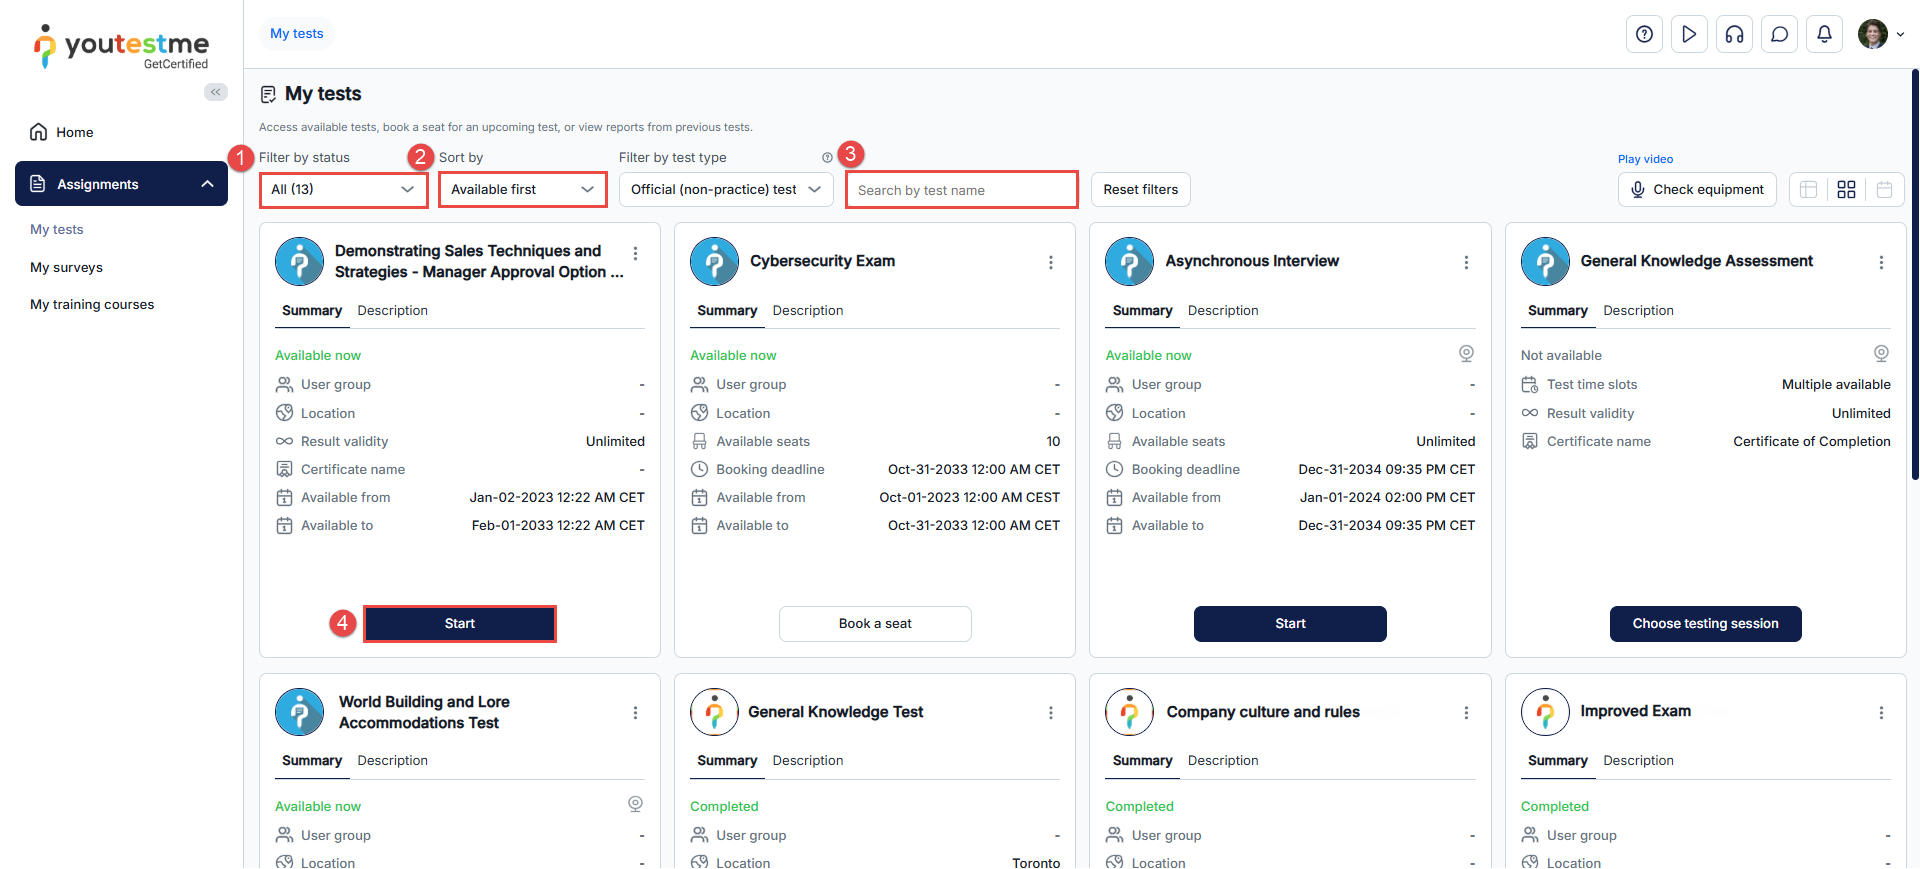
- Select whether to display the available tests for taking or the results of finished tests.
- Filter the list by choosing to display all sessions, tests available for immediate taking, tests available for booking, or tests available for retaking.
- Filter tests based on their availability period.
- Start a test, purchase, retake, or preview their results from the actions column.

For instructions on setting the extended list view to a fixed alphabetical order, see this guide
Customizing the list view
For a better user experience, candidates can customize the test list by selecting the columns they prefer to display. This can be done through the table settings by checking the boxes next to the column names.
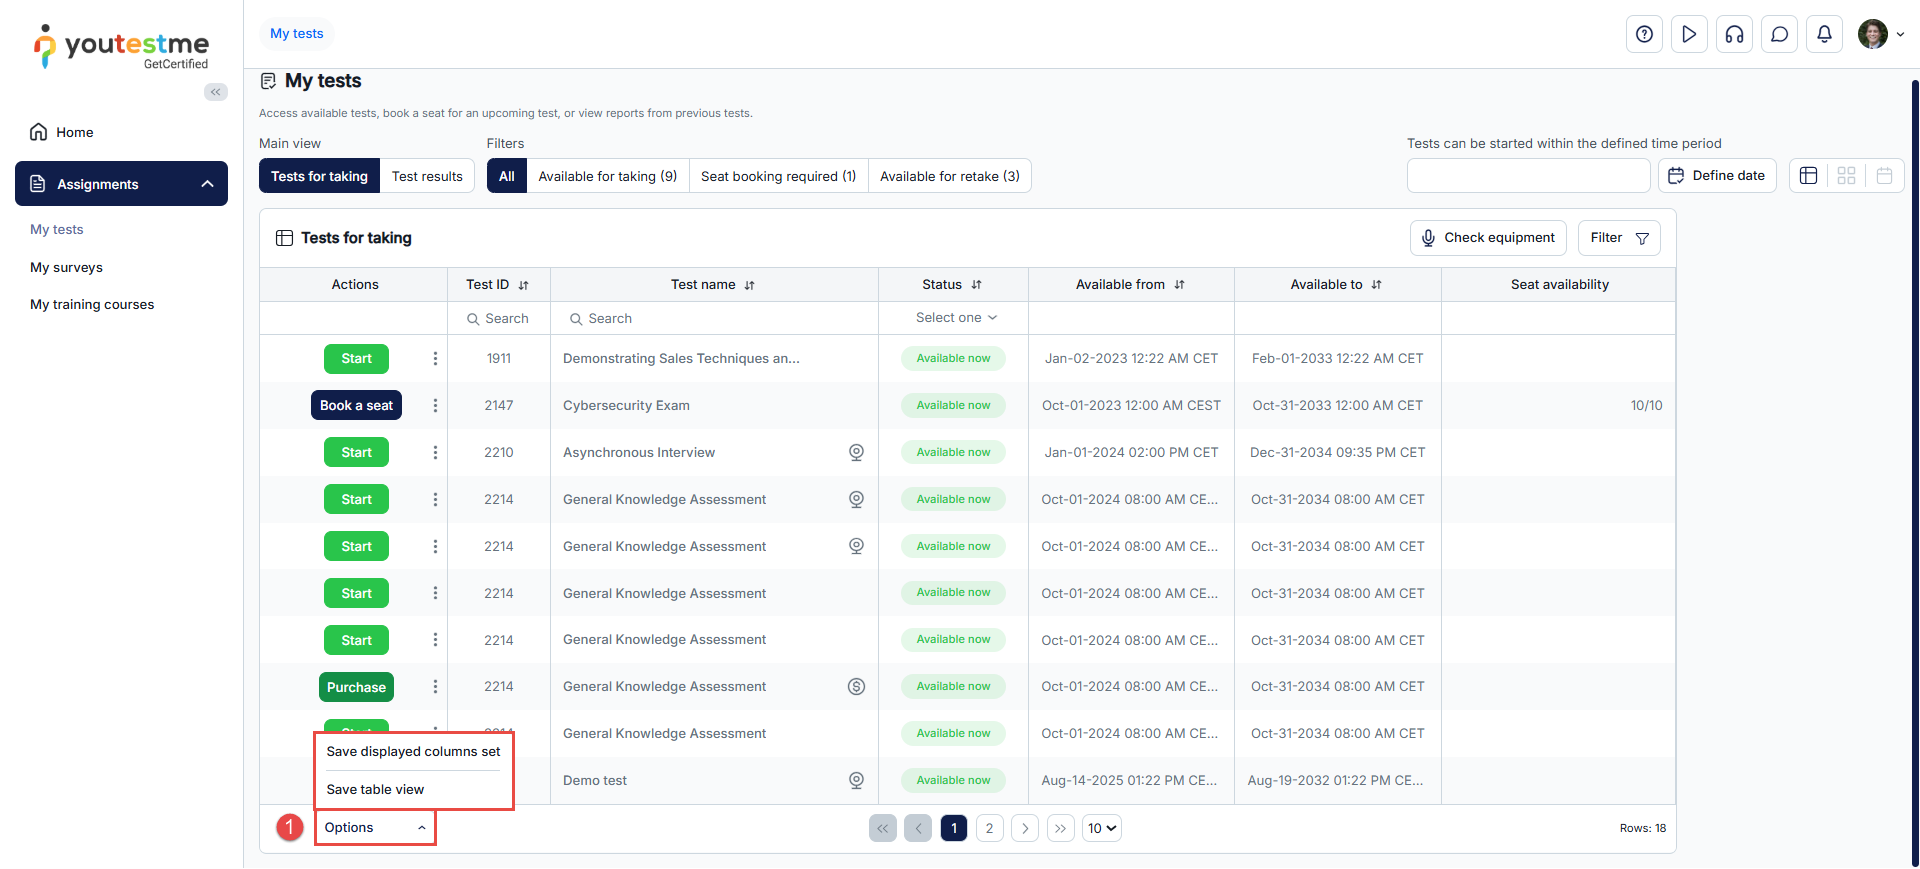
In addition, candidates can further customize their display by applying filters to show their desired tests and saving the customized view for future use. This eliminates the need to reapply filters whenever they access the My Tests tab.
To save and manage display settings, follow these steps:
- Click on the Options dropdown menu and choose one of the following options:
- Save Displayed Columns Set: Saves the current list configuration, including the selected columns and the number of displayed rows.
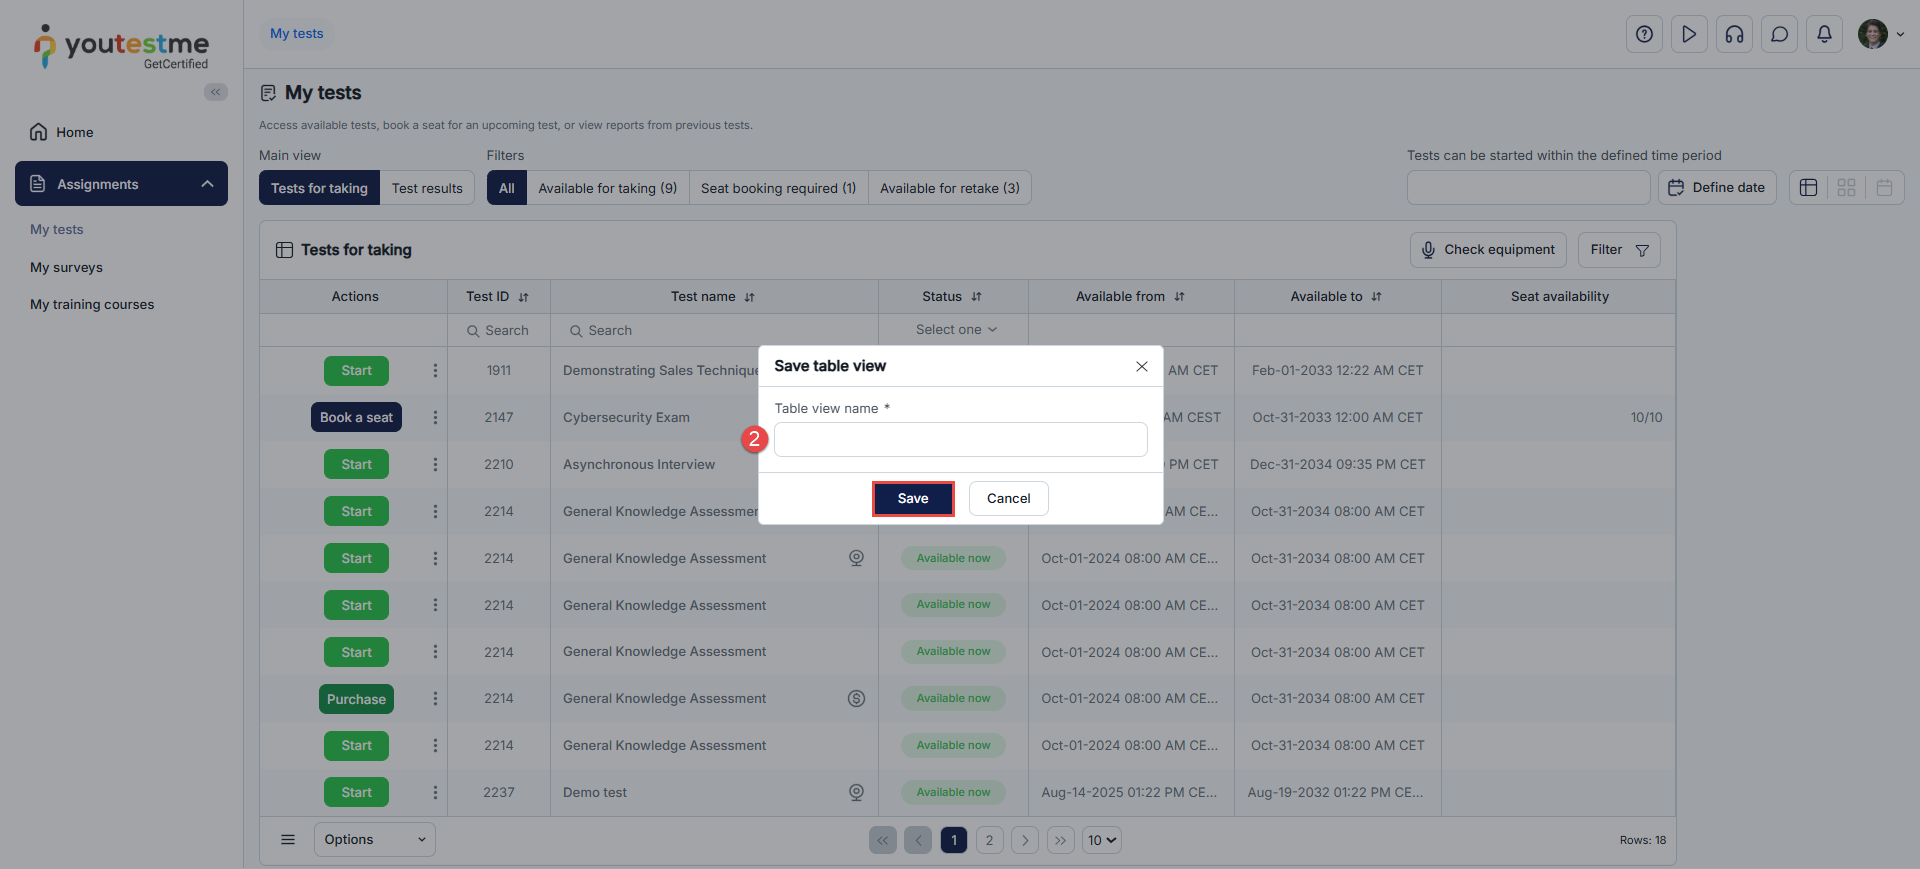
- Save Table View: Saves the entire view, including any applied filters.

- In the pop-up dialogue, enter a name for the table view, then click Save.
Loading a Saved Table View
- To use a previously saved table view, click on the Options dropdown menu and select Load Table View.
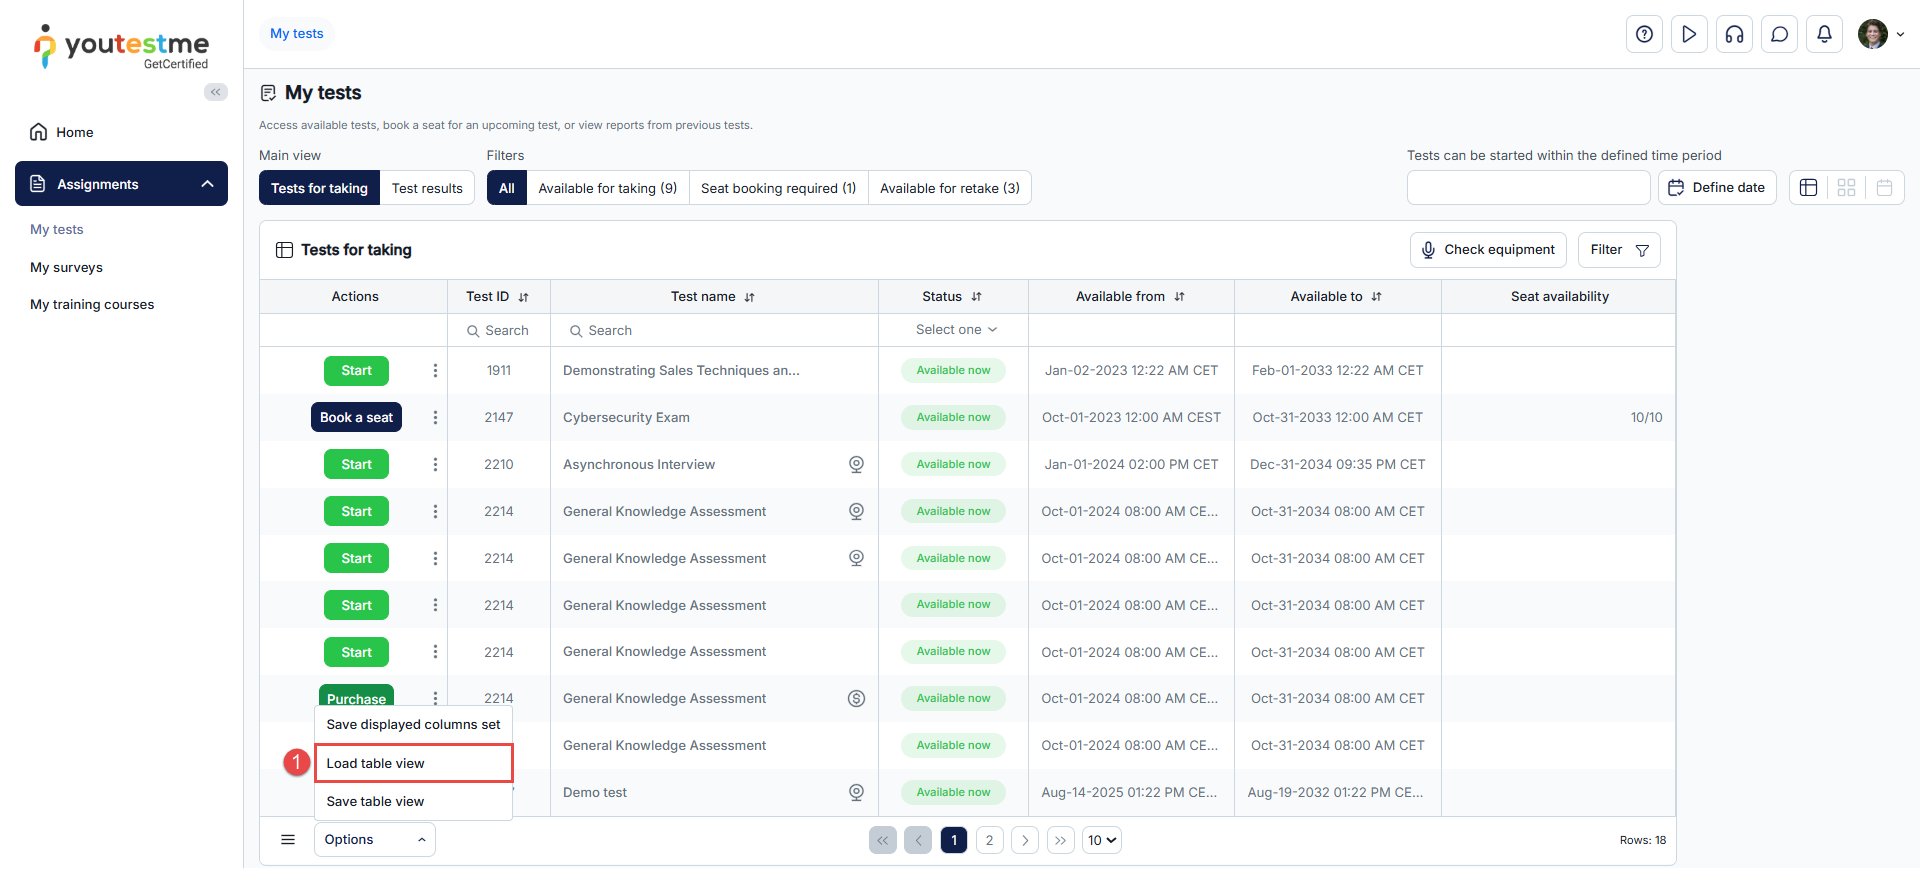
- A dropdown menu will appear, where you can select the desired view and click Load to display the table view.

This feature ensures a personalized and efficient experience for managing test displays.
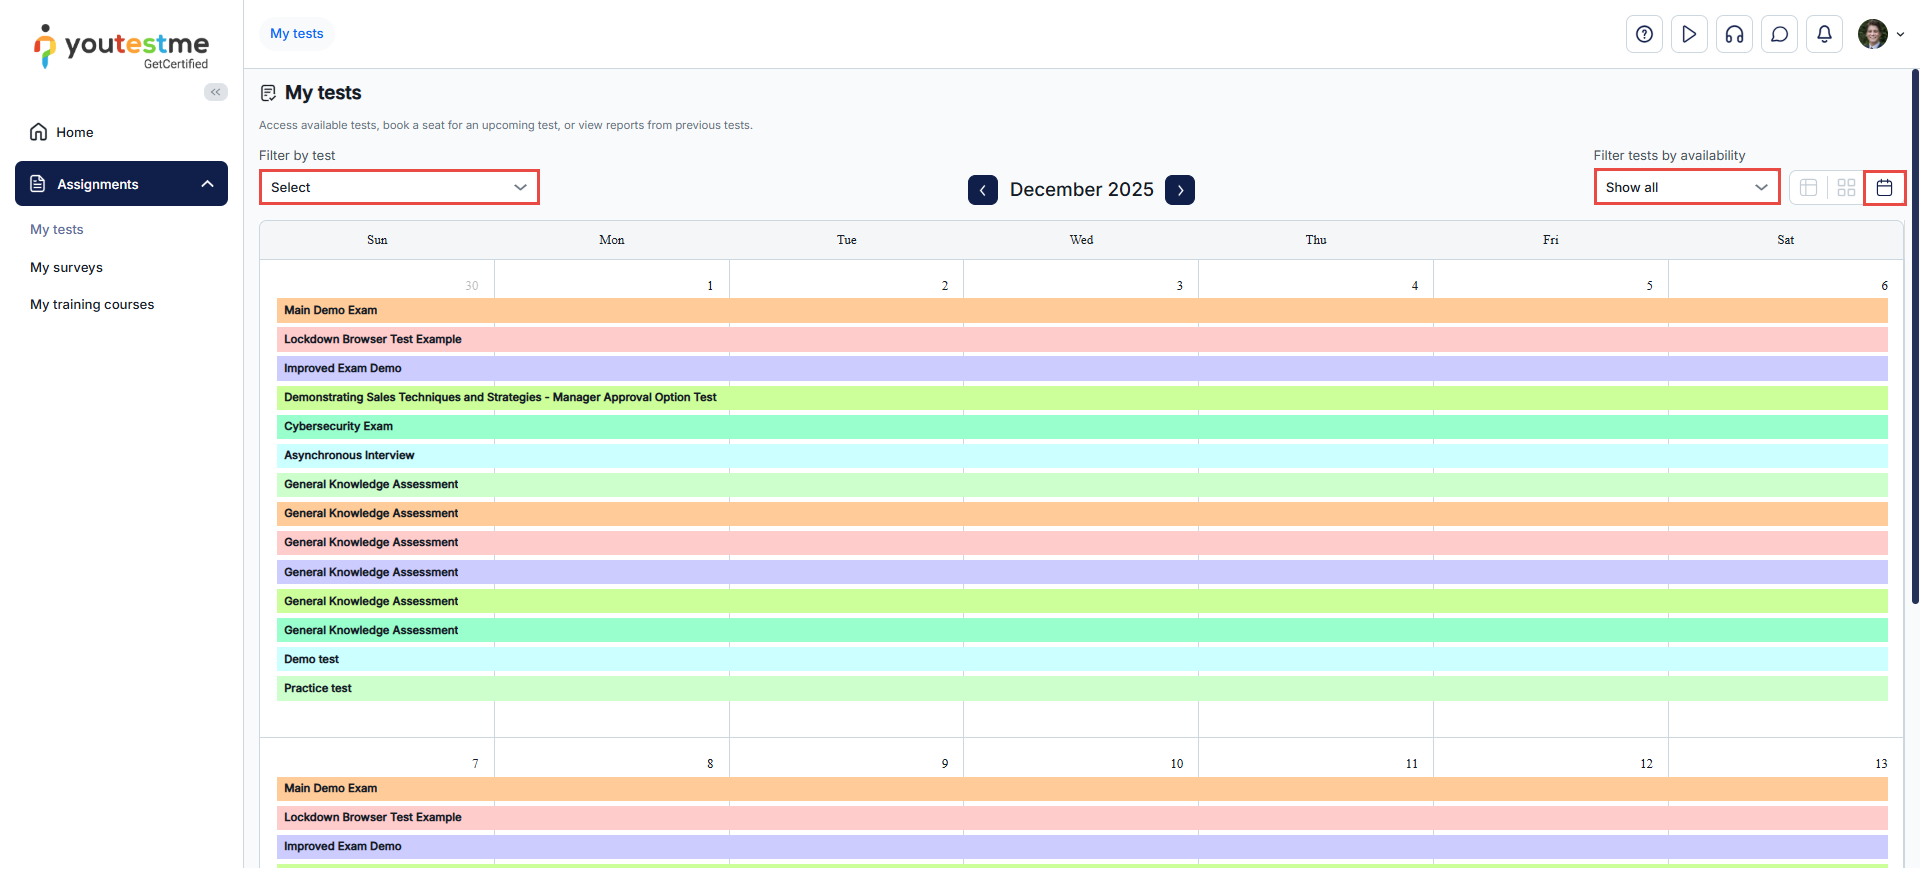
Calendar view
In this view, sessions are presented in a calendar format, allowing candidates to filter tests by delivery preference or availability period.
Tile view
In this view, sessions are presented in tiles, with each tile displaying information specific to that session. Candidates can:
- Filter sessions by status to display those available for upcoming sessions or those that have already finished.
- Sort sessions by name, creation date, etc.
- Search for a specific session by entering its name in the search field.
- Take, purchase, book, retake, or preview test results.
Note: If the authorization module is activated, candidates can only start tests for which they have been authorized.
The Candidates’ Attempts view provides administrators with a centralized interface to manage and monitor candidates’ activity for any test or testing session. It allows you to define the default layout for displaying information about candidates’ attempts.
In the Candidates Attempts page, select the default view: Overview or Progress.
The Overview view displays general information about the attempt, including start and end times, the best-performing session, achieved results, and available actions such as allowing continuation or resetting the attempt.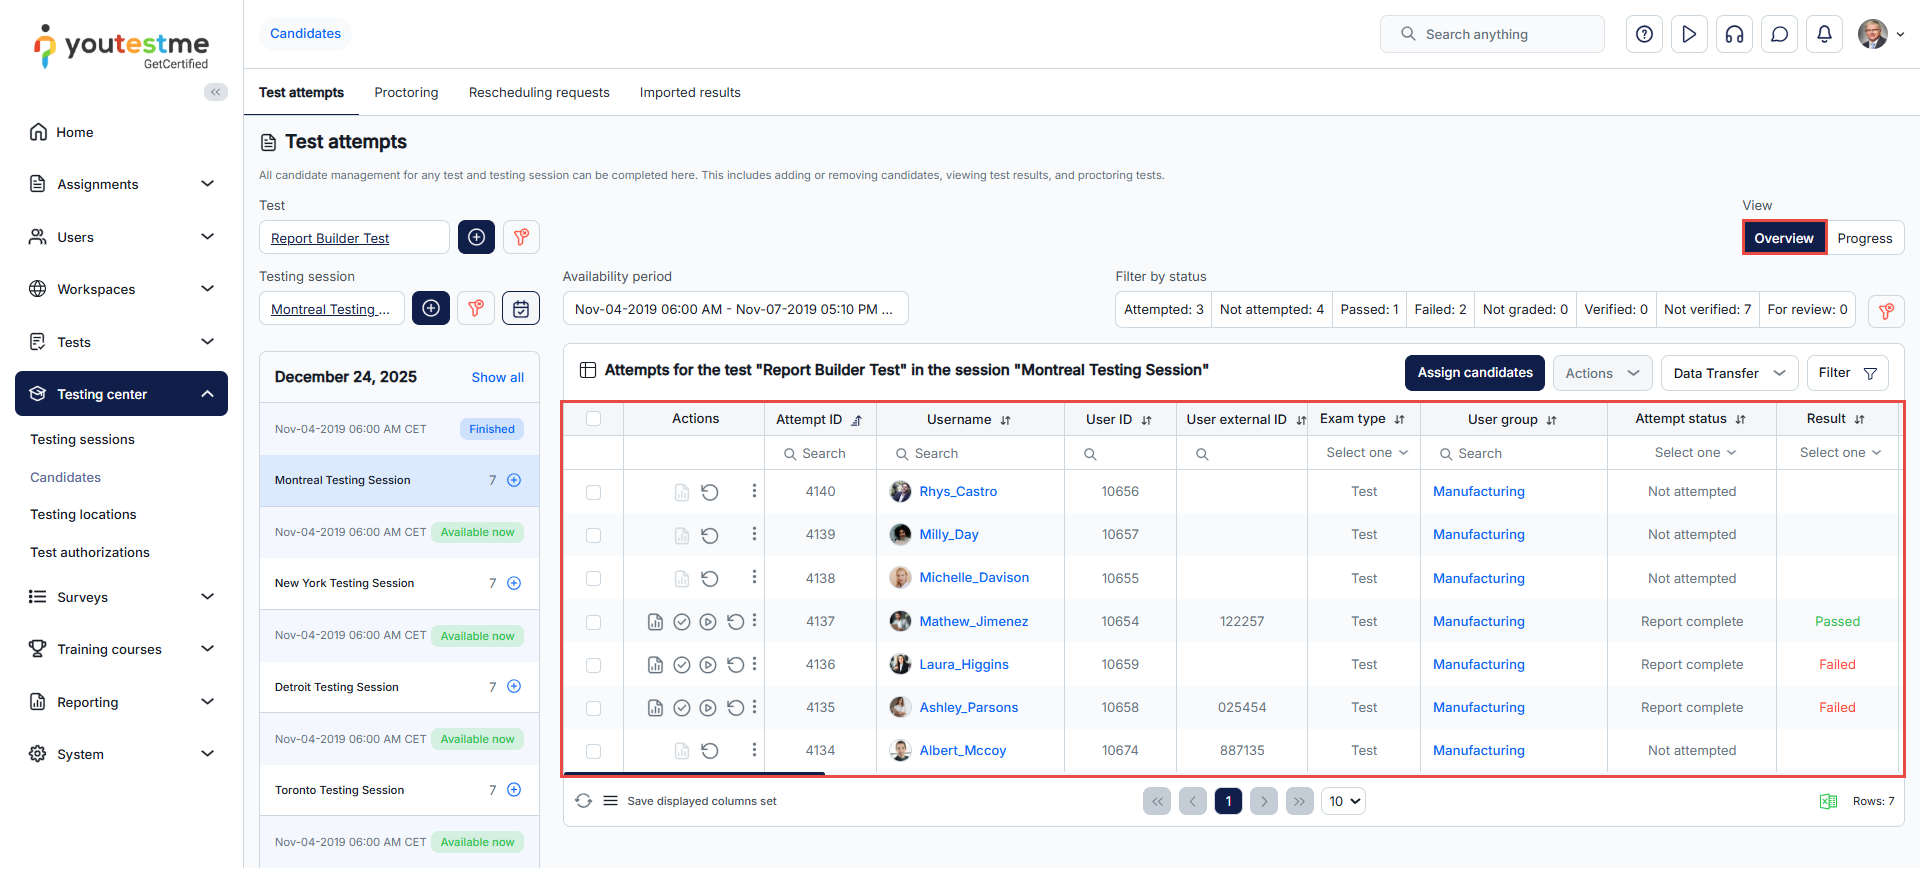
The Progress view provides detailed information about the candidate’s progress, including the number of answered and graded questions, and allows access to the Candidate Report.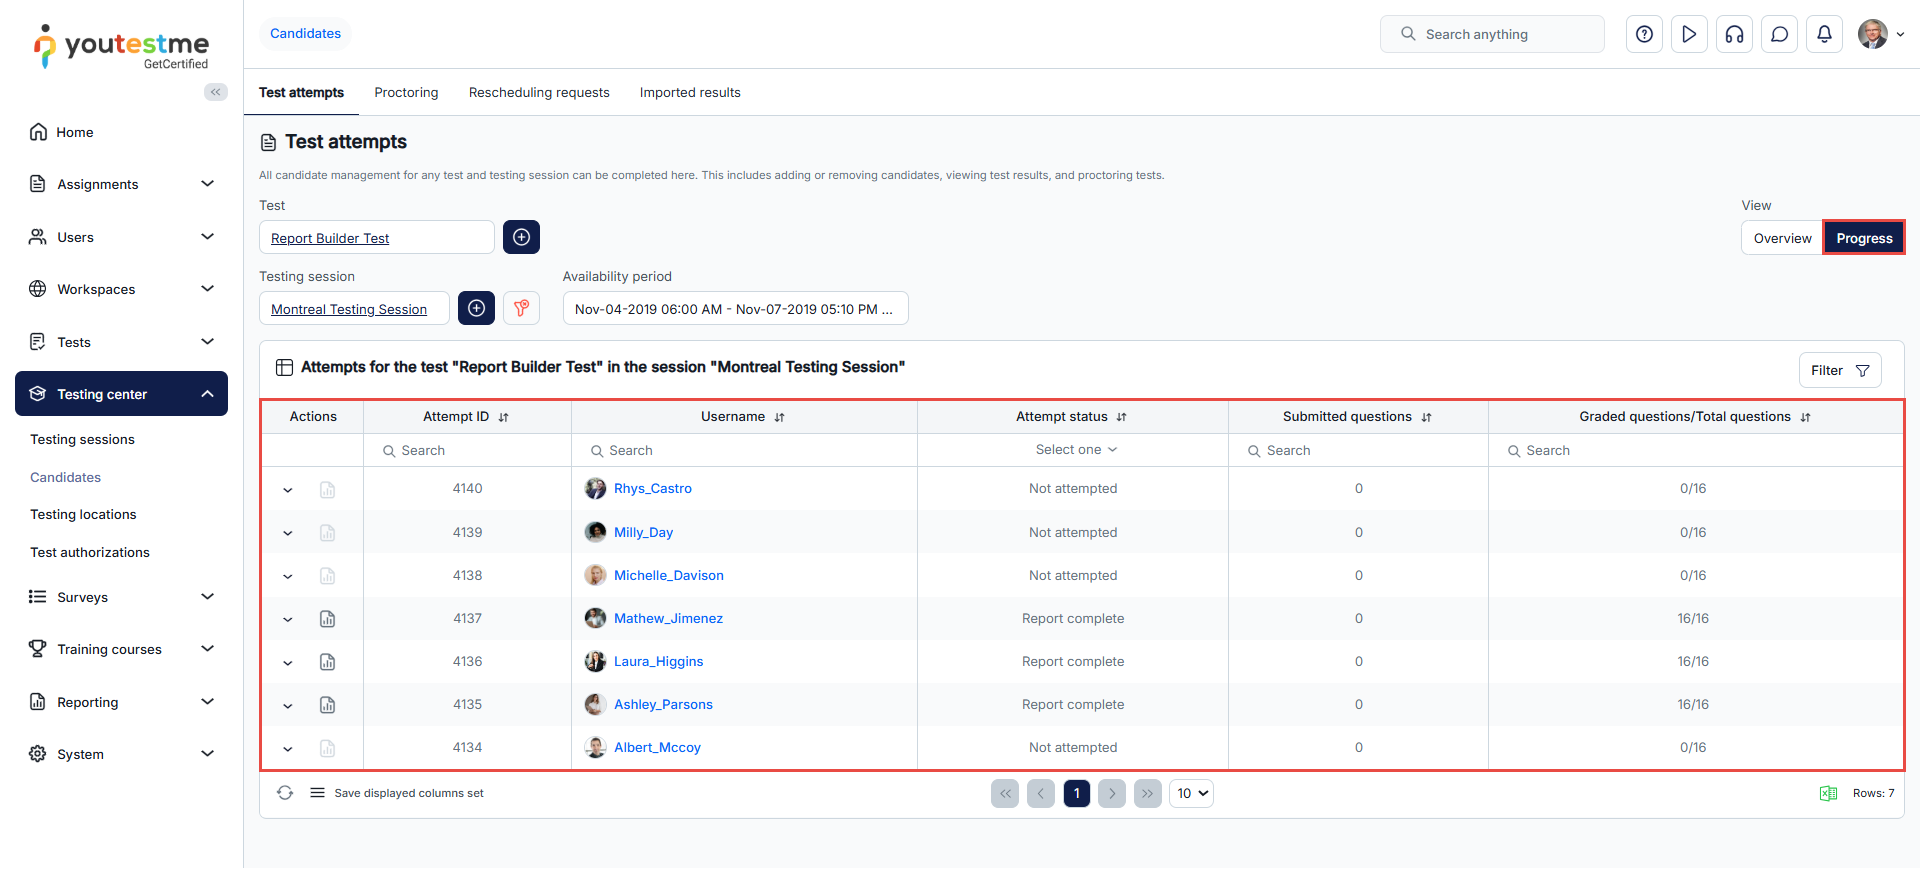
Conclusion
By configuring views, you can optimize the user experience and enhance usability. This flexibility ensures that candidates are presented with the relevant information they need, improving their efficiency and effectiveness during the testing process
