
Article verified for Release 15.2 on February 2, 2026.
This article explains how to achieve a seamless OpenID configuration with Okta, ensuring a more secure and efficient authentication system for your organization.
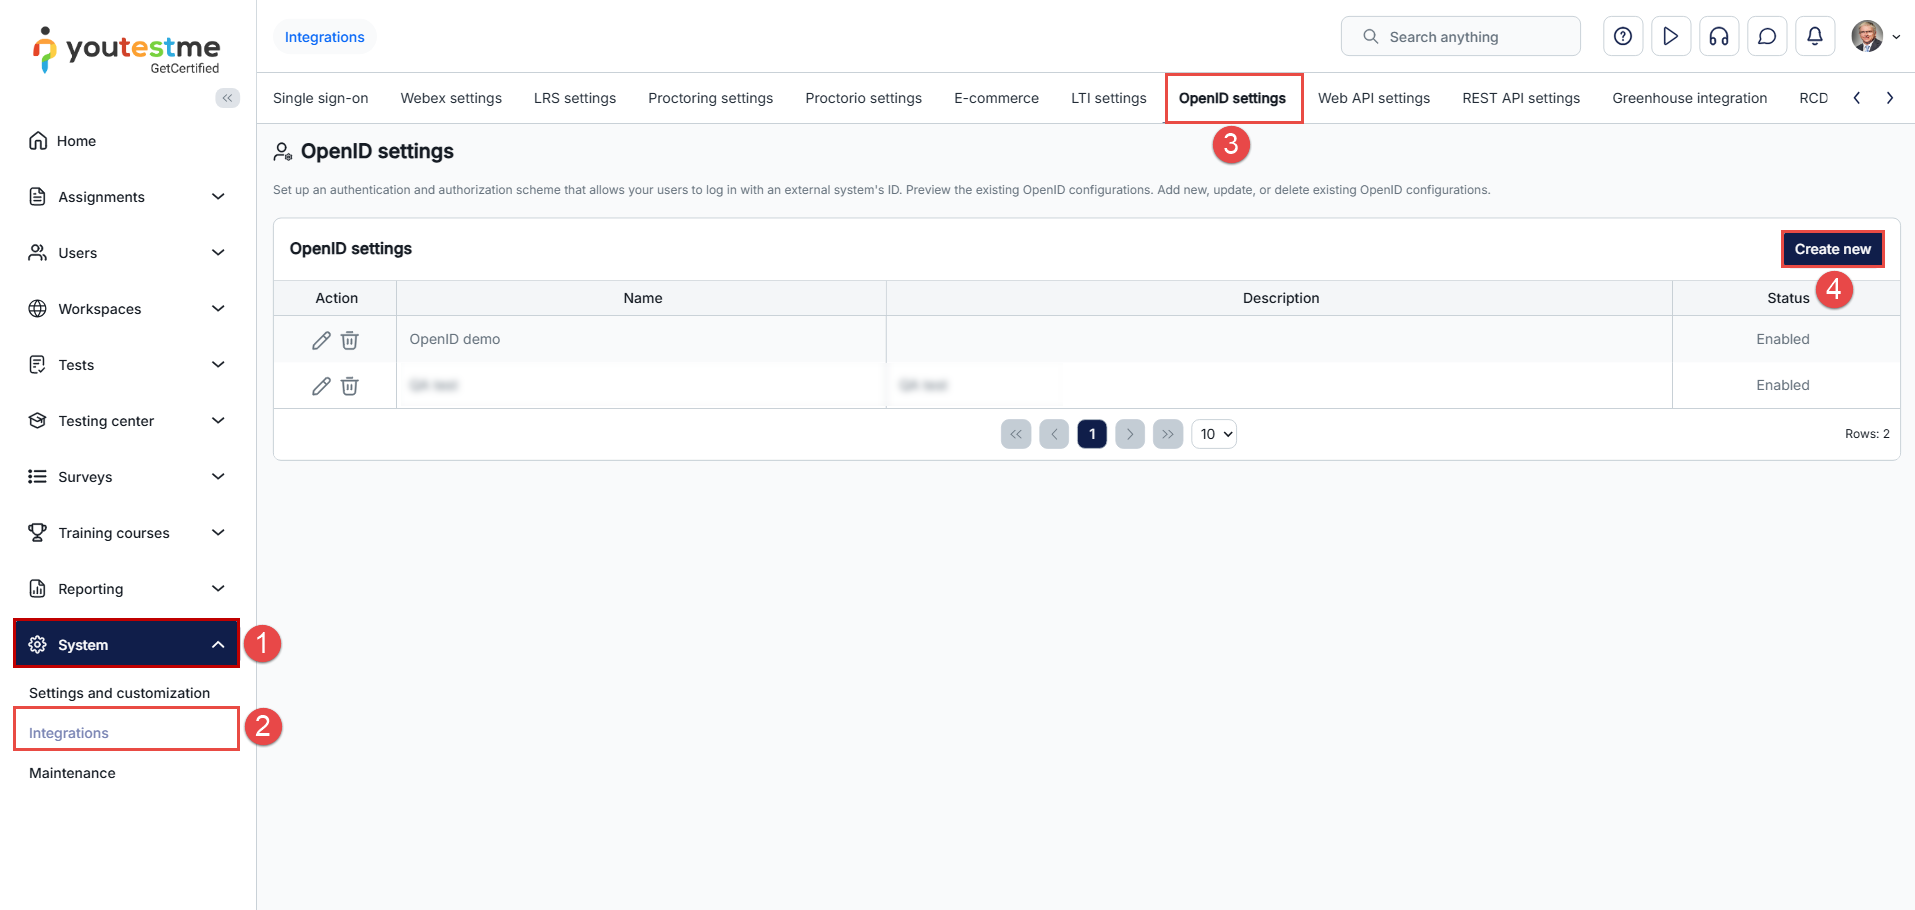
To access the OpenID configuration, do the following:
- Select the System tab.
- Select the Integrations tab.
- Select the OpenID settings tab.
- To create a new integration, select the Create new tab.
Creating an Okta account
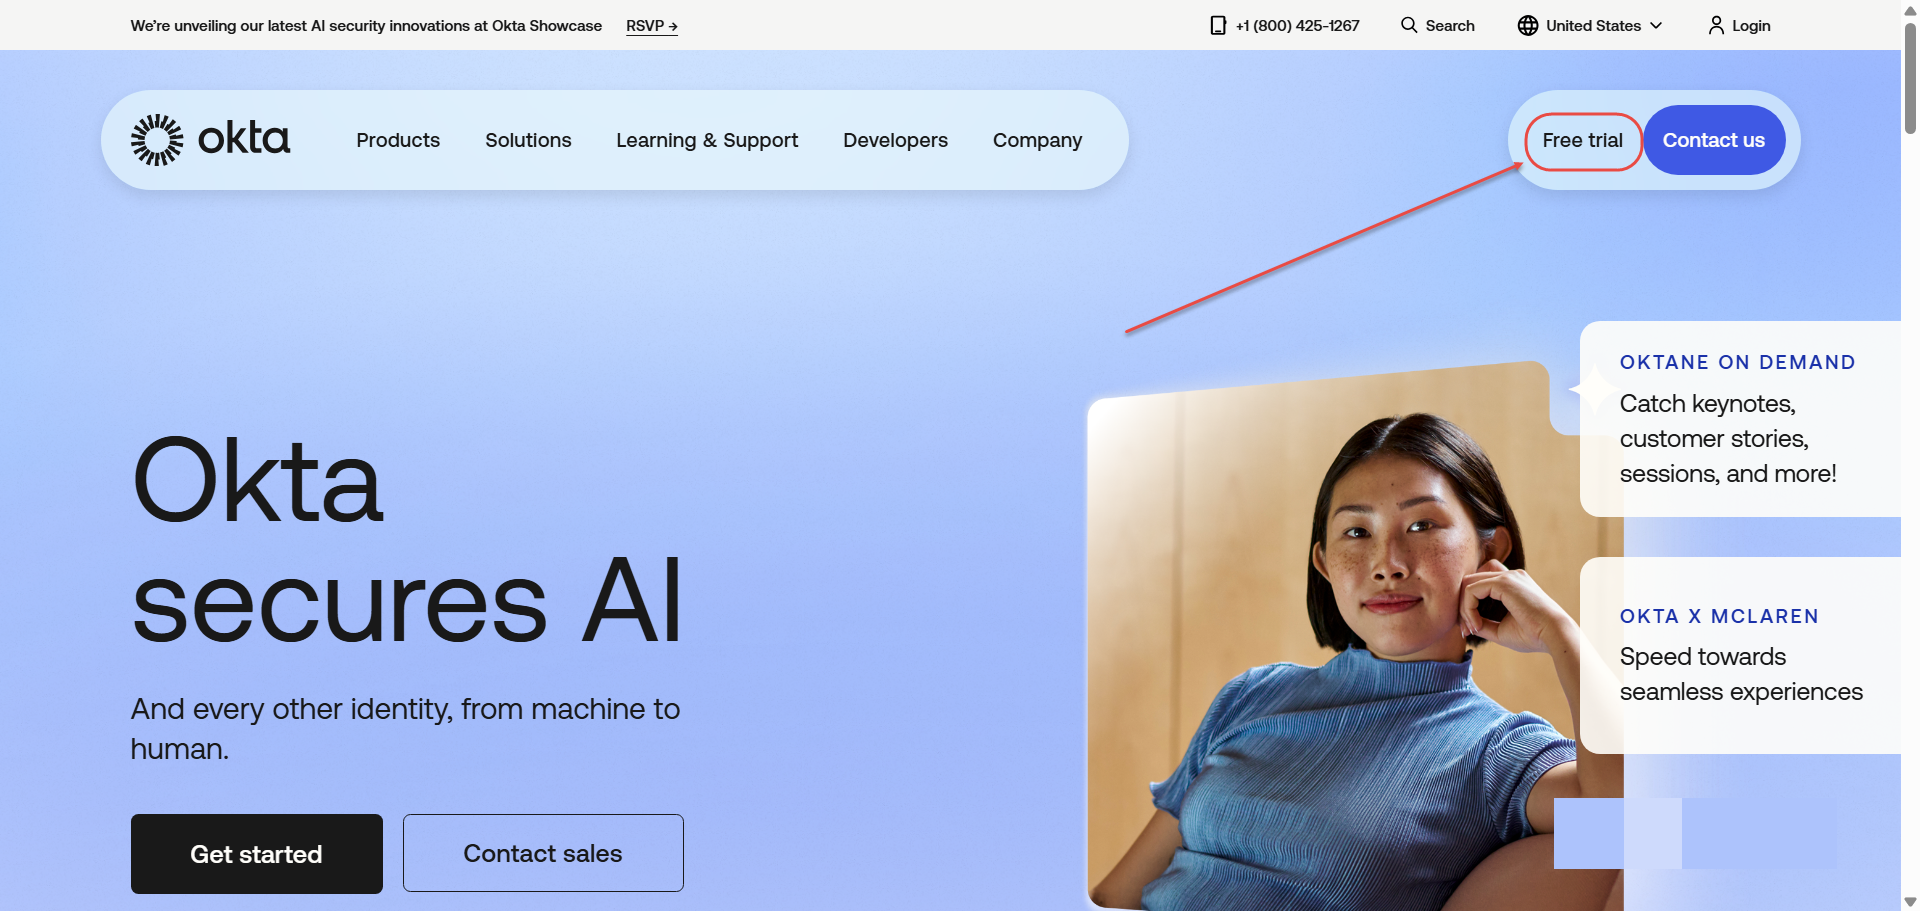
In this section, we explain how to create a free account on the Okta platform, which can be used to configure SSO integration with YouTestMe. This account can be upgraded to a full version later if needed.
- Navigate to the official Okta website: https://www.okta.com/
- Click the Free Trial button located in the top-right corner of the homepage.
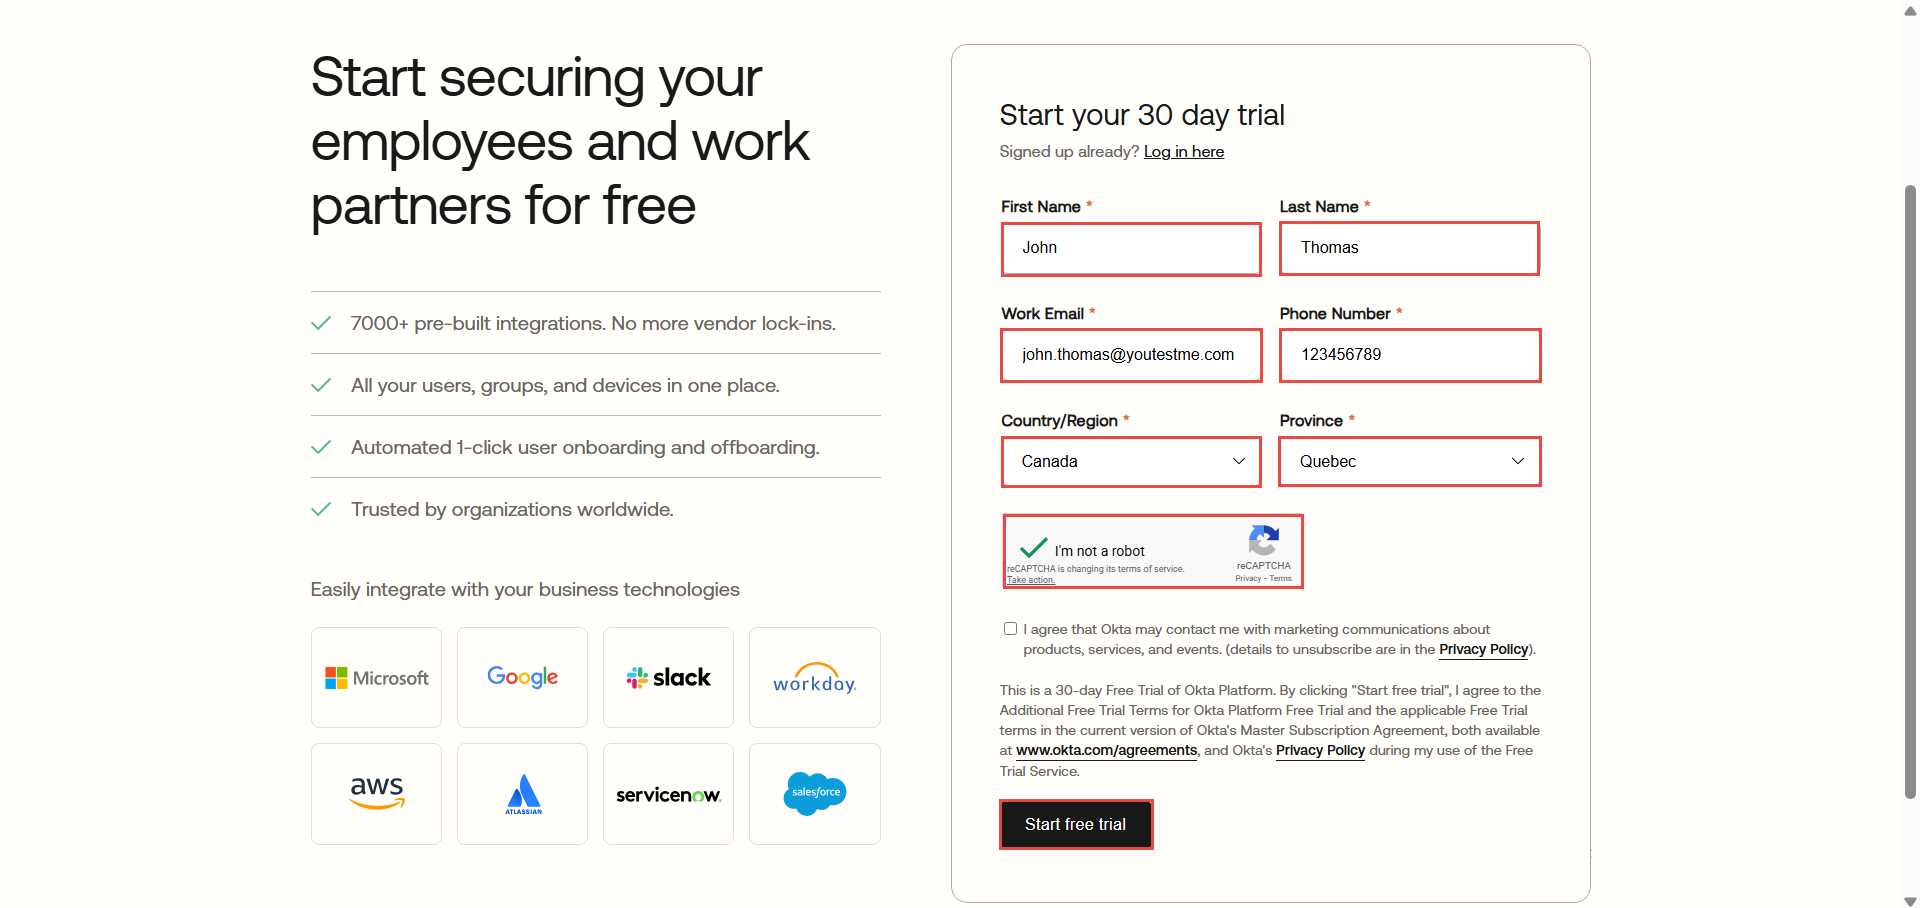
- Fill in all mandatory fields with your personal and work-related information, then submit the form.

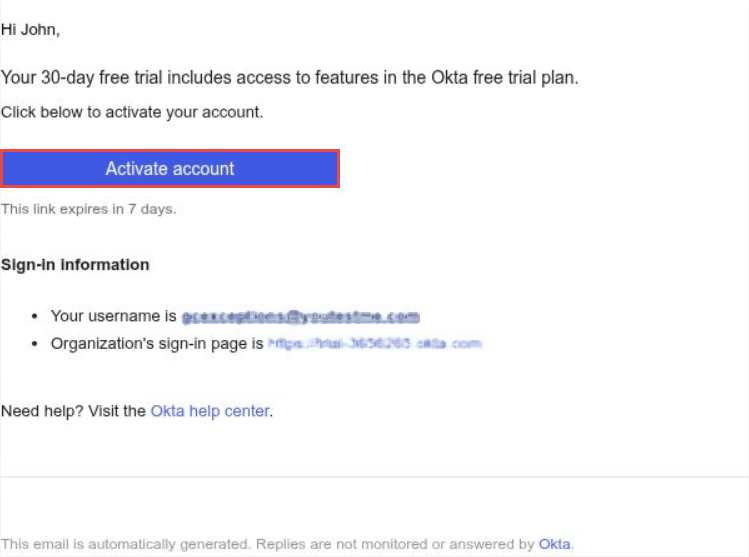
- Check your work email inbox. You should receive an email from Okta.
Open the email and click the Activate Account button. You will be redirected to the Okta website to continue the setup process.

- Click the Set Up button, enter a new password, and confirm it to continue.

- After setting your password, you will be prompted to configure a security method.
Download the Okta Verify app on your mobile device or computer, then click Set Up to proceed.

- Follow Okta instructions to set up Okta Verify:

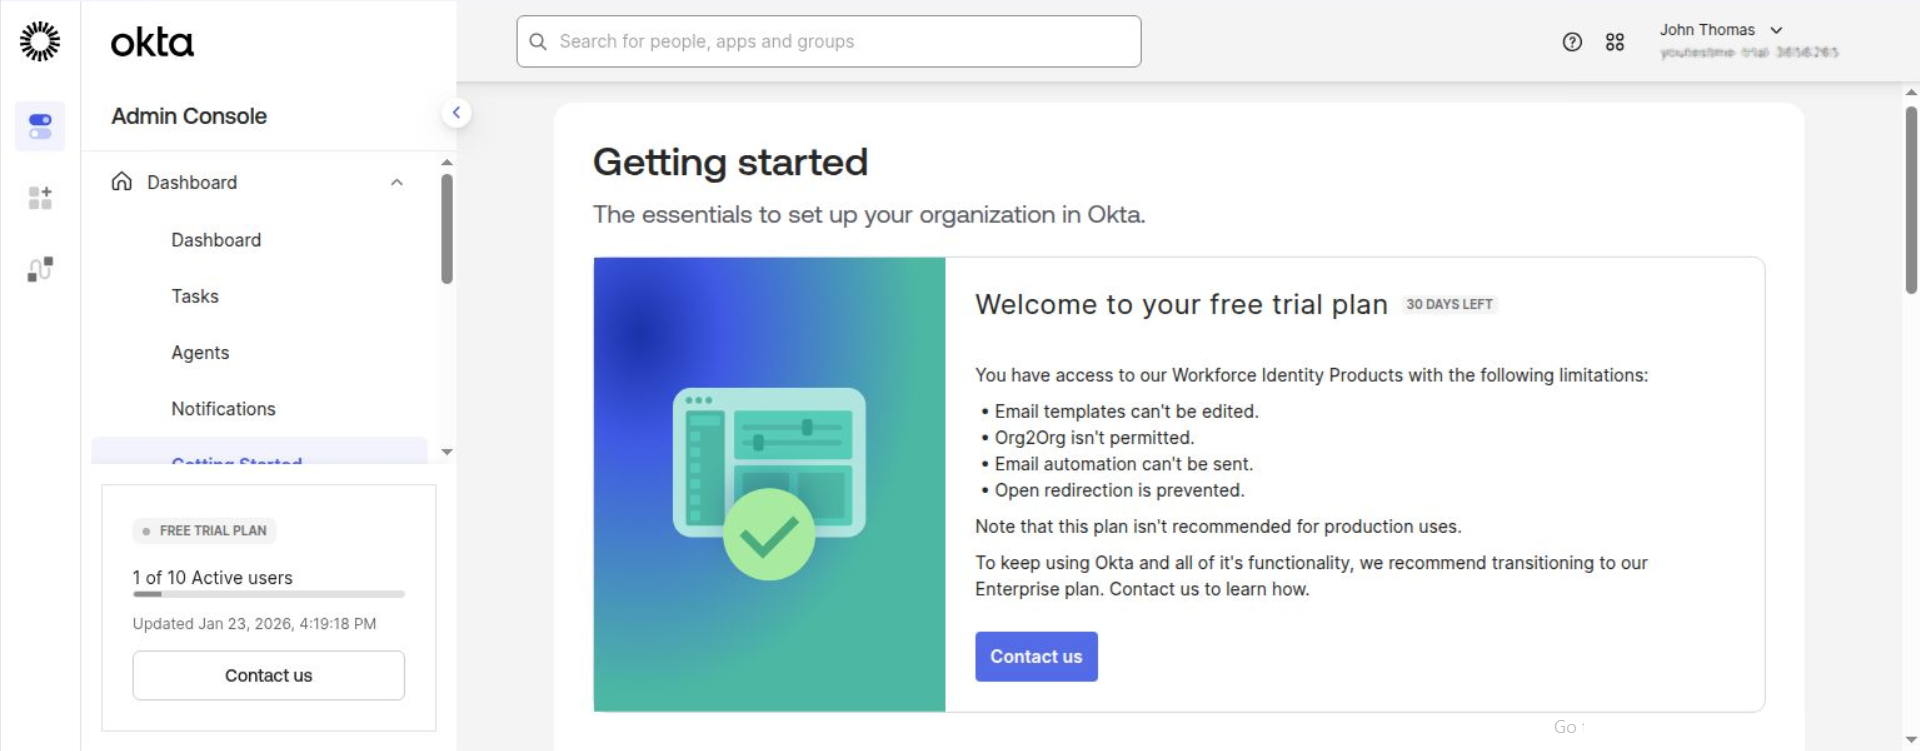
- Once all steps are completed, you will be redirected to your Okta account dashboard.

You are now ready to proceed with the next integration steps.


Creating an OpenID configuration
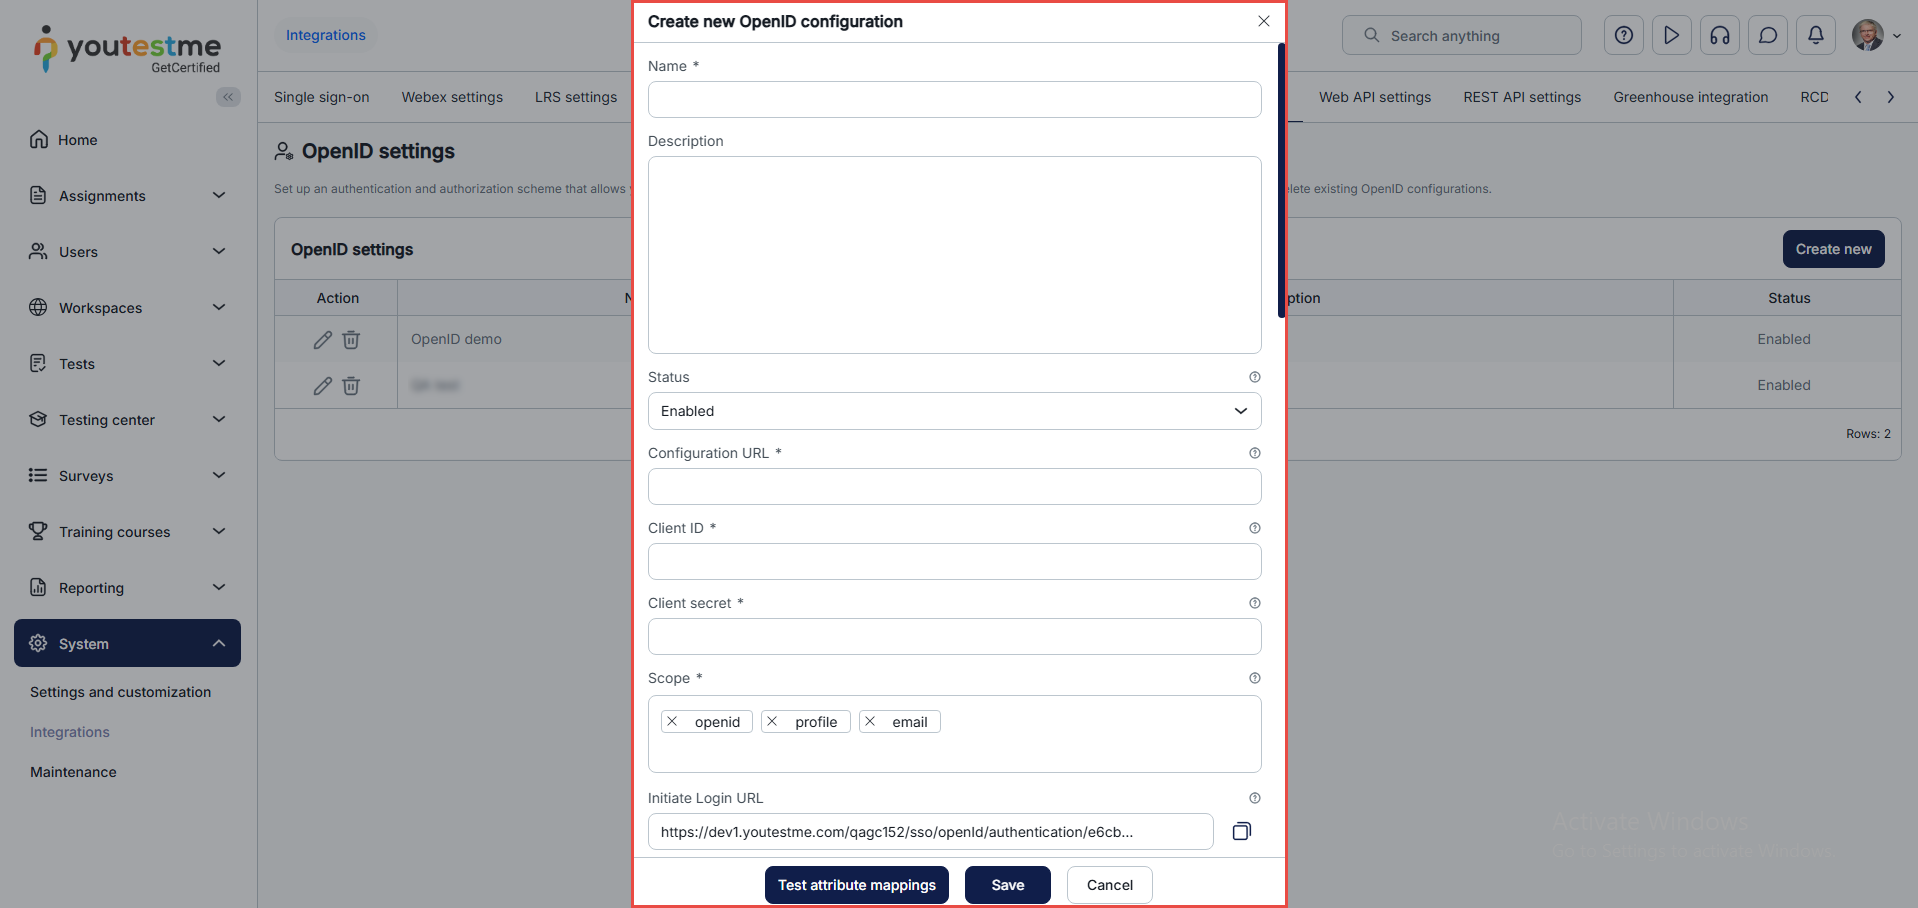
After selecting the Create new button, a dialog will appear where you should enter all the necessary data.
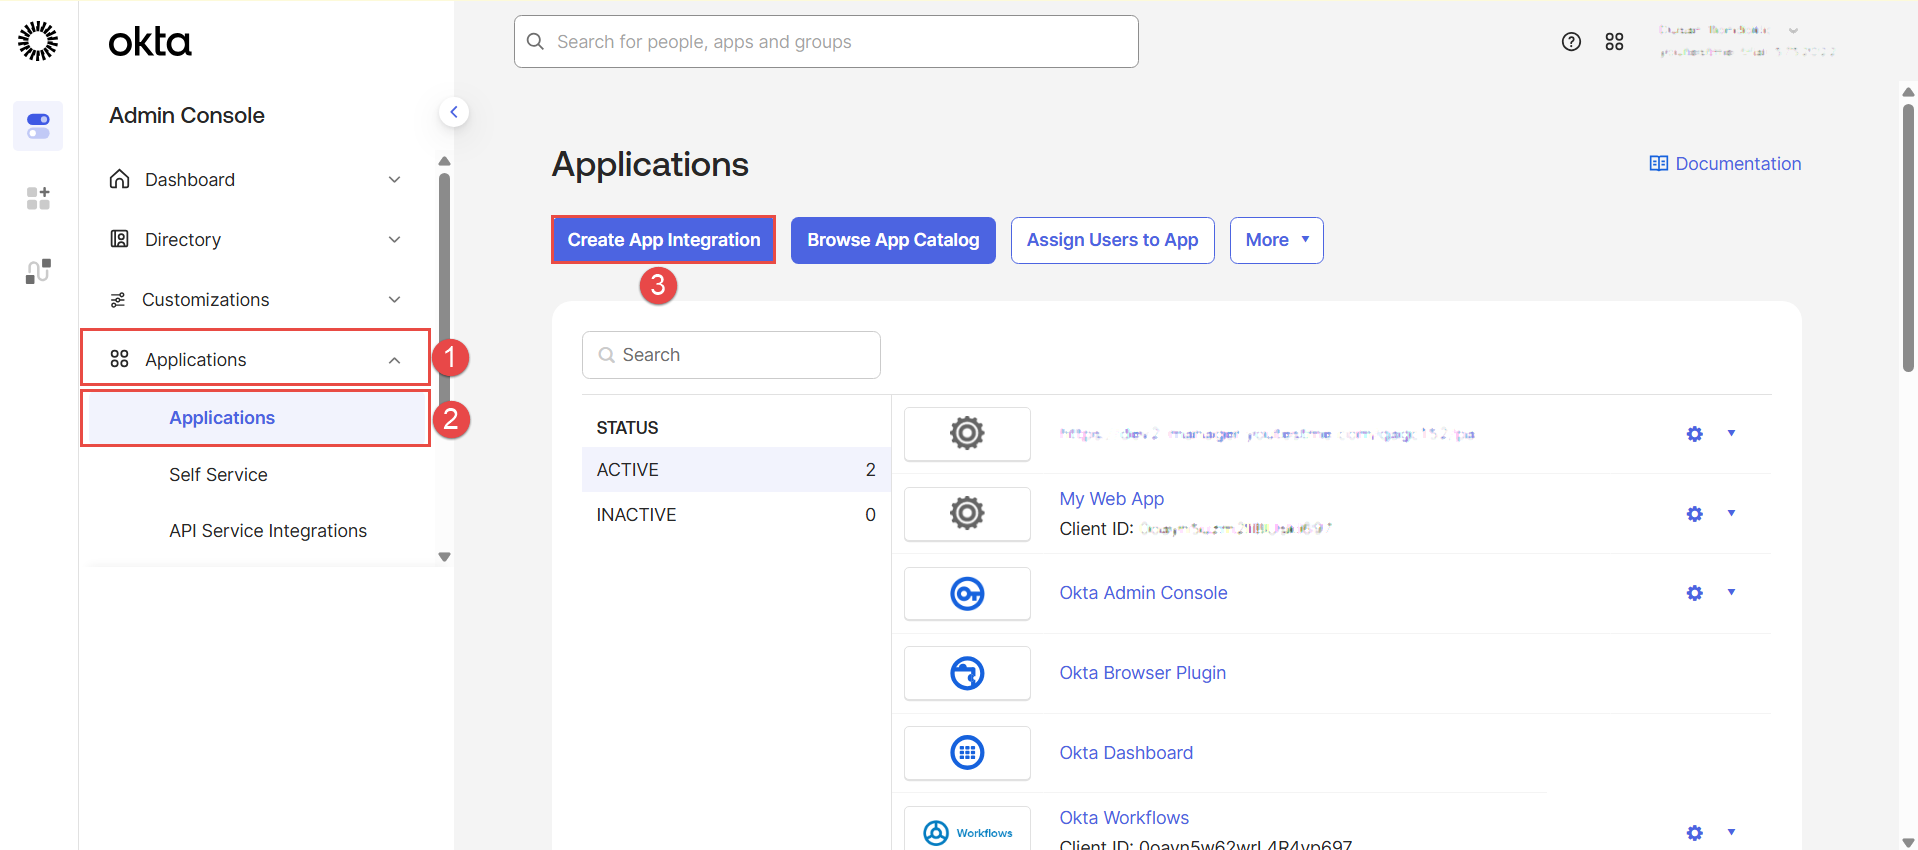
To access the needed links, log in to your Okta account and select the Applications under the Applications tab. To create a new integration, select the Create App Integration button.
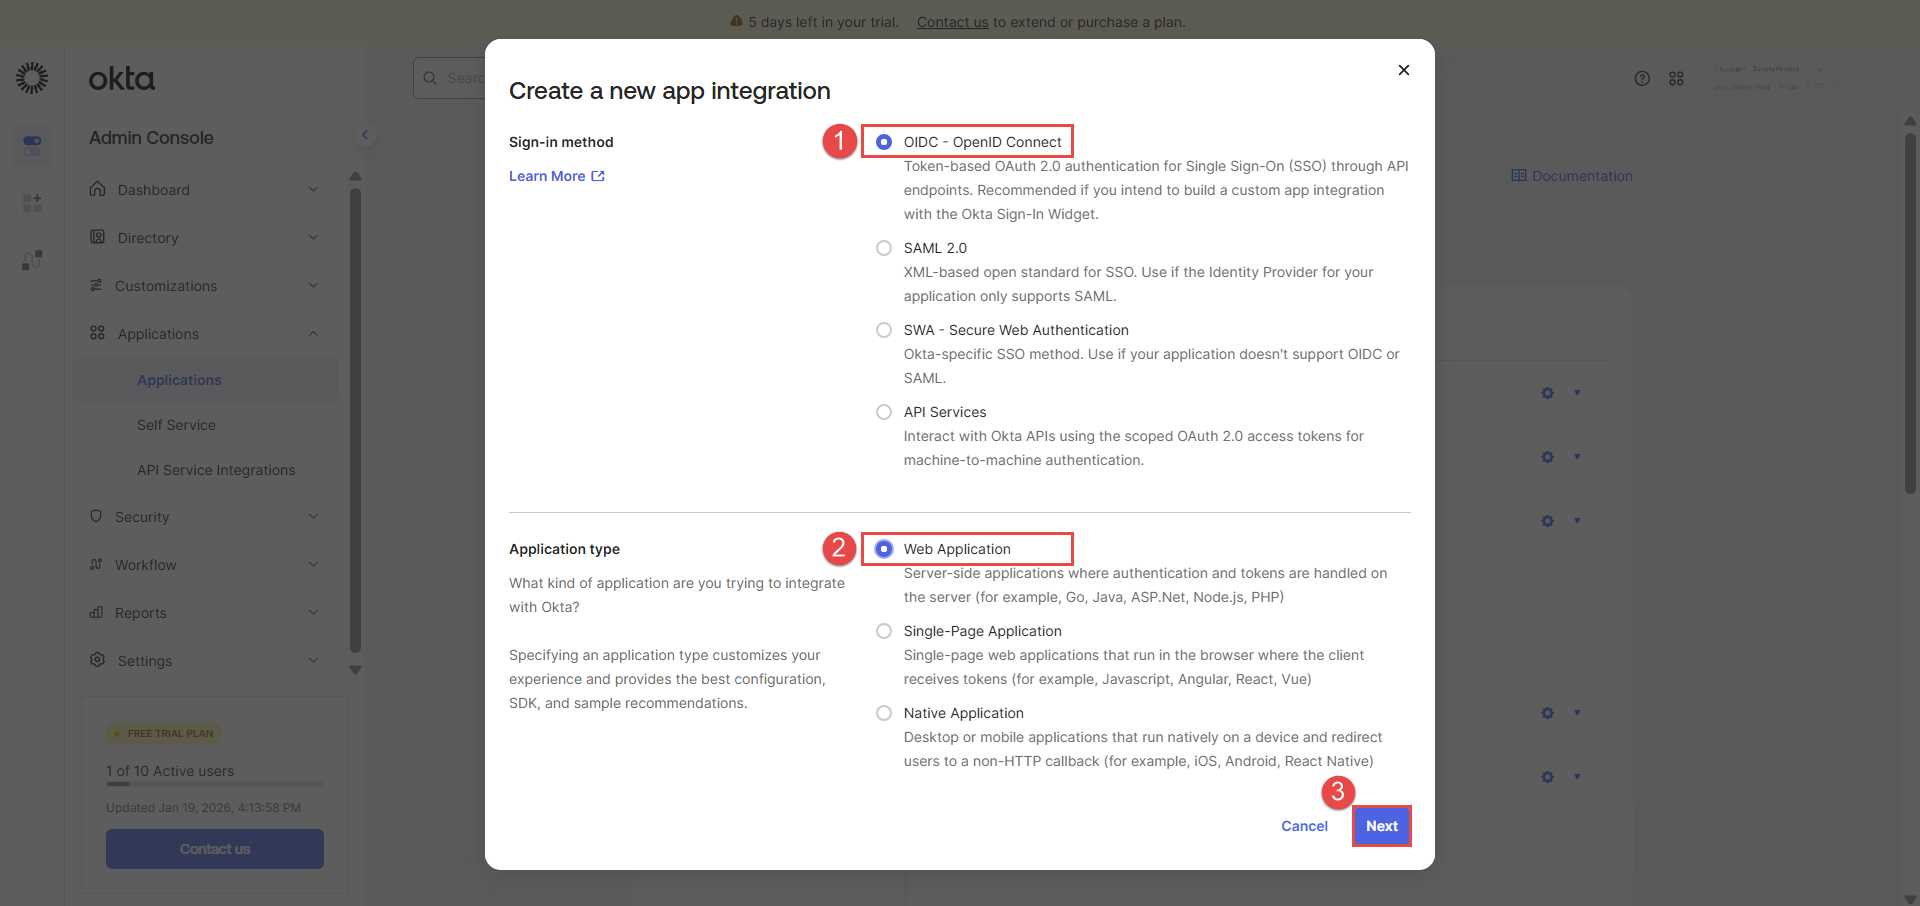
Choose OIDC – OpenID Connection in the pop-up dialog for the sign-in method. For the application type, choose Web Application, then select Next.
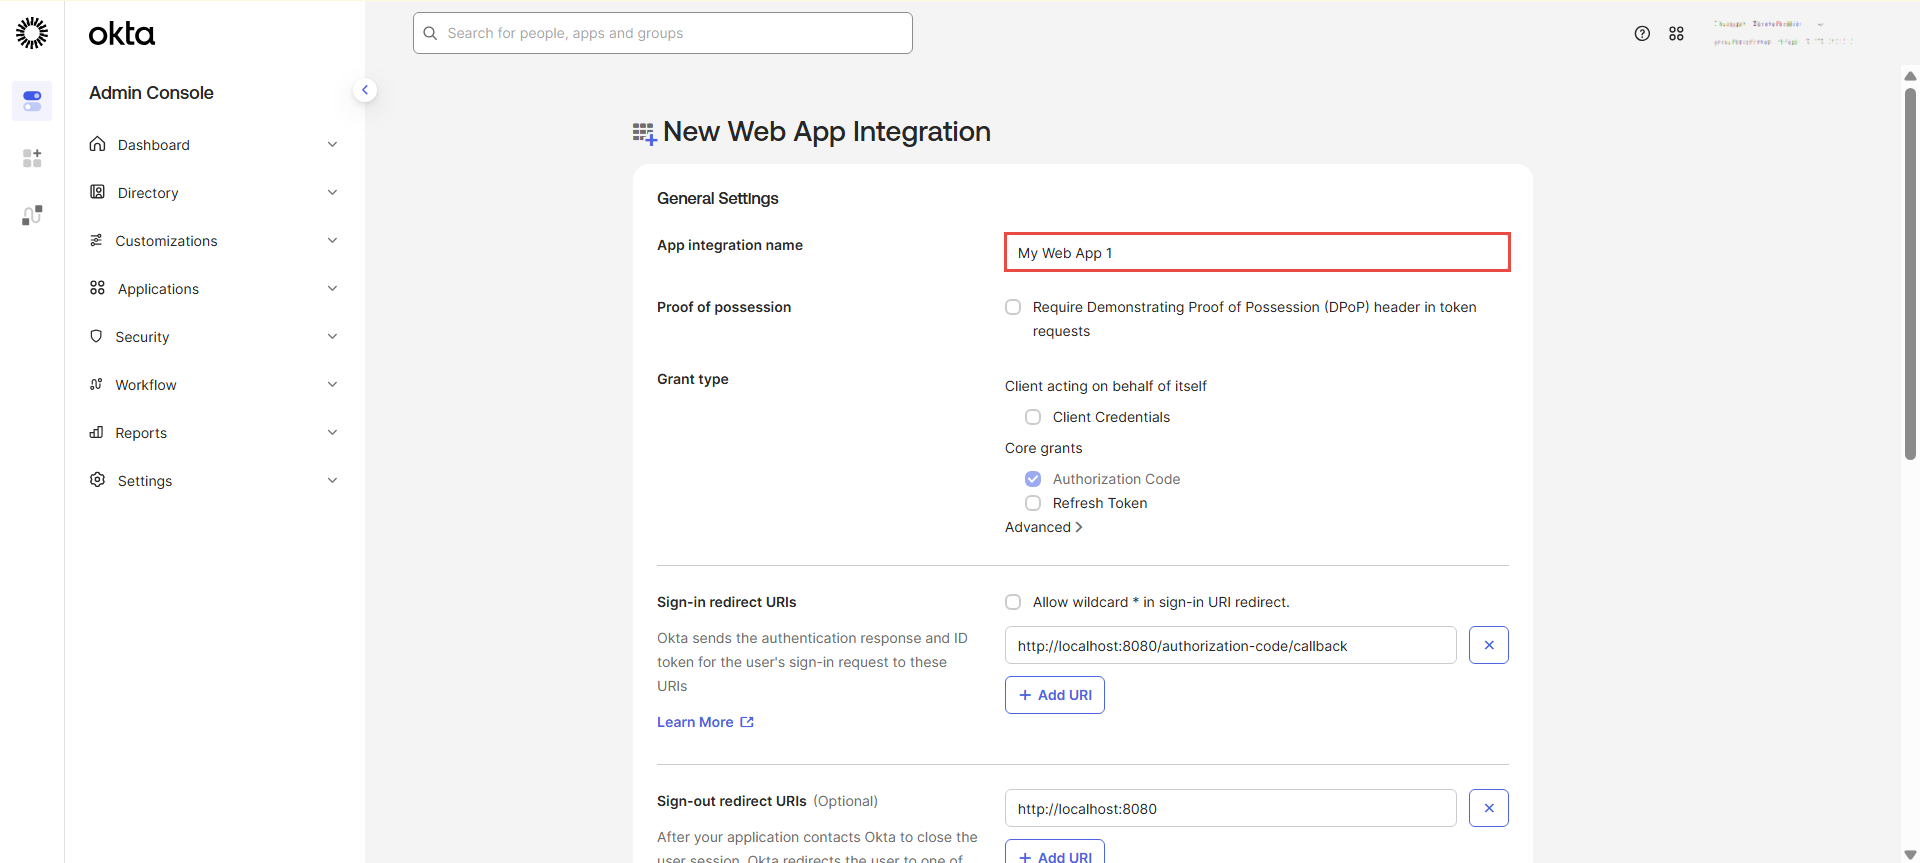
In the new dialog, enter the web app integration name.
Next, you will need the Configuration URL, which you will enter in the Configuration URL field in YouTestMe app.
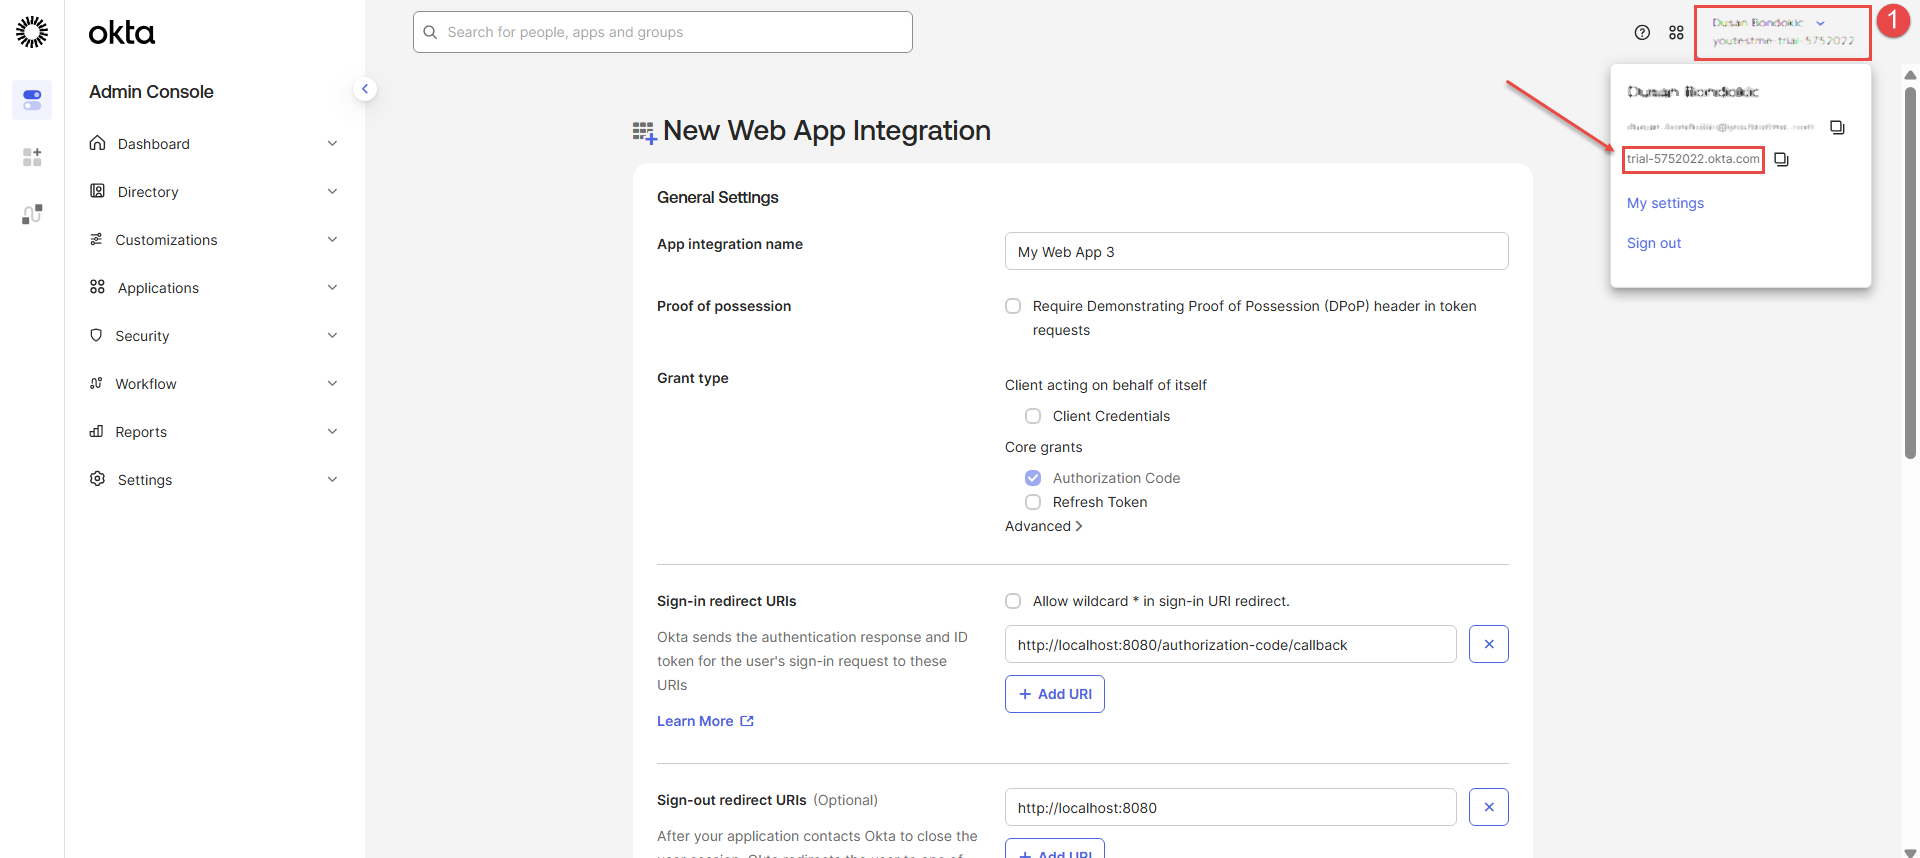
Use the https://{yourOktaDomainName}.okta.com/.well-known/openid-configuration for the configuration URL. Just replace {yourOktaDomainName} with the Okta domain name of your organization. You can find and copy {yourOktaDomainName} in the top-right corner of the Okta application.
Once you enter the link in your browser, you should be presented with the following information:

Now, we will return to the application and insert the Configuration URL.
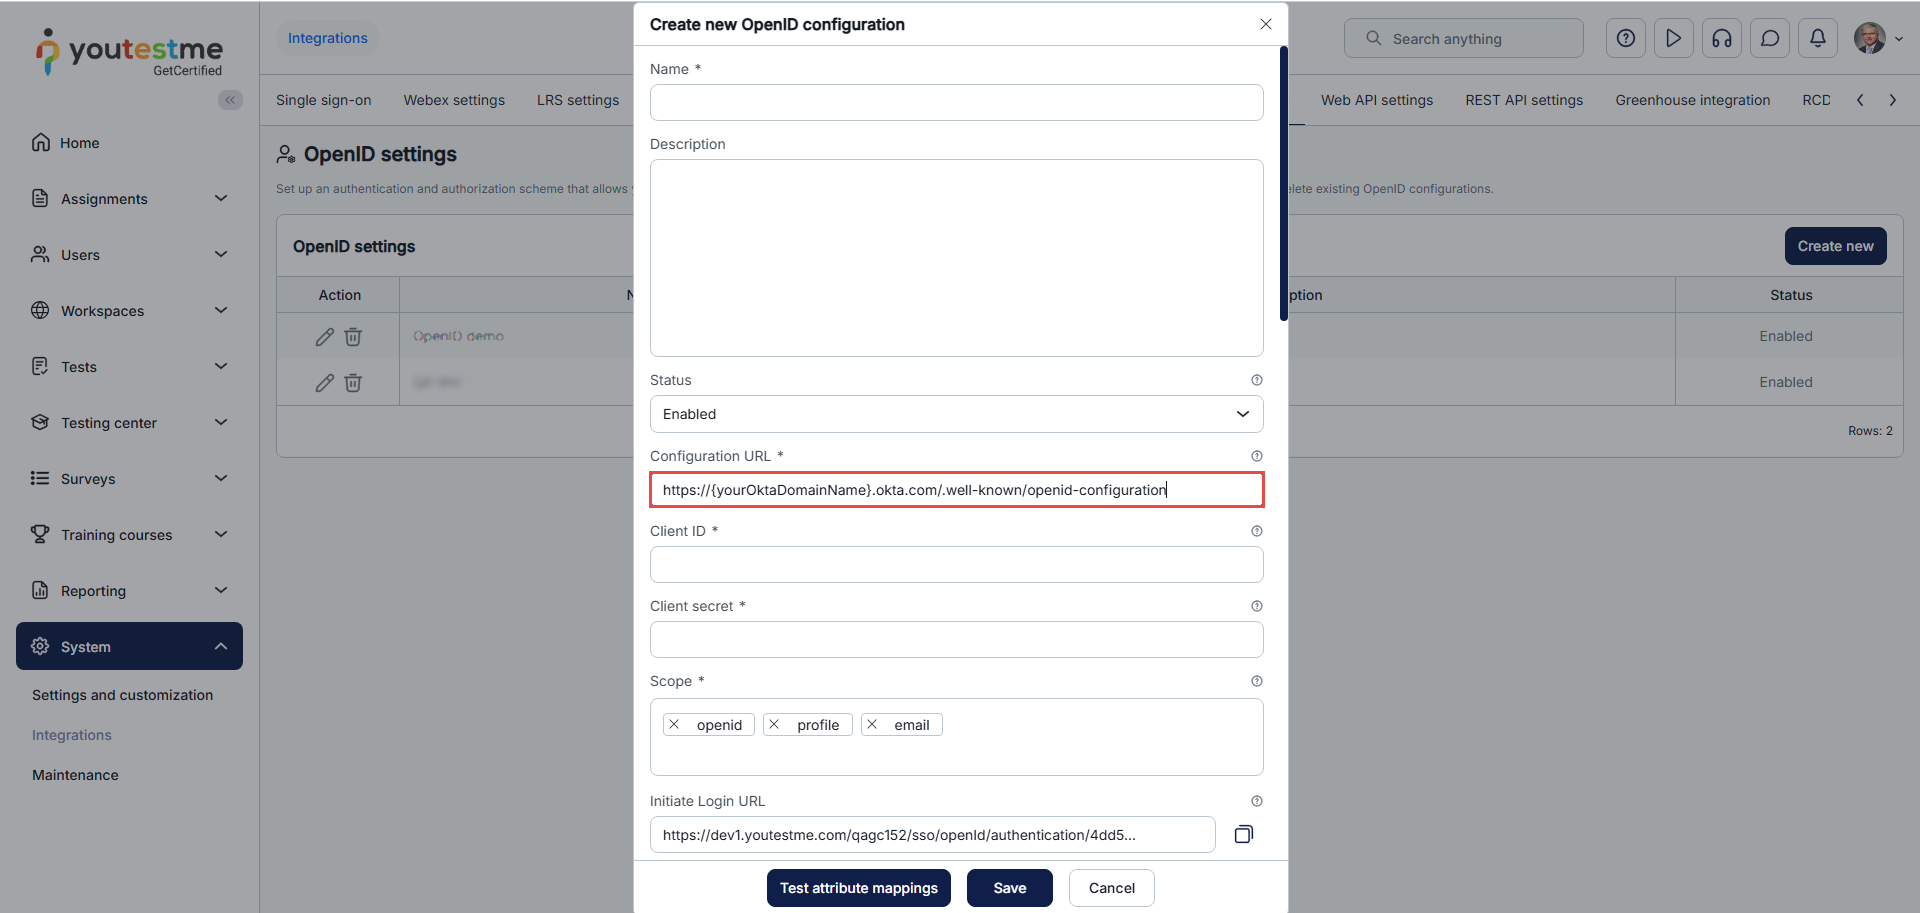
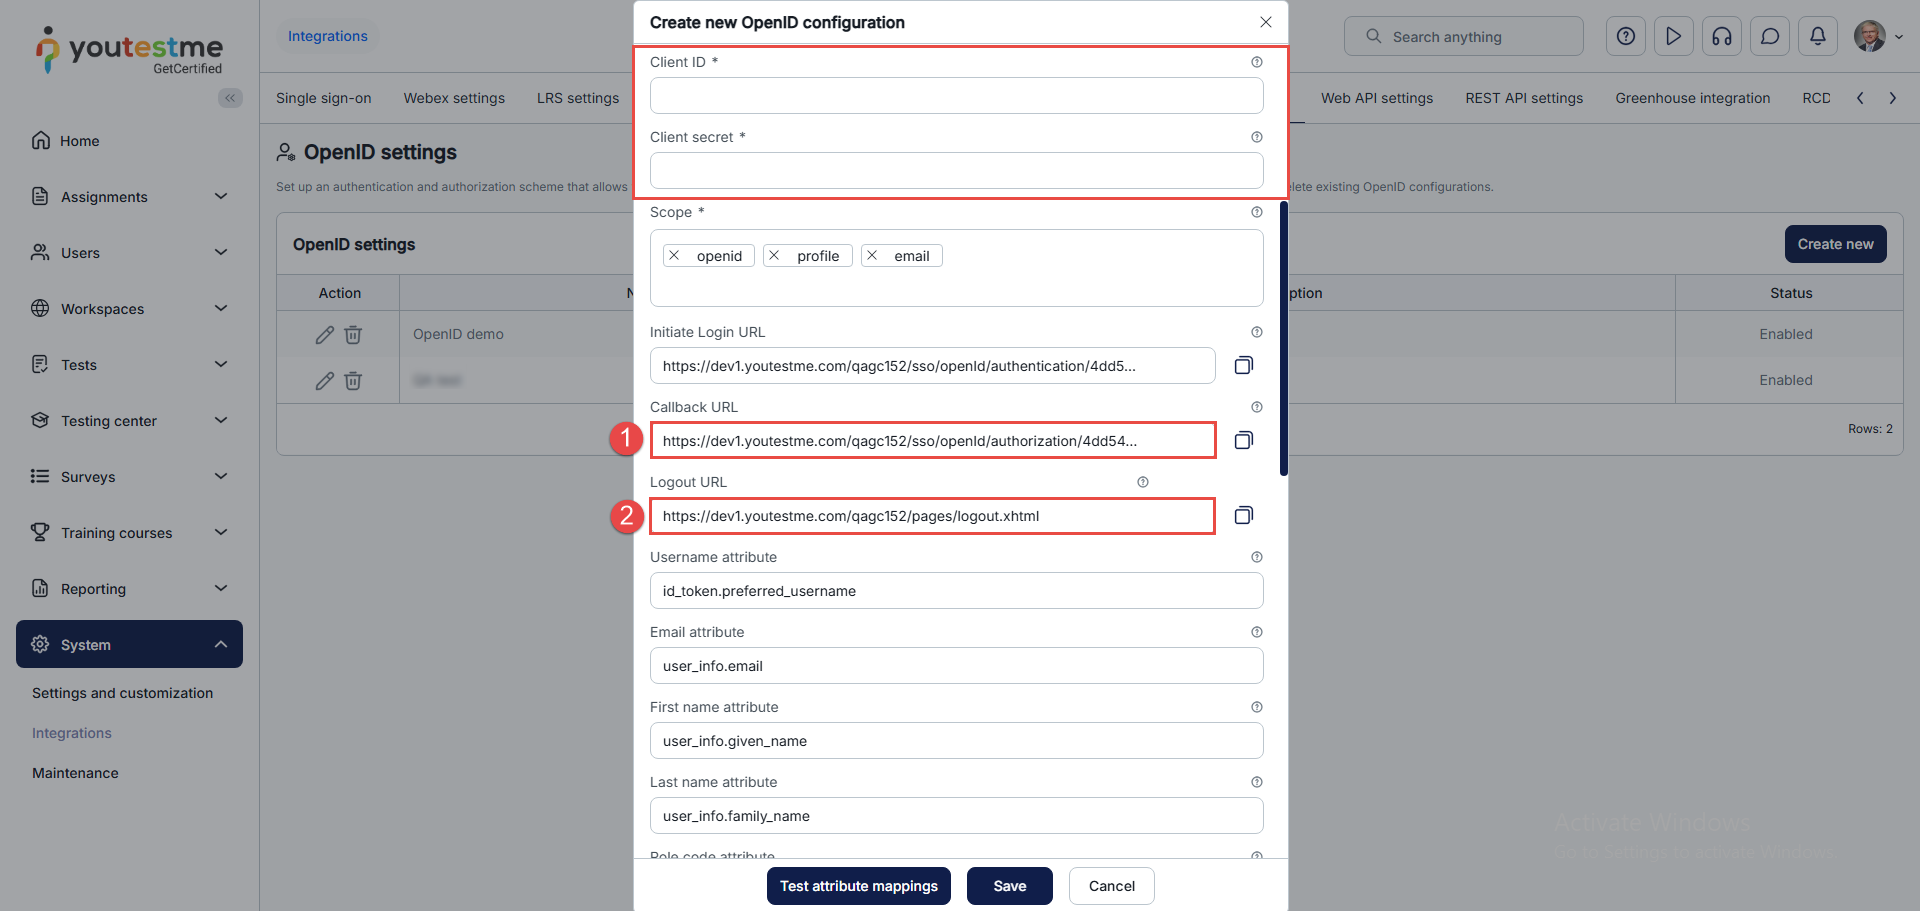
Enter some dummy values in the Client ID and Client secret fields to copy the links. Those fields will be generated later.
Now, we should copy the links provided in the OpenID dialog from the application to Okta:
- Copy the Callback URL and paste it into the Sign-in redirect URIs.
- Copy the Logout URL and paste it into the Sing-out redirect URIs.
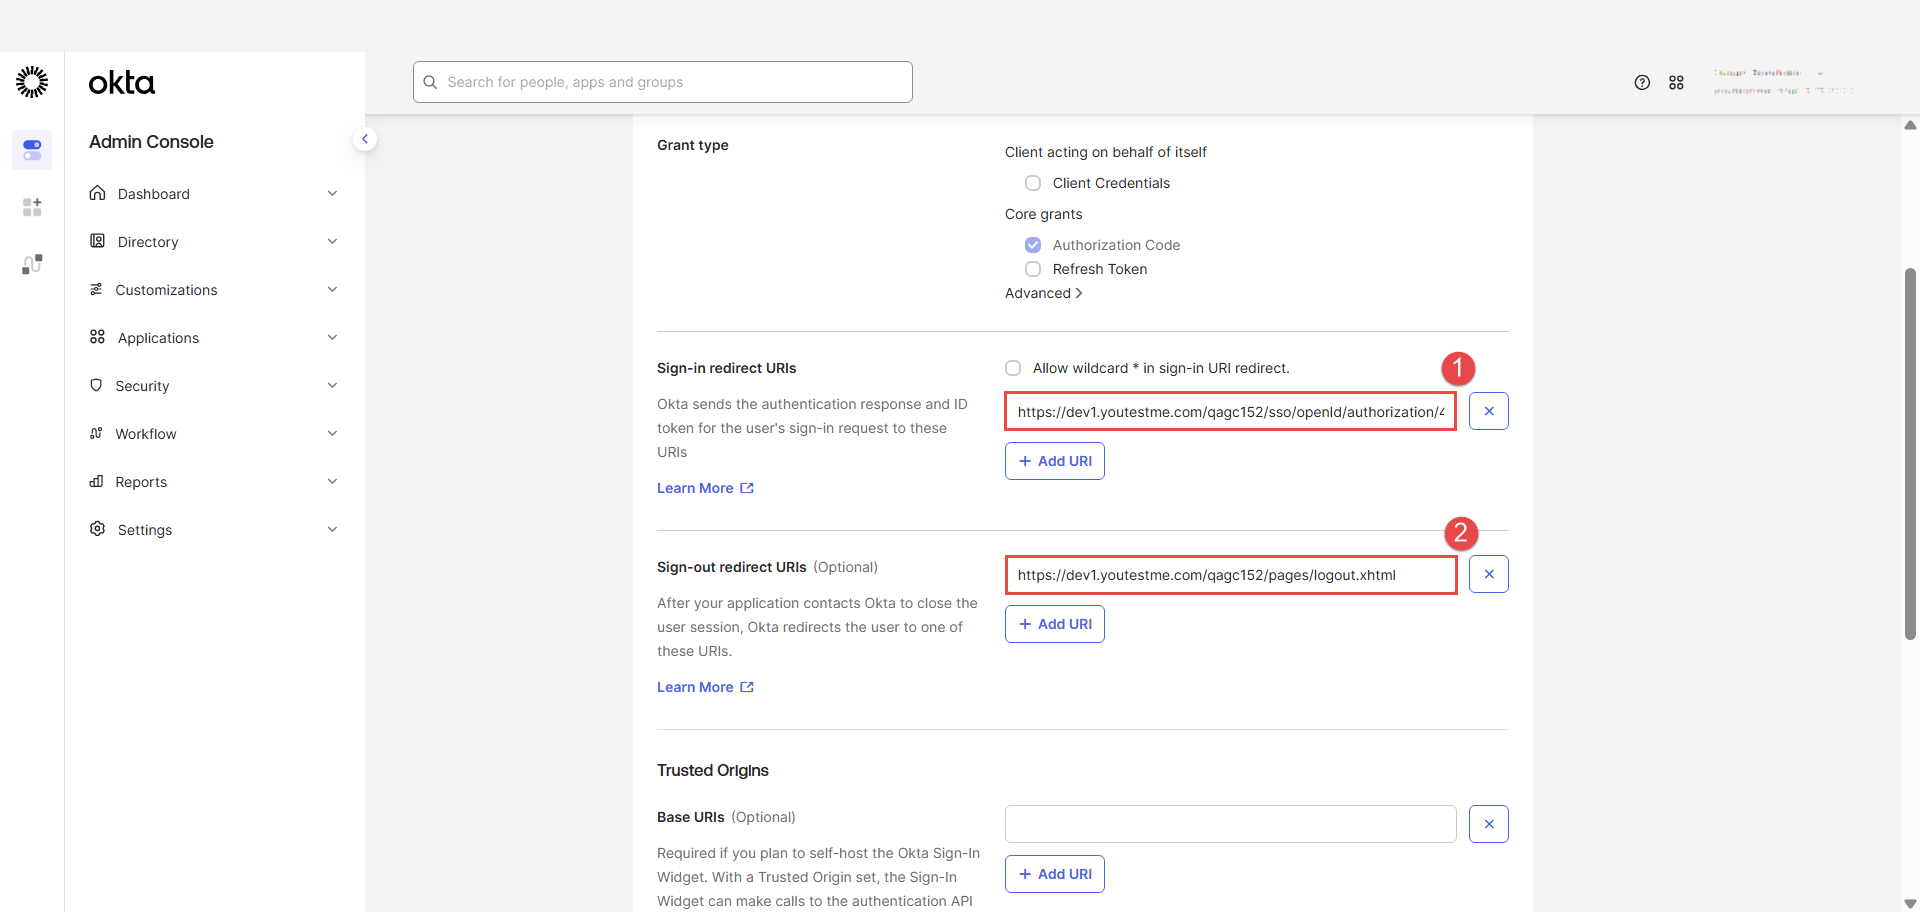
In the Okta app, scroll to the bottom of the page. With the Controlled access, you can select whether to assign the app integration to everyone in your org, only selected group(s), or skip assignment until after app creation.
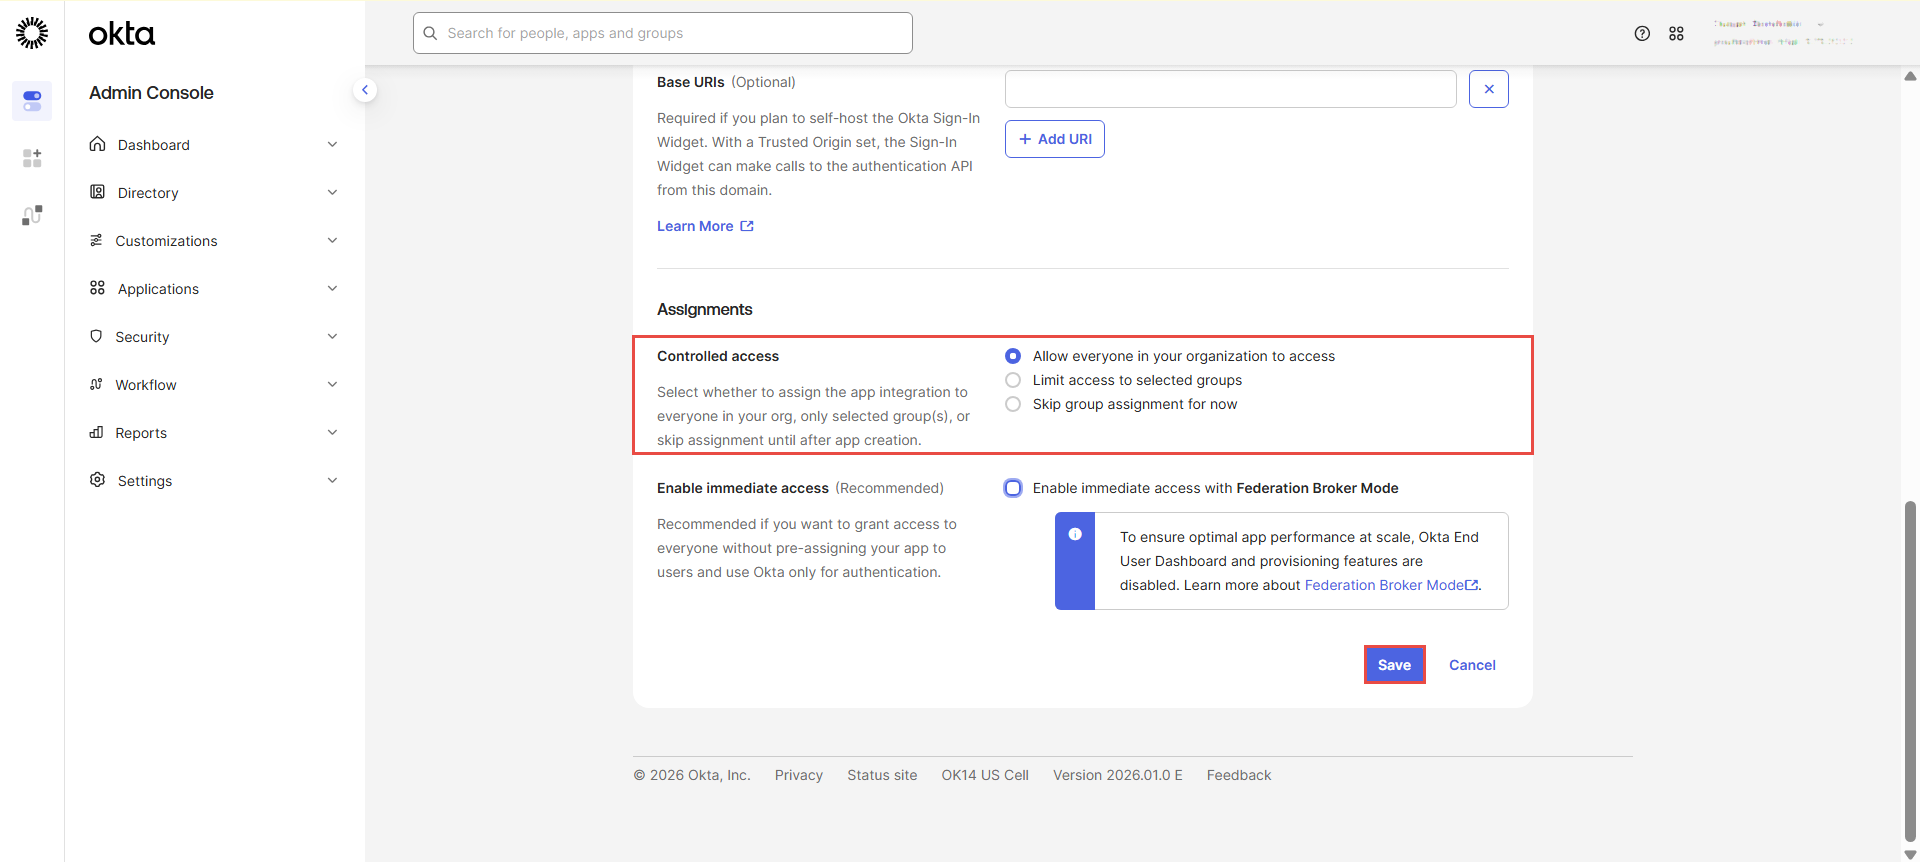
After configuring these settings, select the Save button.
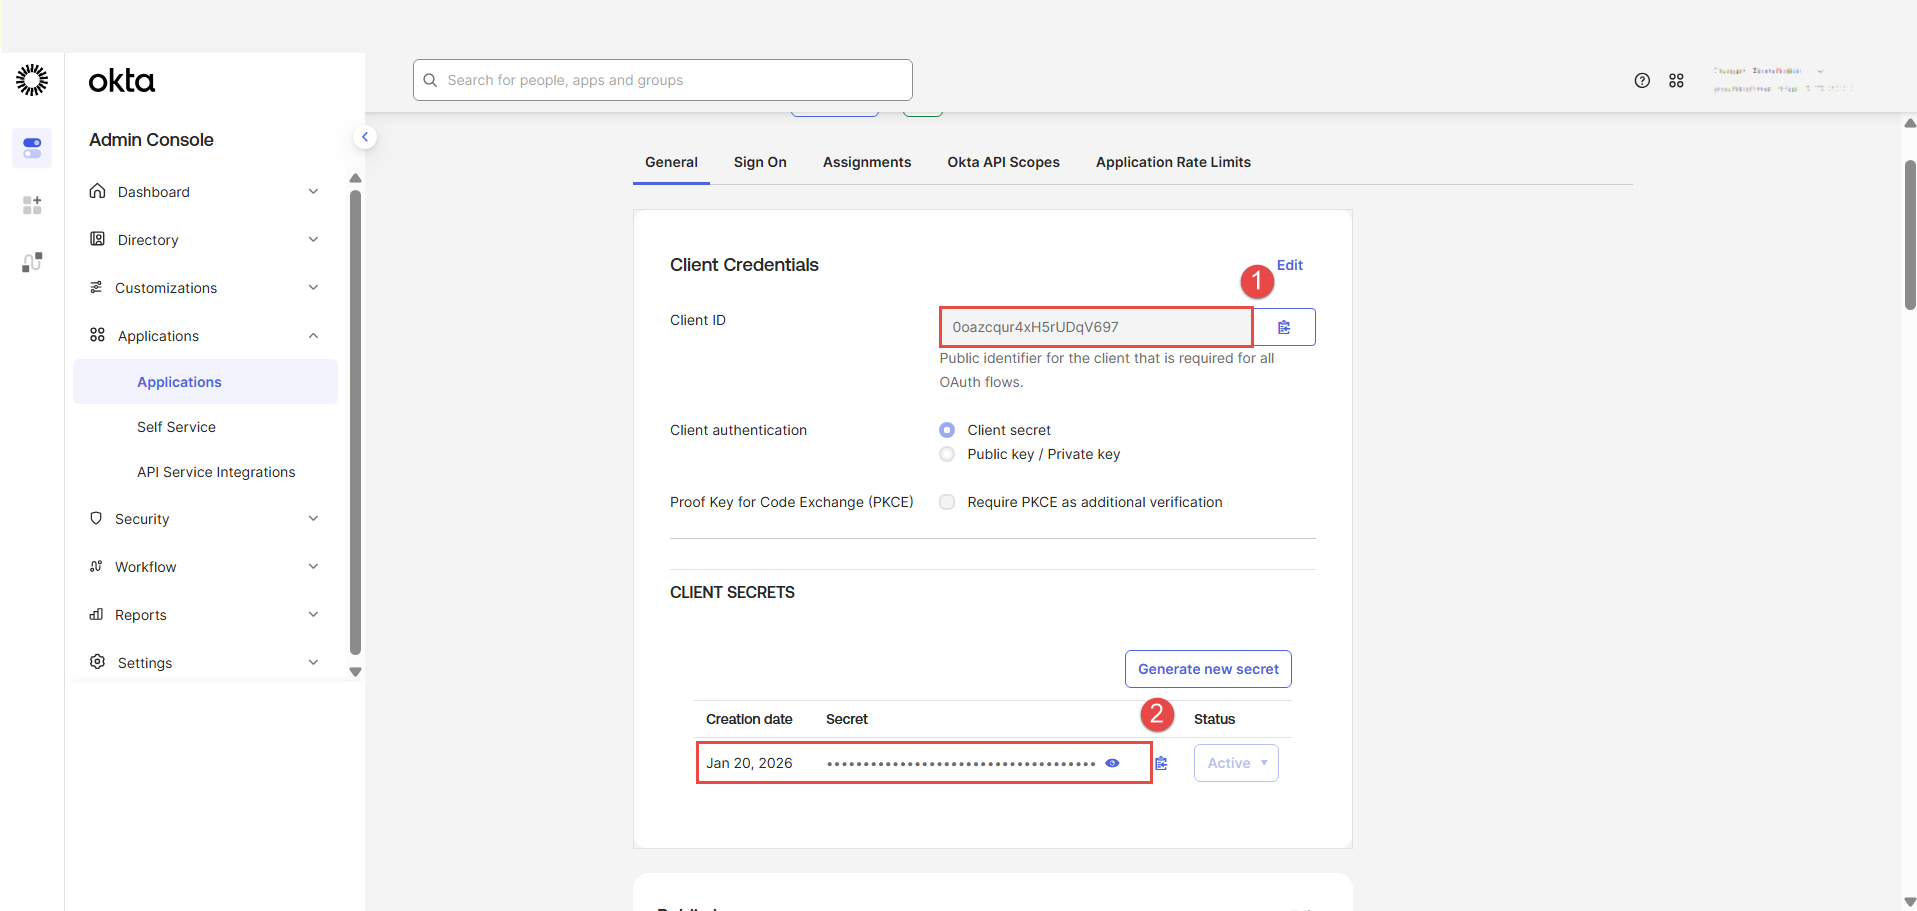
The client ID and the client secret will be generated. Copy them from Okta and paste them into the OpenID dialog in the application to the Client ID and Client secret fields.
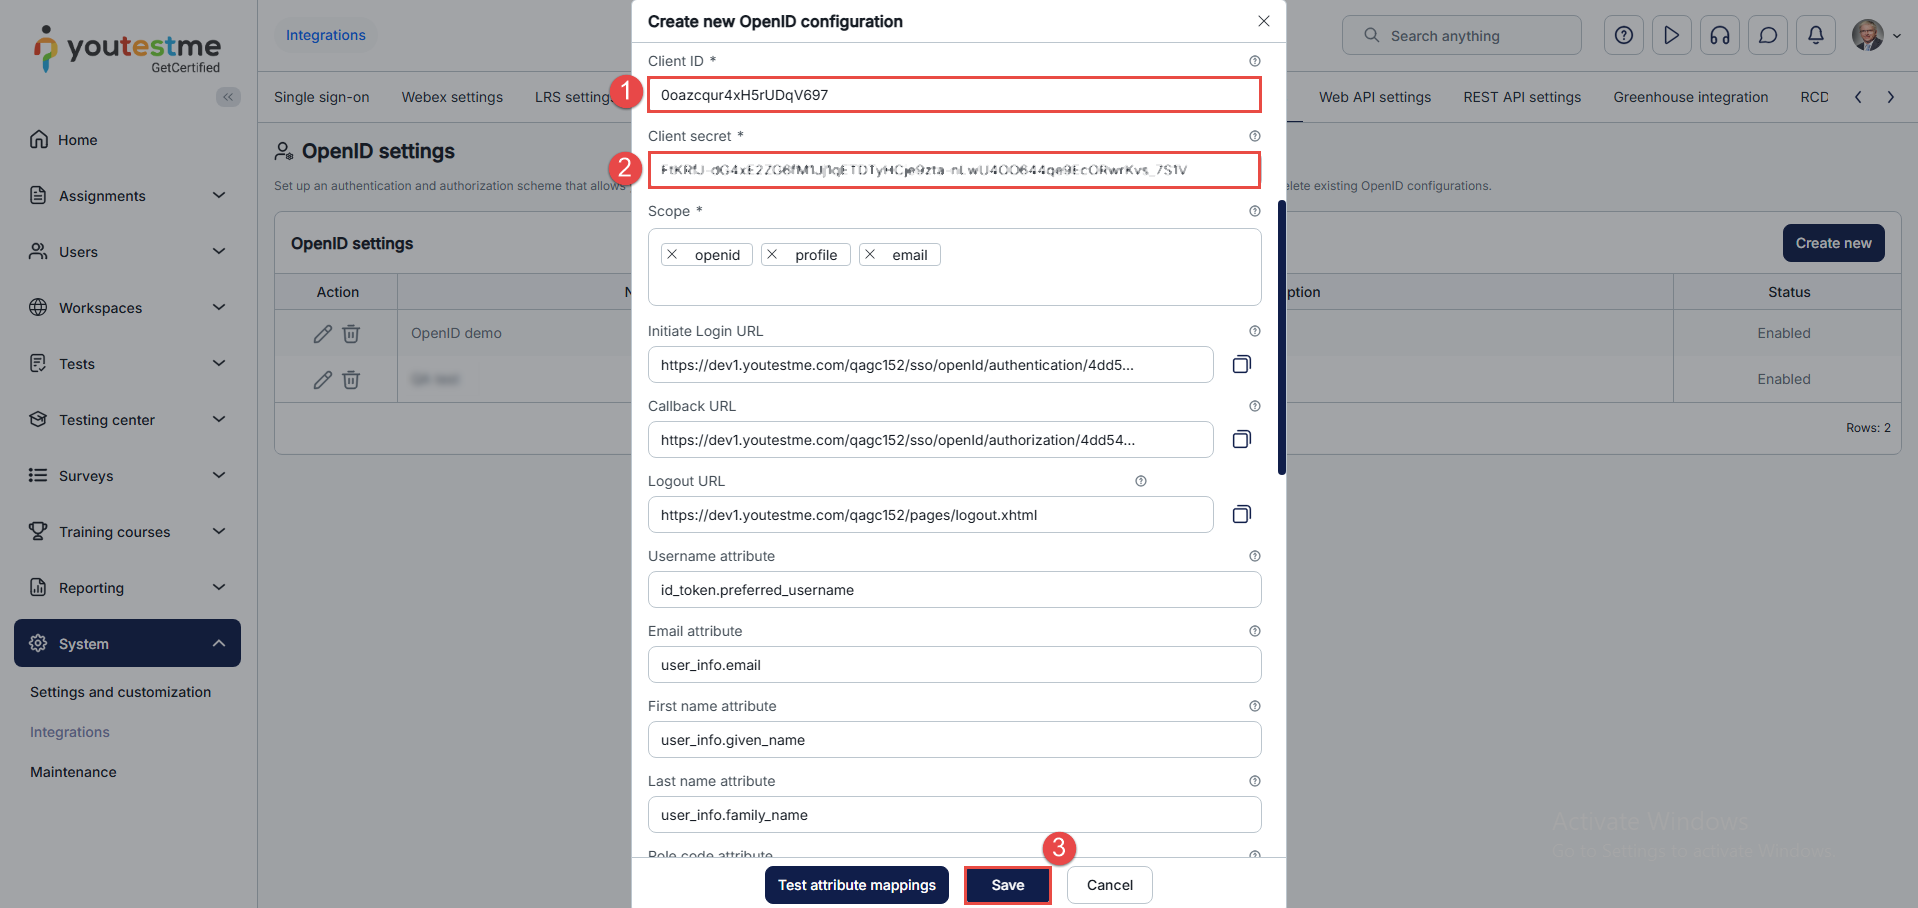
Select the Save button to save the OpenID integration.
Logging in
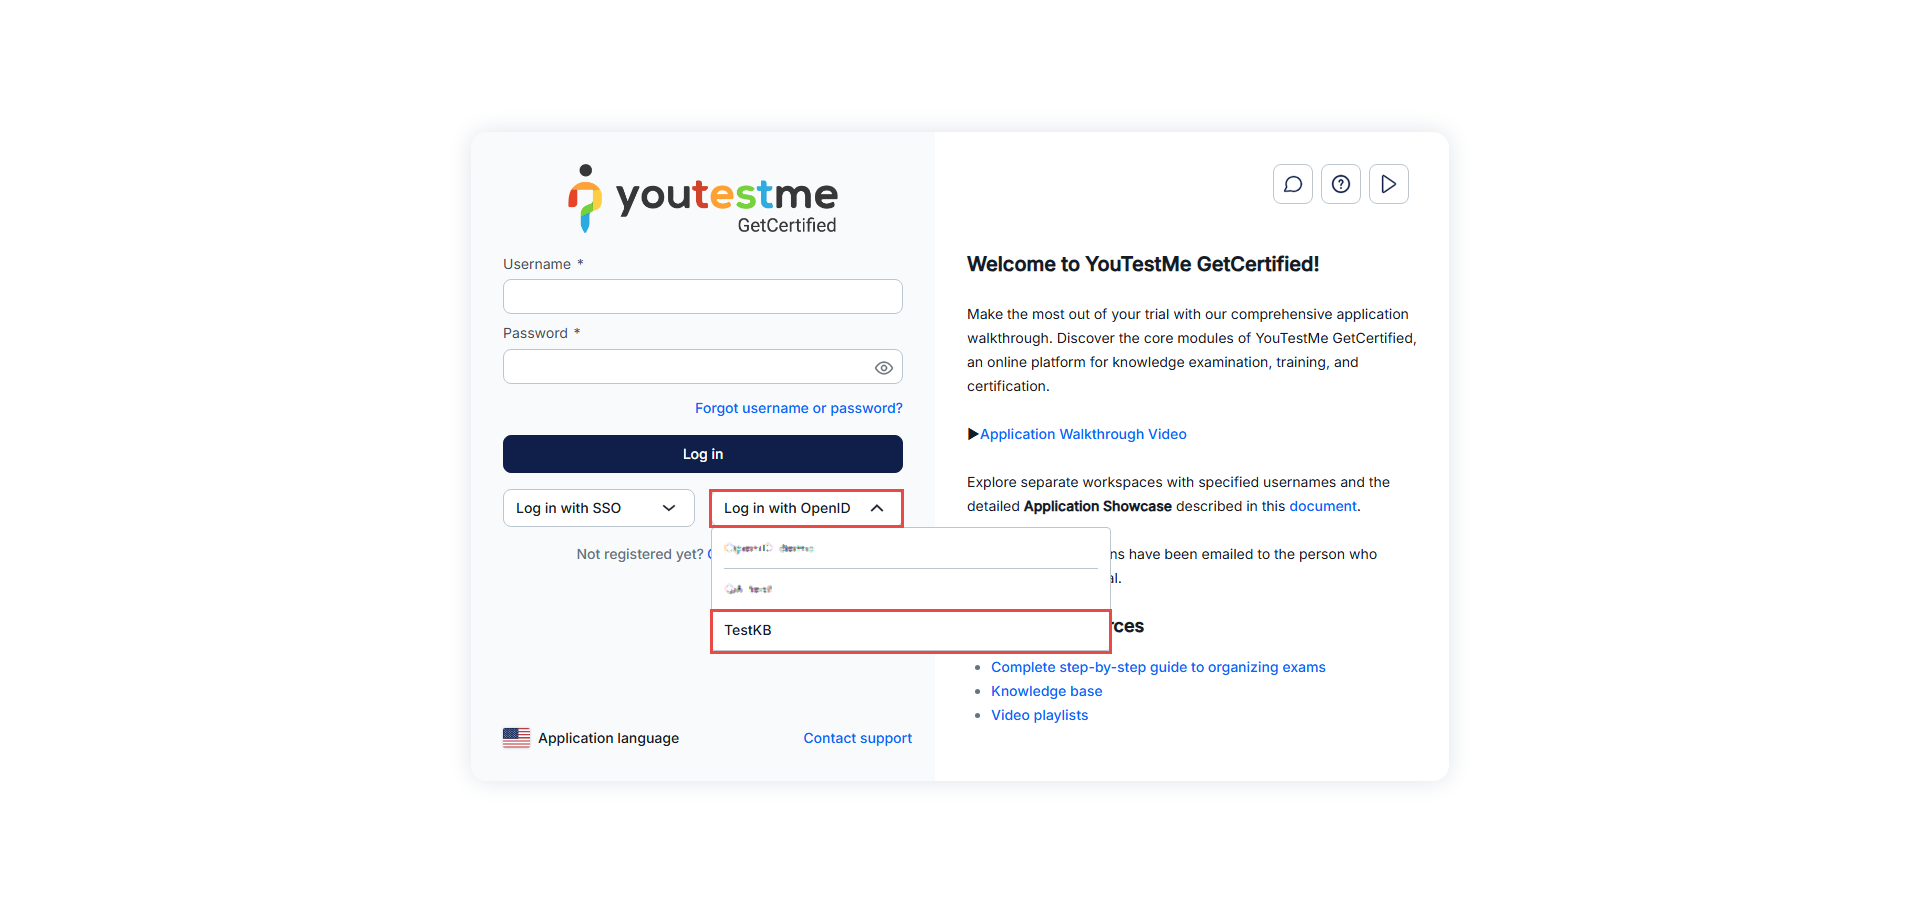
After creating an integration, select the newly created OpenID integration from the Log in with OpenID option.
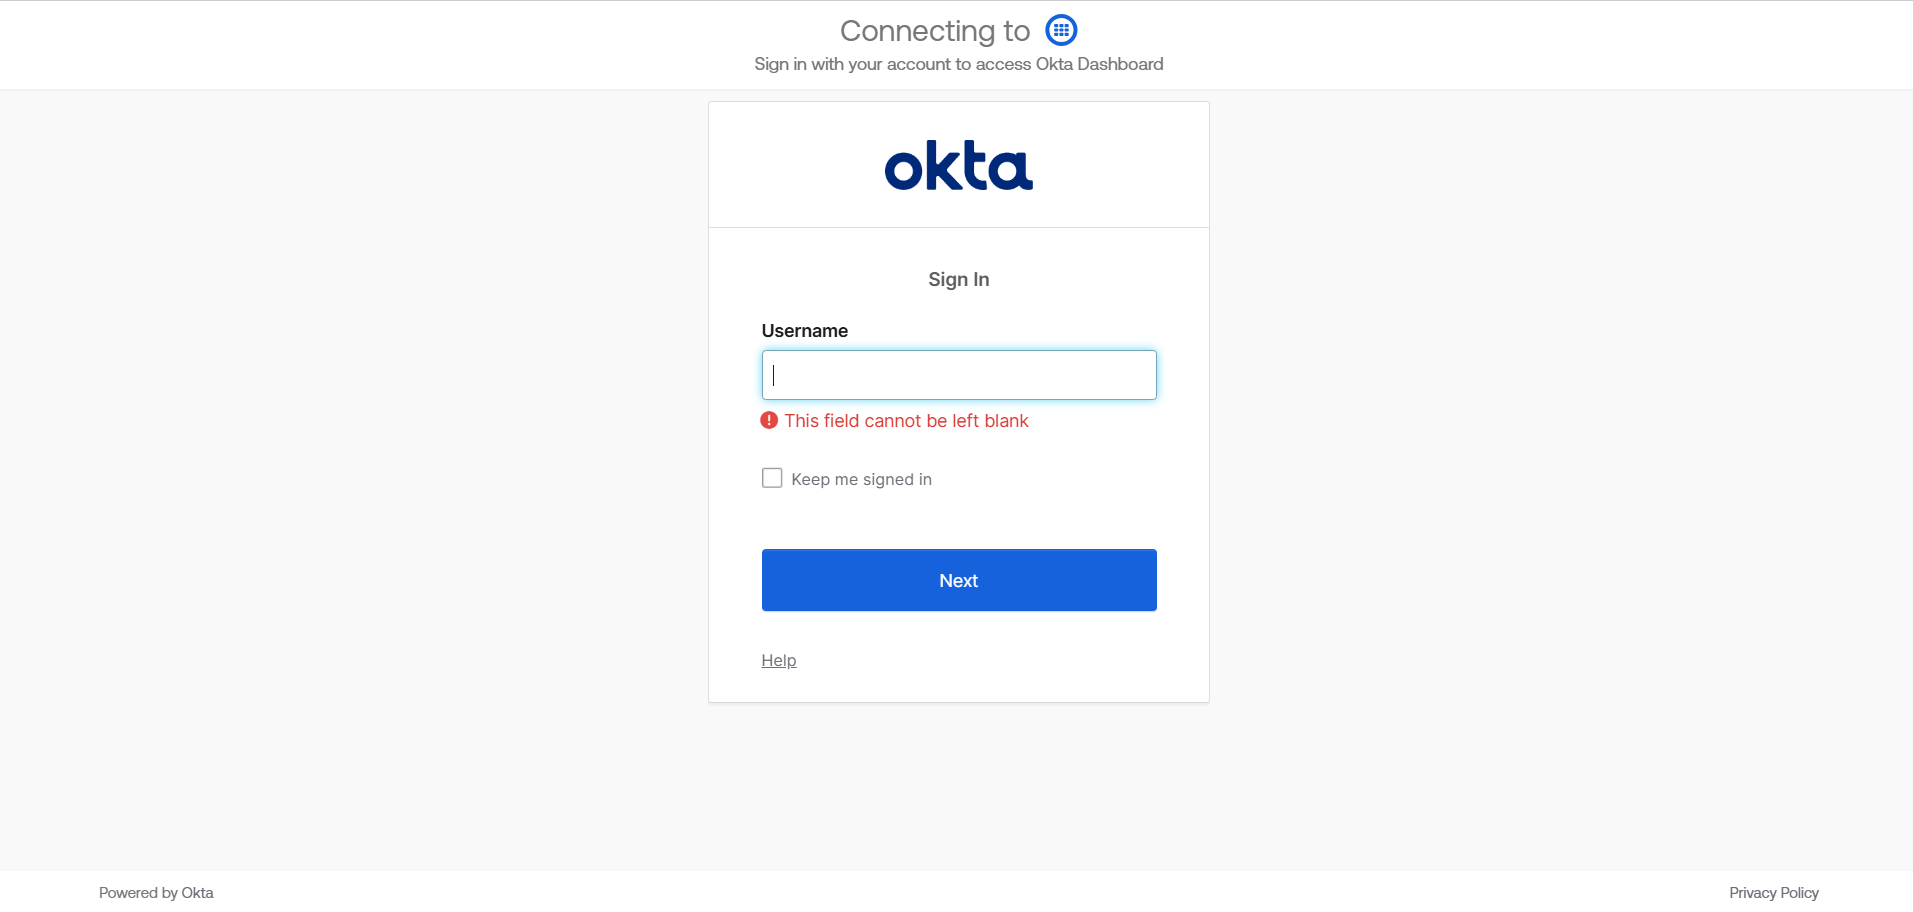
The application will redirect you to the Okta sign-in page. Enter your credentials and click on the Sign in button.
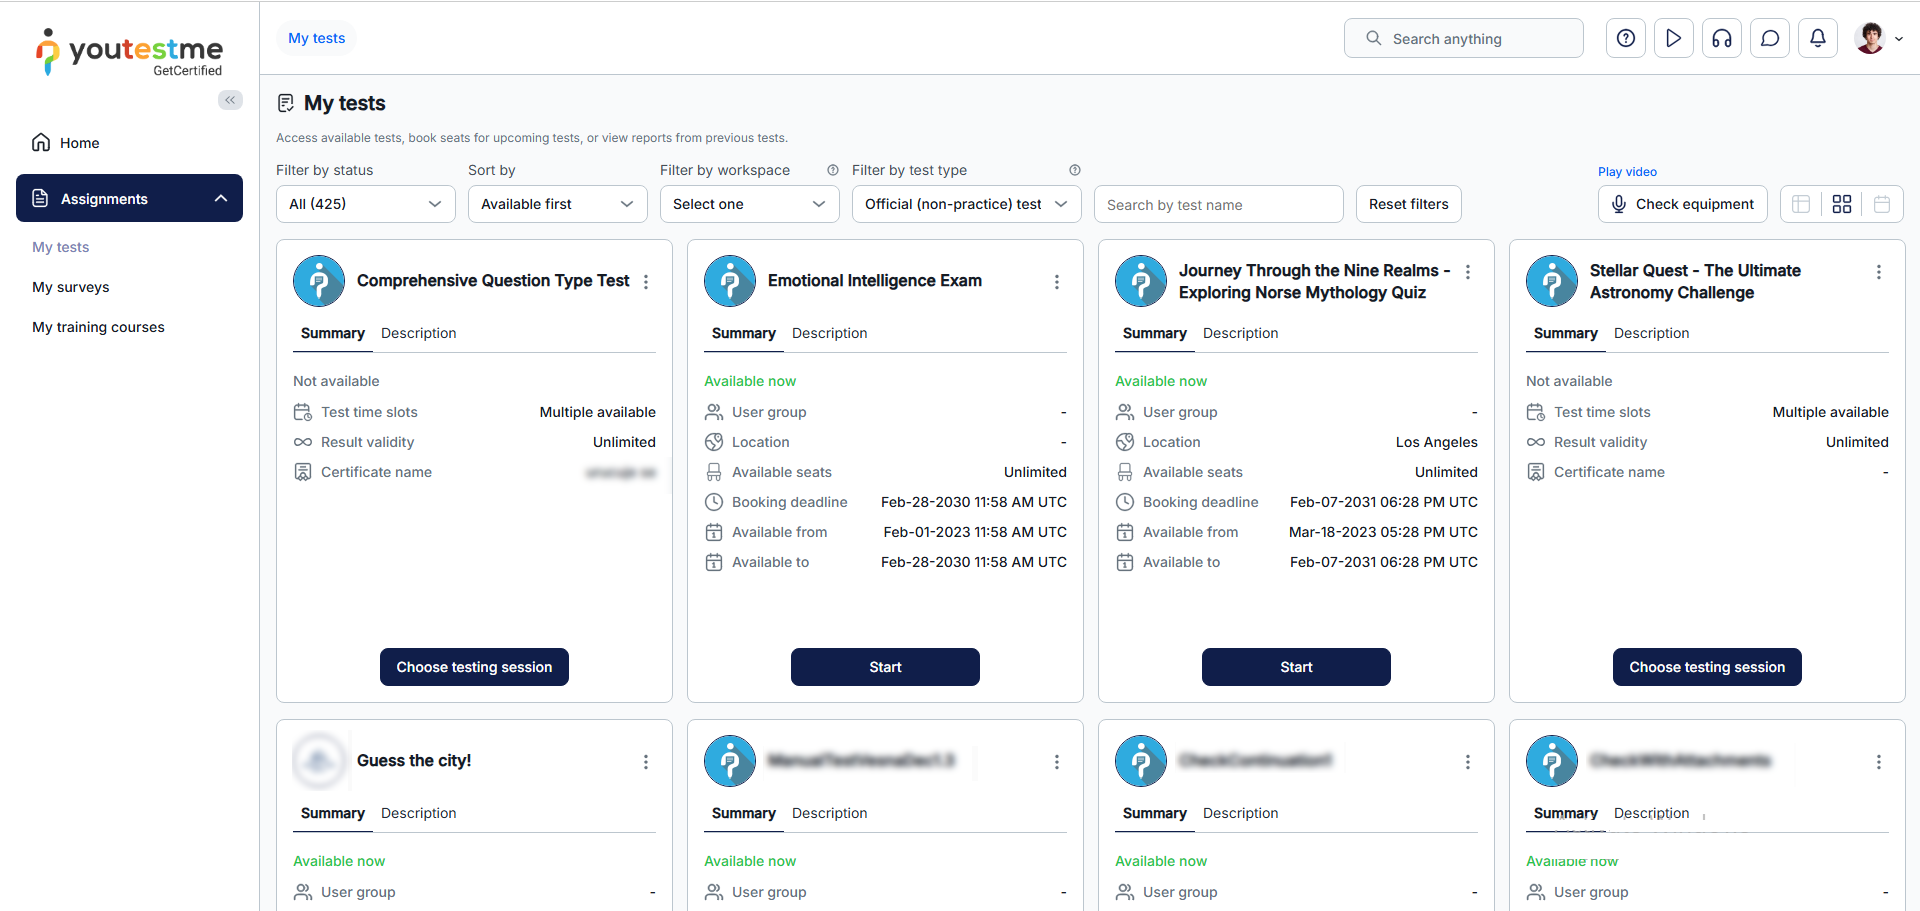
After signing in, you will be redirected to the My tests page in the application.
For more related instructional materials, please visit:
