Article verified for Release 15.2 on January 15, 2026.
In this article, we will guide you on how to use Safe Exam Browser (SEB) and YTM Proctoring in Moodle.
Integrating YTM Proctoring with Moodle
This document explains how to combine YTM Proctoring with Moodle easily. It offers step-by-step instructions for setting up and configuring proctoring features on the Moodle platform.
Integrating SEB into Your Proctored Test on Moodle
SEB can be integrated into your previously created test with configured YouTestMe proctoring, but only if the test does not yet have attempts. If the test already has attempts, it is advisable to create a copy and modify the settings.
Note: Ensure that Edit mode is enabled.
Test Organization
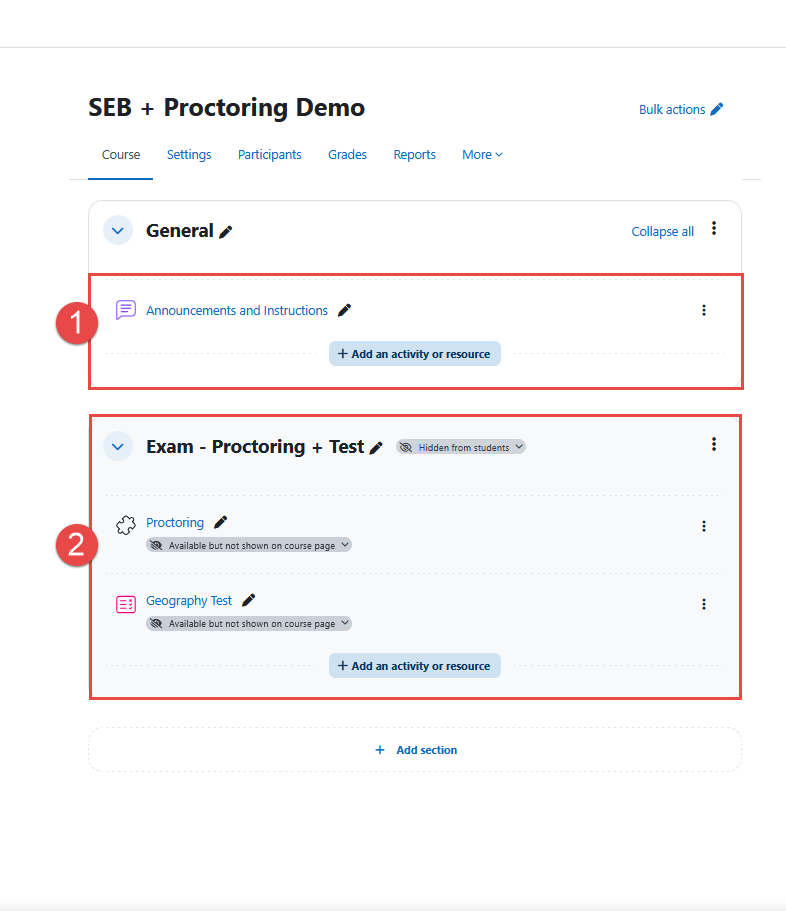
The test is organized into two sections:
- Our suggestion is that the first section, for example, Announcements and Instructions, includes guidance for students, such as what is allowed and not allowed during the test, and provides a link to the SEB configuration file.
- The second section includes the Proctoring element and the Quiz (test) element. This module should be hidden from students, while the individual elements should be set as available but not shown on the course page.
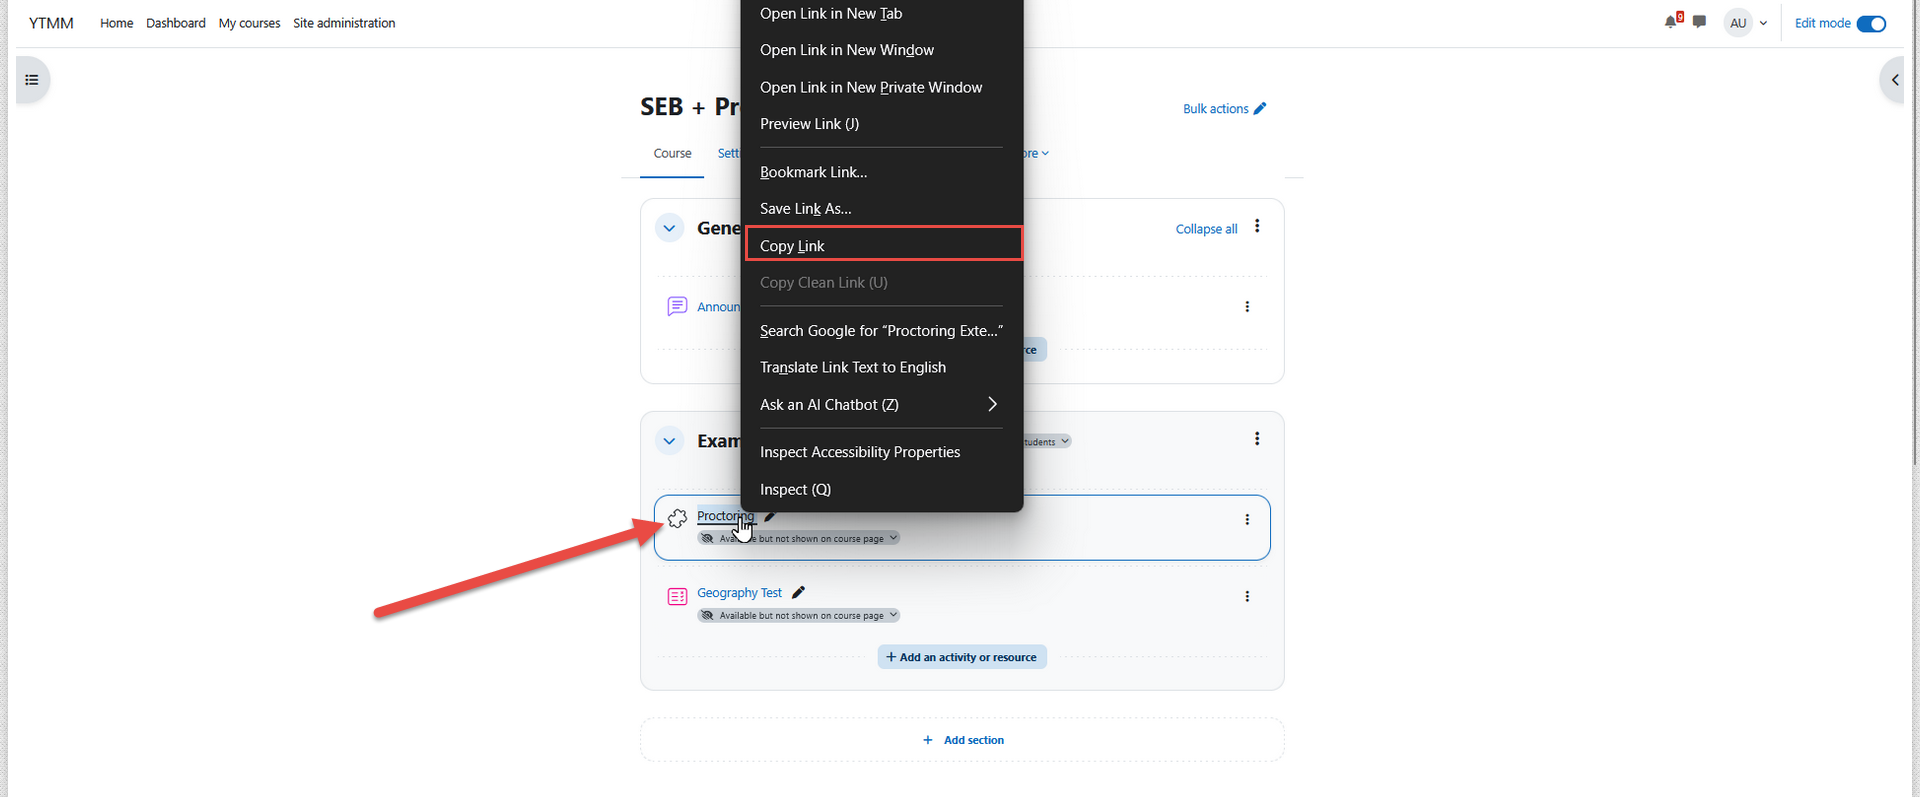
Open the SEB configuration file, then in the General tab, paste the Proctoring element URL into the Start URL field. The proctoring element URL should look like this: https://your-moodle-domain/mod/lti/view.php?id=proctoring_element_id
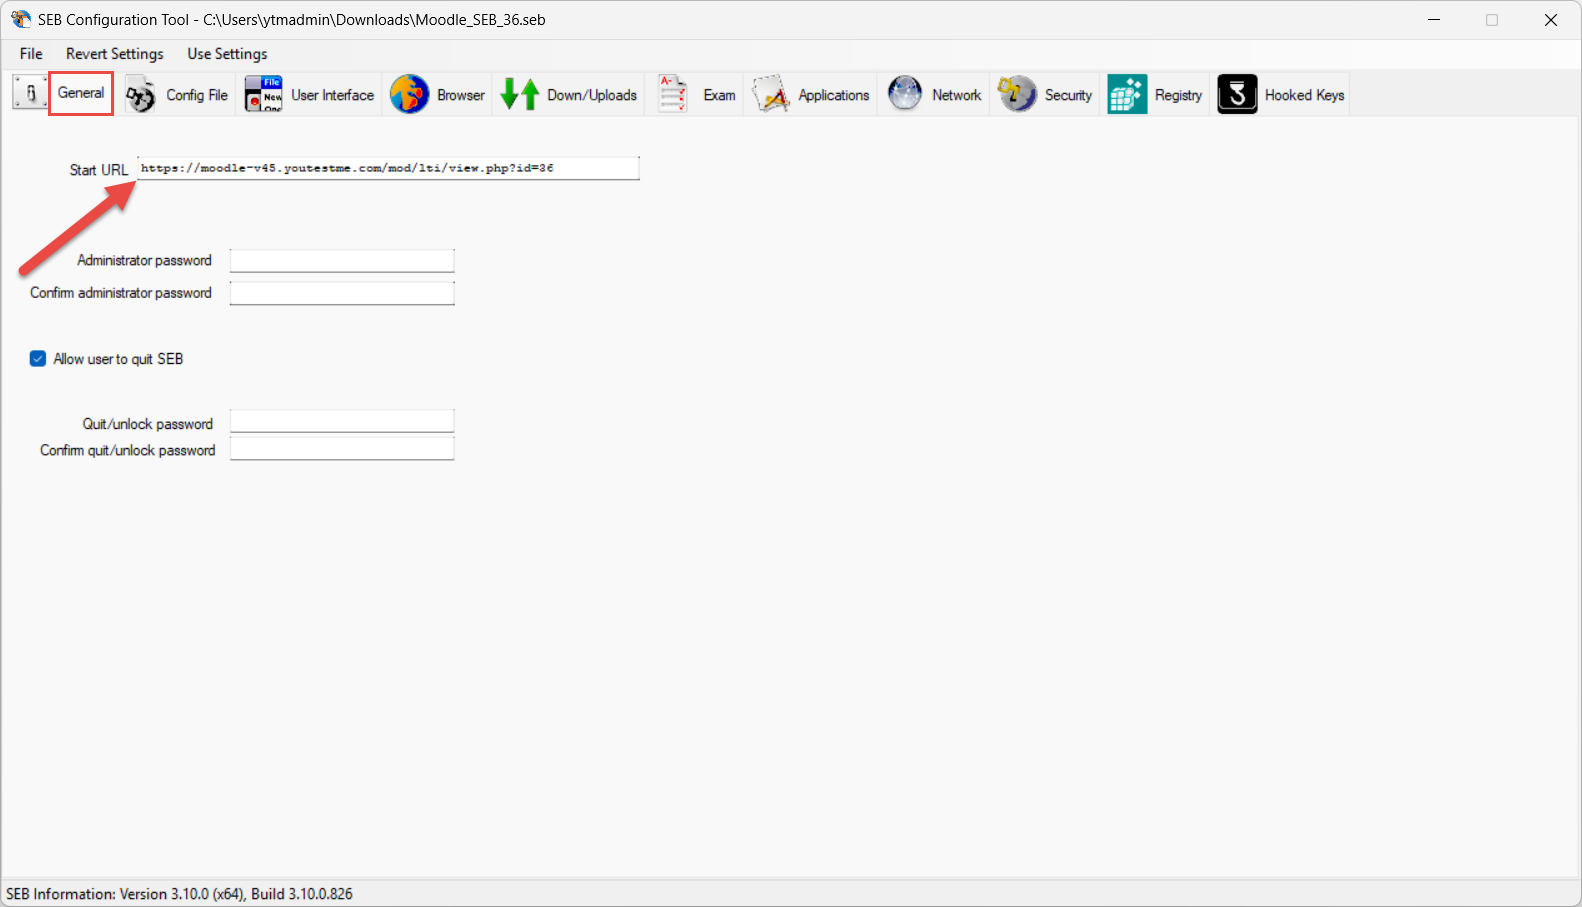
If you want to reuse the SEB configuration across multiple tests, remove the query parameter part from the Start URL. It should look like this: https://your-moodle-domain/mod/lti/view.php.

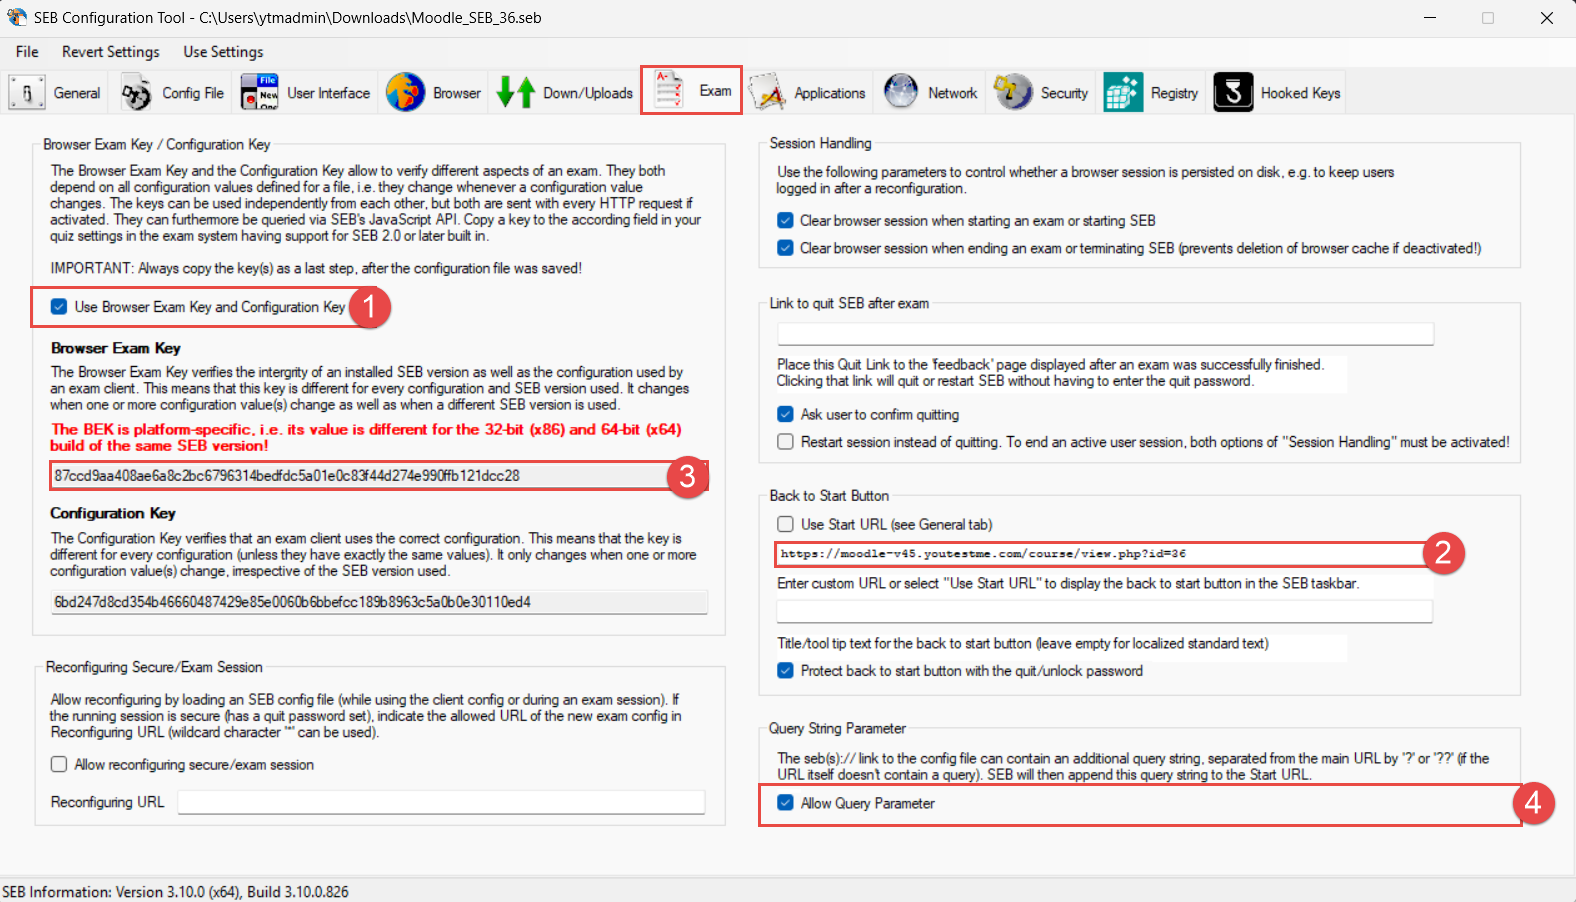
Open Exam tab and:
- Select Use Browser Exam Key and Configuration Key. Otherwise, the proctoring will display an error message stating that the student is using a different browser.
- Also, paste the copied link in the Back to Start Button.
- Copy the Browser Exam Key. The copied key you will use later in Moodle.
- If you want to reuse a single SEB configuration for many tests, enable the Allow query parameters option.
Optionally, go to the Applications tab and add the names of the applications in .exe format that should be blocked during the session by clicking the Choose application button. Otherwise, applications that have not been added to this sheet will run during the session.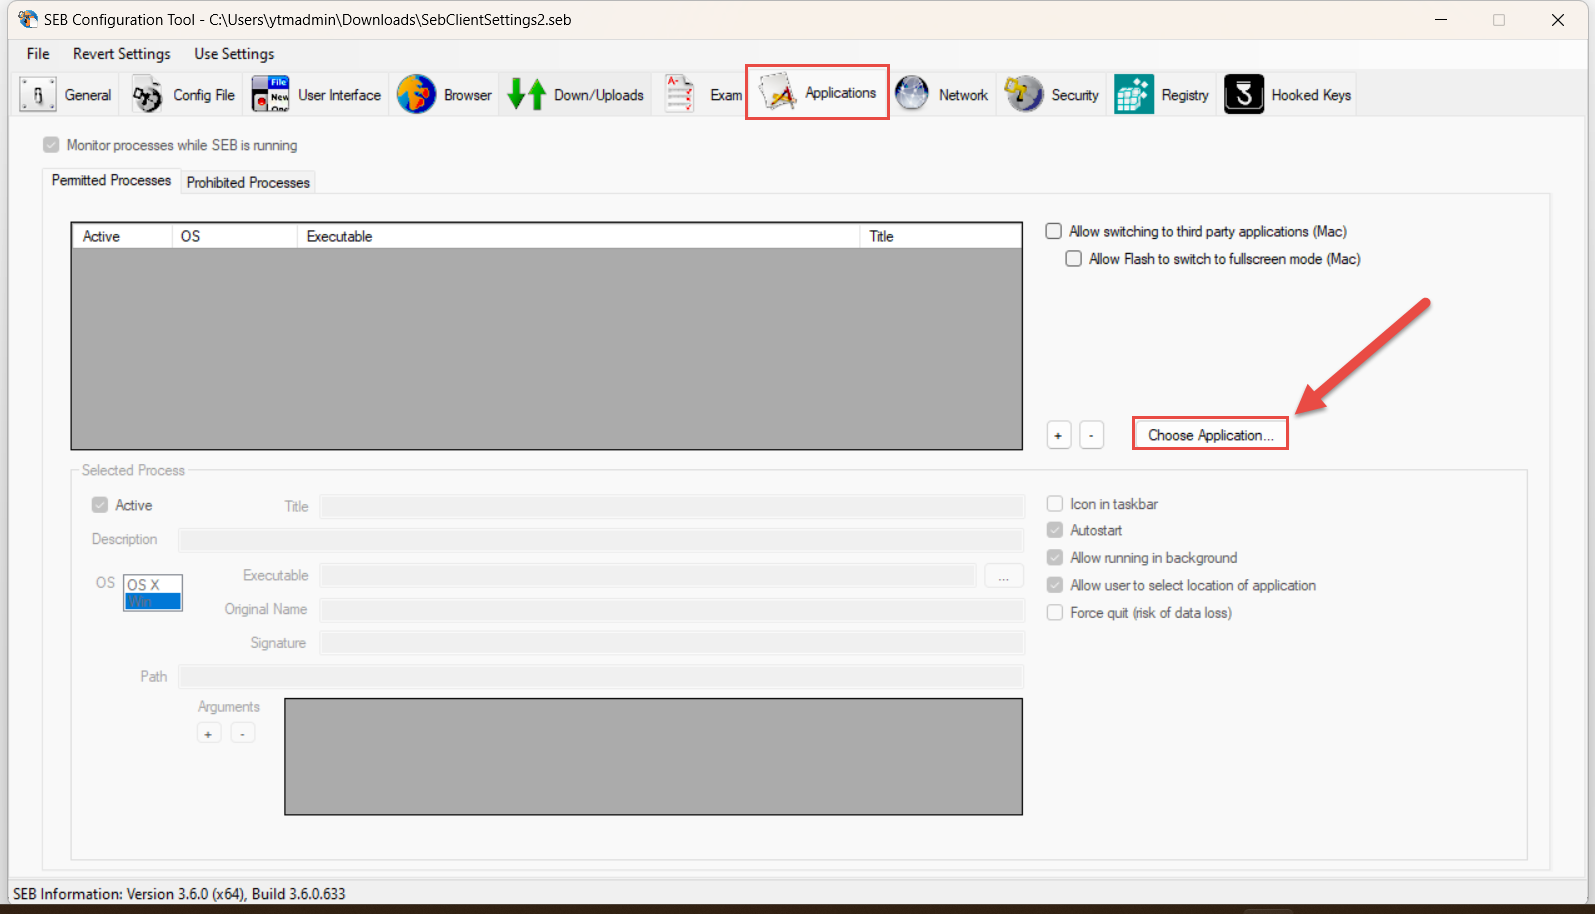 In the Config File, choose the Starting an exam option.
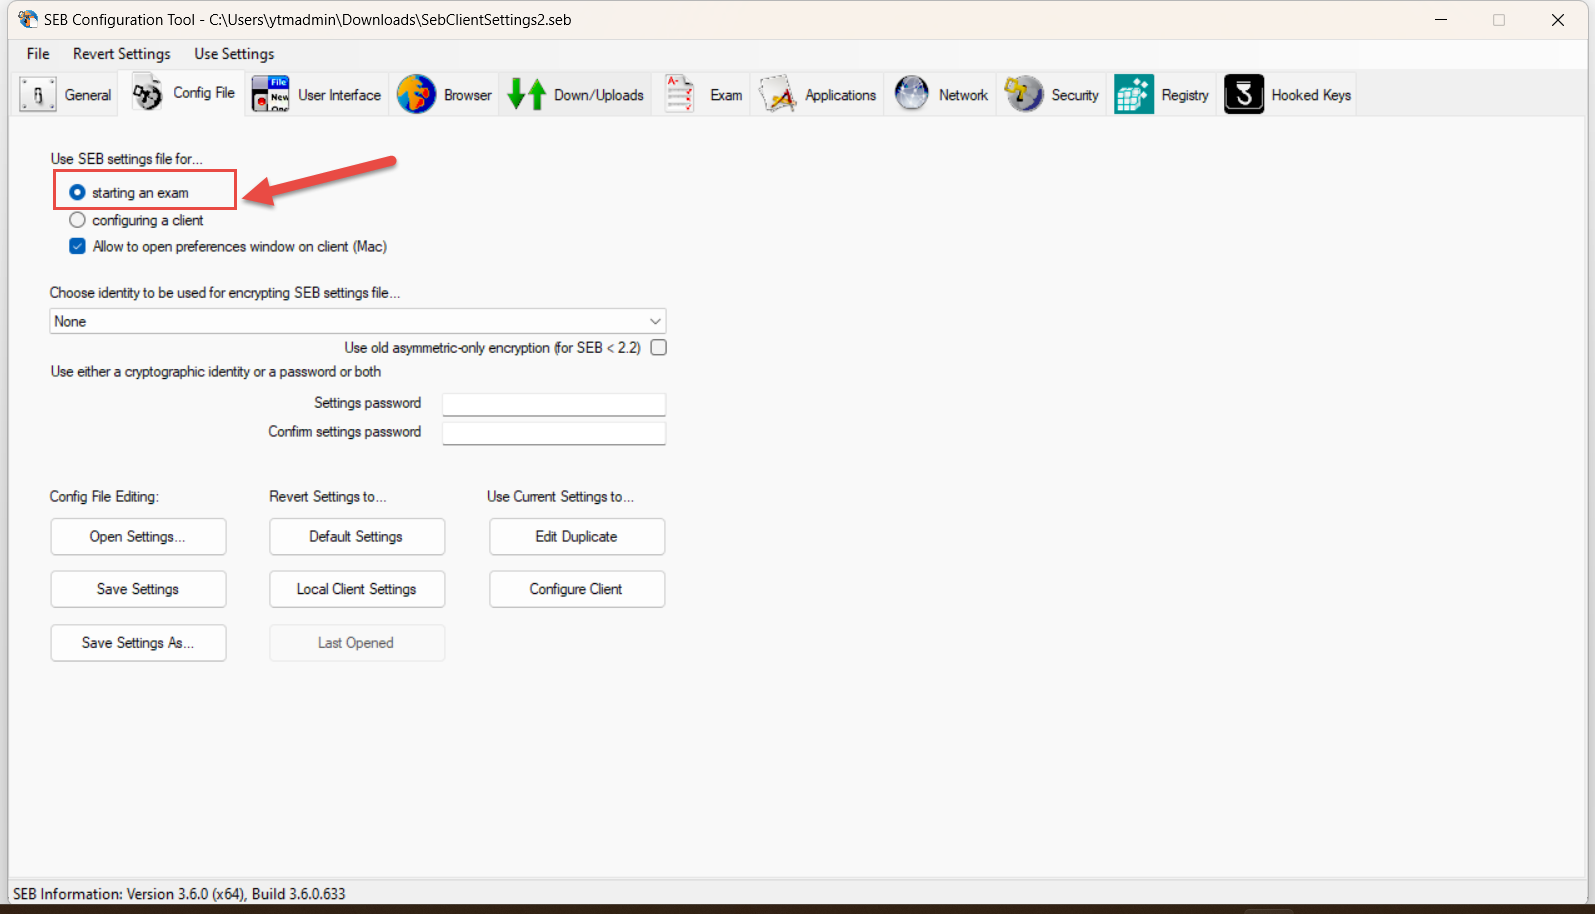 After configuring all, save the configuration.

Once the SEB configuration file is created, upload it to a file storage location that provides a direct download link (for example, a cloud or file repository). The link must trigger an immediate download of the SEB configuration file when accessed. For the illustration, the link should look like this https://your-storage-domain/path-to-seb-config.
To launch the SEB automatically with the created configuration, replace the https protocol with the sebs protocol.
If you are using the SEB configuration for multiple tests, append the proctoring element ID as a query parameter to the SEB configuration URL. Please make sure that a double question mark is appended (??).
The final SEB launch link should look like this:sebs://your-storage-domain/path-to-seb-config??id=proctoring_element_id
The SEB launch link will launch the SEB, start the proctoring equipment check, and redirect the user directly to the test. Place this link in the Moodle course “Announcements and Instructions” section, so students can launch the test with proctoring in the SEB.
Configuring SEB in the Test
Within the Quiz element, navigate to the Safe Exam Browser section and select Yes – Use Safe Exam Browser configuration. Optionally, enable the SEB browser download button and paste the previously copied Browser Exam Keys into the Allowed Browser Exam Keys field.

Student’s Perspective
When students log in to the application, they will find a link to download the SEB config file. After clicking on the SEB config file, SEB will launch, and they will log in using their credentials.
Once logged in, they will be directed to the Equipment Check. After successfully completing the Equipment Check, they can start the proctored test. When they submit their answers, both the Proctoring session and the test will be completed.
How to Set Moodle and Proctoring in a Specific Language
If a candidate wishes to change the language of the equipment check and Moodle interface, that language must first be installed and then set as their preferred language.
Step 1: Install the Language Pack (Admin Only)
You must be logged in as an administrator to install additional languages.
-
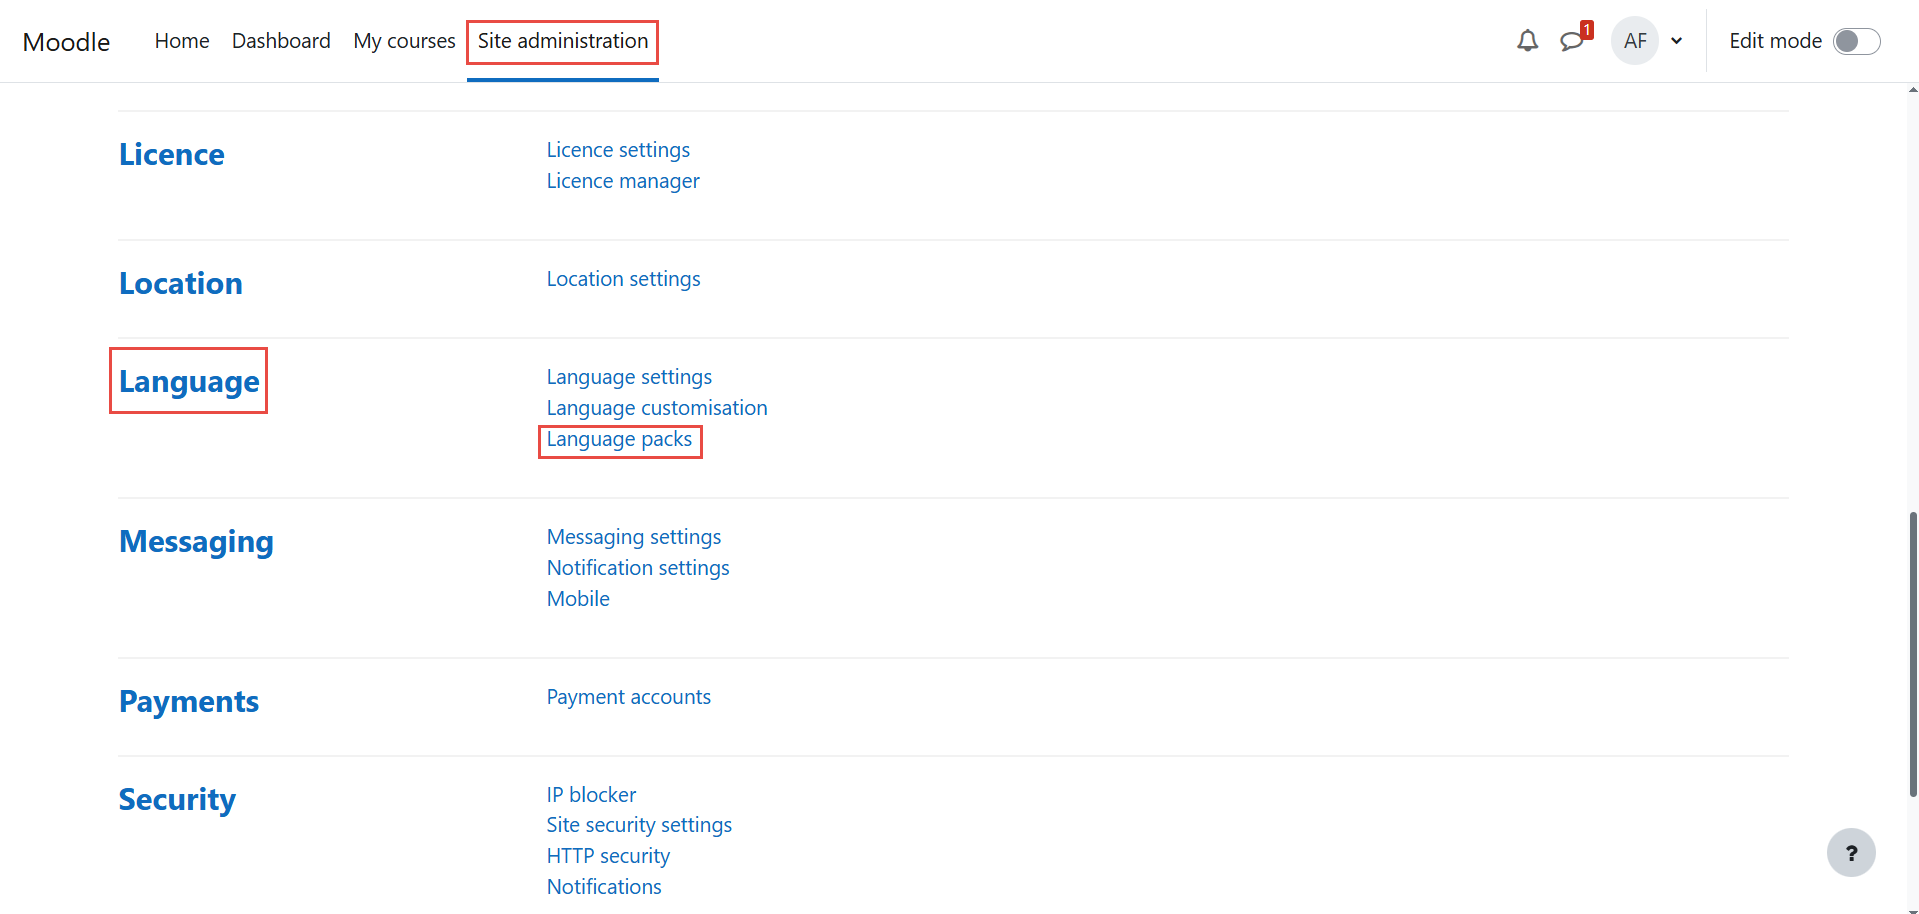
Go to:
Site administration > Language > Language packs
-
In the Available language packs section, select the language(s) you want to install.
-
Click the Install selected language pack(s) button.
Note: If only one language is installed, all candidates will see the interface in that language and will not have the option to change it.
Step 2: Set User’s Preferred Language
Once installed, the language becomes available for users.
For a candidate to take the exam in a different language:
-
-
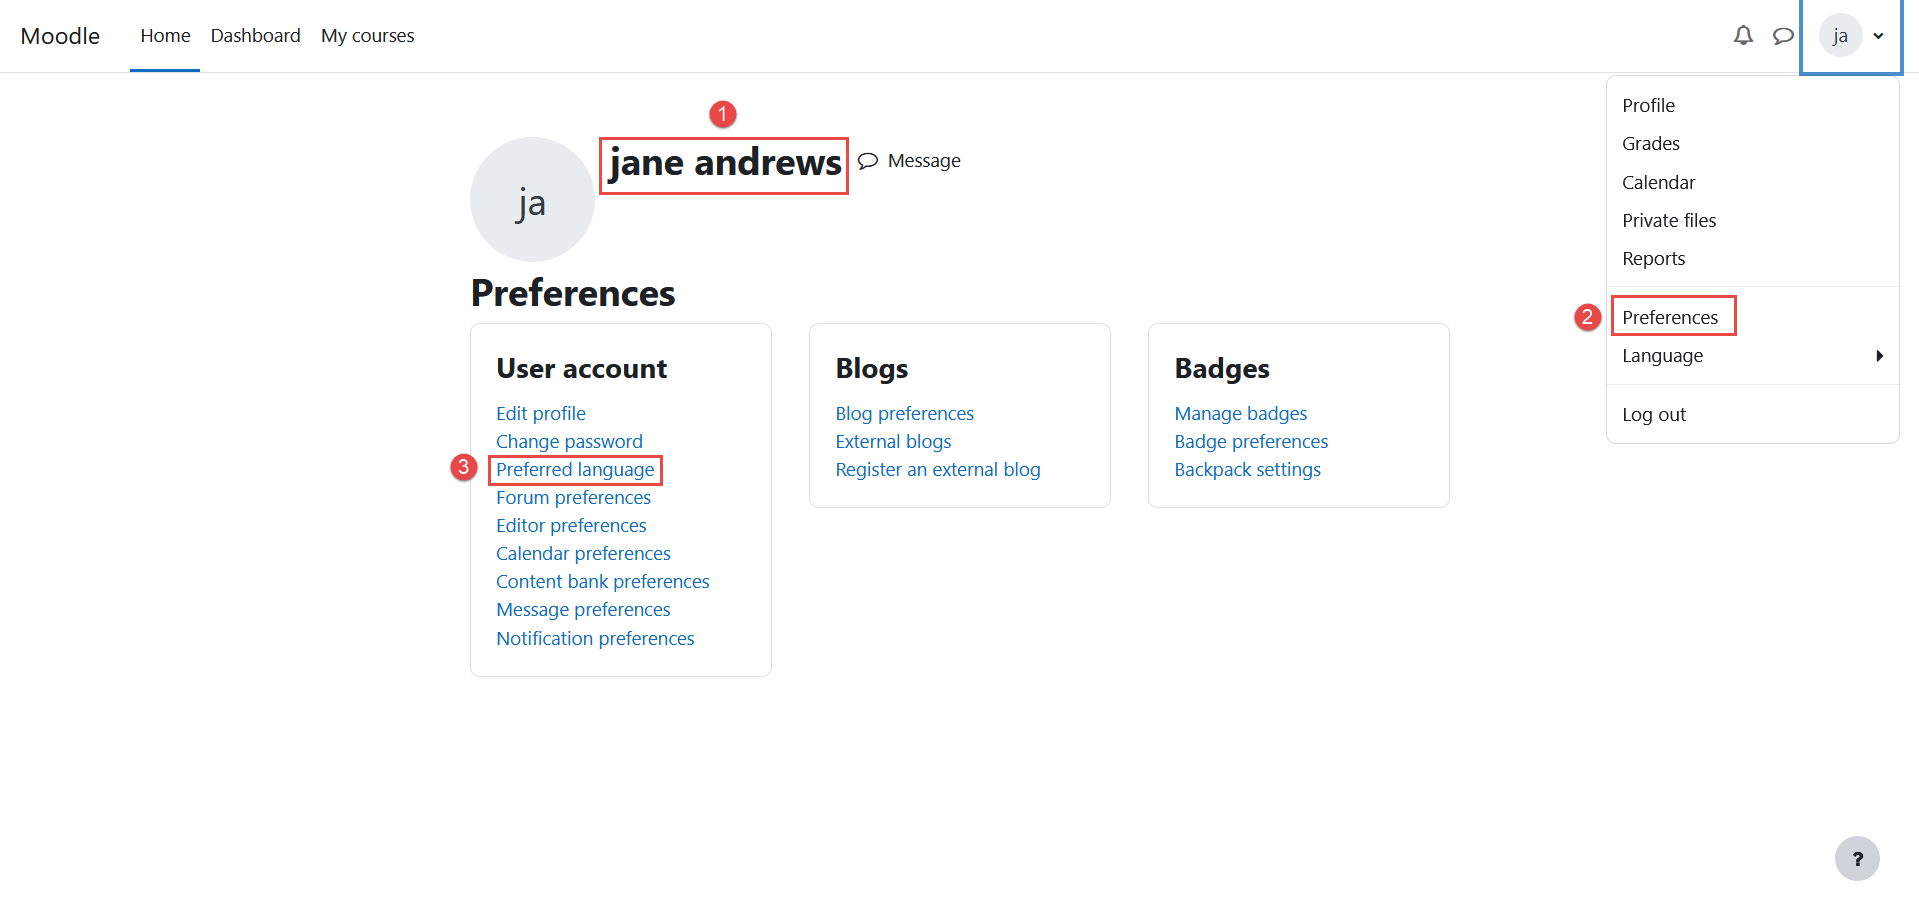
The candidate logs into Moodle.
-
Go to Preferences from the user menu.
-
Click on Preferred language.

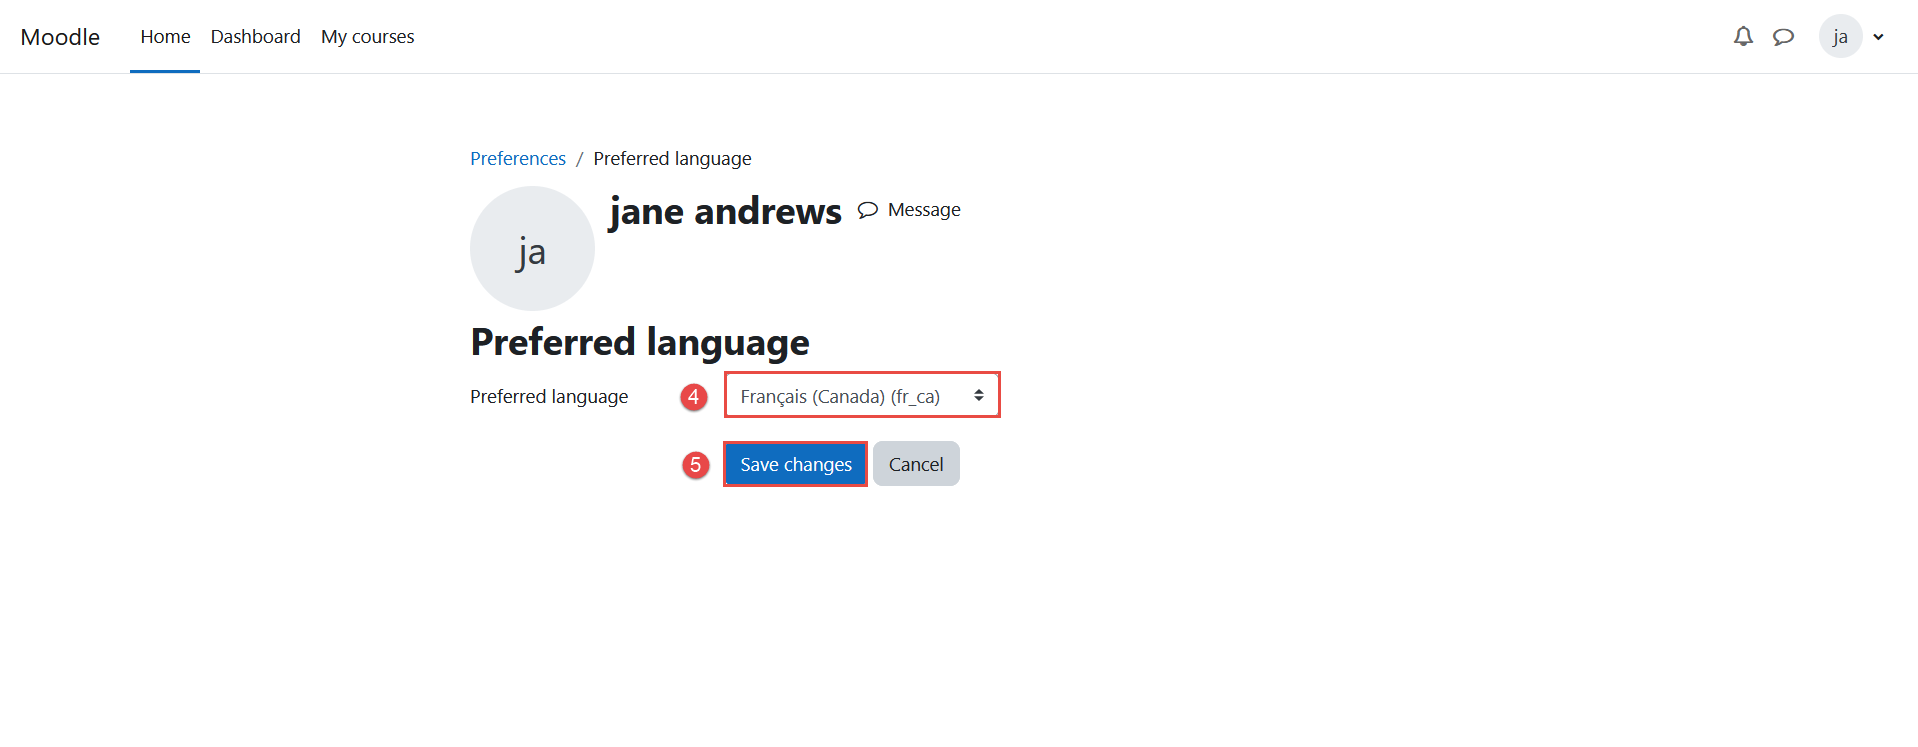
-
Select the desired language from the dropdown.
-
Click Save changes.
-

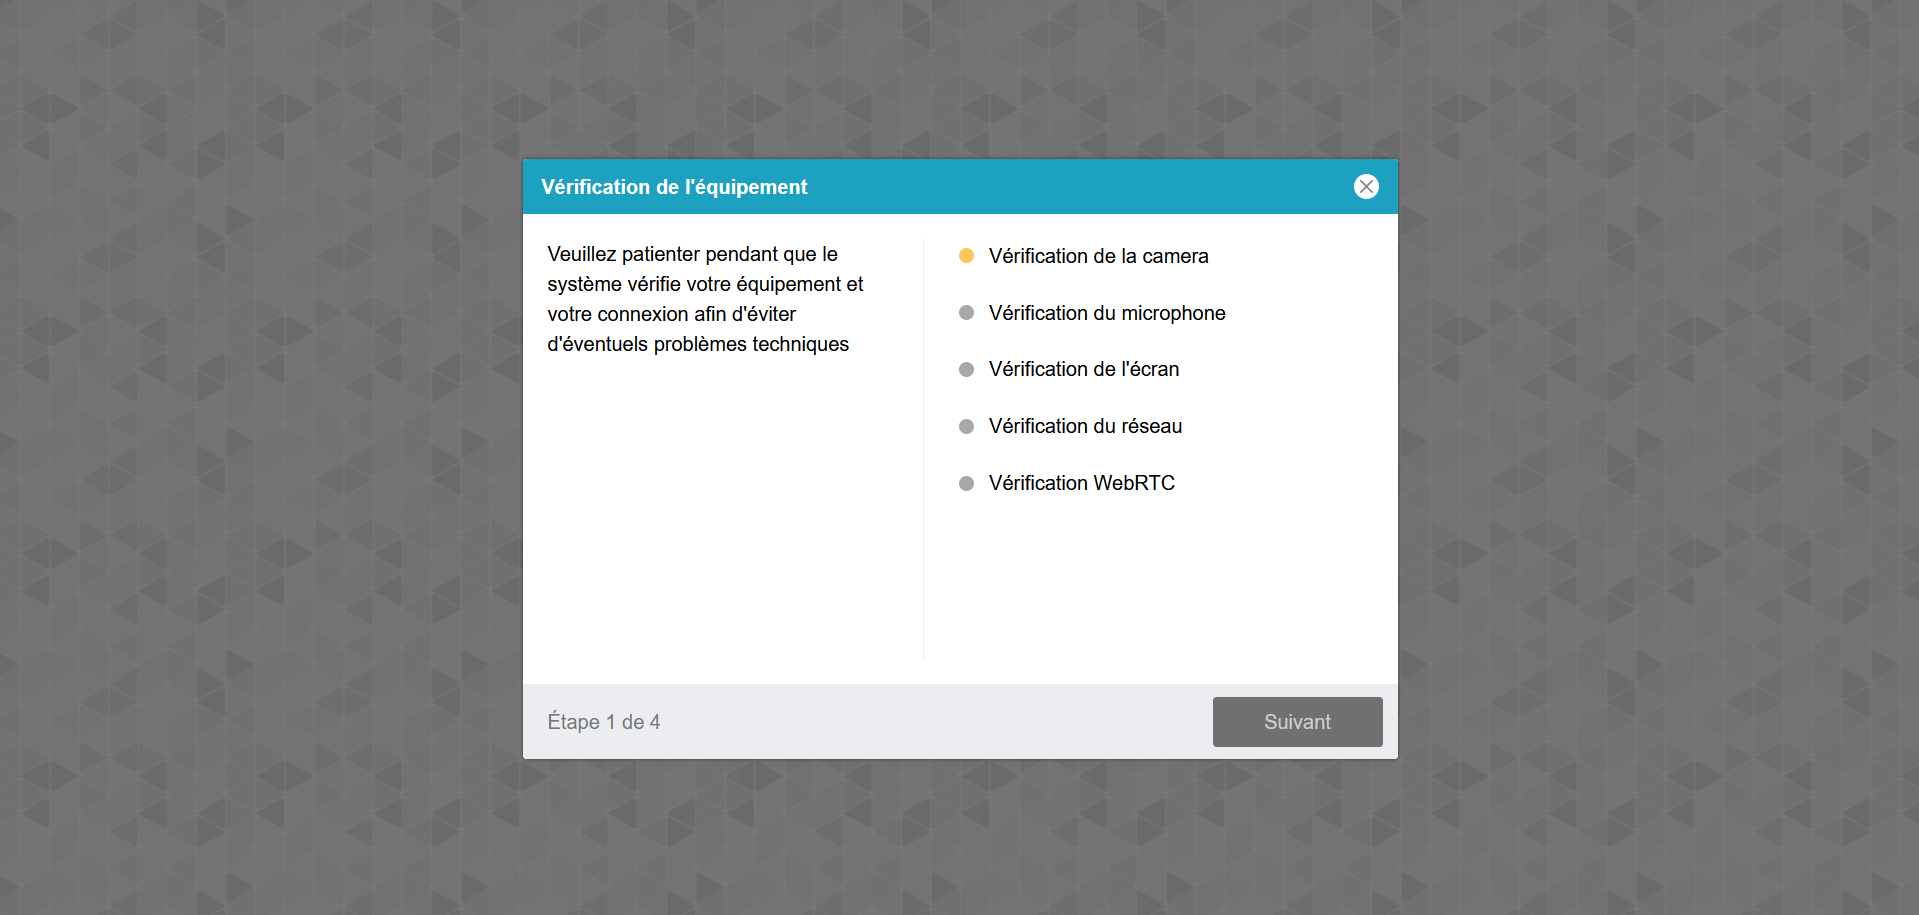
Candidate’s Perspective
Once the candidate starts the equipment check, the interface language will automatically switch to their preferred language.

-