
Article verified for Release 15.1 on October 20, 2025.
Two-factor authentication (2FA) is an important security measure that helps protect accounts from unauthorized access.
- 2FA must be configured by the user on their own device.
- Administrators cannot set up, activate, or re-enable 2FA on behalf of a user.
- If 2FA is required, it can only be enforced at the role level using the “Two-factor authentication required on login” setting, in which case users will be prompted to configure it during their next login.
This article explains how to configure two-factor authentication at the role level.
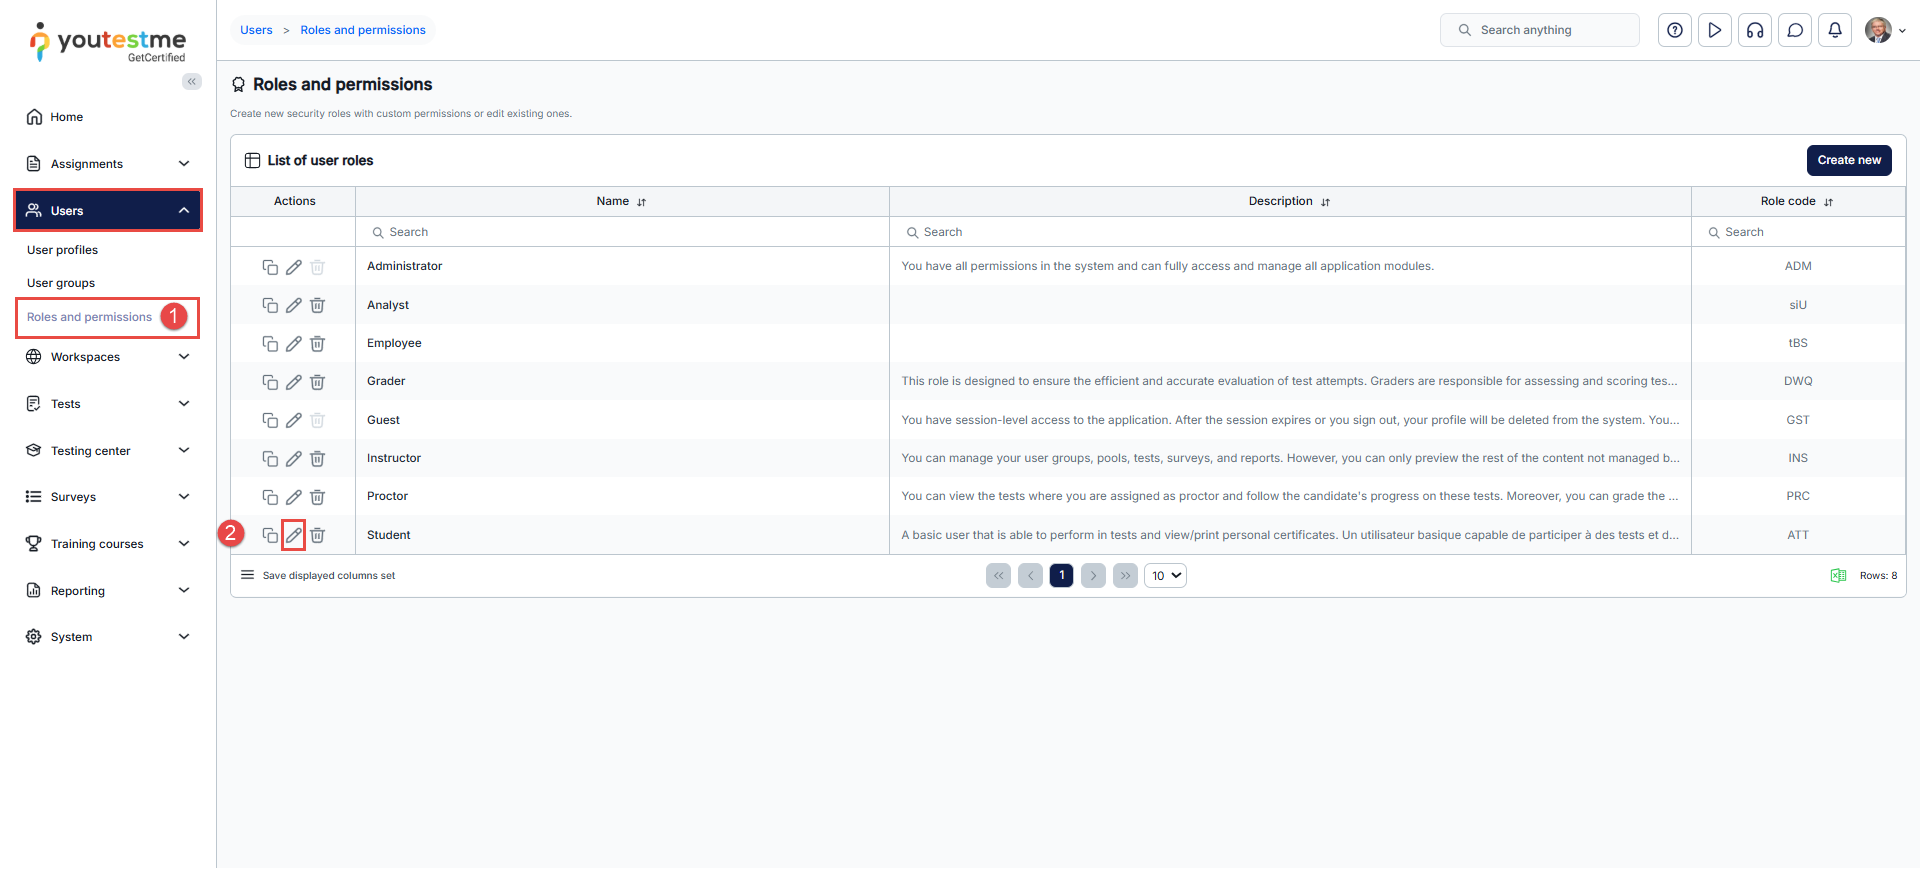
Configuring 2FA on Role Level
To configure the 2FA on the role level:
- From the Users panel in the main menu, navigate to Roles and Permissions.
- Enter the desired role configuration by clicking the Edit icon.
- Enable the Two-factor authentication required on login option.
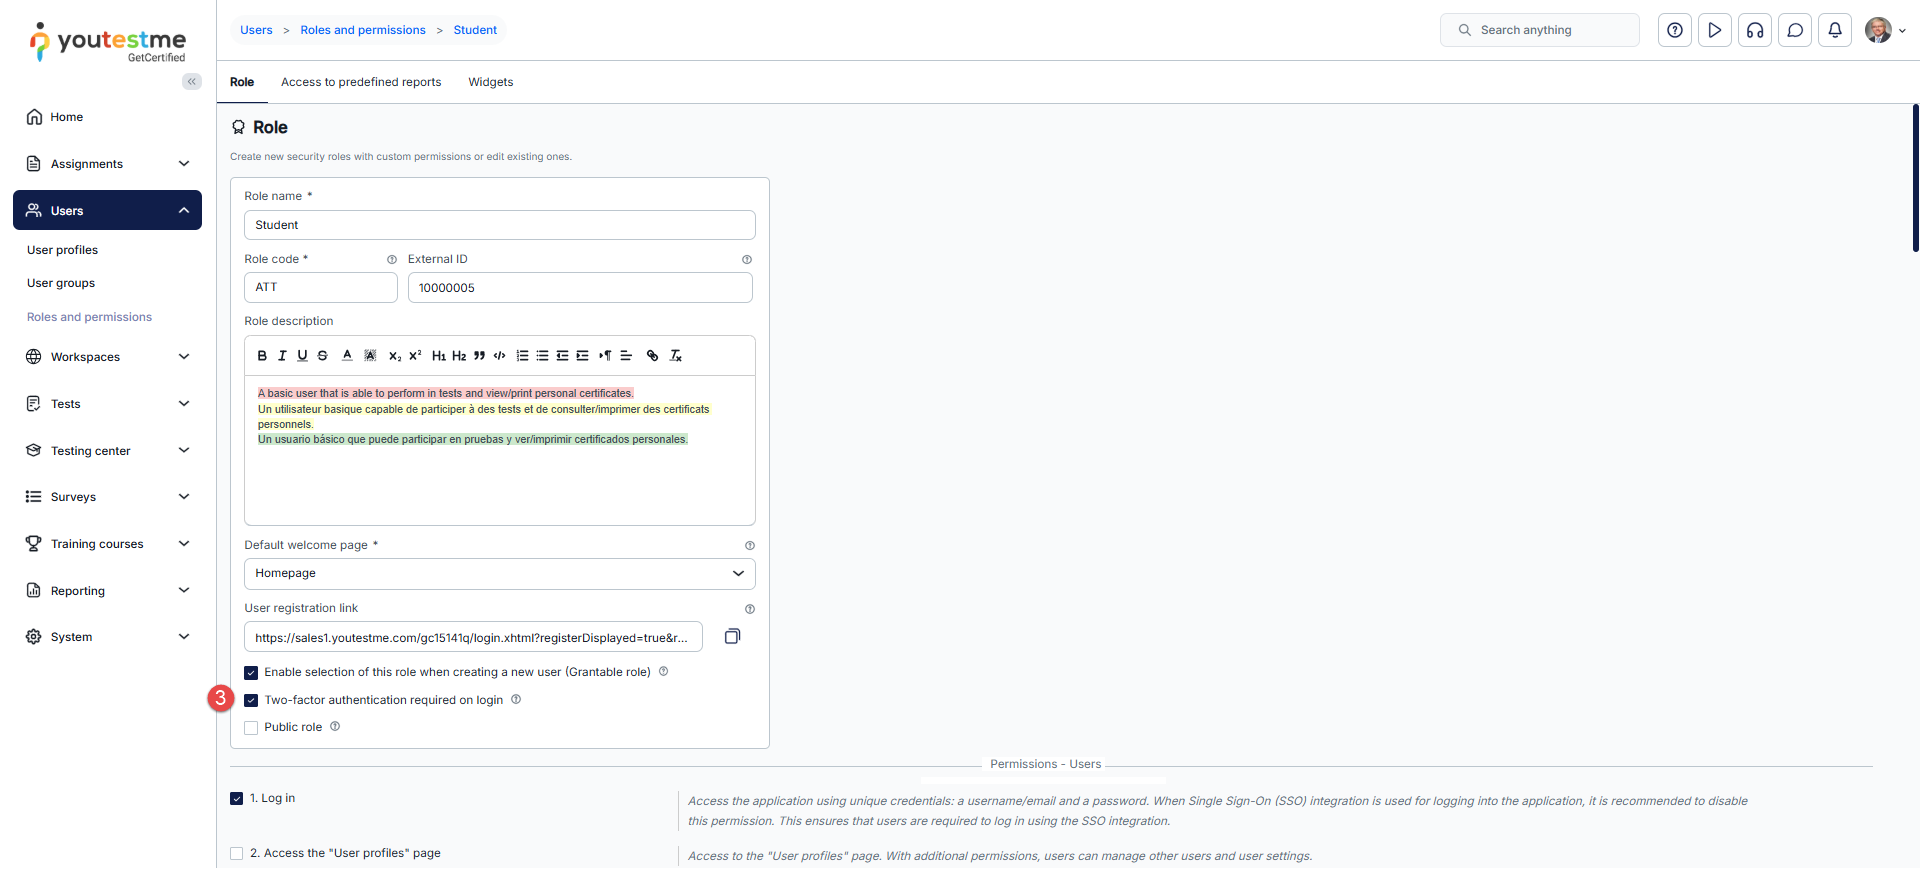
Once the feature is enabled, all users with the role affected by enabling said feature will be required to use 2FA during login or registration.
Enabling 2FA is always completed by the user during login. Administrators can only enforce 2FA, not complete activation on behalf of the user.
To learn how a candidate can log in using two-factor authentication (2FA), please refer to the following article.
Resetting Two-Factor Authentication (2FA)
If a user loses access to their authentication app or deletes their authentication account, they will no longer be able to access their account. In this situation, a user with the Administrator role can reset two-factor authentication (2FA) for the affected user.
To reset 2FA, the administrator must do the following:
- Navigate to Users.
- Locate and select the specific user.
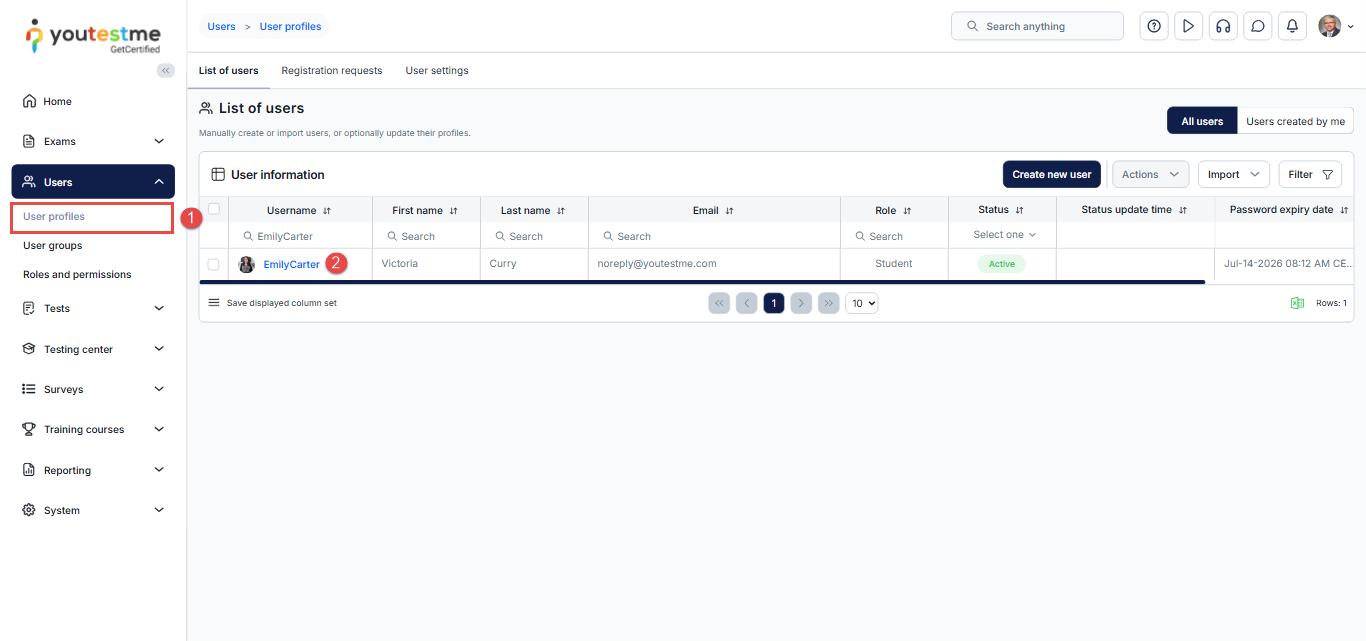
- On the user information page, navigate to Two-factor authentication (2FA).
- Click Deactivate two-factor authentication.

Since 2FA is required for login, the user will be prompted to set it up again and will then be able to sign in to their account.
Useful resources:
