
Article verified for Release 15.2 on January 23, 2026.
This article explains how to customize the test logo displayed on the test card and visible to candidates. Users can update the test logo at different stages, whether during test creation or after the test has been created.
Customize the Test Logo During Test Creation
You can set the test logo while creating a new test. To do this:
- From the main menu, select Tests.
- Click New Test to start the Test Creation Wizard.
- In the first step of the Test Creation Wizard, click Browse and upload your file, then select the image you want to use as the test logo.
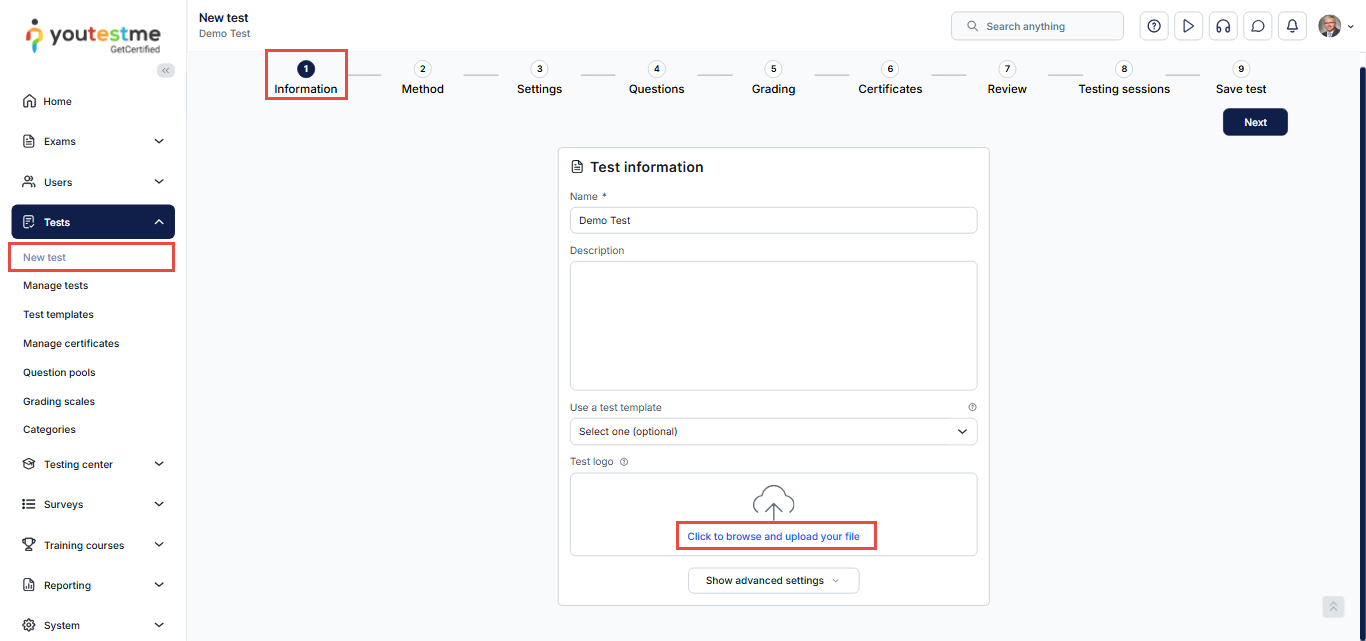
The logo will be added to the test. You can change or remove the image at any time, depending on your preferences.

Note: The accepted formats are JPG, PNG, and BMP. The file size should not exceed 1MB.
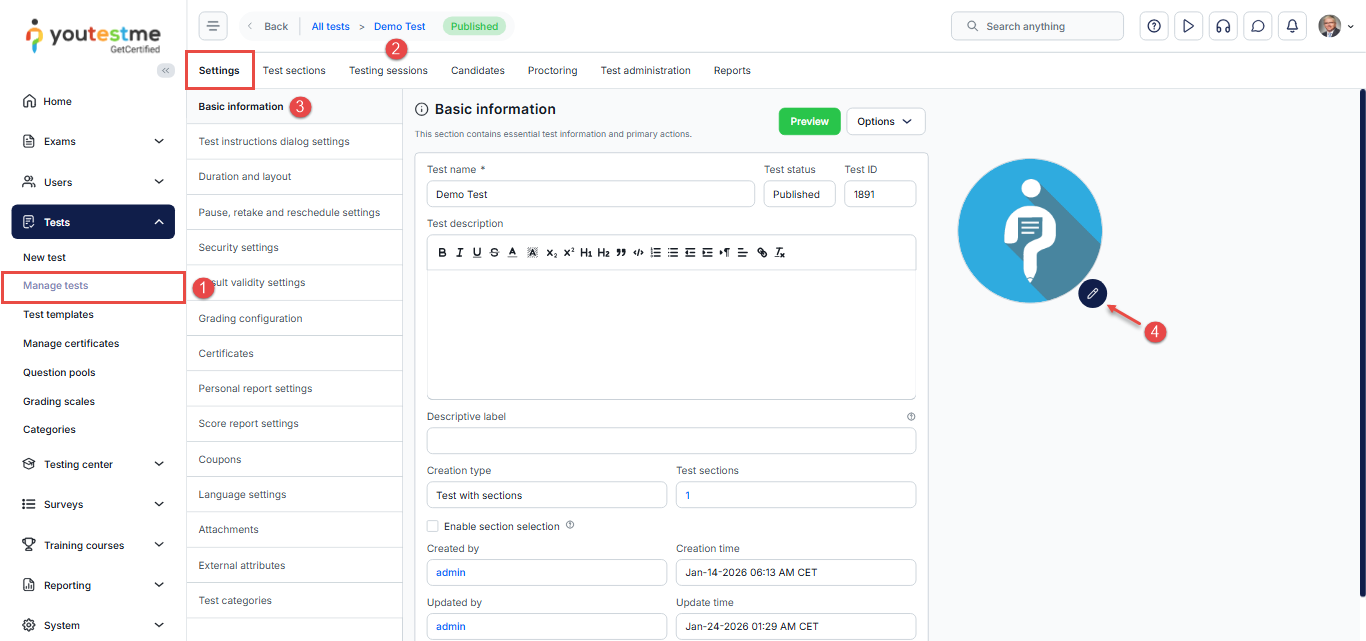
Customize the Test Logo from Test Settings
If you don’t set a test logo during test creation, the system will assign a default logo. You can change this logo at any time from the test settings.
To update the test logo:
- From the main menu, navigate to Tests and select Manage Tests.
- Choose the test you want to update.
- On the Settings page, open the Basic Information tab.
- Next to the default logo, click the Edit icon.
- In the pop-up window, click Upload and select the image you want to use as the test logo.
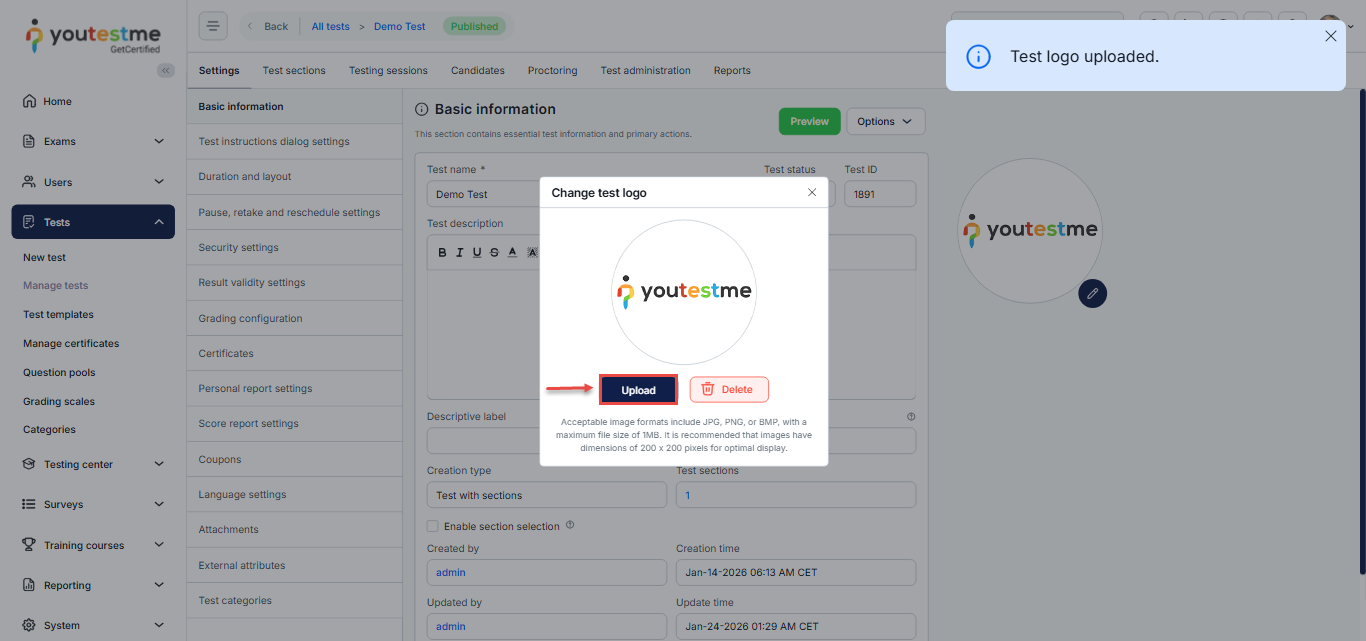
- Save the changes by clicking on the Save button.

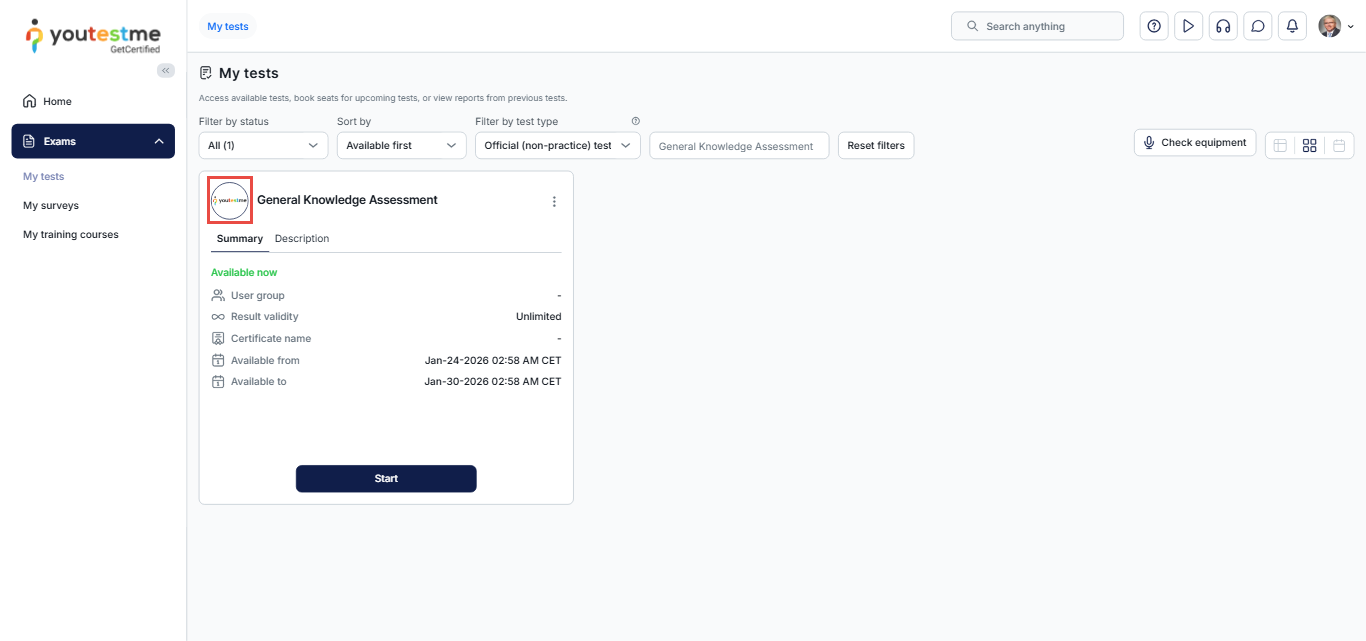
Test Logo from the Candidate’s Perspective
Once added or updated, the test logo will be displayed on the test card for candidates.
The example below shows how the test logo will appear from the candidate’s perspective:
Please examine the following links to access additional choices for customization:
